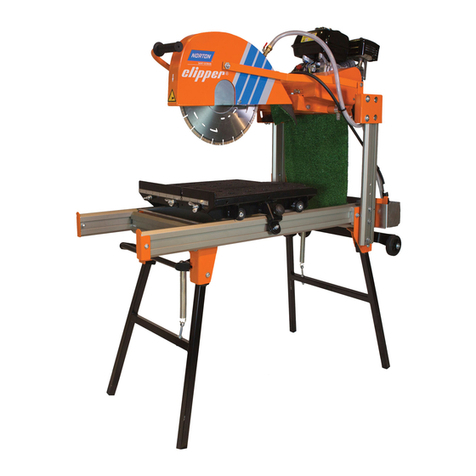
SAINT-GOBAIN Norton Clipper BLOCKBUSTER BBM307 User manual

OWNER’S MANUAL
BLOCKBUSTER MINI
MASONRY SAW
Model: BBM307 | BBM158

1
OwnersManual-MasonrySaw-BBMSeries-Rev09-2023
BBM307 saws manufactured by Norton Clipper are warrantied against defects in workmanship or
materials for a period of six (6) months from the original purchase date from Norton Clipper when
used in commercial, institutional, rental, or professional use.
BBM158 saws manufactured by Norton Clipper are warrantied against defects in workmanship or
materials for a period of one (1) year from the original purchase date from Norton Clipper when used
in commercial, institutional, rental, or professional use.
To activate your warranty for all Norton Clipper products visit the Product Registration page on the
website and register your machine.
The responsibility of Norton Clipper under this warranty is limited to replacement or repair of defective
parts at a point designated by it, of such part as shall appear to us upon inspection at such point, to
have been defective in material or workmanship, with expense for transportation borne by the
customer.
In no event shall Norton Clipper be liable for consequential or incidental damages arising out of the
failure of any product to operate properly.
Integral units such as gasoline engines, electric motors, batteries, tires, transmissions, etc., are
excluded from this warranty and are subject to the prime manufacturer's warranty. This warranty is in
lieu of all other warranties, expressed or implied, and all such other warranties are hereby disclaimed.
Important: Before placing equipment in operation, record the following information:
UPC #: (starts with 701846-xxxxx) MODEL #:
SERIAL #:
PURCHASE DATE:
PURCHASED FROM:
A
DDRESS/CITY/STATE/ZIP:
Before using this equipment, make sure that the person using it has read and understands the
instructions in this Owner’s Manual.
The engine exhaust from this product contains
chemicals known to the State of California to cause
cancer, birth defects or other reproductive harm
WARRANTY
WARNING

2
OwnersManual-MasonrySaw-BBMSeries-Rev09-2023
Warranty…………………………………………………………………………………...1-2
Table of Contents .................................................................................................... 3
Safety Precautions ................................................................................................. 4-10
Dust and Silica Warning ......................................................................................................... 6
Machine Lifting Points ............................................................................................................ 8
Electrical Safety...................................................................................................................... 9-10
Specifications & Features........................................................................................ 11-14
BBM307/BBM158 Items Included and Optional Accessories ................................................. 12
BBM307 Depth Adjustment .................................................................................................... 13
BBM158 Depth Adjustment .................................................................................................... 13
Electrical.................................................................................................................. 15-22
Extension Cord ....................................................................................................................... 16
Generator ............................................................................................................................... 16
BBM307 Electrical .................................................................................................................. 17
BBM307 Wiring Diagram ................................................................................................................ 17
BBM158 Electrical .................................................................................................................. 18-19
BBM158 Wiring Diagram ................................................................................................................ 19
General Electrical Trouble Shooting ....................................................................................... 20-22
BBM307 Trouble Shooting.............................................................................................................. 21
BBM158 Trouble Shooting.............................................................................................................. 22
Operation................................................................................................................. 23-27
Installing The Blade ................................................................................................................ 23-24
Cutting Methods ..................................................................................................................... 24
Wet Cutting............................................................................................................................. 26
Dry Cutting.............................................................................................................................. 27
Maintenance............................................................................................................ 28-34
Maintenance General ............................................................................................................. 28-29
BBM307.................................................................................................................................. 30-33
Cleaning.......................................................................................................................................... 30
Motor Brush Replacement .............................................................................................................. 30-31
Blade Shaft Gear Grease................................................................................................................ 31
Air Filter........................................................................................................................................... 31-32
BBM158.................................................................................................................................. 32-34
Cleaning.......................................................................................................................................... 32
Belts ................................................................................................................................................ 32-33
TABLE OF
CONTENTS
3
OwnersManual-MasonrySaw-BBMSeries-Rev09-2023
Parts Breakdown ..................................................................................................... 35-57
Conveyor Cart Assembly BBM307 and BBM158.................................................................... 36
Conveyor Cart Table BBM307 and BBM158 .......................................................................... 37
Conveyor Cart Tray Assembly BBM307 and BBM158 ........................................................... 38
Frame and Dust/Water Collecting Pan BBM307 and BBM158 ............................................... 39
Cutting Table Guide Rails BBM307 and BBM158 .................................................................. 40
Cutting Table Assembly BBM307 and BBM158 ..................................................................... 41
Electrical System BBM307 ..................................................................................................... 42
Carbon Brush, Air Intake, and Blade Shaft ............................................................................ 43
Cutting Head BBM307............................................................................................................ 44-45
Motor Assembly BBM307 ....................................................................................................... 46
Blade Guard Assembly BBM307 ............................................................................................ 47
Electrical System BBM158 ..................................................................................................... 48
Blade Shaft Assembly BBM158.............................................................................................. 49
Cutting Head Assembly BBM158 ........................................................................................... 50-51
Belt Guard Assembly BBM158 ............................................................................................... 52
Motor Assembly BBM158 ....................................................................................................... 53
Blade Guard Assembly BBM158 ............................................................................................ 54
Optional Splash Guard Assembly BBM307 and BBM158....................................................... 55-56
Option Accessories BBM307 and BBM158 ............................................................................ 57
TABLE OF
CONTENTS

4
OwnersManual-MasonrySaw-BBMSeries-Rev09-2023
Important warnings and pieces of advice are indicated on the machine with icons.
HAZARD ICONS
Fuel (gasoline) is extremely flammable, and its vapors can explode if ignited.
Store gasoline only in approved containers, in well-ventilated, unoccupied
approved areas, and away from sparks or flames. Do not fill the fuel tank while
the engine is hot or running. Do not start the engine near spilled fuel. Never use
the fuel as a cleanin
g
a
g
ent
Hot surface! Do not touch. Engine components can get extremely hot from
operation. To prevent burns, do not touch the engine or related parts while the
engine is running or immediately after it is turned off. Never operate the engine
with any heat shields or guards removed.
Keep all guards in place when operating any piece of equipment.
Moving parts can crush and cut. Keep hands, feet, hair, and loose clothing away
from all rotating parts.
Lethal Exhaust Gas: use only in well ventilated areas. Engine exhaust gases
contain poisonous carbon monoxide, which is odorless, colorless, and can cause
death if inhaled. Avoid inhaling exhaust fumes, and never run the engine in a
closed building or confined area.
Never tamper with the governor components of settings to increase the maximum
speed. Severe personal injury and damage to the engine or equipment can result
if operated at speed above maximum. Always obey the maximum speed rating of
blade.
Warning alert symbol. DO NOT LIFT THE SAW BY THE HANDLEBARS OR
CUTTING TABLE.
SAFETY
PRECAUTIONS

5
OwnersManual-MasonrySaw-BBMSeries-Rev09-2023
Important warnings and pieces of advice are indicated on the machine with icons.
SAFETY ICONS
Read operator’s instructions.
Read OSHA and ANSI B7.1.
Visit the industry safety page:
www.safet
y
.UAMA.or
g
Eye protection must be worn.
Ear protection must be worn.
Protect
y
our lun
g
s a
g
ainst dust.
Hand protection must be worn.
Rotation direction of the blade.
Pump On Pump Off
SAFETY
PRECAUTIONS

6
OwnersManual-MasonrySaw-BBMSeries-Rev09-2023
DUST AND SILICA WARNING
Grinding/cutting/drilling of masonry, concrete, metal, and other materials can generate dust, mists
and fumes containing chemicals known to cause serious or fatal injury or illness, such as respiratory
disease, cancer, birth defects or other reproductive harm. If you are unfamiliar with the risks
associated with the particular process and/or material being cut or the composition of the tool being
used, review the material safety data sheet and/or consult your employer, the material
manufacturer/supplier, governmental agencies such as OSHA and NIOSH and other sources on
hazardous materials and make certain to comply with all product warnings and instructions for the
safe and effective use of the material being cut. California and some other authorities, for instance,
have published lists of substances known to cause cancer, reproductive toxicity, or other harmful
effects.
Control dust, mist, and fumes at the source where possible. In this regard use good work practices
and follow the recommendations of the manufacturer/supplier, OSHA/NIOSH, and occupational and
trade associations. Water should be used for dust suppression when wet cutting is feasible. When the
hazards from inhalation of dust, mists and fumes cannot be eliminated through engineering controls
such as vacuum and/or water mist, the operator and any bystanders should always wear a respirator
approved by NIOSH/MSHA for the material being cut.
CALIFORNIA PROPOSITION 65 MESSAGE
Some dust created by power sanding, sawing, grinding, drilling, and other construction activities
contain chemicals known (to the State of California) to cause cancer, birth defects or other
reproductive harm. Some examples of these chemicals are:
• Lead, from lead-based paints
• Crystalline silica, from bricks and cement and other masonry products
• Arsenic and chromium, from chemically treated lumber
ForAdditionInformationConsulttheFollowingSources:
http://www.osha.gov/dsg/topics/silicacrystalline/index.html
http://www.cdc.gov/niosh/consilic.html
http://oehha.ca.gov/prop65/law/P65law72003.html
http://www.dir.ca.gov/Title8/sub4.html
Use Approved:
Eye Protection Hearing Protection Respiratory
Protection
Head Protection
SAFETY
PRECAUTIONS

7
OwnersManual-MasonrySaw-BBMSeries-Rev09-2023
1. Before mounting any blade on the saw, the blade should be inspected for any damage which might
have occurred during shipment, handling, or previous use.
2. The blade collars and arbors should be cleaned and examined for damage before mounting the
blade.
3. The blade must be properly fitted over the arbor with the relief side of the collars facing the blade.
4. The blade shaft nut must be tightened securely against the outside blade shaft collar.
5. The blade must be operated within the specified maximum operating speed listed on the blade.
6. Fill the water pan with water.
7. The blade guard must be in place with the nose guard down and locked when the saw is running.
8. The operator should wear safety glasses and any other appropriate safety equipment.
9. When starting the saw, the operator should stand away and to the side of the blade.
10.If for any reason the saw should stall in the cut, remove the material from the blade. Check the
outside blade shaft collar and nut for tightness. Inspect the blade for damage before restarting the
saw. Use caution when resuming a cut. Be certain that the blade is in alignment with the previous
cut.
11.Do not force the blade into the cut by pushing the material into the blade too fast.
SAFETY
PRECAUTIONS

8
OwnersManual-MasonrySaw-BBMSeries-Rev09-2023
BBM307 Lift Points
BBM158 Lift Points
1. Before mounting any blade on the saw, the blade should be inspected for any damage which
might have occurred during shipment, handling, or previous use.
2. The blade collars and arbors should be cleaned and examined for damage before mounting the
blade.
3. The blade must be properly fitted over the arbor.
4. The blade shaft nut, which is a left-hand thread nut, must be tightened securely against the
outside blade shaft collar.
5. The blade must be operated within the specified maximum operating speed listed on the blade.
6. If wet cutting submerges the water pump in clean water and open the water control valve to
provide adequate coolant (4 to 6 gallons per minute). Insufficient coolant could result in severe
blade breakage or diamond segment separation.
7. The blade guard must be in place with the blade collar guard closed when the saw is running.
8. The operator should wear approved eye, hearing, respiratory, and head protection.
9. When starting the saw, the operator should stand away and to the side of the blade.
Lift Here Lift Here
SAFETY
PRECAUTIONS

9
OwnersManual-MasonrySaw-BBMSeries-Rev09-2023
10. If for any reason the saw should stall in the cut, raise the blade out of the cut and switch the
power off. Check outside blade shaft collar and nut for tightness. Inspect the blade for damage.
Before restarting the saw. Use caution when resuming a cut. Be certain that the blade is in
alignment with the previous cut.
11. During cutting operations, do not exert excess side pressure on the material as a method of
guiding. Do not force the blade into the cut by lowering the blade too fast or by pushing the
cutting table too fast.
Read all safety warnings and all instructions. Failure to follow the warnings and
instructions may result in electric shock, fire and/or severe injury.
Electrical Safety
Disconnect tool from the power supply while the motor is being mounted, connected, or reconnected.
Electrical Safety
Lockout/Tagout refers to the complete isolation of equipment during maintenance or service work.
OSHA regulations 29 CFR 1910.147 and 1926.416 require the use of locks or tags as warning
devices to
ensure personnel are not injured from accidental machine start-ups. The BBM Block
Buster Mini Masonry saw is equipped with special designed switch cover that turns the power off
when closed and can be locked in the off position. The locking of the switch and
disconnection the power supply will isolate the machine during maintenance,
service, and when the machine is unattended.
To lockout the power switch:
1. Turn the machine off and close the switch cover.
2. Disconnect the power supply
3. Attach a small pad lock (key type) as shown in the photo to the left.
4. Lock and remove the key from the padlock.
5. Tag the machine as per local, OSHA, and your company’s requirements.
Position of Saw
1. To avoid the possibility of the receptacle getting wet, position the saw on one
side of a wall mounted receptacle to prevent water from dripping onto the
receptacle or plug. The user should arrange a “Drip Loop” in the cord
connecting the saw to a receptacle. The “Drip Loop” is
that part of the cord below the level of the receptacle, or
the connector if an extension cord is used, to prevent
water traveling along the cord and coming in contact with
the receptacle.
2. If the plug or receptacle does get wet, DON’T unplug the
cord. Disconnect the fuse or circuit breaker that supplies
power to the tool. Then unplug and examine the plug for
the presence of water in the receptacle.
SAFETY
PRECAUTIONS
BBM307LockOut
BBM158LockOut

10
OwnersManual-MasonrySaw-BBMSeries-Rev09-2023
Extension Cords
1. Use only outdoor rated extension cords. These extension cords are identified by a marking
“Acceptable for use with outdoor appliances; store indoor while not used.” Use only extension
cords having an electrical rating not less than the rating of the product, see page 12 for
extension cord specifications. Do not use damaged extension cords. Examine extension cord
before using and replace if damaged. Do not abuse extension cords and do not jerk on any
cord to disconnect. Keep the cord away from heat and sharp edges. Always disconnect the
extension cord from the receptacle before disconnecting the saw from the extension cord.
2. WARNING: To reduce the risk of electrocution, keep all connections dry and off the ground.
Do not touch the plug with wet hand
3. Ground Fault Interrupter (GFCI) protection should be provided in the circuit(s) or outlet(s) to be
used for the saw. Receptacles are available that have built in GFCI protection and may be
used for additional measures of safety. GFCI must be at the power supply, never use a GCFI
at the end of an extension cord.
SAFETY
PRECAUTIONS

11
OwnersManual-MasonrySaw-BBMSeries-Rev09-2023
The compact BBMxxx Masonry saws are shipped completely assembled and ready for use except for
the diamond blade. Inspect the saw for shipping damage. If any damage is found, contact the shipper
immediately and file a freight claim. The Norton Clipper is not responsible for any freight related
damages. Remove the saw from the shipping container.
BBM307 BBM158
Horsepower 3 HP
(
2,238 kW
)
Peak 2 HP
(
1.5kW
)
Peak
V
olts 115 - volts 115 - volts
Full Load Amps 10A 15A
Hertz 60 Hz 60 Hz
Motor T
y
pe Carbon Brush Induction Moto
r
Bearing Type Thermal Protected
(
Requires filter replacement
)
Heavy Duty Sealed
(
Reduced on Maintenance
)
Blade Shaft Speed 3,600 rpm 3,600 rpm
Max Blade size 14
(
356mm
)
14
(
356mm
)
Arbor size 1
(
25.4mm
)
1
(
25.4mm
)
Max Depth cut 5
(
127mm
)
5
(
127mm
)
Cuttin
g
Len
g
th 10-7/16
(
265 mm
)
10-7/16
(
265 mm
)
Max material size 8 x 8 x 16
(
203 x 203 x 406
)
8 x 8 x 16
(
203 x 203 x 406
)
Dimensions Lx W x H (mm) 31-1/2 x 18 -1/2 x 30
(800 x 470 x 762)
31-1/2 x 24 x 27
(800 x 607 x 684)
Wei
g
ht Uncreated 75 lbs.
(
34.1k
g)
Approx. 123 lbs.
(
55.9 k
g)
Approx.
Powerful low amperage motor with
air filter BBM307 or a 1.5 HP
induction motor BBM158
A
rbor cover helps contain dust and
water
Wide open back design easily
accommodates materials up to
8"x 8" x 16”
Ergonomically designed
Clear View Cutting Head
System provides increase
operator efficiency, reduce
fatigue, and an unobstructed
view of the work area.
Channel flow pan
helps to direct dust
and water away from
the operator
Rigid all-steel unibody
construction provides the
best weight to strength ratio
of any saw in its class. Front and rear handles
for easy transport and
loading.
Lockable heavy duty slide tray with
steel wheels and removal backstop
SPECIFICATIONS
& FEATURES
SPECIFICATIONS
& FEATURES

12
OwnersManual-MasonrySaw-BBMSeries-Rev09-2023
BBM307/BBM158 Items Included and Optional Accessories
UPC Description 307 158 T
y
pe Ima
g
e
70184682710 RIP GUIDE45/90 CTC/YTM7
1 1 S
70184680905 WRENCH UNIVERSAL YTM1015
1 1 S
70184600784
A
IR FILTER BBM307 1 n/a S
Optional Accessories:
70184600691 STAND BBM/YBM OPT OPT S
70184600704 WET KIT
(Recirculating Water Pump System) OPT OPT S
70184680897
MITER BLOCK
(For Miter Cutting Includes Mounting
Hardware)
OPT OPT S
70184680907 GUIDE ADJUSTABLE ANGLE GUIDE
(Includes Mounting Hardware) OPT OPT S
70184633009
GFCI PLUG NEMA 5-15P x NEMA 5-15R
(Connect to Power Supply then attach
machine or extension cord to GFCI for
additional operator protection
)
OPT OPT S
70184602862
VAC ATTACHMENT SYSTEM BBM307
(Allows attachment of HEPA Vacuum to
BBM for Dust Control)
OPT OPT S
70184600753
BACK SPLASH & ADAPTER
(Large Splash Guard with Adapter for Shop
Vac. Machine not included)
OPT OPT S
N/A = Not Applicable; OPT = Optional Accessory; S = Service Replacement Part. Order by UPC number.
SPECIFICATIONS
& FEATURES

13
OwnersManual-MasonrySaw-BBMSeries-Rev09-2023
Cutting Depth Pin Lock
The BBM307 and BBM158 Blockbuster Mini Masonry saw are designed with the feature to easily
adjust the cutting depth.
BBM307 Depth Adjustment:
The BBM307 has three different cutting heights for jam cutting, a moving head for chop (or plunge
cutting), and a moving cart combined with the moving head for step cutting to help make any cutting
task easier.
Before adjusting the cutting height always disconnect the electrical power supply. To adjust the
BBM307’s fixed cutting position, pull up on the Angle Lock Pin (see Figure 1-1: Angle Lock Pin),
move the head to the new position, release e the Angle Lock Pin, and rotate the cutting head
up/down until the Angle Lock Pin locks into position (lowest position for cutting thru bricks, the middle
position for cutting medium size material, and the upper position is for cutting block.) (see Figure 1-2:
Angle Locking Position).
HeadPositionApplication
FixedLowestJamCuttingBricks
FixedMiddleJamCuttingMediumSizeBricks
FixedUpperJamCuttingBlock
PivotingChoporPlungeCutting
PivotingHeadwithMovingTableStepCutting
To operate the BBM307 Blockbuster Mini as a chop or plunge saw: pull up on the Angle Lock Pin,
rotate 90 degrees, and release. Now the cutting head can be rotated by pulling up or pushing down
on the cutting head handle. When not in use, always lock the head into one of the three cutting height
positions.
BBM158 Depth Adjustment:
The BBM158 has an infinitely adjustable cutting depth which allows cutting any masonry-based
product to a depth of 5”. This allows the operator to perform any type of cut from scoring to full depth.
To Adjust the depth of cut, disconnect the power source from the machine, loosen the Depth Control
Cutting Knob (see Figure 1-3: BBM Depth Control Knob), and move the cutting head to the
required depth of cut. After adjusting the blade to the required depth of cut tighten the Depth Control
Cutting Knob.
Do not install the blade until it is time to use the saw!
This machine is designed for the use with steel center diamond blades
Lock the cutting head in place before transporting the BBM158
ANSI regulations prohibit the transportation of any concrete saw with the blade installed!
Do not lift the saw by the cutting head. This may result in injury or damage to the machine.
SPECIFICATIONS
& FEATURES

14
OwnersManual-MasonrySaw-BBMSeries-Rev09-2023
BBM307
BBM158
Figure 1-3: BBM158 Depth Control Knob Figure 1-4: BBM158 Cutting Head
Cuttin
g
Head
Depth Control
Guide Knob
Figure 1-1: Angle Lock Pin Figure 1-2: Angle Locking Position
Cuttin
g
Head
Depth Control
Cutting Knob
SPECIFICATIONS
& FEATURES

15
OwnersManual-MasonrySaw-BBMSeries-Rev09-2023
BBM307 and BBM158 Electric Motor
BBM307 BBM158
V
olta
g
e 115v 115/230v
C
y
cles 60 Hz 60 Hz
Ampera
g
e 15A 15/7.5
A
Horsepower 3 HP
(
2,238 W
)
Peak 2.0 HP
(
1,490 W
)
Peak
Motor T
y
pe Brush Induction
Important-Before connecting the motor leads to the power supply be sure that the voltage, cycles
and phase shown on the nameplate of the motor correspond to the available power supply.
Power Supply
The BBM307 Blockbuster Mini Masonry Saw can only be connected to 115-volt 60 Hz 1 Phase
electrical supply with a minimum of a 15-amp circuit for best performance use a 20-amp circuit.
The BBM158 can be used on a 115-volt 60 Hz 1 Phase circuit with a 20-amp breaker, for best
performance use a 30-amp breaker. The BBM158 can also be used on a 230-volt 60 Hz 1 Phase
electrical supply with a 20-amp breaker, for best performance use a 30-amp breaker.
For safety and security concerns the operator should lockout the power switch when the
machine is not in use. Verify the model number of the machine and select the correct
wiring diagram before preforming any maintenance or service.
Failure to run the motor on the proper voltage will damage the motor and is not covered
under warranty. Improperly wired motors are not covered under warranty.
ELECTRICAL

16
OwnersManual-MasonrySaw-BBMSeries-Rev09-2023
Extension Cords:
Most motor trouble is the result of too small gauge or
too long of extension
cord. Cords must be one piece and as short as
possible. Cords should be no longer than shown on
Table 2: Extension Cord Maximum Length Chart.
Norton Construction Products is not responsible for
damage to motors due to the use of extension cords that are too small or too
long.
For safety and security concerns the operator should lockout the power switch when the
machine is not in use. Verify the model number of the machine and select the correct
wiring diagram before preforming any maintenance or service.
Ground Fault Circuit Interrupt (GFCI)
The BBM307 and BBM158 do not include a Ground Fault Circuit Interrupt (GFCI) device. If a GFCI is
required, please order the following from your Norton Clipper distributor. The 70184633009 GFCI is
designed to attach to the BBM’s power in cord and the power supply, if using an extension cord
always connect the GFCI to the power source, then attach the extension cord (see Extension Cord
section of this manual for details on the cord set), and then attach the BBM to the Extension cord.
DO NOT place the GFCI between the Extension Cord and the machine as it will trip a GFCI.
UPC Description QTY
70184633009 GFCI PLUG NEMA 5-15P x NEMA 5-15R 1
Generator:
Using the machine with a generator that is less than the recommend output can result in motor
damage and is not covered under warranty. Only use with a generator that is capable of continuous
put of 4,000 w (4kW) at 20 amps or greater.
Wiring Diagram:
The BBM307 and BBM158 use different wiring diagrams and electrical systems due to the different
electrical motors the machines have. Be sure to reference the correct wiring diagram for your
machine. See the Machine specific sections under the BBM307 ELECTRICAL and BBM158
ELECTRICAL for details.
ELECTRICAL
Table 2. Extension Cord Maximum Length Chart
Wire Gauge BBM307 – 115v
BBM158 – 115v
BBM158 – 230v
Only
12 AWG 25' (7.6m) 100’ (30.4m)
10 AWG 50' (15.2m) 150’ (45.7m)
8 AWG 75' (22.8 m) 250' (76.2 m)

17
OwnersManual-MasonrySaw-BBMSeries-Rev09-2023
BBM307 Electric Motor
Motor Specifications:
Voltage: 115-volt
Cycles: 60Hz
Amperage: 15Amp
Horsepower: 3HP Peak
Watts: 2,238 watts
Extension Cords:
Most motor trouble is the result of too small gauge or too long of extension
cord. Cords must be one piece and as short as possible. Cords should be no longer than shown
on Table 2: Extension Cord Maximum Length Chart (see above). Norton Construction Products is not
responsible for damage to motors due to the use of extension cords that are too small or too long.
Generator:
Using the machine with a generator that is less than the recommend output can result in motor
damage and is not covered under warranty. Only use with a generator that is capable of continuous
put of 4,000 w (4kW) at 20 amps or greater.
Wiring Diagram:
The BBM307 and BBM158 use different wiring diagrams and electrical systems due to the different
electrical motors the machines have. Be sure to reference the correct wiring diagram for your
machine.
BBM307 Wiring Diagram
Table 2. Extension Cord Chart
Wire Gauge 115V Max Length
12 AWG 25' (7.6 m)
10 AWG 50' (15.2 m)
8 AWG 75' (22.8 m)
ELECTRICAL BBM307

18
OwnersManual-MasonrySaw-BBMSeries-Rev09-2023
BBM158 Electric Motor
Motor Specifications:
Voltage: 115/230 volt
Cycles: 60Hz
Amperage: 15/7.5 Amp
Horsepower: 1.5 HP Peak
Watts: 1,490 kW
Extension Cords:
Most motor trouble is the result of too small gauge or too long of extension
cord. Cords must be one piece and as short as possible. Cords should be no longer than shown
on Table 3: Extension Cord Maximum Length Chart (see above). Norton Construction Products is not
responsible for damage to motors due to the use of extension cords that are too small or too long.
Electrical Supply:
The BBM158 can be used on a 115-volt 60 Hz 1 Phase circuit with a 20-amp breaker, for best
performance use a 30-amp breaker. The BBM158 can also be used on a 230-volt 60 Hz 1 Phase
electrical supply with a 20-amp breaker, for best performance use a 30-amp breaker.
Before connecting the BBM158 to the electrical supply, make sure the
voltage selected on the saw (see Figure: BB158 Dual Voltage Switch)
matches the voltage of the electrical supply. Failure to do so may result
in motor damage and is not covered under any warranty.
Generator:
Using the machine with a generator that is less than the recommend output
can result in motor damage and is not covered under warranty. Only use with
a generator that is capable of continuous put of 4,000 w (4kW) at 20 amps or
greater.
Dual Voltage Switch:
Always turn off the machine before setting the dual voltage switch. Failure to do so will damage the
motor. To change the voltage: Remove the screw, select the desired voltage, and replace the screw
to prevent the switch from being toggled accidentally.
For safety and security concerns the operator should lockout the power switch when the machine is
not in use.
Wiring Diagram:
The BBM307 and BBM158 use different wiring diagrams and electrical systems due to the different
electrical motors the machines have. Be sure to reference the correct wiring diagram for your
machine.
Table 3. Extension Cord Chart
Wire
Gau
g
e
115V Max
Len
g
th
230v Max
Len
g
th
12 AWG 25' (7.6 m) 100' (30.4 m)
10 AWG 50' (15.2 m) 150' (45.7 m)
8 AWG 75' (22.8 m) 250' (76.2 m)
ELECTRICAL BBM158
Figure1:BBM158Dual
VoltageSwitch

19
OwnersManual-MasonrySaw-BBMSeries-Rev09-2023
BBM158 Wiring Diagram
This manual suits for next models
1
Table of contents
Other SAINT-GOBAIN Saw manuals

SAINT-GOBAIN
SAINT-GOBAIN Norton Clipper CM 401 Series User manual

SAINT-GOBAIN
SAINT-GOBAIN NORTON Clipper CWM 216 User manual

SAINT-GOBAIN
SAINT-GOBAIN NORTON CLIPPER CM 501 ME User manual

SAINT-GOBAIN
SAINT-GOBAIN NORTON clipper CTC705 User manual

SAINT-GOBAIN
SAINT-GOBAIN NORTON CLIPPER TT 251 User manual

SAINT-GOBAIN
SAINT-GOBAIN Norton Clipper CWT 315 User manual

SAINT-GOBAIN
SAINT-GOBAIN NORTON clipper C51 Series User manual

SAINT-GOBAIN
SAINT-GOBAIN Norton Clipper CWT 255 User manual

SAINT-GOBAIN
SAINT-GOBAIN NORTON CLIPPER TR 250 H User manual

SAINT-GOBAIN
SAINT-GOBAIN NORTON clipper CSB1 D13 H W Series User manual