2
8835 04/12 For additional product and safety information go to salsacycles.com
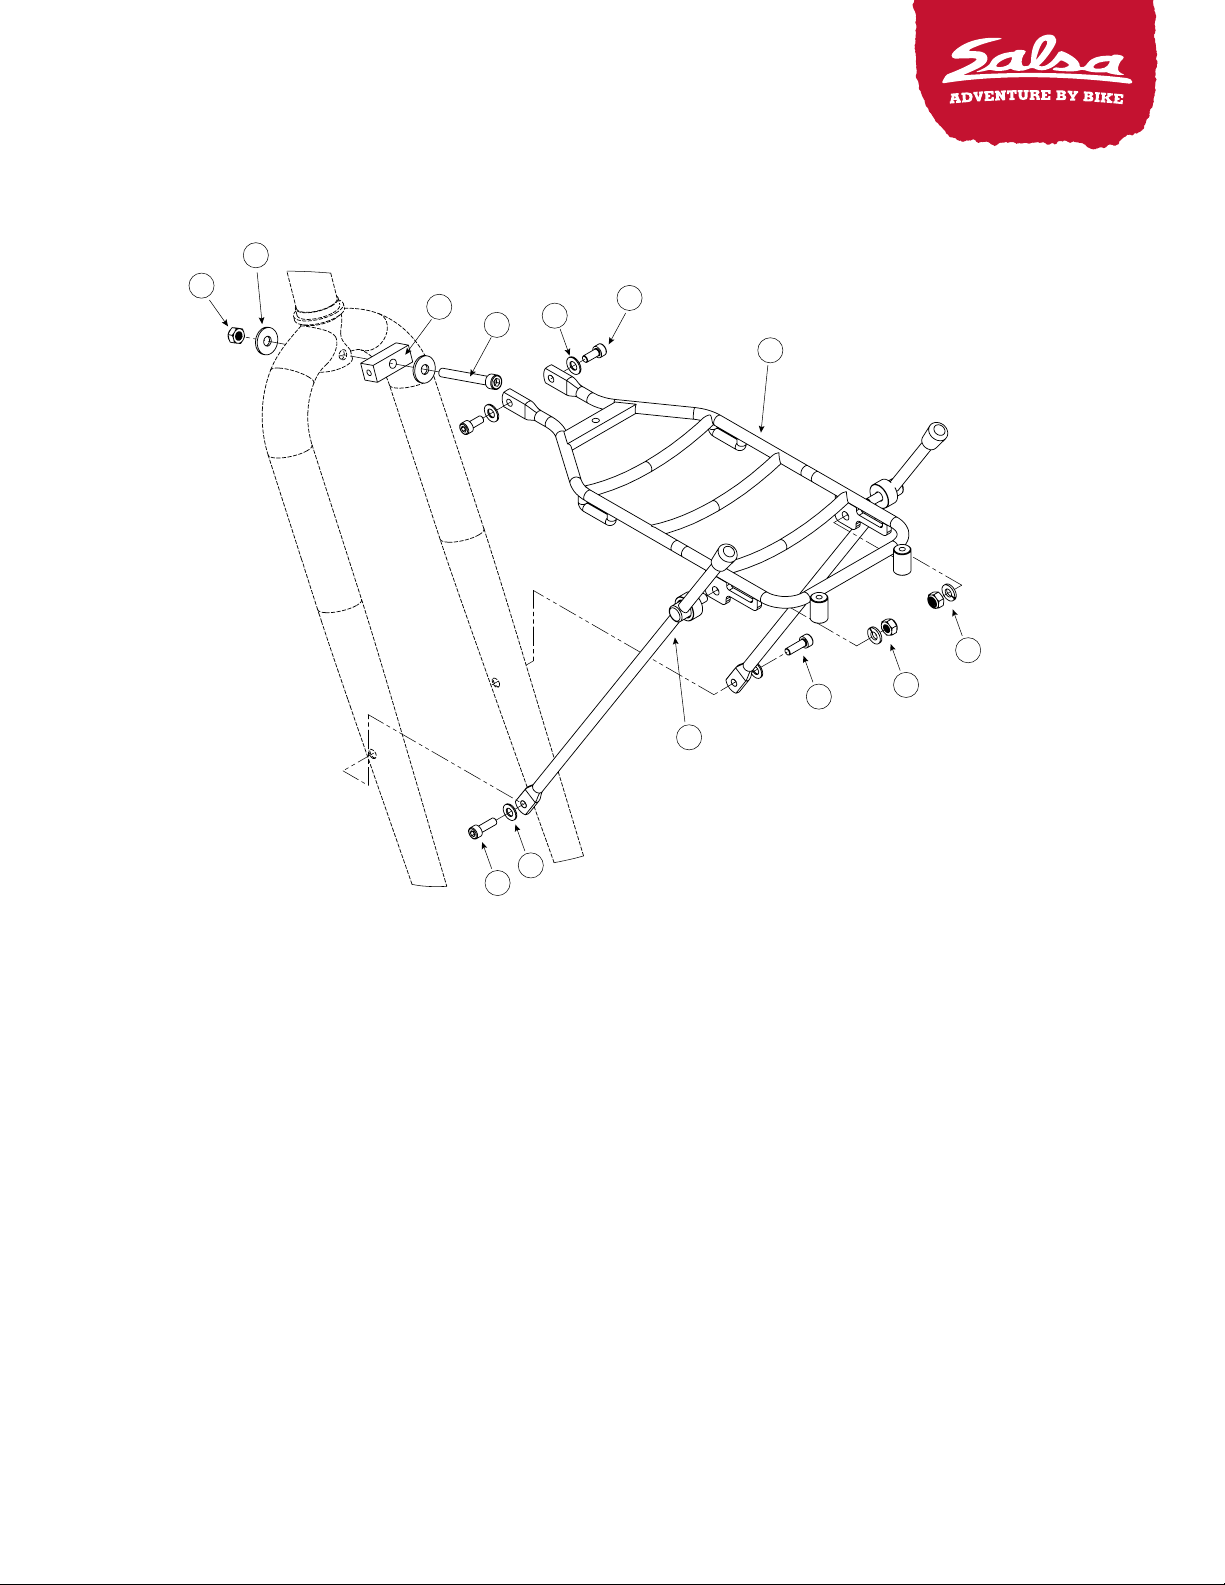
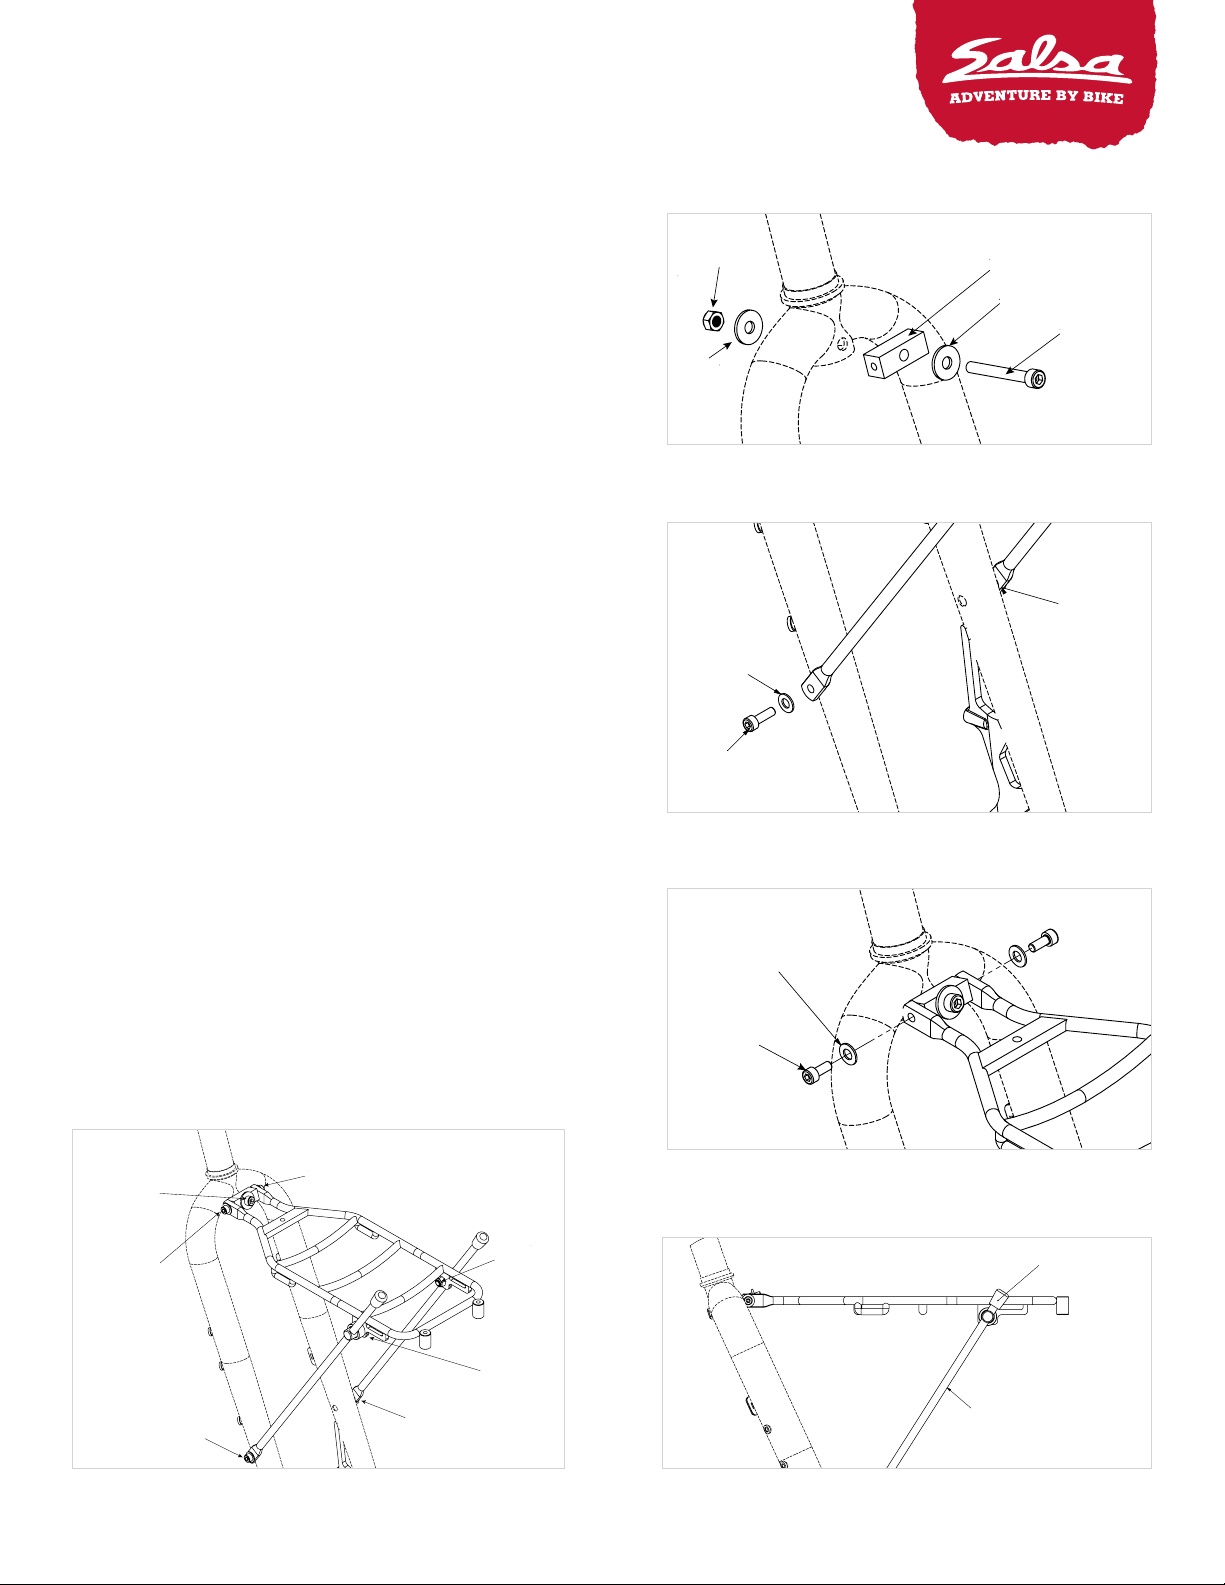
MiniMalist Rack—FRont installation
WARNING
Installing this Salsa rack on a bicycle requires in-depth knowledge
of bicycle mechanics and professional-grade tools. If you do not have
the proper tools or knowledge to perform this installation, please
take your bicycle to your local bicycle dealer. Failure to appropriately
install this rack may lead to component failure, resulting in serious
injury or death. We recommend that you have this product installed,
adjusted and maintained by a professional bicycle mechanic.
• Minimalist racks are compatible only on Salsa Fargo and Enabler
forks. For rear mounting, frames must have seatstay mounts
AND a Salsa Rack-Lock
• Threaded mounts on the Minimalist rack are designed for
mounting headlights only
• Minimalist racks are not designed to attach decks or “flatbeds”
of any kind
• Do not exceed the load capacity of 10 lb (5kg)
• Do not modify the Minimalist rack. Doing so will void the warranty
(see below)
• Check hardware for tightness before every ride
• Front and rear racks may change the steering and handling
of your bike, especially when loaded. Be sure to test the handling
out in a safe area before riding
• Make sure your load is evenly balanced and secure before riding
(i.e. no loose straps to get caught in the wheels)
• Position reflectors and lights so that they are not obstructed when
the racks are loaded
MINIMUM FITMENT REQUIREMENTS
FOR FRONT MOUNT
• This rack was designed for use with Salsa Fargo and Enabler forks
• For proper installation the deck of the Salsa Minimalist rack must
be set up to rest parallel with the ground when installed (figure 3)
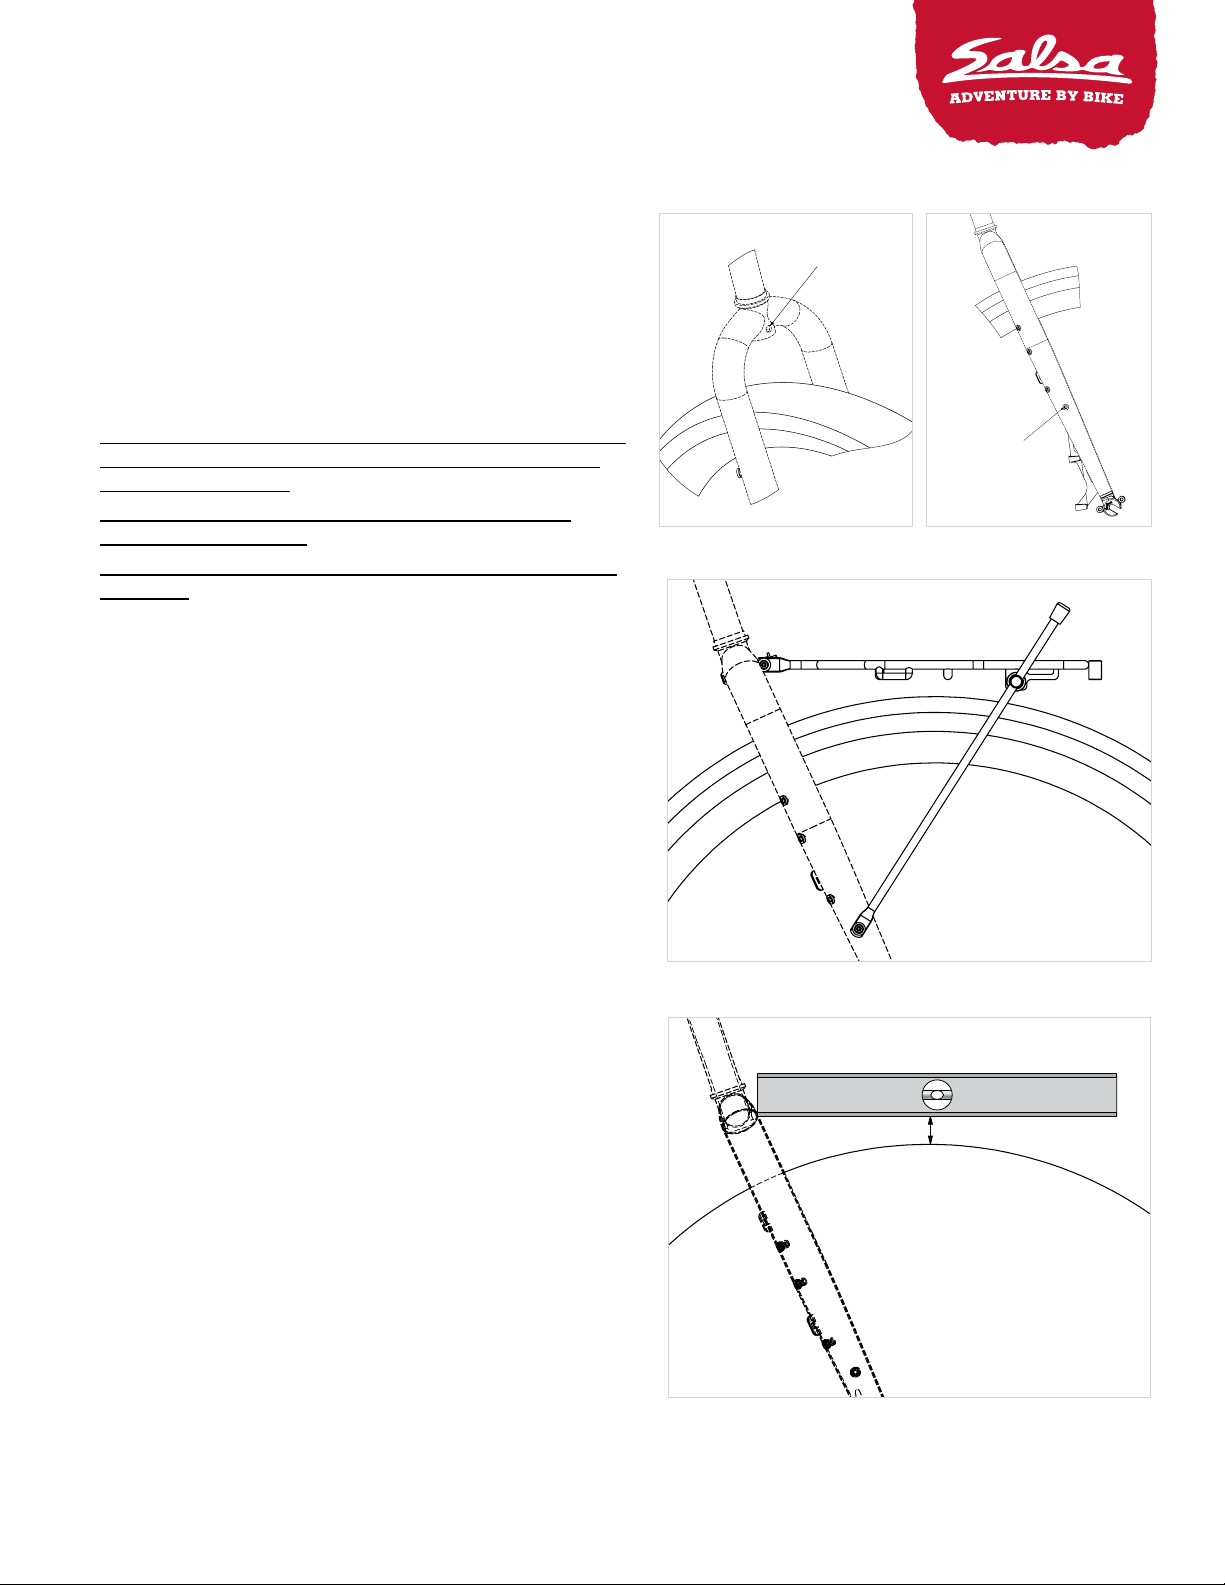
• Your bicycle fork must have a thru-hole crown mount (figure 1)
• Your bicycle fork must have mid-blade rack mounts (figure 2)
• A minimum of 19mm clearance is required between the deck
of the Salsa Minimalist rack and the highest point of the tire
or fender (figure 3)
DETERMINING FRONT MOUNT FIT
The Minimalist rack requires a minimum of 19mm clearance
between the bottom of the rack deck and the tire or fender.
To determine compatibility:
1. Place your fully-assembled bicycle on a flat, level surface.
2. Hold a level above the front tire or fender. Align the bottom of the
level with the center of the thru-hole in the fork crown and check
that it is level (figure 4).
3. Using a tape measure or ruler, measure the distance from the
highest point of the front tire or fender to the bottom of the level.
This distance must be a minimum of 19mm for proper installation.
Mid-Blade
Rack Mount
Figure 1 Figure 2
Figure 3
Figure 4
19mm minimum distance