manuals.online logo
Brands
  1. Home
  2. •
  3. Brands
  4. •
  5. SALSA
  6. •
  7. Bicycle Accessories
  8. •
  9. SALSA REGULATOR Ti SEATPOST User manual

SALSA REGULATOR Ti SEATPOST User manual

REGULATOR TiSEATPOST INSTRUCTIONS
1
7328 03/14 For additional product and safety information go to salsacycles.com/safety
5
4
7
1
3
4
5
6
2
Item # Description Quantity
1 Regulator Ti Seatpost 1
2 Saddle Rail Rest, Thru-Hole 1
3 Saddle Rail Rest, Threaded 1
4 Saddle Clamp 2
5 Saddle Bolt 2
6 Keylocking Threaded Insert 1
7 M6 Bolt 1
Note: For assembly, tighten to 4–5 Nm.
Note: Apply grease to threads and under bolt head.
For assembly, tighten to 3–5 Nm.
REGULATOR TiSEATPOST INSTRUCTIONS
2
7328 03/14 For additional product and safety information go to salsacycles.com/safety
WARNING
Installing this Salsa product on a bicycle requires in-depth
knowledge of bicycle mechanics and professional-grade tools.
If you do not have the proper tools or knowledge to perform
this installation, please take your bicycle to your local bicycle
dealer. Failure to appropriately install this product may lead
to component failure, resulting in serious injury or death.
We recommend that you have this product installed, adjusted
and maintained by a professional bicycle mechanic.
Tools: 5mm and 6mm hex wrenches, torque wrench
Intended Use
The Regulator Ti seatpost is intended for road, gravel, and
cross-country mountain bike use.
Compatibility
The Regulator Ti seatpost is only compatible with 7mm round
metal seat rails. Not for use with carbon seat rails or ovalized
seat rails.
Assembly Instructions
1. Insert the saddle rail rests into seatpost (figure 1).
2. Insert M6 bolt into the non-threaded saddle rail rest
and thread into the opposing tapered saddle rail rest.
Only tighten to hold assembly in-place, so that saddle rail
rests can still rotate slightly.
3. Place saddle onto the seatpost, placing the saddle rails
onto the saddle rail rest pieces (figure 2).
4. Apply grease to threads and under bolt head.
Mount saddle rail clamps and thread in saddle bolts
but not so tightly that the rails can’t move (figure 3).
5. Place saddle in proper fore/aft position.
6. Once proper saddle position is achieved tighten saddle
bolts to 3–5 Nm with M6 hex tool (figure 4).
7. Make sure there is no movement and that saddle cannot
slide in clamps.
8. Set the proper angle of the saddle.
9. Tighten the M6 bolt to 4–5 Nm, and a maximum
of 10 Nm with M5 hex tool (figure 5).
10. Make sure the saddle cannot move fore/aft or rotationally.
11. Test for slippage before every ride.
Seatpost Adjustment
To Adjust Fore/Aft Position
1. Loosen saddle bolts.
2. Once saddle bolts are loose enough, adjust saddle fore
or aft.
3. Check that threads and contact surfaces of saddle bolts
are properly greased.
Figure 1
Figure 3
Figure 5
Figure 4
Figure 2
4. Once desired position is achieved, retighten saddle bolts
to 3–5Nm.
5. Test for slippage before riding.
To Adjust Saddle Angle
1. Loosen M6 bolt. First you will feel bolt loosen and then you
will feel resistance. This is OK; this bolt and assembly act
as a self-extracting mechanism. Continue a couple of turns, then
push downward on the saddle slightly as you loosen the bolt.
Soon the saddle rail rests will loosen from the seatpost and the
saddle will pop loose and freely rotate.
2. Adjust the saddle for desired angle and then tighten the M6 bolt
to 4–5Nm, 10Nm max.
3. Test for slippage before riding.
REGULATOR TiSEATPOST INSTRUCTIONS
3
7328 03/14 For additional product and safety information go to salsacycles.com/safety
WARNING
Do not modify the Regulator Ti Seatpost. Doing so will void the
warranty (see below).
Periodically remove, clean and inspect your Ti Seatpost for
damage (cracks, chips, etc.). Any questions about possible
damage should be directed to your local Salsa dealer immediately.
Warranty
Salsa Cycles warrants this new Salsa product against defects
in materials and workmanship for two (2) years from the original
date of retail purchase by the consumer. This limited warranty
is expressly limited to the repair or replacement of the original
product, at the option of Salsa Cycles, and is the sole remedy
of the warranty. This limited warranty applies only to the original
purchaser of the Salsa product and is not transferable. In no event
shall Salsa Cycles be liable for any loss, inconvenience or damage,
whether direct, incidental or consequential or otherwise resulting
from breach of any express or implied warranty or condition,
of merchantability, fitness for a particular purpose, or otherwise
with respect to this product except as set forth herein.
This warranty does not cover the following:
• Damage due to improper assembly or follow-up maintenance
or lack of skill, competence or experience of the end user
• Products that have been modified, neglected, used
in competition or for commercial purposes, misused
or abused, involved in accidents or anything other than
normal use
• Damage or deterioration to the surface finish, aesthetics
or appearance of the product
• Normal wear and tear
• Labor required to remove and/or refit and re-adjust the
product within the bicycle assembly
TO THE EXTENT NOT PROHIBITED BY LAW, THESE WARRANTIES
ARE EXCLUSIVE AND THERE ARE NO OTHER EXPRESS
OR IMPLIED WARRANTIES OR CONDITIONS INCLUDING
WARRANTIES OR CONDITIONS OF MERCHANTABILITY AND
FITNESS FOR A PARTICULAR PURPOSE
SALSA CYCLES
6400 West 105th Street, Bloomington, MN 55438
Tel: 877-MOTO-ACE Fax: 952-983-6210
www.salsacycles.com

Other SALSA Bicycle Accessories manuals

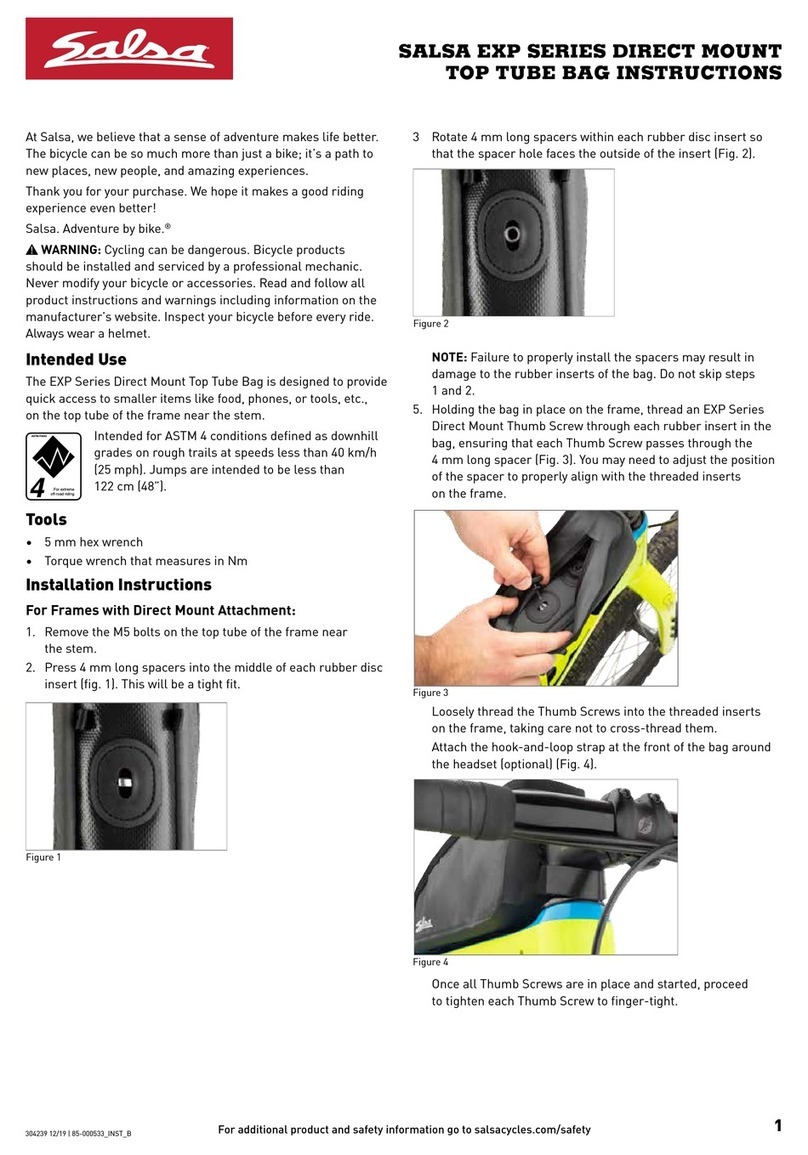
SALSA TIMBERJACK User manual

SALSA

SALSA TIMBERJACK User manual

SALSA Alternator Low Deck 135 User manual

SALSA

SALSA Alternator Low Deck 135 User manual

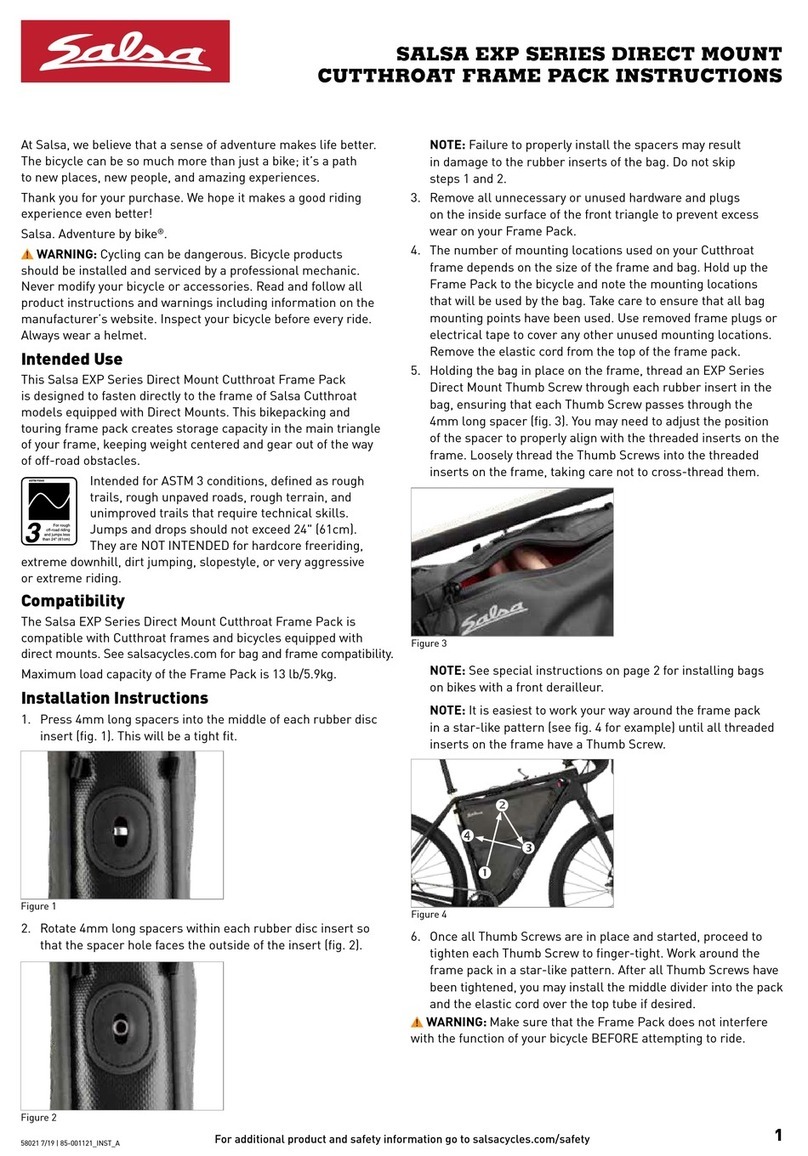
SALSA EXP Series User manual

SALSA

SALSA EXP Series User manual

SALSA EXP Rubber Straps User manual

SALSA

SALSA EXP Rubber Straps User manual

SALSA EXP Series User manual

SALSA

SALSA EXP Series User manual

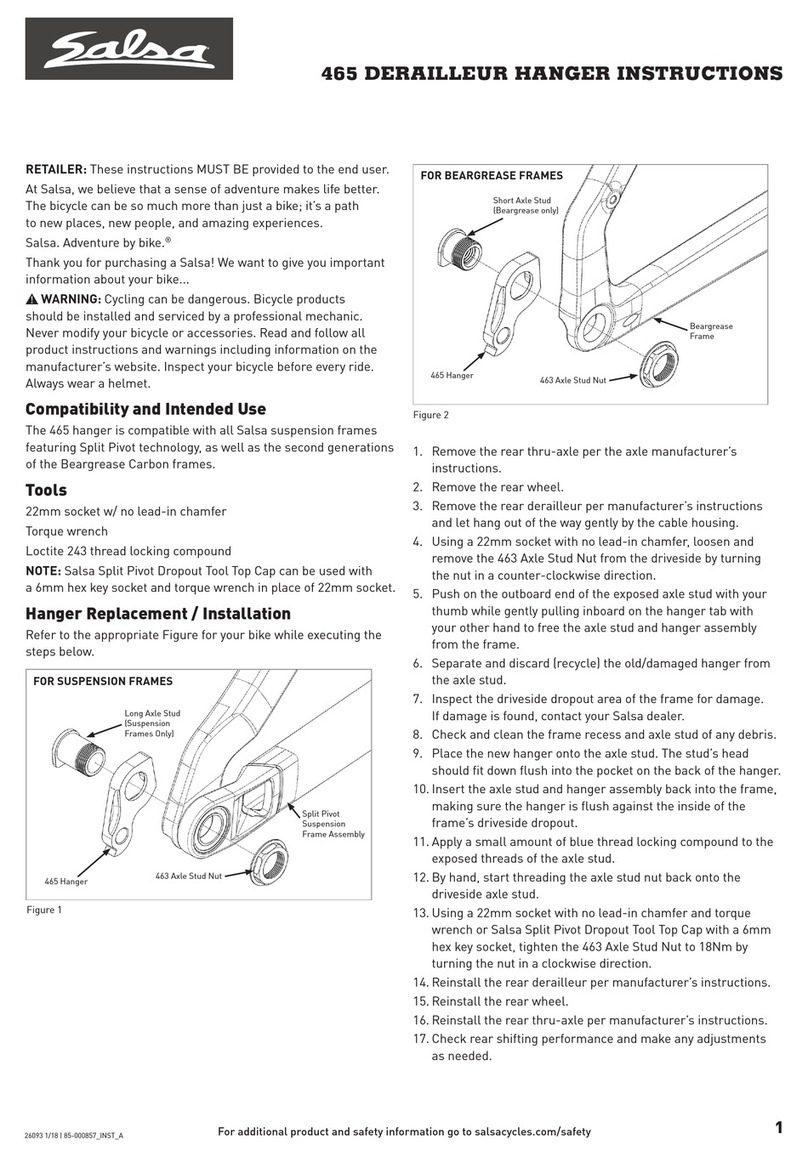
SALSA 465 User manual

SALSA

SALSA 465 User manual

SALSA Minimalist User manual

SALSA

SALSA Minimalist User manual

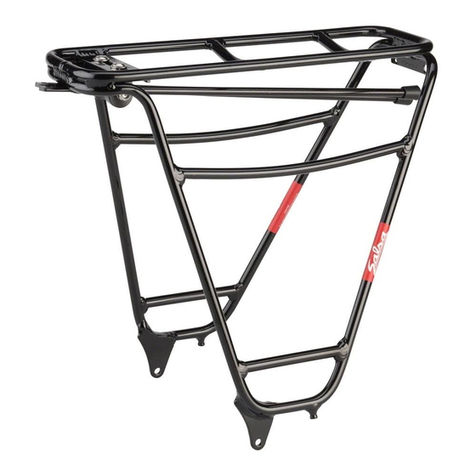
SALSA Guide Seatpost User manual

SALSA

SALSA Guide Seatpost User manual

SALSA EXP SERIES User manual

SALSA

SALSA EXP SERIES User manual

Popular Bicycle Accessories manuals by other brands

Stages cycling Power Meter quick start guide

Stages cycling

Stages cycling Power Meter quick start guide

Marzocchi Jr. T QR20 instructions

Marzocchi

Marzocchi Jr. T QR20 instructions

Rad Power Bikes Front Rack owner's manual

Rad Power Bikes

Rad Power Bikes Front Rack owner's manual

Tern Andros manual

Tern

Tern Andros manual

Yeti Cycles SB140 owner's manual

Yeti Cycles

Yeti Cycles SB140 owner's manual

Barkbusters Storm STM-007 Fitting instructions

Barkbusters

Barkbusters Storm STM-007 Fitting instructions

Sigma BIKE COMPUTER 400 manual

Sigma

Sigma BIKE COMPUTER 400 manual

Vamoose KT-LCD7 user manual

Vamoose

Vamoose KT-LCD7 user manual

Shimano FC-M970 Service instructions

Shimano

Shimano FC-M970 Service instructions

Entity FS60 user manual

Entity

Entity FS60 user manual

Avenir Dome Trailer owner's manual

Avenir

Avenir Dome Trailer owner's manual

Tong Sheng TSDZ2 installation manual

Tong Sheng

Tong Sheng TSDZ2 installation manual

Burley Travoy Owner's instruction and safety manual

Burley

Burley Travoy Owner's instruction and safety manual

Garmin Edge 1000 Quick start manual

Garmin

Garmin Edge 1000 Quick start manual

Shimano SL-U8000 Dealer's manual

Shimano

Shimano SL-U8000 Dealer's manual

Speedict Mercury user guide

Speedict

Speedict Mercury user guide

AddBike AddBike+ instruction manual

AddBike

AddBike AddBike+ instruction manual

Selle SMP Tourism manual

Selle SMP

Selle SMP Tourism manual

manuals.online logo
manuals.online logoBrands
  • About & Mission
  • Contact us
  • Privacy Policy
  • Terms and Conditions

Copyright 2025 Manuals.Online. All Rights Reserved.