5
8
16
3A
3
9
5
6
12
15
8
6
3
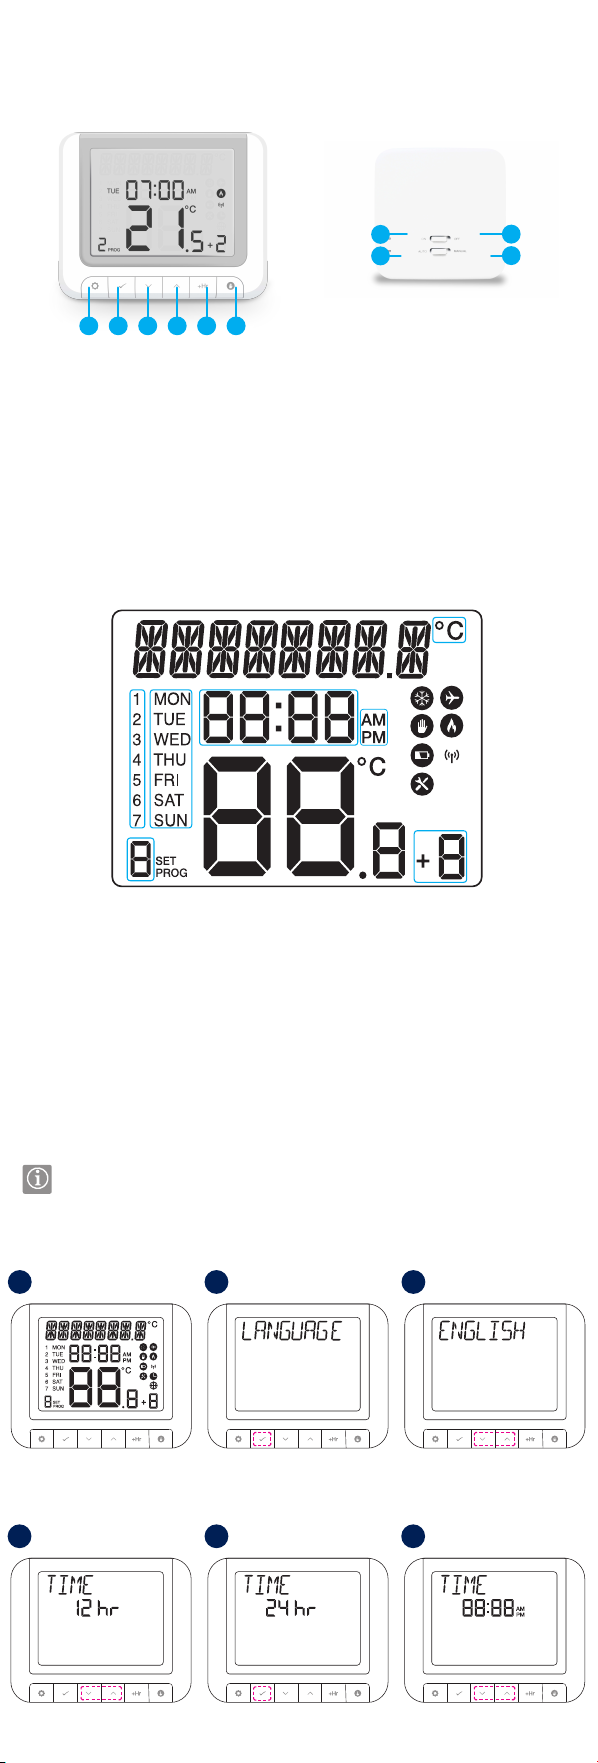
2
1
11
1
14
1
1
7
3B
4
10
13
6
7
4
13A 13B
12
2
15
2
2
8
4
5
11
14
7
Press SELECT to confirm.
Press SELECT to confirm.
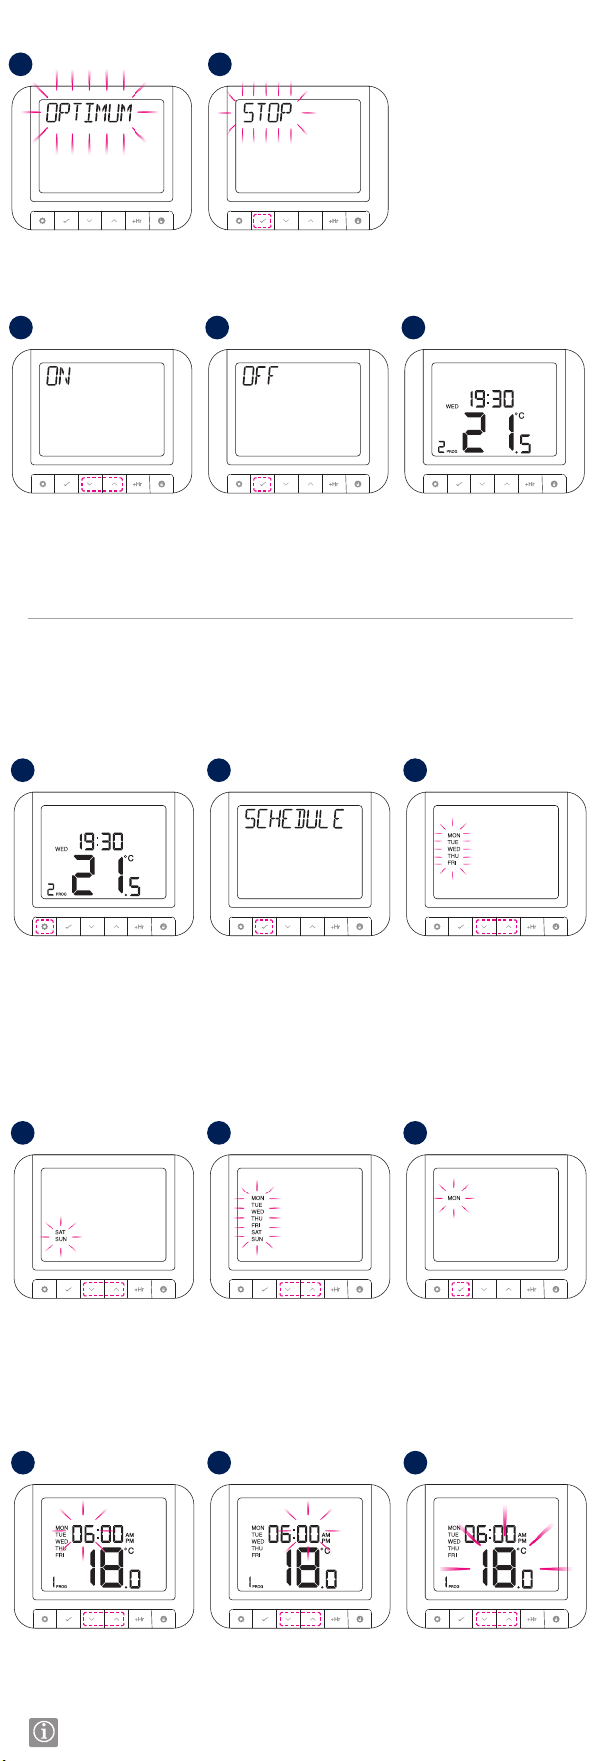
The thermostat will go to
the main screen.
Using UP or DOWN, select the
program type between: 5
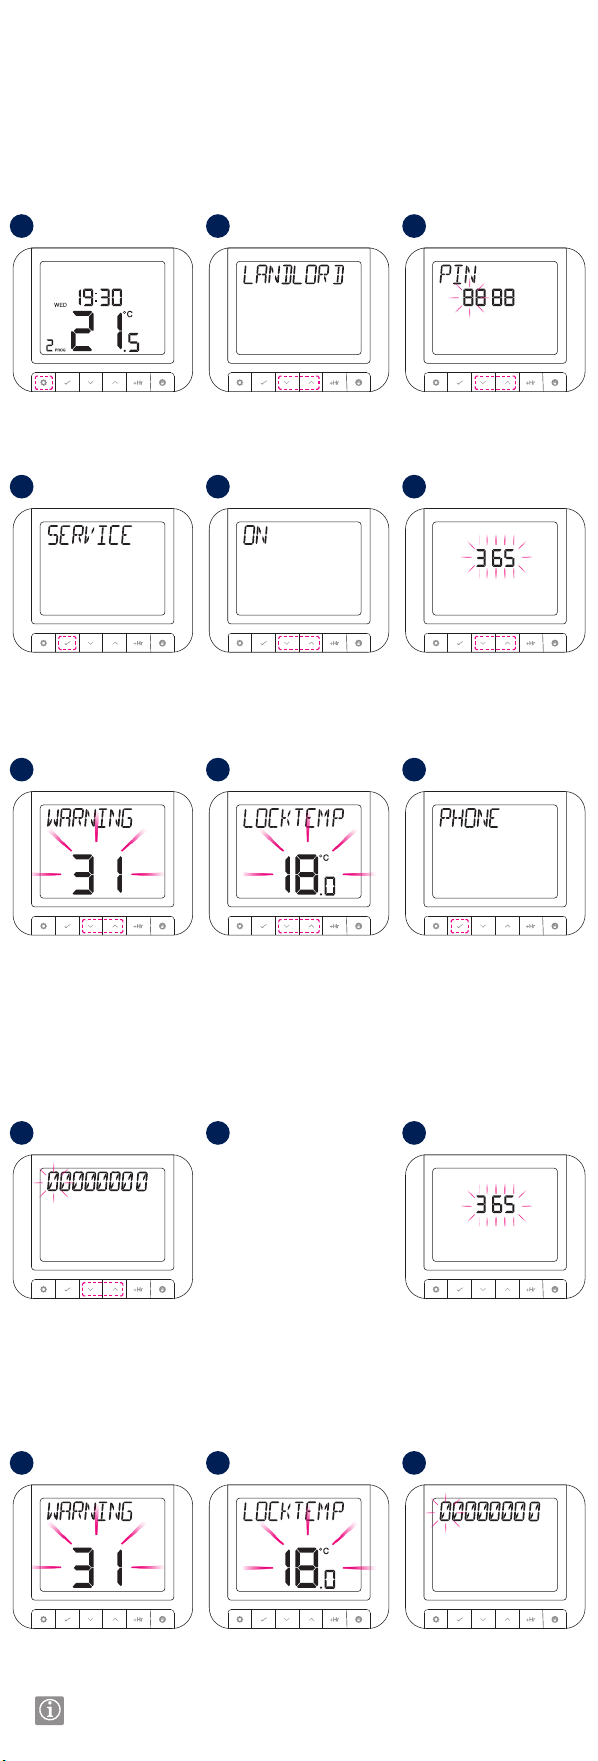
Using UP or DOWN, enter the PIN
code number. Press SELECT to
confirm every digit.
Press SELECT.
Individual (set a daily schedule).
Press SELECT to confirm.
Using UP or DOWN, select the due
date and then press SELECT.
Using UP or DOWN, set the
temperature and then
press SELECT.
Press SELECT.
Using UP or DOWN, select the TPI type you want to use.
Press SELECT.
Using UP or DOWN,
select ON or OFF.
Using UP or DOWN,
select ON or OFF.
Press MENU.
Press MENU.
Using UP or DOWN, select
the warning period and
then press SELECT.
+2 (schedule for the working days
and for the weekend);
Press SELECT.
Using UP or DOWN, enter the
phone number. Press SELECT to
confirm every digit.
Using UP or DOWN, set the hour
and then press SELECT.
Using UP or DOWN, select the
Span value.
Press SELECT to confirm.
Press SELECT.
Press SELECT to confirm.
Press SELECT.
Using UP or DOWN, navigate to
Landlord submenu
and press SELECT.
Using UP or DOWN, select the
lock temperature and
then press SELECT.
All (set one schedule for
the entire week)
Using UP or DOWN, select ON
and press SELECT.
Now you can check your
settings. If you want to
make a change, press UP
or DOWN on the relevant
screen.
Using UP or DOWN, set the
minutes and then press SELECT.
TPI (Time Proportional & Integral) is a self-learning, time-
proportional algorithm. TPI type of regulation ensures economical
system operation through more accurate temperature maintenance
during controlling process and limits overload conditions. In addition
to the exact and stable room temperature, the advantage of this
system is the minimization of energy consumption and significant
savings. RT520 offers 3 types of TPI control: 1. for radiator (6CPH); 2.
for underfloor heating (3CPH); 3. for electric heating (9CPH).
Optimum Stop calculates how
long the house will take to cool
down, then turns off the boiler at
the earliest possible moment, this
means the system is not running
when it’s not actually necessary. If
there is a sudden heat loss during
this period, then Optimum Stop will
be overridden to regain comfort
conditions.
Landlord settings is a pin code protected feature that allows the landlord to set a service reminder on the
thermostat that will warn the tenant when the boiler is due its annual service.
Span is the difference between the
measured temperature and the set
temperature.
In this mode, user can set the schedules for thermostat (temperature setpoints for specic periods of
time). Programmed schedules should use all time periods.
The device will be reset and will
start up automatically.
To reset the thermostat, press MENU,
DOWN and BOOST simultaneously
for 5 seconds.
Repeat the process for all time periods.
Once service mode has become active, the device will lock the set point temperature as set
by the installer/landlord. To unlock this device, the landlord needs to be contacted and the
boiler serviced.
Landlord settings will not be reset.
Programming - Automatic Mode
Landlord Settings
Factory Reset
Standard Power Up and Conguration
Please follow steps 1 to 14 from section Power Up and Configuration.
910A 10B
Press SELECT.Press SELECT.
Optimum Start is a selectable function which, depending on the ambient
room temperature, will start the boiler operation at the optimum time to
achieve the set-point temperature. It saves energy by only firing the boiler
for the minimum required time.


 User manual")

 User manual")