Active AX | Maintenance and troubleshooting
10 User’s manual — 2900453/0
Cycle operation with probe failure
In the event of a fault, the authorised technical service can discon -
nect the element corresponding to the faulty probe, making it possi -
ble to run the cycle. For this reason neither nor is
switched on because of malfunction (emergency operation). The
icon flashes as an indication of abnormal operation and the
program and cycle selection LEDs work.
LED signals on the electronic board
1) For access to the electronic board and wiring: turn off the power
supply at the main switch of the machine and at the automatic
protection switch on the external power supply socket of the
machine.
The electronic board consists of a series of light indicators that are
very useful when it comes to seeing the operation of the machine or
detecting faults.
The indicators are divided into two groups, input and output indica -
tors:
• Yellow input indicator LEDs: they show the information received
by the electronic board.
• Red output indicator LEDs: they show the element activated by
the microprocessor.
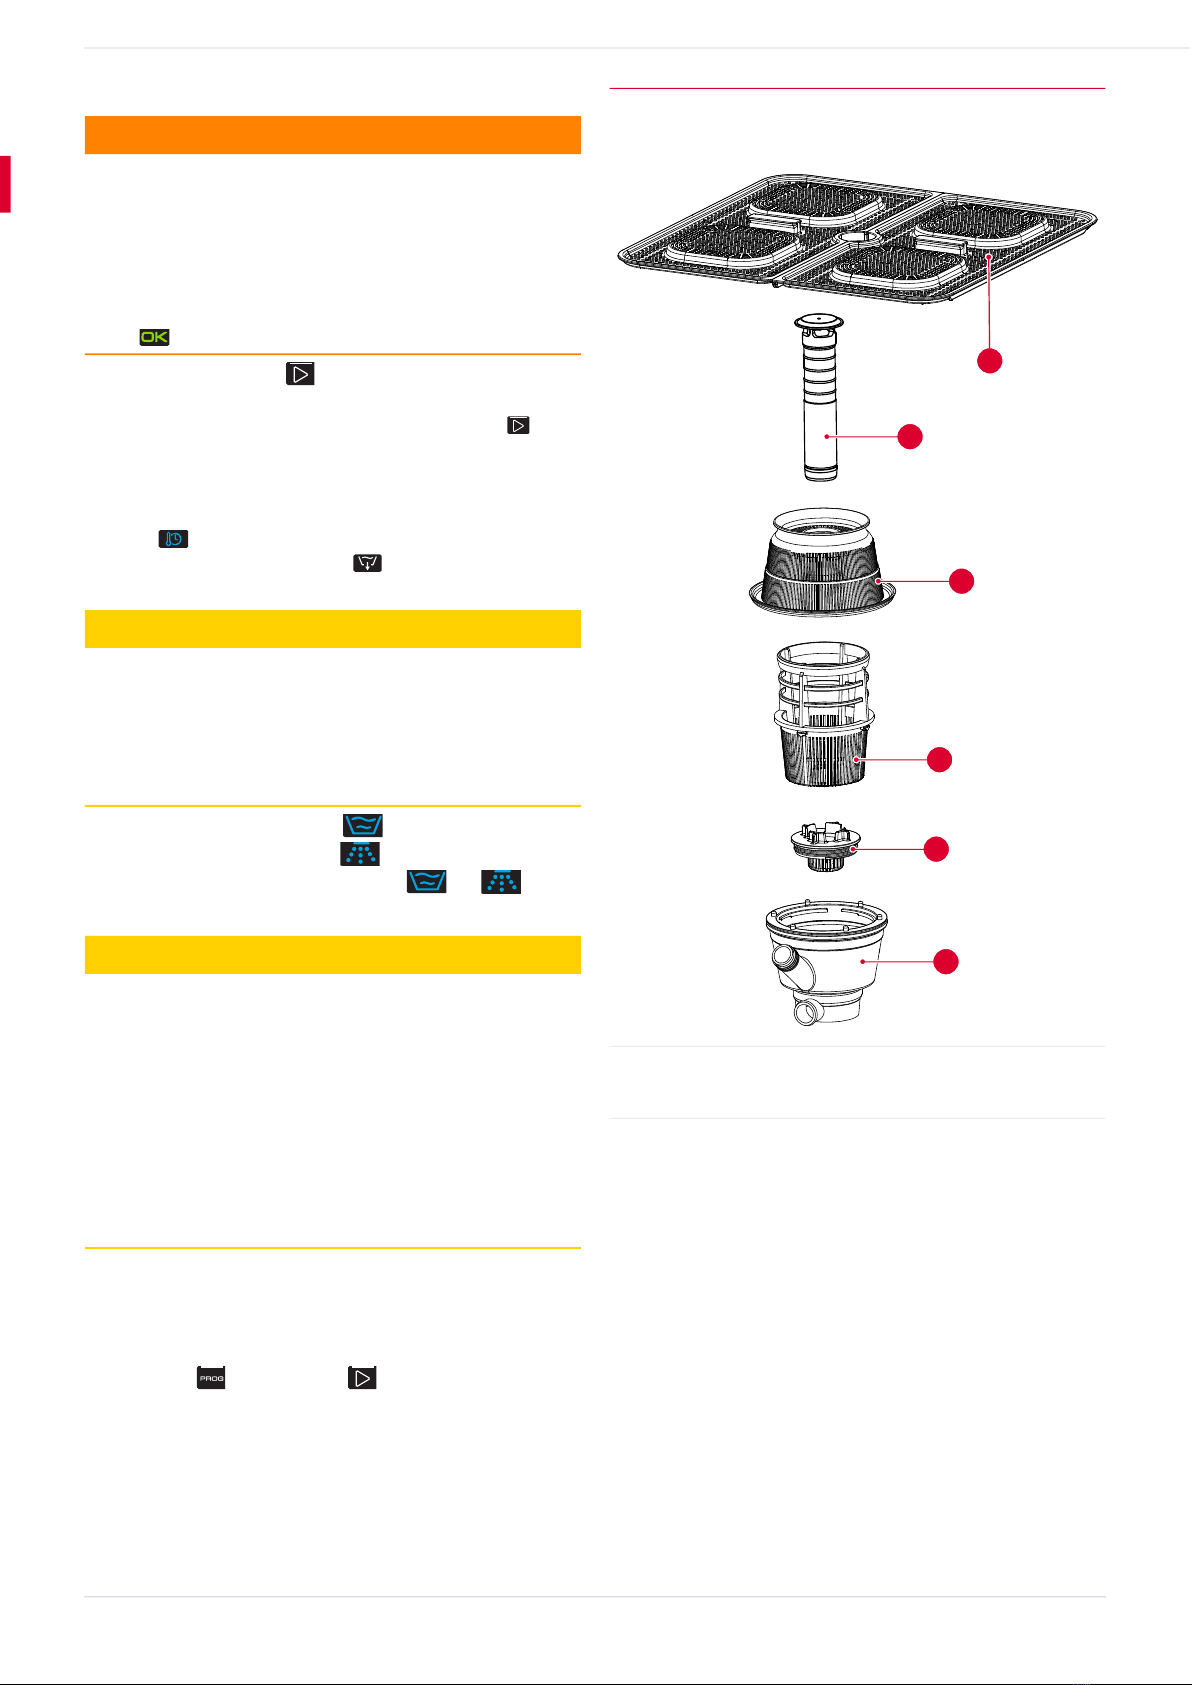
4.4 Spare parts and accessories
4.4.1 Spare parts
For spare parts, see the "Spare parts exploded view" document sup -
plied with the machine.
4.4.2 Accessories
Detergent dispenser
The machine is prepared for the installation of a third-party adjust -
able detergent dispenser pump. Maximum power allowed: 10 W.
To install adjustable detergent dispensers, proceed as follows:
1) Access to the DD power strip on the lower front part of the
machine for the electrical connection of the soap dispenser.
This strip is controlled by solenoid valve EV1. Refer to the wiring
diagram for the correct connection order.
2) Install the soap injection fitting through the hole at the rear.
Rinse aid dispenser
Mains water dispenser
1) Check that the rinse aid tank is full.
2) Start the machine and stop the wash/rinse cycle 5 or 6 times by
successively pressing the
PROG button , checking that the
rinse aid pipe fills up and the rinse aid enters the boiler.
⇒The rinse aid can be adjusted using the adjustment screw on
the lower front part in the direction indicated.
Installation with descaler
Install a Sammic descaler when the limescale content in the
machine feed water exceeds 10 °fH (French grade).
• Installation instructions are supplied with the descaler.
• Avoid flow reductions (choking) before and after installation, as
they cause pressure losses.
Installation with back-up valve
Install a back-up valve when the water pressure to be supplied to
the machine is lower than the pressure specified for that model.
• The back-up valve can be installed at any point near the unit,
extending the water line and stopcock to the back-up valve.
• Make sure that the stopcock is still accessible.
⚠ Warning
Risk of food poisoning from washing at low tempera -
ture
It is possible to start the wash cycle even if the setpoint temper -
atures required for correct sanitization of the items have not
been reached.
–Sammic advises against carrying out washing cycles if the icon
is not lit.
ℹ Information
See the levels in the appendix at the end of the manual.
Name of the yellow
LED
Description
DOOR Door closed.
PRESOST High pressure switch activated, tank full.
PTE. SEG. Connection according to the model table to
avoid malfunction in case of incorrect model
selection
Name of the red LED Description
Relay M1 Washing pump
Relay K2 R2 Tank element
Relay ON/OFF General connection
Triac C1 CALD Boiler element contactor
Triac B.VAC Drain pump activated.
Triac EV1 Hot water solenoid valve activated.
Triac EV REG [Models D, BD, BCD, BCDV] Regeneration or
cold water solenoid valve.
ℹ Information
The reference numbers of the accessories are available in the
"Spare parts exploded view" document supplied with the ma -
chine.
⚠ Caution
Electric shock hazard
Installing a dispenser involves access to power cables.
– Switch off the machine and disconnect the machine from the
mains before installing the dispenser
ℹ Information
Sammic declines all liability for defects caused by faulty con -
nections when installing the dispensers.