manuals.online logo
Brands
  1. Home
  2. •
  3. Brands
  4. •
  5. Samoa
  6. •
  7. Tools
  8. •
  9. Samoa 506 Series Guide

Samoa 506 Series Guide

1
R. 10/15 850 812
SAMOA Industrial, S.A. · Pol. Ind. Porceyo, I-14 · Camino del Fontán, 831 · 33392 Gijón - Spain · Tel.: +34 985 381 488 · www.samoaindustrial.com
2015_10_27-13:40
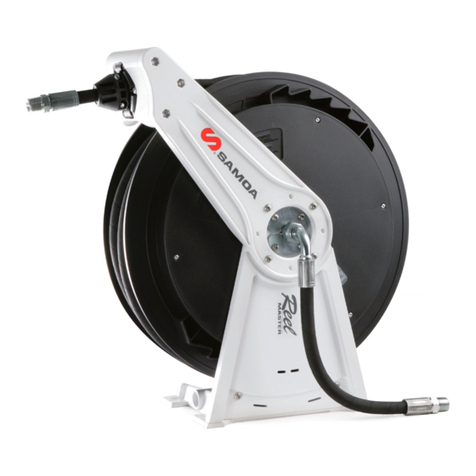
ALUMINIUM REEL 506 SERIES
ENROLLADOR DE ALUMINIO - SERIES 506
ENROULEUR ALUMINIUM - SÉRIE 506
AUTOMATIK SCHLAUCHAUFROLLER - OFFEN, SERIE 506
CARRETEL DE ALUMÍNIO - SERIE 506
Spare parts and technical service guide
Guía de servicio técnico y recambios
Guide d'instructions et pièces de rechange
Bedienungsanleitung und Teileliste
Manual de Serviços Técnicos e Reposições
Part No. / Cód. / Réf. / Art. Nr. / Cód.:
506 XXX
Description / Descripción / Description / Beschreibung / Descrição
310 mm (12.20")
220 mm (8.66") Ø 10 mm (0.39")
480 mm (18.90")
480 mm (18.90")
Ø 450 mm (17.72")
195 mm (7.68")
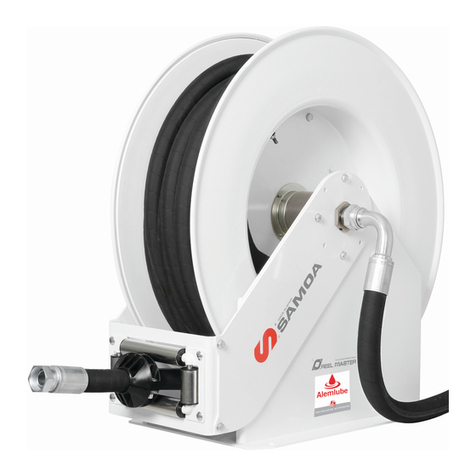
Open hose reel for air, water (cold or hot; high or low pressure),
antifreeze, vacuum, lubricants, grease and other fluids depending
on model.
Hose can be extended to the desired length and latched with the
mechanism.
By pulling the hose, the latch is released and the hose is automatically
rewound.
EN
Enrollador de manguera abierto para aire, agua (fría o caliente; alta
o baja presión), anticongelante, aplicaciones de vacío, detergentes,
lubricantes, grasa y otros fluidos según modelos.
Al tirar de la manguera, esta se desenrolla pudiendo bloquearse a la
longitud deseada por acción de un trinquete.
Para recoger la manguera, basta con tirar ligeramente de ella para
que sea recogida automáticamente.
ES
Enrouleur ouvert pour l'air, l'eau (froide ou chaude; haute ou basse
pression), antigel, applications sous vide, détergents, lubrifiants ou
graisse selon le modèle.
Le flexible peut être déroulé à la longueur désirée et verrouillé avec
le mécanisme à cliquet. Pour enrouler le flexible, il suffit de tirer
légèrement celui-ci jusqu'à ce que le verrou soit libéré et qu'il soit
automatiquement rembobiné.
FR
Offene Schlauchaufroller für Öl, Fett, Luft, Wasser (kalt oder heiss;
nieder– oder hochdruck), Frostschutz, Scheibenwischerflüssigkeit,
AdBlue®und andere leicht aggresive Flüssigkeiten, Modell abhängig.
Durch Ziehen am Schlauch wickelt sich dieser ab und kann durch
Betätigung eines Sperrmechanismus wieder blockiert werden.
Der Schlauch rollt sich automatisch auf, indem der Sperrmechanismus
durch leichtes Ziehen am Schlauch gelöst wird.
DE
Ø 10 mm (0.39")
Carretel com retração automática, aberto, base simples para
mangueira, para ar, água (fria ou quente); alta ou baixa pressão,
fluidos de arrefecimento e óleo lubrificante. Estrutura em alumínio e
suporte para mangueira em ABS.
PT
2850 812 R. 10/15
SAMOA Industrial, S.A. · Pol. Ind. Porceyo, I-14 · Camino del Fontán, 831 · 33392 Gijón - Spain · Tel.: +34 985 381 488 · www.samoaindustrial.com
2015_10_27-13:40
WARNING / ATENCIÓN / ATTENTION / WARNUNG / ATENÇÃO
• This equipment is for professional use only.
• Do not allow the hose to recoil unattended.
• Ensure that pressure does not exceed maximum working
pressure of lowest rated system component.
• Use fluids and solvents that are compatible with the equipments
wetted parts.
• Release pressure inside the reel before servicing.
• The spring is always under great tension. To reduce the risk of
serious injury:
- Do not attempt to remove spring.
- Do not attempt to replace or service the spring.
• Fluids under pressure can cause serious injury.
EN
• Este equipo es para uso profesional.
• Acompañe siempre la recogida de la manguera.
• No sobrepase la presión de trabajo del componente menos
resistente de la instalación.
• Use con fluidos compatibles con los materiales de las partes
húmedas.
• Elimine la presión interior del fluido durante las operaciones de
mantenimiento.
• El resorte está siempre bajo tensión. Para reducir el riesgo de daño:
- No quite el resorte.
- No intente cambiar ni manipular el resorte.
• Los fluidos sometidos a presión pueden causar graves daños.
ES
• Cet équipement est destiné uniquement à un usage professionnel.
• Toujours accompagner le flexible lors de l'enroulement.
• Ne pas dépasser la pression de travail maximum des composants
les plus faibles de l'installation.
• Utiliser des fluides et des solvants qui sont compatibles avec les
matériaux des parties humides de l'enrouleur.
• Éliminer préalablement la pression interne du fluide au cours des
opérations d'entretien.
• Le ressort est toujours sous grande tension. Pour réduire le risque
des blessures graves:
- Ne pas essayer d'enlever le ressort.
- Ne pas essayer de changer ou de manipuler le ressort.
• Les fluides sous pression peuvent causer des blessures graves.
FR
• Diese Geräte sind nur für den professionellen Einsatz geeignet.
• Lassen Sie den Schlauch nicht unbeaufsichtigt aufrollen.
• Stellen Sie sicher, dass der Druck niemals den max. Arbeitsdruck
von niedrigsten bewerteten Systemkomponent übersteigt.
• Verwenden Sie Flüssigkeiten und Lösungsmittel, die mit den
Berührungsteile kompatibel sind.
• Vor Beginn jeglicher Arbeiten am Gerät die Zufuhr abschalten und
das Auslaufventil öffnen, um den Flüssigkeitsdruck abzubauen.
• Der Feder steht immer unter Spannung. Zur Verringerung des
Risikos von schweren Verletzungen:
- versuchen Sie nicht die Feder zu entfernen.
- versuchen Sie nicht die Feder zu ersetzen oder zu reparieren.
• Flüssigkeiten unter Druck können zu ernsthaften Verletzungen
führen.
DE
Description / Descripción / Description / Beschreibung / Descrição
• Este equipamento é para uso profissional.
• Acompanhar sempre a trama da mangueira.
• Não ultrapassar a pressão de trabalho.
• Usar fluidos compatíveis com os materiais usados na construção do
carretel, em contato com os fluidos.
• Eliminar a pressão interior do fluido durante a manutenção.
• A mola está sempre em baixa tensão. Para reduzir o risco de danos:
- não remover a mola.
- não tentar trocar nem manusear a mola.
• O uso com fluidos não indicados podem causar graves danos.
PT
3
R. 10/15 850 812
SAMOA Industrial, S.A. · Pol. Ind. Porceyo, I-14 · Camino del Fontán, 831 · 33392 Gijón - Spain · Tel.: +34 985 381 488 · www.samoaindustrial.com
2015_10_27-13:40
Installation / Instalación / Installation / Montage / Instalação
Hose reel can be installed directly onto a fixed surface or using a
plate (fig. A) or a pivoting bracket (fig. B).
For optimal operation; the hose arm guide can be mounted in these
positions:
• PERPENDICULAR REELING
Recommended for ceiling and wall or column under 2.5 m (8 feet)
(fig. 2).
• SIDE REELING
Recommended for wall, column, bench, tank, etc (see fig 3).
• TANGENTIAL REELING
Recommended for wall or column at a height above 2.5 m (8 feet),
mobile units, lube truck, tank assemblies, etc. (fig. 4).
EN
El enrollador puede instalarse directamente sobre la superficie de
montaje, una base de fijación (fig. A) o un soporte pivotante (fig. B).
El brazo de salida tiene varias posiciones para un adecuado
funcionamiento.
• MONTAJE PERPENDICULAR
Para montaje en techo o sobre pared por debajo de 2.5 m (8 pies)
(fig. 2).
• MONTAJE PARALELO
Para montaje sobre suelo, columna, foso, depósito, banco…
(fig. 3).
• MONTAJE TANGENCIAL
Para montaje sobre pared por encima de 2.5 metros (8 pies).
También adecuado para montaje sobre unidades móviles (fig. 4).
ES
FR
Der Schlauchaufroller wird direkt an die Decke, den Boden oder die
Wand montiert. Das kann mit einer oder ohne
Montageplatte (Fig. A). Zudem kann er auch auf einer schwenkbaren
Konsole (Fig. B) montiert werden.
Um die ideale Position des schlauchführenden Arms zu erreichen,
kann er wie folgt montiert werden:
• SENKRECHTER SCHLAUCHAUSZUG
Empfohlen für Decken- oder Säulenmontage unter 2,5 m - 8'
(Fig. 2).
• SEITLICHER SCHLAUCHAUSZUG
Empfohlen für die Montage an Säulen, Wänden, Werkbänken
oder Tanks (Fig. 3).
• TANGENTIALER SCHLAUCHAUSZUG
Empfohlen für Wand- oder Säulenmontage über 2,5 m - 8' (Fig. 4).
DE
L'enrouleur peut être installé directement sur une surface fixe ou en
utilisant une plaque (fig. A) ou un support pivotant (fig. B).
Pour un fonctionnement optimal, le bras de guidage du flexible
peut être monté dans différentes positions:
• DÉROULEMENT PERPENDICULAIRE
Recommandé pour les plafonds et murs en dessous de 2,5 m
(8 pieds) (fig. 2).
• DÉROULEMENT DE CÔTÉ
Recommandé pour montage au sol, en fosse, sur potence ou
portique, citerne, établi, etc (fig. 3).
• DÉROULEMENT TANGENTIEL
Recommandé pour montage mural à une hauteur supérieure à
2,5 m (8 pieds). Convient également pour les unités mobiles
(fig. 4).
PT
O carretel pode ser instalado diretamente sobre a superfície de
montagem, uma base de fixação (figura A). Ou em suporte giratório
(figura B). O braço de saída possui varias posições para um
funcionamento adequado.
• MONTAGEM PERPENDICULAR
Para montagem em tetos ou em parede, colocar abaixo de 2,5 m
(figura 2).
• MONTAGEM PARALELA
Para montagem no solo, colunas, valetas, depósitos... (figura 3).
• MONTAGEM HORIZONTAL
Para montagem em paredes colocar acima de 2,5 m.
Os carreteis também podem ser montados em unidades móveis
(fig. 4).
Fig. A Fig. B
4850 812 R. 10/15
SAMOA Industrial, S.A. · Pol. Ind. Porceyo, I-14 · Camino del Fontán, 831 · 33392 Gijón - Spain · Tel.: +34 985 381 488 · www.samoaindustrial.com
2015_10_27-13:40
Installation / Instalación / Installation / Montage / Instalação
Fig. 2 Fig. 3 Fig. 4
To reposition the hose guide arm, follow these steps:
1. Clamp the spool with c-clamp to lock the hose reel (fig. C).
2. Remove the hose stop.
3. Unscrew the fixing screws (fig. 5).
4. Place the hose guide arm in the required position and screw the
fixing screws.
5. Insert the hose reel through the hose outlet and assemble the
hose stop.
Affix the hose stop.
6. Unlock the spool.
EN
Para mover el brazo de salida, el procedimiento es el
siguiente:
1. Fije el disco del enrollador con un sargento (fig. C).
2. Quite el tope manguera.
3. Afloje los tornillos del brazo superior (fig. 5).
4. Coloque el brazo del enrollador en la posición deseada y apriete
los tornillos.
5. Introduzca la manguera por la salida de manguera y coloque el
tope manguera de nuevo.
6. Quite el sargento para liberar el disco del enrollador.
ES
Pour repositionner le bras de guidage du flexible, la
procédure est la suivante:
1. Fixer le disque de l'enrouleur avec un serre-joints pour bloquer
le tambour (fig. C).
2. Retirez la butée d'arrêt du flexible.
3. Desserrez les vis sur la partie supérieure du bras (fig. 5).
4. Placez le bras de la bobine dans la position désirée et serrer les vis.
5. Insérer le flexible à travers la sortie à galets, monter la butée
d'arrêt sur le flexible et la bloquer.
6. Retirer le serre-joints.
FR
Um den schlauchführenden Arm zu verstellen, gehen Sie
bitte wie folgt vor:
1. Fixieren Sie das Gehäuse mittels einer C-Klemme (Fig. C).
2. Entfernen Sie den Schlauchstopper.
3. Lösen Sie die Befestigungsschrauben (Fig. 5).
4. Bringen Sie nun den Arm in die gewünschte Position und fixieren
Sie ihn mit Hilfe der Befestigungsschrauben.
5. Schieben Sie nun das Schlauchende in der gewünschten Länge
durch die Schlauchführungsöffnung und befestigen
Sie den Schlauchstopper.
6. Lösen Sie die Arretierung.
DE
5
R. 10/15 850 812
SAMOA Industrial, S.A. · Pol. Ind. Porceyo, I-14 · Camino del Fontán, 831 · 33392 Gijón - Spain · Tel.: +34 985 381 488 · www.samoaindustrial.com
2015_10_27-13:40
Fig. C Fig. 5
Installation / Instalación / Installation / Montage / Instalação
Paramoverobraçodesaídaseguirosseguintesprocedimentos:
1. Fixar a roda do carretel em um sargento (figura C).
2. Retirar a abraçadeira de parada que prende a ponta da
mangueira.
3. Afrouxar os parafusos do braço superior (figura 5).
4. Colocar o braço do carretel na posição desejada e apertar
novamente os parafusos.
5. Introduzir a mangueira pela saída de mangueira do suporte da
frente do carretel e colocar a abraçadeira de parada para
prender a ponta da mangueira.
6. Retirar o carretel do sargento para liberar a roda do carretel.
PT
1. Clamp the hose reel firmly to a work bench.
2. Pre tension the hose reel power spring by rotating the spool:
10 m spring: 16 turns
15 m spring: 19 turns
15 m HD spring: 21 turns
3. Introduce the hose end to fix to the hose reel through the outlet
guide and then through the opening in the drum of the spool.
Pull the hose through the drum towards the swivel.
4. Fix the hose to the swivel as indicated in figure 8a and fix the U
bolt as shown in figure 8b.
5. Fix the hose stop to the free end of the outlet hose.
6. Pull out the hose slightly to free the spool latch and then gradually
release the hose to allow the hose reel to wind up the hose.
7. If the hose reel does not rewind satisfactorily then adjust the
tension of the power spring (see “Spring load adjustment”).
EN
1. Sujete el enrollador a una base firmemente.
2. Aplique, al enrollador sin manguera, las vueltas de pretensión
que se indican a continuación.
Resorte para 10 m: 16 vueltas
Resorte para 15 m: 19 vueltas
Resorte para 15 m HD: 21 vueltas
3. Introduzca el extremo de la manguera por la salida del
enrollador y el orificio del tambor hasta llegar a la rótula.
4. Fije la manguera a la rótula como se indica en la figura 8a y
coloque el abarcón según la figura 8b.
5. Coloque el tope de manguera en el extremo libre.
6. Libere el trinquete tirando ligeramente de la manguera y deje
que enrolle suavemente.
7. Si es necesario ajustar la tensión del resorte, siga las instrucciones
del apartado “Ajuste de la tensión del resorte”.
ES
Maintenance and repair procedures / Procedimientos de mantenimiento y reparación /
Procédures de maintenance et de réparation / Service und Wartung / Procedimentos de Manutenção e Reparos
Hose installation / Instalación de la manguera / Montage du flexible /
Schlauchmontage / Instalação da Mangueira
6850 812 R. 10/15
SAMOA Industrial, S.A. · Pol. Ind. Porceyo, I-14 · Camino del Fontán, 831 · 33392 Gijón - Spain · Tel.: +34 985 381 488 · www.samoaindustrial.com
2015_10_27-13:40
1. Fixer l'enrouleur fermement sur un plan de travail.
2. Appliquer au ressort de l'enrouleur sans flexible une pré-tension
en tournant le tambour selon les instructions ci-dessous:
Ressort pour 10m: 16 tours
Ressort pour 15m: 19 tours
Ressort HD 15m grande longueur: 21 tours
3. Introduire l'extrémité du tuyau à fixer sur l'enrouleur à travers le bras
de guidage, puis par l'ouverture dans le tambour jusqu'à la rotule.
4. Fixer le flexible à la rotule comme indiqué dans la figure 8a et
fixer les boulons en « U » comme illustré dans la figure 8b.
5. Fixer la butée d'arrêt à l'extrémité du flexible, après le bras de
guidage.
6. Libérer le cliquet tirant doucement sur le flexible et laissez
tourner en douceur pour rembobiner complètement le flexible.
7. Si l'enrouleur ne rembobine pas le flexible de manière satisfaisante,
ajuster la puissance de tension du ressort (voir « réglage de la tension
du ressort»).
FR
Maintenance and repair procedures / Procedimientos de mantenimiento y reparación /
Procédures de maintenance et de réparation / Service und Wartung / Procedimentos de Manutenção e Reparos
Hose installation / Instalación de la manguera / Montage du flexible /
Schlauchmontage / Instalação da Mangueira
1. Befestigen Sie den Schlauchaufroller sicher an einer Werkbank.
2. Rollen Sie den Aufroller um:
16 Umdrehungen bei 10 Meter (33') Länge
19 Umdrehungen bei 15 Meter (49') Länge
21 Umdrehungen bei 15+ Meter (49') Länge
ab, um den Aufroller vorzuspannen.
3. Führen Sie nun das Schlauchende durch die Auslassöffnung und
durch die Öffnung in der Schlauchtrommel, um dieses dann am
Drehgelenk zu montieren.
4. Befestigen Sie den Schlauch wie in (Fig. 8a) beschrieben am
Drehgelenk und ziehen Sie den „U-Bolzen“ wie in (Fig. 8b)
dargestellt an.
5. Schrauben Sie den Schlauchstopper an das freie Ende des Schlauchs.
6. Ziehen Sie den Schlauch langsam heraus, um die Sperrklinke der
Trommel zu lösen und langsam den Schlauch aufzurollen.
7. Sollte der Schlauch nicht wie gewünscht aufrollen, stellen Sie die
Spannung der Feder nach (Einstellen der Federstärke).
DE
Fig. 6
Fig. 7
1. Fixar firmemente o carretel à uma base.
2. Aplicar, ao carretel sem mangueira, as voltas pretendidas,
conforme a quantidade de voltas dadas, é o comprimento da
mangueira que será inserida no carretel.
IMPORTANTE: Não ultrapassar as voltar orientadas abaixo:
Mola para 10M: 16 voltas
Mola para 15M: 19 voltas
Mola para 15M HD: 21 voltas
3. Introduzir a extremidade da mangueira pela saída do carretel e
no orifício da roda até chegar ao giratório.
4. Fixar a mangueira no giratório como indicado na figura 8a e
colocar os fixadores, segundo a figura 8b.
5. Colocar a abraçadeira de parada na extremidade livre.
6. Liberar o trinquete do carretel retirando rapidamente a
mangueira e deixando a mangueira enrolar na roda suavemente.
7. Se necessário ajustar a tensão da mola. Seguir as instruções no
paragrafo “Ajuste de tensão da mola”.
PT
7
R. 10/15 850 812
SAMOA Industrial, S.A. · Pol. Ind. Porceyo, I-14 · Camino del Fontán, 831 · 33392 Gijón - Spain · Tel.: +34 985 381 488 · www.samoaindustrial.com
2015_10_27-13:40
ATENCIÓNWARNING
ATTENTION
Before removing the hose, close the nearest shut off valve to
the reel and open the fluid control gun to release the pressure
inside the hose.
NOTE: During hose installation, tighten the U-bolt just till the hose
gets slightly deformed. Do not overtighten the U-bolt, since the
hose could be damaged.
1. Unwind the hose completely and then search for the ratchet
locking position (fig. 6).
2. Remove the hose stop (fig. 7).
3. Disconnect the hose as shown (fig. 8a). Release the hose from
the disk by removing the clamp (fig. 8b).
4. Pass the new hose through the hose outlet and connect it again
to the hose reel. Assemble the clamp and assemble the hose
stop to the required length.
5. Pull the hose hard enough to release the latch, and slowly allow
the hose to retract (fig. 9).
EN
antes de retirar la manguera, cierre la llave de servicio
más cercana al enrollador yaBra la pistola de suministro
afin de liBerar el fluido apresión de la manguera.
NOTA: Durante la instalación de la manguera, apriete el abarcón
sólo hasta deformar ligeramente la manguera. Evite apretar el
abarcón en exceso pues la manguera puede llegar a dañarse.
1. Desenrolle totalmente la manguera usada y busque la posición
de bloqueo del trinquete más próxima a esta longitud (fig. 6).
2. Afloje entonces el tope de manguera y desmóntelo (fig. 7).
3. Desconecte la manguera usada según se indica en la imagen
(fig. 8a) y libere la manguera del disco retirando el abarcón de
fijación manguera (fig. 8b).
4. Conecte la manguera nueva, para ello introduzca el extremo de
la manguera por la salida del enrollador y el orificio del tambor
hasta llegar a la rótula y conecte de nuevo al enrollador y fije
correctamente el abarcón. Coloque el tope manguera.
5. Libere el trinquete y acompañe lentamente la manguera al
recogerse (fig. 9).
ES
avant de retirer le flexiBle, fermer la vanne d'arrêt la plus
proche de l'enrouleur et ouvrez la poignée de distriBution pour
liBérer la pression du fluide àl'intérieur du tuyau.
NOTE : Lors de l’installation du tuyau, serrez le boulon en U
graduellement jusqu’à ce que le tuyau se déforme très légèrement.
Évitez de trop serrer le boulon en U car cela endommagerait le tuyau.
1. Déroulez complètement le flexible jusqu'à la dernière position
de verrouillage du cliquet (fig. 6).
2. Desserrez et retirez la butée d'arrêt du flexible (fig. 7).
3. Débranchez le flexible comme indiqué (fig. 8a). Dévissez le
boulon en « U » et retirez le flexible (fig. 8b).
4. Introduire l'extrémité du nouveau flexible dans l'enrouleur à
travers le bras de guidage, puis par l'ouverture dans le tambour
et le fixer sur la rotule. Visser le boulon en « U » pour maintenir
correctement le flexible. Fixer la butée d'arrêt à l'extrémité du
flexible, après le bras de guidage.
5. Libérer le cliquet tirant doucement sur le flexible et rembobiner
lentement et complètement le tuyau en l'accompagnant (fig. 9).
FR
Maintenance and repair procedures / Procedimientos de mantenimiento y reparación /
Procédures de maintenance et de réparation / Service und Wartung
Hose installation / Instalación de la manguera / Montage du flexible /
Schlauchmontage / Instalação da Mangueira
WARNUNG
Bevor sie den Beschädigten schlauch ersetzen, schliessen sie
das ventil, das am nächsten zum schlauchaufroller
montiert ist und öffnen sie die sich am schlauchende
Befindende pistole, um den druck im schlauch aBzulassen.
ACHTUNG: Ziehen Sie bei der Montage des Schlauches den
U-Bolzen so fest an, bis der Schlauch sich leicht verformt. Zu festes
Anziehen des U-Bolzen kann zu einer Beschädigung des Schlauches
führen!.
1. Pistole, um den Druck im Schlauch abzulassen.
2. Rollen Sie den Schlauch komplett ab und rasten Sie die Trommel
ein (Fig. 6).
3. Entfernen Sie den Schlauchstopper (Fig. 7).
4. Entfernen Sie den Schlauch wie in (Fig. 8a) gezeigt. Lösen Sie
den Schlauch von der Scheibe wie in (Fig. 8b) gezeigt, indem Sie
die Klammer entfernen.
5. SchiebenSiedenneuenSchlauchdurchdieSchlauchausgangsöffnung
und befestigen Sie ihn an der Schlauchtrommel. Montieren Sie die
Klammer und den Schlauchstopper in der gewünschten Länge.
6. Ziehen Sie den Schlauch fest genug, um ihn anschließend
aufrollen zu lassen (Fig. 9).
DE
Fig. 8a
8850 812 R. 10/15
SAMOA Industrial, S.A. · Pol. Ind. Porceyo, I-14 · Camino del Fontán, 831 · 33392 Gijón - Spain · Tel.: +34 985 381 488 · www.samoaindustrial.com
2015_10_27-13:40
WARNING ATENCIÓN
donot over tension the reel. excessive strain on the hose and
reel spring could damage the reel.
To increase spring tension
1. Pull the hose out 10 feet (3 metres) and let the hose reel latch
(fig. 11).
2. Wind the hanging hose into the reel (fig. 13).
3. Gently pull the hose, it will be automatically rewound (fig. 14).
4. Repeat if more spring tension is required.
To decrease spring tension
1. Pull the hose out 10 feet (3 metres) and let the hose reel latch
(fig. 11).
2. Unwind one turn and pull the hose (fig. 12).
3. Gently pull the hose, the hose is automatically rewound (fig. 14).
4. Repeat if less spring tension is required.
EN
noañada demasiadas vueltas al enrollador. una tensión
excesiva podría dañar el muelle yla manguera.
Para dar tensión
1. Extraiga unos 10 pies (3 metros) de manguera y trinque la
manguera (fig. 11).
2. Introduzca una vuelta de la manguera, en el disco del enrollador
(fig. 13).
3. Tire suavemente de la manguera hasta que quede liberada del
trinquete y se recoja por si misma (fig. 14).
4. Repita los pasos anteriores si necesita más tensión.
Para quitar tensión
1. Extraiga unos 10 pies (3 metros) de manguera y trinque la
manguera (fig. 11).
2. Quite una vuelta de manguera del interior del disco del
enrollador (fig. 12).
3. Tire suavemente de la manguera hasta que quede liberada del
trinquete y se recoja por si misma (fig. 14).
4. Repita los pasos anteriores si necesita menos tensión.
ES
Fig. 8b
Fig. 9
ATENÇÃO
antes de retirar amangueira, fechar oregistro da linha que
estiver mais próxima do carretel eacionar ocomando de graxa,
para eliminar toda apressão da graxa da mangueira.
NOTA: Durante a instalação da mangueira, apertar o fixador
somente até ter uma pequena deformação na mangueira. Evitar
apertar demais o fixador, pois a mangueira pode romper.
1. Desenrolar totalmente a mangueira usada e procurar a posição
de bloqueio do trinquete mais próxima a longitude mostrada na
figura 6.
2. Afrouxar os parafusos da abraçadeira de parada e desmonta-la
(figura 7)
3. Desconectar a mangueira como indicado na figura 8a e liberar a
mangueira da roda retirando os fixadores da mangueira do
suporte interno do carretel (figura 8b).
4. Conectar a nova mangueira, introduzindo sua extremidade na
saída do carretel e no orifício da roda até chegar ao giratório, então
conectar novamente a mangueira no carretel e fixar o fixador.
Colocar a abraçadeira de parada na extremidade livre da mangueira.
5. Liberar o trinquete e soltar lentamente a mangueira para enrola-
la (figura 9).
PT
Maintenance and repair procedures / Procedimientos de mantenimiento y reparación /
Procédures de maintenance et de réparation / Service und Wartung / Procedimentos de Manutenção e Reparos
Hose installation / Instalación de la manguera / Montage du flexible /
Schlauchmontage / Instalação da Mangueira
Spring load adjustment / Ajuste de la tensión del resorte /
Réglage de la tension du ressort / Ändern der Federstärke / Ajuste da Tensão da Mola
9
R. 10/15 850 812
SAMOA Industrial, S.A. · Pol. Ind. Porceyo, I-14 · Camino del Fontán, 831 · 33392 Gijón - Spain · Tel.: +34 985 381 488 · www.samoaindustrial.com
2015_10_27-13:40
ATTENTION
nepas donner trop de tension àl'enrouleur. une tension
excessive sur le flexiBle et le ressort pourrait endommager
l'enrouleur.
Pour augmenter la tension du ressort
1. Tirer le flexible de 3 mètres et bloquer le tambour au moyen du
cliquet (fig. 11).
2. Insérer le flexible sur un tour à l'intérieur du tambour par une
flasque de l'enrouleur (fig. 13).
3. Tirer doucement sur le flexible pour le libérer du cliquet et
accompagner jusqu'à ce qu'il soit complètement rembobiné
(fig. 14).
4. Répéter l'opération s'il est nécessaire d'augmenter la tension du
ressort.
Pour diminuer la tension du ressort
1. Tirer le flexible de 3 mètres et bloquer le tambour au moyen du
cliquet (fig. 11).
2. Détendre un tour de flexible et le retirer du tambour (fig. 12).
3. Tirer doucement sur le flexible pour le libérer du cliquet et
accompagner jusqu'à ce qu'il soit complètement rembobiné
(fig. 14).
4. Répéter l'opération s'il est nécessaire de diminuer la tension du
ressort.
FR
Spring load adjustment / Ajuste de la tensión del resorte /
Réglage de la tension du ressort / Ändern der Federstärke / Ajuste da Tensão da Mola
Maintenance and repair procedures / Procedimientos de mantenimiento y reparación /
Procédures de maintenance et de réparation / Service und Wartung / Procedimentos de Manutenção e Reparos
WARNUNG
Bringen sie nicht zuviel spannung auf die spule, üBermässiger
Beanspruchung vom schlauch und feder schadet den
aufroller.
Federstärke Erhöhen
1. Ziehen Sie den Schlauch 3 Meter heraus und lassen Sie ihn
einrasten (Fig. 11).
2. Wickeln Sie den Schlauch eine Windung auf den Aufroller (Fig. 13).
3. Ziehen Sie nun vorsichtig den Schlauch, um ihn anschließend
automatisch aufrollen zu lassen (Fig. 14).
4. Wiederholen Sie diesen Vorgang, falls mehr Spannung gewünscht ist.
Federstärke verringern
1. Ziehen Sie den Schlauch 3 Meter heraus und lassen Sie ihn
einrasten (Fig. 11).
2. Wickeln Sie eine Windung ab und straffen Sie den Schlauch (Fig. 12).
3. Ziehen Sie nun vorsichtig den Schlauch, um ihn anschließend
automatisch aufrollen zu lassen (Fig. 14).
4. Wiederholen Sie diesen Vorgang, falls weniger Spannung
gewünscht ist.
DE
ATENÇÃO
não dar voltas amais no carretel, do que as indicadas acima.
uma tensão excessiva pode danificar amola eamangueira.
Para dar tensão a mola
1. Retirar aproximadamente 3 metros da mangueira e prenda a
mangueira (figura 11).
2. Dar uma volta na mangueira, na roda do carretel (figura 13).
3. Tirar levemente a mangueira até que esteja liberada do trinquete
e se enrole por si mesma (figura 14).
4. Repetir os passos anteriores se necessitar de mais tensão na mola.
Para tirar tensão da mola
1. Retirar aproximadamente 3 metros da mangueira e prenda a
mangueira (figura 11).
2. Tirar uma volta da mangueira de dentro da roda do carretel
(figura 12).
3. Retirar levemente a mangueira até que ela esteja liberada do
trinquete e se enrole por si mesma (figura 14).
4.Repetir os passos acima, caso necessite de menos tensão na mola.
PT
10 850 812 R. 10/15
SAMOA Industrial, S.A. · Pol. Ind. Porceyo, I-14 · Camino del Fontán, 831 · 33392 Gijón - Spain · Tel.: +34 985 381 488 · www.samoaindustrial.com
2015_10_27-13:40
WARNING ATENCIÓN
Fig.12Fig.11 Fig.14Fig.13
EN ES FR
Part. No.
/ Cód. /
Réf. /
Art. Nr. /
Cód.
Description /
Descripción /
Description /
Beschreibung /
Descrição
Standard pre tension turns /
Vueltas nominales pretensión trabajo /
Tours de tension nominale du ressort /
Standard Umdrehungen /
Voltas de tensão padrão
Max. pre tension turns /
Vueltas máximas pretensión de trabajo /
Tours de tension du ressort /
Maximale Umdrehungen /
Máximo de voltas de tensão padrão
850310
Standard spring /
Resorte estandar /
Ressort standard /
Feder - standard /
Mola padrão
5 9
850311
Severe spring /
Resorte severo /
Ressort renforcé /
Feder - verstärkt /
Mola grave
7 7
850313
High spring /
Resorte alto /
Ressort élevé /
Feder - Extra verstärkt /
Mola alta
5 10
Swivel replacement / Sustitución de la rótula / Remplacement de la rotule /
Austausch des Drehgelenks / Substituição do Giratório
Before removing the damaged swivel,
close the nearest shut off valve to the reel and open the fluid
control gun to release the pressure inside the hose.
1. Pull the hose out and let the hose reel latch (fig. 15).
2. Unscrew the nuts with two spanners (fig. 16).
3. Remove the circlip and pull the swivel. Be careful not to damage
the swivel O-Ring (fig. 17).
4. Assemble the new swivel and re-assemble the pieces in reverse
order.
EN
antes de que retire la rótula dañada, cierre la llave de servicio más
cercana al enrollador yaBra la pistola de suministro afin de
liBerar el fluido apresión de la manguera.
1. Tire de la manguera hasta que quede trincada en el enrollador
(fig. 15).
2. Con dos llaves, afloje la manguera de la rótula (fig. 16).
3. Quite la arandela de seguridad y tire de la rótula hacia fuera con
cuidado de no dañar la junta interior (fig. 17).
4. Coloque la nueva rótula y realice los pasos anteriores en sentido
inverso.
ES
Spring load adjustment / Ajuste de la tensión del resorte /
Réglage de la tension du ressort / Ändern der Federstärke / Ajuste da Tensão da Mola
Maintenance and repair procedures / Procedimientos de mantenimiento y reparación /
Procédures de maintenance et de réparation / Service und Wartung / Procedimentos de Manutenção e Reparos
DE PT
11
R. 10/15 850 812
SAMOA Industrial, S.A. · Pol. Ind. Porceyo, I-14 · Camino del Fontán, 831 · 33392 Gijón - Spain · Tel.: +34 985 381 488 · www.samoaindustrial.com
2015_10_27-13:40
ATTENTION
WARNUNG
Fig.15
Fig. 17
Fig.16
avant de retirer la rotule endommagée, fermer la vanne d'arrêt
la plus proche de l'enrouleur et ouvrir la poignée de distriBution
pour liBérer la pression du fluide àl'intérieur du tuyau.
1. Tirer le tuyau jusqu'au verrouillage du cliquet (fig. 15).
2. Avec deux clés, desserrer le flexible de la rotule (fig.16).
3. Enlever le circlip et tirer sur la rotule. Attention à ne pas
endommager le joint torique intérieur (fig. 17).
4. Placer la nouvelle rotule et exécuter les étapes ci-dessus dans
l'ordre inverse.
FR
Swivel replacement / Sustitución de la rótula / Remplacement de la rotule /
Austausch des Drehgelenks / Substituição do Giratório
Maintenance and repair procedures / Procedimientos de mantenimiento y reparación /
Procédures de maintenance et de réparation / Service und Wartung / Procedimentos de Manutenção e Reparos
Bevor sie das aBgenutzte eingangsgelenk aBmontieren, schliessen
sie das ventil, das am nächsten zum schlauchaufroller
montiert ist und öffnen sie die sich am ende Befindende pistole,
um den druck im schlauch aBzulassen.
1. Ziehen Sie den Schlauch ganz heraus und lassen sie ihn einrasten
(Fig. 15).
2. Lösen Sie die Schraubenmuttern mit Hilfe zweier Gabelschlüssel
(Fig. 16).
3. Entfernen Sie den Spannring und entnehmen Sie das Drehgelenk.
Vorsicht, beschädigen Sie nicht den O-Ring des Drehgelenks
(Fig. 17).
4. Montieren Sie das neue Drehgelenk und setzen Sie den Aufroller
in umgekehrter Reihenfolge wieder zusammen.
DE
ATENÇÃO
antes de retirar ogiratório danificado, fechar oregistro da linha
que estiver mais próxima do carretel eacione ocomando de graxa,
para eliminar toda apressão da graxa da mangueira.
1. Tirar a mangueira até que o final, onde ela esta presa ao carretel
pelo giratório (figura 15).
2. Com as chaves apropriadas, afrouxar a mangueira do giratório
(figura 16).
3. Retirar a arruela de segurança e tirar o giratório ara fora com
cuidado para não danificar a junta interna do carretel (figura
17).
4. Colocar o novo giratório e fazer os passos anteriores no sentido
contrário.
PT
12 850 812 R. 10/15
SAMOA Industrial, S.A. · Pol. Ind. Porceyo, I-14 · Camino del Fontán, 831 · 33392 Gijón - Spain · Tel.: +34 985 381 488 · www.samoaindustrial.com
2015_10_27-13:40
Ratchet Replacement / Sustitución de trinquete / Remplacement du cliquet /
Austausch der Raste / Substituição do Trinquete
Fig.18
EN
1. Remove the nut that fixes the latch (fig. 18).
2. Replace the latch and/or the latch spring.
3. Re-assemble the pieces in reverse order.
ES
1. Quite la tuerca que une el trinquete con el brazo del enrollador
(fig. 18).
2. Remplace el trinquete y/o resorte trinquete defectuoso.
3. Realice los pasos anteriores en sentido inverso.
FR
1. Retirer le boulon qui fixe le cliquet sur le bras de l'enrouleur (fig. 18).
2. Remplacer le cliquet et / ou le ressort défectueux.
3. Effectuer les étapes ci-dessus en sens inverse.
DE
1. Entfernen Sie die Schraubenmuttern, die die Sperrklinke
befestigen (Fig. 18).
2. Ersetzen Sie die Sperrklinke und / oder die Feder der Sperrklinke.
3. Setzen Sie die Teile in umgekehrter Reihenfolge wieder
zusammen.
PT
1. Retirar a porca que junta o trinquete com o braço do carretel
(figura 18).
2. Substituir o conjunto do trinquete danificado.
3. Repetir os passos anteriores em sentido inverso para fixar o novo
conjunto do trinquete.
Maintenance and repair procedures / Procedimientos de mantenimiento y reparación /
Procédures de maintenance et de réparation / Service und Wartung / Procedimentos de Manutenção e Reparos
13
R. 10/15 850 812
SAMOA Industrial, S.A. · Pol. Ind. Porceyo, I-14 · Camino del Fontán, 831 · 33392 Gijón - Spain · Tel.: +34 985 381 488 · www.samoaindustrial.com
2015_10_27-13:40
Troubleshooting / Anomalías y sus soluciones / Anomalies et Solutions /
Probleme und deren Lösungen / Problemas e Soluções
Symptom Possible Causes Solution
Hose does not rewind. Spring is not tensioned enough. Increase spring tension.
Leaking hose reel. Hose has a hole or is damaged. Replace the hose.
Leaking swivel. Damaged swivel rings. Replace the swivel rings.
Hose does not extend out as much as required. Spring is over tensioned. Decrease spring tension.
Hose reel does not latch.
Damaged ratchet. Replace the ratchet.
Ratchet not fitted. Assembly the ratchet properly.
Damaged spring ratchet. Change the ratchet spring.
Síntoma Posibles causas Solución
El enrollador no recoge. El muelle ha perdido tensión o se ha roto. De tensión al resorte o reemplácelo.
La manguera pierde fluido. Manguera con poro o rota. Cambie la manguera.
La rótula pierde fluido. Rótula deteriorada. Cambie la rótula.
La manguera no sale todo lo que debería. Demasiada tensión en el resorte. Quite tensión al resorte.
El enrollador no trinca.
Trinquete deteriorado. Cambie el trinquete.
Trinquete fuera de su lugar. Coloque el trinquete adecuadamente.
Muelle trinquete deteriorado. Sustituya el muelle del trinquete.
EN
ES
Symptôme Cause possible Solution
Le flexible ne s'enroule plus. La tension du ressort est insuffisante ou le
ressort est cassé. Augmenter la tension du ressort ou le
remplacer.
Fuite au niveau du flexible. Le flexible est percé ou endommagé. Remplacer le flexible.
Fuite au niveau de la rotule. La rotule est détériorée. Remplacer la rotule.
Le flexible ne se déroule pas entièrement. Trop de tension sur le ressort. Diminuer la tension du ressort.
L'enrouleur ne se verrouille pas.
Le cliquet est endommagé. Remplacer le cliquet.
Le cliquet n'est pas ajusté correctement. Ajuster le cliquet.
Le ressort du cliquet est détérioré. Remplacer le ressort du cliquet.
FR
Symptome mögl. Ursache Lösungen
Schlauch rollt nicht auf. Federspannung zu niedrig. Federspannung erhöhen.
Undichte Schlauchaufroller. Schlauch ist undicht oder beschädigt. Schlauch ersetzen.
Undichtes Drehgelenk. O-Ring beschädigt. O-Ring ersetzen.
Schlauch rollt nicht genügend ab. Federspannung zu hoch. Federspannung verringern.
Aufroller verriegelt nicht.
Raste beschädigt. Raste ersetzen.
Raste nicht korrekt befestigt. Raste korrekt befestigen.
Feder von Raste defekt. Feder ersetzen.
DE
Problema Causas Possíveis Solução
O carretel não desenrola a mangueira. A mola não está tensionada o suficiente. Aumentar a tensão na mola.
Há vazamento pela mangueira. Mangueira está furada ou danificada. Substituir a mangueira.
Há perda de fluido pelo giratório. Giratório danificado. Substituir o giratório
A mangueira não desenrola totalmente. A mola está com muita tensão. Diminuir a tensão da mola.
O carretel não trava.
Trinquete danificado. Substituir o conjunto do trinquete.
Trinquete está fora do lugar. Ajustar adequadamente o trinquete no lugar.
Mola do trinquete está danificada. Substituir o conjunto do trinquete.
PT
14 850 812 R. 10/15
SAMOA Industrial, S.A. · Pol. Ind. Porceyo, I-14 · Camino del Fontán, 831 · 33392 Gijón - Spain · Tel.: +34 985 381 488 · www.samoaindustrial.com
2015_10_27-13:40
526011
526010
526012
526013
750429
750424
850444
850310
850311
850313
850617
850613
850615 850614
950510
850442
944810
944816
941126
850446
852600
852601
852602
850502
942106
941105
941006
940921
850616
750428
941107
850312
750439
850611
942061
Part list / Lista de recambios / Pièces de rechange / Teileliste / Peças de Reposição
940372
940385
940522
850610
15
R. 10/15 850 812
SAMOA Industrial, S.A. · Pol. Ind. Porceyo, I-14 · Camino del Fontán, 831 · 33392 Gijón - Spain · Tel.: +34 985 381 488 · www.samoaindustrial.com
2015_10_27-13:40
Kit No. Part. No incl. Description
526010
Oil, vacuum and cold water swivel kit
850419 Body swivel Stainless Steel
945593 Fitting R 1/2" - 1/2" (MM)
946032 (x2) O-ring NBR
526011
Grease swivel kit
750430 Body swivel
946012 (x2) O-ring NBR
945676 Fitting 3/8” NPT-3/8 BSP (MM)
946307 (x2) Back-up ring
526012
High pressure hot water swivel kit
850419 Body swivel Stainless Steel
945593 Fitting R 1/2" - 1/2" (MM)
946650 O-ring Roto Glyd Ring®
526013
Windscreen washer swivel kit
850445 Body swivel AISI - 316
945703 Fitting R 1/2" - 1/2" NPT-BSP AISI
- 316
946145 (x2) O-ring Viton®
526020
Ratchet kit
850312 Ratchet spring AISI - 316
750439 Ratchet Axle
850611 Ratchet
941107 Nut AISI - 316
942061 (x2) Washer AISI - 316
526021
Hose outlet kit
850616 (x6) Hose roller
750428 (x6) Roller axle
940921 (x6) Screw AISI - 316
526001
Hose-stop and U-bolt kit
944816 U-bolt AISI - 316
941126 (x2) Nut AISI - 316
852601 (x2) Hose-stop
940372 (x2) Screw
941105 (x2) Nut
850446 Plate U-bolt AISI - 316
526002
Hose-stop and U-bolt kit
944816 U-bolt AISI - 316
941126 (x2) Nut AISI - 316
852602 (x2) Hose-stop
940372 (x2) Screw
941105 (x2) Nut
850 446 Plate u-bolt Aisi - 316
Kit No. Part. No incl. Description
526004
Hose-stop and U-bolt kit
944810 U-bolt AISI - 316
941126 (x2) Nut AISI - 316
852600 (x2) Hose-stop
940372 (x2) Screw
941105 (x2) Nut
850446 Plate u-bolt AISI - 316
526003
Hose-stop and U-bolt kit
944816 U-bolt AISI - 316
941126 (x2) Nut AISI - 316
850502 Hose - Stop
940385 Screw
941006 Nut
942106 (x2) Washer
850446 Plate u-bolt AISI - 316
526022
Spool and grease reel shaft kit
850615 Washer
850613 Spool
750429 High pressure shaft
950510 (x2) Ball bearing
850617 Spacer
850614 Spring cover
940522 (x6) Screw
850442 Spring washer
526023
Spool and fluid reel shaft kit
850615 Washer
850613 Spool
750424 Low-medium pressure shaft
950510 (x2) Ball bearing
850617 Bushing
850614 Spring cover
940522 (x6) Screw
850442 Spring washer
526024
Spool and fluid reel shaft kit
850615 Washer
850613 Spool
850444 Shaft AISI - 316
950510 (x2) Ball bearing
850617 Bushing
850614 Spring cover
940522 (x6) Screw
850442 Spring washer
Part list / Lista de recambios / Pièces de rechange / Teileliste
EN
Part. No Description
850310 Standard spring (10 m - 33')
850311 Severe spring (15 m - 49' HD)
850313 High spring (15 m - 49' HD)
16 850 812 R. 10/15
SAMOA Industrial, S.A. · Pol. Ind. Porceyo, I-14 · Camino del Fontán, 831 · 33392 Gijón - Spain · Tel.: +34 985 381 488 · www.samoaindustrial.com
2015_10_27-13:40
Part list / Lista de recambios / Pièces de rechange / Teileliste
Cód. kit Cód. incl. Descripción
526010
Kit rótula aceite, vacío y agua
850419 Rótula Inoxidable
945593 Adaptador R 1/2" - 1/2" (MM)
946032 (x2) Junta tórica NBR
526011
Kit rótula grasa
750430 Rótula
946012 (x2) Junta tórica NBR
945676 Adaptador 3/8 NPT-3/8 BSP
(MM)
946307 (x2) Junta tórica
526012
Kit rótula agua caliente alta presión
850419 Rótula Inoxidable
945593 Adaptador R 1/2" - 1/2" (MM)
946650 Junta tórica Roto Glyd Ring®
526013
Kit rótula limpiaparabrisas y AdBlue®
850445 Rótula AISI - 316
945703 Adaptador R 1/2" - 1/2" NPT - BSP
AISI - 316
946145 (x2) Junta tórica Viton®
526020
Kit trinquete
850312 Resorte trinquete AISI - 316
750439 Eje trinquete
850611 Trinquete
941107 Tuerca autoblocante AISI - 316
942061 (x2) Arandela AISI - 316
526021
Kit salida
850616 (x6) Rodillo salida manguera
750428 (x6) Eje salida manguera
940921 (x6) Tornillo AISI - 316
526001
Kit tope manguera y abarcón
(aire, agua y grasa 3/8", aceite 1/2")
944816 Abarcón AISI - 316
941126 (x2) Tuerca autoblocante AISI - 316
852601 (x2) Bicono
940372 (x2) Tornillo
941105 (x2) Tuerca autoblocante
850446 Pletina abarcón AISI - 316
526002
Kit tope manguera y abarcón
(aire, agua, limpiaparabrisas y AdBlue®1/2")
944816 Abarcón AISI - 316
941126 (x2) Tuerca autoblocante AISI - 316
852602 (x2) Bicono
940372 (x2) Tornillo
941105 (x2) Tuerca autoblocante
850 446 Pletina abarcón AISI - 316
ES
Cód. kit Cód. incl. Descripción
526004
Kit tope manguera y abarcón
(agua caliente 3/8" y grasa 1/4")
944810 Abarcón AISI - 316
941126 (x2) Tuerca autoblocante AISI - 316
852600 (x2) Bicono
940372 (x2) Tornillo
941105 (x2) Tuerca autoblocante
850446 Pletina abarcón AISI - 316
526003
Kit tope manguera y abarcón (aceite usado)
944816 Abarcón AISI - 316
941126 (x2) Tuerca autoblocante AISI - 316
850502 Tope manguera
940385 Tornillo
941006 Tuerca autoblocante
942106 (x2) Arandela
850446 Pletina abarcón AISI - 316
526022
Kit disco y eje para grasa
850615 Arandela tope disco
850613 Disco enrollador completo
750429 Eje para grasa
950510 (x2) Rodamiento
850617 Espaciador rodamientos
850614 Tapa resorte
940522 (x6) Tornillo cierre tapa resorte
850442 Arandela resorte
526023
Kit disco y eje para fluidos
850615 Arandela tope disco
850613 Disco enrollador completo
750424 Eje de baja-media presión
950510 (x2) Rodamiento
850617 Espaciador rodamientos
850614 Tapa resorte
940522 (x6) Tornillo cierre tapa resorte
850442 Arandela resorte
526024
Kit disco y eje para fluidos para
limpiaparabrisas y AdBlue®
850615 Arandela tope disco
850613 Disco enrollador completo
850444 Eje AISI - 316
950510 (x2) Rodamiento
850617 Espaciador rodamientos
850614 Tapa resorte
940522 (x6) Tornillo cierre tapa resorte
850442 Arandela resorte
Cód. Descripción
850310 Resorte (10 m - 33')
850311 Resorte (15 m - 49' HD)
850313 Resorte (15 m - 49' HD)
17
R. 10/15 850 812
SAMOA Industrial, S.A. · Pol. Ind. Porceyo, I-14 · Camino del Fontán, 831 · 33392 Gijón - Spain · Tel.: +34 985 381 488 · www.samoaindustrial.com
2015_10_27-13:40
Part list / Lista de recambios / Pièces de rechange / Teileliste
Kit Nr. Références
incluses Désignation
526010
Kit rotule huile, eau froide et vide
850419 Rotule acier inoxydable
945593 Adaptateur R 1/2" - 1/2" (MM)
946032 (x2) Joint torique NBR
526011
Kit rotule graisse
750430 Rotule
946012 (x2) Joint torique NBR
945676 Adaptateur 3/8” NPT - 3/8 BSP
(MM)
946307 (x2) Joint torique
526012
Kit rotule eau chaude à haute pression
850419 Rotule acier inoxydable
945593 Adaptateur R 1/2" - 1/2" (MM)
946650 Joint torique Roto Glyd Ring®
526013
Kit rotule LR-LG et AdBlue®
850445 Rotule AISI - 316
945703 Adaptateur R 1/2" - 1/2" NPT -
BSP AISI - 316
946145 (x2) Joint torique Viton®
526020
Kit cliquet
850312 Ressort cliquet AISI - 316
750439 Axe du cliquet
850611 Cliquet
941107 Écrou autobloquant AISI - 316
942061 (x2) Rondelle AISI - 316
526021
Kit de sortie à galets
850616 (x6) Galets
750428 (x6) Axes
940921 (x6) Vis AISI - 316
526001
Kit butée d'arrêt pour flexible et boulon en
« U » (air, eau et graisse 3/8", huile 1/2")
944816 Boulon en « U » AISI - 316
941126 (x2) Écrou autobloquant AISI - 316
852601 (x2) Butée
940372 (x2) Vis
941105 (x2) Écrou autobloquant
850446 Platine pour boulon en « U »
526002
Kit butée d'arrêt pour flexible et boulon en
« U » (air, eau, LR-LG et AdBlue 1/2")
944816 Boulon en « U » AISI - 316
941126 (x2) Écrou autobloquant AISI - 316
852602 (x2) Butée
940372 (x2) Vis
941105 (x2) Écrou autobloquant
850 446 Platine pour boulon en « U » AISI
- 316
FR
Kit Nr. Références
incluses
Désignation
526004 Kit butée d'arrêt pour flexible et boulon en
« U »
(eau chaude 3/8‘'et graisse 1/4'')
944810 Boulon en « U » AISI - 316
941126 (x2) Écrou autobloquant AISI - 316
852600 (x2) Butée
940372 (x2) Vis
941105 (x2) Écrou autobloquant
850446 Platine pour boulon en « U » AISI
- 316
526003 Kit butée d'arrêt pour flexible et boulon en
« U » (huile usagée)
944816 Boulon en « U » AISI - 316
941126 (x2) Écrou autobloquant AISI - 316
850502 Butée
940385 Vis
941006 Écrou autobloquant
942106 (x2) Rondelle
850446 Platine pour boulon en « U » AISI
- 316
526022 Kit axe et tambour graisse
850615 Rondelle
850613 Tambour d'enrouleur complet
750429 Axe pour graisse à haute pression
950510 (x2) Roulement
850617 Entretoise roulements
850614 Capot du ressort
940522 (x6) Vis pour fermer le capot du
ressort
850442 Rondelle du ressort
526023 Kit axe et tambour pour fluides
850615 Rondelle
850613 Tambour d'enrouleur complet
750424 Axe pour fluides à basse et mo-
yenne pression
950510 (x2) Roulement
850617 Entretoise roulements
850614 Capot du ressort
940522 (x6) Vis pour fermer le capot du
ressort
850442 Rondelle du ressort
526024 Kit axe et tambour pour LR-LG et AdBlue®
850615 Rondelle
850613 Tambour d'enrouleur complet
850444 Axe AISI - 316
950510 (x2) Roulement
850617 Entretoise roulements
850614 Capot du ressort
940522 (x6) Vis pour fermer le capot du ressort
850442 Rondelle du ressort
Réf Désignation
850310 Ressort standard (10 m - (33')
850311 Ressort renforcé (15 m - 49' HD)
850313 Ressort grande longueur (15 m - 49')
18 850 812 R. 10/15
SAMOA Industrial, S.A. · Pol. Ind. Porceyo, I-14 · Camino del Fontán, 831 · 33392 Gijón - Spain · Tel.: +34 985 381 488 · www.samoaindustrial.com
2015_10_27-13:40
Part list / Lista de recambios / Pièces de rechange / Teileliste
Kit Nr. Artikelnum-
mer
Beschreibung
526004 Schlauchstopper Kit Warmwasser 3/8" und
Fett 1/4"
944810 U-Bolzen
941126 (x2) Mutter
852600 (x2) Schlauchstopper
940372 (x2) Schraube
941105 (x2) Mutter
850446 Platte U-Bolzen AISI 316
526003 Schlauchstopper Kit Altöl
944816 U-Bolzen AISI 316
941126 (x2) Mutter AISI 316
850502 Schlauchstopper
940385 Schraube
941006 Mutter
942106 (x2) Unterlegscheibe
850446 Platte U-Bolzen AISI 316
526022 Gehäuse Kit Fett
850615 Scheibe
850613 Gehäuse
750429 Hochdruck Achse
950510 (x2) Kugellager
850617 Büchse
850614 Federdeckel
940522 (x6) Schraube
850442 Federscheibe
526023 Gehäuse Kit sonnstige Flüßigkeiten
850615 Scheibe
850613 Gehäuse
750424 Nieder– und Mitteldruck Achse
950510 (x2) Kugellager
850617 Büchse
850614 Federdeckel
940522 (x6) Schraube
850442 Federscheibe
526024 Gehäuse Kit Scheibenwischerflüssigkeit,
AdBlue®
850615 Scheibe
850613 Gehäuse
850444 Achse AISI 316
950510 (x2) Kugellager
850617 Büchse
850614 Federdeckel
940522 (x6) Schraube
850442 Federscheibe
Art. Nr. Beschreibung
850310 Feder - standard (10 m - 33')
850311 Feder - verstärkt (15 m - 49')
850313 Feder - extra verstärkt (15 m - 49')
Kit Nr. Artikelnummer Beschreibung
526010
Drehgelenk Kit Öl, Vakum und Wasser
850419 Drehgelenk Edelstahl
945593 Nippel R 1/2" - 1/2" (aa)
946032 (x2) O-Ring NBR
526011
Drehgelenk Kit Fett
750430 Drehgelenk
946012 (x2) O-Ring NBR
945676 Nippel 3/8 NPT-3/8 BSP (aa)
946307 (x2) Scheibe
526012
Drehgelenk Hochdruck-Heißwasser
850419 Drehgelenk Edelstahl
945593 Nippel 1/2 NPT-1/2 BSP (aa)
946650 O-Ring Roto Glyd Ring®
526013
Drehgelenk Kit Scheibenwischerflüßigkeit,
AdBlue®
850445 Drehgelenk AISI 316
945703 Nippel R 1/2" - 1/2" - NPT-BSP
AISI 316
946145 (x2) O-Ring Viton®
526020
Raste Kit
850312 Raste-Feder
750439 Raste-Achse
850611 Raste
941107 Mutter
942061 (x2) Unterlegscheibe
526021
Kit de sortie à galets / Schlauchauslauf Kit
850616 (x6) Führungsrollen
750428 (x6) Rollen Achse
940921 (x6) Schraube
526001
Schlauchstopper Kit Luft, Wasser, Fett 3/8",
Öl 1/2"
944816 U-Bolzen AISI 316
941126 (x2) Mutter AISI 316
852601 (x2) Schlauchstopper
940372 (x2) Schraube
941105 (x2) Mutter
850446 Platte U-Bolzen AISI 316
526002
Schlauchstopper Kit Luft, Wasser,
Chemikalien, AdBlue® 1/2"
944816 U-Bolzen AISI 316
941126 (x2) Mutter AISI 316
852602 (x2) Schlauchstopper
940372 (x2) Schraube
941105 (x2) Mutter
850 446 Platte U-Bolzen AISI 316
DE
19
R. 10/15 850 812
SAMOA Industrial, S.A. · Pol. Ind. Porceyo, I-14 · Camino del Fontán, 831 · 33392 Gijón - Spain · Tel.: +34 985 381 488 · www.samoaindustrial.com
2015_10_27-13:40
Part list / Lista de recambios / Pièces de rechange / Teileliste
Conj. Cód. Descrição
526010
Conjunto giratorio óleo, vácuo, água
850419 Giratório inoxidável
945593 Adaptador R 1/2" - 1/2" (MM)
946032 (x2) O-Ring NBR
526011
Conjunto giratorio graxa
750430 Giratório
946012 (x2) O-Ring NBR
945676 Adaptador 3/8 NPT-3/8 BSP aa
946307 (x2) O-Ring
526012
Conjunto giratorio alta pressão de água quente
850419 Giratório inoxidável
945593 Adaptador R 1/2" - 1/2" (MM)
946650 O-Ring Roto Glyd Ring®
526013
Conjunto giratorio limpador, Adblue®
850445 Giratório AISI - 316
945703 Adaptador R 1/2" - 1/2" NPT - BSP
AISI - 316
946145 (x2) O-Ring Viton®
526020
Conjunto do trinquete
850312 Mola trinquete AISI - 316
750439 Eixo do trinquete
850611 Trinquete
941107 Platina pa abraçadeira AISI - 316
942061 (x2) Arruela AISI - 316
526021
Conjuntos dos rodilhos de saída da mangueira
850616 (x6) Rodilhos de saída da mangueira
750428 (x6) Eixos de saída da mangueira
940921 (x6) Parafuros AISI - 316
526001
Abraçadeira de parada da mangueira
(ar, água y graxa 3/8", óleo 1/2")
944816 Abraçadeira AISI - 316
941126 (x2) Porca de segurança AISI - 316
852601 (x2) Parada mangueira
940372 (x2) Parafusos
941105 (x2) Porca de segurança
850446 Platina pa abraçadeira AISI - 316
526002
Abraçadeira de parada da mangueira (ar,
água, limpador, y AdBlue®1/2”)
944816 Abraçadeira AISI - 316
941126 (x2) Porca de segurança AISI - 316
852602 (x2) Parada mangueira
940372 (x2) Parafusos
941105 (x2) Porca de segurança
850 446 Pletina abarcón AISI - 316
PT
Cód. kit Cód. incl. Descrição
526004
Abraçadeira de parada da mangueira
(água quente 3/8" y graxa 1/4")
944810 Abraçadeira AISI - 316
941126 (x2) Porca de segurança AISI - 316
852600 (x2) Tampa da mangueira
940372 (x2) Parafuso
941105 (x2) Porca de segurança
850446 Platina da abraçadeira AISI - 316
526003
Abraçadeira de parada da mangueira
(óleo usado)
944816 Abraçadeira AISI - 316
941126 (x2) Porca de segurança AISI - 316
850502 Tampa da mangueira
940385 Parafuso
941006 Porca de segurança
942106 (x2) Arruela
850446 Platina da abraçadeira AISI - 316
526022
Conjunto eixo central do carretel (graxa)
850615 Retentor de vedação do giratório
com a roda
850613 Roda em ABS para carreteis
750429 Eixo central do carretel
950510 (x2) Rolamento do eixo central do
carretel
850617 Espaçador do rolamento
850614 Tampa mola
940522 (x6) Parafusos da tampa da mola
850442 Retentor de vedação da mola
526023
Conjunto eixo central do carretel (fluídos)
850615 Retentor de vedação do giratório
com a roda
850613 Roda em ABS para carreteis
750424 Eixo de médio-baixa pressão
950510 (x2) Rolamento do eixo central do carretel
850617 Espaçador do rolamento
850614 Tampa mola
940522 (x6) Parafusos da tampa da mola
850442 Retentor de vedação da mola
526024
Conjunto eixo e roda pa limpador e AdBlue®
850615 Retentor de vedação do giratório
com a roda
850613 Roda em ABS para carreteis
850444 Eixo AISI - 316
950510 (x2) Rolamento do eixo central do
carretel
850617 Espaçador do rolamento
850614 Tampa mola
940522 (x6) Parafusos da tampa da mola
850442 Retentor de vedação da mola
Cód. Descrição
850310 Mola para carretel (10 m - (33')
850311 Mola para carretel (15 m - 49' HD)
850313 Mola para carretel (15 m - 49')
20 850 812 R. 10/15
SAMOA Industrial, S.A. · Pol. Ind. Porceyo, I-14 · Camino del Fontán, 831 · 33392 Gijón - Spain · Tel.: +34 985 381 488 · www.samoaindustrial.com
2015_10_27-13:40
For SAMOA INDUSTRIAL, S.A.
Por SAMOA INDUSTRIAL, S.A.
Pour SAMOA INDUSTRIAL, S.A.
Für SAMOA INDUSTRIAL, S.A.
Pedro E. Prallong Álvarez
Production Director
Director de Producción
Directeur de Production
Produktionsleiter
EC conformity declaration / Declaration CE de conformidad
Déclaration CE de conformité / EG-Konformitätserklärung
SAMOA INDUSTRIAL, S.A., Pol. Ind. Porceyo, I-14 · Camino del Fontán, 831 · 33392 - Gijón - Spain, declares that this product conforms
with the EU Directive:
2006/42/EC
EN
SAMOA INDUSTRIAL, S.A., Pol. Ind. Porceyo, I-14 · Camino del Fontán, 831 · 33392 - Gijón - España, declara que este producto cumple
con la Directiva de la Unión Europea:
2006/42/CE
ES
SAMOA INDUSTRIAL, S.A., Pol. Ind. Porceyo, I-14 · Camino del Fontán, 831 · 33392 - Gijón - Espagne, déclare que ce produit est conforme
au Directive de l"Union Européenne:
2006/42/CE
FR
SAMOA INDUSTRIAL, S.A., Pol. Ind. Porceyo, I-14 · Camino del Fontán, 831 · 33392 - Gijón - Spanien, bestätigt hiermit, dass dieses Produkt
der (den)EG-Richtlinie(n):
2006/42/EG
entspricht.
DE
SAMOA INDUSTRIAL, S.A., Pol. Ind. Porceyo, I-14 · Camino del Fontán, 831 · 33392 - Gijón - Espanha, declara que o produto cumpre as
diretrizes da União Europea:
2006/42/EG
PT

Other manuals for 506 Series

2

Other Samoa Tools manuals

Samoa 501 100 Operating manual

Samoa

Samoa 501 100 Operating manual

Samoa 500110 User manual

Samoa

Samoa 500110 User manual

Samoa 167 500 Operating manual

Samoa

Samoa 167 500 Operating manual

Samoa Larius STAR 3001W Operating instructions

Samoa

Samoa Larius STAR 3001W Operating instructions

Samoa 500110 Operating manual

Samoa

Samoa 500110 Operating manual

Samoa 507 Series Guide

Samoa

Samoa 507 Series Guide

Samoa 501 100 Operating manual

Samoa

Samoa 501 100 Operating manual

Samoa 507 Series How to use

Samoa

Samoa 507 Series How to use

Samoa 167 500 Operating manual

Samoa

Samoa 167 500 Operating manual

Samoa 503 120 Operating manual

Samoa

Samoa 503 120 Operating manual

Samoa 160 50 Series User manual

Samoa

Samoa 160 50 Series User manual

Samoa 505 Series Operating manual

Samoa

Samoa 505 Series Operating manual

Samoa 501 100 Operating manual

Samoa

Samoa 501 100 Operating manual

Samoa 508 8 Series Operating manual

Samoa

Samoa 508 8 Series Operating manual

Samoa 363100 User manual

Samoa

Samoa 363100 User manual

Samoa 612 100 User manual

Samoa

Samoa 612 100 User manual

Samoa 500110 How to use

Samoa

Samoa 500110 How to use

Samoa 507 Series How to use

Samoa

Samoa 507 Series How to use

Samoa 160 500 Operating manual

Samoa

Samoa 160 500 Operating manual

Samoa 506 Series Operating manual

Samoa

Samoa 506 Series Operating manual

Samoa 500110 Operating manual

Samoa

Samoa 500110 Operating manual

Samoa 160 100 Operating manual

Samoa

Samoa 160 100 Operating manual

Samoa 168 600 Operating manual

Samoa

Samoa 168 600 Operating manual

Popular Tools manuals by other brands

BGS technic 2832 instruction manual

BGS technic

BGS technic 2832 instruction manual

Hilti NCT 45 S-22 manual

Hilti

Hilti NCT 45 S-22 manual

Worx MAKER X WX742L manual

Worx

Worx MAKER X WX742L manual

Sealey VS0205.V2 manual

Sealey

Sealey VS0205.V2 manual

Collins Youldon SDM09H product manual

Collins Youldon

Collins Youldon SDM09H product manual

DeWalt DXDP710140 instruction manual

DeWalt

DeWalt DXDP710140 instruction manual

Gedore KL-0014-46D manual

Gedore

Gedore KL-0014-46D manual

Blue Giant M Service manual

Blue Giant

Blue Giant M Service manual

Paslode tetraGRIP tG100CSN Operating manual and schematic

Paslode

Paslode tetraGRIP tG100CSN Operating manual and schematic

Hausmann XPERT PNT138-R Operator's manual

Hausmann

Hausmann XPERT PNT138-R Operator's manual

Freund biegetec Bitumen Pro user manual

Freund

Freund biegetec Bitumen Pro user manual

Priest Tools PM-25MV installation guide

Priest Tools

Priest Tools PM-25MV installation guide

Cembre ht51 Operation and maintenance manual

Cembre

Cembre ht51 Operation and maintenance manual

SW-Stahl 23060L instruction manual

SW-Stahl

SW-Stahl 23060L instruction manual

Timberline Tool TopReach Clamp TR250 instruction manual

Timberline Tool

Timberline Tool TopReach Clamp TR250 instruction manual

Magnetic Instrumentation 942B instruction manual

Magnetic Instrumentation

Magnetic Instrumentation 942B instruction manual

Sealey 1020LE instructions

Sealey

Sealey 1020LE instructions

SMC Networks CKZ3N-X2742A Series Operation manual

SMC Networks

SMC Networks CKZ3N-X2742A Series Operation manual

manuals.online logo
manuals.online logoBrands
  • About & Mission
  • Contact us
  • Privacy Policy
  • Terms and Conditions

Copyright 2025 Manuals.Online. All Rights Reserved.