Samsung SHS-H635 User manual

1
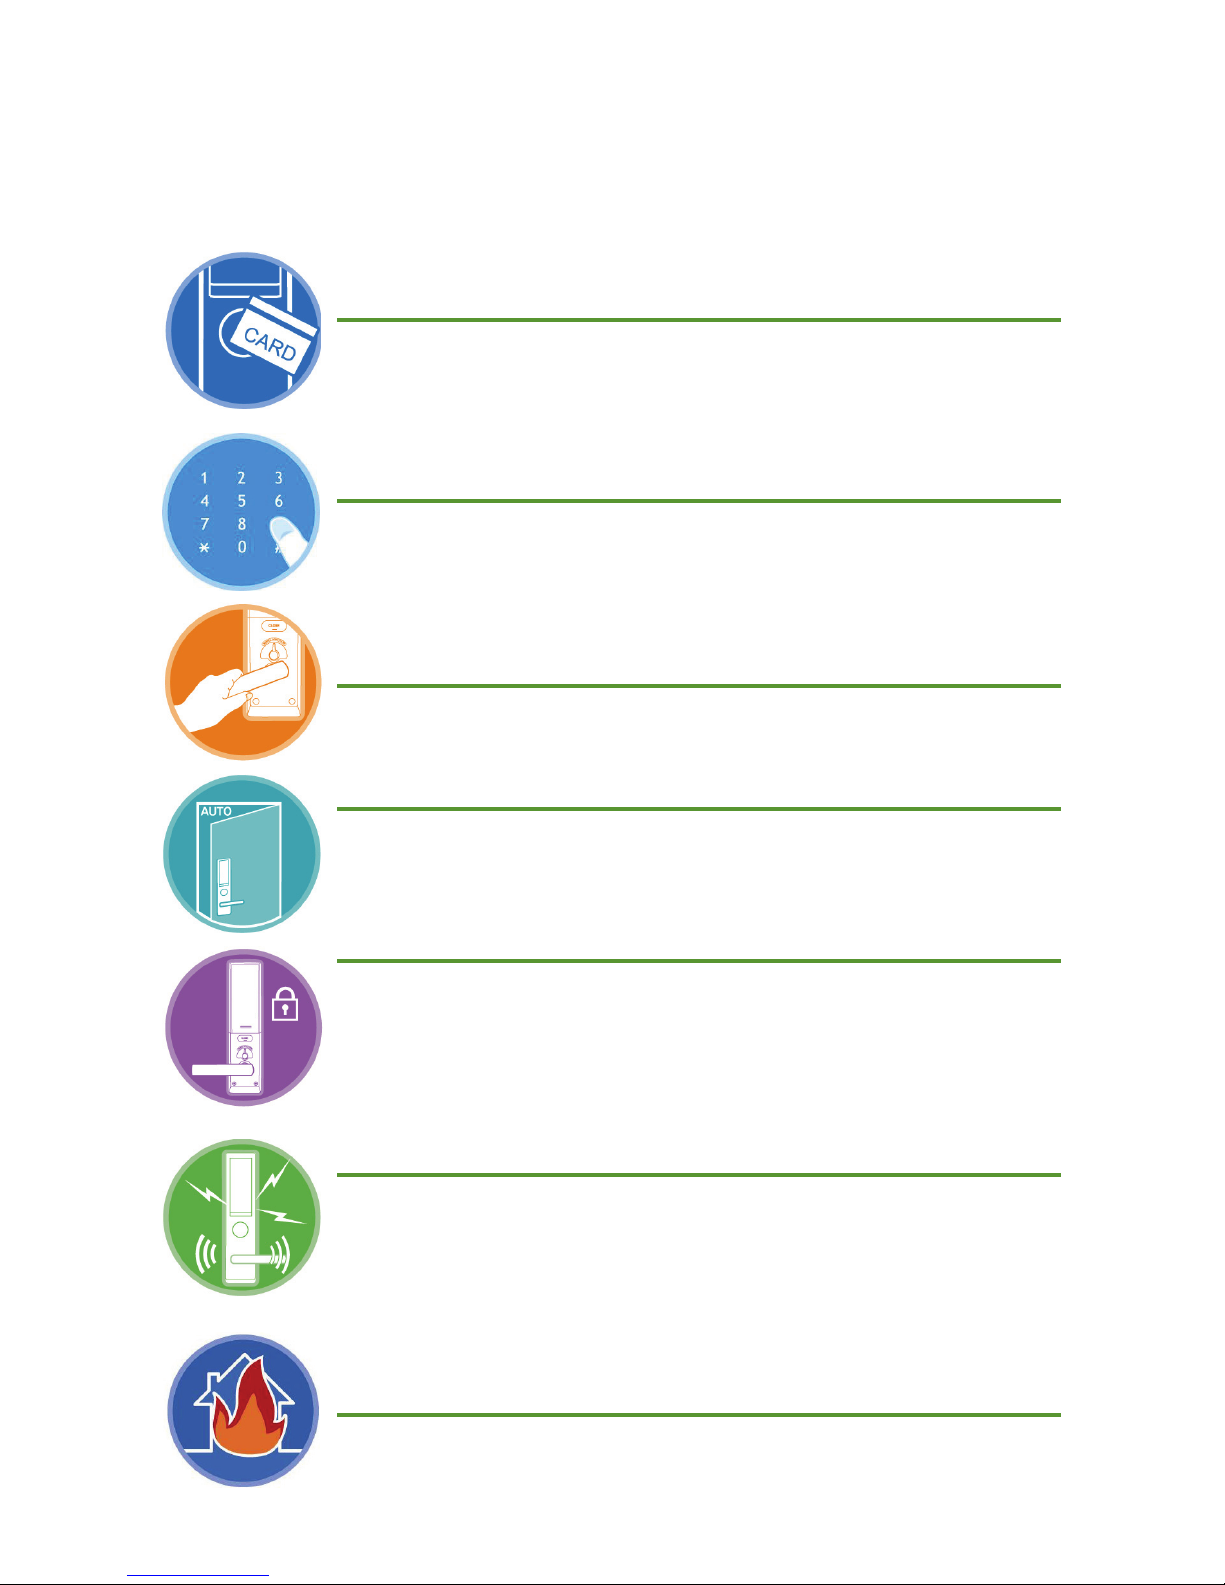
Product Features
The door can be opened with a card as well
as a key tag.
The door can be opened with a transit card or a credit card with the
transit card function as well as a keypad contained in the product. Up
to 20 cards may be registered.
The door can also be opened with a password.
Once the user’s password is registered, the door can be opened
without a key by entering the registered password.
The anti-panic function allows for easy
opening of a locked door from the inside.
When opening the locked door from the inside, just turn the handle.
The door does not have to be locked manually.
Using the automatic lock function, the door is automatically locked
when it closes, eliminating the need to lock it manually.
The double-locking function adds security.
The double-locking function adds security by preventing the door from
being opened from outside at night or at times when extra security is
needed.
Pranks played by children and juveniles can
be prevented.
When an unregistered card or key tag is used, or when an invalid
password is entered 5 or more times consecutively, an alarm sound is
generated and power to the lock is automatically cut off for three
minutes.
The built-in fire detection function helps
occupants escape in case of fire.
When the inside temperature rises to a certain level due to fire, an
alarm is generated and the door is opened automatically.

2
Table of Contents
Product Features 1
Safety Cautions 3
Notes before Operation 6
Product Components ................................................................... 6
Outer Body Parts ........................................................................ 8
Inner Body Parts ....................................................................... 10
Mortise .................................................................................... 11
Replacing the Batteries .............................................................. 12
Using the Emergency Battery ...................................................... 13
Using the Emergency Key ........................................................... 14
Basic Functions 15
Initialization (Password, Card, Key Tag) ........................................ 15
Password Change ...................................................................... 16
Card and Key Tag Registration .................................................... 18
Deleting the Card or Key Tag ..................................................... 20
Opening the Door from Outside with a Password ............................ 21
Opening the Door from Outside with a Card or Key Tag .................. 22
Opening the Door from the Inside ............................................... 23
Closing the Door from the Outside .............................................. 24
Closing the Door from the Inside ................................................. 24
Additional Functions 25
Multi-leveled Security Code Entry Mode Setting ........................... 25
Double Authorization Mode Setting ............................................. 26
Automatic/Manual Locking Setting .............................................. 27
Sound Setting and Releasing ..................................................... 28
Alarm Sound/Emergency Sound ................................................. 29
Troubleshootings 33
Operation Summary 35
Product Specifications 37
Wa r r a nt y 3 9

3
Safety Cautions
This section contains important information to ensure the user’s safety and prevent
potential damage to property. Please, read this section carefully and use the product
accordingly.
Warning, Caution and Note Explained:
Warning
Information given under this heading is information the user must be aware of to
prevent physical harm.
Caution
Information given under this heading is information the user must be aware of to
prevent service problems or system damage.
Note
Information given under this heading provides additional information relating to the
text in this manual.
Descriptions of Symbols
General warning or caution
Prohibited activity
Recommended activity

4
Cautions during Installation
Cautions during Operation
The user shall not install or repair
the product without authorization.
The manufacturer does not assume
responsibility for
damage to the
product resulting
from attempts to the
user to install or repair
it without authorization.
Do not use the excessive force or
sharp objects to push the lock
buttons, as this can
damage
the
product.
Make sure that no unauthorized
person has the access to the
password.
To minimize the risk of
burglary, it is
recommended
that you periodically
change the password.
Do not operate the product with
wet hands, and keep liquids such
as water or drinks away from the
product, or the product
may
malfunction
or be
damaged.
Make sure that the door is
completely closed when going
outside. The manufacturer does
not assume the
responsibility for
any harm caused
by engagement of
the lock on an
improperly
c
l
osed
doo
r
.
Do not install the product in the
place where the gap between the
door and the frame is 5mm or
more.
If the gap is too wide,
the product may not
function properly.

5
Cautions during Operation
Cautions during Repair or Maintenance
Replace all batteries immediately
after they run out of power, and
never mix new batteries with used
ones.
This can cause
reduction of
product life or
malfunction
in the product.
Be sure to correctly match the
poles (+/-) when installing the
batteries. Install the batteries with
the correct poles (+/-).
Improperly installed
batteries can cause
rupture or battery
fluid leakage.
Do not use water, benzene or
alcohol when cleaning the product,
as these fluids can cause product
malfunction.
Use a soft and
dry cloth instead.
Please do not hang on the product
or pull it.
It can damage the product
or cause its malfunction.
Replace the batteries within 1 week
after the battery replacement alarm
sounds.
The product can stop operating
if the batteries
are not
replaced in time.
6
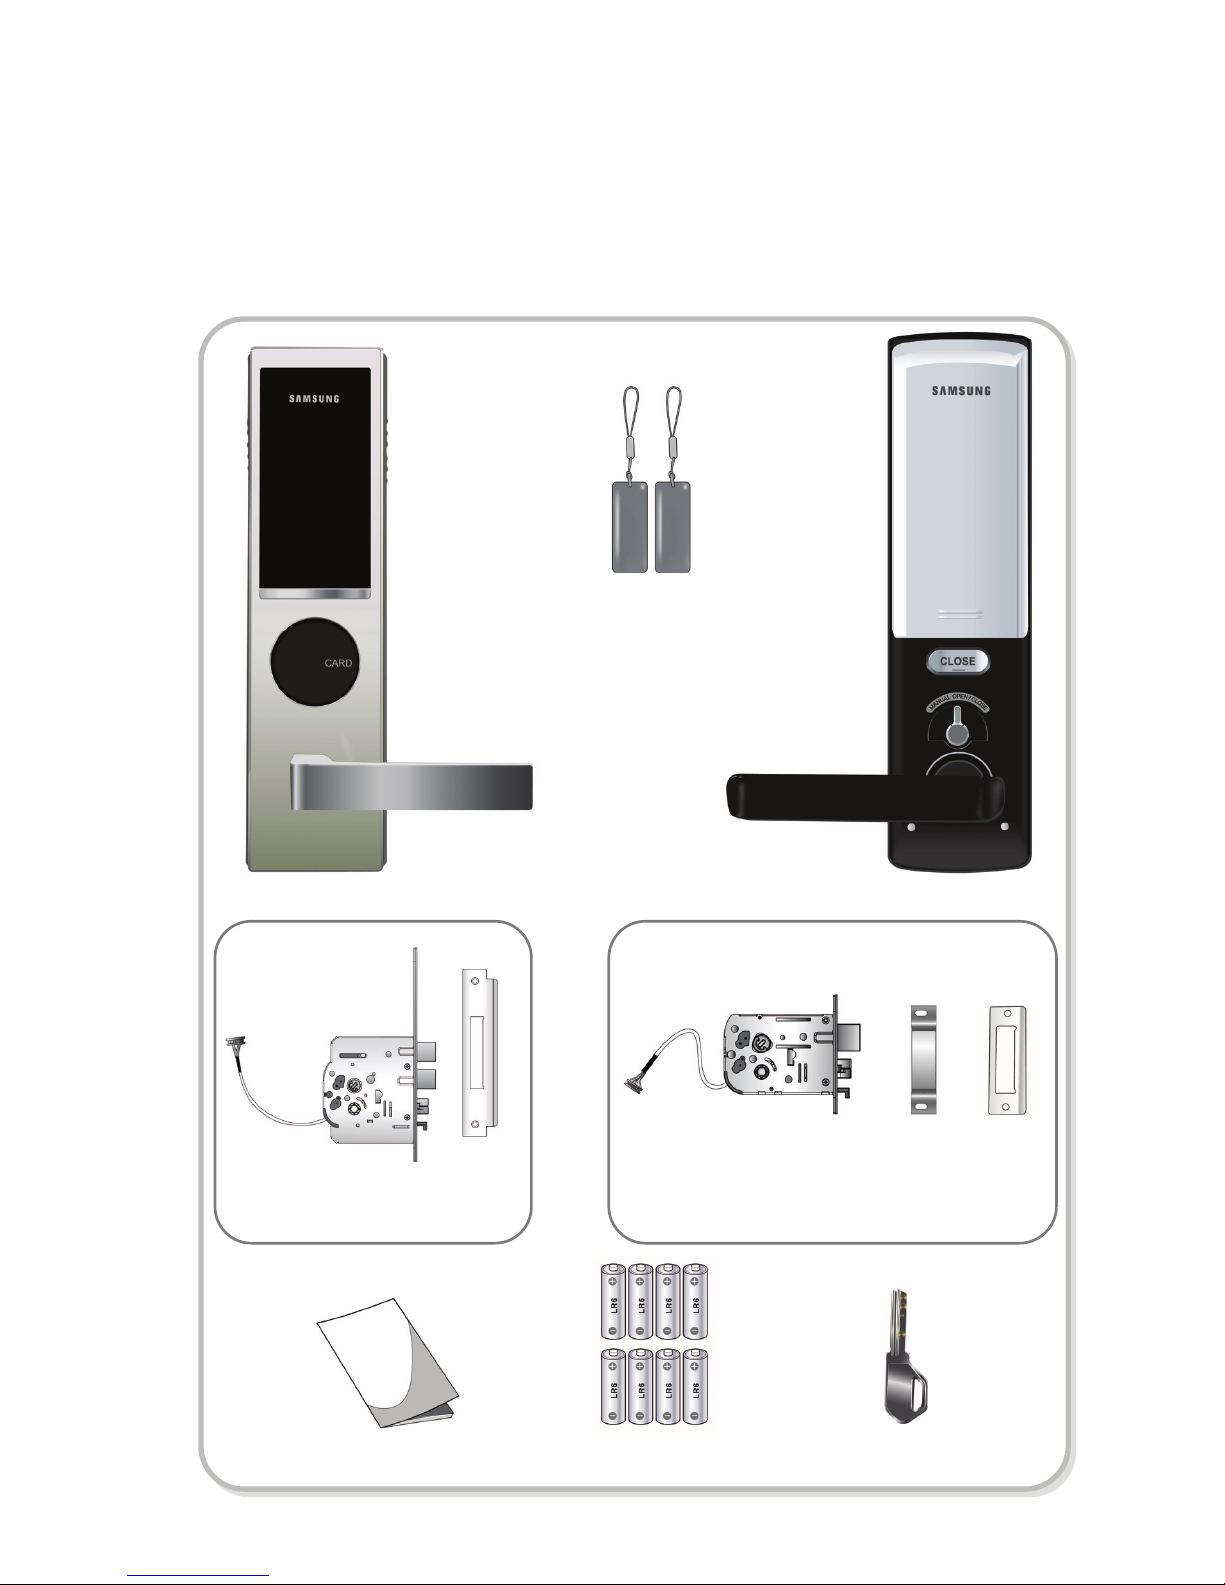
'AA' Batteries (LR6)
Or
Strike
Strike box
Mortise
(SHS-AML220)
Mortise
(SHS-AML320)
Strike
Notes before Operation
Product Components
User Guide
Inner Body
Outer Body
Key Tag
Emergency Key(5EA)
7
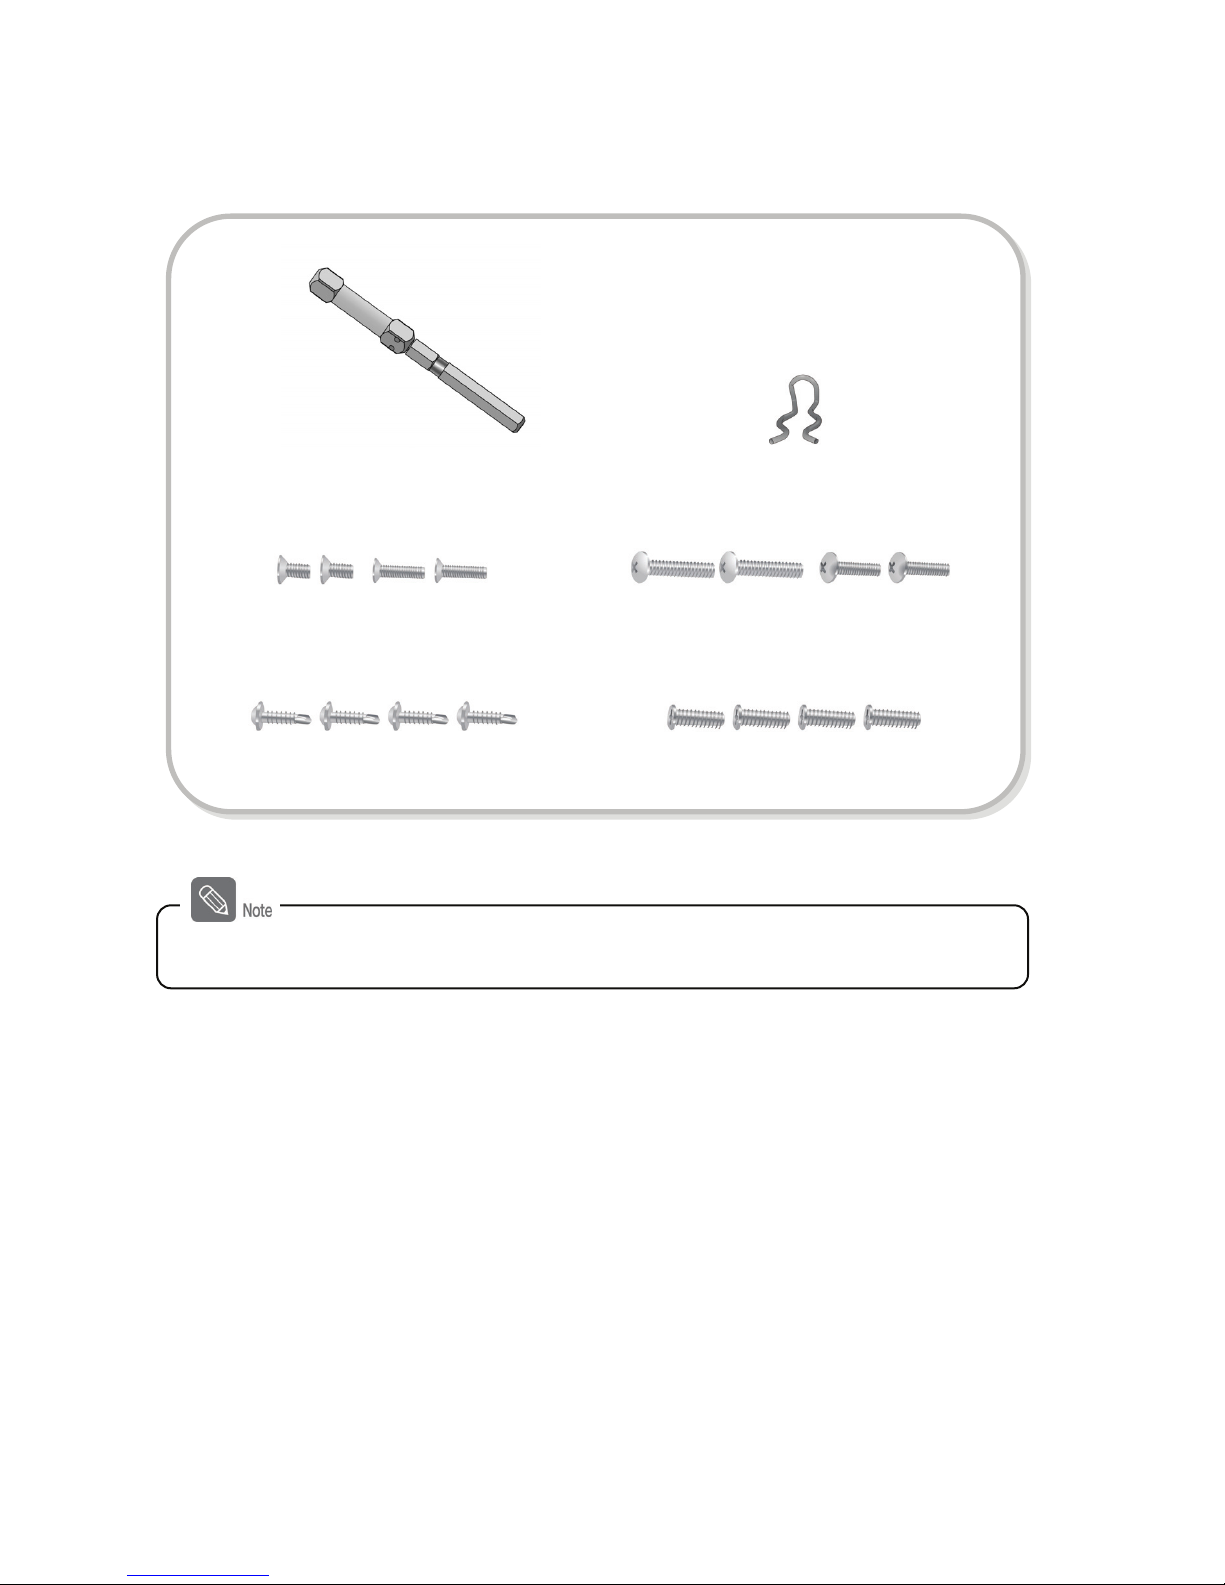
Support Panel and Outer Body
Fastening Bolts
Handle Shaft
Support Panel and Inner Body
Fastening Bolts
Inner Fastening Bolts Strike Fastening Bolts
Handle Shaft Spring
The product components used may vary depending on the installation environment.
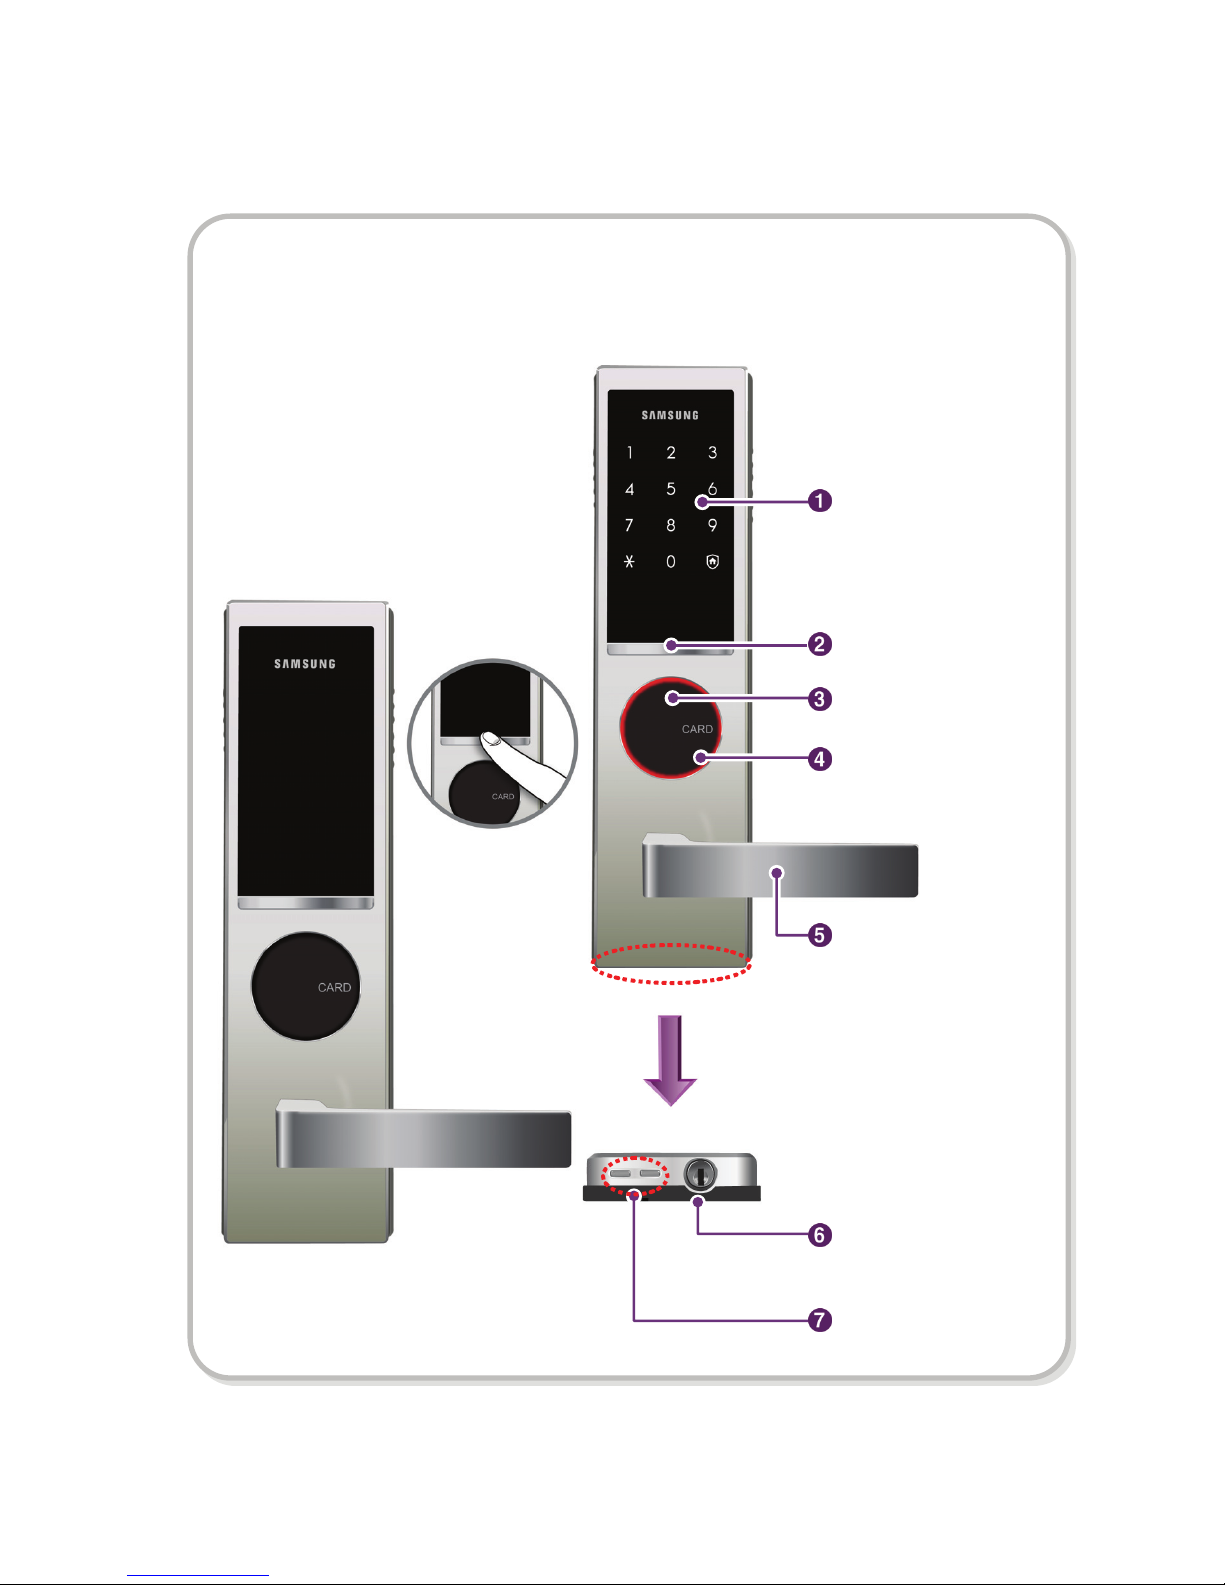
8
Outer Body Parts
External Power Port
Emergency Keyhole
Number Pad Unlighted
Outer Body Handle
Number Pad
Enter Number Button
Number Pad Lighted
LED Indicator
Card Reader
Table of contents
Other Samsung Lock manuals


