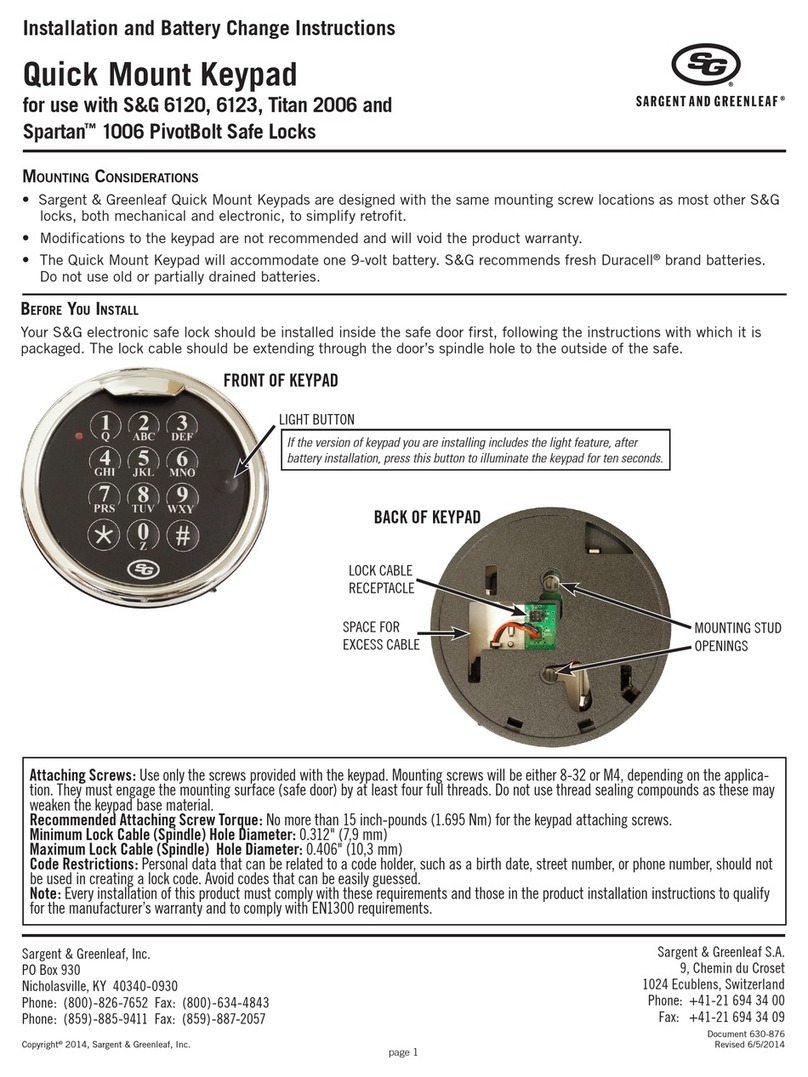
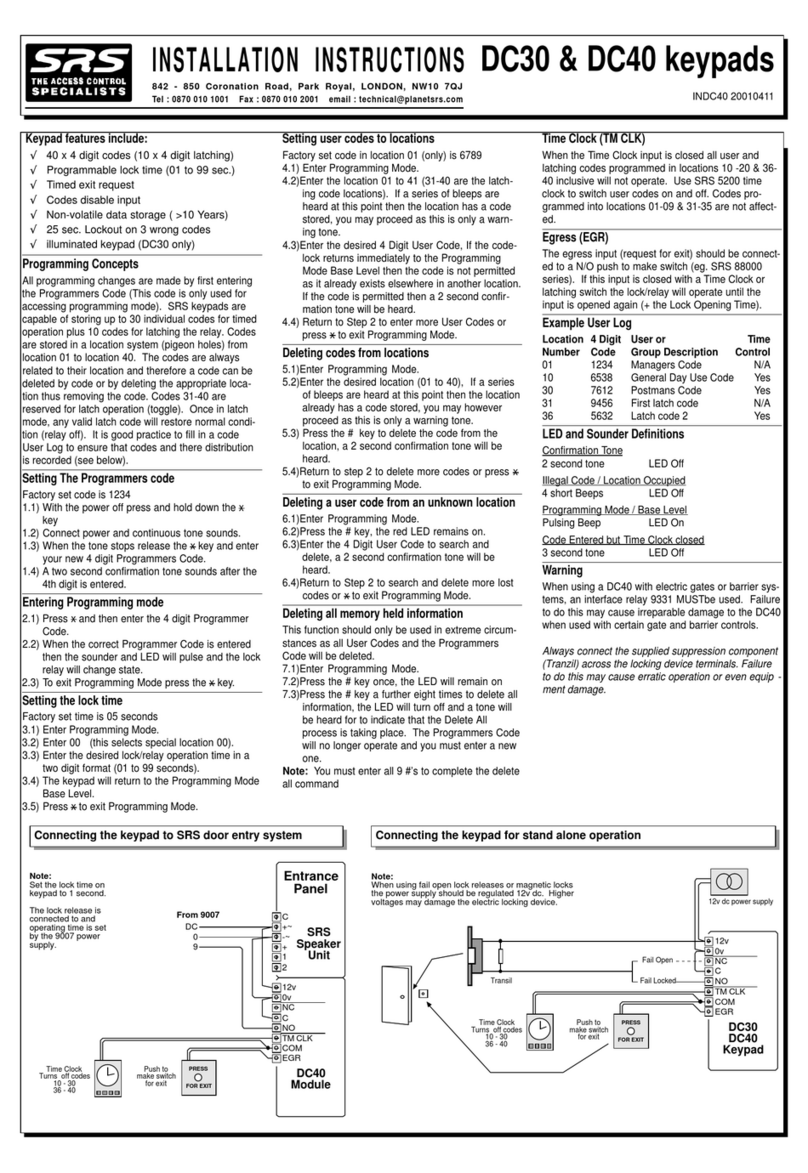
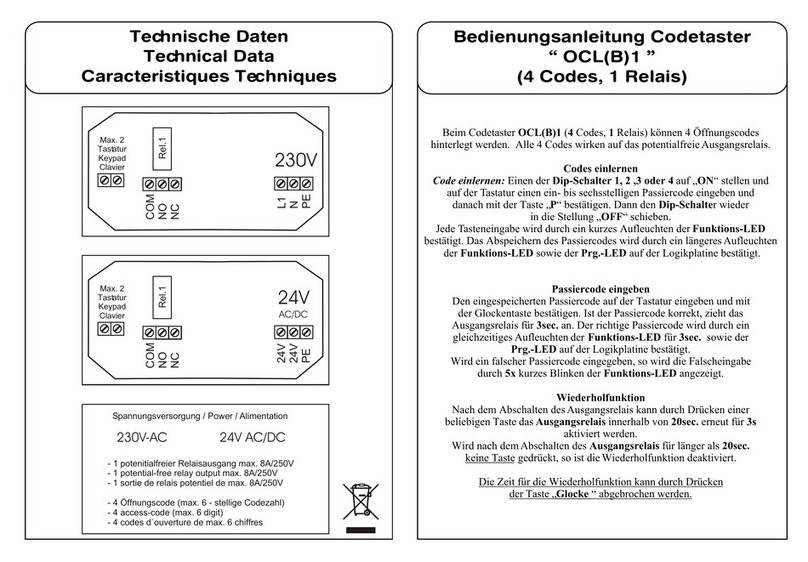
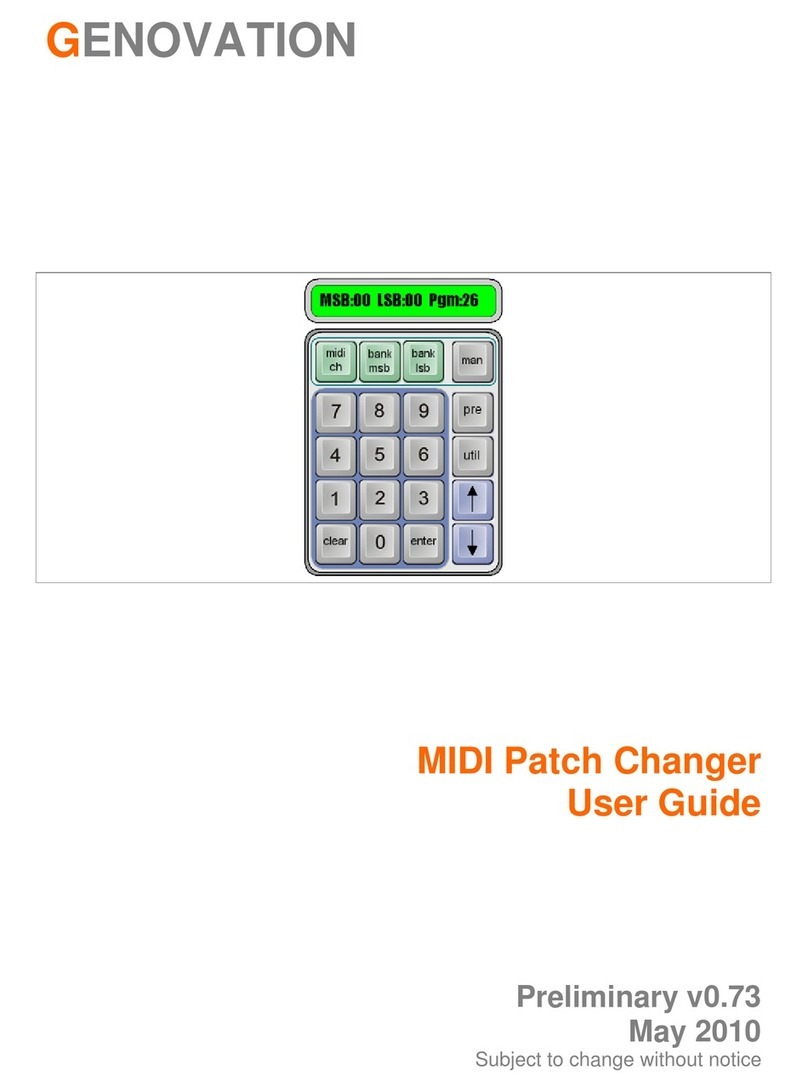
S&G Biometric Keypad User manual

In t r o d u c t I o n
The Sargent & Greenleaf®Biometric Keypad can be added to S&G
electronic lock models 6120, 6123, and Z02 (model designation Z02
represents models 2002-200 and 2002-300). The keypad enables
your lock to be opened using a fingerprint only, a code only, or a
fingerprint and code together.
• The silicon-based active capacitive fingerprint reader
represents superior biometric technology that combines high
reliability with the ability to reject devices and methods which
are sometimes used to fool optical-type readers.
• The Biometric Keypad is equipped with a backlit LCD readout,
offering two lines of text. The backlight feature can be turned
on or off at the keypad. Its use greatly increases readability
under marginal lighting conditions.
• The keypad houses two nine-volt alkaline batteries which
power both the keypad and the lock. Normal battery life is
approximately 1500 openings and closings of the lock, fewer if
the backlight feature is turned on. Batteries are easily replaced
from outside the safe. No data is lost during battery changing
or if power is lost for extended periods.
• When a Biometric Keypad is first connected to a lock
body, it is important that both components are set to
factory defaults. Both should be in single user mode, with
only a master code of 123456 installed. No other codes should
be present, and the time delay value should be zero.
• This Sargent & Greenleaf®Biometric Keypad is shipped from
the factory with a factory master code of 1 2 3 4 5 6 #. This
code can be used to open the lock and set or change codes.
You should set the lock to your own, unique master code.
• Your lock can be programmed with a management reset code
if one was not set at the factory. This code can be used to
regain control of the lock in the event the master code is lost.
The management reset code must be programmed into the
lock before the master code is changed for the first time.
• Each time a button is pressed, the lock acknowledges it by
sounding a “beep,” and the red LED on the keypad will light
momentarily as the “beep” sounds.
• All codes must contain six digits or six letters. Any digit or
letter can be used as many
times as you wish. All
codes end with #.
This signals the
lock that you have
finished entering
all digits of the
code.
• If you pause
more than 10
seconds between
button presses when
entering a code or
performing programming,
the lock will power down to
conserve battery life. You will have to begin the code entry
process again by pressing START.
• If you realize you have pressed an incorrect button when
entering a code, press ✽to erase the last digit entry.
• Personal data which can be directly related to a code holder,
such as a birth date, should not be used in making up a lock
code. Avoid codes which can be easily guessed.
• After the lock is changed to a new code, lock function must
be checked by locking and unlocking it several times with the
container door open. Make sure it functions correctly before
closing the door.
• It is recommended the fingerprint sensor be cleaned
periodically with a clean, dry cloth. The keypad will operate
best with no debris or latent fingerprints on the sensor.
© Copyright 2005, Sargent & Greenleaf, Inc.
Pr o g r a m m i n g a n d oP e r a t i n g in s t r u c t i o n s
Biometric Keypad
Document 630-713
Revised 1/5/09
Sargent & Greenleaf, Inc.
A Wholly Owned Subsidiary of Stanley Security Solutions, Inc.
PO Box 930, Nicholasville, Kentucky 40340-0930 USA
Phone (859) 885-9411
Phone (800) 826-7652
FAX (859) 887-2057
FAX (800) 634-4843
Sargent & Greenleaf S.A.
9, chemin du Croset
1024 Ecublens, Switzerland
Phone +41-21 694 34 00
FAX +41-21 694 34 09

tI p s f o r op e r a t I n g t h e Ke y p a d a n d Lo c K
Anytime you press a button on the keypad, the red LED blinks,
and the keypad emits a beep. If you press a button and don’t see
or hear this feedback, it’s likely you didn’t press the button fully.
Just press it again.
Whenever you see the green LED light up, the lock is prompting
you to place your finger on the fingerprint reader. It will not go on
to the next opening or programming step until you do so.
The lock cannot be operated by fingerprint until one is enrolled
in the keypad. It can be operated by PIN code alone as shipped
from the factory. The factory default master code is 123456#.
Instructions for enrolling a fingerprint appear later in this manual.
The LCD readout makes using your lock very easy. Just read the
display, and follow the prompts.
➥toop e n t h e Lo c K I n fI n g e r p r I n t o r pIn Mo d e
Press START, located just above the LCD screen. The lock will
display:
After about 1 ½ seconds, the display will read:
The keypad’s green LED will light up. You can either place your
finger on the fingerprint reader until the LED goes off, or you can
enter your 6-digit PIN code followed by #.
Do not put any pressure on the safe handle until after the
LCD displays:
The lock will stay unlocked for about 6 seconds, allowing ample
time to open the safe. The lock will then re-lock automatically
when the safe door is closed and the handle is turned to the
locked position.
➥toop e n t h e Lo c K I n fI n g e r p r I n t a n d pIn Mo d e
Your lock can be set to require both an enrolled fingerprint and
a valid PIN code before opening. This adds an extra measure of
security. To open the lock, begin by pressing START.
If you place an enrolled finger on the keypad’s reader, the
following screen will appear, prompting you to enter the 6-digit
code (followed by #) that is associated with the fingerprint.
Do not put any pressure on the safe handle until after the
LCD displays:
➥toop e n t h e Lo c K I n fI n g e r p r I n t o r pIn Mo d e w I t h tI M e
de L a y ac t I v e
If you are using a time delay, instead of opening, the keypad
will display a time delay countdown screen after you enter your
fingerprint or PIN code.
oP e r a t i n g in s t r u c t i o n s
Biometric Keypad
© Copyright 2005, Sargent & GreenleafPage 2

oP e r a t i n g in s t r u c t i o n s
Biometric Keypad
When the time delay reaches zero, the opening window display
will appear.
This window counts down the time you have in which to re-enter
your fingerprint or PIN. If you do not do this during the opening
window period, the lock will simply power down. You will have to
press START, and go through the opening process again to open
the lock.
After you successfully enter your fingerprint or PIN during the
opening window, the LOCK OPEN screen will appear, indicating
that it is okay to turn the safe handle.
➥toop e n t h e Lo c K I n du a L co n t r o L Mo d e
If your lock is a model 6123 or Z02, it is capable of dual control
mode. Dual control simply adds another layer of security to the
operation of the lock. Two different codes and/or two different
fingerprints must be entered into the lock before it will open.
If the keypad is set to require either a fingerprint or PIN code, two
different people will have to enter a fingerprint or PIN within 60
seconds of each other to open the lock.
If you set the keypad to require a fingerprint and PIN code, two
different code holders will have to enter a fingerprint and PIN within
60 seconds of each other to open the lock.
If a time delay is being used, any valid user can enter a fingerprint
and/or PIN code to begin the time delay countdown. When the
opening window screen appears, two different people will have to
enter their enrolled fingerprint and/or PIN within 60 seconds of each
other to open the lock. One of those people can be the same as the
one who first entered a fingerprint and/or code to begin the time
delay, or it can be someone different.
➥toop e n t h e Lo c K I n du a L co n t r o L fI n g e r p r I n t a n d pIn
Mo d e w I t h tI M e de L a y
This example illustrates how the lock is opened when set to both
dual control and fingerprint and PIN mode.
To open the lock, begin by pressing START.
If you place an enrolled finger on the keypad’s reader, the
following screen will appear, prompting you to enter the 6-digit
code (followed by #) that is associated with the fingerprint.
Next, the time delay countdown window will appear, to be
followed by the opening window display.
When the opening window appears, the keypad’s green LED will
light, prompting you to place your finger on the reader. You can
use the same fingerprint that was used to start the time delay,
or you may use any other fingerprint enrolled in the system. Then
the ENTER USER PIN screen will prompt you to enter the 6-digit
PIN associated with the fingerprint.
Note that after you enter a valid PIN code, the green LED will light,
prompting for a second enrolled fingerprint to be entered. The LCD will
then ask for the PIN that goes with the second fingerprint to be entered.
If all entries are valid, the lock will open.
© Copyright 2005, Sargent & Greenleaf Page 3

➥toop e n t h e Lo c K I n su p e r v I s o r /su b o r d I n a t e Mo d e
If your lock is a model 6123 or Z02, it is capable of supervisor/
subordinate mode. In this mode, the master and supervisor codes
(PIN positions 1 and 2) cannot open the lock directly. Instead, they
are used to toggle the lock on and off for operation by the holders of
user codes (PIN positions 3 through 7). Note that time delay override
does not work when the lock is in supervisor/subordinate mode. If
you enter it, the lock will display:
When you enter a master code (#1) or a supervisor code (#2), the
lock’s LCD will indicate whether the lock is toggled on or off for
opening by the user codes (#3, #4, #5, #6, #7). Entering either the
master code or the user code, or using the fingerprint associated
with either one of these codes, will toggle the lock from its present
state to the opposite state (ie. lock enabled or lock disabled).
When the lock is enabled, it can be unlocked by any of the user
codes in PIN positions 3 through 7. The keypad can be set for
operation by fingerprint, PIN, or fingerprint and PIN in supervisor/
subordinate mode.
➥toop e n t h e Lo c K us I n g tI M e de L a y ov e r r I d e
If your lock is a model 6123 or Z02, it is capable of time delay
override in the single user and dual control modes. TDO (time delay
override) provides a code (stored in the #9 PIN position), which can
open the lock without waiting for the time delay to finish. TDO is
desirable in situations where a time delay is used to deter armed
robbery, yet armored car couriers need instant access to the safe
for pickups. It only works when a time delay is set in the lock, and it
can function in two different ways.
The first is single control. After pressing START, simply enter the
TDO fingerprint and/or PIN code to open the lock, depending on
whether the keypad is programmed for fingerprint or code access, or
fingerprint and code access. The time delay never starts.
The second is dual control time delay override. Press START, then
enter a valid fingerprint and/or PIN code to start the time delay.
Once it has started, enter the TDO fingerprint and/or PIN code to
open the lock immediately.
➥Inca s e o f tr o u b L e
If your lock should fail to open when a valid code is entered,
check for the following:
1. The boltwork of a safe can, under certain conditions, place
pressure on the side of the lock’s bolt. This is often caused
by something inside the safe pressing against the door or by
something caught between the safe door and its frame. When
this occurs, the lock will not operate properly. To relieve side
pressure on the lock bolt, move the safe’s handle to the fully
locked position, then re-enter a working code. The lock should
release.
2. If the lock beeps when keys are pressed, but it will not open,
the batteries may be drained to the point that they will not
operate the lock’s mechanical components. Follow the battery
replacement procedure in this manual. Low battery condition
can also be detected by the beeps emitted from the lock.
The lock emits a lower frequency tone when batteries are
low. This lower tone is only emitted when a keypad button is
pressed, not when a fingerprint is used.
3. If the lock makes no sound when any of the keys are
pressed, or the LCD screen doesn’t display any information,
dead batteries are likely to be the cause. Follow the battery
replacement procedure in this manual.
oP e r a t i n g in s t r u c t i o n s
Biometric Keypad
© Copyright 2005, Sargent & GreenleafPage 4

oP e r a t i n g in s t r u c t i o n s
Biometric Keypad
LocK and Keypad setup
It is very important to be certain your lock and keypad are
both in the factory default mode. The lock should only have
a master code of 1 2 3 4 5 6 #, be in single user mode, with no
time delay. If the keypad was used with another lock, the lock’s
values should have been set to those outlined above, using the
Biometric Keypad to set those default values. The lock and
keypad must start with the same default values.
bI o M e t r I c Ke y p a d In f o r M a t I o n
If you do not press any buttons on the keypad for approximately
15 seconds, it will “go to sleep.” To save power, it will shut down.
To enter a fingerprint or code, or to perform programming, you
will need to press START, then begin again.
If you enter an incorrect digit, press ✻to delete the entry, then
begin entering the intended code again.
To back out of a menu, you can generally press 0. Keep pressing
0 to continue moving up to higher level menus.
It is possible to put the lock into penalty lockout mode if enough
programming errors are made consecutively. If the lock and
keypad do not appear to be functioning normally, simply refrain
from pressing any buttons for at least five minutes, then attempt
your programming procedure again.
➥ge t t I n g t o t h e se t u p Me n u s
The Biometric Keypad can be used with lock models 6120, 6123,
and Z02. These locks have different features and parameters, so
the keypad must know which model is connected. The following
procedure should be implemented immediately after the lock
and keypad are connected, before any other programming is
attempted.
To wake up the keypad, press START. When the following screen
appears, press ✻. or follow the instructions that appear when you
press the #
▼
button at the bottom of the keypad.
The following screen is asking for the lock’s master code. For the
setup, the master code must be the factory original 1 2 3 4 5 6 #.
Entering the PIN code brings up the SETUP MENU . You can use
the arrow keys (
▲
✻and #
▼
at the bottom of the keypad) to
scroll through the main setup menu options.
Four options are available under the setup menu.
➥cu s t o M I z I n g t h e Ke y p a d dI s p L a y —La n g u a g e se L e c t I o n
Display setup (option 1 above) allows you to set the display
language, and turn on or turn off the screen’s backlight. You can
back out of any menu by pressing 0.
© Copyright 2005, Sargent & Greenleaf Page 5

oP e r a t i n g in s t r u c t i o n s
Biometric Keypad
© Copyright 2005, Sargent & GreenleafPage 6
➥cu s t o M I z I n g t h e Ke y p a d dI s p L a y —ba c K L I g h t se L e c t I o n
Option 2 in the display setup menu lets you turn the screen’s
backlight on or off. Remember that the keypad consumes about
20% more battery life with the backlight on. You can back out of
any menu by pressing 0.
➥se t t I n g Lo c K In f o r M a t I o n —Mo d e L I.d. a n d pr o g r a M M I n g
The Biometric Keypad must know which lock model it’s attached
to, and it must be programmed to meet your particular needs.
These areas are addressed by option 2, lock setup, under the
main setup menu.
As shown in the following screen illustration, you can select one
of three lock models—Z02, 6120, or 6123. It is important that you
identify your lock correctly. Otherwise, the system may not work
correctly, depending on the features you opt to use.
➥se t t I n g Lo c K In f o r M a t I o n —pr o g r a M M I n g Me n u s
Option 2 under the lock setup menu leads to several menus of the
lock’s programming capabilities. For example, the following menu
set is available if you identified your lock as a model 6120.
The menu sets for the 6123 and Z02 are identical, except for
the name of the lock model. These two locks have mechanical
differences, but are programmed the same. We’ll use the Z02
menus for this manual, just remember that the 6123 is exactly
the same.

oP e r a t i n g in s t r u c t i o n s
Biometric Keypad
If you look closely, you’ll see that the 6123 and Z02 have all the
options of the 6120 plus access modes (option 4 below), time
delay opening window (option 6), and time delay override (option
9). Features that are labeled the same between the menu sets
are programmed identically.
➥se t t I n g Lo c K In f o r M a t I o n —se t Ma n a g e M e n t re s e t co d e
The lock’s MRC (management reset code) may have been pre-set
at the factory. If so, it will be printed on a white label attached
to the lock body if your lock is a model 6120 or 6123. It will
accompany the lock in a sealed, black plastic pouch if your lock
is a model Z02. The safe manufacturer or installer may have
recorded this important number for you. If the MRC was set at
the factory, you will not be able to change it, and you can skip
this section.
A management reset code can only be created before the lock's
master code is changed for the first time. It can later be used to
reset the lock in the event the master code is lost.
It is important to note that the management reset code can only
be set or changed before the lock’s master code is changed for
the first time. It is recommended that the management reset code
be stored off premises as an additional security measure.
If the lock has never had its master code changed and it has no
MRC, you can make up your own, and set it into the lock. The
management reset code is different from other lock codes. It is
composed of seven digits, two of which are pressed at the same
time. This two-digit pair must be either 0/1 or 0/3. For instance,
a management reset code could be 3 6 2 [0/3] 1 9. The 0 and 3
must be pressed simultaneously. The 0/1 or 0/3 can be located
anywhere in the management reset code, and the digits 0, 1, and
3 can also be used as individual digits anywhere in the code. For
instance, 0 3 1 0 [0/1] 0 would be an acceptable MRC. Only the
0/1 in brackets would be pressed simultaneously.
The following illustration is for a model Z02 lock, but it applies to
all models (6120, 6123, and Z02). From the lock program menu,
use the up or down arrow key to scroll to the MRC options screen.
Select Set MRC (option 5 for a 6120, option 7 for a Z02 or 6123.
The factory master code you enter must be 1 2 3 4 5 6 #. If it
has been changed, you cannot set a management reset code.
The lock’s display will prompt you to enter the management reset
code, then enter it again to confirm. Remember that there is a
double key press of 0/1 or 0/3 somewhere in the MRC. Success is
indicated by the following screen.
© Copyright 2005, Sargent & Greenleaf Page 7

oP e r a t i n g in s t r u c t i o n s
Biometric Keypad
© Copyright 2005, Sargent & GreenleafPage 8
If the display indicates that the MRC was only set in the keypad,
your lock most likely already has a management reset code
programmed, or the master code was changed at some time.
This means your lock and keypad have different MRCs, or that
your lock has no MRC while the keypad has the MRC you just
programmed into it. The mismatch means you will not be able to
reset your lock using the MRC you programmed. If you attempt to
use it, the keypad and lock will be out of sync.
➥se t t I n g Lo c K In f o r M a t I o n —us e Ma n a g e M e n t re s e t co d e
From the lock program menu, use the up or down arrow key to
scroll to the MRC options screen. Select Set MRC (option 6 for a
6120, option 8 for a Z02 or 6123. Enter your management reset
code when prompted to do so.
The display will indicate if the lock and keypad have been
successfully reset by the MRC.
If the system not reset screen appears, neither the keypad nor
the lock was reset. It is most likely you have an incorrect MRC, or
it was entered incorrectly.
If either the lock reset only or keypad reset only screen appears, it
most likely means the lock and keypad MRCs are different. If you
see one of these screens, your lock and keypad are undoubtedly
out of sync. You can enter the lock MRC, then enter the keypad
MRC to get them back in sync.
What happens when you use the MRC successfully? In a model
6120 lock, the master code is reset to 1 2 3 4 5 6 #. All user
codes are erased. If a time delay was programmed, it is erased.
In models 6123 and Z02, the master code is reset to 1 2 3 4 5 6 #,
the supervisor code and all user codes are erased. If a time delay
override code was set, it remains in the lock. If a time delay was
programmed, it remains. Also, the mode of operation remains as
it was last programmed.
➥se t t I n g Lo c K In f o r M a t I o n —tI M e de L a y ov e r r I d e
Time delay override is only available in lock models 6123 and Z02.
If your lock is a 6120, skip this section.
Time delay override (TD0) provides for a special lock code that
can circumvent the time delay. TDO capability and type must
be set before the lock’s master code is changed for the first
time. Like the management reset code, it is important that
you address this feature before setting a new master code
and putting your lock into service.
There are three choices for TDO capability:
1. No TDO—No code will ever be able to override the time delay.
2. Single Control TDO—The time delay code holder can enter his
code to open the safe immediately.
3. Dual Control TDO (default mode)—A regular code holder
enters his or her code to start the lock’s time delay. Within 60
seconds, the TDO code holder enters his code to open the safe
immediately, without waiting for the time delay to reach zero.

oP e r a t i n g in s t r u c t i o n s
Biometric Keypad
When you decide which of the three options to utilize, navigate
to the TD override option in the setup menu (option 9). Once you
program a TDO option, you will not be able to change it.
As you can see from the next set of menus, you have the option
of setting the type of TDO (none, single control, or dual control),
or setting the TDO code. Remember that the TDO mode must be
set before the master code is changed for the first time, and that
once programmed, the TDO mode cannot be changed.
If you select single user (option 1) or dual control (option 2), the
following screen will be displayed while the keypad communicates
with the lock.
If the lock alerts you that the TDO mode could not be set, it is
likely the TDO mode was previously set, and it cannot be changed
after it is set and the lock’s master code is changed.
➥Ma n a g I n g Lo c K co d e s —ad d I n g us e r s
Lock model 6120 will accept up to 8 user codes, in positions 2
through 9. Models 6123 and Z02 will accept up to 6 user codes
in positions 2 through 7. New users can only be set up in empty
PIN positions. To overwrite an existing code, you will first have to
delete it.
© Copyright 2005, Sargent & Greenleaf Page 9

oP e r a t i n g in s t r u c t i o n s
Biometric Keypad
© Copyright 2005, Sargent & Greenleaf
When setting a new user, the display first prompts for a PIN
position in which to store the user code.
If the PIN position is already in use, the lock will indicate it, and
you will be taken back to the enter user ID + # screen.
As you enter the new code, each digit is represented by a ✻
in the display window. All codes must be followed by #. After
the code is entered, the display will ask you to enter it again to
confirm it.
If the new code and confirmation do not match, the display will
alert you, and you will be taken back to the code entry screen, so
that you can attempt to enter the new code again.
If the code entry and confirmation match, the code will be set
into the lock, and the following display will confirm the action.
➥Ma n a g I n g Lo c K co d e s —de L e t I n g us e r s
Deletion of existing user codes is very easy. Select option 2
(delete user) under the lock setup menu.
The display will indicate the user PIN position you entered
immediately after you press it’s number. Remember that you still
have to press # before the entry is actually made.
The keypad will communicate with the lock, and PIN deletion will
be confirmed by display of the screen above. If the PIN position
was not in use, no harm was done, and the keypad will display
the following screen for a few seconds, then take you back to the
enter user PIN + # screen.
Page 10

oP e r a t i n g in s t r u c t i o n s
Biometric Keypad
➥Ma n a g I n g Lo c K co d e s —ch a n g I n g t h e Ma s t e r co d e
The lock’s master code cannot be deleted, but it can be changed.
Before changing it for the first time, make sure you have the
management reset code (all lock models) and time delay override
mode (models 6123 and Z02 only) set the way you want them. If
necessary, refer to those sections earlier in the instructions.
Select option 3 (master code) under the lock setup menu.
Confirmation of a successful master code change will be the final
screen shown above.
➥Ma n a g I n g Lo c K co d e s —tI M e de L a y ov e r r I d e co d e
This code is only available with 6123 and Z02 model locks. If your
lock is a 6120, skip this section.
As explained earlier in this instruction manual, the time delay
override code is used to circumvent the lock’s time delay for uses
such as armored car pickups and deliveries. It can only be used if
a time delay is programmed into the lock, and it is not available
if the lock is in supervisor/subordinate access mode.
To set or change the TDO code, go to option 9 in the 6123 or Z02
setup menu.
If a TDO code already exists, it can be changed by simply entering
a new TDO code following this procedure.
To delete the TDO code, go to the delete user screen (option 2
under the lock setup menu), and delete PIN code #9.
© Copyright 2005, Sargent & Greenleaf Page 11

➥Ma n a g I n g Lo c K co d e s —th e su p e r v I s o r co d e
The supervisor code is only available when the Biometric keypad
is being used with a 6123 or Z02 lock. If your lock is a model
6120, this information does not apply.
The supervisor code is the PIN code stored in the #2 PIN position.
It must initially be set by using the master code to access the
lock setup menus. When the lock is in single user or supervisor/
user mode, the supervisor code can set, change, and delete user
codes in PIN positions 3 through 7. When the lock is in dual
control mode, the supervisor code holder loses these abilities and
cannot even change his own 6-digit code.
To employ the supervisor code to set, change, and delete user
codes (including itself), simply access the lock setup menus by
using the supervisor code. You will be limited to the capabilities
shown in the menu illustrations shown here.
Press START to begin.
Press ✻to get the lock to prompt you for the setup code, which
in this case will be the #2 PIN code (supervisor code).
At the top of the following column are the menu items available
to you when the supervisor code is used to access lock setup. You
will not have access to any other lock setup functions.
Note that the supervisor code has the capability to delete itself.
➥Ma n a g I n g Lo c K co d e s —th e us e r co d e s
Holders of user codes can only change their own 6-digit PIN
codes when the Biometric keypad is used with a 6123 or Z02 lock.
If your lock is a model 6120, this information does not apply,
and all code management must be handled by the holder of the
master code.
For a user code holder (PIN positions 3 - 7) to change codes, the
code holder simply accesses the lock setup menus by using his or
her own 6-digit code.
Press START to begin.
Press ✻to get the lock to prompt you for the setup code, which
in this case will be any user code from PIN position 3 through 7.
You will only have the ability to enter a new user code for the
same PIN position as the one associated with the code entered to
access the setup menu, as shown in the following illustrations.
oP e r a t i n g in s t r u c t i o n s
Biometric Keypad
© Copyright 2005, Sargent & GreenleafPage 12

User codes can be set, changed, or deleted by the holder of either
the master code or the supervisor code. They also have the ability
to change themselves, as long as the lock model is either a 6123
or Z02.
Ac c e s s Mo d e s —BA c k g r o u n d In f o r M A t I o n
6123 and Z02 locks can operate in three different modes: single
user, dual control, and supervisor/user. The mode of operation
can be changed at any time. The 6120 lock can only be used in
single control mode, so users of that lock should skip the entire
section dealing with modes of operation.
➥ac c e s s Mo d e s —sI n g L e us e r Mo d e
One person with a single, valid, six-digit code and/or enrolled
fingerprint can open the lock. Lock features can include time
delay and time delay override capability, if desired.
➥ac c e s s Mo d e s —du a L co n t r o L Mo d e
This is also referred to as dual user mode. It requires two
different valid lock codes and/or enrolled fingerprints to be
entered within one minute of each other for the lock to open.
The idea is that no one person has the ability to open the safe
alone. Lock features can include time delay and time delay
override code, if desired. You should also be aware that a single
user time delay override code and/or associated fingerprint can
open the lock immediately without entry of a second code and/or
fingerprint. The dual control time delay override will require
another code to start the time delay before the TDO code and/or
associated fingerprint can be used to open the safe. A time delay
period of at least one minute must be programmed into the lock
for a time delay override code or associated fingerprint of single
or dual control variety to work. TDO cannot open a lock that is not
using the time delay feature.
➥ac c e s s Mo d e s —su p e r v I s o r /us e r Mo d e
This is sometimes referred to as supervisor/subordinate or
supervisor/employee mode. The master code and the code in PIN
position #2 (supervisor code) cannot open the lock. Instead, they
enable and disable the lock for opening by the other user codes.
When either the master code or the #2 code (if set) is entered,
the lock emits four short beeps or two long beeps. If it gives the
four short beeps, any of the other user codes can subsequently
be used to open the lock. The next time the master code or the #2
code is entered, the lock will emit two long beeps. Now the other
user codes cannot open the lock. When the lock is disabled and a
user code is entered, it does not open, but emits two long beeps
instead. The master code and #2 code are used to toggle the
lock back and forth between usable and non-usable states. Lock
features can include time delay, but the time delay override is not
available in this mode.
➥ac c e s s Mo d e s —se t t I n g t h e ac c e s s Mo d e
Remember, access modes can only be set if the Biometric Keypad
is being used with a 6123 or Z02 lock.
oP e r a t i n g in s t r u c t i o n s
Biometric Keypad
© Copyright 2005, Sargent & Greenleaf Page 13

➥ac c e s s Mo d e s —se t t I n g t h e ac c e s s Mo d e (c o n t .)
From the lock setup menu, select option 4 (access modes), to
choose the access mode you want.
Remember that you cannot choose supervisor/user mode unless
the supervisor code (PIN position #2) has already been set.
➥tI M e de L a y —ba c K g r o u n d In f o r M a t I o n
Time delay is a security feature that enforces a predetermined
waiting period between the entering of a valid lock code and the
actual opening of the lock. The delay period can be set from 1
to 9 minutes using a 6120 lock, and from 1 to 99 minutes when
using either a 6123 or Z02.
The opening window is a period of time immediately after the
time delay during which you can enter a valid lock code to open
the lock. The factory default opening window is 2 minutes for all
lock models, but it can be changed to any value between 2 and
10 minutes for 6123 and Z02 locks.
Note: If your lock employs a time delay, changes to an existing
time delay or opening window can only be accomplished during
the opening window period. This can make the process lengthy,
depending on the length of the time delay. If you intend to change
the length of the opening window from the factory default 2
minutes, it is recommended you do so before programming a
value for the time delay period.
➥tI M e de L a y —se t t I n g atI M e de L a y va L u e
From the lock setup menu, select time delay (option 4 for a model
6120 lock, option 5 for a 6123 or Z02).
Simply enter a time value when prompted by the display to do so.
The value can be anything from 1 to 9 minutes for a model 6120
lock, and anything from 1 to 99 minutes for a model 6123 or Z02.
The example above shows a value of 1 minute programmed into
the lock.
➥tI M e de L a y —de L e t I n g atI M e de L a y va L u e
Deleting an existing time delay is very similar to the preceding
process, and requires you to enter zero as the time delay value.
oP e r a t i n g in s t r u c t i o n s
Biometric Keypad
© Copyright 2005, Sargent & GreenleafPage 14

You will notice, however, that deleting a time delay requires you
to wait through the existing time delay period before you can
change the value, whether you’re changing it to zero or some
other number. After you enter the new time delay value and #, the
time delay countdown screen displays. When it reaches zero, you
will be asked to enter the lock’s master code as verification of the
change and your authority to make the change.
The time delay counts down from the existing delay period, then
the display prompts you to confirm the master code.
➥tI M e de L a y —ch a n g I n g t h e op e n I n g wI n d o w va L u e
You can only change the length of the opening window if you are
using a model 6123 or Z02 lock. If your lock is a 6120, this section
does not apply to you.
The opening window is the limited period of time following the
end of the time delay during which you can enter a valid code
and/or an enrolled fingerprint to open the lock. The factory
default opening window period is 2 minutes. It can be anywhere
from 2 to 9 minutes.
If there is an active time delay in the lock, you will have to wait
through the existing time delay period before yo can change the
opening window value. After you enter the new opening window
value and #, the time delay countdown screen displays. When it
reaches zero, you will be asked to enter the lock’s master code as
verification of the change and your authority to make the change.
oP e r a t i n g in s t r u c t i o n s
Biometric Keypad
© Copyright 2005, Sargent & Greenleaf Page 15

➥fI n g e r p r I n t Ma n a g e M e n t —ba c K g r o u n d In f o r M a t I o n
The Biometric Keypad’s silicon-based active capacitive
fingerprint reader represents superior biometric technology that
combines high reliability with the ability to reject devices and
methods which are sometimes used to fool optical-type readers.
Be sure to enroll at least one fingerprint before you set the
fingerprint mode. You wouldn’t want to tell the lock to open by
fingerprint and code, then discover that you had not enrolled a
valid fingerprint.
You should consider enrolling more than just one of your
fingerprints. Damage to a finger, such as a cut, could cause the
keypad to reject your fingerprint.
You can enroll one fingerprint for each available code position
in a lock. For a model 6120 lock, it’s 1 master code and 8
user codes. For models 6123 and Z02, it’s 1 master code, 1
supervisor code, 5 user codes, and 1 time delay override code. If
a numerical code is not already programmed into the lock in the
PIN position you wish to assign to a fingerprint, the code will be
programmed as part of the fingerprint enrollment process. Each
numerical code can only be assigned one fingerprint.
If a code is deleted from the lock, the associated fingerprint will
no longer work. If a fingerprint is deleted from the keypad, the
code remains in the lock. Another fingerprint can be assigned
to it, or it can function by itself, depending on how the lock is
configured.
➥fI n g e r p r I n t Ma n a g e M e n t —ch e c K I n g av a I L a b L e po s I t I o n s
You must use the lock’s master code as the setup code to access
the fingerprint options. Before enrolling a fingerprint, it’s a good
idea to see which PIN positions don’t already have fingerprints
enrolled. From the fingerprint setup menu, select option 4, and
use the up and down arrows to scroll through the PIN positions
to see which are already associated with a fingerprint and which
ones are available for you to assign a new fingerprint. Keep
in mind that for a 6123 or Z02 lock, position 8 may show that
it’s available, but it is, in fact, used for the time delay opening
window value. You may not use it for code or fingerprint storage.
Also, PIN position 9 is reserved for the time delay override code
in models 6123 and Z02. The model 6120 can use all displayed
positions for user code storage.
oP e r a t i n g in s t r u c t i o n s
Biometric Keypad
© Copyright 2005, Sargent & GreenleafPage 16

➥fI n g e r p r I n t Ma n a g e M e n t —en r o L L I n g afI n g e r p r I n t
You must use the lock’s master code as the setup code to access
the fingerprint options. From the fingerprint setup menu, select
option 2 (enroll).
➥fI n g e r p r I n t Ma n a g e M e n t —de L e t I n g afI n g e r p r I n t
You must use the lock’s master code as the setup code to access
the fingerprint options. From the fingerprint setup menu, select
option 3 (delete).
The keypad display will alert you if you attempt to delete a
fingerprint from an empty PIN position, just as it would alert you
if you tried to enroll a fingerprint in position that was already in
use. The keypad display makes setting up and maintaining your
lock parameters and data very intuitive.
oP e r a t i n g in s t r u c t i o n s
Biometric Keypad
© Copyright 2005, Sargent & Greenleaf Page 17
This is the PIN position
where the fingerprint and
associated code will be
stored.
Enter the 6-digit code
already stored in this PIN
position. If there isn’t one,
enter a new 6-digit code.
You will only be asked
to enter the 6-digit
code again if you are
creating a new one.
You will only see this
screen if a new 6-digit
code is being created.
You will be instructed
to place your finger
on the keypad sensor
3 times to create a
detailed image. Each of
these screens repeats
3 times.

➥fI n g e r p r I n t Ma n a g e M e n t —se t t I n g t h e Mo d e
Once you have enrolled at least one fingerprint, it’s time to set
the keypad’s mode of operation. Do you want to open the lock
using just a fingerprint or a 6-digit code? Or do you want to
require both an enrolled fingerprint and a 6-digit code before
the lock will open? You can select from either of these two
options.
Select option 1 (mode) from the fingerprint setup menu. In
the menu that follows, select 1 for fingerprint or numeric code
entry. Select 2 to require both an enrolled fingerprint and the
associated code for lock entry. A confirmation screen will verify
your selection.
➥Ma n u a L Mo d e —co n t r o L L I n g t h e Lo c K dI r e c t L y
The Biometric Keypad is designed to handle programming
and operation of your lock using an LCD display to make the
processes easy to follow. There may be times, however, when you
need to control the lock directly, without the Biometric Keypad
acting as the middleman. To do this, make sure you understand
the lock programming procedures. Separate operating
instructions for the lock were included when it was shipped
from the factory. If these have been misplaced, you can obtain
replacements online, at www.sargentandgreenleaf.com.
From the keypad’s main setup menu, select option 4 (manual
setup). Once you do so, any key presses will transmit
information directly to the lock. Programming changes you
make will not affect the keypad in this mode. Be certain you
understand what you are doing, as use of this mode makes it
easy to get the lock and keypad out of sync.
If you are working with the lock in manual mode and want to
return to keypad mode, simply press the keypad’s START button.
oP e r a t i n g in s t r u c t i o n s
Biometric Keypad
Page 18

oP e r a t i n g in s t r u c t i o n s
Biometric Keypad
© Copyright 2005, Sargent & Greenleaf Page 19
➥ba t t e r I e s —wh e n t o ch a n g e
When programming or operating the lock, it emits beeps. If you
notice a distinct change in the pitch of the beeps, the lock is
telling you it’s time to change the batteries. If you ignore this
signal, the lock will finally beep 20 times rapidly when you try
to open it, but it will remain locked. This is the lock’s way of
insisting you change the batteries. Erratic or inconsistent lock
operation is another sign that it’s time for new batteries.
➥ba t t e r I e s —ho w t o ch a n g e
Codes and programming information are not corrupted or lost
during battery changes.
Underneath the bottom of the keypad, you’ll find a raised ridge.
Place your finger behind it, pull slightly forward and down to
open the battery compartment.
The batteries are connected to wired leads with tops that snap
onto the batteries terminals. These are the same connectors
found on most appliances that use 9-volt batteries. Snap off the
connectors, remove the old batteries, then snap the connectors
onto a pair of fresh Duracell®brand (for best performance)
alkaline batteries. The batteries must be alkaline. Orient the
batteries in the tray with the connector wires facing up.
Once the replacement batteries are in place, push the tray back
up into the keypad until it snaps into place.

Sargent & Greenleaf, Inc.
A Wholly Owned Subsidiary of Stanley Security Solutions, Inc.
PO Box 930, Nicholasville, Kentucky 40340-0930 USA
Phone (859) 885-9411
Phone (800) 826-7652
FAX (859) 887-2057
FAX (800) 634-4843
Sargent & Greenleaf S.A.
9, chemin du Croset
1024 Ecublens, Switzerland
Phone +41 21 694 34 00
FAX +41 21 694 34 09
WARRANTY
Seller warrants that for one year from the date of shipment from Seller’s point of manufacture, the goods shall be free from defects in material and workmanship,
provided the goods are normally and properly used according to the Seller’s written instructions.
THIS WARRANTY IS EXPRESSLY MADE IN LIEU OF ANY AND ALL OTHER WARRANTIES, EXPRESS OR IMPLIED. S&G DOES NOT WARRANT THAT THE GOODS ARE
MERCHANTABLE OR FIT FOR ANY PARTICULAR PURPOSE EXCEPT AS EXPRESSLY PROVIDED HEREIN.
Seller’s entire liability and Buyer’s exclusive remedy in the event that the goods do not conform to the foregoing warranty shall be Seller’s repair or replacement of
the goods (including payment of freight costs to and from point of manufacture).
UNAUTHORIZED USE OF DIAL, DIAL RINGS, AND/OR SPINDLES NOT MANUFACTURED BY THE SELLER IN CONJUNCTION WITH ITS COMBINATION LOCK PRODUCTS
INVALIDATES THE WARRANTY.
SELLER SHALL HAVE NO LIABILITY FOR ANY CONSEQUENTIAL, INCIDENTAL, INDIRECT OR SPECIAL DAMAGES. SELLER DOES NOT WARRANT ITS LOCK PRODUCTS
TO BE IMPERVIOUS TO FORCIBLE OR SURREPTITIOUS ENTRY, AND SELLER SHALL HAVE NO LIABILITY FOR DAMAGE TO OR LOSS OF PROPERTY SOUGHT TO BE
PROTECTED BY ANY SUCH LOCK.
Table of contents
Popular Keypad manuals by other brands
Assa Abloy
Assa Abloy Securitron DK-26 manual
Honeywell
Honeywell 6280 Series user guide

Richmond
Richmond GTR057 installation manual
APO
APO DK-9865 MK-II Programming & installation manual
Kingston Technology
Kingston Technology IronKey Keypad 200 user manual
resideo
resideo Honeywell Home PROSIXLCDKP Series Installation and setup guide
