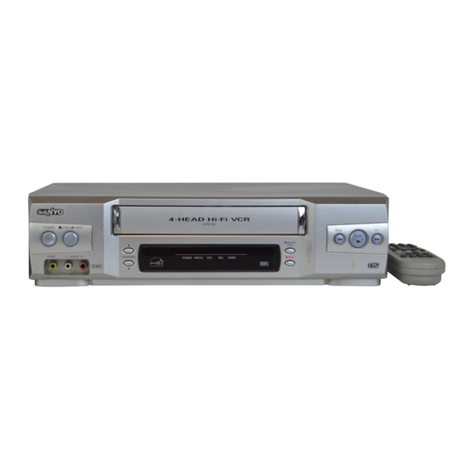
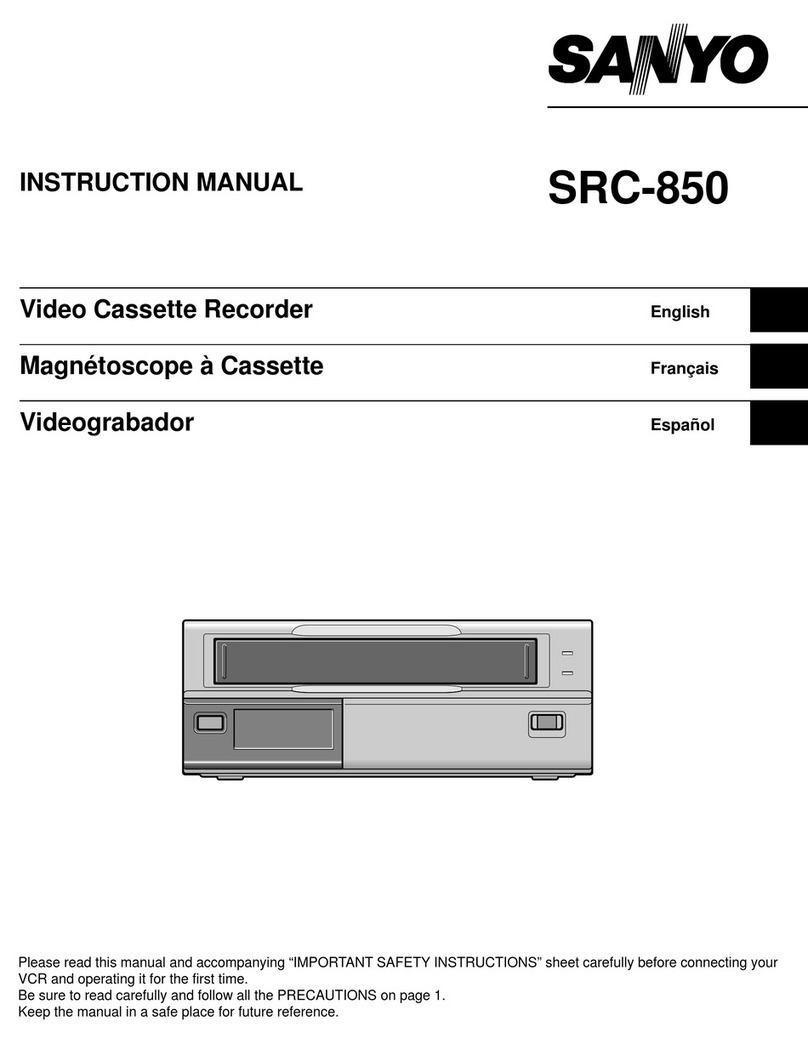
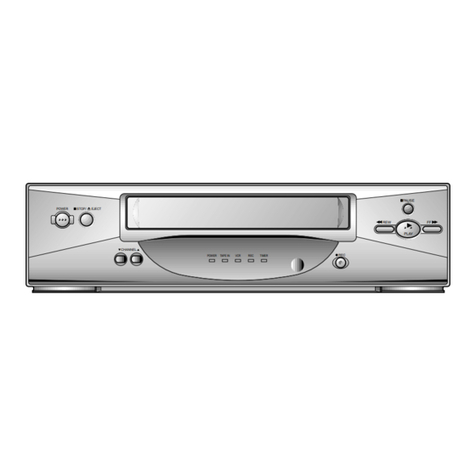
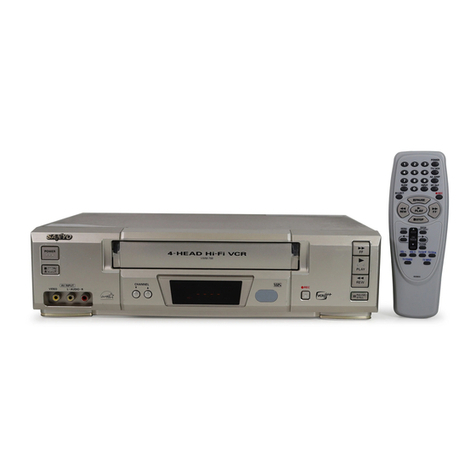
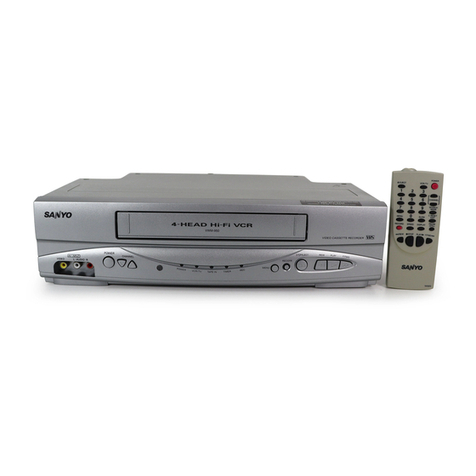
Sanyo VHR-850 User manual

INSTRUCTION MANUAL VHR=850
Video cassette recorder

This page is designed to get you started if you are in ahurty, but please read the full instructions manual to get the best from your VCR.
■UNPACK UNIT ❑n❑•1
Power cord Aerial output cable Remote control unit 2“AA (IEC R6)” size,
@l!9 batteriea
““:.
....”.
■CONNECT TO TV
AS INDICATED TV Aerial ‘—7
d
■SETTING THE TV TO THE VIDEO CHANNEL
1
Turn on your TV and set your TV to “VCR” or the position designated ~
VCR
for VCR use (always aposition where no TV programme is received).
2
2
Turn off the VCR using the (!)/1button.
%
3
8
Press the PRESET button on the VCR (For Australia)
“9 “+ remote control for more than 3seconds.
●The VCR display shows the RF output -
channel. (For New Zealand)
-
4Tune the UHF channel on your TV to the displayed RF output
channel 37 or 36. (Please refer to TV instruction manual.)
●The test pattern will appear.
If the test attern is disturbed or replaced by aTV station, go to
steP6intionPa9- (Test pattern)

,*.. \
■VCR TUNING (Auto tuning) J
13G,, Turn on the VCR using the 0/1 button.
For Australia, the TV stations are preset to the programme
positions (see page 7).
To modify the channel tuning, follow the steps below.
2Press the both CHANNEL (+ and -) buttons
on the VCR for 3seconds or more.
●Auto tuning will start.
n
NOW SEARCH INO
PLEASE WAIT.
●When the Auto tuning is finished, the TV
station preset to the lowest programme
position number will be tuned on your TV
screen.
38
Press the CH (+ or -) button to confirm that the channels tuning
:!‘has been performed.
If you sort the TV stations, please refer to”- SORTING
THE TV STATIONS” on page 8.
■CLOCK SETTING
12?Press the MENU/TV button.
E
CLOCK SET
&.-, .-,-- --:--
[0-91 .INPUT
[CLEAR 1●TO CORRECT
[MENU 1●TV
Example:
■To set December 1st, 1998,16:15.
Set the day, month, year and time using the
numeric (O–9) buttons.
CLOCK SET
01.12.98 16:15
[CH+/-l+Tl ME SHIFT
[CLEAR I●TO CORRECT
[OK 1●ENTER
Press the OK button.
Power interruption
If the power to the VCR has failed or has been disconnected for more than
1hour, the VCR display will show ”-: ––“. The clock will need to be reset
However the tuning information will NOT be erased.

Make sure to make these
settings before operating the
VCR.
3
CONTENTS
QUICKSETUPGUIDE ............................................. 1
1
PRECAUTIONS ..................................................... 4
CONTROLS ......................................................... 5
INTRODUCTION
2-CONNECTIONS
...................................... 6
PREPARATION Accessories ............................................................... 6
Remote control baHeries insetiion ............................ 6
_vIDEO CHANNEL sETTING ........................ 7
_VCRTUNING ........................................ 7
_sORTING THE TVsTATIONs ...................... 8
~~ CLOCK SETTING .................................... 8
L...-,.-...—.—.-...?----
ON-SCREEN MENUS AND BASIC CONTROL ................... 9
VCR PRESETTING ................................................. 10
Additional tuning controls ......................................... 10
Changing the clock .................................................... 10
Hi-Fi Stereo/Bilingual programmed sound selection ..... 10
Function setup ........................................................... 11
Display function ......................................................... 11
3PLAYBACK ......................................................... 12
Variable playback modes ........................................... 12
BASICOPERATION Playback of an NTSCtape ......................................... 12
Counter memory ....................................................... 12
Index search .............................................................. 13
Endless play .............................................................. 13
Picture adjustments ................................................... 13
RECORDING TV PROGRAMMED ................................ 14
Setting the recording type ......................................... 14
Quick Start Recording timer ...................................... 14
4TIMER RECORDING PROGRAMMING .......................... 15
Confirmation/Cancelling ............................................ 15
ON-SCREEN Notes on timer recording .......................................... 15
OPERATION TAPE LIBRARY SYSTEM ......................................... 16
5
ADVANCED
OPERATION
TAPE COPY ......................................................... 17
6TROUBLESHOOTING .............................................. 18
SPECIFICATIONS .........................................Back cover

PRECAUTIONS
Safety precautions Operating precautions
DANGER:
This VCR contains live parts. Do not remove
the cabinet.
WARNING:
To prevent fire or shock hazard, do not
expose this product to rain or moisture.
CAUTION:
Do not put your hand or other objects in the
cassette loading slot because of the risk of
injury or an accident. Be sure to keep small
children away from the VCR.
Caution concerning condensation
Be careful of condensation
Condensation can form inside aVCR when it
is suddenly moved from acold place to a
warm, humid one, or when aheater has been
turned onto quickly heat the room.
Do not insert avideo cassette if you use
this VCR in areas subject to condensation.
Wait for 1-1/2 to 2hours to completely
eliminate condensation before using the
VCR.
Place the VCR on a flat, stable, level
surface. Never subject it to violent shaking
or any other shock or impact
Do not expose the unit to high
temperatures. Excessive heat (heat
sources such as heaters, ovens, closed car
on hot days, etc.) may damage the unit.
Be sure to use this VCR only in a
temperature range of 5°C to 40°C (41 ‘F to
105°F) and at less than 80% humidity.
Do not use the unit under the following
conditions:
—
—
—
—
in locations with high humidity
in presence of excessive dirt or dust
in areas subject to strong vibrations
near strong magnetic fields (e.g.
transmitting antennas, motors,
fluorescent lights, etc.)
Do not stack anything on top of your VCR,
or block the air vents, to prevent damaging
or overheating.
Do not place anything, except W-K video
cassette tapes, in the unit.
Do not allow rain, steam, dew, salt water,
sand, oily smoke, metal objects, etc. to
enter the unit.
Clean with adry and soft cloth, or soft cloth
slightly moistened with amild detergent
solution.
Do not use any type of solvent, such as
alcohol or benzine.
Power precautions
Do not forget that even in the stand-by
there is an electrical voltage inside the VCR
as long as it is connected to awall socket.
Disconnect the power cord from the wall
socket if the VCR is not to be used for a
long time.
INTRODUCTION
Onlycassettes marked ~can
be used with this VCR.
Note:
If the unit does not operate
properly, switch it off, refer to
“TROUBLESHOOTING”or contact
your Sanyo authorized service
igent.
Power on/stand-bymode
rhe power on (I)/stand-by ((!))
mode is selected by pressing the
0/1 button,
LICRdisplay
‘ower onmode(1)
Uand-bymode(0)
‘Stand-by mode” is the condition
nwhich only the time is
~isplayed.
4

INTRODUCTION
VCRdisplay
Mode IOisplay
Cassettein 1“
Playback ID
Forwardsearch ID
Rewind I %f-
Still picture
(;::.: Flashing)
5
CONTROLS
Remote control sensor
Operate the remote control unit within arange of
approx. 30” and approx. 6m (20 ft.) from the front of
the VCR.
Indication Function
WI Power onlstand-by mode
CHANNEL(+, –), CH (+, -) Programme selection, tracking adjustment
FF Fast-forward, forward search during playback
PAUS13STILL Pause during recording, still picture during playback
PLAY Playback
REC Recording
REW IRewind, reverse search during playback
STOP/EJECT, STOP ICassette ejection (on the VCR only), tape stop
(On the remote control only)
AUDIO Sound track selection
CLEAR Clears data
DISPLAY Programme position, dayltime, remaining tape duration display
INDEX Index search
INPUT IExternal in~ut mode selection
MEMORY Counter “0:00:00 position memory
MENLVTV On-screen menu display selection
OK Confirms data
PRESET Tuner preset
RESET Counter reset
SP/LP ]Recording tape speed selection
TYPE Recording type set
o–9 Direct programme selection, for various input

CONNECTIONS
Aerial/RF connection Additional connections
1Disconnecttheaetial cord from yourTV.
Aerial TV
AV connection
Connect an AV cable (sold separately)
between the VCR and the TV.
●YOUcan get ahigher quality of picture and
sound during playback.
‘T
zConnect the aerial cord tothe VCR
AERIAL IN.
Aerial
‘T
3Connect the supplied aerial output cable
between the VCR AERIAL OUT and the
TV aerial socket.
-%=%=
T
ITV
I\●I
\J
AV cable (sold separately)
Hi-Fi audio connection
You can obtain adynamic sound output
through your Hi-Fi system when you playback
atape recorded in Hi-Fi stereo on this VCR.
Stereo audio system -==
7
Cii&il
@
.
\J
Aerial output cable
(supplied)
●Stereo sound can be enjoyed when using
an AV connection or Hi-Fi audio connection.
dConnectthe supplied power cord between
the VCR AC IN -and a wall socket.
To awall socket
t
Power cord
(supplied)
Audio-cable (sold separately)
2
PREPARATION
accessories
severything inthe box?
Power cord
I
IAerial output cable
Remote control unit
@,..2”
//
I2“AA (IEC R6)” size,
1.5-volt batteries
Remote control batteries
inserlion
1
2
3
Openthe lid,
Insert 2“AA (IEC R6)” 1.5
volt batteries (supplied)
according to the@ and @
signs.
Replacethe lid.

2k—~i VIDEO CHANNEL SETTING
PREPARATION If the VCR has been connected to the TV using the “AV connection”, simply set your TV to
the “AV” mode. Go to -VCR TUNING.
6CIvmge the RFoutput channel numbercm
the VCR display to avacant channel
number applicable to your area.
For Australia: Press the CH (+) button.
--+------------------ -69 RFA
1=
----------------------------- 29 RFAe 28RF
●Press the CH (–) button to return to
channel “28 RF’.
For New Zealand: Press the CH (-) button.
~3613Fn~
=
37 RFn1+------------------- 69 RFn
.‘-----‘m-=------ 21 RFn
●Press the CH (+) button to return to
channel “28 RF’.
TTune the U1-lFchannelonthe TVtothe
changed RF output channel.
●The test pattern will appear.
●Adjust the tuning on the TV, if necessary,
so that the test pattern is clear.
8If the test pattern stays the same, press the
PRESET button.
●The VCR is turned off.
This completes the video channel setting.
1
2
3
Turn on your TV and set your TV to
“VCR” or the position designated for VCR
use (always aposition where no TV
programme is received).
7
(!)/1
PRESET
CH(+,-) Turn off the VCR using the 0/1 button.
Press the PRESET button on the remote
control for more than 3seconds.
●The VCR display shows the RF output
channel.
(For Australia) (For New Zealand)
RF converter output
(Video channel) 4Tune the UHF channel on the TV to the
displayed RF output channel 37 or 36.
●The test pattern (below) will appear.
Area IFactory 1Range
settina
●Adjust the tuning on the TV, if necessary,
so that the test pattern is clear.
5
This completes the video channel setting.
If the test pattern is disturbed or
replaced by aTV station, go to step 6.
If the test pattern stays the same, press
the PRESET button.
●The VCR is turned off.
2krWVCR TUNING
PREPARATION
Auto tuning
This VCR has abuilt-in tuner capable of
tuning up to 88 TV stations.
The TV stations available in your area will be
automatically preset in order starting from
program me position number “01”.
Notes:
●During the auto tuning operations, please do not
press any of the buttons or controls on the VCR
or remote control.
●Auto tuning is not possible if the VCR is set to
external input mode.
●The skip function will be automatically set for all
position numbers where no TV station has been
preset.
Tuning confirmation
When the Auto tuning is finished, the TV station
preset to the lowest programme position number
will be tuned on your TV screen.
Press the CH (+ or –) button to confirm that the
channels tuning has been performed.
Turn on the VCR using the (5/1 button.
!(
WI
CH(+,-)
9For Australia
The TV stations are meset as follows.
Programme
position I6’2” I“7” I“9” 1“lo” “28”
TV station
(MHz) 64.25 182.25 196.25 209.25 527.25
To keep the preset channel tuning, press the
CH (+ or -) button.
To modify the channel tuning, follow the steps
below.
IIFor New Zealand (and Australia, if
1necessary)
Press the CHANNEL (+ and -) buttons on the
VCR for 3seconds or more.
CHANNEL(-, +) ●Auto tuning will start.
1’ >
I-J
NOW SEARCH IM
PLEASE WAIT.
7

SORTING THE TV STATIONS
It is possible to sorl the TV stations as desired.
&n@e; To change TVl from programme
position “03 to programme position
“01”.
Programneposition] 01 02 03
3Using the numeric buttons (O–9), enter the
target programme position number (e.g
“01”).
m
I
(Before)l TV3.. TV2 m4!%ess the O~button.
TV etation (After) -.3
1
2Press the PRESET button.
Usina the CH (+ or-) button select the
desir;d TV station (e”.g. TVI).
m
m
~xamp/e: To set the December
16:15
1Press the MEfWJ/TV button.
Ist. 1998,
J
CLOCK SET
--, --,-- --:--
[0-91 +INPUT
[CLEAR 1●TO CORRECT
[MENU1●TV
Repeat steps 2to 4to change another TV
station programme position number.
sWhen finished, press the PFtESET button.
2Set the day, month, year and time using
the numeric buttons (e.g. 01129816 15)
~
I01.12.98 16:15 I
Ex!?E_J
If you enter awrong number, press the
CLOCK SETTING
3When finished, press the OK button.
●Seconds will start counting from “00
as the OK button is pressed.
●The normal TV broadcast screen will
return.
Power interruption
If the power to the VCR has failed or has been
disconnected for more than 1hour, the VCR
display shows ”-: ––”.
The tuner rxeset memory will not be erased.
So there is no need to retune the VCR
stations.
However, the date, time, function setup
memory and any recording information
regarding future recordings should be reset.
First set the clock (date and time), then set
any function again.
CLEAR button to delete it, then enter the
2
PREPARATION
o-9—
OK
2
PREPARATION
o-
CLE
OK ENU/TV

2ON-SCREEN MENUS AND BASIC CONTROL
PREPARATION
The VCR can easily be programmed by using the menus displayed on-screen.
The menus are controlled from the remote control.
If you memorize the basic operations, each setting can easily be made by following the steps of the
OK
l!!!
CH (+, -)
TYPE MENU/TV concerned menu.
nTurn on the TV, then set it to the preset video channel or AV mode (if using the ‘(AV
—connection”).
Multicolored on-screen display
For easier viewing, the menu colours have the following appearance.
●If awrong sub-menu has been selected, press the MENU~V button and start again.
MENIJTV Timer recording
programming -
(See page 15)
PR DATE START END
.- --, ---- :-- -- :-_ P
-- ----- _-:-- -_ :--
_- --, ---- :-- --: --
-- --,-- _-:_- _-:_-
-- _- -- __:-- --:--
-- -- -- ----- _____
Menu title:
White letters on magenta
background [0-91 *INPUT
[CLEAR 1●TO CORRECT
[MENU I●TV
To select an item
l+’.:.
c,
......
PROGRAM CHECK/CLEAR
VCR SETUP
CLOCK SET
TAPE LIBRARY SYSTEM
[CH-/+ 1●SELECT
[OK I* ENTER
[MENU 1●TV
I
O+OK
-0-
CH ===@ o“ Confirmation/Cancelling
(See page 15)
PR DATE START END
01 01.12 21:30 23:15W
02 25.12 M.FIO:30 ll:OOIP
---- ___ --:-- _-:--
-- __,-- --:-- .-: _-
-- _____ -_ :-_ _-:--
_- __,-- --:-- --: _-
[CH-/+l *SELECT
[CLEAR 1●CANCEL
[MENU1●TV [TYPE I*TYPE
Setup item: Operation indications:
White letters on green Blue letters on white background
background ●The buttons that can be used
with each menu are displayed
at the bottom of the screen. Function setup
(See page 11)
For Australia
-m
\
TYPE+ -----
[TYPE 1●TYPE
[CLEAR I* CANCEL
[OK I* ENTER
For New Zealand
7
Clock setting
Recording type setting
(See page 14) See page 1~
CLOCK SET
01.12,98 16:15
[CH-/+l+Tl ME SHIFT
[CLEAR 1●TO CO+IRECT
[OK 1●ENTER
Tape library system
(See page 16)
TAPE LIBRARY SYSTEM
PR DATE START TYPE
1
2:
3.
4.
5.
6.
7.
[OK 1*START

nTurn on the TV, then set it to the video
—channel or AV mode (if using the ‘{AV
connection”).
Additional tuning controls
Fine tuning
If the tuning is not optimum, it can be
improved by manual fine tuning.
1
2
3
4
Press the PRESET button.
Press the FF or REW button to obtain the
best possible picture and sound.
Press the OK button.
When finished, press the PRESET button.
Skip function
If only programme position numbers 1to 30
have been preset, you can set the skip
function for programme position numbers 31
to 88, so that only the preset TV stations will
appear when pressing the CH (+ or -) button.
1FTess the PRESET button.
2Using the numeric buttons or the CH (+ or
-) button, select the programme position
number to skip.
3Press the CLEAR button.
●The %“ indicator will light.
To cancel the skip function, press the
CLEAR button again to erase the “S
indicator.
dPress the OK button.
Repeat steps 2to 4for every programme
position number to skip.
sWhen finished, press the PRESET b.tton.
Manual tuning
This tuning mode can be used to modify the
settings entered by the Auto tuning function,
or to manually preset the TV stations to
particular programme position numbers.
1
2
3
Press the PRESET button.
Using the CH (+ or -) button, select the
desired programme position number.
Press the PLAY button.
If the search stops on a broadcast other
than the one desired, press the PLAY
button again until the broadcast from the
desired TV station armears on the TV
screen.
8
VCR PRESETTING 2
PREPARATION
dPress the OK button when thedesiredTV
station appears on the TV screen.
Repeat steps 2to 4to preset another TV
station to another programme position number.
sWhen finished, press the PRESET button.
Changing the clock
1Press the MENLUTV button, then select
the CLOCK SET using the CH (+ or –)
button.
4
MENU 01.12.98 16:15
TIMER PROGRAM SET
PROGRAM CHECK /CLEAR
VCR $E.TU.F......................
rTCuoC~..S.ET .....................J
TAPE LISRARY SYSTEM
Press the OK button.
CLOCK SET
01.12.96 16:15
Summer/Standard time setting
Each press of the CH (+ or -) button will
advance or retard the clock by 1hour.
Clock adjustment
Continue pressing the CLEAR button to
delete the incorrect numbers, then enter
the new settings using the numeric
buttons.
When finished, press the OK button.
Hi-Fi Stereo/Bilingual programmed
sound selection
Using the AUDIO button, select the desired
sound to listen.
Stereo sound selection
When astereo broadcast is received, the stereo
indicator “ST’ illuminates on the VCR display.
VCR display Selected sound
“LR” Left and Right tracks
“~ nILeft track
“R“ Right track
No indicator Monaural
Bilingual sound selection
When abilingual broadcast is received, the
bilingual indicator “BIL illuminates on the
VCR display.
0
c
o
R
PLAY
Il_J
“R“ Sub
No indicator Main

2
PREPARATION VCR PRESETTING
OK
‘“ fl
CH (+, -)
DISPLAY MENIJTV
Function setup Display function
1
2
Press the MENUTW button, then select
the VCR SETUP using the CH (+ or -)
button.
MENU 01.12.98 16:15
TIMER PROGRAM SET
PROGRAM CHECK /CLEAR
:.-vcR-:sEf.u-P.:-:.:-.-.-.-.-.-.:-.-.-.-.:-.-.:-::
CLOCK SET
TAPE LIBRARY SYSTEM
I[CH-/+ 1●SELECT
[OK 1●ENTER
[MENU 1●TV I
Press the OK button
(For New Zealand)
?7 E&r_J
(For Australia)
3
\
NTSC PBOPAL-TV NTSC443
CHILD LOCK ON #OFF
[CH-/+l *SELECT
[OK I. ENTER
[MENU 1●TV
Press the CH (+ or -) button to select the
desired item to set (0 -0).
(New Zealand only)
NICAM broadcasts setting
AUTO: To record NICAM stereo broadcasts
and bilingual broadcasts.
OFF: To record the normal sound (FM mono).
@NTSC playback system
PAL-TV: When using aPAL (B/G) system
TV.
NTSC443: When using an NTSC4.43 system
TV. (Please use the AUDIOI
VIDEO OUT terminals.)
@Child lock function
ON: “BLOCKED” is displayed on the TV
screen and the sound is muted.
OFF: The child lock function is not engaged.
4
5
Press the OK button to set the desired
mode.
●Every time the OK button is pressed,
the symbol “O” will move from one
setting to the next. To set amode,
make sure the “O” is displayed to the
left of the desired setting.
When finished, press the MENUflV
button.
When pressing the buttons shown in the table
below, each mode can be seen displayed on
the TV screen for about 2seconds.
Tape mode
r
\
●0=?—Programme
position mode
LJ
Ta~e mode
Press .... IMode IDis~lav
. .
PLAY Playback ●
FF Fast-forward m
REW Rewind M
REC Recording ●02
PAUSE/STILL in
recording mode Recording pause ●1 1 02
Programme position mode
Press.... Mode Dieplay
CH (+ or -) Programme
Numeric (0 –9) Dosition number 01-88
INPUT External input
(AUDIONIDEO IN) “
By pressing the DISPLAY button, the
programme position number and the current
day/time can be displayed.
Progremme position number
f—l”) 02
01,12.98 16:15—
I
Current day/time
To cancel the function display, press the
DISPLAY button one more time.

Turn on the TV, then set it to the preset
video channel or AV mode (if using the
“AV connection”).
Insert arecorded video cassetie.
Cassette loading
Gently push the centre of the cassette
until it is loaded automatically.
v
n
—
‘Erasure-prevention tab
Press the PLAY button.
stop
Press the STOP button.
Eject the cassette
Press the EJECT button on the VCR.
Rewind
Press the REW button during stop or reverse
search operation.
Fast-forward
Press the FF button during stop or forward
search operation.
Variable playback modes
Forward search
Press the FF button during playback or
fast-fotward operation.
Reverse search
Press the REW button during playback or
rewind operation.
Still picture
Press the PAUSE/STILL button during normal
playback.
Frame advance
Press the PAUSER3TILL button during still
picture.
Note:
If still picture is continued for about five
minutes, the VCR will automatically change to
stop mode in order to prevent the ta~e from
being damaged.
PLAYBACK 3
BASICOPERATION
Playback of an NTSC tape
This VCR can playback an NTSC tape on a
PAL (B/G) or NTSC 4.43 system TV.
For NTSC playback system setting, refer to
“Function setup” on page 11.
NTSC
ml “Lj or~c]
When you playback an NTSC tape on a PAL
TV,
●If the image is unstable, rolling vertically,
use the TV vertical hold button to stabilize
the image.
●The image may shrink vertically and a
black band may appear at the top and
bottom of the screen.
Notes about NTSC tape
●
●
●
An NTSC tape cannot be copied normally.
Picture quality of NTSC tapes cannot be
guaranteed with this VCR.
When an NTSC Hi-Fi tape is played back,
the monaural sound only will be heard.
Counter memory
This convenient feature for finding the
beginning of aspecific recording etc., is made
possible by the “Linear Time counter” that
indicates the tape run time in hours, minutes
and seconds.
1
2
Press the RESET then the MEMORY
button before starting recording or playback.
●The zero point of the counter is now
memorized and the memory indicator
“~” will illuminate.
Press the REW button at the end of the
recording or playback, the tape will be
rewound and stop automatically at the
memorized position.
Notes:
●Whenever you load acassette tape, the
counter is reset to “0:00:00”.
●If you play back ablank tape or ablank
portion of tape, the counter will not operate.
#
RESET
PLAY MEMORY
REW FF
STOP PA#[
EJECT
Autopower on
The power is automatically
switched on as acassette is
inserted while the VCRis in the
stand-by mode.
Auto play
TheVCR will play back atape
automatically when avideo
cassette is inserted whose
*erasure-prevention tab has been
removed.
Auto eiect
When avideo cassettewithout an
*erasure-prevention tab is played
to the end of the tape, the tape
will beautomatically rewound and
then the cassette will be ejected.
Stand-by mode eject
Thevideo cassette will be ejected
when the EJECTbutton is
pressed, even when the VCR is in
stand-by mode.
12

3
BASICOPERATION
I
~R
CH (+, -)
REW INDEX
STOP FF
IForEndlessplay
1PLAY
b
I
REW
PLAYBACK
Index search Picture adjustments
An index signal is automatically placed at the
beginning of each recording made on this
VCR. This index can be used to search for the
next (or present) recording.
Current position
~Index Index
signal signal
Notes:
●
●
1
2
Make sure that indexes are at least five
minutes apart from each other.
Index signals are not recorded after a
recording pause.
Press the INDEX button while in the stop
or playback mode.
To cancel the index search mode, press
the INDEX button again.
Press the FF or REW button.
To stop the search function, press the
STOP button.
●Playback will start automatically when
an index is found.
mlmlml
Endless play
This function will play back atape to the end,
rewind it then replay it again, and again until
you stop it.
1
2
In the stop or playback mode, first press
the PLAY button then while holding it
down press the REW button on the VCR
To cancel the endless play, press the
STOP button.
If the counter memory function is used in
combination with endless play, the VCR will play
back the tape to the counter reading
“M 0:00:00 then start again from the beginning.
“m 0:00:00
‘F*J:,:,,J
Note:
During endless play, please do not press FF,
REW or PAUSEETILL button because the
endless play will be cancelled.
Tracking adjustment
This VCR is equipped with an auto tracking
function, During playback this function will adjust
the tracking to the best possible image.
If noise appears in the playback picture, press the
CH (+ or -) button, to reduce the noise interference
in the image.
When the tracking is adjusted using the CH (+ or -)
button, the auto tracking mode is cancelled.
To return to auto tracking mode, eject the cassette
(press the EJECT button), then reload it again.
( )
Note:
Depending on the cassette tape, you may find
that some noise interference cannot be
completely corrected using the tracking
controls.
If the still picture moves up and down
Use the CH (+ or -) button, to correct.
Once the cassette tape is unloaded, the VCR
is reset and the next time the VCR is used
you may need to do the corrections again.
fn)
Notes:
During variable playback modes the picture
may contain some noise or vibration that
cannot be corrected. This is not a
malfunction.
This VCR will not guarantee the variable
playback modes picture quality of tapes
recorded in LP mode.

RECORDING TV PROGRAMMED
Turn on the TV, then set it to the preset
video channel or AV mode (if using the
“AV connection”).
Insert avideo cassette with
erasure-prevention tab.
Press the numeric buttons, or the CH (+
or-) button, to select the TV station to be
recorded.
To select the tape speed, press the
SP/LP button.
If necessary, press the TYPE button to
set the recording type.
Please refer to “Setting the recording
type” below.
Press the REC button.
To stop the recording, press the STOP
button.
Settino the recording type
If arecording type is selected, it will be
displayed and make programme selection
easier when listing the tape recordings data.
It can be used to easily find adesired
recording. (Refer to “TAPE LIBRARY
SYSTEM” on page 16.)
1Press the TYPE button repeatedly untill
the desired type is displayed.
zWhen thedesired type has been selected,
press the OK button.
~ypE+-:-+ . . . . .. .. .. .. . ...
(Tape library system)
1-l
TAPE LIBRARY SYSTEM
PR DATE START TYPE
1 02 25.12 18: OO:%”POR-T;
2, 08 25.12 20: OO; MUSIC;
3. 12 26.12 14: OO:NEWS ;
4. 02 26,12 18:00 :Fj.~M;
5.
6.
7.
[1 -71 .SELECT
FILM (F): Film
S;ORT (S): spOItS ~
D~AMA (d): Drama !
M!ISIC (M): Music
N;WS (n): News
A;IMA (A): Animation, ~
cartoon
E#UC. (E): Educational \
programme
G~ME (g): Game
T/RIL (t): Thriller
C;MEO (c): Comedy j
Theletterinbrackets
(e.g.(F))showsthedisplay [
ontheVCRdisplay. ;
..................................
Note:
The selected recording type is cancelled if the
VCR is turned off (stand-by mode) or if the
cassette tape is ejected.
If you wish to avoid recording
unwanted material
1Press the PAUSE/STILLbutton.
zTo continue recording, press the
PAUSER3TILL button or REC button.
Note:
If the record pause mode continues for about
five minutes, the VCR will automatically go
into the stop mode in order to prevent damage
to the tape
Recording one programme while
watching another
1Start recording thedesiredTV station
programme selected on the VCR.
zSelect on theTV receiver the TVstation
you want to watch.
If using the “AV connection”, set the TV
to the TV mode.
Quick Start Recording timer
Timer recording is simple.
You can start arecording and then
programme when the VCR will automatically
stop recording and go into stand-by mode.
1Press the REC button twice.
zSet the recording endtime by using REC
and CH (+ or-) buttons.
REC: Units of 30 minutes
CH +, -: Units of 1minute
●The timer indicator (~) will light after the
recording end time is set.
To stop the recording at any time, press the
STOP button.
Checking/Changing
When the REC button is pressed during Quick
Start Recording, the recording end time will
blink.
The recording end time can be changed by
pressing REC and CH (+ or -) buttons.
3
i
BASICOPERATION
-
o-9—
TYPE— -
sP/LP—“——INPUT
P&: [
STOP
Ill
ro record from an external
;ource
Mstepl,
‘ress the INPUT button.
‘Ll” is displayed instead of the
)rogramme position number.
UJDIO/VIDEOIN: “L1“
rapes
SP
LP
EP
leed
Bestimageandsound
quality.
Nodisolav.
Recordingorplaybacktimes
aredoubletheSPmode.
m
NTSCplaybackonly
m
Mis-erasure prevention eject
rhe cassette will automatically be
?jectedif recording is attempted
mavideo cassettewithout an
?rasure-preventiontab.
MItorewind
rhe VCRautomatically rewinds
:hetape when it reachesthe end.
rhis function does not operate
with timer recording or Quick
Start Recording timer.
Erasure-prevention tab
To prevent accidental erasure,
remove the tab after recording.
To record again, coverthehole
withvinyltape.

ON-SCREENOPERATION
o-9—
OK
TYPE~
sP/LP— J—‘INPUT
To record from an external
source
At step 3,
Pressthe INPUT button.
“LI° is displayed instead of the
programme position number.
AUDIO/VIDEO IN: “L1 “
If aprogramme position number
is already displayed, first press
the CLEARbutton.
Programme priority
If severaltimer recordings have
overlapping recording time, the
recording with the earliest start
time will be recorded first, until
the end.
1900 20:00 21:00 2200 23;00
@@z@l
These portions will not be recorded
TIMER RECORDING PROGRAMMING
&mp/e: Programme position.., 02
Date.., 25 December
Start time... 21:30
End time... 23:15
❑Turn cm the TVthen set it to the preset
video channel or AV mode (if using the
“AV connection”).
1F’ress the ~~~U/Tvbutton, then select
the TIMER PROGRAM SET using the CH
(+ or -) button.
MENU 01.12.98 16:15
I
~--z-rEEF----~-~-$~T--.$~T--.-.-.-.-.-.---::
PROGRAM CHECK /CLEAR
VCR SETUP
CLOCK SET
TAPE L1BRARV SYSTEM
2Press the OK button.
3Using the numeric buttons, set the
programme position number (e.g. 02)
If you entered awrong number, press the
CLEAR button to delete it, then enter the
correct number.
Recording tape speed setting
Press the SP/LP button repeatedly to display
the desired tape speed.
dUsing the numeric buttons, setthe date
(e.g. 25 12).
IPR DATE START END
02 z:$::’~ --:-- ..-:-- 9I
Daily/Weekly recording
Press the CH (+) button repeatedly to display
the desired recording mode.
M-F: for daily recording (Monday through
Friday)
WK: for weekly recording (the same
programme every week)
sSet the recording start andendtimes (e.g.
213023 15).
IPR DATE START END
................\
02 25.12 :zj.:aQ..z3.:I.$Y I
Setting the recording type
Press the TYPE button repeatedly until the
desired type is displayed.
IPR DATE START TYPE
01 25,12 21:30 ~=~=;
,1
~FILM+SPORT+DRAMA+ MUSIC +
;NEWS+ANIMA+EDUC. +GAME+
~THRIL+COMED
~When all the settings areas desired,
-“Q,,””!.”” !! .!0“
VCR is turned off (sta;djby mode) or if the
cassette tape is ejected.
~Insert avideo cassette with
7
erasure-prevention tab.
Make sure the tape is longer than the total
recording time.
Press the (!)/1button.
●The timer indicator (~) will light on the
VCR display and the VCR goes into
timer recording stand-by mode.
Confirmation/Cancelling
1Press the MENIJ/TV button, then select
the PROGRAM CHECWCLEAR using the
CH (+ or -) button.
MENU 01.12.96 16:15
TIMER PROGRAM SET
:.-PR~-R.AM.-.-c.H7~c.~gAR~;A;.-.-.;-.-.;
vCR SETUP
CLOCK SET
TAPE LIBRARY SYSTEM I
2Press the OK button.
●Programmed timer recordings are
listed.
Recording type confirmation
Press the TYPE button and the ‘TYPE”
column will be displayed instead of the “END
time column.
Press the TYPE button again to return to the
“END time column display.
●To correct aprogrammed timer recording,
first cancel it, then reprogramme it as desired.
●To cancel aprogrammed timer recording,
continue with step 3.
●To return to the normal TV broadcast
screen, press the MENUTW button.
3Using the CH (+ or -) button, select the
programme to cancel.
dPress the CLEAFt button.
sWhen finished, press the MENU/TV button.
Noteson timer recording
The (D) indicator will flash if no video
cassette is loaded when going into timer
stand-by mode.
The (D) indicator will flash and the video
cassette is ejected if avideo cassette with
no erasure-prevention tab is loaded.
Daily recording starting on a Saturday or
Sunday is not possible.
Even if atimer recording has been preset,
the VCR can be used as usual up to the
programmed start time. When finished
using the VCR, do not forget to return it to
14

TAPE LIBRARY SYSTEM 1ON-SCREENOPERATION
This function will list the tape recordings data
(Programme position number, date, recording
starl time, type). It can be used to easily find a
desired recording.
The recording type is only displayed if it has
been set before recording the programme.
Insert acassette tape recorded on this
VCR.
Press the MENWTV button, then select
the TAPE LIBRARY SYSTEM using the
CH (+ or -) button.
MENU 01.12.98 16:15
TIMER PROGRAM SET
PROGRAM CHECK ICLEAR
VCR SETUP
CLOCK SET
:.-~ApE.-LiBRBARAy.$ysTgM:::::::::::
EEr_J
Press the OK button.
●If the tape recordings data has already
been read, it will be displayed.
TAPE LIBRARY SYSTEM
PR DATE START TYPE
1.
2.
3.
4.
::
7.
[OK 1●START
Press the OK button one more time.
●The tape is rewound to the beginning
and the recordings data is read. Every
time aset of recording data is read it is
displayed on-screen.
●Up to 7sets of recording data can be
displayed on-screen at the same time
If 8or more sets of recording data are
read, the last 7sets only are displayed.
To cancel the operation, press the STOP button.
aWhen thedataforthe desired recording is
displayed, press the corresponding
numeric button (1 –7).
TAPE LIBRARY SYSTEM
PR DATE START TYPE
1. 02 24.09 16:00 -----
2. 03 06.10 11:50 FILM I
3. -- ----- --:-- -----
4. -- ----- --:-- -----
:: I
I;i-71 *SELECT I
●This message will be flashing
on-screen while the tape is rewound to
the beginning of the desired recording.
Playback will then start automatically.
\\ll l//
_NOW SEARCH IW_
PLEASE WAIT
~/ill\’
Notes:
●
●
●
●
●
●
This function can only be used with tapes
recorded by this VCR.
If arecording data cannot be read, “--” will
be displayed.
If atype has not been selected before
recording, “-----” will be displayed.
Recording data of recordings shorter than 5
minutes may not be displayed.
If the tape is unloaded or rerecorded, the
data will be cancelled.
If more than one search is made, starting
with the second search, the tape will be
completely rewound before it is
fast-forwarded to the desired recording.

ADVANCEDOPERATION
-.
=TAPE COPY
Q
sP/LP INPUT
REC
STOP
Copying (dubbing) atape can be done using
two video recorders, aplayback VCR and a
recording VCR.
Recording VCR
IPlayback VCR (Camcorder) I
1Camcorder VCR J
Recording VCR
~Insert avideo cassette with
1
2
erasure-prevention tab.
Press the INPUT button to select the
terminal used (external input mode).
●“L1” is displayed instead of the
programme position number.
To select the tape .smeed, txess the
SPILP button.
Playback VCR (Camcorder)
~Insert the recorded video cassette.
3Start playback.
Recording VCR
4
5
When the desired starting position is
reached, press the REC button to record.
When finished, press the STOP button on
the RECORDING VCR then on the
PLAYBACK VCR.
CAUTION:
The unauthorized recording of television
programmed, video tapes, films and other
such material may infringe upon copyright or
the rights of third parties.

TROUBLESHOOTING 6
Symptom Check points
POWER TROUBLE
No power ●The power cord is disconnected.
The remote control unit ●The batteries are low.
doesn’t operate
RECEIVER TROUBLE
No TV programmed ●Are the connections between your VCR and TV correct?
received ●Was tuning correctly preset?
Off the air reception on the ●The video channel setting of the TV receiver does not
VCR is Door correspond to the video channel presetting of the VCR.
PLAYBACK TROUBLE
Playback picture does not ●The video channel setting of the TV receiver does not
appear correspond to the video channel presetting of the VCR.
Interference in playback ●Adjust the tracking control.
picture .Dust or dirt on video heads. Take the VCR to an
Authorized Service Centre.
RECORDING TROUBLE
No recording .The erasure-prevention tab on the cassette has been
removed.
Timer recording is not .The starting day and time have not been set correctly.
possible ●The clock time is not set correctly.
●There has been a power interruption of more than 1hour.
Hi-Fi TROUBLE
Sound of aHi-Fi recorded .The tape might be defective.
ta~e drops out Use anew video cassette tape.
Repairs
This VCR is aprecision instrument and if treated with care will provide satisfactory
performance. However, in the event of difficulty, the owner is advised not to attempt to make
repairs or open the cabinet. Servicing should always be referred to your dealer or Authorized
Service Centre.
18

6SPECIFICATIONS
General
Video format: VHS PAL/NTSC 4.43
Television system: CCIR: 625 lines, PAL colour signals
TV channel storage capacity: 88 positions
Video heads:
Tape speed:
RF converter:
Converter output:
Timer indication:
Power failure backup:
Timer recording:
Power requirement:
Dimensions (W xHxD):
Weight:
Power consumption:
Electrical characteristics
Video input:
Video output:
Audio input:
Audio output:
Video SIN:
Horizontal resolution:
Hi-Fi audio
Audio recording system:
Frequency response:
Dynamic range:
Wow and flutter:
Channel separation:
2heads
●PAL
SP: 23.39 mm/see
LP: 11.70 mmls.ec
●NTSC (Playback only)
SP: 33.35 mm/see
LP: 16.67 mm/see
EP: 11.12 mm/see
Built-in UHF converter
28 – 69 (for Australia)
21 – 69 (for New Zealand)
24-hour indication
Approx. one hour
1year 6programmed with daily (Monday through Friday) and
weekly recording function
220-240 VAC, 50Hz
360 x97x 301 mm
Approx. 3.5 kg
20 W(in operation), less than 6W(stand-by mode)
0.5- 2.OVP-P, 75 i5ohms
1.0 +0.2 Vp-p, 75 f5ohms
–8.0 dBs, more than 47 kohms
–8.0 dBs, less than 2.2 kohms
More than 43 dB
More than 240 lines
VHS Hi-Fi system (2 tracks),
(Normal audio track is monaural)
20 Hz -20,000 HZ
More than 90 dB
Less than 0.005% (WRMS)
More than 60 dB
Appearance and specifications are subject to change without notice.
Automatic head-cleaning system
This VCR is equipped with an automatic head-cleaning system which automatically cleans
the heads every time acassette is loaded or unloaded. However this system cannot
completely clean the VCR heads and if during playback noise appears in the picture, it is
recommended to have the heads cleaned professionally by an Authorized Service Centre.
s* o
1AC6P1 PI 834--
AP2HN/A2, NZ2 (0698 KP-SJC)
SANYO Electric Co., Ltd.
Printed in Indonesia
Other manuals for VHR-850
1
Table of contents
Other Sanyo VCR System manuals

Sanyo
Sanyo SRC-850A User manual

Sanyo
Sanyo VHR-VX600 User manual

Sanyo
Sanyo VHR-H531 User manual

Sanyo
Sanyo VHR-610 User manual

Sanyo
Sanyo VHR-M341 User manual

Sanyo
Sanyo VHR-330EV User manual

Sanyo
Sanyo VHR-H601 User manual

Sanyo
Sanyo HR-VX200 Manual

Sanyo
Sanyo VHR-VK210P User manual

Sanyo
Sanyo VHR-VK310A User manual