FEATURES
TIMER/CLOCK
œSelectable standard/daylight saving time
œ1-year/8-event program timer with daily/weekly settings
œSmart Speed Record function
œRemaining tape duration display
œQuick timer recording (QTR)
œOff timer (up to 6 hours)
AUDIO/VIDEO
œVHS Hi-Fi stereo audio recording and playback
œMTS stereo/second audio program (SAP) recording and
playback
œDigital picture control
SPECIAL PLAYBACK/SEARCH
œAd JUMPTM
œRecording contents on-screen list (Rec. List Super)
œDouble-Azimuth 4-head video recording/playback system for
clean special playback:
Forward/reverse search, double-speed playback, clean still
image, frame advance, variable-speed slow motion
œZero search
œIndex search
AUTOMATIC FUNCTIONS
œAutomatic clock setting and adjustment
œAutomatic head cleaner
œEndless playback
œAutomatic digital tracking
œAutomatic channel programming
œFull auto playback functions: power-on, rewind, eject, record
auto cancel, power-off eject
GENERAL
œMultilanguage, multicolor on-screen menu
œRemote control
œVibration-suppressing mid-mount design
œChild lock
œFront/rear audio/video inputs
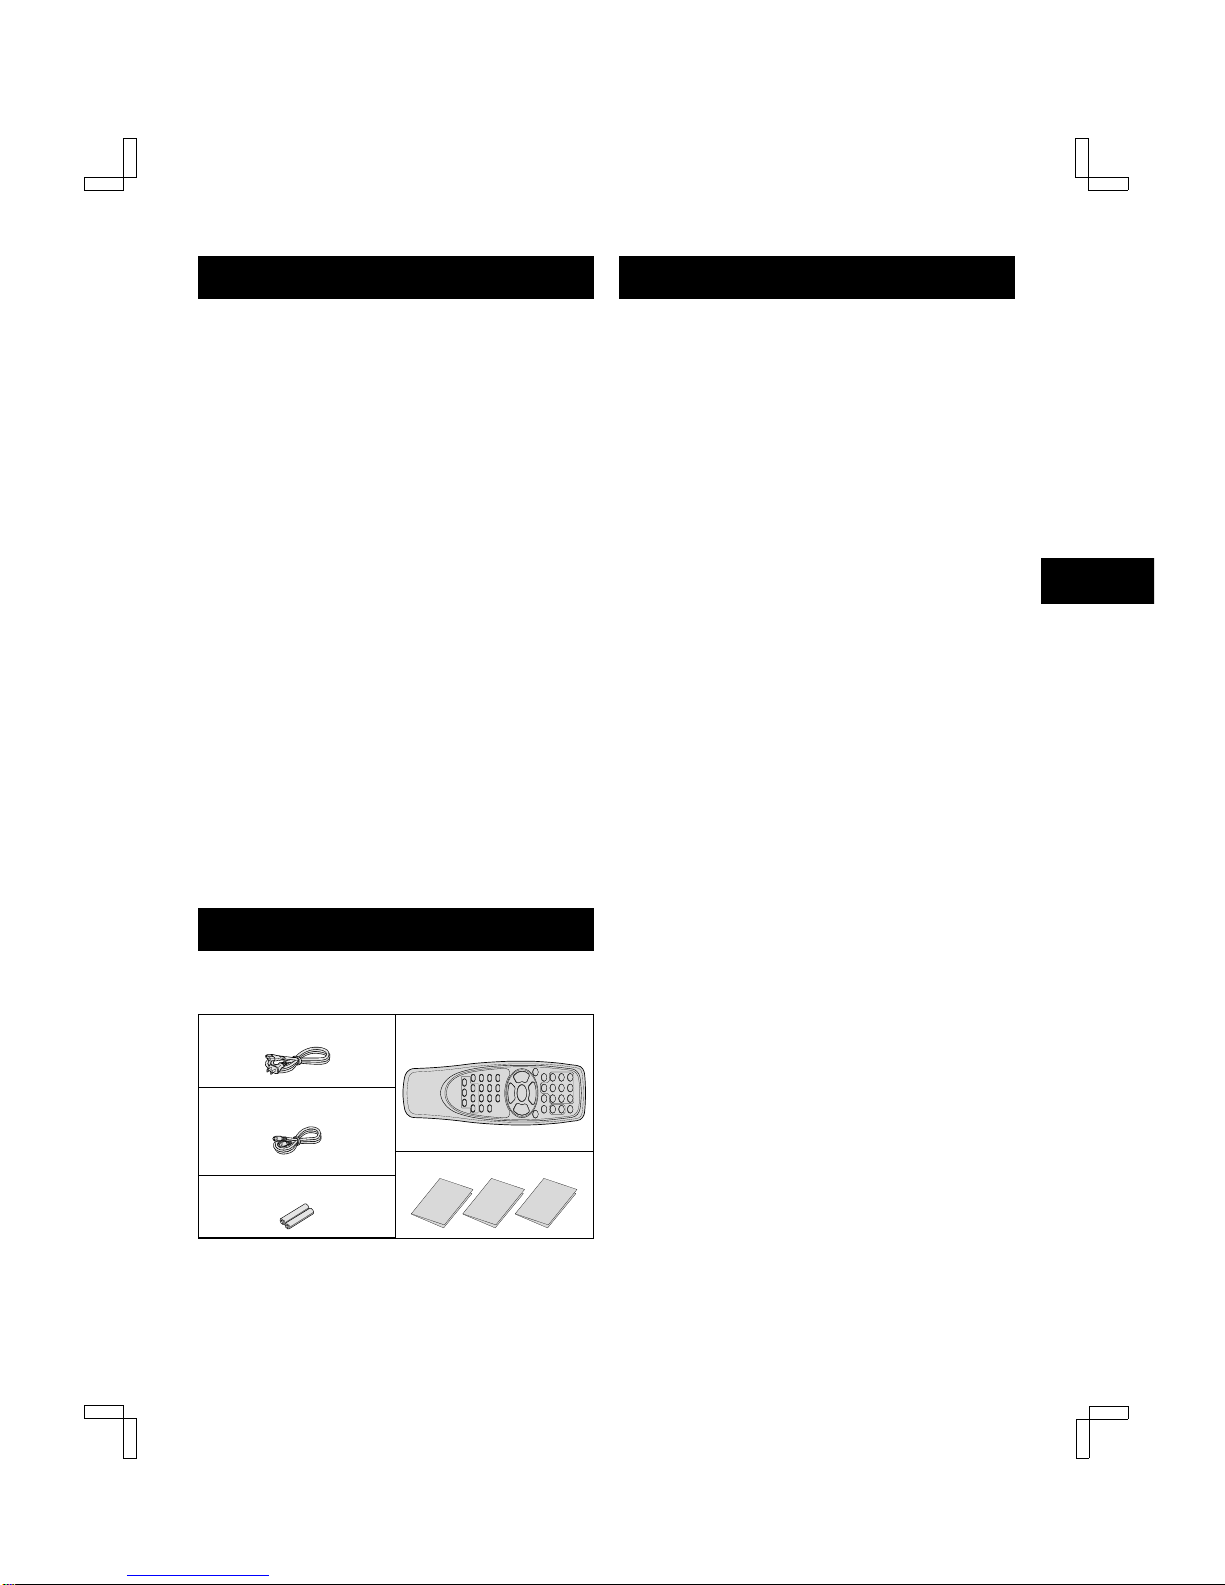
ACCESSORIES
Make sure that all the accessories listed below have been
included with your VCR.
Power cord Remote control
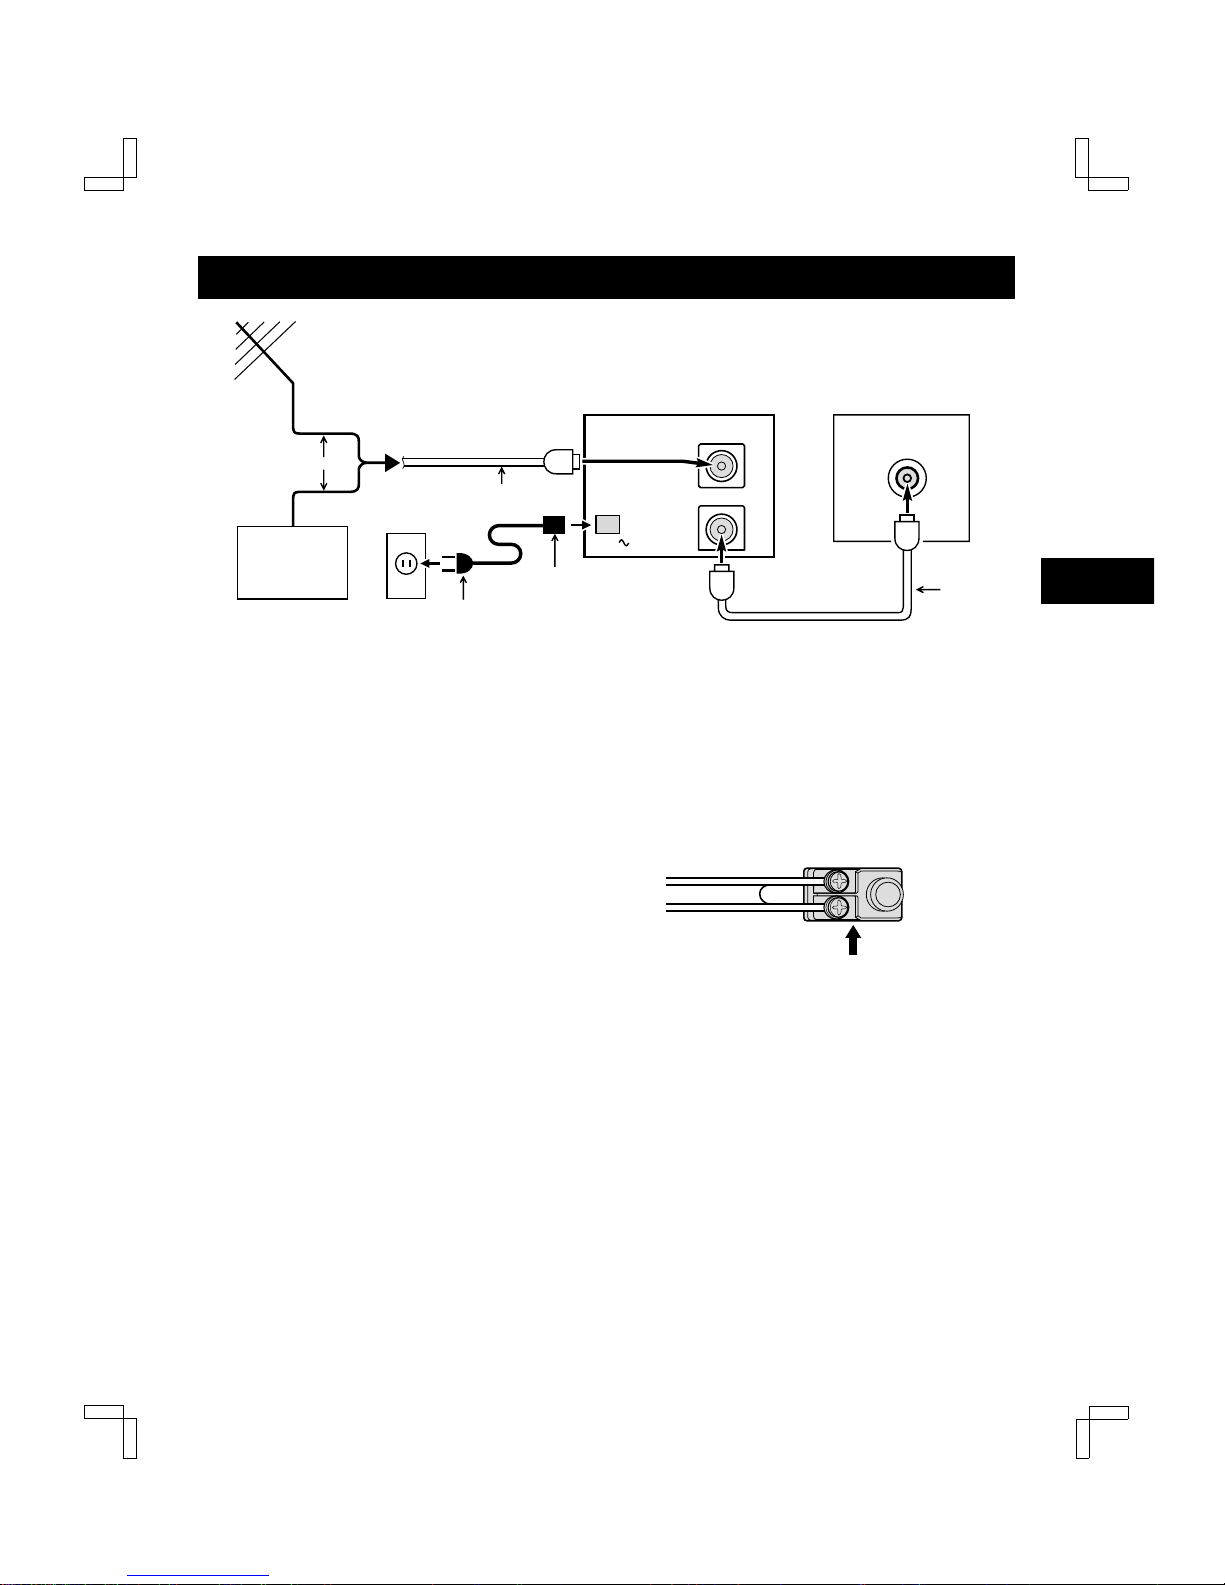
75-ohm coaxial cable
Quick Start Guide
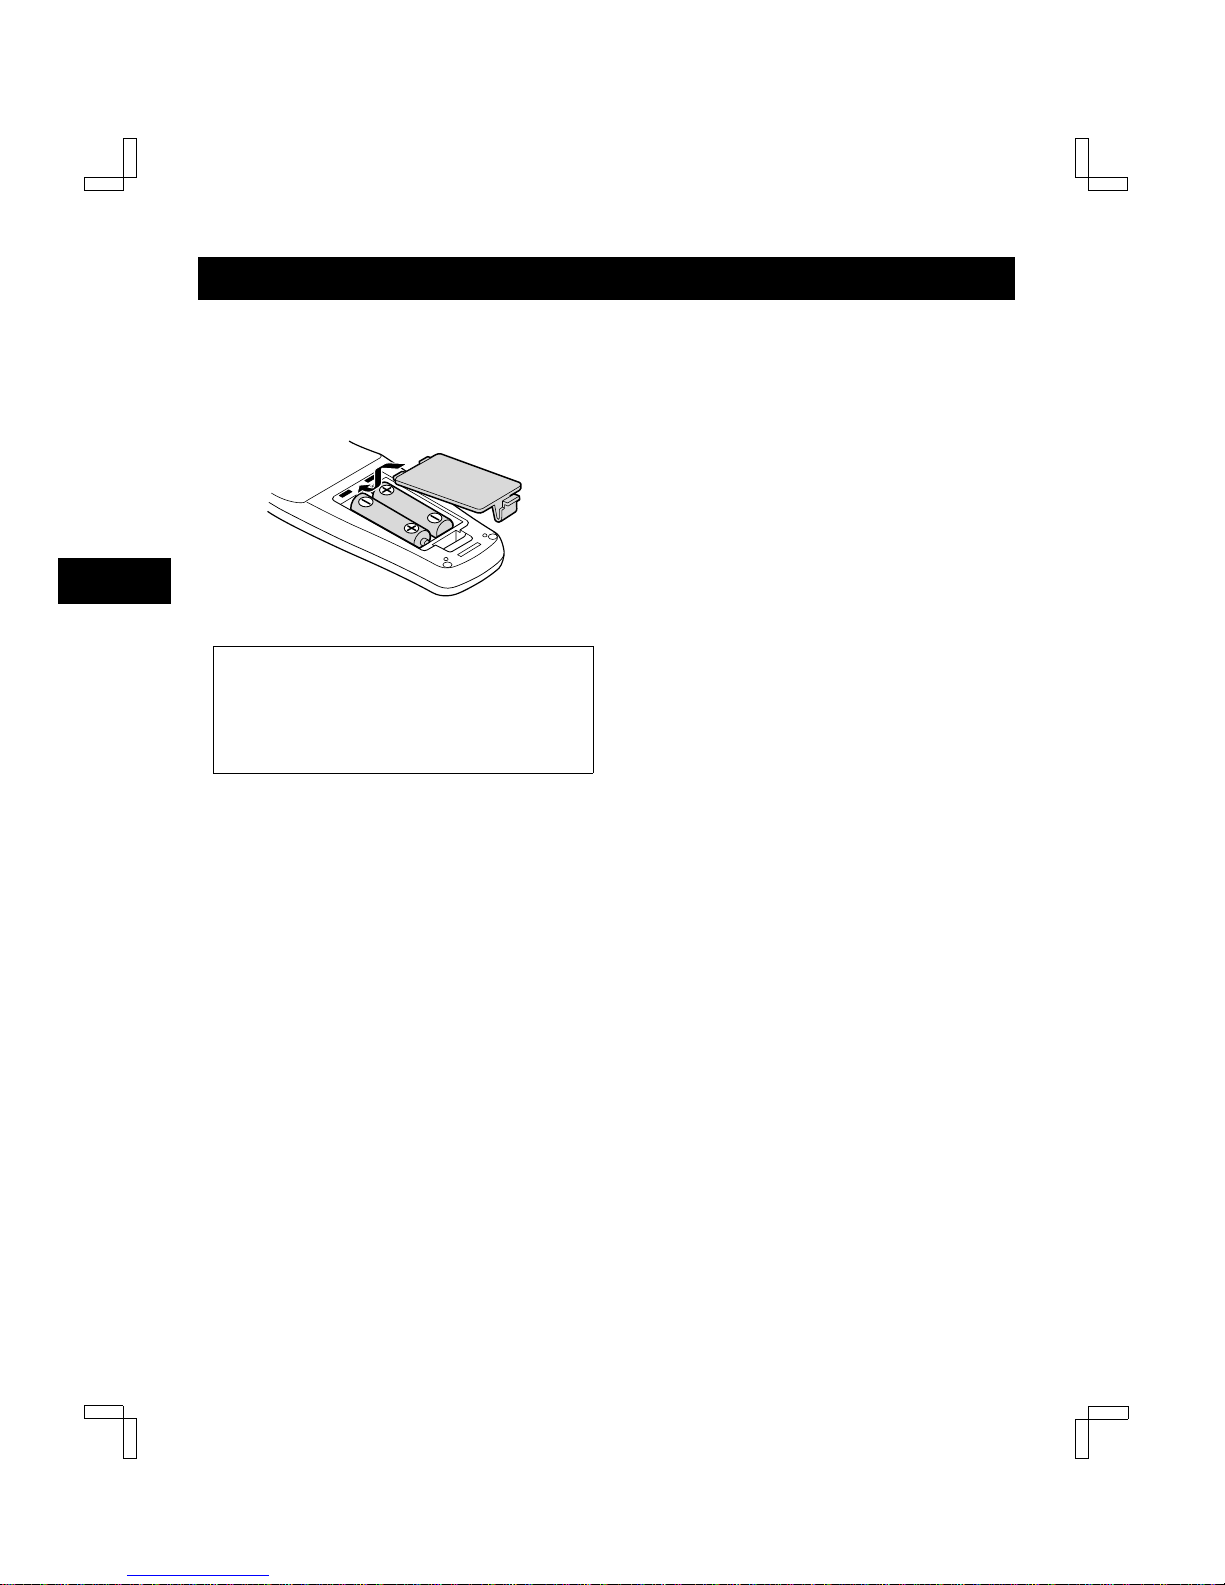
Two AA batteries (1.5 volt)
CONTENTS
Precautions. . . . . . . . . . . . . . . . . . . . . . . . . . . . . . . . . . . 1
Features . . . . . . . . . . . . . . . . . . . . . . . . . . . . . . . . . . . . . 2
Accessories. . . . . . . . . . . . . . . . . . . . . . . . . . . . . . . . . . . 2
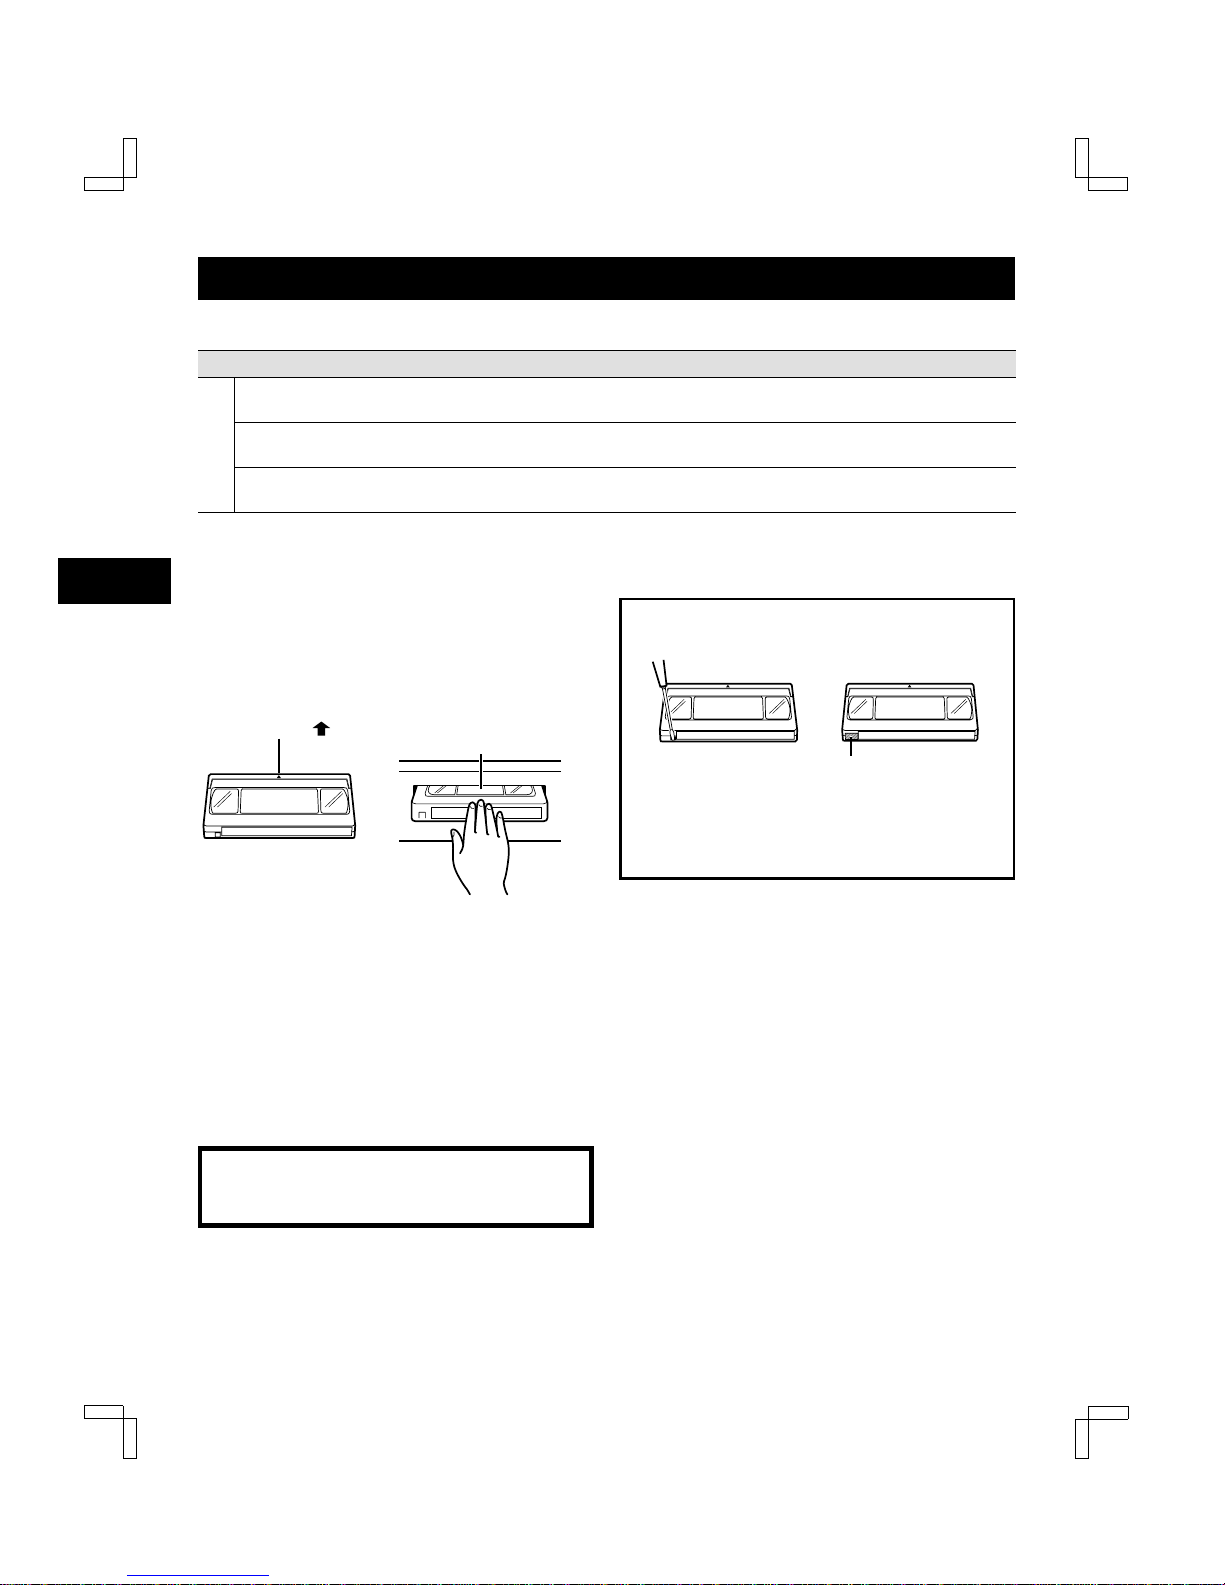
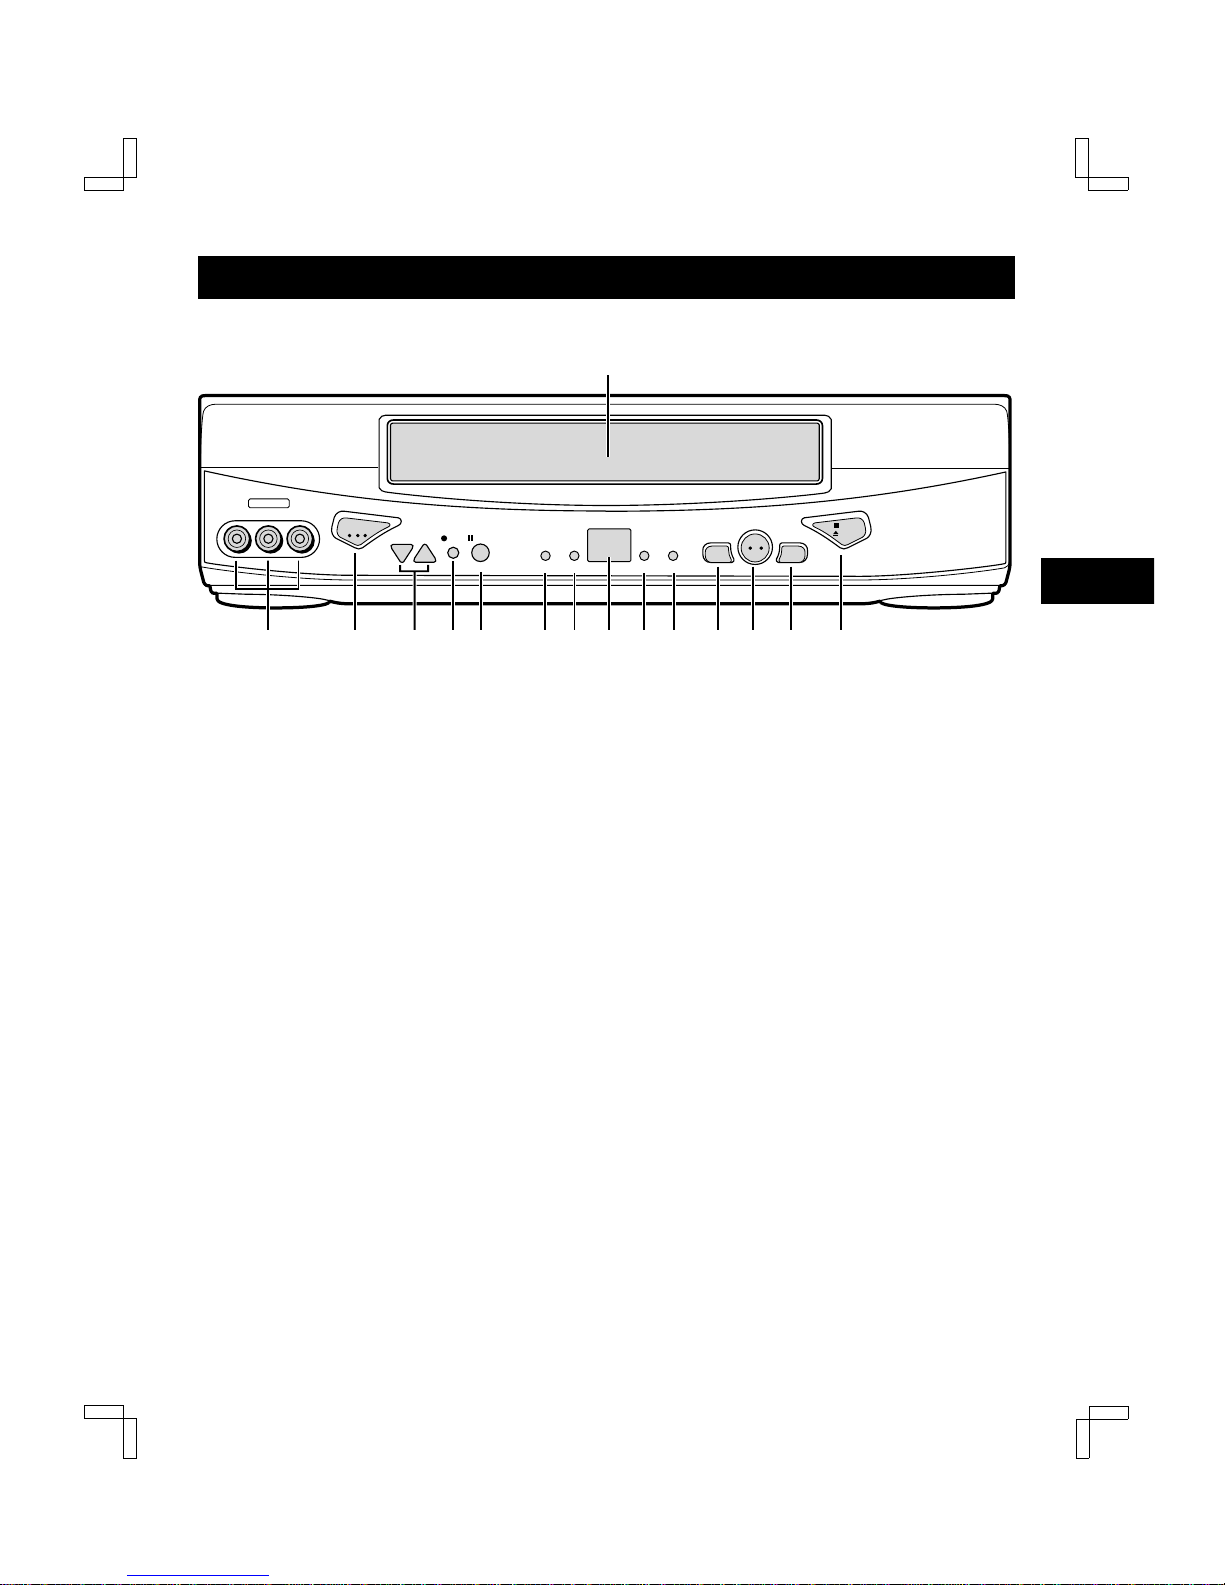
DESCRIPTION
VHS video cassette tapes . . . . . . . . . . . . . . . . . . . . 3
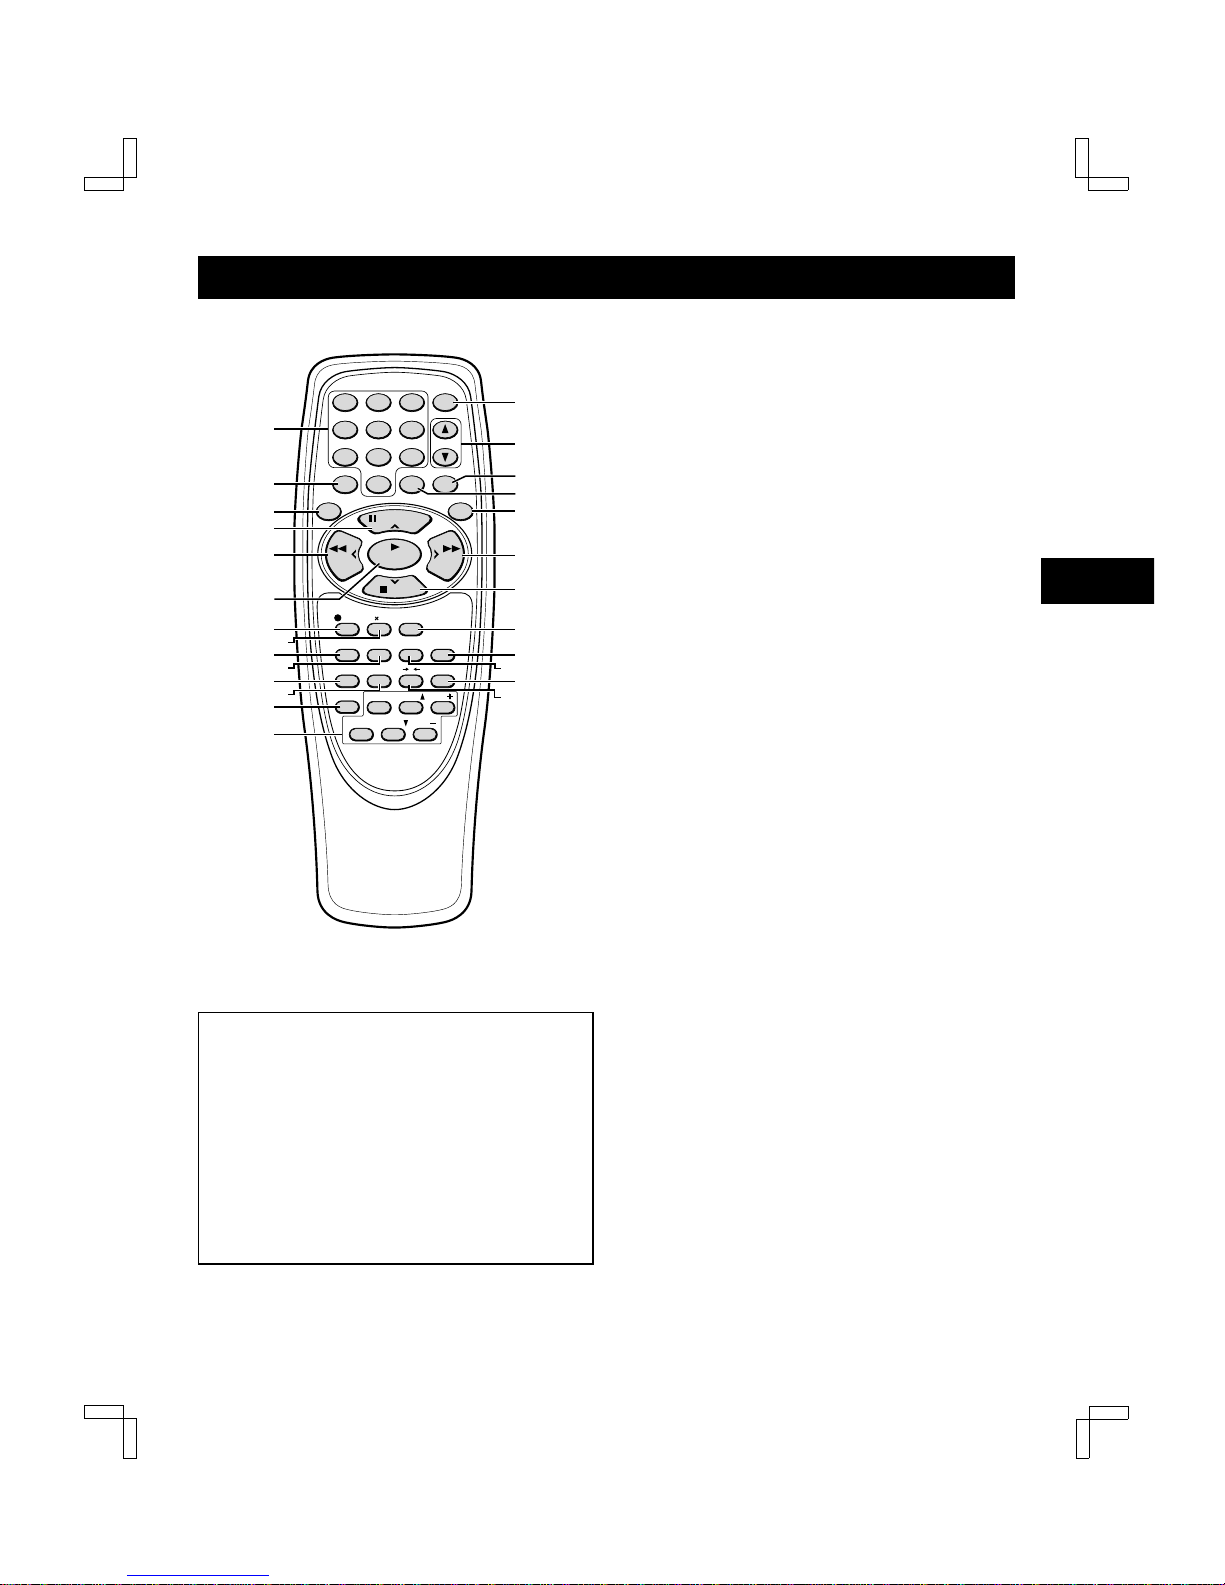
Locations of controls and indicators. . . . . . . . . . . . . 4
Remote control. . . . . . . . . . . . . . . . . . . . . . . . . . . . . 6
CONNECTIONS
Basic antenna/cable connections. . . . . . . . . . . . . . . 8
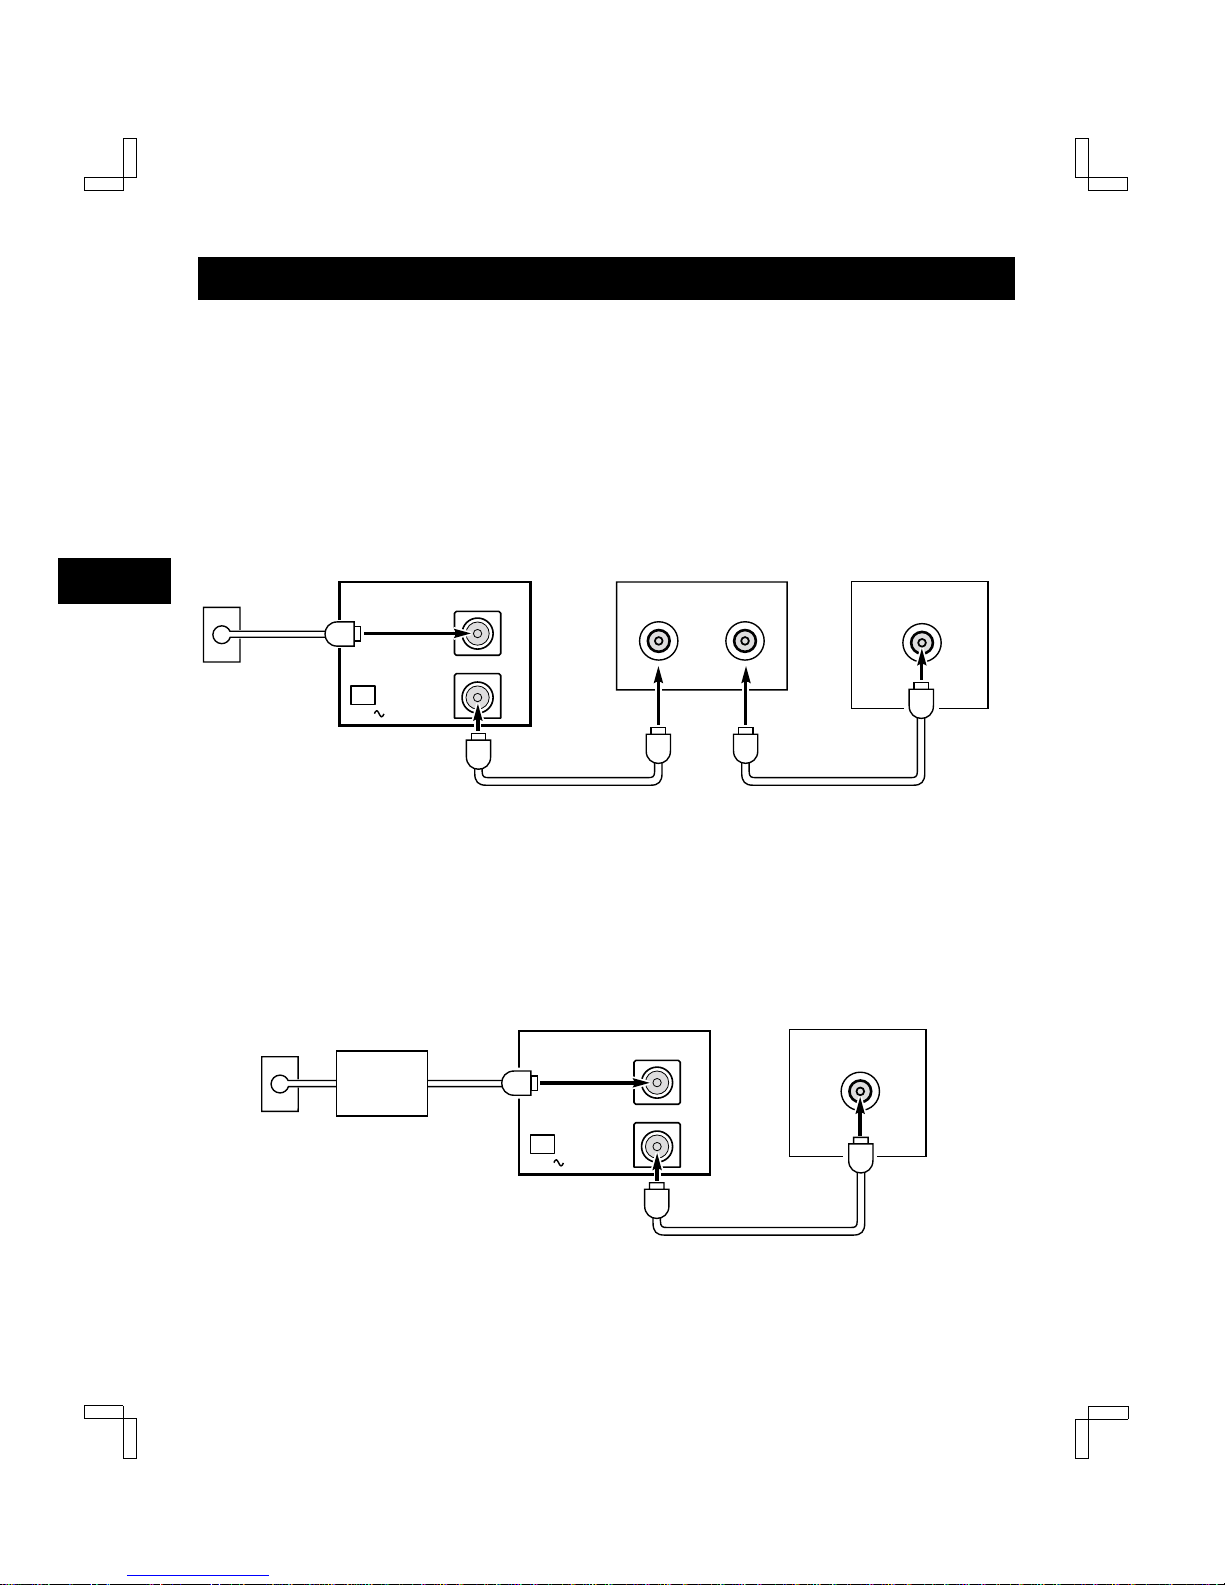
Alternative cable TV connections. . . . . . . . . . . . . . . 9
Audio/video connections . . . . . . . . . . . . . . . . . . . . 11
BASIC OPERATION
Initial setup . . . . . . . . . . . . . . . . . . . . . . . . . . . . . . . 12
Multifunction on-screen displays . . . . . . . . . . . . . . 14
On-screen menu. . . . . . . . . . . . . . . . . . . . . . . . . . . 15
Setting the clock. . . . . . . . . . . . . . . . . . . . . . . . . . . 17
Changing the menu language . . . . . . . . . . . . . . . . 19
Programming channels . . . . . . . . . . . . . . . . . . . . . 19
Viewing TV only . . . . . . . . . . . . . . . . . . . . . . . . . . . 20
Playing a rental tape. . . . . . . . . . . . . . . . . . . . . . . . 20
Normal playback. . . . . . . . . . . . . . . . . . . . . . . . . . . 21
Tracking control . . . . . . . . . . . . . . . . . . . . . . . . . . . 22
Recording. . . . . . . . . . . . . . . . . . . . . . . . . . . . . . . . 23
Rec. List super . . . . . . . . . . . . . . . . . . . . . . . . . . . . 25
ADVANCED USE
VHS Hi-Fi audio and MTS broadcasts . . . . . . . . . . 27
Audio output mode . . . . . . . . . . . . . . . . . . . . . . . . . 28
Special playback . . . . . . . . . . . . . . . . . . . . . . . . . . 29
Zero search . . . . . . . . . . . . . . . . . . . . . . . . . . . . . . 30
Index search. . . . . . . . . . . . . . . . . . . . . . . . . . . . . . 30
Program timer recording. . . . . . . . . . . . . . . . . . . . . 31
Quick timer recording (QTR) . . . . . . . . . . . . . . . . . 34
Child lock . . . . . . . . . . . . . . . . . . . . . . . . . . . . . . . . 35
Ad JUMPTM . . . . . . . . . . . . . . . . . . . . . . . . . . . . . . . 35
Copying a tape . . . . . . . . . . . . . . . . . . . . . . . . . . . . 36
Maintenance . . . . . . . . . . . . . . . . . . . . . . . . . . . . . . . . . 36
Troubleshooting guide . . . . . . . . . . . . . . . . . . . . . . . . . 37
Specifications . . . . . . . . . . . . . . . . . . . . . . . . . . . . . . . . 38
Quick Start Guide
xxxxxxx xxx xxxx xxx xxx xxx xxx x
xxxxxxxxx xxxx x xx xxxxx xxxxxx
xxxx
xxxxxxx xxx xxxx xxx xxx xxx xxx x
xxxxxxxxx xxxx x xx xxxxx xxxxxx
xxxx xxx xxx
xxxxxxx xxx xxxx xxx xxx xxx xxx x
xxxxxxxxx xxxx x xx xxxxx xxxxxx
xxxxxx xxxxxxxxxxxx
xxxxxxx xxx xxxx xxx xxx xxx xxx x
xxxxxxxxx xxxx x xx xxxxx xxxxxx
xxxx
Guía rápida
xxxxxxx xxx xxxx xxx xxx xxx xxx x
xxxxxxxxx xxxx x xx xxxxx xxxxxx
xxxx
xxxxxxx xxx xxxx xxx xxx xxx xxx x
xxxxxxxxx xxxx x xx xxxxx xxxxxx
xxxx xxx xxx
xxxxxxx xxx xxxx xxx xxx xxx xxx x
xxxxxxxxx xxxx x xx xxxxx xxxxxx
xxxxxx xxxxxxxxxxxx
xxxxxxx xxx xxxx xxx xxx xxx xxx x
xxxxxxxxx xxxx x xx xxxxx xxxxxx
xxxx
Guide simplifié d’utilisation
xxxxxxx xxx xxxx xxx xxx xxx xxx x
xxxxxxxxx xxxx x xx xxxxx xxxxxx
xxxx
xxxxxxx xxx xxxx xxx xxx xxx xxx x
xxxxxxxxx xxxx x xx xxxxx xxxxxx
xxxx xxx xxx
xxxxxxx xxx xxxx xxx xxx xxx xxx x
xxxxxxxxx xxxx x xx xxxxx xxxxxx
xxxxxx xxxxxxxxxxxx
xxxxxxx xxx xxxx xxx xxx xxx xxx x
xxxxxxxxx xxxx x xx xxxxx xxxxxx
xxxx
SC4HW/NA (VHR-H530 GB) Fri. Jan., 07/2000
2