SATA 97204 User manual

重型手动黄油枪 600CC
Heavy Duty Grease Gun 600cc
Schmierfett aus dem Fass hinzufügen
Заполнение смазкой в бочках
통 포장 그리스 주입
Adicionar a graxa de barril
缶詰グリースを注入する
Agregación de grasa en barril
97204
使用说明书 \ User's Manual \ Bedienungsanleitung \ Инструкция по эксплуатации
사용설명서 \ Manual de instruções \ 取扱説明書 \ Manual del uso
中文 EN DE RU KO PT JA ES


中文 EN DE RU KO PT JA ES
97204
3
加装桶装黄油:
1)旋开油枪头与枪筒分开。
2)将油枪后部从动把手,完全拉至枪筒底部,然后向边侧倾斜拉入油枪管底部的锁定装置。
3)把桶装黄油盖旋下,将桶装黄油完全放入枪筒内,撕开筒装黄油另一端封口。
4)拧上枪头但不要太紧。按住枪筒尾部的锁定片将从动把手直着推入枪筒内。
5)空载状态下将从动把手拉至底部再推回原位,这样反复几次,直到压出黄油为止。
6)旋紧枪筒,推动从动把手进入筒内。
★务必保证黄油筒的底部插入到黄油筒内,且黄油筒边缘没有损伤或挤压。否则黄油筒橡胶塞无法插
入黄油筒内,黄油无法挤出。如果这种情况发生,请纠正上述错误,只有以上事情都纠正,黄油枪才
能打开黄油。
★切记不要再次使用已经使用过的空油桶。
★在油枪中适当加入一些黄油或其它润滑油将有助于黄油枪的使用和润滑。
注意:
枪头滤网是防止在油枪的重复使用过程中,以免进入颗粒,导致油枪损坏。
枪头
枪身

中文 EN DE RU KO PT JA ES
97204
4
加装散装黄油:
1)旋开油枪头与枪筒分开。
2)将油枪头一头浸入黄油筒,一手紧抓黄油枪,一手从后拉从动杆,确保油枪开口始终浸在油里面,避
免空气进入。
3)装上油枪头,按住枪筒尾部的锁定片将从动把手推入枪筒内。
铁心拉柄
枪身
黄油弹
橡胶塞

中文 EN DE RU KO PT JA ES
97204
5
出现问题的情况:
问题 :黄油枪操作正常油口并无黄油排出
原因 :黄油枪内含有空气,形成空打现象,导致黄油无法排出。
解决方法:
1)将从动把手向后拉至枪筒尾部的适当位置,一手按住枪头上的排气孔,一手按下枪管尾部的锁定片将
铁心拉柄推入枪身内。
2)或将从动把手向后拉至枪筒尾部的适当位置 ,将枪头和枪筒拧松,按下枪筒尾部的锁定片将铁心拉柄
推入枪身内。
3)试打几次黄油枪,如果还打不出黄油,再反复做以上动作 2-3 次,直到目视黄油正常排出。
4)锁紧枪头及枪筒。
5)轻轻按下排气按钮,直到出油后方可松手。
#此种现象在散装黄油使用时较普遍发生
问题 : 黄油枪出油口之配件锁合处有漏油现象
原因 :配件未适度锁紧
解决方法:
1)黄油枪出油口之牙纹为斜度牙,为优良之特殊防漏设计,其旋入为越深入锁合越能发挥防漏功能。
2)以上工具适度锁紧配件,勿仅以手力锁合,将可发挥优良之防漏功能。
散装黄油桶

中文 EN DE RU KO PT JA ES
97204
6
Injection of barreled grease:
1)Disconnect the grease gun coupler and gun tube.
2)Pull the driven handle at tail of grease gun to the bottom of the gun tube. Then, pull the driven handle to the locking
device at the bottom of the gun tube slantingly.
3)Remove the cover of the barreled grease, put the barreled grease in the gun tube and tear the seal of the barreled
grease at the other end.
4)Install the gun coupler not in tight way. Press the locking sheet on the tail of gun tube and directly push the driven
handle into the gun tube.
5)In no load state, pull the driven handle to the bottom and then push it into original position. Repeat the operation several
times until the grease is squeezed out.
6)Tighten the gun tube and push the driven handle into the gun tube.
★Make sure to push the bottom of grease barrel into the grease barrel and prevent from damage or squeezing of
grease barrel edge. Otherwise, the rubber piston of grease barrel cannot enter the grease barrel and the grease cannot
be squeezed out. In this case, please correct above operation. Only after correction of above wrong operation, the
grease gun can squeeze out the grease.
★Never reuse empty grease barrel that has been used.
★Addition of a little grease or other lubricating oils in the grease gun is good for use and lubrication of grease gun.
Notice:
the coupler strainer is installed to prevent from foreign matters entering the gun during repeated using of grease
gun, resulting in damage of grease gun.
Gun coupler
Gun body

中文 EN DE RU KO PT JA ES
97204
7
Injection of bulk grease:
1)Disconnect the grease gun coupler and gun tube.
2)Immerse the grease gun coupler into grease barrel. Tightly hole the grease gun by one hand. Pull the driven handle from
back side by other hand to ensure that the grease gun coupler is always immersed in the grease to avoid the air
entering.
3)Install the grease gun coupler. Press the locking sheet at the tail of gun tube and push the driven handle into the gun
tube.
Iron core handle
Gun body
Grease cartridge
Rubber piston

中文 EN DE RU KO PT JA ES
97204
8
Troubleshooting:
Problem: the grease gun is normally operated, but there is no grease squeezed out.
Reason: the grease gun has air, which causes empty injection phenomenon. Therefore, the grease cannot be squeezed out.
Solution:
1)Pull the driven handle to proper position at tail of the gun tube. Press the exhaust vent of the gun coupler by one hand,
press the locking sheet at tail of the gun tube by the other hand, and push the iron core handle into the gun body.
2)Pull the driven handle to proper position at tail of the gun tube. Loosen the gun coupler and gun tube. Press the locking
sheet at tail of the gun tube and push the iron core handle into the gun body.
3)Try to operate the grease gun several times. If no grease is squeezed out, repeat above steps 2 to 3 times until the
grease is normally squeezed out.
4)Tightly lock the gun coupler and gun tube.
5)Gently press the exhaust button until the grease is squeezed out.
#This phenomenon is more common during injection of the bulk grease.
Problem: there is grease leakage phenomenon at fitting locking position of outlet of grease gun.
Reason: the fittings aren't tightened properly.
Solution:
1)The thread of outlet of the grease gun is oblique thread which is the excellent anti-leakage design. If the thread enters
deeper, the anti-leakage function will be better.
2)Use relevant tool to tighten the fittings. Don't tighten only by hand. Only in this way, its excellent anti-leakage function
can be fully realized.
Bulk grease barrel

中文 EN DE RU KO PT JA ES
97204
9
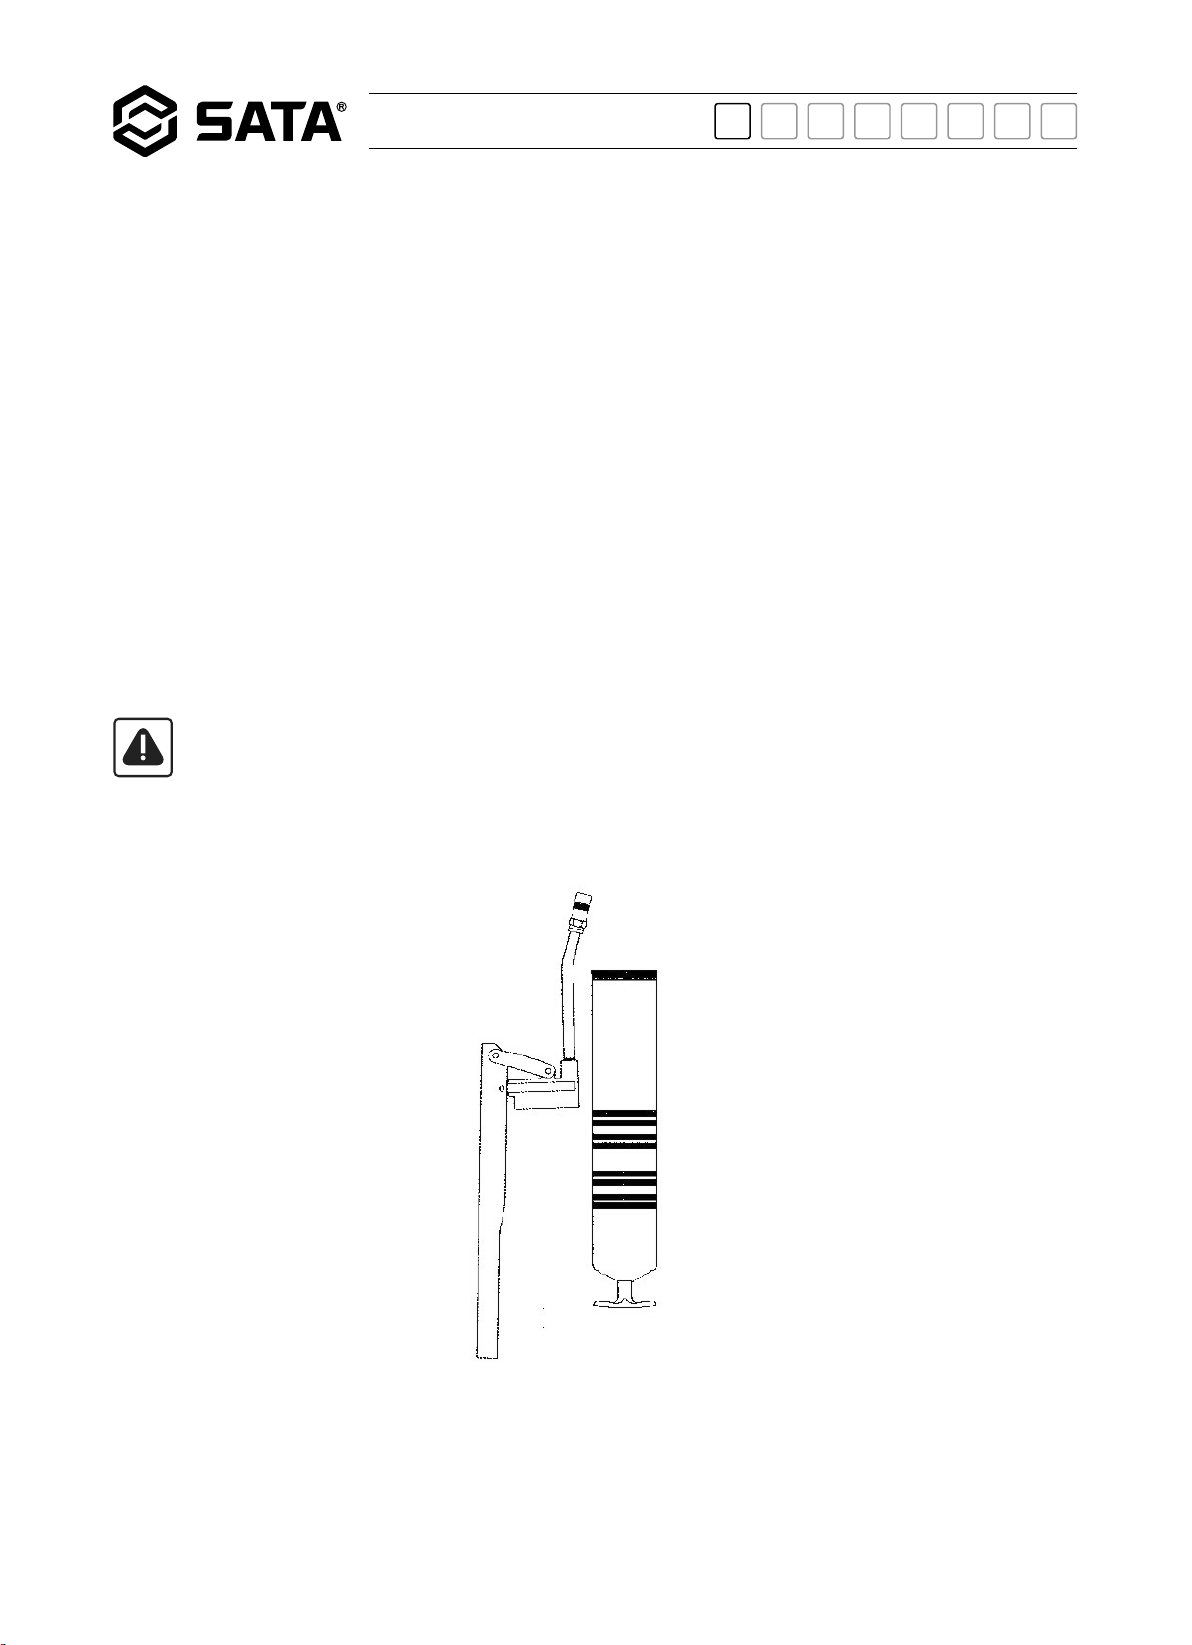
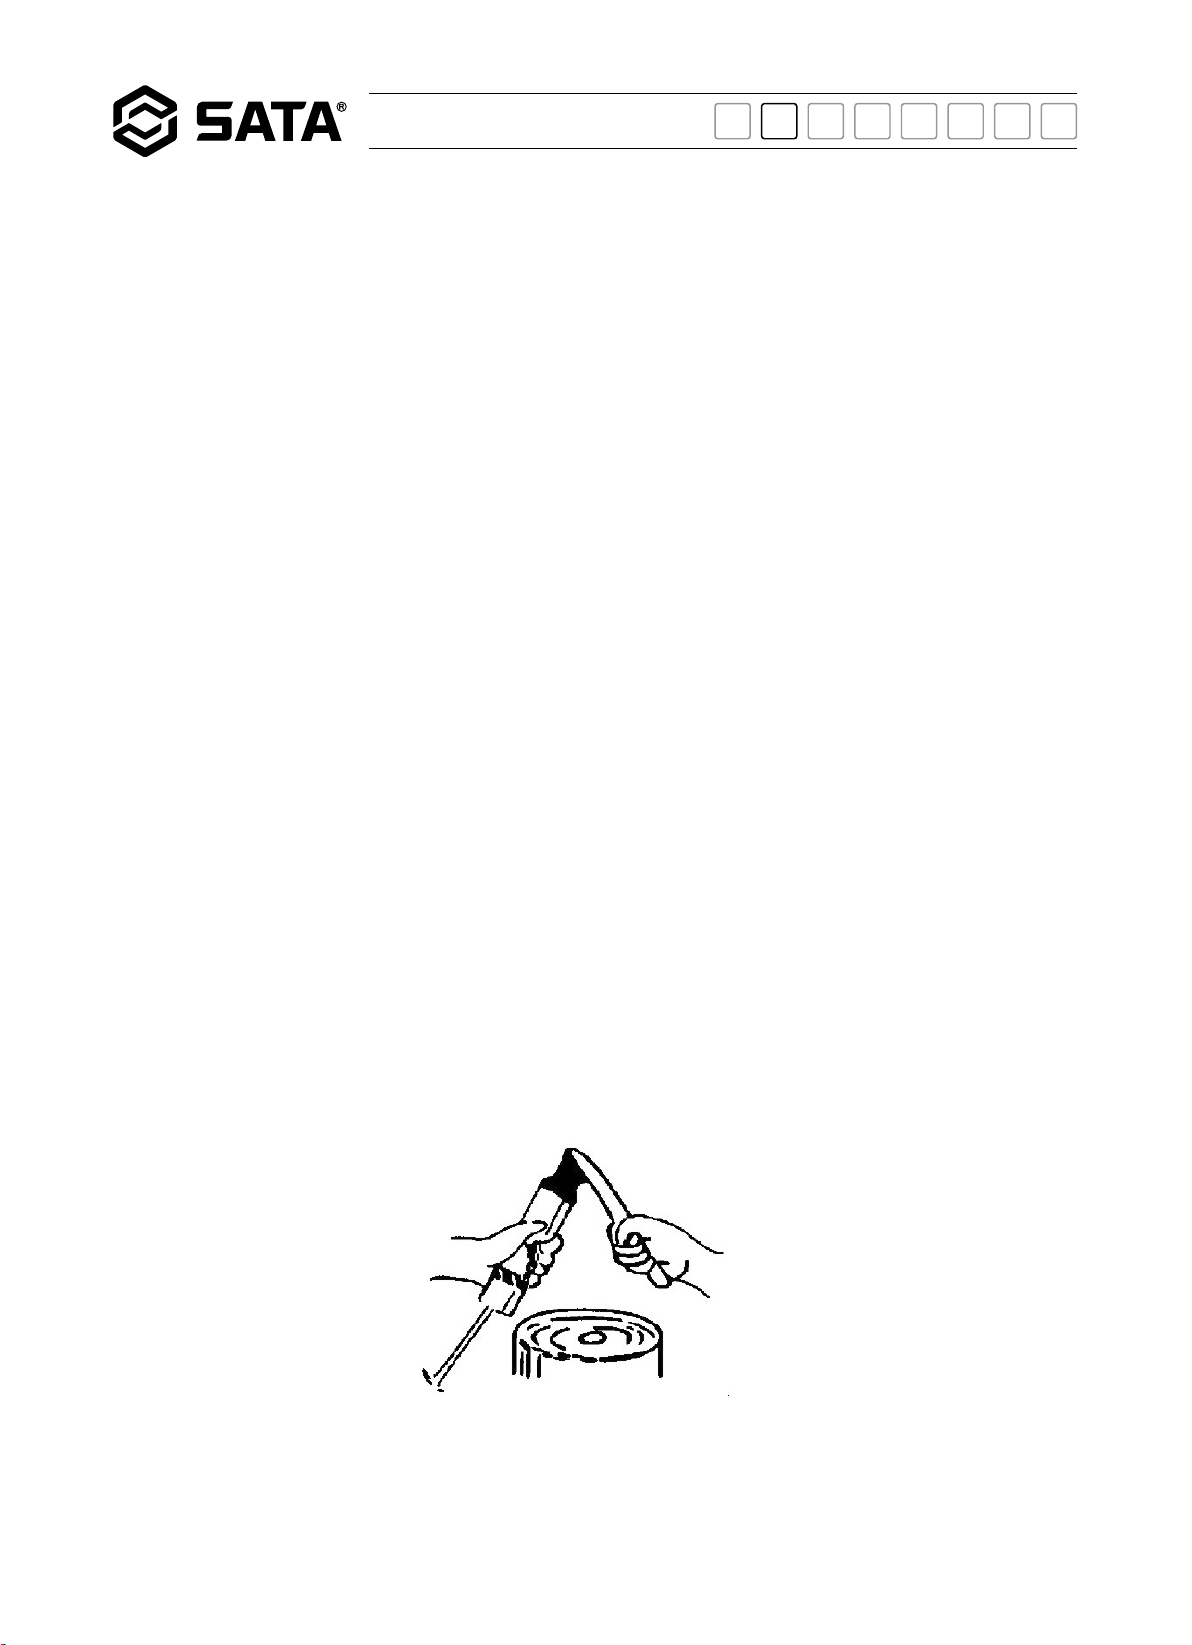
Schmierfett aus dem Fass hinzufügen:
1)Schrauben Sie den Pressenkopf von dem Lauf ab.
2)Ziehen Sie den Mitnehmergriff im Hinterteil der Schmierfettpresse vollständig an der Unterseite des Laufs und ziehen
Sie ihn dann zur Seite, um die Verriegelung an der Unterseite des Laufs zu ziehen.
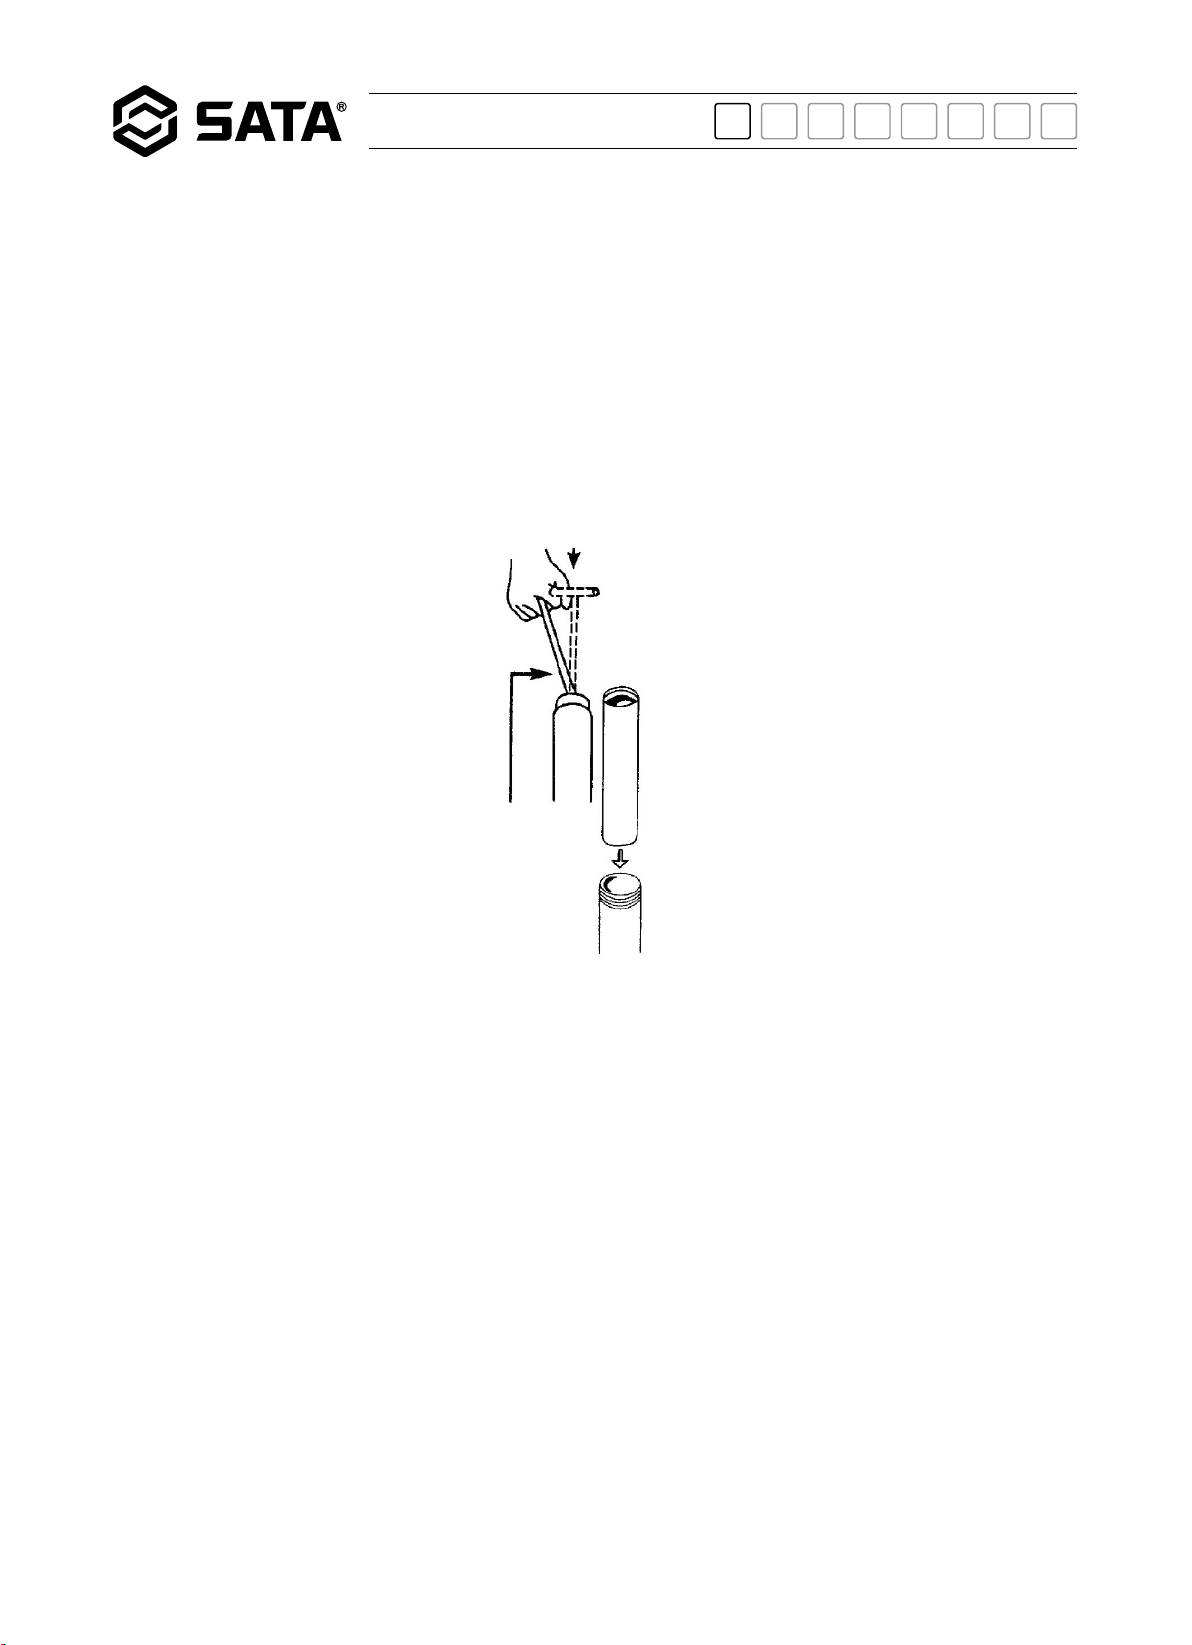
3)Lösen Sie den Fassdeckel des Schmierfetts und setzen Sie das Schmierfett vollständig in den Lauf. Reißen Sie das
andere Ende des Schmierfettfasses.
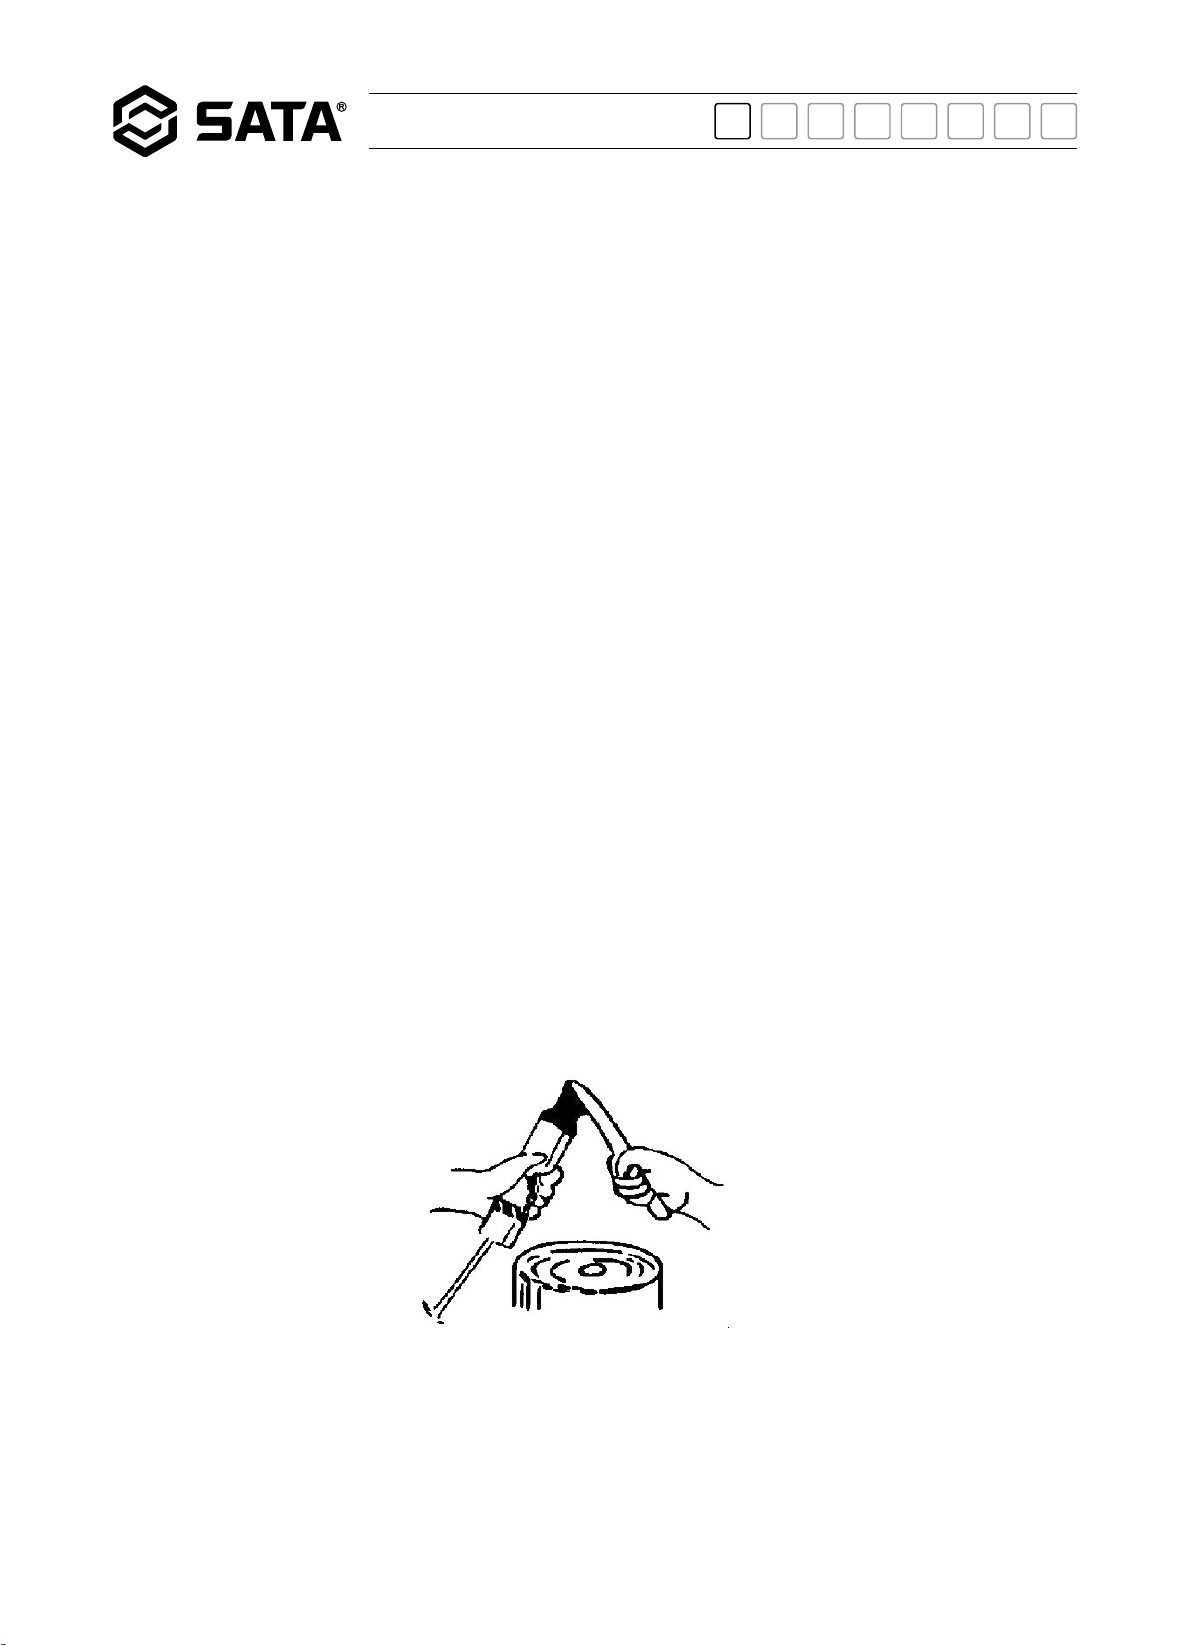
4)Schrauben Sie die Spitze fest, aber nicht zu fest. Drücken Sie auf die Verriegelungslasche am Ende des Laufs und
schieben Sie den Griff gerade in den Lauf.
5)Ziehen Sie im Leerlauf den Mitnehmergriff nach unten und schieben Sie sie wieder in die ursprüngliche Position.
Wiederholen Sie diesen Vorgang mehrmals, bis das Schmierfett herausgedrückt ist.
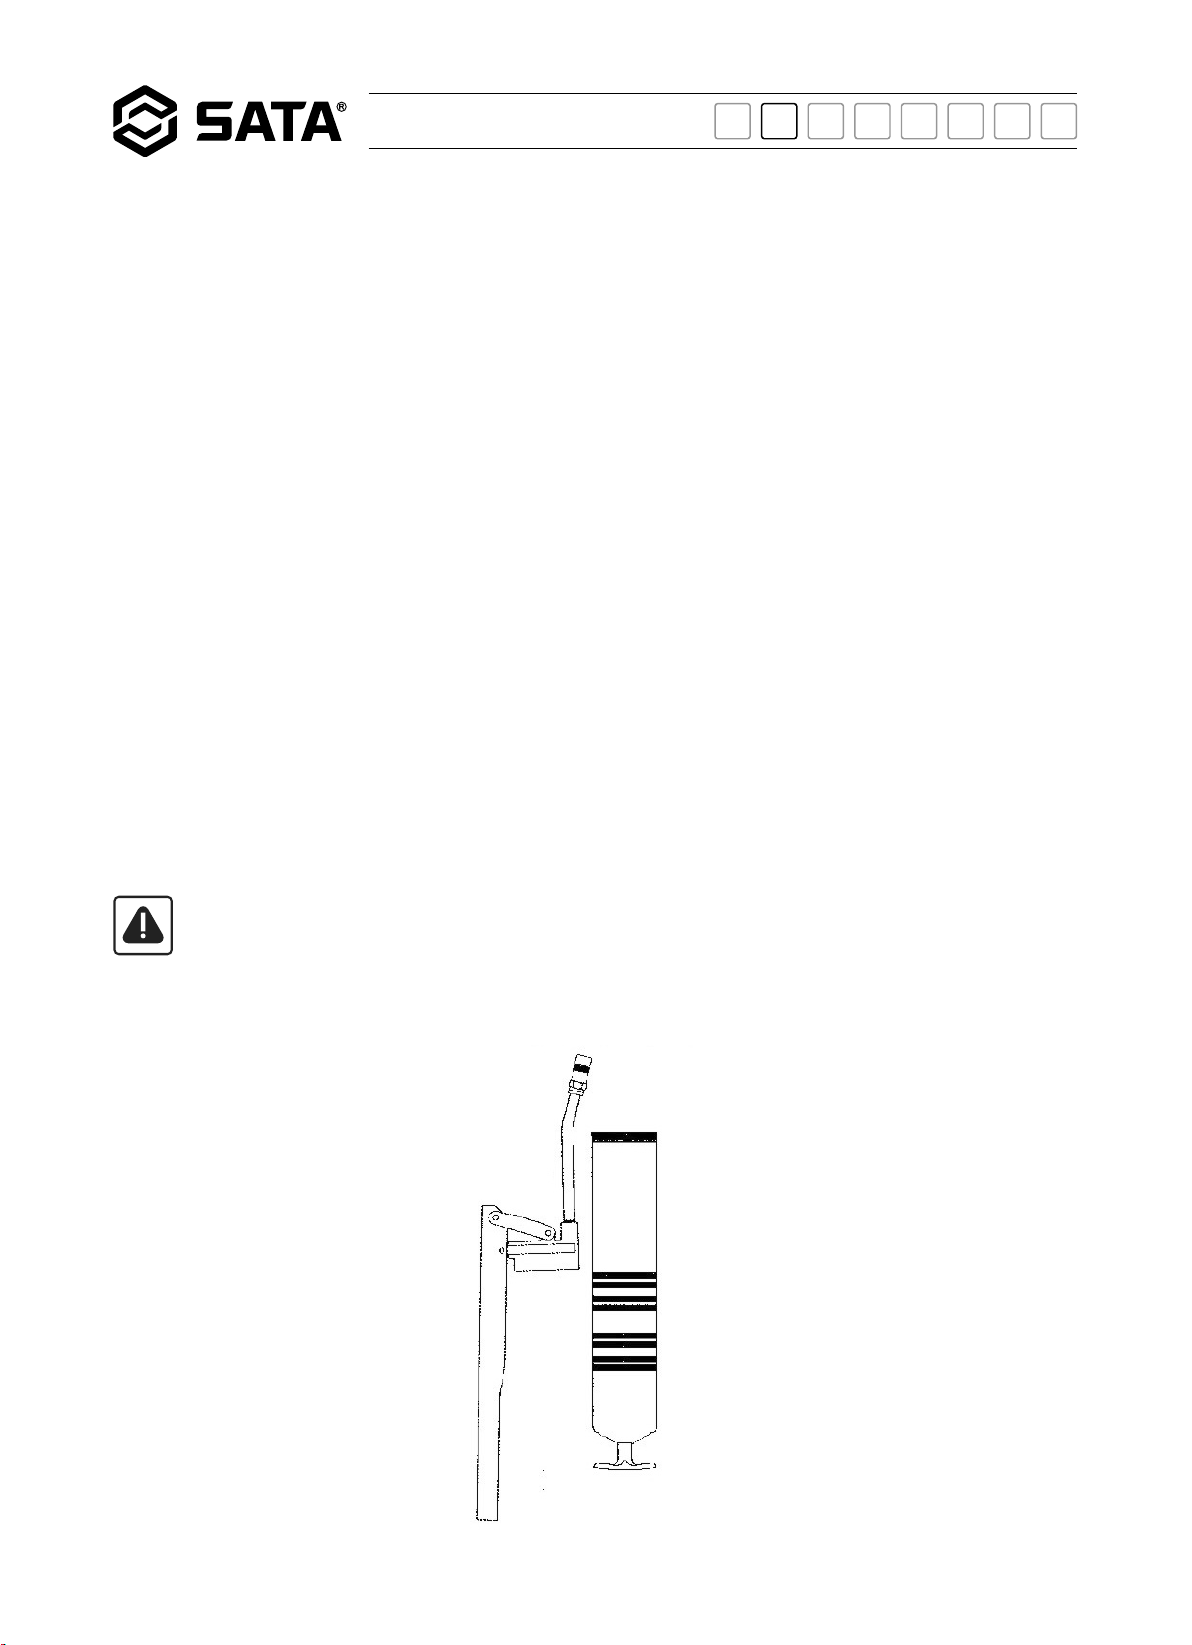
6)Ziehen Sie den Lauf fest und schieben Sie den Mitnehmergriff in den Lauf
★Stellen Sie unbedingt sicher, dass der Boden des Schmierfettfasses in den Lauf eingeführt ist und dass die
Ränder des Schmierfettfasses nicht beschädigt oder gequetscht sind. Andernfalls kann der Gummistopfen des
Schmierfettfasses nicht darin eingeführt werden und das Schmierfett nicht herausgedrückt werden. In diesem
Fall korrigieren Sie bitte den oben genannten Fehler. Nur wenn die oben genannten Fehler behoben werden, kann
die Schmierfettpresse das Schmierfett öffnen.
★Denken Sie daran, das verwendete leere Schmierfettfass wieder zu verwenden.
★Wenn Sie der Schmierfettpresse etwas Schmierfett oder anderes -öl hinzufügen, kann diese leichter verwendet und
geschmiert werden.
Hinweis:
Der Spitzenfilter soll verhindern, dass Partikeln in die Schmierfettpresse bei wiederholtem
Gebrauch eindringen und die Schmierfettpresse beschädigen.
Spitzenkopf
Hauptkörper

中文 EN DE RU KO PT JA ES
97204
10
Das Schmierfett(Schüttgut) hinzufügen:
1)Schrauben Sie den Pressenkopf von dem Lauf ab.
2)Tauchen Sie die Spitze in das Schmierfettfass, halten Sie die Schmierfettpresse mit einer Hand und ziehen Sie den
Mitnehmerhebel von hinten, um sicherzustellen, dass die Öffnung der Schmierfettpresse immer im Fett eingetaucht ist,
damit keine Luft eindringt.
3)Setzen Sie den Pressenkopf ein und drücken Sie auf das Verschlussstück am Ende des Laufs, um den Mitnehmergriff in
den Lauf zu drücken.
Eisenhebel
Hauptkörper
Schmierfettpille
Gummistopfen

中文 EN DE RU KO PT JA ES
97204
11
Fehlerbehebung:
Problem: Die Schmierfettpresse funktioniert normal, ohne dass das Fett von der Öffnung abfließt
Ursache: Die Schmierfettpresse enthält Luft, die ein Freilaufphänomen erzeugt, das ein Austreten des Schmierfetts
verhindert.
Lösungen:
1)Ziehen Sie den Mitnehmergriff zurück in die entsprechende Position auf der Rückseite des Laufs, halten Sie die
Entlüftungsöffnung am Spitzenkopf mit einer Hand fest und drücken Sie den Eisengriff mit einer Hand in den
Hauptkörper. Drücken Sie dabei auf das Verschlussstück am Ende des Laufs.
2)Oder ziehen Sie den Mitnehmergriff zurück in die entsprechende Position auf der Rückseite des Laufs, lösen Sie den
Spitzenkopf und den Lauf; drücken Sie auf das Verriegelungsstück am Ende des Laufs, um den Eisengriff in den
Hauptkörper zu drücken.
3)Probieren Sie ein paar Fettpressen aus. Wenn Sie das Schmierfett nicht schlagen können, wiederholen Sie die obigen
Schritte 2-3 Mal, bis das Schmierfett in der Sichtprüfung entladen ist.
4)Verriegeln Sie den Spitzenkopf und den Lauf.
5)Drücken Sie die Entlüftungstaste vorsichtig, bis das Schmierfett austritt.
#Dieses Phänomen tritt häufiger beim Schmierfett (Schüttgut) auf
Problem: Am Verschluss des Fettpressenauslasses tritt Öl aus
Ursache: Das Zubehör ist nicht richtig verriegelt
Lösungen:
1)Das Zahnmuster des Fettpressenauslasses ist ein schräger Zahn. Es handelt sich um eine spezielle, auslaufsichere
Ausführung. Je tiefer die Verriegelung ist, desto dichter kann die Funktion ausgeführt werden.
2)Die oben genannten Werkzeuge eignen sich zum ordnungsgemäßen Verriegeln der Zubehörteile. Verwenden Sie nicht
nur die Hand zur Verriegelung, da diese eine hervorragende Dichtigkeit gewährleistet.
Schmierfettfass(Schuettgut)

中文 EN DE RU KO PT JA ES
97204
12
Заполнение смазкой вбочках:
1)Отвинтите головку шприца для смазки иотделите ее от ствола.
2)Полностью потяните ведомую ручку взадней части шприца для смазки до нижней части
ствола, азатем потяните блокировочное устройство внижней части ствола всторону.
3)Открутите крышку бочки ипоместите смазку вбочках полностью вствол, ипорвите
уплотнение другого конца бочки.
4)Прикрутите головку шприца для смазки, но не слишком туго. Нажмите контрпластинку на
хвостовой части ствола ипротолкните ведомую ручку прямо вствол.
5)В состоянии холостого хода ведомая ручка будет вытягиваться на дно ипроталкиваться
висходное положение, так что это будет повторяться несколько раз, пока смазка не будет
выдавлена.
6)Ввинтите ствол, толкая ведомую ручку вствол
★Убедитесь, что нижняя часть ствола вставлена вствол, акрай ствола не поврежден
или не сжат. Впротивном случае резиновая пробка ствола не может быть
вставлена вствол, исмазка не может быть выдавлена. Если это произойдет,
пожалуйста, исправьте вышеуказанные неправильные шаги, исправлены только
вышеперечисленные шаги, шприц для смазки может открыть смазку.
★Не забудьте использовать пустую бочку, которую вы использовали снова.
★Добавление смазки или других масел вшприц для смазки поможет содействовать
использованию исмазке шприца для смазки.
Головка шприца для смазки
Ствол

中文 EN DE RU KO PT JA ES
97204
13
Заполнение сыпучей смазкой:
1)Отвинтите головку тавотницы иотделите ее от ствола.
2)Опустите головку шприца для смазки вствол, держите шприц для смазки одной рукой
ипотяните ведомую ручку сзади, чтобы отверстие шприца для смазки всегда было
погружено всмазку, чтобы предотвратить попадание воздуха.
3)Установите головку шприца для смазки инажмите контрпластинку на хвостовой части
ствола, протолкните ведомую ручку вствол
Ручка ссердечником
Ствол
Масляная пружина
Резиновая пробка
Возникшие проблемы:
Проблема: шприц для смазки работает нормально, отверстие не имеет слив смазки
Причина:вшприце для смазки содержится воздух, который образует явление свободного
хода, препятствующее сливу смазки.
Внимание:
Фильтровальная сетка головки шприца для смазки предназначена
для предотвращения повреждения шприца для смазки при повторном
использовании шприца для смазки.

中文 EN DE RU KO PT JA ES
97204
14
Методы устранения:
1)Потяните ведомую ручку назад всоответствующее положение вхвостовой части ствола,
одной рукой удерживайте выпускное отверстие на головке шприца для смазки, адругой
рукой нажмите контрпластинку вхвостовой части ствала ивставьте железную ручку
вкорпус шприца для смазки.
2)Или потяните ведомую ручку назад всоответствующее положение вхвостовой части
ствола, ослабьте головку шприца для смазки иствол, инажмите контрпластинку в
хвостовой части ствола, ипротолкните ручку вкорпус шприца для смазки.
3)Попробуйте использовать шприц для смазки несколько раз. Если вы не можете взбить
смазку, повторите вышеуказанные действия 2-3 раза, пока визуально увидеть нормальный
выпуск смазки.
4)Заблокируйте головку шприца для смазки иствол.
5)Слегка нажимайте кнопку удаления воздуха, пока смазка не будет выпущена, иотпустите.
Такое явление чаще встречается при использовании сыпучей смазки.
Проблема:Вместе сопряжения арматуры выпускного отверстия шприца для смазки
существует утечка
Причина: Арматура неправильно заблокирована
Методы устранения:
1)Зубья выпускного отверстия шприца для смазки используют наклонные зубья, которые
представляют собой превосходную специальную герметичную конструкцию. Чем глубже
сопряжение, тем более герметичная функция может быть выполнена.
2)Вышеуказанные инструменты имеют арматуры умеренной блокировки ине должны
блокироваться вручную, они будут играть превосходную роль защиты от утечки.
Сыпучая смазка вбочках

中文 EN DE RU KO PT JA ES
97204
15
통포장 그리스 주입:
1)오일 건 헤드를 풀어 튜브와 분리시킨다 .
2)오일 건 뒷부분의 손잡이를 튜브 밑부분까지 잡아당기고 옆쪽으로 경사지게 당겨 건 파이프 밑부분
의 로크 장치에 끼워 넣는다 .
3)통 포장 그리스의 커버를 열고 그리스를 오일 건의 튜브 속에 넣은 후 그리스 통의 다른 한쪽의 밀
봉을 뜯는다 .
4)건을 재운다 . 단 꽉 조이지는 않는다 . 튜브 끝부분의 고정판을 눌러 손잡이를 튜브 속에 밀어 넣는
다 .
5)무부하 상태에서 손잡이를 밑부분까지 당겼다가 다시 원래 위치로 복귀시킨다 . 그리스가 나올 때까
지 해당 동작을 반복한다 .
6)튜브를 꽉 조이고 손잡이를 튜브 속에 밀어 넣는다
★튜브 밑부분이 그리스 통에 삽입되도록 하며 그리스 통 테두리가 손상되었 거나 눌러 변형되어
서는 안된다 . 그렇지 아니할 경우 그리스 통 고무마개가 통속에 삽입이 불가하여 그리스를 짜낼
수 없게 된다 . 만약 이런 상황이 발생하였다면 상술한 오류를 시정해야 한다 . 그렇게 해야만 오
일 건으로 그리스를 사용할 수 있다 .
★이미사용했던빈오일통을재사용해서는안된다 .
★오일건속에적당한양의오일 혹은 기타 윤활유를 넣으면 오일 건의 사용에 유리하고 윤활 작
용을 한다 .
주의:
오일 건 필터는 중복 사용 과정에서 입자가 들어가 파손되는 것을 방지 하기
위한 것이다 .
오일 건 헤드
튜브

中文 EN DE RU KO PT JA ES
97204
16
낱개 포장 그리스 주입:
1) 오일 건의 헤드를 풀어 튜브와 분리시킨다 .
2) 오일 건 헤드의 한쪽 부분을 오일 통에 넣은 후 한 손으로 오일 건을 잡고 다른 한 손으로는 방아쇠
를 당겨 오일 건 입구가 시종 오일 속에 잠겨 있도록 확보 하여 공기가 들어가는 것을 방지한다 .
3) 오일 건 헤드를 조립해 넣고 튜브 밑부분의 고정판을 눌러 손잡이를 튜브에 밀어 넣는다 .
철심 당김 장치
튜브
튜브형 그리스
고무 마개

中文 EN DE RU KO PT JA ES
97204
17
낱개 포장 그리스 주입:
문제 :오일 건의 조작이 정확하지만 오일이 나오지 않는다 .
원인 : 오일 건 내에 공기가 있어 오일이 나오지 못한다 .
해결방법:
1)손잡이를 오일 건 튜브 밑부분의 적당한 위치로 잡아 당긴 후 한 손으로 오일 건 헤드의 배기구를
누르고 다른 한 손으로는 건 파이프 끝부분의 고정판을 눌러 철심 당김 장치를 튜브 내에 밀어 넣
는다 .
2)혹은 손잡이를 튜브 끝부분의 적당한 위치까지당기고 오일 건 헤드와 튜브를 느슨하게 풀며 튜브
끝부분의고정판을 눌러 철심 당김 장치를 튜브내에 밀어 넣는다 .
3)오일 건을 몇 번 테스트한다 . 만약 오일이 나오지 않는다면 오일이 나올 때까지 2~3 회 반복한다 .
4) 오일 건 헤드와 튜브를 꽉 재운다 .
5) 배기 버튼을 누르며 오일이 나오면 손을 뗀다 .
#이는 낱개 포장된그리스를 사용할 때자주 발생하는현상임 .
문제 : 오일 건 오일 배출구의 부품 접합 부분에 오일이 새는 현상이 발생함 .
원인 :부품을 꽉 재우지 않음 .
해결방법:
1)오일 건 오일 배출구의 이빨 패턴은 경사진 패턴으로서 우수한 특수 유출 방지 설계를 사용하였다 .
깊게 틀어 넣을수록 유출 방지 기능을 더 잘 발휘한다 .
2)이상의 공구로 부품을 적당하게 재워야 하며 수동 외 기타 방법을 사용하면 우수한 유출 방지 기능
을 발휘한다 .
낱개 포장 그리스 통

中文 EN DE RU KO PT JA ES
97204
18
Adicionar a graxa de barril:
1)Desaperte a cabeça da pistola de óleo e separe-a do cano.
2)Puxe a maçaneta acionada da parte traseira da pistola de óleo completamente para a parte inferior do cano e, em
seguida, puxe e incline o dispositivo de bloqueio na parte inferior do cano para o lado.
3)Desparafuse a cobertura do barril de graxa, coloque o barril de graxa no cano completamente, e rasgue o selo de outra
extremidade do barril de graxa.
4)Aparafuse a cabeça de pistola, mas não deve ser muito apertada. Pressione o guia de bloqueio no final do cano e
empurre a maçaneta acionada em linha reta no cano.
5)No estado sem carga, a maçaneta acionada será puxada para a parte inferior e empurrada de volta para a posição
original, para que seja repetido várias vezes até que a graxa seja espremida.
6)Aperte o cano e empurre a maçaneta acionada no cano
★Certifique-se de que a parte inferior do cano de graxa esteja inserida no cano de graxa e que não haja nenhum
dano ou apertar a borda do cano de graxa. Caso contrário, a tampa de borracha do cano de graxa não pode ser
inserida no cano de graxa, e a graxa não pode ser espremida. Se isso acontecer, por favor, corrija o erro acima,
apenas as coisas acima são corrigidas, a pistola de graxa pode abrir a graxa.
★Lembre-se de não usar o barril de óleo vazio que foi usado novamente.
★Adicionar um pouco de graxa ou outro óleo lubrificante à pistola de óleo ajudará o uso e a lubrificação da pistola de
graxa.
Nota:
O filtro da cabeça de pistola é projetado para evitar que a pistola de óleo seja danificada por
entrando partículas durante o uso repetido da pistola de óleo.
Cabeça de pistola
Corpo de pistola

中文 EN DE RU KO PT JA ES
97204
19
Adicionar a graxa a granel:
1)Desaperte a cabeça da pistola de óleo e separe-a do cano.
2)Mergulhe a ponta da pistola no cano de graxa, segure a pistola de graxa numa das mãos e puxe a maçaneta acionada
pela parte de trás para garantir que a abertura da pistola de óleo está sempre imersa no óleo para impedir a entrada
de ar.
3)Instale a cabeça da pistola de óleo e pressione o guia de bloqueio no final do cano para empurrar a maçaneta para
dentro do cano.
Alça de ferro
Corpo de pistola
Bomba de graxa
Rolha de borracha

中文 EN DE RU KO PT JA ES
97204
20
Situação problemática:
Problema: A operação da pistola de graxa está normal, sem drenagem de graxa
Causa: A pistola de graxa contém ar, o que forma um fenómeno de batida no ar que impede que a graxa seja
descarregada.
Solução:
1)Puxe a maçaneta acionada de volta para a posição apropriada na parte traseira do cano, segure o orifício de ventilação
na cabeça da pistola com uma mão e empurre a alça de ferro no corpo da pistola com uma mão pressionando o guia
de bloqueio no final do cano.
2)Ou puxe a maçaneta acionada de volta para a posição apropriada na parte traseira do cano, solte a cabeça e o cano e
pressione o guia de bloqueio no final do cano para empurrar a alça de ferro para dentro do corpo da pistola.
3)Tente algumas vezes de pistola de graxa. Se não conseguir bater a graxa, repita as ações acima de 2 a 3 vezes até que a
graxa visual seja espremida normalmente.
4)Bloqueie a cabeça e o cano da pistola.
5)Pressione suavemente o botão de ventilação até que o óleo seja espremido.
# Este fenômeno é mais comum quando usado em graxa a granel
Problema: Há vazamento de óleo na fechadura da saída da pistola de graxa
Causa: o acessório não está bloqueado corretamente
Solução:
1)O padrão dentário da saída da pistola de graxa é um dente inclinado, que é um excelente design especial à prova de
fugas, quanto mais profundo for o bloqueio, mais pode ser exercida a função à prova de fugas.
2)As ferramentas acima são moderadamente travadas, e não devem ser apenas travadas à mão, terão uma excelente
função à prova de vazamento.
Graxa a granel
Table of contents
Languages:
Other SATA Tools manuals