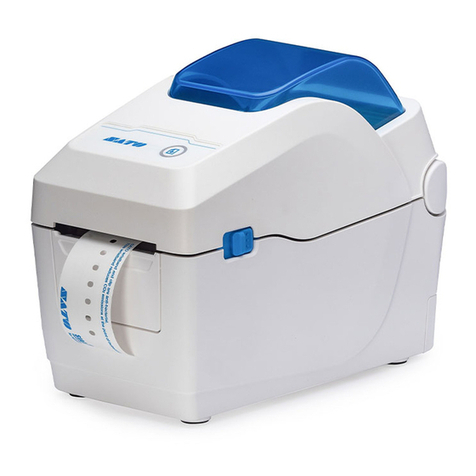
SATO PW4NX User manual

FX3-LX

Table of Contents
2
Table of Contents
Before You Start......................................................................................................... 7
About This Manual............................................................................................................................. 7
Safety Precautions............................................................................................................................. 8
Safety Precautions for the Battery...................................................................................................13
Precautions for Installation and Handling........................................................................................ 17
Select a Safe Location................................................................................................................17
Power Supply.............................................................................................................................. 18
Printing.........................................................................................................................................19
Regulatory Approval......................................................................................................................... 20
Environmentally Hazardous Materials..............................................................................................23
Copyrights.........................................................................................................................................24
Trademarks....................................................................................................................................... 25
What You Can Do with This Product..................................................................... 26
Features of the Product................................................................................................................... 26
Various Ways to Output................................................................................................................... 27
Outputting with General-purpose Software.................................................................................27
Outputting and Controlling with Dedicated Command................................................................28
Outputting with Standalone (AEP) Applications..........................................................................29
Basic Information..................................................................................................... 30
Bundled Accessories........................................................................................................................ 30
Optional Devices.............................................................................................................................. 31
Parts Identification............................................................................................................................ 34
Using the Operator Panel................................................................................................................ 39
LED Indicator...............................................................................................................................39
Operations in Online/Offline Mode..............................................................................................40
Status Icon...................................................................................................................................42
Battery Indicator.......................................................................................................................... 48
Operations When Errors Occur...................................................................................................49
Adjusting the Print Settings During Printing................................................................................50
Canceling the Print Job...............................................................................................................52
Guidance Videos.............................................................................................................................. 53
List of the Guidance Videos........................................................................................................54
Playing the Guidance Video from the Error Screen................................................................... 55
Getting Access to the Guidance Video in Online Mode............................................................. 56
Operating the Guidance Video....................................................................................................59
Settings Mode...................................................................................................................................60
Settings Mode Menus................................................................................................................. 61
Changing to the Settings Mode.................................................................................................. 62
Logging In to/Logging Out of the Settings Mode........................................................................64
Item Selection..............................................................................................................................65
Setting Value Input or Selection................................................................................................. 67
Memory of the Product.....................................................................................................................70
Product Memory and USB Memory............................................................................................ 70
Connecting a USB Memory to the Product................................................................................ 71

3
Getting Started......................................................................................................... 72
Charging the Battery........................................................................................................................ 72
Precautions during charging....................................................................................................... 73
Inserting the Battery....................................................................................................................74
Charging Using AC Adapter (Option)......................................................................................... 75
Charging Using the 1Bay Charging Cradle (Option).................................................................. 76
Charging Using the Battery Charger (Option)............................................................................ 79
Charging Using Cigarette Lighter Adapter (Option)....................................................................81
Charging Using 12-60V DC Power Supply (Option)...................................................................82
Installing Accessories....................................................................................................................... 84
Attaching the Shoulder Strap (Option) and the Carrying Case (Option).....................................84
Attaching the Hand Strap (Option)............................................................................................. 87
Attaching the Belt Clip or Belt Loop (Option)............................................................................. 88
Powering On/Off the Product........................................................................................................... 90
Powering On the Product............................................................................................................90
Powering Off the Product............................................................................................................92
Initial Setup (Startup Guide).............................................................................................................93
Startup Guide Flow..................................................................................................................... 94
Startup Guide Cancelation.......................................................................................................... 99
Connecting the Product to a Computer......................................................................................... 100
Procedure for Connecting the Product to a Computer............................................................. 101
Connecting Interfaces................................................................................................................102
Available Interfaces.............................................................................................................. 102
USB Interface Connection (Standard)................................................................................. 102
Bluetooth Interface Connection (Standard)..........................................................................103
NFC Interface Connection (Standard)................................................................................. 104
Wireless LAN Interface Connection (Standard)...................................................................104
Configuring the Interface Settings.............................................................................................105
Interface Setting Methods.................................................................................................... 105
Configuring the Interface Settings from the Interface Menu of the Product.........................105
Configuring the Interface Settings Using the All-In-One Tool.............................................. 107
Installing the Printer Driver....................................................................................................... 109
All-In-One Tool Features........................................................................................................... 110
Loading Media........................................................................................................ 111
Usable Media..................................................................................................................................111
Loading the Media..........................................................................................................................112
Precautions for Loading the Media........................................................................................... 112
Loading the Media Roll: Continuous/Tear-Off/Linerless Tear-Off Mode....................................113
Loading the Media Roll: Dispenser Mode.................................................................................117
Loading the Fan-fold Media (When Using the 1Bay Charging Cradle (Option)).......................123
Loading the Fan-fold Media (When Using the Printer Stand (Option))..................................... 127
Settings to Match the Media.......................................................................................................... 133
Media Sensor Type................................................................................................................... 133
Manually Setting the Print Mode...............................................................................................137
When to Replace Media.................................................................................................................140
Various Settings of the Product........................................................................... 141
The [Settings] Menu....................................................................................................................... 141
[Printing] Menu.......................................................................................................................... 142
[Label Length].......................................................................................................................142
[Label Width]........................................................................................................................ 142
[Auto Measure]..................................................................................................................... 142
[Speed]................................................................................................................................. 143

Table of Contents
4
[Print Mode].......................................................................................................................... 143
[Backfeed].............................................................................................................................144
[Sensor Type]....................................................................................................................... 144
[Darkness Range].................................................................................................................145
[Darkness].............................................................................................................................145
[Imaging]............................................................................................................................... 145
[Advanced]............................................................................................................................147
[Interface] Menu.........................................................................................................................157
[Network]...............................................................................................................................157
[USB].................................................................................................................................... 195
[Bluetooth].............................................................................................................................195
[NFC].................................................................................................................................... 198
[Ignore CR/LF]......................................................................................................................199
[Ignore CAN/DLE].................................................................................................................199
[Applications] Menu................................................................................................................... 200
[Protocol]...............................................................................................................................200
[SBPL]...................................................................................................................................201
[SZPL]...................................................................................................................................206
[SIPL].................................................................................................................................... 207
[AEP].....................................................................................................................................208
[System] Menu...........................................................................................................................210
[Regional]..............................................................................................................................210
[Notifications]........................................................................................................................ 211
[Sound]................................................................................................................................. 213
[Energy Saving].................................................................................................................... 214
[LCD Brightness].................................................................................................................. 215
[LCD Rotation]......................................................................................................................215
[Show Total Count]...............................................................................................................216
[Password]............................................................................................................................ 216
[Tools] Menu.............................................................................................................................. 219
[Test Print]............................................................................................................................ 219
[HEX-Dump]..........................................................................................................................225
[Reset].................................................................................................................................. 229
[Profiles]................................................................................................................................230
[Service]................................................................................................................................232
[Factory]................................................................................................................................232
[Wi-Fi Site Survey]............................................................................................................... 232
[Install Certificates]............................................................................................................... 232
[Delete Certificates].............................................................................................................. 233
[Clone].................................................................................................................................. 234
[Logging Function]................................................................................................................235
[Startup Guide]..................................................................................................................... 236
[Information] Menu.....................................................................................................................237
[Help].................................................................................................................................... 237
[Build Version]...................................................................................................................... 239
[Applications]........................................................................................................................ 239
[Installation Log]................................................................................................................... 239
[Print Module]....................................................................................................................... 239
[Sensor Module]................................................................................................................... 240
[FPGA Version].....................................................................................................................240
[Counters]............................................................................................................................. 240
[Estimated Printable]............................................................................................................ 241
[Wi-Fi]................................................................................................................................... 241
[Wi-Fi Direct].........................................................................................................................241
[Wi-Fi Versions].................................................................................................................... 242
[Bluetooth].............................................................................................................................242
[Battery] Menu........................................................................................................................... 243
[Health]................................................................................................................................. 243
[SOH].................................................................................................................................... 243

5
[Cycle Counts]...................................................................................................................... 243
[Eco Charge]........................................................................................................................ 243
[Full Charge Power-Off]....................................................................................................... 244
[Voltage]................................................................................................................................244
[Capacity]..............................................................................................................................244
[Temp]................................................................................................................................... 244
[Battery Type]....................................................................................................................... 245
[Shortcut] Menu......................................................................................................................... 246
Configuring the Product Settings from a Web Browser................................................................. 247
Accessing to the Web Configuration Page............................................................................... 247
Dashboard................................................................................................................................. 249
Settings...................................................................................................................................... 251
Tools...........................................................................................................................................253
Certificates................................................................................................................................. 255
Enabling SATO App Storage..........................................................................................................256
Adjusting the Product............................................................................................266
Printable Area.................................................................................................................................266
Media Sensor Positions and Media Stop Positions....................................................................... 267
Flow of Printing Operations............................................................................................................268
Printing Operations....................................................................................................................268
Operations in Continuous Mode............................................................................................... 269
Operations in Tear-Off Mode.....................................................................................................272
Operations in Dispenser Mode................................................................................................. 276
Operations in Linerless Mode................................................................................................... 282
Operations When the Media Sensor Is Disabled..................................................................... 286
Adjusting the Base Reference Point.............................................................................................. 287
About the Base Reference Point.............................................................................................. 287
Adjusting the Print Position.......................................................................................................289
Adjusting the Media Stop Position............................................................................................ 292
Notes on the Stop/Cut Position of Different Media...................................................................295
Adjusting the Print Quality..............................................................................................................297
Adjusting the Print Darkness.................................................................................................... 297
Adjusting the Print Speed......................................................................................................... 300
Adjusting the Product's Buzzer Volume......................................................................................... 302
Initializing the Product.................................................................................................................... 304
Procedures for Initializing..........................................................................................................304
List of Initial Values................................................................................................................... 308
[Printing] Menu..................................................................................................................... 308
[Interface] Menu................................................................................................................... 310
[Applications] Menu.............................................................................................................. 319
[System] Menu..................................................................................................................... 321
[Tools] Menu......................................................................................................................... 322
[Information] Menu............................................................................................................... 325
[Battery] Menu...................................................................................................................... 326
Maintenance............................................................................................................ 327
Cleaning the Product......................................................................................................................327
Cleaning.....................................................................................................................................327
Cleaning Intervals......................................................................................................................328
Cleaning the Inside of the Product........................................................................................... 329
Cleaning the Inside of the Product (for Linerless Models)........................................................331
Cleaning the Exterior of the Product Using Disinfectant Chemicals......................................... 333
Replacing Consumable Parts.........................................................................................................335
Replacing the Print Head..........................................................................................................335

Table of Contents
6
Replacing the Platen Roller...................................................................................................... 339
Linerless Platen Roller Replacement Timing............................................................................343
Operating the Notification Screen of the SOS (SATO Online Services) On-Demand Mode (SOS
users only)...................................................................................................................................... 344
SOS (SATO Online Services) Application (SOS users only)......................................................... 346
When You Are in Trouble...................................................................................... 347
When an Error Message Appears................................................................................................. 347
Error Message Indication and Operating Procedure When the SOS (SATO Online Services) Is
Enabled (SOS users only)............................................................................................................. 389
Messages for Provisioning Errors When SOS (SATO Online Services) is Enabled (SOS users
only)................................................................................................................................................ 391
Contact Information for When You Are in Trouble.........................................................................392
Product Specifications...........................................................................................393
Hardware........................................................................................................................................ 393
Interface.......................................................................................................................................... 397
Supported Interfaces................................................................................................................. 397
USB Interface............................................................................................................................ 398
Bluetooth Interface.................................................................................................................... 399
NFC Interface............................................................................................................................ 400
Wireless LAN Interface............................................................................................................. 401
Printer language............................................................................................................................. 403
Standards........................................................................................................................................404
Usable Media..................................................................................................................................405
Usable Fonts.................................................................................................................................. 408
Usable Barcodes............................................................................................................................ 433
Support and Warranty............................................................................................435
SOS (SATO Online Services) (SOS users only)........................................................................... 435
Warranty for Consumables within the Product Warranty Period....................................................436

7
Before You Start
About This Manual
Thank you for purchasing the SATO PW4NX (hereafter referred to as "the product").
This manual supplies basic information on how to operate the product. Read the manual carefully to
understand each function of the product before operation.
Symbols
This operator manual uses following symbols:
Item Description
Warning
The Warning symbol indicates that you can cause death or serious injury
if you do not follow the instructions or procedures.
Caution
The Caution symbol indicates that you can cause injury or property
damage if you do not follow the instructions or procedures.
Note
The Note symbol indicates useful and supplemental information that you
should know.
Reference
The Reference symbol indicates the link of relevant information.
• Reproduction in any manner of all or part of this manual is prohibited.
• The content of this manual is subject to change without notice.
• Great care has been taken in the preparation of this document, but if any problems,
mistakes, or omission are found, please contact your SATO reseller or technical
support.

Safety Precautions
8
Safety Precautions
This topic describes how to use the product safely.
Be sure to read the following information carefully before using the product.
Pictographic Symbols
This operator manual and the product labels use a variety of pictographic symbols. These symbols
emphasize the safe and correct use of the product and to prevent injury to others and property
damage. The explanation of the symbols is as follows. Be sure to understand these symbols well
before you read the main text.
Ignoring the instructions marked by this symbol and
erroneously operating the product could result in death or
serious injury.
Ignoring the instructions marked by this symbol and
erroneously operating the product could result in injury or
property damage.
Example Pictographs
The pictograph means "Caution is required".
The pictograph means "Should not be done".
The pictograph means "Must be done".

9
Do not use the voltage
other than specified
• Do not use the power supply voltage other than the one specified.
Doing so could result in a fire or electric shock.
Do not use in
hazardous locations
• The product is not explosion proof certified. Do not use in a
potentially explosive environment or atmosphere. Doing so could
result in a fire or explosion.
Do not set on an
unstable area
• Do not set the product on an unstable area, such as a wobbly table
or slanted area or on an area subject to strong vibration. The product
could fall or topple over, possibly resulting in injury.
Do not place in high-
temperature locations
• Do not place the product near heating equipment such as cooking
appliances or a heater, or in high-temperature locations. Doing so
could damage the product or result in a fire or electric shock.
When the product or
AC adapter is dropped
or breaks
• If the product or AC adapter is dropped or breaks, immediately power
off the product, unplug the power cord from the outlet, and contact
your SATO reseller or technical support. Using the product in one of
these conditions could result in a fire or electric shock.
Handling the power
cord and other cables
• If the power cord and other cables become damaged (core is
exposed, wires broken, deformed, etc.), contact your SATO reseller
or technical support. Using the power cord and other cables in this
condition could result in a fire or electric shock.
Handling the AC
adapter, power cord,
and other cables
• Do not damage, break, or alter the AC adapter, power cord, or other
cables. Do not place heavy objects on them, apply heat to them, or
place them in high-temperature locations. Also, do not forcibly bend,
twist, or pull the power cord and other cables. Doing so could result
in a fire or electric shock.
• Do not splash water on the AC adapter, power cord, and other cables
or get them wet. Doing so could result in damage or electric shock.
• Do not use the product if any abnormality such as smoke or an
unusual odor is detected. Doing so could result in a fire or electric
shock. Immediately power off the product, unplug the power cord

Safety Precautions
10
Do not use the product
when something is
abnormal
from the outlet, and contact your SATO reseller or technical support
for repairs.
Do not place
containers holding
water or other liquid
near the product
• Do not place flower vases, cups, or other containers holding liquids,
such as water or chemicals, near the product. If water or chemicals
get inside the product, immediately power it off, and contact your
SATO reseller or technical support. Using the product in this condition
could result in a fire or electric shock.
Do not drop the
product in water
• Do not use the product near a container holding liquid. If the product
is dropped into water, immediately power it off, and contact your
SATO reseller or technical support. Using the product in this condition
could result in a fire or electric shock.
Do not put objects
inside the product
• Do not insert or drop any metal or flammable objects down the
opening (cable port, etc.) of the product. If a foreign object gets inside
the product, immediately power it off, unplug the power cord from the
outlet, and contact your SATO reseller or technical support. Using the
product in this condition could result in a fire or electric shock.
Connecting cables or
optional devices
• When connecting a cable or optional device to the product, be sure
to turn off each of the devices. If they are connected with the power
on, an optional device could move unexpectedly, resulting in injury,
electric shock, or damage.
• When installing a cable or optional device, be sure not to make a
mistake in the orientation and steps to install. Otherwise, it could
result in injury, fire, electric shock, or damage.
• Do not use cables other than the ones supplied with the product or
recommended by us. Doing so could result in smoke, fire, electric
shock, or damage.
Do not operate with
wet hands
• Do not power on/power off the product, replace the battery, or plug/
unplug the power cord and other cables with wet hands. Doing so
could result in electric shock.
Do not disassemble
the product and the
AC adapter
• Do not disassemble or modify the product or the AC adapter. Doing
so could result in a fire or electric shock. Ask your SATO reseller or
technical support to conduct internal inspections, adjustments, and
repairs.
Using the cleaning
fluid
• Do not use cleaning fluids other than the ones supplied with the
product or recommended by us.
• The cleaning fluid is to be strictly kept away from the fire. Never apply
heat or place it in the fire.

11
• Keep the fluid out of reach of children to prevent them from
accidentally drinking it. If a child accidentally drinks the fluid,
immediately consult with a physician.
Carrying the product
• Before moving the product, be sure to power it off, unplug the power
cord from the outlet, and disconnect any connected cables. Moving
the product with the power cord or cables still connected could
damage them, possibly resulting in a fire, electric shock, or damage.
Do not place the
product in areas with
high humidity
• Do not place this product in an area with high humidity or where
condensation occurs. If condensation has occurred, immediately
power off the product, and avoid using it until it is dried. Using the
product while condensation is on it could result in a fire, electric
shock, or damage.
AC adapter
• An AC adapter could become hot. Be careful not to get burned.
Power cord and other
cables
• Grab a power cord and other cables by the plug when removing from
the outlet or connector port. Removing a power cord and other cables
by grabbing the cord/cable area could result in exposure of wires,
breakage, fire, electric shock, or damage.
• Do not place the power cord and other cables near a heater or other
sources of heat. Doing so could result in melting of the power cord
and other cables sheathing, fire, electric shock, or damage.
Loading fan-fold media
• Be careful not to get injured when handling the media inlet or the
cover.
Loading media roll
• When loading a media roll, be careful not to get your fingers trapped
between the media roll and the supply spindle.
Print head
• The print head is hot after printing. Be careful not to get burned when
replacing media or cleaning immediately after printing.
• Do not touch the print head with your bare hands. Doing so could
result in injury or damage.
• To replace the print head, follow the procedure in the Operator
Manual. If the Operator Manual does not contain this procedure,

Safety Precautions
12
avoid trying to replace it on your own terms, and contact your SATO
reseller or technical support.
Cover
• When opening and closing the cover, be careful not to get your
fingers trapped in between. Also, firmly hold the cover to prevent it
from closing unexpectedly.
When not using the
product for a long time
• When not using the product for a long time, remove the battery from
the product and unplug the power cord from the outlet to maintain
safety.
During maintenance
and cleaning
• When maintaining and cleaning the product, remove the battery from
the product and unplug the power cord from the outlet to maintain
safety.

13
Safety Precautions for the Battery
Always observe the following safety precautions for battery use.
Mishandling the battery may cause electric shock, battery leakage, overheating, smoke, rupture, or
fire.
Pictographic Symbols
This operator manual and the product labels use a variety of pictographic symbols. These symbols
emphasize the safe and correct use of the product and to prevent injury to others and property
damage. The explanation of the symbols is as follows. Be sure to understand these symbols well
before you read the main text.
Ignoring the instructions marked by this symbol and
erroneously operating the product could result in death or
serious injury.
Ignoring the instructions marked by this symbol and
erroneously operating the product could result in injury or
property damage.
Example Pictographs
The pictograph means "Caution is required".
The pictograph means "Should not be done".
The pictograph means "Must be done".

Safety Precautions for the Battery
14
• Do not disassemble or modify the battery.
• Never apply heat or place the battery in the fire.
• Do not place the battery near heating equipment such as cooking
appliances or a heater, inside a car under the blazing sun, or in other
high-temperature locations (above 60°C or 140°F). Doing so could
cause the battery to rupture.
• While charging or discharging the battery, do not put any flammable
material on the battery or cover the battery with a cloth or other
materials.
• Do not place the positive (+) and negative (-) terminals of the battery
on or in contact with any conductive materials, such as metal wires.
Do not carry or store the battery together with necklaces, hairpins,
or other metal objects. Doing so could result in accidental short-
circuiting of the battery.
• Do not wet or immerse the battery in liquids such as water, seawater,
beverages, and seasoning agents.
• Do not beat the battery with a hammer, and do not step on, throw, or
drop it.
• Do not pierce the battery with a nail or other metal objects.
• Do not touch the terminals of the battery. Doing so could cause the
battery to corrode.
• The lithium ion battery has a finite lifespan. We recommend that you
replace the battery after 300 charge cycles or 3 years from the date
of first use, whichever comes first.
• If you notice any dents or cracks on your battery caused by a strong
impact or shock, stop using the battery immediately and replace
it with a new one. Using the battery in this condition could lead to
abnormal overheating or fire.
• Use only the specified battery.

15
• When charging the battery while in the product, use an AC adapter
specified by us.
• When connecting the battery to an outlet such as a car cigarette
lighter outlet, always use the dedicated battery charger.
• Do not rub your eyes if the liquid from the battery leaks and comes
into contact with your eyes. Rinse well with clean water such as tap
water, and seek medical attention immediately. Otherwise, it could
impair your vision.
• If charging is not completed even after a specified time elapses,
remove the battery from the product or battery charger and stop
charging. Then, contact your SATO reseller or technical support.
• If any abnormality is detected (such as a strange odor, overheating,
discoloration, deformation, leakage, etc.), stop using the product
immediately and perform the following. Then, contact your SATO
reseller or technical support. Using the product in this condition could
result in a fire, injuries, or electric shock.
◦ Power off the product.
◦ Unplug the power cord from the outlet.
◦ Remove the battery from the product or battery charger, and
place it away from any flammable materials.
• Be sure to charge the battery before its first use or when it has not
been used for a long time.
• Charge the battery in the recommended temperature range from 5°C
to 35°C (41°F to 95°F).
• Store the battery in a location out of reach of young children. Also, do
not lick the battery or put it in your mouth.
• Dirty terminals on the battery could result in an unstable connection,
battery exhaustion, or an inability to charge. Clean the terminals of
the battery with a dry cloth before use.
• When storing the battery, avoid storing in the following state. Doing
so could result in a degraded battery performance or reduced
lifespan.

Safety Precautions for the Battery
16
◦ In a fully charged state (a state immediately following the
completion of charging)
◦ In a state with no remaining capacity (the battery is so exhausted
that it is even impossible to power on the product)
An optimal remaining capacity to store the battery is approximately
40%.
• When not using the battery, store it in a location with low humidity to
prevent the battery from leaking or rusting.
• When replacing the battery, be sure to install it in the correct
orientation. Incorrectly inserting the battery could damage the
periphery of the battery insertion slot.
• If you have an old battery to dispose, to ensure the efficient use
of scarce resources, seal the contact with tape or with a similar
material, and consult with your reseller or technical support on how to
dispose them. Do not place the battery together with other batteries
such as dry batteries.
A tip before use
If you write down the start date on the sticker on the battery, you will know when to replace the battery.

17
Precautions for Installation and Handling
Select a Safe Location
Product operations can be affected by the product's environment.
Refer to the following instructions regarding how to install and handle the product.
Install the product on a surface that is flat and level.
Installing the product on a surface that is tilted, and not flat, may reduce the print quality. This may
also cause malfunctions and decrease the life span of the product.
Store the product on a level surface.
Do not store the product on an uneven or slanted surface. Doing so may result in a falling
accident.
Do not use or store the product in a location where the temperature and/or humidity are high.
Avoid locations subject to extreme or fast changes in temperature or humidity.
Do not place the product near heating equipment such as a cooking appliance or heater, or in
other high-temperature locations.
The product may break.
Do not use or store the product in a location exposed to water or oil.
Water or oil entering inside the product may cause a fire, electric shock or malfunction.
Avoid dust.
Dust build up may result in reduced print quality, malfunctions, or damage.
Keep out of direct sunlight.
The product has a built-in optical sensor. Exposure to direct sunlight may cause false detections
by the sensor, and may cause the product to not operate correctly. In addition, close the cover
when using the product.
Do not use in hazardous locations.
Do not use in a potentially explosive environment or atmosphere. Doing so could cause a fire or
explosion.
Do not supply power from an AC outlet near electrical equipment with high power
consumption.
Doing so could cause malfunctions or damage due to electrical noise or voltage reduction.

Power Supply
18
Power Supply
Product operations can be affected by the product's environment.
Refer to the following instructions regarding how to install and handle the product.
The product requires a battery.
Be sure to install a battery in the product.
Supply a stable source of electricity to the product.
Do not share its power outlet with other electrical devices. This could cause power fluctuations
and performance issues with your product.

19
Printing
The print result varies depending on the usage environment (temperature and humidity), the supply
condition, and the product settings (the print speed, the print darkness, etc.).
Please sufficiently test the product in your usage environment, and use it with the optimal combination.
If anything is unclear, or if you have any questions, contact your SATO sales representative or reseller.

Regulatory Approval
20
Regulatory Approval
• When you want to take the product to countries other than where you purchased it,
contact your SATO reseller.
FCC Warning
You are cautioned that changes or modifications not expressly approved by the party responsible for
compliance could void your authority to operate the equipment.
This device complies with Part 15 of the FCC Rules. Operation is subject to the following two
conditions: (1) this device may not cause harmful interference, and (2) this device must accept any
interference received, including interference that may cause undesired operation.
This equipment has been tested and found to comply with the limits for a Class B digital device,
pursuant to Part 15 of the FCC Rules. These limits are designed to provide reasonable protection
against harmful interference in a residential installation. This equipment generates, uses and can
radiate radio frequency energy and, if not installed and used in accordance with the instructions, may
cause harmful interference to radio communications.
However, there is no guarantee that interference will not occur in a particular installation.
If this equipment does cause harmful interference to radio or television reception, which can
be determined by turning the equipment off and on, the user is encouraged to try to correct the
interference by one or more of the following measures:
• Reorient or relocate the receiving antenna.
• Increase the separation between the equipment and the receiver.
• Connect the equipment into an outlet on a circuit different from that to which the receiver is
connected.
• Consult the dealer or an experienced radio/TV technician for help.
Shielded cable must be used in order to comply with the emission limits.
FCC Statement for Wireless LAN
This device complies with RF radiation exposure limits set forth for an uncontrolled environment.
The antenna used for this transmitter must be installed to provide a separation distance of at least 20
cm from all people and must not be collocated or operating in conjunction with any other antenna or
transmitter.
Bluetooth/Wireless Communication
Compliance Statement
This product has been certified for compliance with the relevant radio interference regulations of your
country or region. To make sure continued compliance, do not:
• Disassemble or modify this product.
• Remove the certificate label (serial number seal) affixed to this product.
Use of this product near microwave and/or other wireless LAN equipment, or where static electricity
or radio interference is present, may shorten the communication distance, or even disable
communication.
Industry Canada (IC) Statement for Bluetooth
This device complies with Industry Canada license-exempt RSS standard(s). Operation is subject to
the following two conditions:
• This device may not cause interference.
Other manuals for PW4NX
1
Table of contents
Other SATO Printer manuals
SATO
SATO CT 400 Use and care manual
SATO
SATO CG408TT User manual

SATO
SATO M-8460Se Series User manual
SATO
SATO GL408e User manual
SATO
SATO M-8450 Guide
SATO
SATO D508 User manual

SATO
SATO MN-4203 User manual

SATO
SATO ARGOX AME-3230W User manual

SATO
SATO Argox XM4 Series User manual

SATO
SATO HT200e User manual
SATO
SATO M-8485Se Series User manual

SATO
SATO CL4NX RIDF User manual
SATO
SATO WS4 Series Owner's manual

SATO
SATO TXPSX4 User manual

SATO
SATO M10e Series User manual
SATO
SATO TG3 Series User manual

SATO
SATO CX200TT Installation guide
SATO
SATO M-8459Se Series User manual
SATO
SATO TH208 User manual

SATO
SATO GL4 Series User manual


