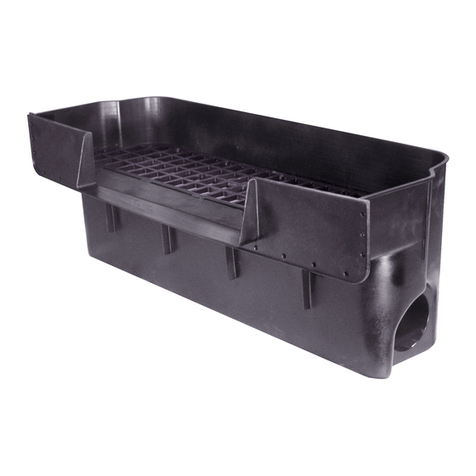
Savio High Flow Skimmer HFS12500 User manual

A
_____________________________
Read entire instructions prior to assembly and operation
High Flow Skimmer™
Read the entire instructions prior to assembling and operating
Operating Manual & Specications
HFS12500
• For Pump Flows up to 12,500 GPH
• Provides Excellent Skimming
• Perfect for Ponds & Water Gardens
with Separate Biological Filtration
Jolie Products Inc

2
Replacement Parts
Item Description
RS001 Skimmer Tank
RS002 Skimmer Cover
RS003 Skimmer Leaf Basket
RS004 Skimmer Center Bae
RS007 Skimmer Face Plate 16”
RS010 Skimmer Weir Door 16”
RS018 Skimmer Divider
RS022 Skimmer Screw Packet
RS105 Left Bae Shield
RS106 Right Bae Shield
Item Description
K5001 Stone Cover Large
K5001-LB Stone Cover Large - Light Brown
K5002 Stone Cover Small
K5002-LB Stone Cover Small - Light Brown
High Flow Skimmer Accessories
Jolie Products Inc

4
Installation
A) Place the High Flow Skimmer opposite the waterfall
or water return in an easily accessible location.
B) Avoid placing rocks or plants in front of
the High Flow Skimmer. Anything placed in
front will interfere with the water ow and
skimming action.
C) Waterfalls generally face the viewing area.
Place the High Flow Skimmer so it
faces the
waterfall. This hides the
High Flow Skimmer
from view and allows for easy access.
D) Positioning the High Flow Skimmer on
the downwind side of the pond will aid in
the eective collection of oating debris.
This is less important than placing the High
Flow Skimmer opposite the waterfall but it
is a signicant design consideration.
Install Skimmer
Mark Water Level Dig Skimmer Hole
With the pond full, mark position of water level
on the liner at the Skimmer location. Partially
drain pond, 8”-10”before proceeding.
5” back from the coping shelf, dig a round hole
measuring 22” across, with a depth of 14” be-
low the marked water line. Dig the front of the
hole 1/4” deeper than the back to compensate
for settling.
Dig a channel 6-3/4” below the water line (see diagram A), measuring 15”wide (see diagram B), to rest
the neck of the Skimmer. Compact and level the bottom of excavation. Do not dig too deeply or the
soil may settle unevenly.
Dig Neck Channel (A) Dig Neck Channel (B)
Jolie Products Inc

5
Installation
Insert weir dividers for 16”
weir in the outermost tracks.
Place the High Flow Skimmer in
the hole. Check to make sure the
intended water level meets the
Skimmer 3-1/4” inches below the
top of the neck. Adjust
up or down
by adding or
removing soil.
Push the weir door hinge tabs
into the notches on the
bottom
of the weir dividers, using
thumbs to hold tabs secure. Lay
the door horizontal in the Skim-
mer neck. *DO NOT ATTACH
THE WEIR DOOR TO THE TOP
WEIR DIVIDER NOTCHES.
Verify that the face of the
High Flow Skimmer is ush
with the back wall of the
lined coping shelf. Adjust
placement, if necessary.
Level the unit front to back and
side to side. Make
the front edge ¼”lower
than the back edge. Check
water level once again. The
placement of the High Flow
Skimmer will determine the
depth of your pond before you
proceed.
For stability, ll the High Flow
Skimmer with water then place
lid on top. Add backll around
the entire unit. Use moist sand
or pea gravel or, if unavailable,
gravel and loose soil (free from
clumps). Hand pack every 3
inches. Do not
over compact.
Lightly
dampen the backll
after installation to help set the
backll.
Insert Weir Dividers
Insert Weir Door
Place Highow Skimmer
Check Position Verify Water Level Backll
Cut 3”opening by
placing hole saw at the
top indicator and cutting
blow the guide.
16”WEIR
3 - 1/8”
Jolie Products Inc

6
Installation
Pull Liner Over Skimmer Make Incision
Position pond liner over the High Flow
Skimmer mouth and hold it in place. Smooth
liner free of wrinkles and folds. Wipe clean.
Make a 3” wide incision through the centered
liner 3/4” below the top of the High Flow
Skimmer opening.
Attach Faceplate Trim Liner
Use the a #3 screwdriver to install screws into all
four corners. Install the remaining screws.
Tighten top, bottom and sides alternately until
screw heads are ush to create a watertight
seal. Do not over-tighten.
Do not use a power drill.
After the faceplate is secured, use a knife to
trim the liner inside the mouth of the High
Flow Skimmer.
FreezeFlex hose reduces plumbing
joints and the leaks that come with
them, it’s easier to use, saves instal-
lation
time and increases
produc-
tivity. Flexible PVC is more freeze
tolerant than rigid PVC, glues to
standard PVC ttings and its black
color makes it easier to hide.
Dig a trench for the
Discharge pipe.
Use the side clos-
est to your water
return or waterfall.
Extend this trench
so that it connects
to the waterfall
lter.
Install FreezeFlex™ Hose
Jolie Products Inc

7
Installation
Bury the FreezeFlex below frost line. Dig a
trench (shovel width) 10”below existing
ground level along the pond perimeter from
the Savio Skimmer to the Livingponds®
Waterfall Filter or water return.
Bury FreezeFlex Hose
Finishing Up
Finish Coping Hide Neck
To hide the Skimmer from view, extend the
coping shelf rock-work up to both sides of
the Skimmer opening.
Place a at rock over the Skimmer neck to
camouage.
Jolie Products Inc

8
Maintenance
Winterization
Under normal operating conditions this Skimmer will provide years of trouble-free use. Here are a
few items which will require periodic maintenance:
1. Check and remove debris captured in the leaf basket every week or as needed. The frequency
required will vary seasonally, with cleaning required more often in the fall than at other
times.
Prepare for winterization in mid-to-late November, or when ice persistently develops on the pond.
Keep equipment winterized until late February or early March when the water temperature rises
consistently to 40ºF or higher.
If the pond is to be shut down in winter:
1. Disconnect pump, clean and store in bucket of water. This prevents any rubbers seals from
drying and cracking.
2. Drain any plumbing lines not buried below frost line (18”-24” in agricultural zones 4-6).
3. Use plumber’s heat tape on pipes and shut o valves. Insulate the pump house and exterior
pumps and valves.
4. Completely empty the tank.
Locate a GFCI (ground fault current interrupter) protected power source nearby. Typically a 2-4 outlet,
15 amp, 1
10v, grounded, single phase service is sucient. Refer to your electrical equipment specica-
tions or
consult a qualied electrician to determine power demands for your system.
Warnings
To prevent electrical shock, disconnect all electrical devices before servicing the Skimmer.
Do not attempt to operate electrical devices with damaged cords or plugs.
Do not attempt to remove any electrical device from the Skimmer by pulling on its cord.
Jolie Products Inc

9
Troubleshooting
Faults Possible Causes Remedies
Pump chamber
runs dry during
operation
Low water level in pond.
Wier door close/stuck/obstructed
Weir not large enough for pump
ow.
Add water to pond. Water level
should be between 3/4” above or
below optimum water mark on
faceplate.
Reduce pump ow.
Install smaller pump.
Install larger weir assembly.
Water leak around
faceplate.
Faceplate screws not tight.
Faceplate not sealed properly.
Use #3 philips screwdriver to hand
tighten screw snugly.
Remove weir face, clean liner of mud
or gravel, smooth
wrinkles.
Reinstall.
Filter pad requires
frequent cleaning.
Pump ow rate too high.
Heavy waste load in pond due to
sh or plant debris.
Adjust pump ow rate to be below
recommended maximum.
Remove lter pad. Add a Savio
Livingponds lter.
Jolie Products Inc

10
_____________________________________
_____________________________________
_____________________________________
_____________________________________
_____________________________________
_____________________________________
_____________________________________
_____________________________________
_____________________________________
_____________________________________
_____________________________________
_____________________________________
_____________________________________
_____________________________________
_____________________________________
_____________________________________
_____________________________________
_____________________________________
_____________________________________
_____________________________________
_____________________________________
_____________________________________
_____________________________________
_____________________________________
_____________________________________
_____________________________________
_____________________________________
_____________________________________
_____________________________________
_____________________________________
_____________________________________
_____________________________________
_____________________________________
_____________________________________
_____________________________________
_____________________________________
Maintenance Notes
Jolie Products Inc

11
______________________________________
______________________________________
______________________________________
______________________________________
______________________________________
______________________________________
______________________________________
______________________________________
______________________________________
______________________________________
______________________________________
______________________________________
______________________________________
______________________________________
______________________________________
______________________________________
______________________________________
______________________________________
______________________________________
______________________________________
______________________________________
______________________________________
______________________________________
______________________________________
______________________________________
______________________________________
______________________________________
______________________________________
______________________________________
______________________________________
______________________________________
______________________________________
______________________________________
______________________________________
______________________________________
______________________________________
Maintenance Notes
Jolie Products Inc

Warranty
Savio Engineering provides a manufacturer’s limited warranty of 5 years from original purchase
date. Warranty does not cover consumables or wear items. Warranty is non-transferable. Within
the warranty period, Savio will repair materials with manufacturing deciencies at their
discretion.
This warranty does not cover any faults caused by improper use, installation and handling of
the device or as a result of wear and tear. Savio Engineering does not assume liability for
consequential damage caused by the failure of the product.
Warranty is void if the product is not used in accordance with instructions. For warranty claims,
please contact your dealer or place of purchase.
Innovative, precision-engineered solutions
Advanced water gardening products for healthy, clean living ponds.
Savio Engineering
1008 Liberty Industrial Dr.
O’Fallon, MO 63366
Skimmer® Livingponds® Waterfall Filter Pond Package™
UVinex® System Water Master™ Pumps Waterfall Well™ SpringFlo™
Ignite Landscape Lighting® Rescue Water Treatment™ Black Foam™ Pond Free® Kits
Jolie Products Inc
Table of contents
Other Savio Water Filtration System manuals

Savio
Savio Compact Skimmerfilter CS0000 User manual

Savio
Savio F100 Livingponds Filter Specification sheet

Savio
Savio FilterWeir 31 User manual

Savio
Savio Livingponds F070 User manual

Savio
Savio Livingponds 070 User manual

Savio
Savio K5003 User manual

Savio
Savio Uvinex Standard User manual
Savio
Savio Water Master Pump Series User manual
Popular Water Filtration System manuals by other brands

HEPA
HEPA FLT4825 quick start guide

Brita
Brita PURITYHEADPLV installation instructions

CALEFFI
CALEFFI DISCAL 5517 Series Installation, commissioning and servicing instructions

UV Pure Technologies
UV Pure Technologies Hallett instructions

Hydac
Hydac FluidAqua Mobil FAM 15 Maintenance instructions

Sera
Sera UV-C-System Assembly instruction