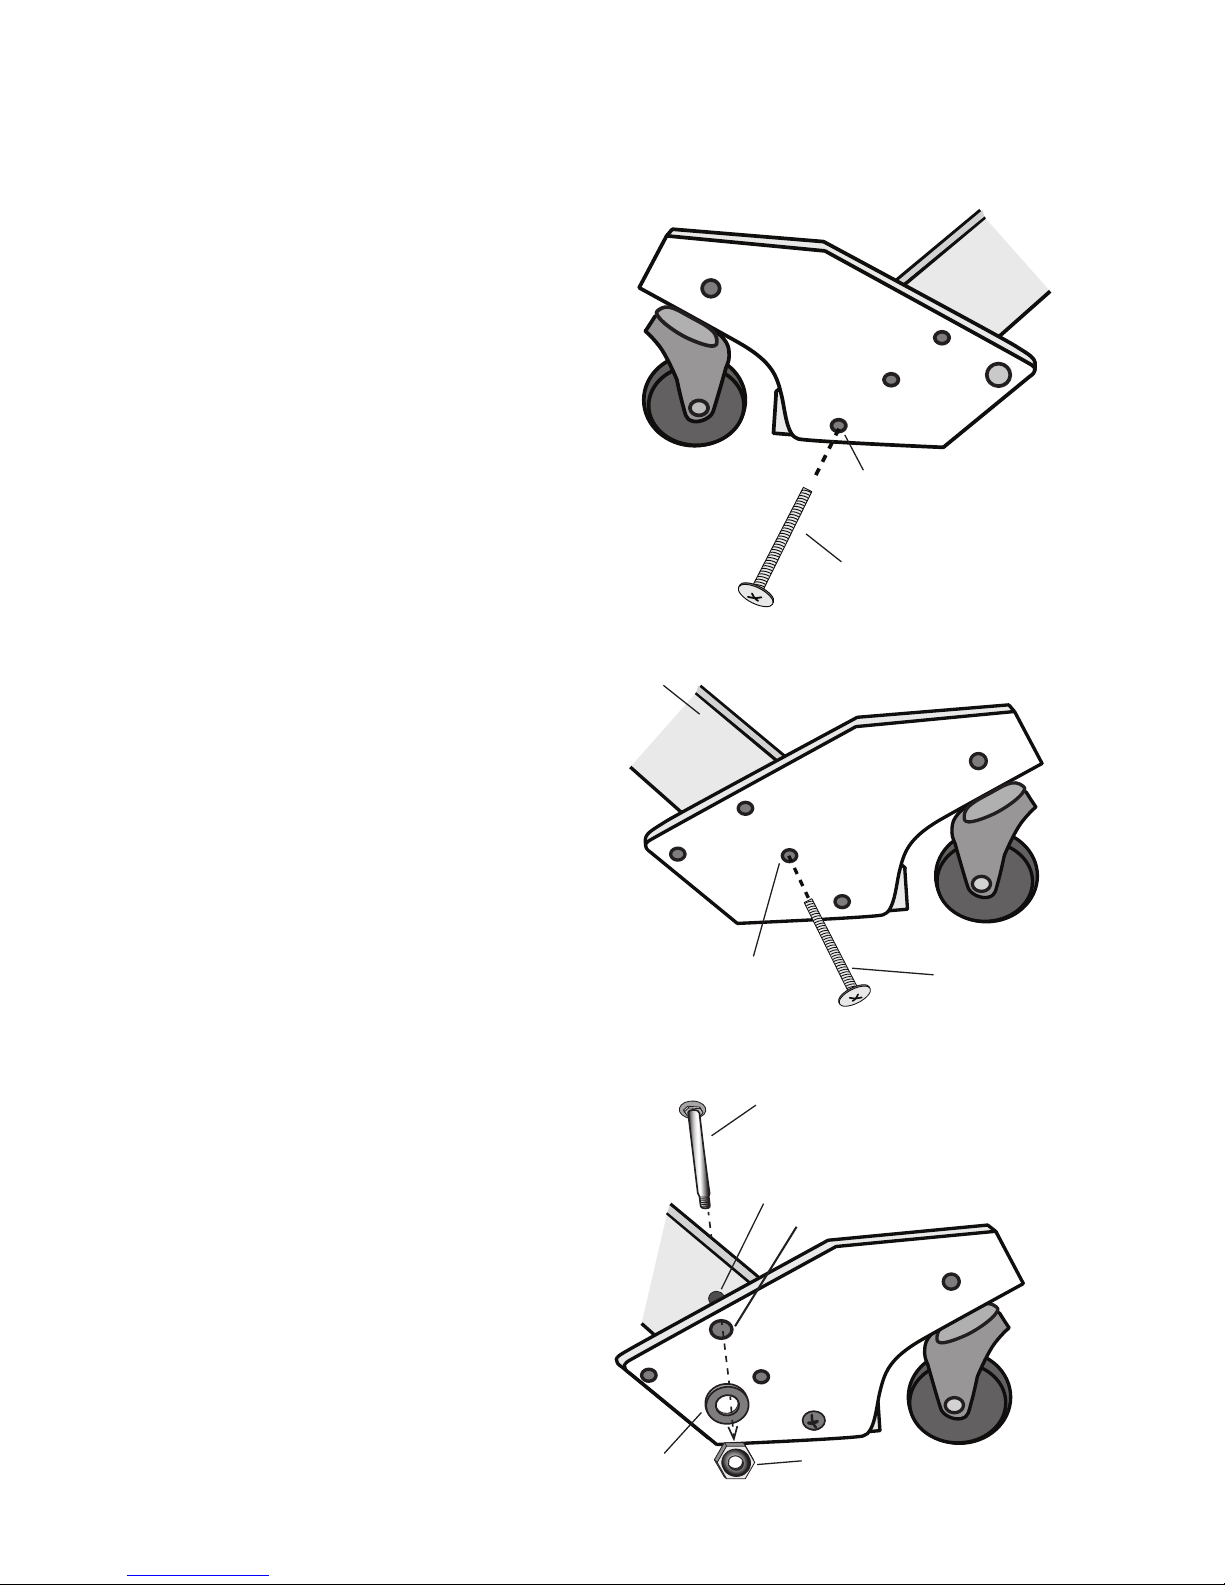
– 4 – – 5 –
into the loom leg using a rubber mallet or
hammer and a piece of scrap wood. Place
a washer and a lock nut on the carriage
bolt and tighten the lock nut enough to
draw the head of the carriage bolt into the
wood of the leg (Figure 4). Note: When
installing the caster block on the
inside right leg, depress the brake re-
lease pedal or undo the brake release
cord from the pedal, to allow easier
access to the hole (H).Repeat for the
other three caster blocks. If you detached
the brake release cord from the pedal,
reattach it.
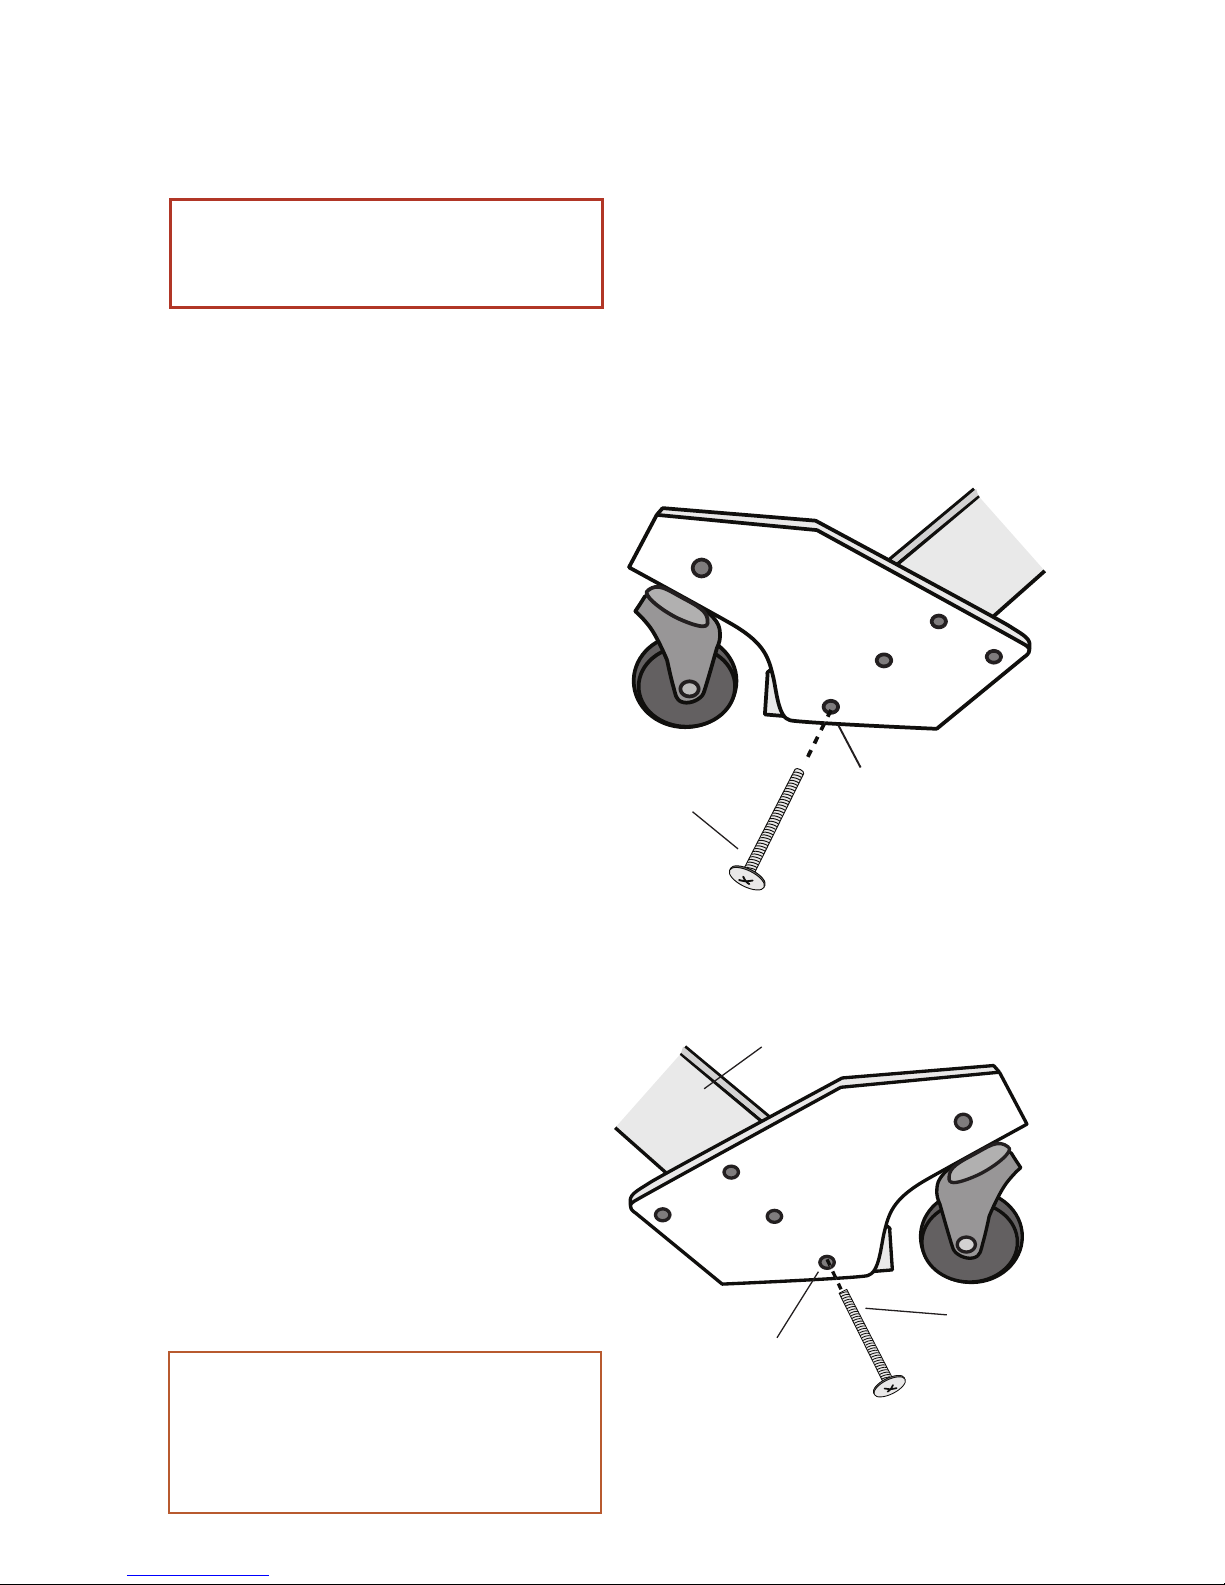
5. Attach the metal support bar to the
rear caster block. From the inside of the
loom, insert a 1-½" hex bolt through the
hole (G) in the rear caster block. Place a
washer on the bolt and then place the cir-
cular hole at the end of the metal support
bar (S) over the bolt so that the jog in the
bar points inward. Secure with a lock nut.
Tighten the lock nut, allowing the support
bar to pivot (Figure 5). Repeat for the
other rear caster
block.
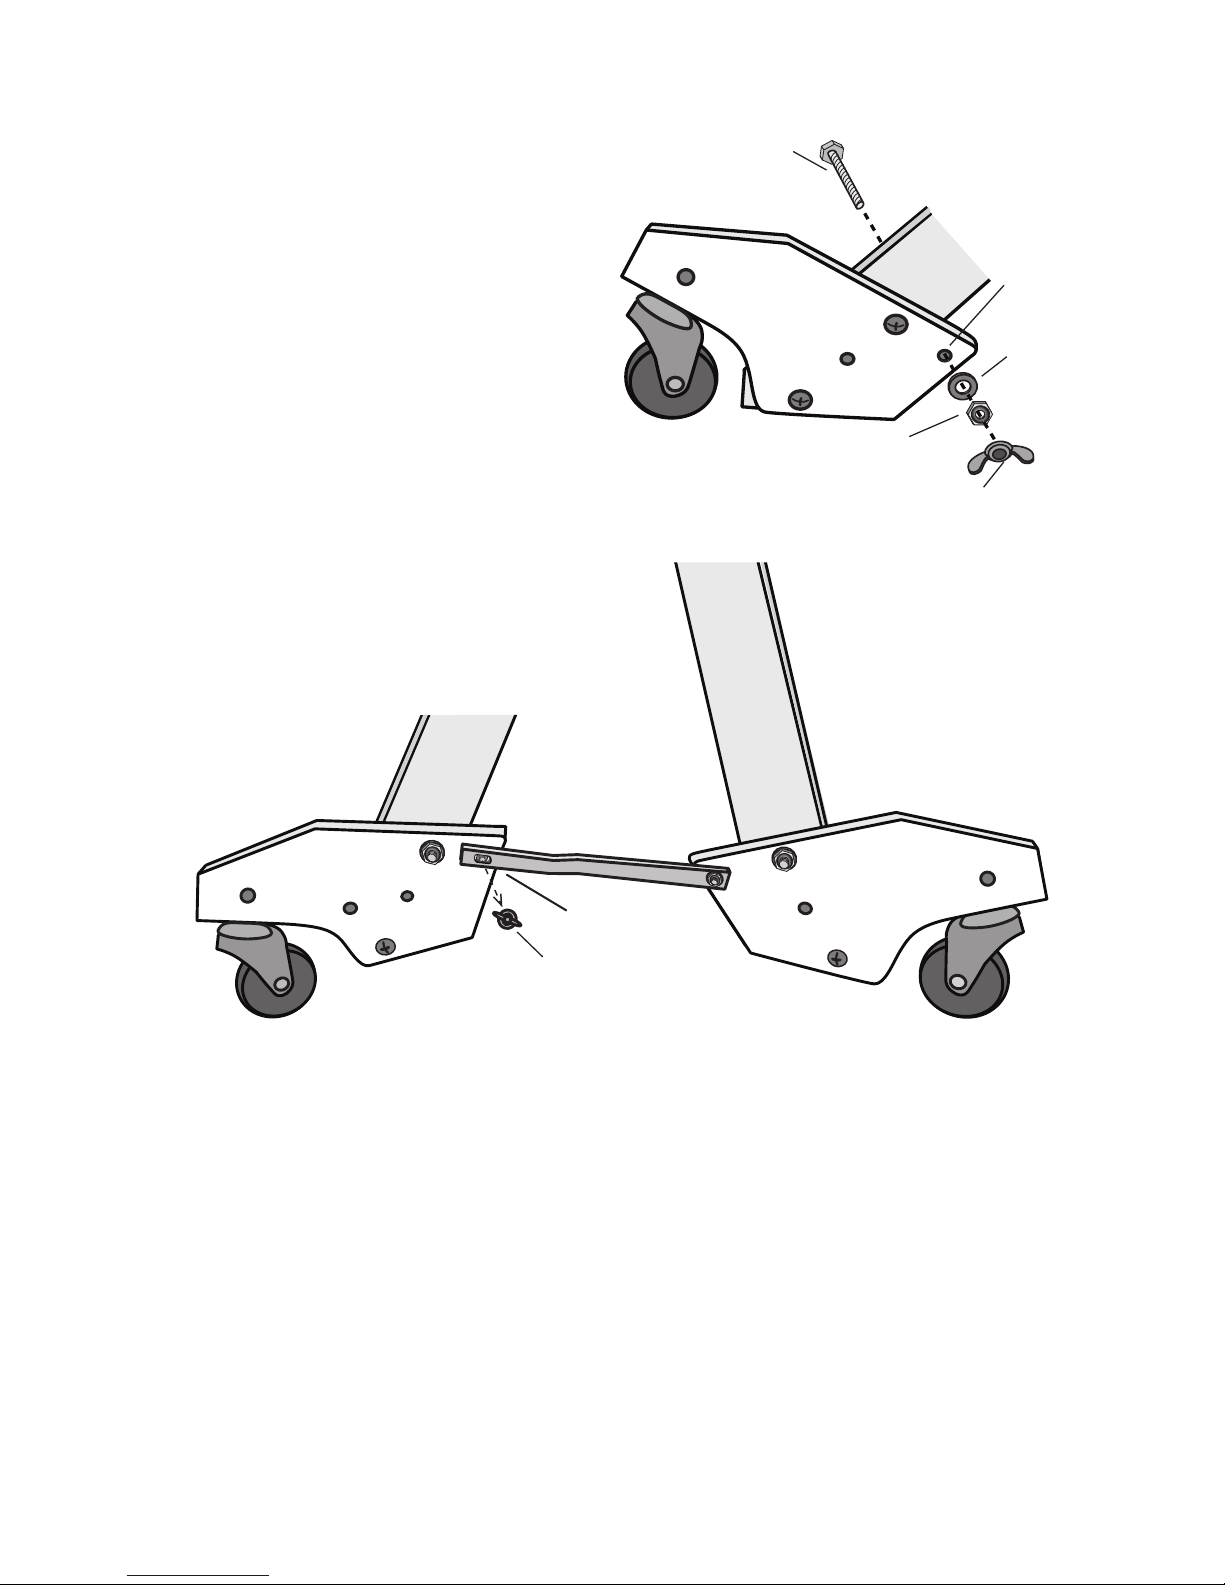
6. Attach the bolt to hold the front
of the metal support bar when the loom is
folded. From the inside of the loom, insert
a 1-¾” hex bolt through the hole (G) in
the front caster block. Secure the hex bolt
with a washer and a lock nut. Place a ¼”
wing nut on the bolt (Figure 6). Repeat
Step 5 for the other front caster block.
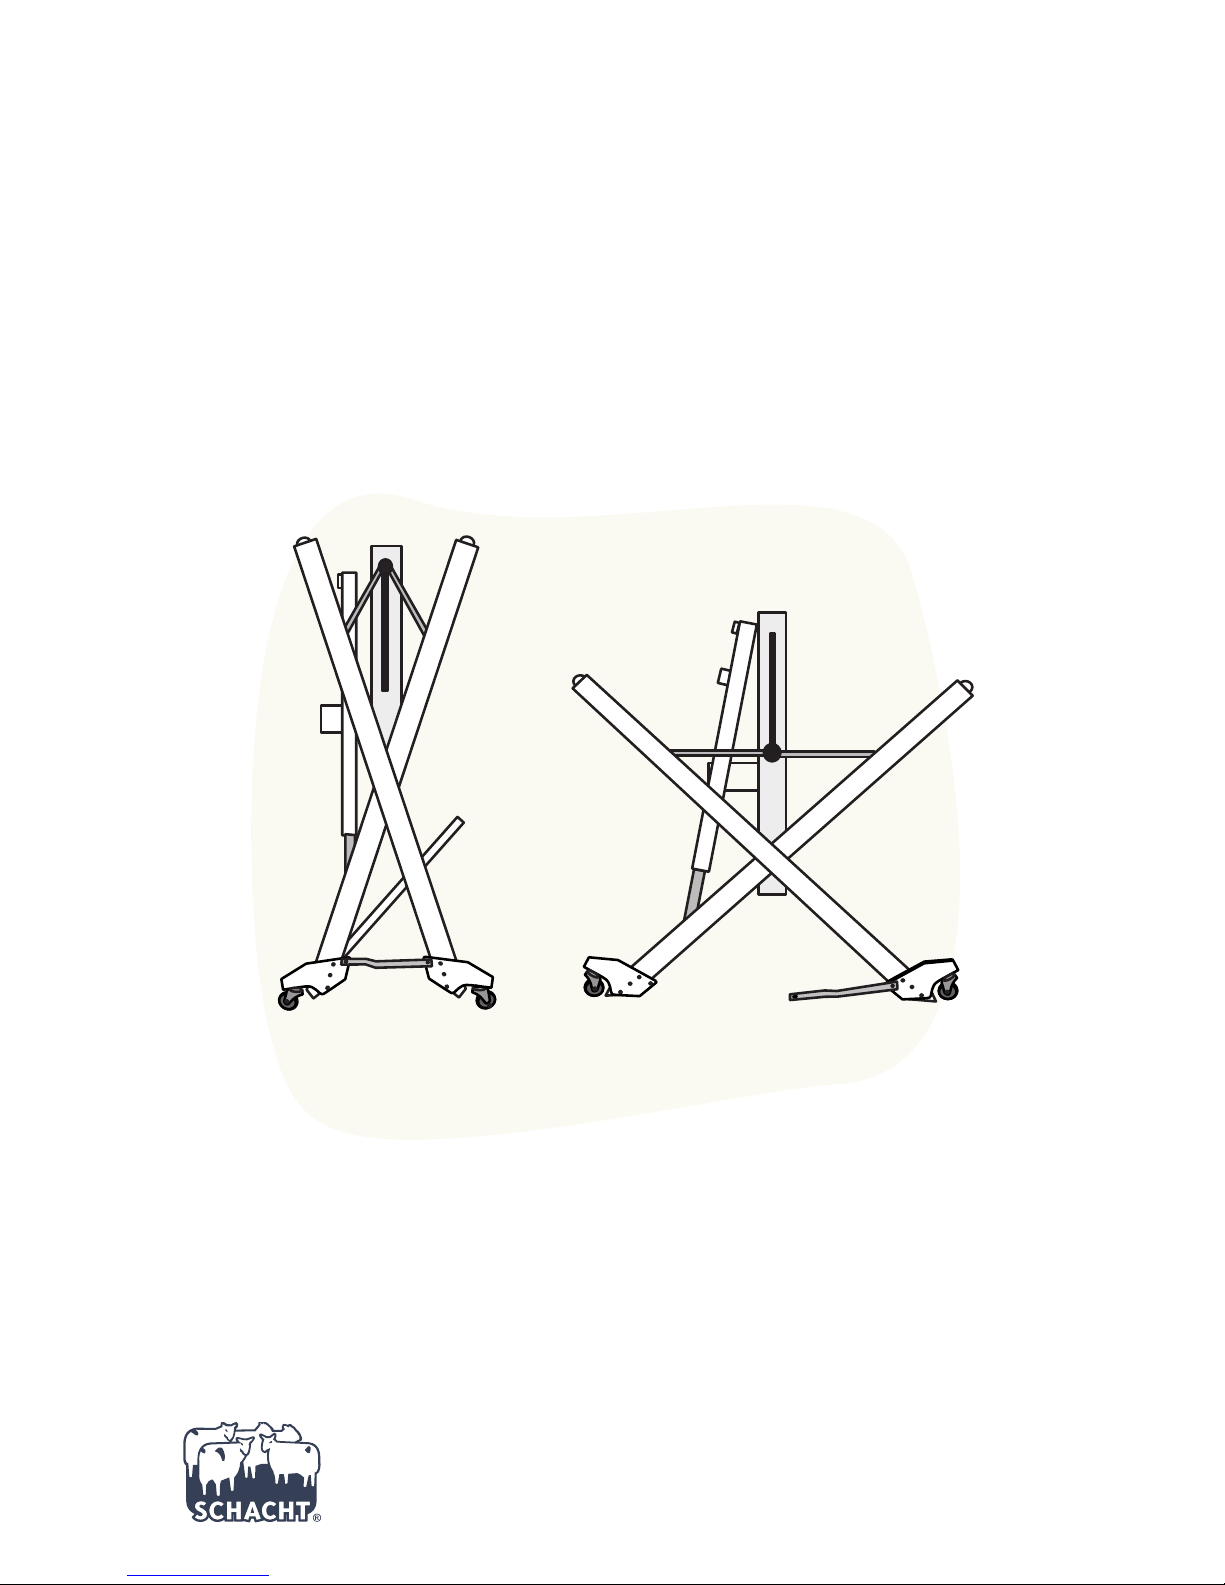
7. Using the stroller. (Figure 13, page
7) Fold the loom. Tighten the fold-up
knobs and secure the slide lock bars to
prevent the loom from opening. You will
notice that the loom is now sitting on its
stroller wheels. Remove the wing nut
from the bolt at (G) on the front caster
blocks. Place the slots at the front end of
each metal support bar over these bolts,
replace the wing nut and tighten.
Your Wolf loom is now ready to travel. •FIGURE 6
1-3
/4" hex bolt
¼" lock nut
¼" wing nut
¼" washer
G
FIGURE 5
1-1
/
2
" hex bolt
stroller
support bar
¼" lock nut
¼" washer
G