manuals.online logo
Brands
  1. Home
  2. •
  3. Brands
  4. •
  5. Schwinn
  6. •
  7. Fitness Equipment
  8. •
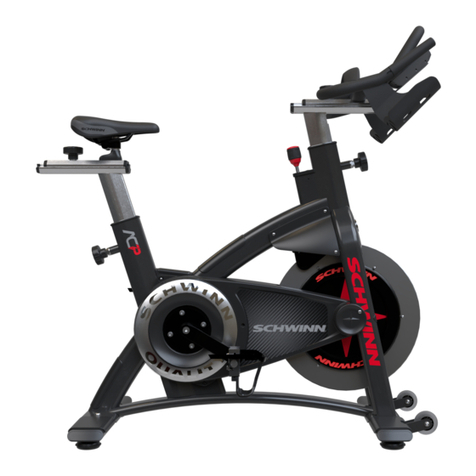
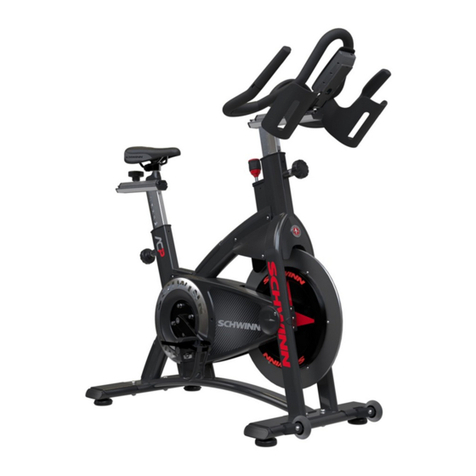
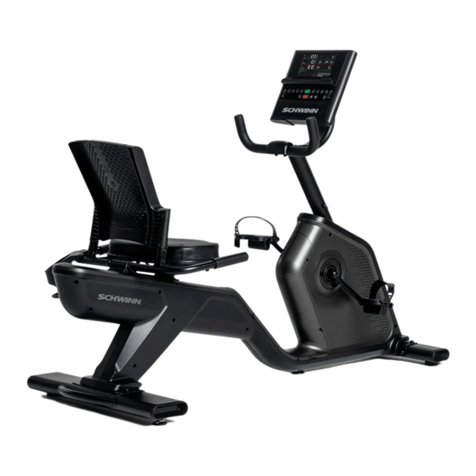
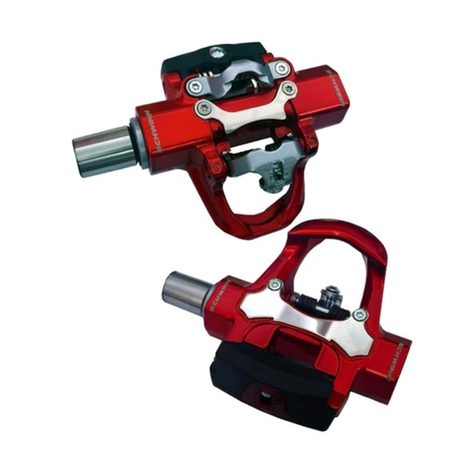
  9. Schwinn Active series 20 series User manual

Schwinn Active series 20 series User manual

20 SERIES
RECUMBENT BIKE
ASSEMBLY GUIDE
PN 001-7054 REVA (06/14/2007) ASSEMBLY GUIDE
Table of Contents
Exploded View .......................................................................................2
Parts List .................................................................................................:3
Hardware ................................................................................................4
Assembly Instructions ..........................................................................5
AC Adapter Specifications ..................................................................15
C_
©
Z
2
@
@
m
x
m
m
PARTSLiST
Re[ Description Qty
1
2
3
4
5
6
7
8
9
10
11
12
13
14
15
16
17
18
19
20
21
22
23
24
25
26
27
28
29
30
31
32
Main Frame
Front Stabilizer
RearStabilizer
Saddle Support Frame
RailTube
Handlebar
Saddle
Back Cushion
PulseWire Connector
Console (Computer)
Left Pedal
Right Pedal
Carriage Bolt M10x 65ram
Acorn Nut M10
Arc Washer ID 10.5;OD25ram:T 1.5ram
Allen HeadScrew M8x 15ram
FlatWasher ID8.4ram;OD25ram;T1.5ram
Limit Rubber Pad
Crank
Phillips Screw M6x 15ram
Not Used
Lower PulseWire (Contact Heart Ratewire)
Middle PulseWire (Contact Heart Ratewire)
Lower ComputerWire
HandlebarWire Connector (CHRElectrode cable)
Allen HeadScrew M8x 10ram
ComputerWire Connector
Flat Head PhillipsScrew M5x 10ram
Adjustment Handlebar
Screw M6x 8ram
Front Post
Arc Washer (ID8.5;OD22ram:T1.5ram)
16
12
4
1
8
1
1
1
1
4
1
4
1
1
1
4
If you are missing items, are short quantities, or have damagedcomponents,
please contact at 1 -800- 4- MY- HOME.
©
£}
s{{_'
<
L/
<
z
13.CarriageBolt M10 x6Bmm- 2pcs
14.Acorn Nut M10 - 2pcs
15.ArcWasher- 2 pcs
(ID10.Bmm;OD2Bmm;T 1.Bmm)
16.Allen HeadScrew- 16pcs
M8 x 1Bmm
17.FlatWasher- 12pcs
(ID8.4mm;OD16mm;T 1.Bmm)
@
18.Limit RubberPad- 4pcs
20.Phillips HeadScrew - 8pcs
M8 x 1Bmm
26.Allen HeadScrew - 4pcs
M8 x 10mm
32.ArcWasher- 4 pcs
(ID8.Bmm;OD22mm;T 1.Bmm)
Allen or HexL- Key6mm- 1pc
OpenEndWrench 1Bmm- 1pc J
You will also need the following tools, which are readily available from
any hardware store:
Phillips screwdriver
Basic Assembly Principles
Here are a few basic tips that will aid in the assembly process.
By using these principles, you can simplify each process and save
yourself extra time and effort.
1.To make the assembly process go faster, gather the pieces you need
for each step and thoroughly read the assembly instructions for that
step prior to starting assembly for the step.
2. When attaching two pieces, gently lift and look through the bolt holes
to help guide the bolt through the holes.
3. As a general rule, and for all bolts and nuts, turn bolts or nuts toward
the right to tighten and left to loosen. Or you can remember the
mnemonic: "Righty tighty, Lefty Ioosey."
-,4
z
Step 1Install Front Stabilizers
Parts:
=Front Stabilizer (2)
=Main Frame (1)
=Carriage Bolts- 2 (13)
=ArcWasher - 2 (15)
=Acorn Nut- 2 (14)
Tools:
=Wrench
Step 1: Install FrontStabilizer (2) to Main Frame (1) using two Car-
riage Bolts (13), two ArcWashers (15), and two Acorn Nuts (14)
as indicated (Figure 1).
Note: Position FrontStabilizer soarrow ondecal is pointing upwards
(Figure1A).
Figure 1
UP_
Sticker
Figure 1A
Step 2Assemble Saddle Support
Parts:
• Saddle Support Frame (4)
RaiITube (5)
Step 2-1: Side Saddle Support Frame (4) onto RaiITube (5) as shown
in Figure 2. The wires from the RaiITube pass through the
Saddle Support Frame.
Note: Take care not to cut or pinch the wires.
Figure 2
Step 3 Install RaiITube Assembly to Main Frame
Parts:
• Lower PulseWire (22)
Middle PulseWire (23)
RaiITube Assembly (5) from
Step 2
=Main Frame (1)
• Allen Head Screws- 6 (16)
FlatWasher - 6 (17)
Limit Rubber Pad - 2 (18)
Tools:
•Allen Key L6
Step 3-1: Connect theLower PulseWire (22) to the Middle PulseWire
(23) as shown in Figure 3A.
Step 3-2: Side the RailTube Assembly (5) onto the Main Frame (1)
and attach using 6 Allen Head Screws (16) and 6 FlatWash-
ers (17) as shown in Figure 3.
NOTE: Make sureto pushLower PulseWire (22)andthe Middle Pulse
Wire (23)into the Main Frame(1) connection bracket. Ensure
the wires will not be pinchedor severed when assemblingthe
RailTubeAssembly (5)to the Main Frame(1).
Step 3-3: Attach the 2Limit Rubber Pads using 2 Allen Head Screws
(16). DO NOT overtighten screws.
Figure 3A
Figure 3
Step 4Attach Rear Stabilizer Bar
Parts: Tools:
• Rear Stabilizer Bar (3) oAIlen Key L6
• Rail Tube Assembly (5)
• Allen Head Screw- 4 (16)
• FlatWasher - 2 (17)
Limit Rubber Pads - 2 (18)
Step 4-1: Attach the Rear Stabilizer Bar (3) to the RaiITube (5) using
4Allen Head Screws (16), 2 FlatWashers (17), and 2 Limiting
Rubber Pads (18).
DO NOT overtighten the screws attaching the 2 Limiting
Rubber Pads (18).
NOTE: Make surethe RearStabilizer Bar (3)is orientated asillustrated, with
the bendin the barfacing forward.
c
c%
Figure 4
z
©
z
Step 5 Attach Handlebar to Saddle Support Frame
Parts:
• Handlebar (6)
Saddle Support Frame (4)
,,Allen Head Screws - 4 (26)
Tools:
,,Allen Key L6
•FlatWasher - 4 (17)
,, HandlebarWire Connector (25)
Middle PulseWire (23)
Step 5-1: Attach the Handlebar (6) to Saddle Support Frame (4)
using 4Allen Head Screws (26) and 4 FlatWashers (17) as
shown in Figure 5.
Step 5-2: Connect HandlebarWire Connector (25) to Middle Pulse
Wire (23) as shown in Figure 5A. Take care not to pinch the
HandlebarWire Connector (25) during assembly.
Step 6 Attach Cushions
Parts:
• Saddle (7)
=Back Cushion (8)
• Support Frame (4)
• Phillips Screws - 8 (20)
Tools:
•Phillips Screw Driver
Step 6-1: Install Saddle (7) and Back Cushion (8) onto the
Saddle Support Frame (4) using 8 Phillips Screws (20).
Insert the Phillips Screws through the screw holes in the
Saddle Support Frame first when attaching the Saddle and
Back Cushion.
Note: There aretwo groupsof mountingholeson the Back Cushion
(8)sothat youmay adjustthe height ofthe backsupport to your
preference.
Figure 6
z
©
z
Step 7 Mount the Console
Parts:
• Lower PulseWire (22)
• Lower ComputerWire (24)
• Front Post (31)
• PulseWire Connector (9)
• ComputerWire Connector (27)
• ArcWasher - 4 (32)
• Allen Head Screw- 4 (16)
• Flat Head Phillips Screw - 4 (28)
Step 7-1: FeedLower PulseWire (22) and Lower ComputerWire (24)
through the Front Post (31).
Step 7-2: Install the Front Post [31)onto the Main Frame (1), using 4
Allen Head Screws (16) and 4ArcWashers (32).
Step 7-3: ConnectLower PulseWire (22) to the PulseWire Connector
(9), and the Lower ComputerWire (24) to the ComputerWire
Connector (27).
Note: Pushthe wires gently intothe Front Post. Takecare notto cut
or pinchthe wires.
Step 7-4: install the Console (10) to Front Post [31)using 4 Flat Head
Phillips Screws (28) as shown in Figure 7A.
12
Figure 7 Figure 7A
Step 8 Install Adjustment Handle
Parts:
• Adjustment Handle (29)
• Screw (30)
Step 8-1: Insert the Adjustment Handle (29) into the adjustment
handle mount. Position the Adjustment Handle at an angle
that is easy for you to reach and operate from your normal
seated position on the bike. This may vary from person to
person. Finish install by tightening Screw (30).
Note: Be careful not to overtightenandstrip the threads on the screw (30).
Handle
mount
Figure 8
13
Step 9 install Pedals
Parts:
=Left Pedal (11)
• Right Pedal (12)
,*"C" Cell Batteries
Tools:
• SpannerWrench L15
Step 9-1: Install the Left Pedal (11) to Left Crank (19). Install Right
Pedal (12) to the Right Crank.
Note: The Left Pedalhasa left handedtread andscrews into the Left
Crankcounter-clockwise.
Step 9-2: Insert 4 "C" cell batteries into the back of the console as
shown by the diagram in battery bay.
Figure 9
14
NOTE: If you prefer,you may power the bike with a Class 2
Transformer AC Adapter. The adapter plugs into the DC
Connector Jack on the back of the console.
The adapter must be purchased separately and can be
obtained frommany electronic stores.
The AC adapter specifications are:
* INPUT:A0 120v60Hz5.7W
*OUTPUT:DO6V 500mA
.DC PLUG:
Outer Diameter 5.5_+0.1
internal Diameter 2.1_+0.1
Length 10+0.1
DOWire Length 71in. (180cm)
Wire Diameter 24AWG
The DCConnectorJack configuration:
•Outside: Negative
.inside:Positive
AC ADAPTOR
CLASS 2 TRANSFORMER
INPUT: 120VAC 60Hz 5.7W
OUTPUT: 6VDC 500mA
XXXXX _ XXXXXXXX
XXX SAC
XXXXXX XXXXXX
5
Step 10 Final inspection
Step 10-1: Please inspect your machine to ensure that all fasteners are
tight and components are properly assembled. Review all
warnings affixed to machine.
Congralulations! Assemblyiscomplele!
Please reference the Owner's Manual for information
regarding Computer Operation, Product Maintenance,
Warranty Information, General Fitness and
Exercise Guidelines.
1G
(b2087 Nautil[is,h/c AllRightsReserved The Nautiluslogo, Nautilusand Active are either r#g]ster#dtradomarksor tradomatks ofNautiltJs,hlc
Schwhln alld the Schwinn QualityS_al an _g]ste_d tradomarks
Nautilus,_nc, Wurld_eadq uarters,_@0 SENautilus D_,Val/_ot_ve_WA _68S
Printedin China

Other manuals for Active series 20 series

1

This manual suits for next models

1

Other Schwinn Fitness Equipment manuals
Schwinn A.C. Performance User manual

Schwinn

Schwinn A.C. Performance User manual

Schwinn 590U User manual

Schwinn

Schwinn 590U User manual

Schwinn SCHWINN AC PERFORMANCE FULL ASSY Quick start guide

Schwinn

Schwinn SCHWINN AC PERFORMANCE FULL ASSY Quick start guide

Schwinn 230 Recumbent Bike User manual

Schwinn

Schwinn 230 Recumbent Bike User manual

Schwinn SCHWIN COMP User manual

Schwinn

Schwinn SCHWIN COMP User manual

Schwinn AD6 User manual

Schwinn

Schwinn AD6 User manual
Schwinn IC3 User manual

Schwinn

Schwinn IC3 User manual
Schwinn Triple Link-SDL Setup guide

Schwinn

Schwinn Triple Link-SDL Setup guide

Schwinn AD6 User manual

Schwinn

Schwinn AD6 User manual

Schwinn 4iiii User manual

Schwinn

Schwinn 4iiii User manual

Schwinn 410 i User manual

Schwinn

Schwinn 410 i User manual

Schwinn 490e User manual

Schwinn

Schwinn 490e User manual

Schwinn 411 Instruction manual

Schwinn

Schwinn 411 Instruction manual

Schwinn 590R User manual

Schwinn

Schwinn 590R User manual

Schwinn 9-7310 User manual

Schwinn

Schwinn 9-7310 User manual

Schwinn Star Trac 4iiii User manual

Schwinn

Schwinn Star Trac 4iiii User manual
Schwinn AirDyne Pro User manual

Schwinn

Schwinn AirDyne Pro User manual

Schwinn IC Pro User manual

Schwinn

Schwinn IC Pro User manual
Schwinn AD6 User manual

Schwinn

Schwinn AD6 User manual
Schwinn MPower Echelon2 Power Upgrade User manual

Schwinn

Schwinn MPower Echelon2 Power Upgrade User manual

Schwinn AD6 User manual

Schwinn

Schwinn AD6 User manual
Schwinn Cadence Pro User manual

Schwinn

Schwinn Cadence Pro User manual

Schwinn AD6 User manual

Schwinn

Schwinn AD6 User manual

Schwinn 9-7300 Reference guide

Schwinn

Schwinn 9-7300 Reference guide
Popular Fitness Equipment manuals by other brands

Revitive Arthritis-Knee user manual

Revitive

Revitive Arthritis-Knee user manual

Domyos BM100 operating instructions

Domyos

Domyos BM100 operating instructions

Movement EDGE PUXADA ALTA Assembly manual

Movement

Movement EDGE PUXADA ALTA Assembly manual

Lifeline LLUWB-BLK owner's manual

Lifeline

Lifeline LLUWB-BLK owner's manual

Precor CW-816 Assembly guide

Precor

Precor CW-816 Assembly guide

Balanced Body Precision Rotator Discs manual

Balanced Body

Balanced Body Precision Rotator Discs manual

G-FITNESS AIR ROWER user manual

G-FITNESS

G-FITNESS AIR ROWER user manual

CAPITAL SPORTS Dominate Edition 10028796 manual

CAPITAL SPORTS

CAPITAL SPORTS Dominate Edition 10028796 manual

Martin System TT4FK user guide

Martin System

Martin System TT4FK user guide

CIRCLE FITNESS E7 owner's manual

CIRCLE FITNESS

CIRCLE FITNESS E7 owner's manual

G-FITNESS TZ-6017 user manual

G-FITNESS

G-FITNESS TZ-6017 user manual

Accelerated Care Plus OMNISTIM FX2 CYCLE/WALK user manual

Accelerated Care Plus

Accelerated Care Plus OMNISTIM FX2 CYCLE/WALK user manual

pedalo 20230165 manual

pedalo

pedalo 20230165 manual

Saebo SaeboStim Pro Instructions for use

Saebo

Saebo SaeboStim Pro Instructions for use

Performance HyperVibe User instructions

Performance

Performance HyperVibe User instructions

Scalamobil S27 Operator's manual

Scalamobil

Scalamobil S27 Operator's manual

Precor Experience Series Service manual

Precor

Precor Experience Series Service manual

FYTTER RedMIUM BENCH BE-T6R manual

FYTTER

FYTTER RedMIUM BENCH BE-T6R manual

manuals.online logo
manuals.online logoBrands
  • About & Mission
  • Contact us
  • Privacy Policy
  • Terms and Conditions

Copyright 2025 Manuals.Online. All Rights Reserved.