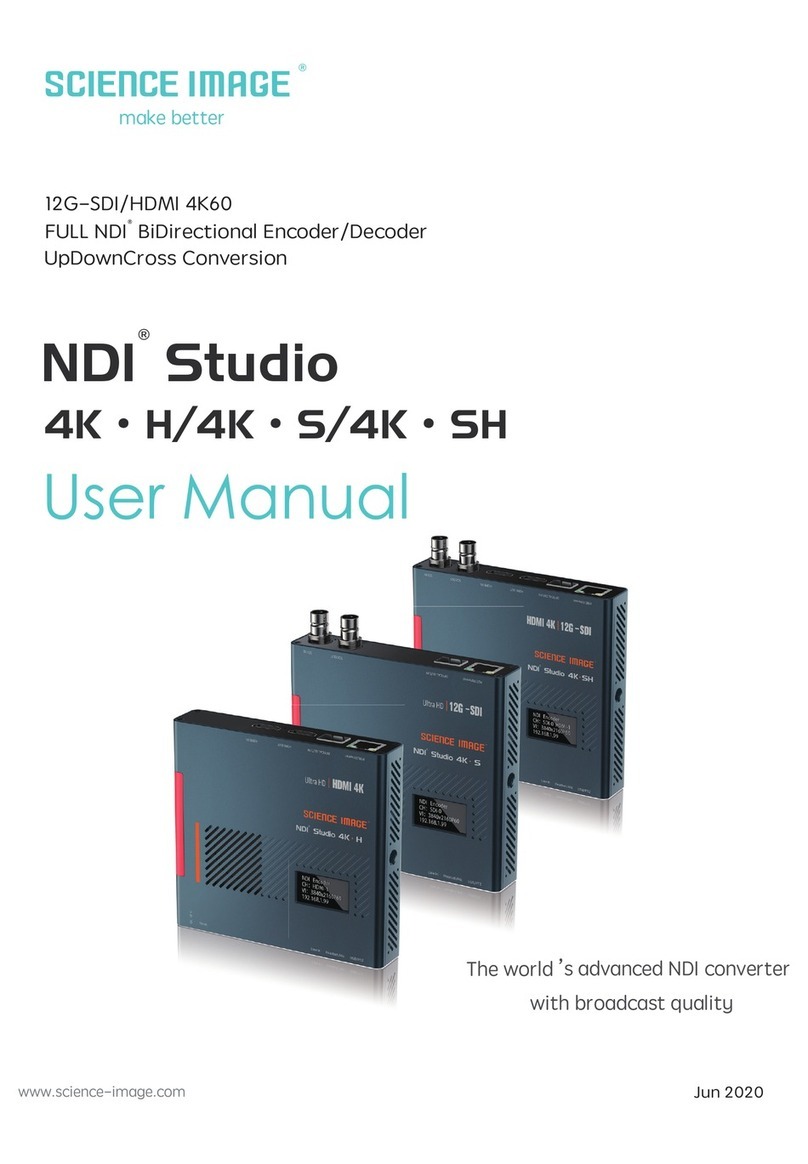
Science Image NDI HD mini User manual

Jan 2021
www.science-image.com
make better
NDI HD mini
The world’s advanced NDI converter
with broadcast quality.
NDI HDMI mini
NDI SDI mini
SDI/HDMI BiDirectional
NDI Encoder/Decoder
®

www.science-image.com
Reading before use
If you find that some functions are unavailable in future use, you need to check the following to find out whether it is caused by improper operation or settings:
1. This product is an audio and video codec conversion device, which only supports streaming and pushing in the local area network, but not on the Internet;
2. If you find that the video stream is not detected in NDI Studio Monitor, please check whether the stream name of the encoder has been modified.
Multiple identical stream names may cause NDI Studio Monitor to fail to detect;
3. If you see the background picture of the logo up streaming (the background picture set on the [Video] page of the encoder) on the encoder end
through the software that supports NDI, and you cannot input the source, please click the right side of the [Video] page on the web end.
Click the [Stop Now] button on the side;
4. If there is a login failure due to the upgrade, please clear the browser cache and refresh the page and log in again;
5. If you find that the web page cannot be accessed, please check whether the IP address of the PC or mobile phone and the IP address of the NDI® HD mini
are in the same network segment;
If you power on the device and the screen displays the IP address as "192.168.8.8", it means that your box has enabled the DH CP function means
automatic setting of IP address mode and there is no router in the connected link. At this time, you only need to Add a router to the road, and then power off
and restart the device to redistribute it to the IP with routing; if you only have a switch, you need to adjust the IP address information of your local PC or
mobile phone to the network segment of "192.168.8.1", Then enter the webUI of this device. After entering, you need to set the IP address mode to manual mode,
enter the IP address information, and keep it in the same LAN segment as the local PC or mobile phone.

www.science-image.com
MENU
NDI® HD interface and indicator introduction
1.
2.
3.
4.
5.
6.
7.
9.
3 power-on methods of NDI HD mini
OLED screen display instructions
DHCP mode
Manual mode
NDI Multicast setting
NDI Group setting
NDI Discovery server setting
Encoder Setting
Set frame rate
Set bitrate (Bandwidth)
Set NDI decoder volume
System Setting
Reset login password
Firmware upgrade
Working mode switch
Reboot Device
Set screen aspect ratio
Set Tally lights
Set NDI encoder volume
Set background Logo and pic to upstreaming
Modify the NDI stream name
8. Decoder Setting
Select NDI decoder source
Restore initial settings
1
1
1
2
2
2
2
3
3
3
3
3
3
4
4
6
6
6
6
6
7
7
8
8
4.1
4.2
6.1
6.1.1
6.1.2
6.2
6.3
6.4
7.1
7.2
7.3
7.4
7.5
7.6
7.7
8.1
8.2
9.1
9.2
9.3
9.4
9.5
5
5
5
5
5
5
5
Login Web UI
open the web login page
log in
Device Information
Network settings
Modify IP
10
11

www.science-image.com
MENU
How to use Studio Monitor to view NDI stream
10.
11.
Control
How to use vMix, Studio Monitor to view NDI stream
How to use vMix to add NDI stream
Setting Camera
PTZ Control
8
8
8
10.1
10.2
11.1
11.2
9
9
9
10

www.science-image.com
1/9
1. NDI® HD mini interface and indicator introduction 2. 3 power-on methods of NDI HD mini
1 2 3 4 5 6
7
8 9 10 12 13 14
11
15
SDI input---------------- 3G-SDI input, only available in encoding state
SDI output---------------3G-SDI output, the picture is looped out in the encoding state, and the decoded output picture in the decoding state
HDMI input---------------HDMI input, only available in encoding state
HDMI output--------------HDMI output, loop out the picture in the encoding state, and decode the output picture in the decoding state
Network port/POE---------network connection/through POE (Power Over Ethernet) switch can be connected to the LAN and powered on at the same time
USB/PTZ-----------------USB mode power supply / support for pan/tilt omni-directional (up and down, left and right) movement and lens zoom,
zoom control camera connection
Tally indicator------------real-time display of the three states of the current broadcast video: yellow/standby, green/pre-monitoring, red/program
Hot shoe hole-------------fixed connection slot with imaging equipment
5-17V DC-IN--------------5-17V DC power input
DC power indicator--------DC power indicator, white light after successful power-on
Start indicator------------the system core chip starts the work indicator, and the green light is displayed when the startup is successful
Wifi and Bluetooth---------Wfi and Blutooth Atena
Reset--------------------manual reset button
SD Card------------------An external boot disk before firmware version 0620a, which is no longer used since 0620a, and the system is moved to flash
Headset or Mic------------headphone jack, adopts American standard; at the same time can be used as Mic
1
2
3
4
5
6
7
8
9
10
12
13
14
15
11
3. OLED screen display instructions
① Use the standard DC-12V power supply of the product to power on, and insert the network cable to connect to the LAN;
② Power on using USB, and insert the network cable to connect to the LAN;
③ Connect to the LAN at the same time through the power of the network cable connected to the POE (Power Over Ethernet)
switch.
After power on, the NDI® HD mini will display four lines of information on the front OLED screen. The specific informationis listed
as follows:
NDI Decoder
NDI: SCIENCEIMAGE
VI: 1920 1080 p50
192.168.1.24
If the NDI® HD mini has been set to the decoding mode, the screen will first display the
default initialization encoding state each time it is first powered on, and it will resume
displaying the currently set decoding state after waiting for about 30 seconds.
NDI Decoder
NDI: SCIENCEIMAGE
VI: 1920 1080 p60
192.168.1.24
The first line:
The second line:
The third line:
The fourth line:
Note:
Displays the current mode of the NDI® HD mini, there are two types: encoding and decoding. The encoding is:
"NDI Encoder"; the decoding is: "NDI Decoder".
Displays the name of the NDI stream currently being encoded or decoded by NDI® HD mini. Such as:
"NDI:SCIM-2020" (encoding end) or "NDI:SCIENCEIMAGE" (decoding end).
Cyclically display the resolution of the video stream currently being encoded or decoded and the type of the
connected video source interface. In the encoding state, first display the resolution of the input video stream,
for example: "VI: 1920x1080P60"; then switch to the connected video source interface type such as
"CH: SDI-1 HDMI-0" (0 means no input, 1 It has input); the video sourceinterface type connected in the decoding
state is displayed as: "CH:NDI-1", which means it is in the state of decoding NDI video stream. When there is no
input at the encoding end, it will display "VI:0x0/0" first and then "CH:SDI-0 HDMI-0".
Cyclically display the current device's IP address, the real-time temperature of the main chip, and the frequency
of the audio codec. For example: "192.168.1.24" and "CPU:56 AI:48khz" are displayed cyclically.

www.science-image.com
2/9
4. Login webUI
4.2 Login In
4.1 open the web login page
Default login account:︓admin
Default password︓111
2
Method 1:
Open the login page by entering the IP address of the device in the browser address bar.Open the computer or mobile browser,
enter the IP address displayed on the fourth line of the OLED screen of the device in the address bar, and press Enter to the
login page, as shown below:
Method 2:
The first step:
Download and install the free NDI® tool-NDI Studio Monitor on NewTek's official website. Download link: "https://ndi.tv/tools"
The second step:
After the installation is complete, open the "NDI Studio Monitor" program.
The third step:
The fourth step:
On the opened Studio Monitor page, click the gear icon in the lower right corner. As shown in the above right picture
The PC or mobile phone must be in the same
routing network as the NDI® HD mini device.
Note:
Open the login page through NDI Studio Monitor
Click the menu icon in the upper left corner or right-click anywhere, select "SCIENCEIMAGE"-click to find an item consistent
with the NDI stream name of the device. As shown in the left picture above
This page is the NDI® HD series device information page, which contains the following information:
Device Information
Device running time (since power-on), device heartbeat monitoring (every 10s to monitor whether the system is
operating normally), the video resolution and audio frequency of the HDMI source or SDI source of the current
encoding input (or the format of the decoded NDI video stream Information), real-time temperature of the main
chip and detailed device param-eter information.
1
The device information includes:
Device name (can display the current codec mode of the device), device serial number, hardware version, firmware
version (can be upgraded on the system page with the version update), MAC address (unique and unmodifiable),
device IP address (can be Modify at any time on the web page), local IP address (the IP address of the local PC or
mobile phone), and disk space (usage of hardware flash disk space).
2
1

www.science-image.com
3/9
6. Network Settings
6.1 Modify IP
6.1.1 DHCP Mode
6.1.2 Manual mode
Click [Network] to enter the network setting page
There are two modes for device IP address setting: DHCP and manual.
Auto(DHCP) mode needs to be used in the link connecting the router. The router dynamically assigns an IP address to the device
in real time. Each time the device is powered on, an IP address is randomly assigned to the device. You can log in to the web page
to modify the corresponding information according to the IP address assigned by the router. .After selecting this mode, there is
no need to fill in the page IP address information, just click the [Apply] button below, and wait for 10 seconds to restart or power
on the device to take effect.
If this mode is selected, the user needs to set the IP address information of the device to be in the same network segment as the
IP address information of the local PC or mobile phone. For example: View the local computer's Ethernet IPv4 information as
"IP address: 192.168.1.144 Subnet mask: 255.255.255.0 Default gateway: 192.168.1.1", then you can set the device IP address as:
"IP address: 192.168.1.25 gateway : 192.168.1.1 Subnet mask: 255.255.255.0 "The gateway and subnet mask are the same as the
local computer or mobile phone, and the IP address does not conflict with other addresses in this network segment
After filling in the IP address, click the [Apply] button below, and then the system will
complete the IP address modification and automatically restart the device.
The web page will also automatically enter the modified IP address page (no need to enter the new IP again),
this process takes about 30 seconds.
1
2
12

www.science-image.com
4/9
6.3 Setting NDI UDP(Multicast)
6.4 Setting NDI Group
6.2 NDI Discovery server setting
When the multicast mode is UDP (Multicast) transmission mode, there will be a default multicast address and subnet mask. You can also
configure the address manually and click Apply to take effect. Multicast mode is enabled by default,To turn off multicast and select
TCP (Multi-Connection) transmission mode is adopted.
NDI default public group name is: “public”, if you want to add a new group, add a comma "," to separate it. You can also
create a separate private group, such as: Science Image, so that only the same fill in “Science
Image” device can obtain the video information.
The NDI discovery server can enable video streaming to be transmitted across network segments. To use this function, you need to visit the
NewTek official website (https://www.ndi.tv/sdk/) download and install NDI SDK and NDI Tools.
Sources represents the number of encoders connected to the server, and Listeners represents the number of decoders connected to the server.
Step 1: Open the NDI Discovery service and record the IPv4 address of this computer (for example: 192.168.1.106).
Step 2: Log in to the web UI and find the NDI discovery server settings under the network, click Open, fill in the server address with the IPv4
address recorded in the first step (192.168.1.106), and click Apply.
Step 4: Computer software such as vMix, studio monitor, etc and If you want to find the NDI source of box when it’s in Encoding
mode in cross-network segment , you need to download and install NDI tools and open NDI Access Manager.
For this software, tick √ in front of Use Discovery Server under Advanced, and fill in the IPv4 address (192.168.1.106) recorded in
the first step for Server IP, and click OK.
Step 3: If there in Decoding mode wants to find the NDI source from NDI box in cross-segment encoding mode, you also need
to open the NDI discovery server settings and fill in the same server address. (For example: 192.168.1.191) Click Apply.
7. Setting Encoder
The encoder setting page can set the aspect ratio of the video source, frame rate, bit rate,
tally light status, NDI encoder volume and Default NDI stream background image push.
编码模式的 web UI

7.2
7.3
7.5 Set Tally Light
7.4
7.6
7.7
The tally light can be turned on or off at any time (there are three display states: yellow/standby, green/pre-monitoring, red/program).
www.science-image.com
5/9
7.1 Modify the NDI stream name in the encoding state
If the device is used as an encoder, you need to modify the NDI stream name. The NDI stream name must be unique locally, otherwise
software such as NDI Studio Monitor may not be recognized. After the modification, click the [Apply] button below to take effect in
real time. See the modification result on the OLED screen of the device.Examples are as follows:
Set screen aspect ratio
Supports five screen aspect ratio settings: source aspect ratio, 4:3, 16:9, 16:10, square.
Set frame rate
Support 4 kinds of frame rate settings: source frame rate, 1/2 frame rate, 1/3 frame rate, 1/4 frame rate.
Set bitrate (Bandwidth)
Adjusting the code rate of the video source can save network bandwidth without affecting the picture quality.
Set NDI encoder volume
"Encoder volume" adjusts the volume of the video source encoded by the encoder, such as the volume of the picture in the NDI St
Logo background image upload streaming
If it is in the encoding state, the user can choose to set the LOGO background picture as a picture stream according to actual
Up streaming background image
displayed in NDI Studio Monitor

www.science-image.com
6/9
8.1 Setting Decoder volume
adjusts the volume of decoding from SDI/HDMI output to the display device, such as output to monitor or TV.
To change the decoder settings, the device needs to be in the decoding working mode, please refer to page 8 for working mode switching.
9. System Setting
9.1 Reset Password
Modify the login password and click Apply. After the password modification is completed, it will take effect the next time you log in.
8. Setting Decoder
8.2 Select NDI source to decode
If this device is used as a decoder, you need to select an NDI source to decode and output.
Setting steps:
① Log in to the webUI of the decoder
② Click [Decode]
③ Click [Refresh List]
④ Click the number in front of the NDI source to be decoded (1 is the NDI source currently being decoded)
Decoder web UI
4
23

www.science-image.com
7/9
9.2 Restoring factory settings
9.3 Firmware Upgrade
Restoring factory settings can restore the device to its initial state, including all settings in the network, encoding, decoding, and system.
Note: The firmware version will not be restored. The factory default IP address of the device is: 192.168.1.188.
The company’s official website will regularly release new upgrade firmware, and users can download the latest firmware to upgrade as
needed. Download address: " http://www.science-image.com", After downloading, you can click the[Open Upgrade Page] button on the
[System] page to enter the upgrade page or click the human icon in the upper right corner and then click the [Firmware Upgrade Upgrade]
button.
After entering the upgrade page, click the [Select File] button at ①, select the firmware to be upgraded, such as: siup-ndi-20201220b.si, open it,
and there will be a progress prompt in the lower left corner of the browser.When finished, the uploaded file information will be displayed.
The button at ② will also change from red to green, and then click to start the upgrade. As shown below:
When the progress bar reaches 10%, there will be a long pause.
Don’t be surprised, just wait patiently.
ion.
Attention:
1
2
After the progress bar reaches 100%, click the pop-up [Finish] button and close the upgrade page to complete the upgrade
operation. After confirming that the upgrade is successful, power on and restart the device.
Do not cut off the power during the upgrade process, otherwise the system files
may be damaged and the system will not start normally.
Note:

www.science-image.com
8/9
9.4
9.5 Restart
The first line of the OLED screen of the product will display the working mode, "NDI Encoder" is on Encoding, and "NDI Decoder" is on Decoding,
as shown in the figure below.
Click the Remote restart button , and the NDI box will restart the system.
①Camera type
Select the type of camera and click Connect.
②Camera adjustment
Select the type of camera and click Connect.
10.1 Camera Setting
10. Control
NDI Encoder
NDI: SCIENCEIMAGE
VI: 1920 1080 p60
192.168.1.24
NDI Decoder
NDI: SCIENCEIMAGE
VI: 1920 1080 p60
192.168.1.24
Working mode switch
Click [System] to enter the system setting page
Select "Encoder" or "Decoder" and click the [Switch NDI Mode] button to immediately switch to the corresponding mode.
If the current mode is already required, there is no need to switch.

www.science-image.com
9/9
Open Studio Monitor software, click in the upper left corner or right-click anywhere --->【SCIENCEIMAGE】--->
click the name of the NDI stream you want to view
11.2 How to use Studio Monitor to view NDI video stream
11.1 How to use vMix to add NDI video stream and view
Open the vMix software, click [Add Input] in the lower left corner in turn--->[NDI/Desktop Capture]---> double-click the video source you want to view
11. how to use vMix and Studio Monitor software To view
the NDI stream
Control the zoom aperture of the camera.
10.2 PTZ Control

www.science-image.com
make better
ScienceImage Tech
Dec 2020
Other manuals for NDI HD mini
1
This manual suits for next models
2
Table of contents
Other Science Image Media Converter manuals

Science Image
Science Image NDI Studio 4K SH User manual

Science Image
Science Image FLOW 2 User manual

Science Image
Science Image NDI HD mini User manual

Science Image
Science Image NDI Studio 4K SH User manual

Science Image
Science Image NDI Studio 4K User manual

Science Image
Science Image NDI Studio 4K User manual

Science Image
Science Image NDI HD User manual

Science Image
Science Image FLOW 4K User manual