Science Image FLOW 2 User manual

QUICK-START GUIDE
FLOW·2

1. FLOW·2 Inteace and Indicator
10 Headset / Mic
6Ethernet/POE 7DC 12V 8Facto Restore 9LINE IN
1/4 inch hole
11 USB / PTZ 12 Scroll Wheel Button 13 Power LED 14
5Optical TX/RX
1SDI input 2SDI output 3HDMI input 4HDMI output
- 01 -
2
1
8
7
910 11 12
3456
14
13

2. Power on and sta up
For FLOW 2, both DC input and POE power supply modes are available. When it stas up, the characters
‘ScienceImage Tech’ appear on the OLED screen, and the power lights on the right bottom of the FLOW 2.
Power on FLOW 2 with the SCIENCE IMAGE original
standard 12V power supply.
Please always use genuine SCIENCEIMAGE power
adapeters, third pay products may cause permanent
damage!
Power is supplied to the device by connecting a POE
(Power over Ethernet) Gigabit / 10 Gigabit network
switch.
Always use a ceied 802.11 af/at with a po
power capacity of at least 30W and a Gigabit network
switch.
2.1 DC 12V Input 2.2 POE Power over Ethernet (802,11af/at)
- 02 -

3. OLED Display and Scroll Wheel Button
In the power-up state, the current status and parameters displayed
on lines 1, 3 and 4 of the screen.
4K Converter
Optical Transmit
- 03 -
NOTE:
!
It takes about 30 seconds
from power up to normal
operation. Please be
patient.
1. The 1st line:
4K Conveer / Optical Transmit / Optical Receiver
Display device name and the status of the Optical Transceiver status.
The default is Optical Transmitting(or Receiving, the status can be
stored when power o).
2. The 2nd line:
Prima HDMI / SDI Selection
Show SDI or HDMI input priority.
3.
The 3rd line:
IN: 1080i50 / CH: SDI-Y HDMI-N
Display the input video format(when FLOW 2 at Optical Receiver,
the line shows format of the optical input);
Show whether the SDI and HDMI inputs are recognized, Y is detected,
N is no signal.
4.
The 4th line:
OUT: 2160p60 / 192.168.3.166
Display the user-selected output format for Up/Down conversion;
IP address

Scroll Wheel Button
Set FLOW 2 function: SDI/HDMI priority, output format, optical transceiver mode, SDI/HDMI input selection.
Operation method:
Press and hold the scroll wheel button for 3 seconds to enter the setup menu. Press “--Quit--” to exit.
- 04 -
Scroll down to ip down.
Setup Menu
Primary IN
>> Output Mode
Optical
Setup Menu
>> Primary IN
Output Mode
Optical
Scroll upward to ip up.
Setup Menu
Primary IN
>> Output Mode
Optical
Press down to conrm selection.

System Tools
Computer Management
Computer Management (Local)
Device Manager
4. Login Web UI
Open IE browser, type FLOW 2 IP address(OLED
screen), and enter the login page, as shown
below, Defualt User name and password are
the same: admin User name 用户名
admin
admin
Password 密码
Login 登录
- 05 -
NOTE:
!
The control PC or remote devices
needs to be in the same network
segment with FLOW 2.
Enter English
setting page
Enter Chinese
setting page
Method 1:
Login to the WebUI using USB RNDIS
function, power up the device and connect
tFLOW 2 to the computer with a USB cable.
Method 2:
>
A17D
>
Other devices
RNDIS
>

- 06 -
After the driver installation completed, open IE and enter ip address of FLOW 2:
192.168.88.8 and log in. Default username: admin Password: admin.
Use the following IP address:
IP address: 192 . 168 . 88 . 20
255 . 255 . 255 . 0
192 . 168 . 88 . 1
Subnet mask:
Default gateway:
If can't log in, you can change the IP address
of the new NDIS NIC in Network Connections
to 192.168.88.*, which is on the same
network segment as the device. IP address in
the same network segment as the device can
be used, please note that the device in the
LAN cannot use the same IP address.
NOTE:
!
Right-click RNDIS and select Update Driver -- browse my computer to nd a new driver -- select from the
list of drivers available on my computer -- Network Adapters -- Microsoft -- Remote NDIS compatible devices.
2
Common hardware types:
Update Drivers - RNDIS
Select your device’s type from the list below.
Network Seice
Next
Update Drivers - RNDIS
Select Network Seice
Microsoft
Microsoft NDIS Capture
Network Seice:
Next

5. Device information
Dashboard is FLOW 2 device information, contains the following information:
Device basic information, such as input HDMI source or SDI source, Video/Audio format, CPU temperature,
Memo usage and other parameters.
Dashboard
1
2
Device information includes:
Device name, Encoder/Decoder mode, Serial number, Hardware version, Firmware version, MAC address,
IP address, Local IP address, Disk space, etc.
2
1
- 07 -

- 08 -
6. Network settings
Click [Network] to enter the network setting page, where you can set the IP address. There are two modes:
automatic DHCP and manual.
Auto Manual
192.168.1.88
255.255.255.0
192.168.1.9
IP Address
Netmask
Gateway
Manual mode:
In manual mode, user can dene the FLOW 2 IP address freely and after that, FLOW 2 automatically
resta with new IP address.
DHCP:
In DHCP mode user do not need set IP address/Subnet Mask/Gateway, select Auto and click [Apply] below,
FLOW 2 will automatically reboot and get a new IP address assigned by the router.

7. Control
In the control page, user can select video output format, SDI/HDMI Input priority selection, optical transmitter/
Receiver and external audio embedded /Mixer control.
Control
Output format
selection
Input source preference
Optical transceiver
External Audio
- 09 -
User could select any format in the suppo format list, FLOW 2 will output to the selected format, If select Auto,
which will be the same format as the source input format.
When there are both dierent/same SDI and HDMI signal inputs, the selected will be considered as the defaul
priority input signal.
7.1 UpDown Conversion
7.2 SDI/HDMI Input Priority (Input source preference) setting

- 10 -
The main audio volume is indicated from video
source, and the Line IN audio volume indicates
External Line-IN.
Two audio volume can freely adjust and mix.
Optical transceiver can setup as transmitting and
receiving mode, and user can switch Transmit or
Receive status by web UI or Scroll button.
If used as an optical transceicer, then FLOW 2 should
be used in pairs.
SDI/HDMI UpDownCross conversion and Optical
Transmitting can work simultaneously.
NOTE:
!
The format of the transmitter and receiver
should be the same integer or the decimal
with source!
7.6 Audio Em-bedded and Mixing7.3 Optical Transmitter/Receiver setting
Main audio volume [Mute <--> Max]: 32
External audio embedding setting
Line In audio volume [Mute <--> Max]: 24
Disable Enable
Optical switch:
Transmitting Receiving
Optical mode:

8. System settings
The system settings can peorm operations such as login password, facto restoration, rmware upgrade,
switching Encoder/Decoder mode and restaing the device.
System settings
Firmware update
Remote resta
Restore facto settings
Reset login password
Change the login password, click [Apply] and the new password will take eect at the next login.
- 11 -
8.1 Reset login password
Click [Open Upgrade Page] and select Automatic Upgrade to update the le remotely.
8.2 Firmware update
Please do not Power Down or close the upgrade page during the upgrading, otherwise, the system
les may be damaged and the system will not sta normally.
NOTE:
!

Press and Hold the FLOW 2 reset button on the front panel and Do Not Release, then power on the FLOW 2 at the
same time. System Recove will display on the 1st line, THEN you can release the reset button.
When ‘burning: 100’ is displayed on the 2nd line of the screen, the facto recove is completed, FLOW 2 will
resta. then manually power o and power on again.
Facto Restore will take about 20 minutes.
Click the OneKey Recove button on the web UI, FLOW 2 will resta and system will be restored to its
original settings before use, not the facto state.
Click the Remo Resta device button on the web UI, FLOW 2 will resta the system.
- 12 -
Please Do Not Power O during the upgrade process!
Method 1:
Method 2:
8.3 Restore Facto
NOTE:
!
8.4 Device resta

9. FAQ
- 13 -
Q: Why FLOW 2 do not sta?
Q: Can not login to the Web UI?
A: Check whether the device power indicator (located on the right side of the shell) and OLED screen are on.
A: Please check FLOW 2 and control device IP address weather in the same network segment, or conicts.

- 14 -
Table of contents
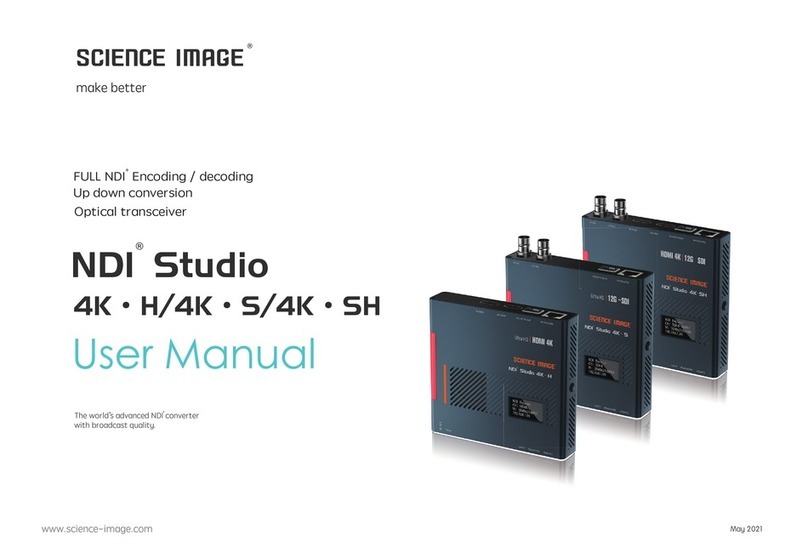
Other Science Image Media Converter manuals
Science Image
Science Image NDI HD User manual

Science Image
Science Image NDI Studio 4K SH User manual

Science Image
Science Image NDI Studio 4K User manual

Science Image
Science Image FLOW 4K User manual
Science Image
Science Image NDI HD mini User manual

Science Image
Science Image NDI Studio 4K SH User manual

Science Image
Science Image NDI Studio 4K User manual

Science Image
Science Image NDI HD mini User manual