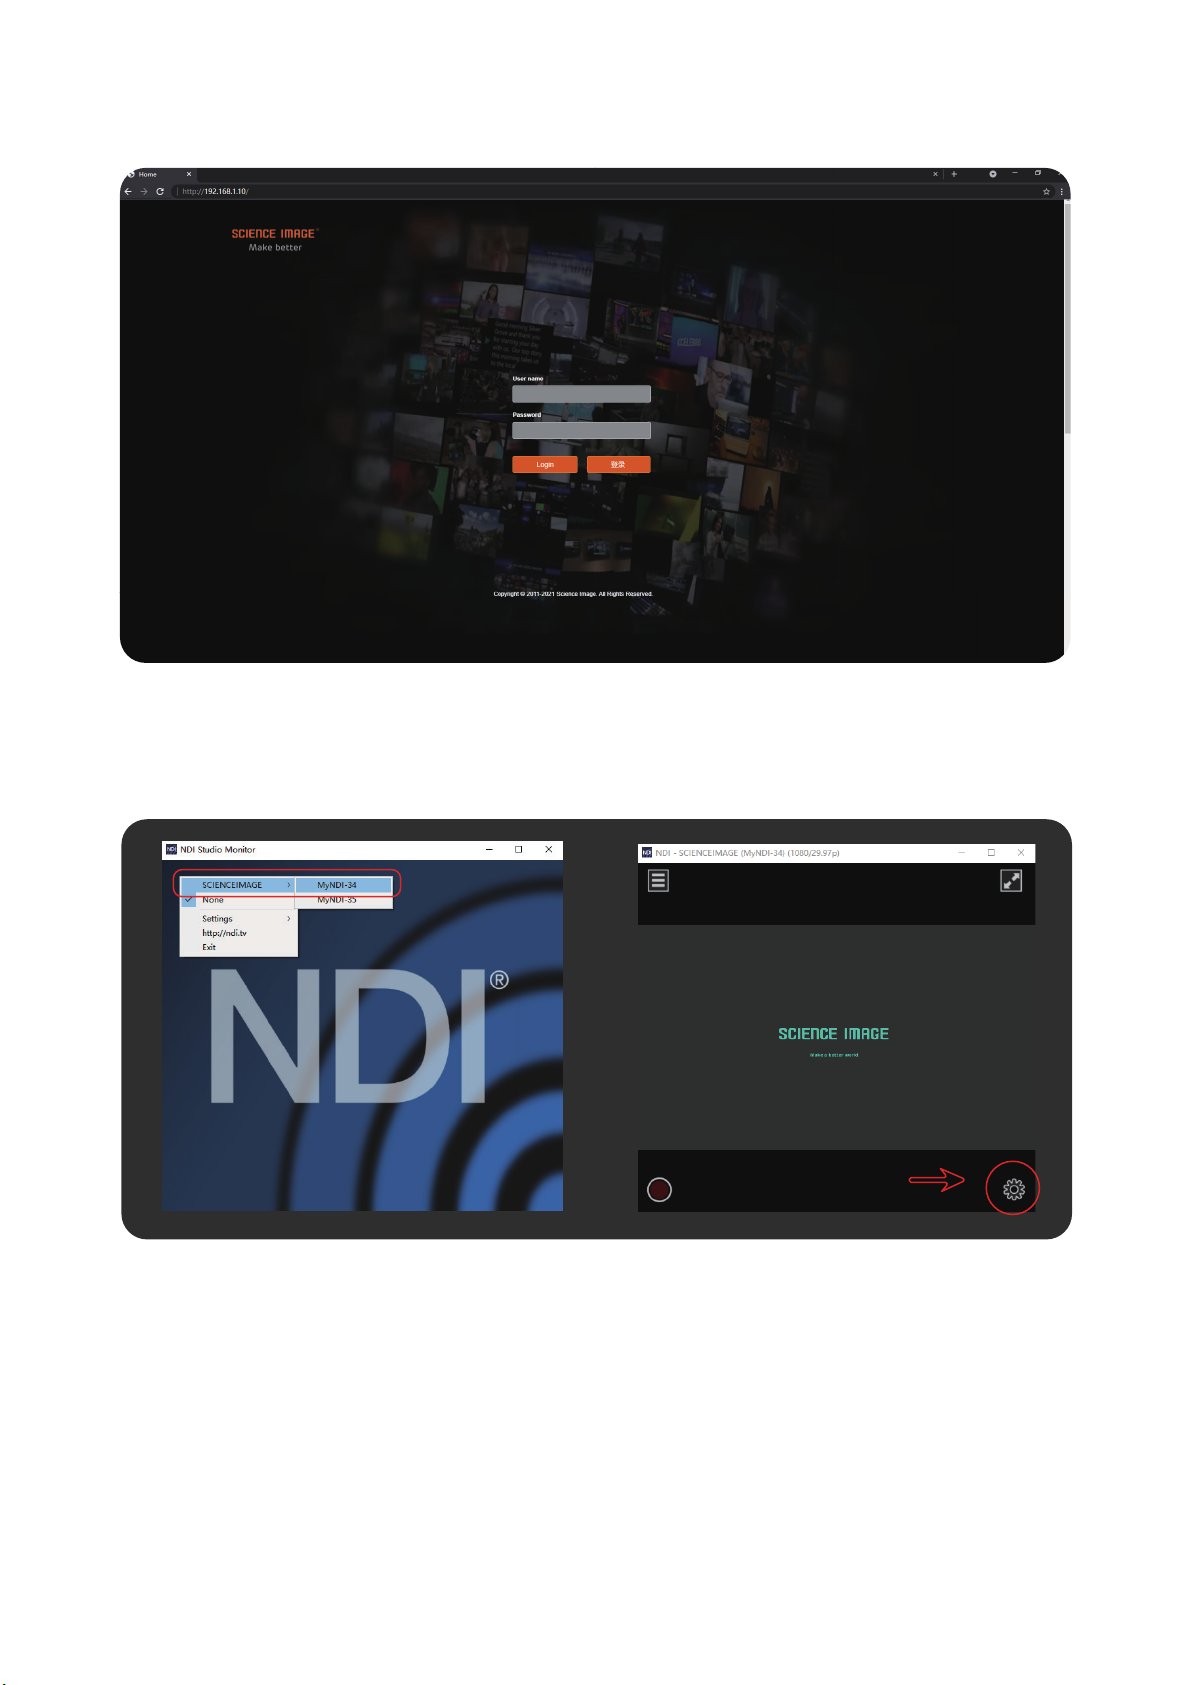
How to use Studio Monitor to view NDI video stream
NDI® HD mini interface and indicator
----------------------------------------------------
------------------------------------------------
---------------------------------------------------------
-------------------------------------------------------------------------
--------------------------------------------------------------------
---------------------------------------------------------------------
--------------------------------------------------------------------
------------------------------------------------------------------
----------------------------------------------------------------
-------------------------------------------------------
-------------------------------------------------------------
---------------------------------------------------------------
---------------------------------------------------------------------
-------------------------------------------------------
---------------------------------------------------------
-------------------------------------------------------------------
-----------------------------------------------------------
-----------------------------------------------------------
-----------------------------------------------------------------
------------------------------------------------------------------
---------------------------------------------------------------------
------------------------------------------------------------
--------------------------------------------------
----------------------------------------------------------------------
-----------------------------------------------------------
--------------------------------------------------------------
----------------------------------------------------------------
--------------------------------------------------------------
--------------------------------------------------------------------
-----------------------------------------------------------------------------
-----------------------------------------------------------------
----------------------------------------------------------------
-------------------------------------
------------------------------------
2.
3.
4.
5.
6.
7.
8.
11.
12.
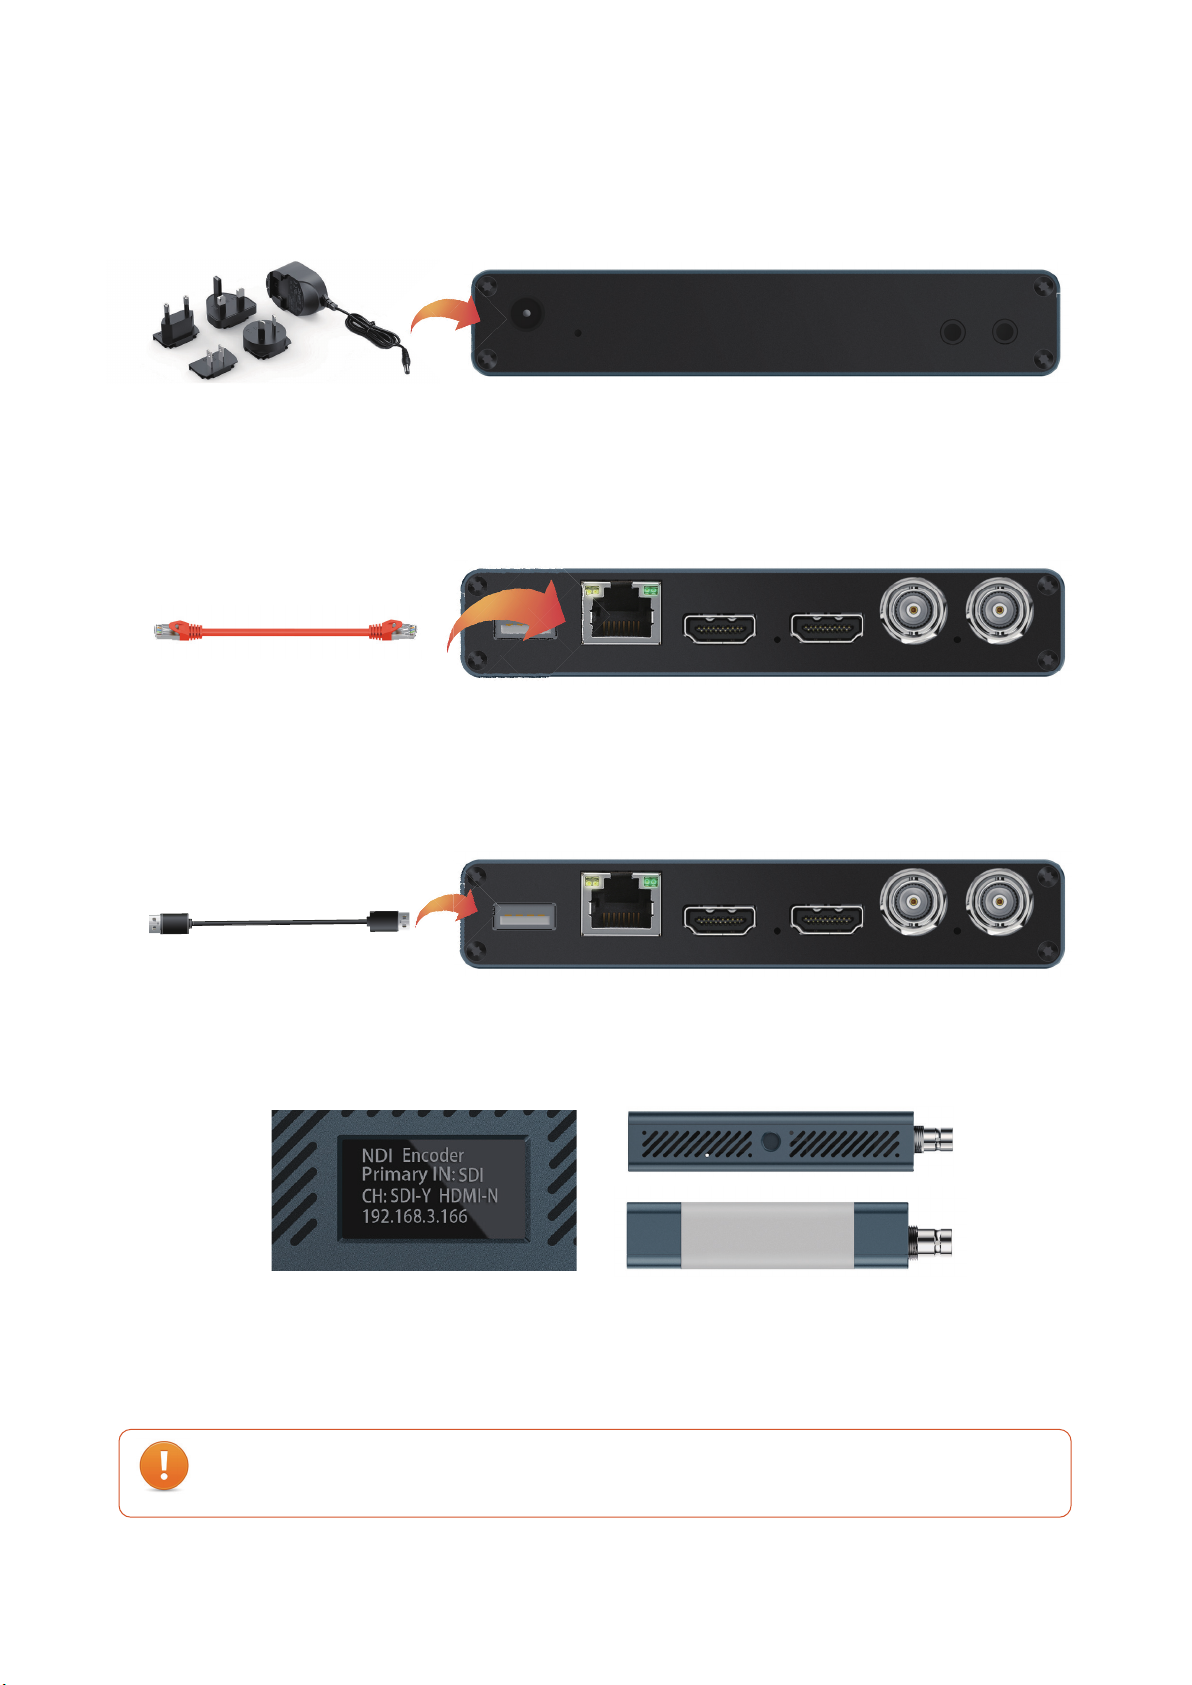
Three ways to power on and connect to LAN
OLED screen display instructions
Login Web UI
Device Information
Network settings
Modify the IP
DHCP mode
Manual mode
NDI Multicast settings
NDI Group settings
NDI Discovery server settings
Encoder settings
Set frame rate
Set bit rate (bandwidth)
Set NDI decoder volume
Control
Briefly introduce how to use vMix, Studio Monitor software to view NDI video stream
How to use vMix to add NDI video stream and view
Set the screen aspect ratio
Set up tally lights
Set NDI encoder volume
Intercom switch
Camera settings
PTZ control panel
Modify the NDI stream name
9.
Decoder settings
7.1
7.1.1
7.1.2
7.2
7.3
7.4
8.1
8.2
8.3
8.4
8.6
8.5
8.7
9.1
10.
System settings
Reset login password
Select NDI source in decoding state
9.2
10.1
Firmware upgrade
Restore factory settings
10.2
10.3
Working mode switch
10.4
Device restart
10.5
11.1
11.2
12.1
12.2
02
NDI® HD mini Application Topology
----------------------------------------------------
1.
01
03
03
04
06
06
06
07
07
08
09
09
10
10
10
11
11
11
11
12
12
12
13
13
13
14
15
16
17
17
18
18
19
19
20
CONTENTS