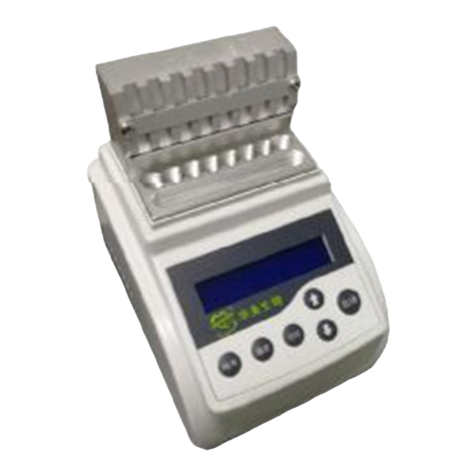
scigiene INFY-1 User manual

Operation Manual for Mycotoxin LFD Incubator
INFY-1
1

Contents
1 Introduction……………………………………………………………………………………………..3
1.1 Components…………………………………………………………………………………..….3
1.2 Primary Structure………………………………………………………………………...4
2 Technical Parameter…………………………………………………………………………….…6
3 Safety Warning…………………………………………………………………………………………6
4.Operation Procedure...........................................................................................................7
4.1 Set up a new Procedure…………………………………………………………………….…7
4.2 Set S.N. of Procedure……………………………………………………………………………7
4.3 Set Temperature……………………………………………………………………………..……7
4.4 Set Time………………………………………………………………………………………….….7
4.5 Set Time Unit……………………………………………………………………………………...8
4.6 Procedure On/Off……………………………………………………………………………..8
4.7 Other Functions..……………………………………………………………………………9
5 Maintenance………………………………………………………………………………………….….10
6 Troubleshooting……………………………………………………………………………………..10
2

Thanks for purchasing Scigiene’s Mycotoxin LFD Incubator. This manual includes
device function and operation procedure. Please read the manual before
operation. Please check device components once you receive goods and contact
us immediately if you found any parts mismatched, missing or damaged.
1 Introduction
Incubator is new product controlled by microcomputer. It is widely used for sample preservation and reaction,
DNA-PCR, electrophoretic pre-degeneration, serum coagulation and etc. Please read the manual before
operation.
1.1 Components
Mainframe
1pcs
Transparency Cover
1pcs
Power Adapter
1pcs
Operation Manual
1pcs
3

1.2 Primary Structure
Metal Module
Display
Operation
Panel
Power Switch
Power Input Socket
4

1.3 Installation
1.3.1 Put it on horizontal working table.
1.3.2 Insert cylindrical socket of power adapter into power input socket, then connect the other
end of power adapter with power grid between 100V and 240V. Check below chart.
1.3.3 Power switch on and then it will reach to setting temperature. Basically, it takes five minutes.
1.3.4 Put test tube onto metal module after reaching setting temperature. Then cover transparency cover.
5

2 Technical Parameter
Model
Power Supply
MAX Power
Average Power Consumption
Temperature Range
Timing Range
Temperature Precision
Display Accuracy
Heating up Time
(from 40 ℃to 100℃)
Environment Temperature
Overall Dimension(W×D×H)
Net Weight
INFY-1
DC24V
40W
5 W
RT+5 ℃~100℃
1sec~999sec
1min ~999min
1hour~99hour
≤± 0.3℃
0.1℃
≤20min
5℃~35℃
110mm×148mm×120mm
0.5 kg
3 Safety Warning
It is used indoor.
It might cause personal injury if you did not read the manual before operation. Only trained
person in installation and operation of electrical equipment are qualified to use this device.
You may get electric shock and lose warranty if you disassemble it.
6

The device is supposed to put the place where contains low humidity, little dust, well-ventilated,
avoiding water and sunshine or strong direct light or corrosive gas or high intensity magnetic field or
heating or fire or other heat source.
Power Switch. Press “ I ” , power on. Press“ O ” , power off.
Power Input is DC24V, center of socket is “+”, outer ring is “-”.
Power off when you do not need to use it. Pull out power socket if you will not use it in a long time.
Cover it with soft cloth or plastic paper to avoid dust.
4. Operation Procedure
4.1 Set up a new Procedure:
Power on and then system comes to operation
interface. Press Start/Stop key over 2 minutes,
then is goes into Setting up Procedure interface.
You can DIY 9 procedures, P1 to P9. Each
procedure includes 3 sections/move (A, B, C).
-----28.7-----
4.2 Set up S.N. of Procedure:
Cursor will point ID number of procedure by
quickly pressing P key, then you can select
ID number and section of procedure (A, B, C)
by ▲or ▼.
4.3 Set Temperature:
Cursor will point temperature by quickly pressing
Temp key, then you can change temperature by
▲or ▼.
P2-A
55.5
095
P2-A 55.5 095 M
4.4 Set Time:
Cursor will point time by quickly pressing Timer
key, then you can change time by ▲or ▼.
P2-A 75.5 032M
Quickly press ▼when time parameter value
equals to 000. Time parameter value at OFF
means this procedure will not run.
7
P2-A 75.5 OFF
P2-A 55.5032 s

P2-A 55.5 032 H
4.5 Set Time Unit:
Cursor will point time unit by quickly pressing
Timer key, then you can change time unit in
second, minute or hour by ▲or ▼.
4.6 Procedure On/Off
P2-A 55.5 032 M
P2-A 55.5 032 s
4.6.1 Power on then it will increase
temperature automatically.
----28.7----
4.6.2 WAIT means it is heating.
P1-A 32.5 WAIT
4.6.3 It will send warning tone and blinking
display OK when temperature is steady. It will
start countdown of constant temperature at A
section when it comes to A/Stop key.
P1-A
40.0
OK
P1-A
40.0
180 S
4.6.4 It displays FINISHED and keeps
sending warning tone when countdown of A
section finished. Press Start/Stop key, then
it begins B section.
4.6.5 Likewise, B section and C section run
the same procedure.
P1-A FINISHED
P1-B
40.0OK
P1-b FINISHED
4.6.6 It will send warning tone at one minute at
a time and also display FINISHED after running
complete procedure. Meanwhile, it will remain
at current temperature. Please turn off the
power if you do not need to use it. If you want
to repeat the whole procedure, please press
start/stop key quickly.
P1-c FINISHED
Finished 40.5
8

All keys will be blocked when system comes into counterdown interface.
Please restart it if you need to config parameter or select procedure. It will
goes into running interface in 3 seconds. Then press start/stop key over 2
seconds, you will see parameter configuration interface. At last, press
start/stop key quickly to run it when you finished setting parameter.
4.7 Other Functions
Power on, then immediately press P key and Timer key at the same time, it will enters
into Function Configuration Menu.
4.7.1. Automatically keep constant temperature
after finishing operation(RTF):
RTF
ENABLE
Enable RTF, keep constant temperature after
finishing operation.
RTF
DISABLE
Disable RTF, start cooling after finishing operation.
4.7.2. Automatic recovery after power failure
ORF
(ORF):
Enable ORF, it will get back to the procedure run
before power failure, once when power on again.
ORF
Disable ORF, it requires to select procedure when
power on again.
4.7.3. Automatic Running(APF): Enable APF,
APF
automatic running last procedure when power on.
Disable APF, Select procedure when power on.
APF
APF & RTF are enabled, while ORF is disabled at default. It will run ORF if ORF
and APF are both enabled. Quickly press start/stop key, procedure will save
the configuration information and exit current menu. Press start/stop over
1second, it will exit current menu without saving configuration information.
ENABLE
DISABLE
ENABLE
DISABLE

9

5 Maintenance
Regularly clean longhole on module with clean soft cloth that takes a
little absolute alcohol. Make sure tube contact wall of taper hole
sufficiently, good thermal conductivity and avoiding contamination.
Use soft cloth that takes cleansing cream to clean the surface.
Must turn off power before cleaning the device. Cleaning
Solution is forbidden to pour into holes on module. Do not use
corrosive cleaning solution.
6 Troubleshooting
Troubles Analysis of causes
Power off
Black display screen Poor switching
Broken controller
Display Screen shows “PT Open circuit or
open circuit of EEROR”and it sends alarm
temperature control sensor tone
Module did not heat up Heater malfunction
Resolution
Check power supply and re-
plug power socket;
Replace switch;
Contact us.
Contact us.
Contact us.
Key malfunction Broken membrane switch Contact us.
10
Table of contents
Other scigiene Laboratory Equipment manuals
Popular Laboratory Equipment manuals by other brands

Olympus
Olympus SZ2-STU1 instructions

Ivoclar Vivadent
Ivoclar Vivadent IvoBase Series operating instructions

Four E's Scientific
Four E's Scientific Ironman III operating instructions

Bruker
Bruker NanoScope OMV-UNIVERSAL quick start guide

multicomp pro
multicomp pro MP008632 user manual

Pincore
Pincore The CoKey Instructions & user's manual