Specifications
Measuring Range: 40°F to 572°F/-40°C to 300°C
Accuracy: ±0.5°C (-10°C to 100°C),
±1°C (-20°C to -10°C)(100°C to 150°C) Otherwise ±2°C
Resolution: 0.1°F(0.1°C)
Display Size:32mm X 20mm
Response: 4 seconds –15 seconds (From 25 °C to 100°C)
Probe: 2 wire PT100 RTD, 150mm x 4mm
Battery: CR 2032 3V Button
Auto-off: 1 hour
Waterproof: IP68
Body: ABS material
This thermometer has been factory calibrated
Features
ON/OFF
and Backlight --- Press [ON/OFF] once to power on. Then Press
ON/OFF anytime the unit is on will enable the Backlight for 3 seconds, and
will mute an active alarm. Press and Hold the ON/OFF for 4seconds to
power down.
°C/°F---Press °C/°F button
on the back of the
thermometer to select the
desired temperature unit
[Internal switch]
Min/Max---Minimum and
maximum temperature
value memories
CAL---Calibration
“+”“-”---Use this two
buttons to set your alarm
temperature
Setting Alarm
5. Press “+” or “-“ button to setting high or low alarm.
6. Two alarm functions included:
Heat up Alarm and Cool Down Alarm
Heat Up Alarm –you set the alarm value to 150°C during the temperature being
risen slowly. Then the thermometer will be alarming beep sounds when the
current temperature meets or exceeds the ALARM value 150°C.
Cool Down Alarm –you set the alarm value to -10°C during the temperature
being dropped slowly. Then the thermometer will be alarming beep sounds
when the current temperature meets or exceed the ALARM value -10°C.
7. Press the ON/OFF button once. Then you can turn the deep sound off when
the thermometer is alarming.
8. Press the ON/OFF button once also can turn on the light.
Calibration Procedure
Step 1) Make sure you have a certified reference thermometer that is at least
twice the accuracy of the thermometer to be recalibrated. Eg. RD0370R
https://www.scigiene.com/Scigiene-Reference-Thermometer-NIST-Traceable
Step 2) Make sure you have a good high accuracy calibrator that works at 0°C or
preferable over the range you will be using the
thermometer. https://www.scigiene.com/SCCAL-9-Calibrator or
https://www.scigiene.com/SCCAL-2-Calibrator. Again, the calibrator must have
precision better than the test thermometer. For example, ice baths are only
barely acceptable for thermometers with an accuracy of +-2.0C. See:
www.scigiene.com for a more detailed explanation.
Step 3) Place both the reference and thermometer(s) to be tested in the
calibrator following the calibrator’s instructions precisely and set the calibrator
at 0.0°C. Then wait at least 10 seconds to allow the probes to all stabilize at the
calibrator temperature. If necessary, make adjustments until the reference
thermometer reads precisely 0.0° C. Wait 10 seconds and then press the Cal
button on the thermometer being calibrated down for 2 seconds. The
thermometer is now precisely calibrated at 0.0°C.
Step 4) If possible the reference and test thermometer should be similarly tested
at other points. If these are significantly out of specification the thermometer
should be removed from service.
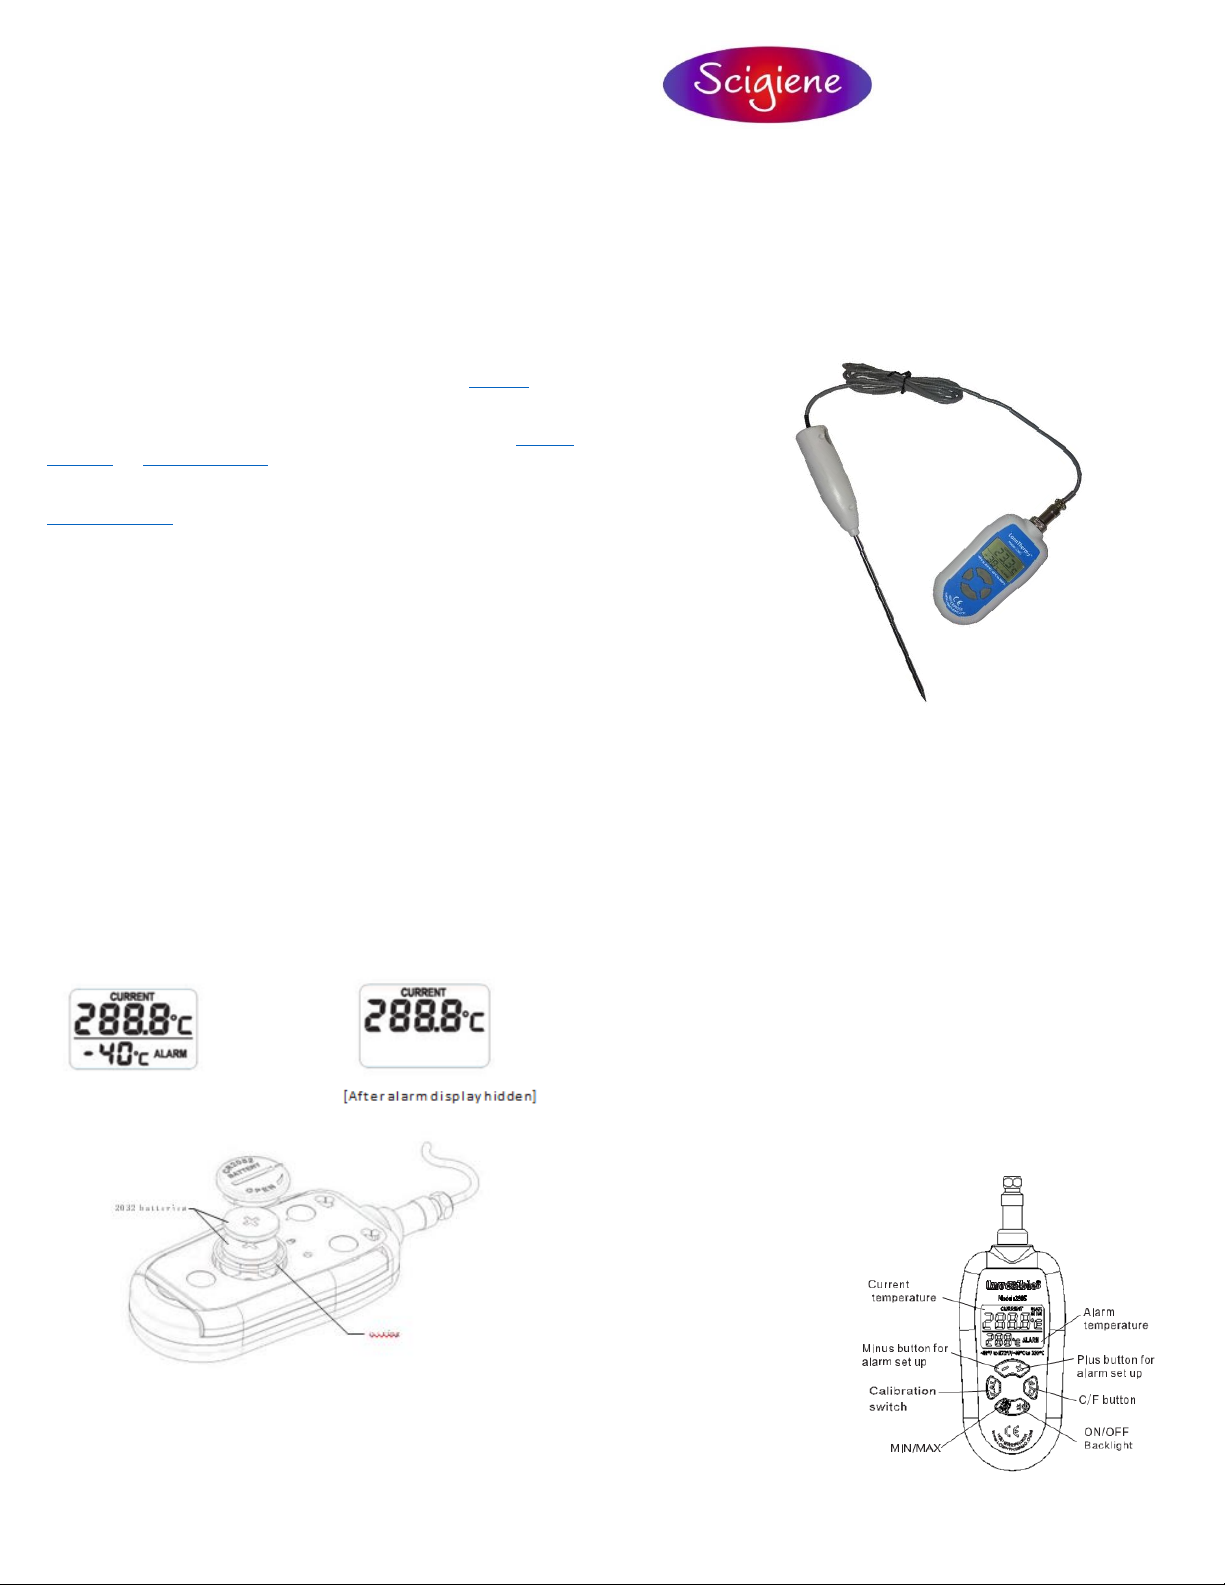
Alarm Display Hidden
Press the “-”button till the alarm value equal to -40°C, 2.Press one more
time the “-”button, then the alarm display will be hidden as below
picture.
1. Use a small coin to open the Battery door and turn it counter-
clockwise until the small triangle feature on top of the battery door is
lined up with the “Un-lock” symbol.
2. Take out the door and replace the battery. Make sure the original o-
ring is inside the battery chamber. Line up the small line feature on top
of the battery door with the “Un-lock” symbol. Then Insert the battery
door into the chamber and turn it clockwise till the small line feature on
top of the battery door is lined up with the “Lock” symbol.