GEOMETRY/TECHNICAL DATA GENIUS 29”
Travel 130/90/0mm
Suspension
Ratio
2.60
Piston stroke 50mm
Shock length
(Eye to Eye)
190mm
Hardware
Mainframe
22.2mm x 6mm
Hardware
Swingarm
22.2mm x 6mm
Seatpost
diameter
31.6mm
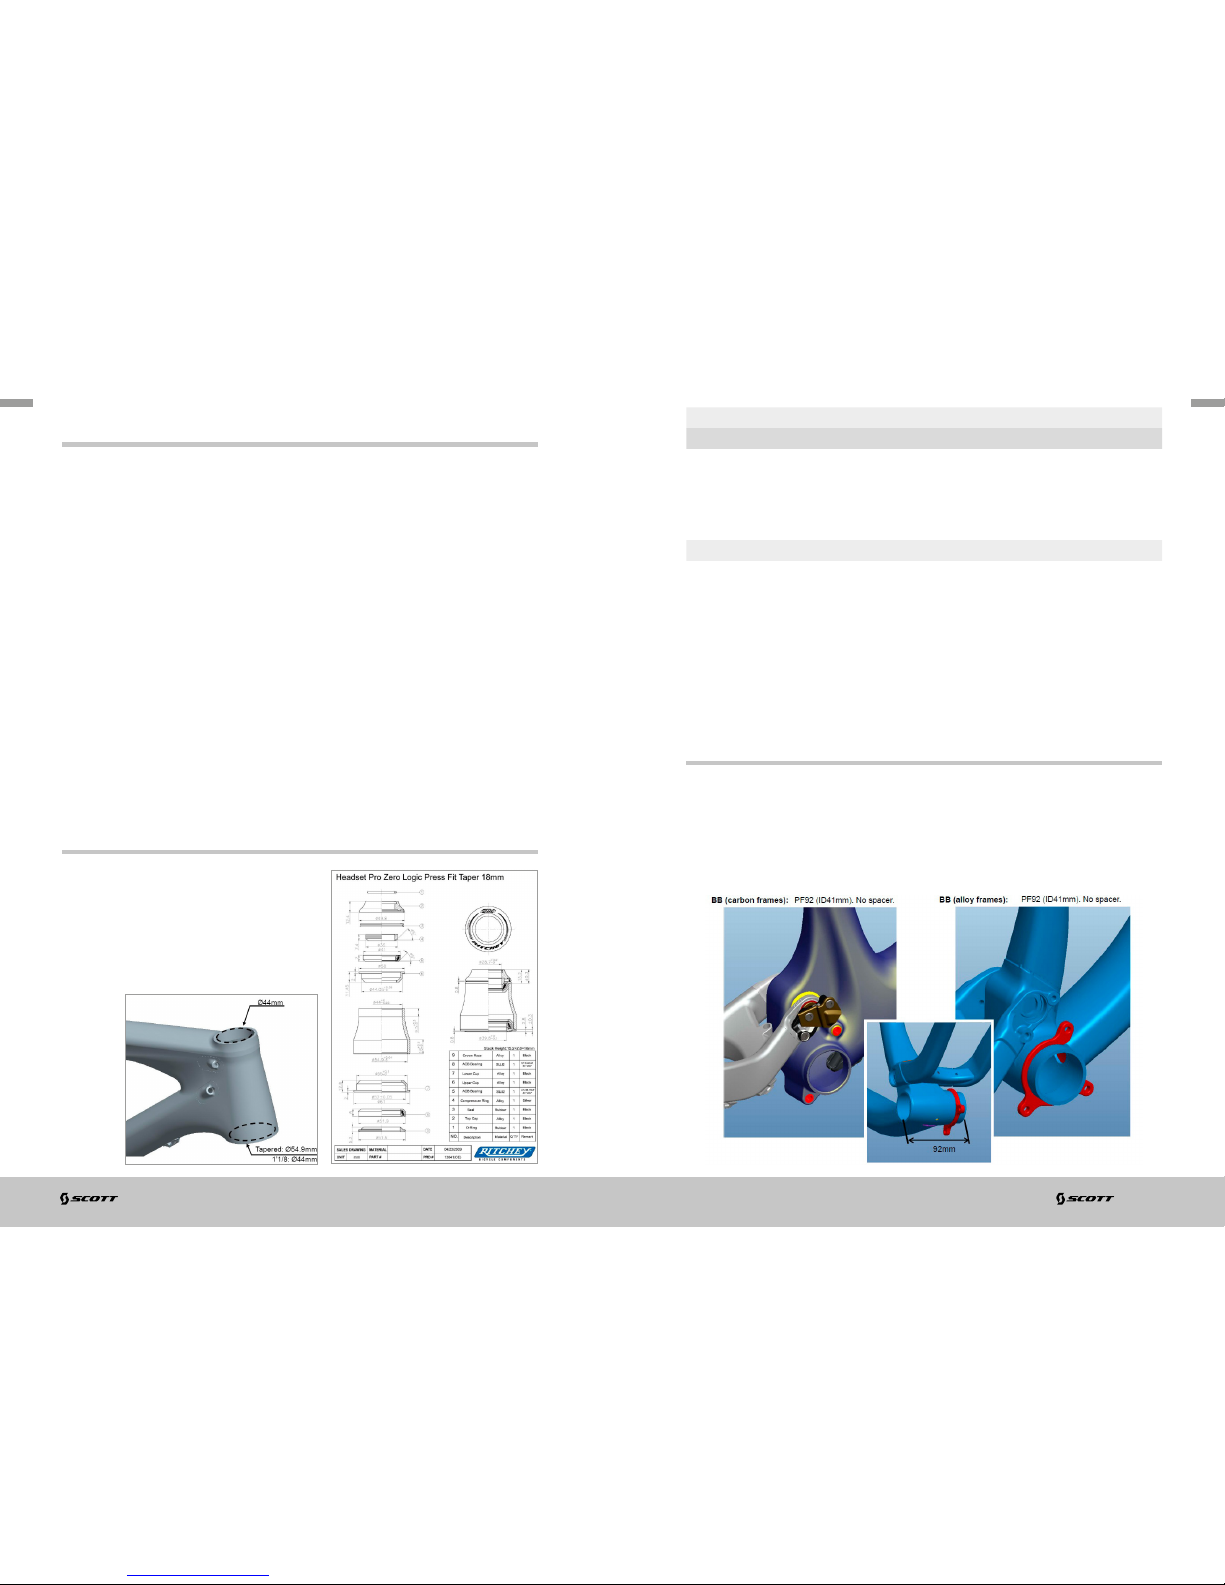
Headset semi integr. for tapered 1 1/8-1.5
(44/54.9mm Inner diameter of frame) or
with 1 1/8 straight (44.0mm)
Fork travel 130mm
Fork length 540mm
BB housing BB PF 92
Front derailleur Shimano E-Type/SRAM S3 direct mount
Bearings 2 x IGUS / 6 x 6802 (24 x 15 x 5)
Max Tire Width 57mm/2.25”
S S M M L L XL XL
LOW BB SETTING HIGH BB SETTING LOW BB SETTING HIGH BB SETTING LOW BB SETTING HIGH BB SETTING LOW BB SETTING HIGH BB SETTING
AHEAD TUBE
ANGLE 68.9 ° 69.4 ° 68.9 ° 69.4 ° 69.0 ° 69.4 ° 69.0 ° 69.4 °
BHEAD TUBE
LENGTH 100.0 mm 3.9 in 100.0 mm 3.9 in 100.0 mm 3.9 in 100.0 mm 3.9 in 110.0 mm 4.3 in 110.0 mm 4.3 in 120.0 mm 4.7 in 120.0 mm 4.7 in
CTOP TUB E
HORIZONTAL 570.3 mm 22.5 in 569.0 mm 22.4 in 600.3 mm 23.6 in 598.9 mm 23.6 in 625.2 mm 24.6 in 623.8 mm 24.6 in 650.2 mm 25.6 in 648.8 mm 25.5 in
DSTANDOVER
HEIGHT 770.4 mm 30.3 in 772.8 mm 30.4 in 772.8 mm 30.4 in 775. 5 mm 30.5 in 803.0 mm 31.6 in 806.1 mm 31.7 in 800.6 mm 31.5 in 803.8 mm 31.6 in
EBB OFFSET -34.5 mm -1.4 in -29.1 mm -1.1 in -34.5 mm -1.4 in -29.0 mm -1.1 in -34.0 mm -1.3 in -28.5 mm -1.1 in -34.0 mm -1.3 in -28.4 mm -1.1 in
FBB HEIGHT 335.5 mm 13.2 in 340.9 mm 13.4 in 335.5 mm 13. 2 in 341.0 mm 13.4 in 336.0 mm 13.2 in 341.5 mm 13.4 in 336.0 mm 13. 2 in 341.6 mm 13.4 in
GWHEEL BASE 1,112.2 mm 43.8 in 1,111.8 mm 43.8 in 1,142.2 mm 45.0 in 1,141.8 mm 45.0 in 1,168.0 mm 46.0 in 1,1 6 7. 6 mm 46.0 in 1,193.9 mm 47. 0 in 1,193.5 mm 47. 0 in
HBB CENTER TO
TOPTUBE CENTER
IBB CENTER TO TOP
OF SEATTUBE 415.0 mm 16.3 in 415.0 mm 16.3 in 440.0 mm 17.3 in 440.0 mm 1 7. 3 i n 475.0 mm 18.7 in 475.0 mm 18.7 in 510.0 mm 20.1 in 510.0 mm 20.1 in
JSEAT ANGLE 73.9 ° 74.4 ° 73.9 ° 74.4 ° 74.0 ° 74 . 4 ° 74.0 ° 74. 4 °
KCHAINS TAY 450.0 mm 17.7 in 449.0 mm 1 7.7 in 450.0 mm 1 7.7 in 449.0 mm 17.7 in 449.9 mm 17. 7 in 448.9 mm 17.7 in 449.9 mm 17. 7 in 448.9 mm 17.7 in
LREACH 394.2 mm 15.5 in 399.2 mm 15.7 in 424.2 mm 16.7 in 429.1 mm 16.9 in 4 47.1 m m 17.6 in 451. 8 mm 17.8 in 469.4 mm 18.5 in 474 .1 mm 18.7 in
MSTAC K 770.4 mm 30.3 in 772.8 mm 30.4 in 772.8 mm 30.4 in 775.5 mm 30.5 in 803.0 mm 31.6 in 806.1 mm 31.7 in 800.6 mm 31.5 in 803.8 mm 31.6 in
NSTEM LENGTH 60.0 mm 2.4 in 60.0 mm 2.4 in 70.0 mm 2.8 in 70.0 mm 2.8 in 80.0 mm 3.1 in 80.0 mm 3.1 in 90.0 mm 3.5 in 90.0 mm 3.5 in
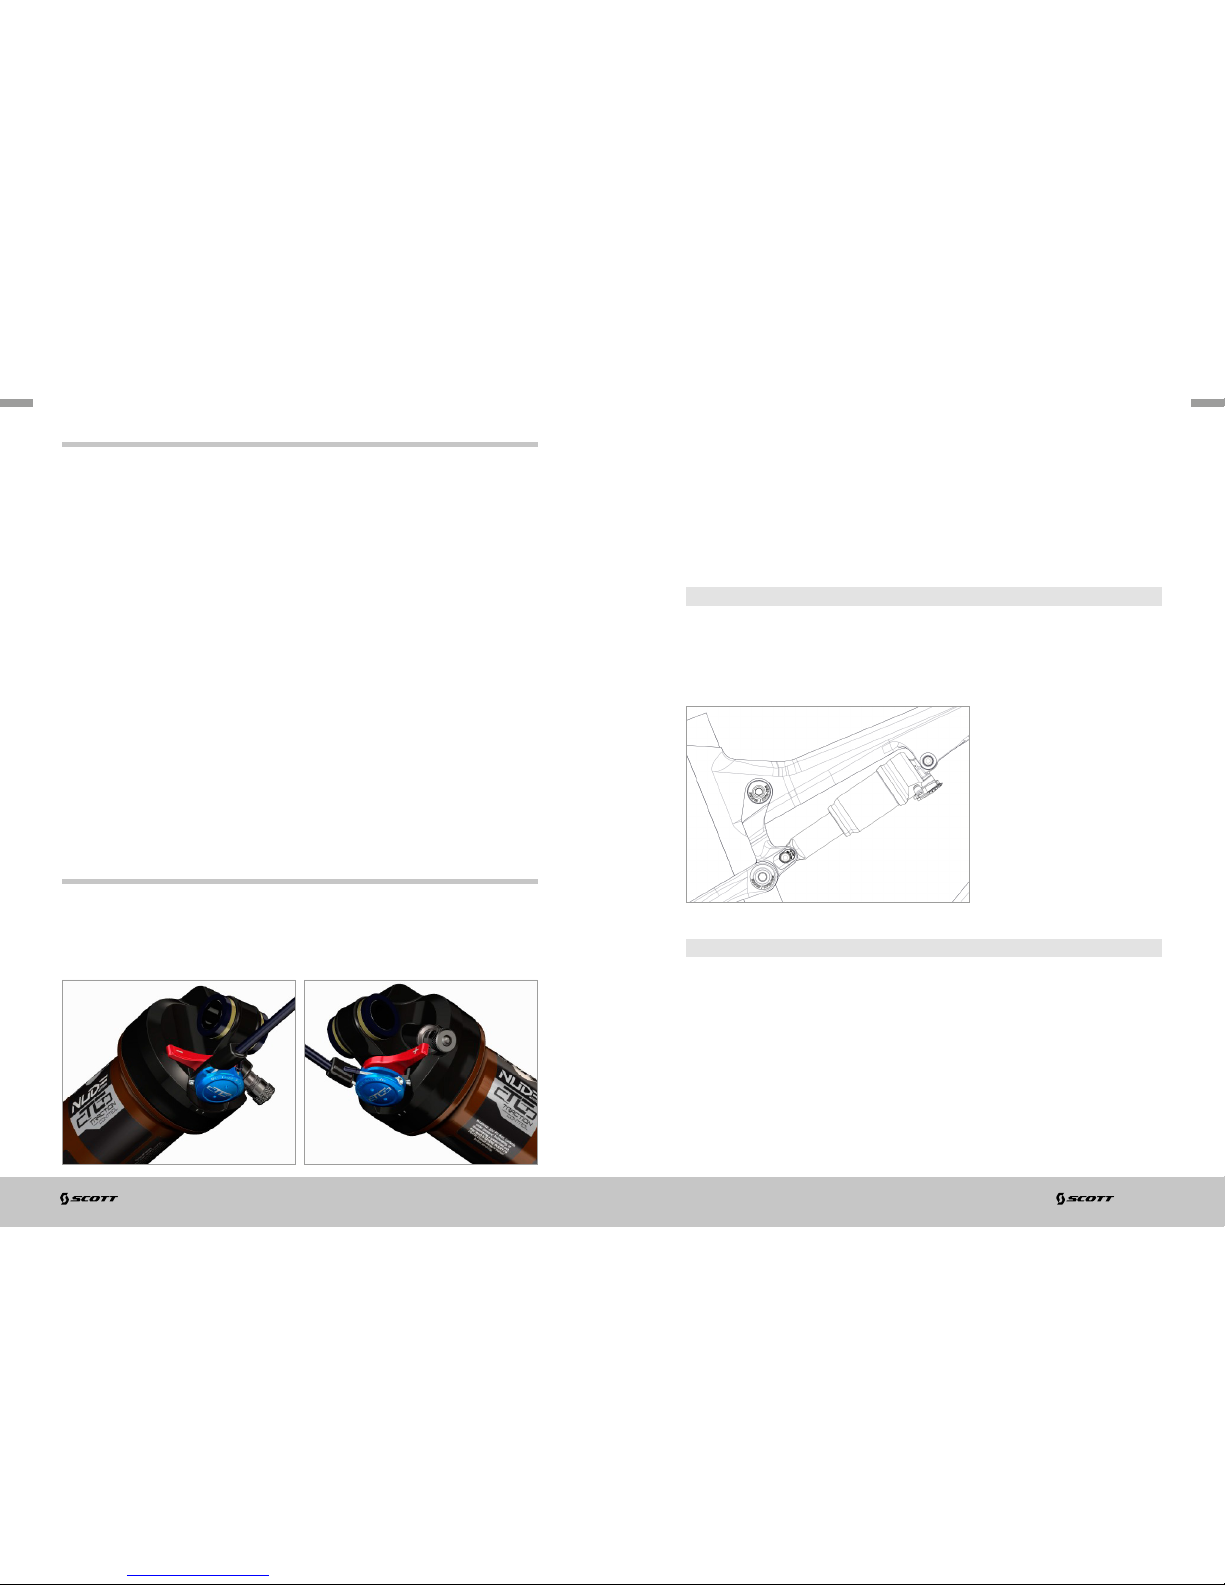
TC SHOCK TECHNOLOGY/TWINLOC LEVERS
The heart of the TC-System is the FOX Nude Shock made by FOX, offering three
functions which make this system possible.
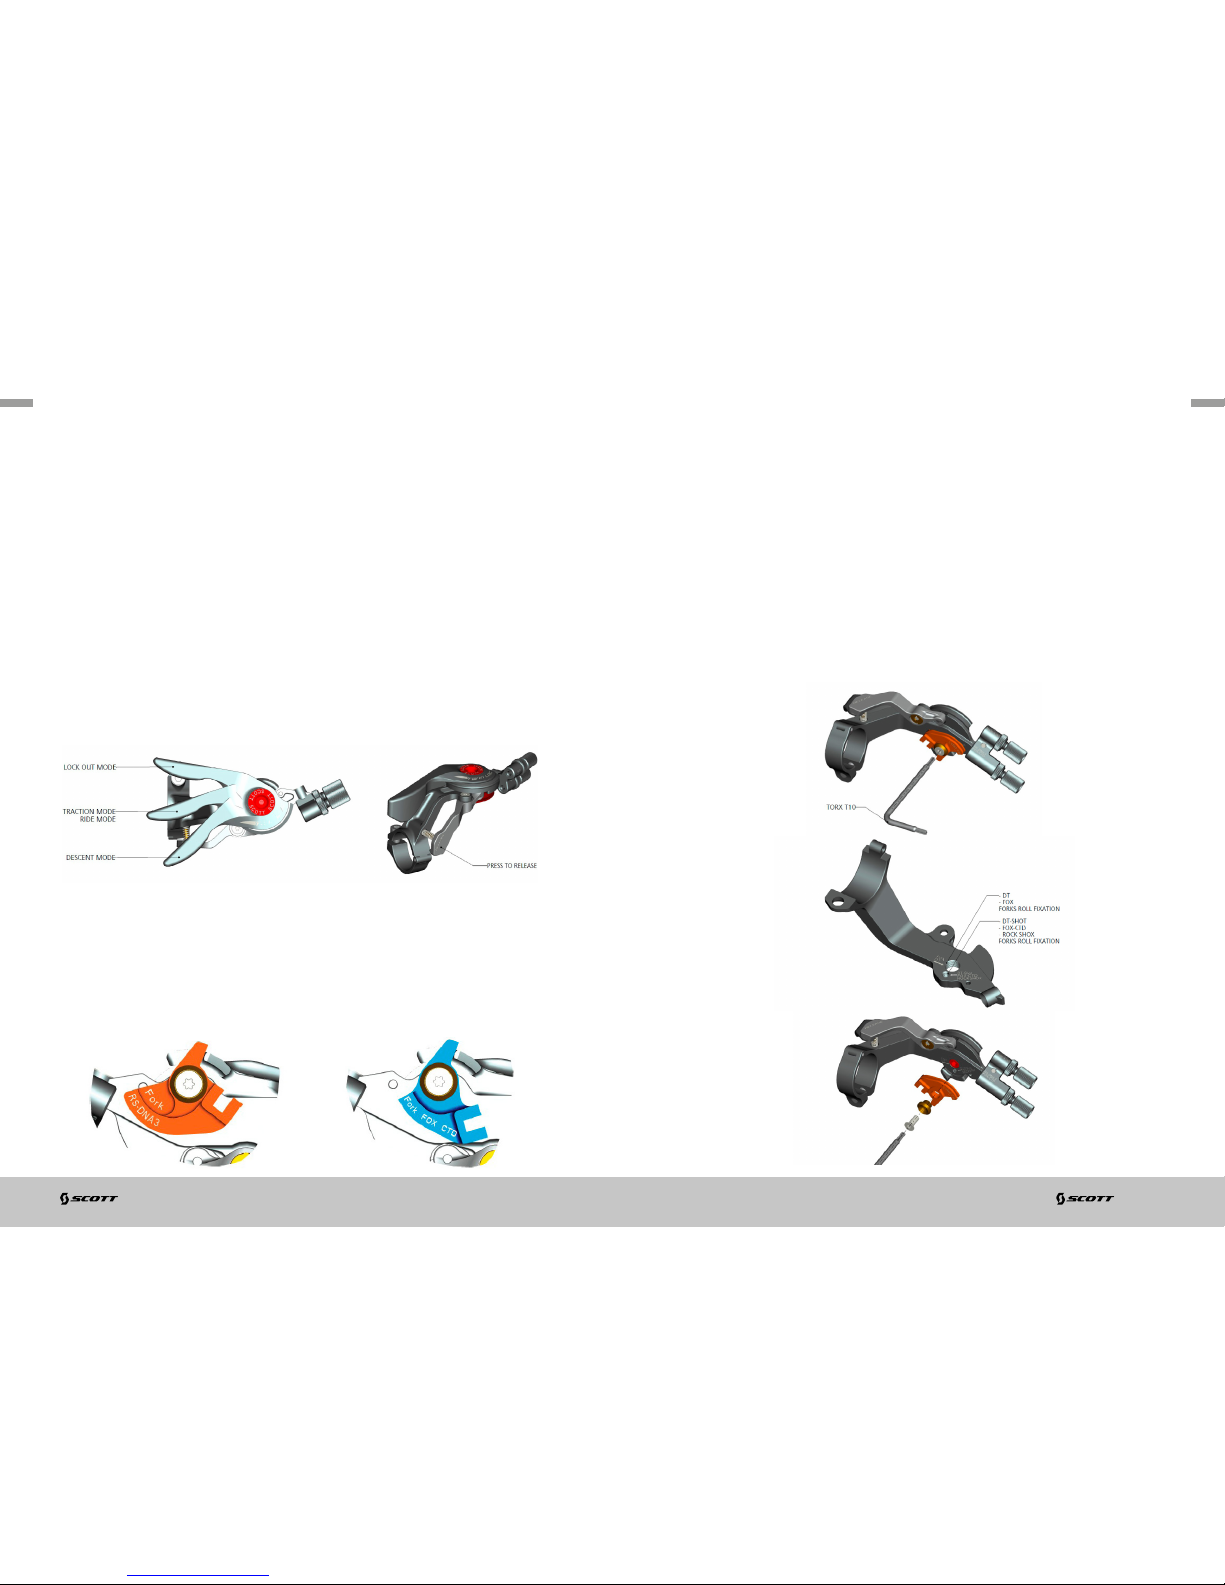
The TWINLOC XL remote control lever is the evolution of the already outstanding
TRACLOC system of SCOTT.
While TRACLOC allowed only the change on the SCOTT TC rear shocks between
the SCOTT patented Lock-out, traction and full-mode on the fly from the handlebar,
the TWINLOC allows also the remote control of the front fork to shift between
lock-out and open mode at the same time when you change the modes on the
SCOTT rear shox.
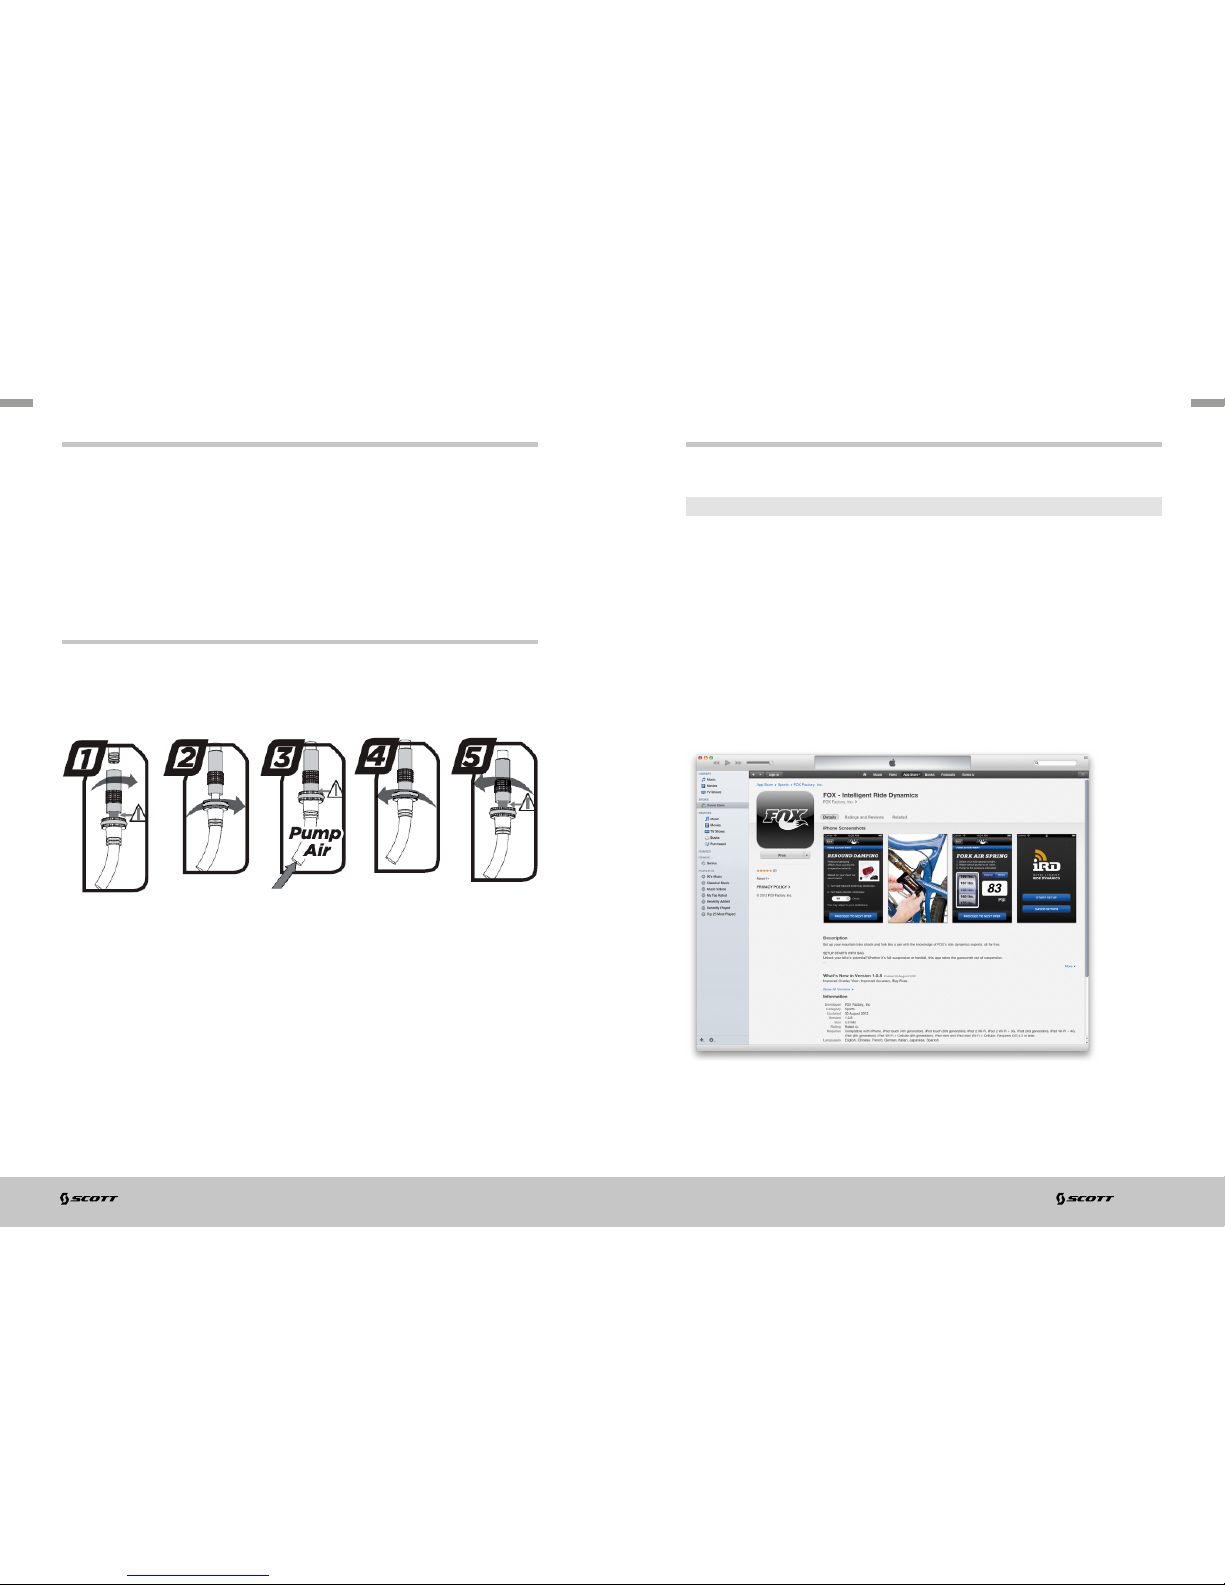
In combination with FOX 34 CTD or FOX 32 CTD forks it is also possible to have a
platform mode on the fork.
The 3 modes of CTCD in combination with FOX Nude are:
- Climb Mode : lock-out rear, lock-out front
- Traction Mode: traction mode rear (incl. Geometry change and reduced travel),
platform mode front
- Descent Mode: full travel rear (Descent), full travel front
The 3 modes of CTD in combination with the FOX CTD shock are:
- Climb Mode : lock-out rear, lock-out front
- Ride Mode: platform (Ride) mode rear, platform mode front
- Descent Mode: full travel rear (Descent), full travel front
Therefore SCOTT offers 2 different TWINLOC levers with following fork/rear shock
combinations:
- FOX Nude with different rolls for FOX CTD fork and RockShox DNA 3 fork
(SCOTTArticle number: 230097)
- FOX CTD with different rolls for FOX CTD fork and RockShox DNA 3 fork
(SCOTTArticle number: 230098)
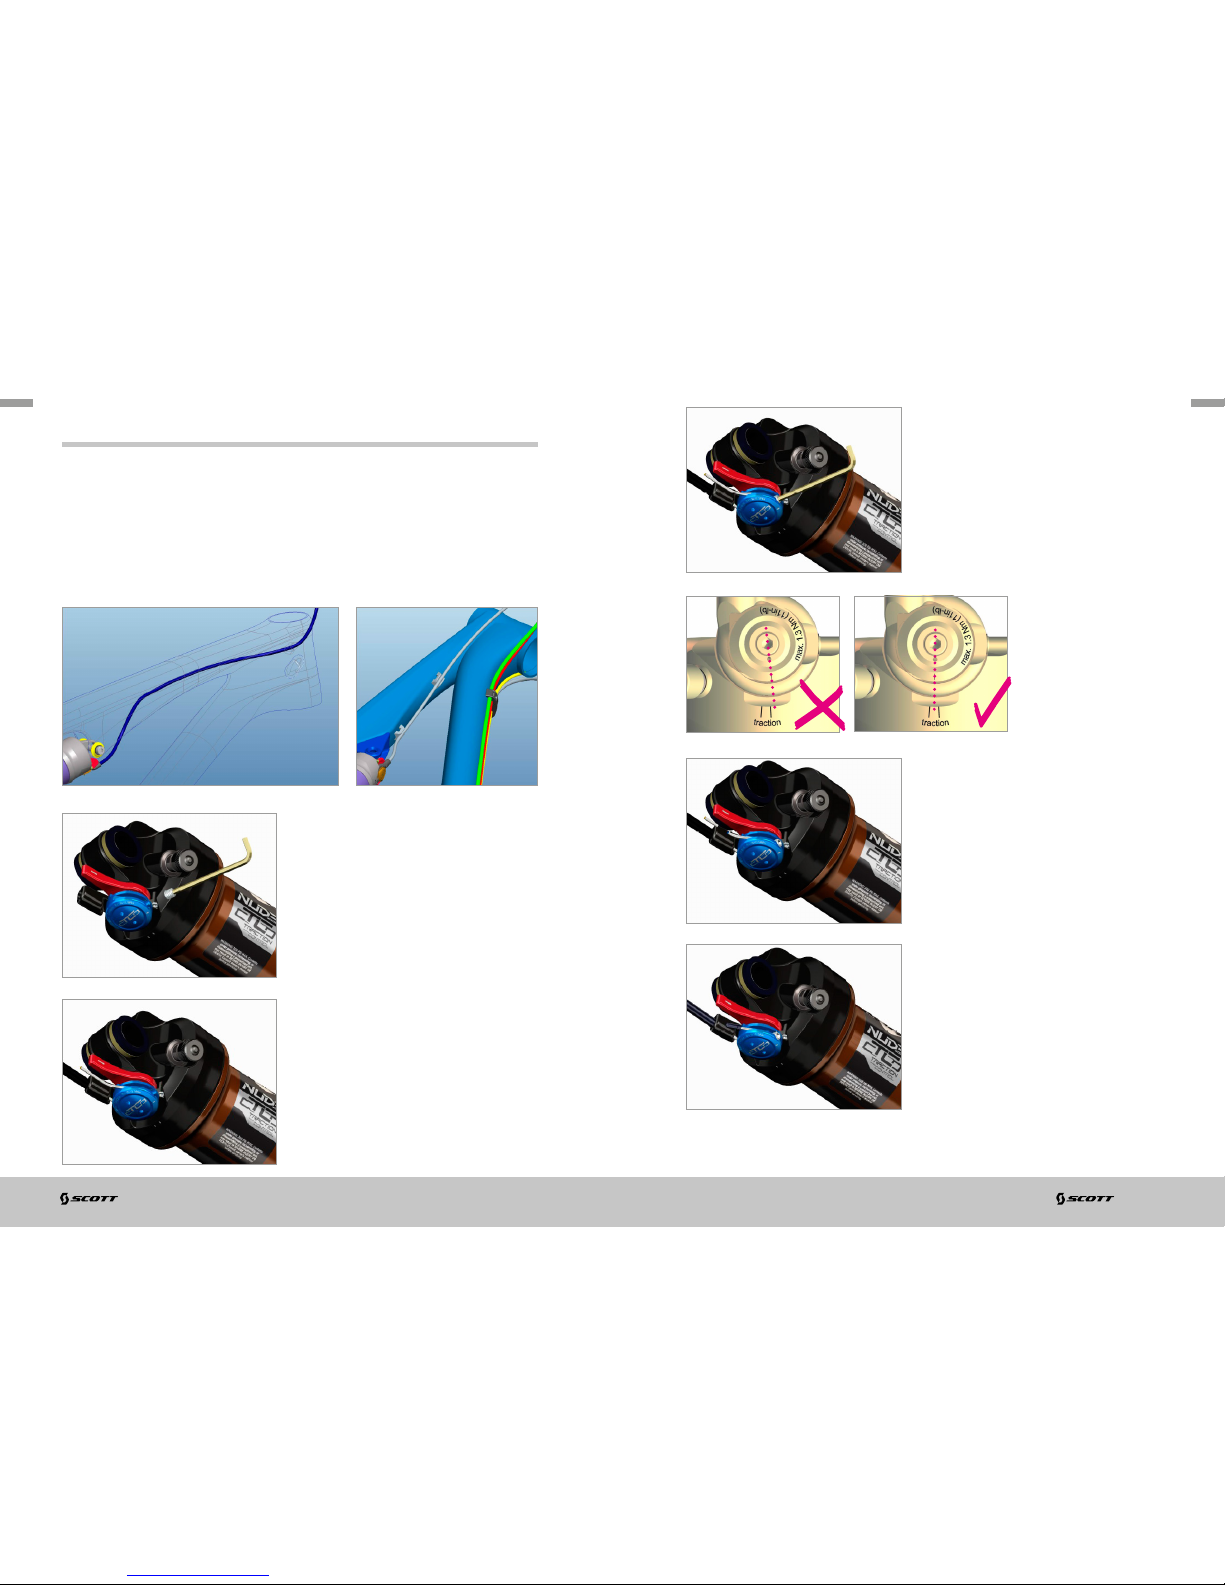
Please note that the FOX CTD rear shock does not offer a traction mode, but a
platform mode. In contrary to FOX Nude the air-chamber volume of the positive
chamber remains the same throughout the different modes
IMPORTANT!
You can only assemble the TWINLOC remote lever in “left side upward position” on
the handlebar.