Scout VR2 User manual

VR2 (PG DT)
GEBRUIKSHANDLEIDING BEDIENINGSKASTEN
MANUEL D’UTILISATION - BOÎTIER DE COMMANDE
BEDIENUNGSANLEITUNG STEUERKASTEN
USER MANUAL CONTROLS
4100666A

2

3
Nederlands ................................................................................. 4
English ...................................................................................... 14
Français .................................................................................... 24
Deutsch ..................................................................................... 34

4
Nederlands
© 2017 Scout Mobility B.V.
Alle rechten voorbehouden.
De verstrekte informatie mag geenszins worden verveelvoudigd en/of openbaar gemaakt op welke
wijze en met welke middelen dan ook (elektronisch of mechanisch), zonder voorafgaande,
uitdrukkelijke en schriftelijke toestemming van Scout Mobility B.V..
De verstrekte informatie is gebaseerd op algemene gegevens aangaande de ten tijde van
verschijnen bekende constructies. Scout Mobility B.V. voert een beleid van continue product-
verbetering, wijzigingen zijn derhalve voorbehouden.
De verstrekte informatie is geldig voor het product in standaard uitvoering. Scout Mobility B.V. kan
derhalve niet aansprakelijk worden gesteld voor eventuele schade voortvloeiend uit de van de
standaard uitvoering afwijkende specificaties van het product.
De beschikbare informatie is met alle mogelijke zorg samengesteld, maar Scout Mobility B.V. kan
niet aansprakelijk worden gesteld voor eventuele fouten in de informatie of voor de gevolgen
daarvan. Scout Mobility B.V. kan niet aansprakelijk gesteld worden voor schade voortvloeiend uit
werkzaamheden die door derden zijn uitgevoerd.
De door Scout Mobility B.V. gehanteerde gebruiksnamen, handelsnamen, handelsmerken,
etc. mogen krachtens de wetgeving inzake de bescherming van handelsmerken niet als vrij
worden beschouwd.
2017-01

5
Inhoudsopgave
Voorwoord ..................................................................................................................... 6
1. De bedieningskast ................................................................................................ 7
1.1 VR2 bedieningskast ........................................................................................ 7
2. Rijden met de rolstoel via de bedieningskast .................................................... 9
2.1 Aan- en uitzetten van de bedieningskast ........................................................ 9
2.2 Rijden met de rolstoel ..................................................................................... 9
2.3 Snelheid .......................................................................................................... 9
3. Het bedienen van elektrische verstellingen........................................................ 9
3.1 Het kiezen van de gewenste verstelling ........................................................ 10
4. Verlichting ........................................................................................................... 10
5. Storingen ............................................................................................................. 11
6. Technische specificaties .................................................................................... 11
7. Technische schema’s ......................................................................................... 12
7.1 Elektrisch aansluitschema ............................................................................. 12
7.2 Aansluitschema Acculader ............................................................................ 13

6
Voorwoord
Voorwoord
Deze handleiding
Deze handleiding beschrijft het gebruik van de elektrische rolstoel middels de
bedieningskast. De totale gebruikshandleiding bestaat uit drie boekjes. Neem de
gehele gebruikshandleiding goed door voordat het product in gebruik genomen wordt.
De inhoud is essentieel voor veilig gebruik en het goed onderhouden (reinigen) van de
rolstoel.
De algemene gebruikshandleiding
De zitsysteem handleiding (AGILO)
De bedieningskast handleiding (dit boekje)
Indien een van deze handleidingen niet meegeleverd is bij uw rolstoel, neem dan direct
contact op met uw dealer. Naast deze gebruikshandleiding is er voor dealers een
servicehandleiding beschikbaar.
Deze algemene handleiding verwijst daar waar nodig naar de andere handleidingen.
Dit gebeurt op de volgende wijze:
ALGEMEEN: Verwijzing naar algemene gebruikshandleiding.
BEDIENINGSKAST: Verwijzing naar gebruikshandleiding van de bedieningskasten.
AGILO
: Verwijzing naar gebruikshandleiding van het zitsysteem.

7
De bedieningskast
1. De bedieningskast
1.1
VR2 bedieningskast
Een bedieningskast heeft in de basis drie functies:
Het rijden en besturen van de rolstoel
Het bedienen van elektrische zitverstellingen
Via de besturingskast kunnen de accu’s van de rolstoel worden opgeladen
Er zijn verschillende besturingssystemen op de markt voor elektrische rolstoelen. Als
de bedieningskast op de rolstoel niet overeenstemt met afbeelding 1.1, neem dan
contact op met de dealer.
Afbeelding 1.1 Van links naar rechts; VR2 drive only, VR2 Lights, VR2 Seats&Lights
VR2 van PG Drive Technologies (CW) is de verzamelnaam van het gehele
elektronische besturingssysteem van de rolstoel. De bediening van de rolstoel
gaat via de bedieningskast en bevat de volgende componenten:

8
De bedieningskast
Afbeelding 1.1 Van links naar rechts; VR2 drive only, VR2 Lights, VR2 Seats&Lights
Onderdeel
Functie
A. Joystick In de ‘rijden’ modus: rijden en sturen
In de ‘verstellingen’ modus:
Links/rechts om de verstelling te selecteren
Voor/achter
om de
verstelling
te
activeren
B. Aan/uit knop Aan of uitzetten van de bedieningskast
C. Claxon Waarschuwing geluid signaal
D1: Accu indicator Geeft aan hoe ‘vol’ de accu is
D2: Maximale snelheid Weergave van de ingestelde maximum snelheid
D3: Verstellingen Weergave van de gekozen elektrische verstelling
E. “Mode” toets Wisselen tussen ‘rijden’ modus en ‘verstellingen’
modus
F1: Snelheidsregelaar Rijsnelheid omlaag (langzamer)
F2: Snelheidsregelaar Rijsnelheid omhoog (sneller)
G. Oplaadaansluiting Ingang voor de acculader
H. Oplaadplug van
acculader
Aansluitpunt van acculader
I. Verlichting knop Aan of uitzetten van de verlichting
J. Alarmlichten Waarschuwing licht signaal
K1: Richtingaanwijzer links Aan of uitzetten van richtingaanwijzer links
K2: Richtingaanwijzer rechts Aan of uitzetten van richtingaanwijzer rechts

9
Rijden met de rolstoel via de bedieningskast
2. Rijden met de rolstoel via de bedieningskast
2.1
Aan- en uitzetten van de bedieningskast
Om met de rolstoel te kunnen rijden of om de elektrische verstellingen te kunnen
bedienen moet de bedieningskast aan worden gezet. Druk daartoe op de aan/uitknop
(B in afb. 1.2).
2.2
Rijden met de rolstoel
Het rijden met de rolstoel gebeurt via de joystick. Beweeg de joystick naar voren en de
rolstoel zal zich naar voren bewegen. Stuur naar links en rechts en de rolstoel zal
draaien.
2.3
Snelheid
De maximum snelheid is te regelen via de snelheidsregelaar op de bedieningskast (F1
en F2 in afb. 1.2). De maximale snelheid wordt weergegeven via LED lampjes boven
de snelheidsregelaars (D2 in afb. 1.2). Tijdens het rijden is de snelheid te reguleren via
de joystick. Als de joystick een klein beetje wordt verplaatst dan is ook de snelheid
langzamer.
3. Het bedienen van elektrische verstellingen
Niet iedere rolstoel is uitgerust met elektrische verstellingen. We onderscheiden hier
vier elektrische verstellingen van het zitsysteem:
Kantelverstelling
Hoog/Laag verstelling
Rugverstelling
Beensteunverstelling
Het gebruik van de electrische verstellingen is alleen mogelijk in combinatie met de
VR2 Seats&Lights bedieningskast (maximaal 2 electrische verstelling).
Afbeelding 3.1 Elektrische verstellingen

10
Verlichting
3.1
Het kiezen van de gewenste verstelling
1. Zet de bedieningskast aan
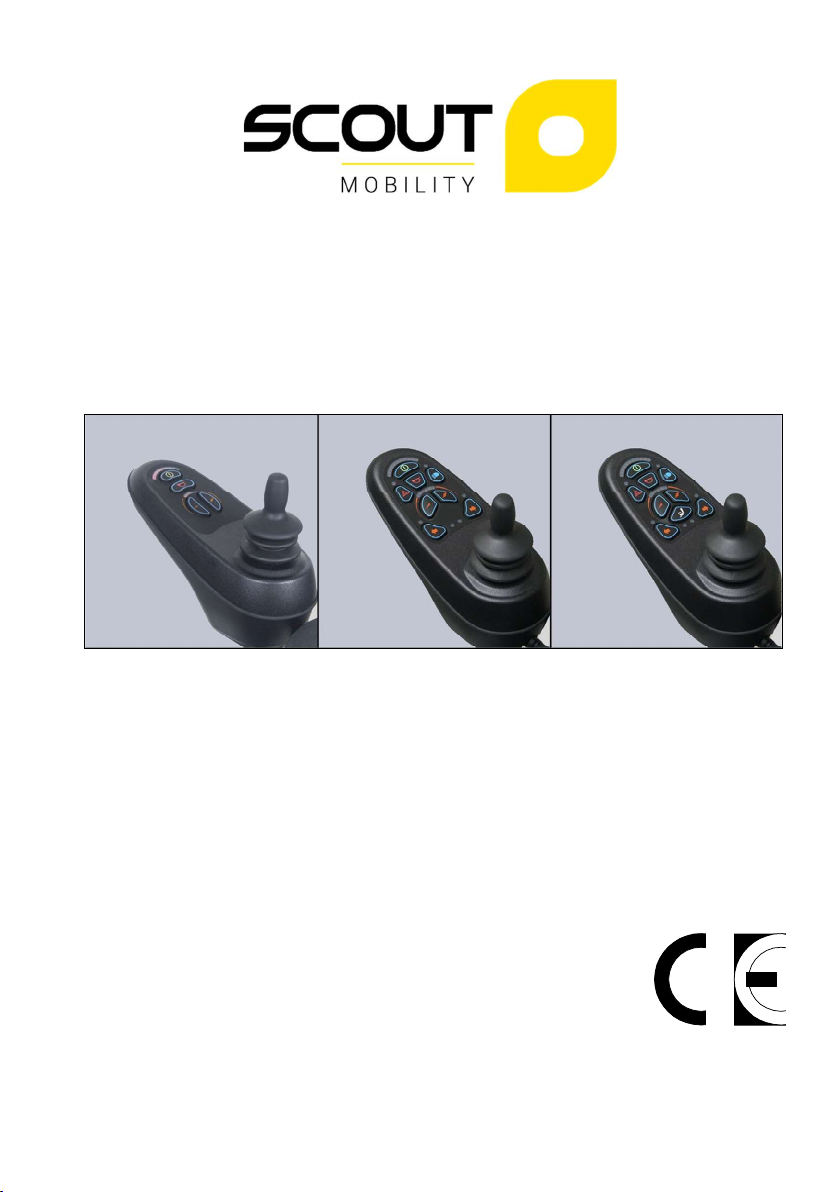
2. Ga naar de ‘verstellingen’ modus door op de ‘mode’ knop te drukken (E in afb. 1.2).
De bedieningskast bevindt zich nu in de ‘verstellingen modus’. Het is nu niet meer
mogelijk om te rijden.
Het kiezen van de elektrische verstelling en het bedienen daarvan gebeurt via de
joystick.
3. Druk eenmaal op de knop en verstelling 1 is geselecteerd. Het linker LED lampje
brand nu. Dit is voorgeprogrammeerd en afhankelijk van de aanwezige
verstellingen op de stoel. Druk nog een keer om de tweede verstelling te
selecteren. Nu brand het rechter LED lampje. Bij een derde keer keert de stuurkast
terug naar de ‘rijden’ modus. Beide LED lampjes zijn nu uit.
4. Door de joystick naar voren en achteren te bewegen wordt de geselecteerde
elektrische verstelling geactiveerd (zie tabel 3.1). Beweeg de joystick naar voren of
achteren tot de gewenste stand is bereikt.
Joystick naar achteren
Joystick naar voren
Kantelverstelling
Gehele stoel kantelt naar
achteren
Gehele stoel kantelt naar
voren
Hoog/Laag verstelling
Gehele stoel gaat omhoog Gehele stoel gaat omlaag
Rugverstelling
Rugleuning kantelt naar
achteren
Rugleuning kantelt naar
voren
Beensteun verstelling
Beenhoek wordt groter,
voetplaat komt omhoog
Beenhoek wordt kleiner,
voetplaat komt omlaag
Tabel 3.1 Elektrische verstellingen
5. Om weer te kunnen rijden: Druk op de ‘mode’ knop om terug te keren naar de
rijmodus.
NB: Als u de stoel middels de hoog/laag omhoog beweegt dan wordt de snelheid
beperkt.
4. Verlichting
Niet iedere rolstoel is uitgerust met verlichting. Enkel met VR2 Lights of VR2
Seats&Lights kan dan het volgende geactiveerd worden:
Verlichting (I in afb. 1.2)
Waarschuwingslichten (J in afb. 1.2)
Knipperlichten (K1 & K2 in afb. 1.2)

11
Storingen / Technische specificaties
5. Storingen
Als de rolstoel niet functioneert, terwijl de accu's voldoende geladen zijn, controleer dan
de volgende punten voordat u de dealer raadpleegt.
Zet de bedieningskast uit en weer aan. Controleer of de storing is verholpen.
Controleer of de vrijloophendel in de stand ‘RIJDEN’ staat.
Controleer of joystick in de nulstand stond tijdens het aanzetten. Met andere woorden;
de joystick niet bewegen tijdens het aanzetten van de bedieningskast.
Storingslijst
Een uitgebreide storingslijst is door de dealer te vinden in de bijlage van de service
handleiding (enkel voor gekwalificeerde specialisten). Deze is beschikbaar op
www.scoutmobility.nl
6. Technische specificaties
Supply Voltage: 24Vdc
Operating Voltage: 16Vdc to 35Vdc
Peak Voltage: 35Vdc
Reverse Battery Voltage: 40Vdc
PWM Frequency: 20kHz ± 0.5%
Brake Voltage: 12Vdc or 24Vdc
Brake Current: 100mA min.
1A max.
Charger Connector: Use only Neutrik NC3MX
Batt. Charging Current: 12Arms max.
Actuator Current: 12A max.
Maximum Drive Current:
VR2 50 50A
VR2 60 60A
VR2 70 70A
VR2 90 90A
Moisture Resistance: IPx4
Operating Temperature: -25°C to +50°C
Storage Temperature: -40°C to +65°C
EMC tested on sample wheelchair:
Susceptibility: Tested at 30V/m to EN12184 (1999) and ANSI/
RESNA requirements
Emissions: To EN55022 Class B
ESD: IEC801 part 2

12
Technische schema’s
7. Technische schema’s
7.1
Elektrisch aansluitschema
Het elektrisch aansluitschema is ook terug te vinden in de accubak.
Afbeelding 7.1:

13
Technische schema’s
7.2
Aansluitschema Acculader
De joystick heeft een standaard configuratie die is voorzien van een ‘3-pins-
aansluiting’. Zorg ervoor dat de aansluiting van de acculader op correcte wijze is
gebruikt zodat de ‘negatieve pool’ en de inhibit zijn verbonden, zodat het systeem
voorkomt dat de rolstoel kan rijden op het moment dat accu wordt geladen.
Afbeelding 7.2

14
English
© 2017 Scout Mobility B.V. All rights reserved.
The information provided herein may not be reproduced and/or published in any form, by print,
photoprint, microfilm or any other means whatsoever (electronically or mechanically) without the
prior written authorization of Scout Mobility B.V..
The information provided is based on general data concerning the constructions known at the time
of the publication of this manual. Scout Mobility B.V. executes a policy of continuous improvement
and reserves the right to changes and modifications.
The information provided is valid for the product in its standard version. Scout Mobility B.V.
cannot be held liable for possible damage resulting from specifications of the product deviating
from the standard configuration.
The available information has been prepared with all possible diligence, but Scout Mobility B.V.
cannot be held liable for possible errors in the information or the consequences thereof.
Scout Mobility B.V. accepts no liability for loss resulting from work executed by third parties.
Names, trade names, etc. used by Scout Mobility B.V. may not, as per the legislation
concerning the protection of trade names, be considered as being available.
2017-01

15
Table of contents
Preface ......................................................................................................................... 16
1. The controller ...................................................................................................... 17
1.1 VR2 controller ............................................................................................... 17
2. Driving the wheelchair with the controller ........................................................ 19
2.1 Switching the controller on or off ................................................................... 19
2.2 Driving the wheelchair ................................................................................... 19
2.3 Speed............................................................................................................ 19
3. Operating the electrical adjustment options .................................................... 19
3.1 Selecting the desired adjustment option ....................................................... 20
4. Lights ................................................................................................................... 20
5. Troubleshooting .................................................................................................. 21
6. Technical specifications .................................................................................... 21
7. Technical diagrams ............................................................................................ 22
7.1 Technical diagram ......................................................................................... 22
7.2 Technical diagram battery charger ................................................................ 23

16
Preface
Preface
This manual
This user manual describes the use of the electric wheelchair via the controller. The
total user manual for this electric wheelchair consists of three booklets. Read the entire
user manual carefully before taking the product into use. The information provided by
this manual is essential for the safe use and proper care (cleaning) of the wheelchair.
The general user manual
The user manual for the seating system (AGILO)
The user manual for the controller (this booklet)
If one of these user manuals was not included with your wheelchair, please contact
your dealer immediately. In addition to this user manual, there is also a service manual
for qualified specialists.
This general user manual will refer, where necessary, to one of the other user manuals.
This is indicated as follows:
GENERAL
: Refers to the general user manual.
CONTROLLER: Refers to the user manual for the controllers.
AGILO: Refers to the user manual for the seating system.

17
The controller
1. The controller
1.1
VR2 controller
A controller will usually have three basic functions:
Driving and steering a wheelchair
Operating electrical seat adjustments
Charging the wheelchairs batteries
There are many different control systems for wheelchairs on the market. If the controller
on your wheelchair does not resemble the one in figure 1.1, contact your dealer.
Figure 1.1 From the left to the right ; VR2 drive only, VR2 Lights, VR2 Seats&Lights
VR2 by PG Drive Technologies (CW) is a collective name for the entire control system
of the wheelchair. The wheelchair is operated by means of a controller, which includes
the following components:

18
The controller
Figure 1.2 From the left to the right ; VR2 drive only, VR2 Lights, VR2 Seats&Lights
Part
Function
A. Joystick In the ‘drive’ mode: driving and steering
In the ‘adjustment options’ mode:
Left/right to select the adjustment options
Front/back
to select the
adjustment
options
B. On/off switch Switching the controller on or off
C.
Horn Warning signal with sound
D1: Battery indicator Displays the power level of the battery
D2: Maximum speed Displays the maximum speed limit as set by the user
D3: Adjustment option Displays the selected adjustment options
E. “Mode” button Changing between the ‘driving’ and the ‘adjustment
options’ mode
F1: Speed regulator Reduce driving speed (slower)
F2: Speed regulator Increase driving speed (faster)
G.
Charge connector Input for the battery charger
H.
Charge plug for the
battery charger
Connector for the battery charger
I. Lights button Switching the lights on or off
J. Hazard lights Warning signal with lights
K1: Direction indicator left Switches the left direction indicator on or off
K2: Direction indicator right Switches the right direction indicator on or off

19
Driving the wheelchair with the controller
2. Driving the wheelchair with the controller
2.1
Switching the controller on or off
To be able to drive or operate the electronic adjustment options of the wheelchair, the
controller must be switched on. Press the on/off button (B in figure 1.2).
2.2
Driving the wheelchair
Driving an electric wheelchair is done by operating a joystick. Move the joystick
forwards and the wheelchair will also move forwards. Steer left and right and the
wheelchair will turn.
2.3
Speed
The maximum speed can be controlled by the speed regulator on the controller (F1 en
F2 in figure 1.2). De maximum speed is displayed by the LED lights above the speed
regulators (D2 figure 1.2). Speed can be controlled with the joystick while driving. If the
joystick is moved a little, the wheelchair will move more slowly.
3. Operating the electrical adjustment options
Not every wheelchair has been equipped with electronic adjustment options. We make
a distinction between four different adjustment options to the seating system:
Tilt adjustments
High/low adjustments
Backrest adjustments
Legrest adjustments
To use electrical adjustment options, the VR2 Seats&Lights controller is required
(maximum of two options).
Figure 3.1 Electronic adjustment options

20
Lights
3.1
Selecting the desired adjustment option
1. Switch on the controller
2. Press on the ‘mode’ button (E in figure 1.2) to select the ‘adjustment options’ mode.
The controller will now be in the ‘adjustment options’ mode. It is also possible to
follow the status.
The joystick is used to select and operate the electronic adjustment options.
3. Move the joystick to the left or the right to select the desired adjustment option. The
selected adjustment option will be visible on the display screen.
4. Moving the joystick forwards and/or backwards will activate the selected electronic
adjustment option (see table 3.1). Move the joystick forwards or backwards until the
desired adjustment option has been attained.
Move joystick backwards
Move joystick forwards
Tilt adjustment
The entire chair will tilt
backwards
The entire chair will tilt
forwards
High/low
adjustments
The entire chair will be raised The entire chair will be
lowered
Backrest
adjustments
The backrest will tilt
backwards
The backrest will tilt
forwards
Legrest
adjustments
The legrest angle will
increase, the footplate will be
raised
The legrest angle will
decrease, the footplate will
be lowered
Table 3.1 Electrical adjustments
5. To return to the ‘drive’ mode: Press on the ‘mode’ button to select the ‘drive’ mode.
Note: If you move the chair while adjusting the high/low option, the speed will be
reduced.
4. Lights
Not every wheelchair has been equipped with lights. You can activate the following
functions only by using VR2 Lights and/or VR2 Seat&Lights:
Lights (I in figure 1.2)
Hazard Lights (J in figure 1.2)
Direction indicators (K1 & K2 in figure 1.2)
This manual suits for next models
1
Table of contents
Languages:
Other Scout Wheelchair manuals