Sea Tel 4006-23 IN A 60" RADOME Owner's manual

Sea Tel, Inc.
4030 Nelson Avenue
Concord, CA 94520
Tel: (925) 798-7979
Fax: (925) 798-7986
Web: www.seatel.com
Look to the Leader. Look to Sea Tel.
Sea Tel Europe
Unit 1, Orion Industrial Centre
Wide Lane, Swaythling
Southampton, UK S0 18 2HJ
Tel: 44 (0)23 80 671155
Fax: 44 (0)23 80 671166
Web: www.seatel.com
July 9, 2007 Document. No. 125135
Rev C
CAUTION: This stabilized antenna system is designed to be used with transmit/receive equipment
manufactured by others. Refer to the documentation supplied by the manufacturer which will
describe potential hazards, including exposure to RF radiation, associated with the improper use of
the transmit/receive equipment. Note that the transmit/receive equipment will operate independently
of the stabilized antenna system. Prior to work on the stabilized antenna system, the power to
the transmit/receive system must be locked out and tagged.
When the transmit/receive system is in operation, no one should be allowed anywhere within the
radiated beam being emitted from the reflector.
The ultimate responsibility for safety rests with the facility operator and the individuals who
work on the system.
INSTALLATION AND OPERATION
MANUAL FOR SEA TEL BROADBAND-AT-SEA
TRANSMIT / RECEIVE SYSTEM
MODEL: 4006-23 IN A 60” RADOME

ii
Sea Tel Marine Stabilized Antenna systems are manufactured in the United
States of America.
Sea Tel is an ISO 9001:2000 registered company. Certificate Number 19.2867 was
issued August 12, 2005. Sea Tel was originally registered on November 09, 1998.
The Series 06 Family of Marine Stabilized Antenna Pedestals with DAC-2200
Antenna Control Unit complies with the requirements of European Norms and
European Standards EN 60945 (1997) and prETS 300 339 (1998-03). Sea Tel
European Union Declaration of Conformity for this equipment is contained in this
manual.
Copyright Notice
All Rights Reserved. The information contained in this document is proprietary to Sea Tel, Inc.. This
document may not be reproduced or distributed in any form without the consent of Sea Tel, Inc. The
information in this document is subject to change without notice.
Copyright © 2006 Sea Tel, Inc.


iv
Revision History
REV ECO# Date Description By
A N/A February 9, 2006 Initial Production Release, includes FCC TX Mute function
information.
MDN
B N/A July 17, 2006 Updated text and drawings MDN
C 5499 July 9, 2007 Change ACU to DAC-2202. Update text and drawings MDN

Table of Contents 4006-23 Broadband At Sea
v
1. INTRODUCTION.................................................................................................................................1-1
1.1. GENERAL SYSTEM DESCRIPTION..................................................................................................... 1-1
1.2. PURPOSE ..................................................................................................................................... 1-1
1.3. SYSTEM COMPONENTS.................................................................................................................. 1-1
1.4. GENERAL SCOPE OF THIS MANUAL .................................................................................................. 1-2
1.5. QUICK OVERVIEW OF CONTENTS ..................................................................................................... 1-2
2. OPERATION........................................................................................................................................2-1
2.1. SYSTEM POWER-UP....................................................................................................................... 2-1
2.2. ANTENNA INITIALIZATION ............................................................................................................... 2-1
2.3. ANTENNA STABILIZATION ............................................................................................................... 2-1
2.4. STABILIZED PEDESTAL ASSEMBLY OPERATION ................................................................................. 2-1
2.5. TRACKING OPERATION................................................................................................................... 2-2
2.6. ANTENNA POLARIZATION OPERATION.............................................................................................. 2-2
2.7. LOW NOISE BLOCK CONVERTER OPERATION ................................................................................... 2-2
2.8. RF EQUIPMENT............................................................................................................................. 2-2
2.9. FCC TX MUTE FUNCTION .............................................................................................................. 2-2
2.10. RADOME ASSEMBLY OPERATION.................................................................................................... 2-2
3. BASIC SYSTEM INFORMATION.......................................................................................................3-1
3.1. SATELLITE BASICS......................................................................................................................... 3-1
3.1.1. Ku-Band Frequency (10.95-12.75GHz)............................................................................. 3-1
3.1.2. Signal level ....................................................................................................................... 3-2
3.1.3. Satellite Footprints ........................................................................................................... 3-2
3.1.4. Satellite polarization ......................................................................................................... 3-2
3.2. ANTENNA BASICS.......................................................................................................................... 3-3
3.2.1. Unlimited Azimuth ........................................................................................................... 3-3
3.2.2. Elevation........................................................................................................................... 3-3
3.2.3. Antenna Reflector/Feed Assembly .................................................................................. 3-3
3.2.4. Antenna polarization......................................................................................................... 3-3
3.2.5. Interchangeable LNBs...................................................................................................... 3-4
3.2.6. Stabilization ...................................................................................................................... 3-4
3.2.7. Search Pattern ................................................................................................................. 3-4
3.2.8. Tracking Receiver - Satellite Identification Receiver........................................................ 3-4
3.2.9. Tracking............................................................................................................................ 3-4
3.3. COMPONENTS OF THE SYSTEM CONFIGURATION .............................................................................. 3-4
3.3.1. Antenna ADE Assembly................................................................................................... 3-5
3.3.2. Antenna Control Unit ....................................................................................................... 3-5
3.3.3. Above Decks AC Power Supply....................................................................................... 3-6
4. INSTALLATION .................................................................................................................................. 4-1
4.1. UNPACKING AND INSPECTION ......................................................................................................... 4-1
4.2. SITE SELECTION ABOARD SHIP ....................................................................................................... 4-1
4.3. ASSEMBLY NOTES AND WARNINGS................................................................................................. 4-1
4.4. INSTALLING THE ABOVE-DECKS EQUIPMENT (ADE) .......................................................................... 4-2

4006-23 Broadband At Sea Table of Contents
vi
4.4.1. 60” Radome Assembly.................................................................................................... 4-2
4.4.2. Antenna Pedestal Mechanical Checks............................................................................. 4-2
4.5. CABLE INSTALLATION .................................................................................................................... 4-3
4.5.1. Shipboard Cable Installation............................................................................................. 4-3
4.5.2. Cable Terminations In The Radome................................................................................. 4-3
4.6. BELOW DECKS EQUIPMENT. .......................................................................................................... 4-4
4.6.1. System Configuration ...................................................................................................... 4-4
4.6.2. Installing the Below Deck Equipment.............................................................................. 4-4
4.6.3. Antenna Control Unit Connections .................................................................................. 4-4
4.6.4. Terminal Mounting Strip Connections ............................................................................. 4-4
4.6.5. Control Cable Connections .............................................................................................. 4-4
4.6.6. NMEA GPS, Modem Lock & TX Inhibit Output Cable Connections................................ 4-4
4.6.7. Ships Gyro Compass Connections .................................................................................. 4-5
4.6.8. IF Cable Connections ....................................................................................................... 4-5
4.6.9. AGC Tracking Input Connections..................................................................................... 4-5
4.7. BROADBAND CONNECTIONS BELOW DECKS .................................................................................... 4-5
4.8. SET-UP &CONFIGURATION............................................................................................................. 4-5
5. SET-UP & CONFIGURATION ............................................................................................................5-1
5.1. OPERATOR SETTINGS .................................................................................................................... 5-1
5.2. OPTIMIZING TARGETING ................................................................................................................. 5-1
5.3. OPTIMIZING AUTO-POLARIZATION TX/RX ........................................................................................ 5-1
5.4. CALIBRATING RELATIVE ANTENNA POSITION (HOME FLAG OFFSET).................................................... 5-2
5.4.1. To Calculate HFO: ............................................................................................................ 5-3
5.4.2. To Enter the HFO value: .................................................................................................. 5-4
5.5. RADIATION HAZARD AND BLOCKAGE MAPPING (AZ LIMIT PARAMETERS)........................................... 5-5
5.6. TX POLARITY SETUP...................................................................................................................... 5-8
5.7. DEFAULT SETUP PARAMETERS ....................................................................................................... 5-9
5.8. CONFIGURING “YOUR LAN COMPUTER(S)”................................................................................... 5-10
5.8.1. To configure Setup Computer with MS Windows 98 operating system; ..................... 5-10
5.8.2. To configure Setup Computer with MS Windows 2000 operating system; ................. 5-12
5.8.3. To configure Setup Computer with MS Windows XP operating system;..................... 5-14
6. FUNCTIONAL TESTING.....................................................................................................................6-1
6.1. ACU /ANTENNA SYSTEM CHECK.................................................................................................... 6-1
6.2. LATITUDE/LONGITUDE AUTO-UPDATE CHECK ................................................................................... 6-1
6.3. SHIP HEADING –GYRO COMPASS FOLLOWING CHECK...................................................................... 6-1
6.4. AZIMUTH &ELEVATION DRIVE ........................................................................................................ 6-1
6.5. FOUR QUADRANT TRACKING TEST .................................................................................................. 6-2
6.6. BLOCKAGE SIMULATION TEST......................................................................................................... 6-2
6.7. TEST BROADBAND OPERATION....................................................................................................... 6-3
6.8. TEST VOICE OVER IP (VOIP) OPERATION ........................................................................................ 6-3
7. MAINTENANCE AND TROUBLESHOOTING ...................................................................................7-1
7.1. WARRANTY INFORMATION ............................................................................................................. 7-1

Table of Contents 4006-23 Broadband At Sea
vii
7.2. RECOMMENDED PREVENTIVE MAINTENANCE ................................................................................... 7-2
7.2.1. Check ACU Parameters ................................................................................................... 7-2
7.2.2. Latitude/Longitude Auto-Update check ........................................................................... 7-2
7.2.3. Heading Following ........................................................................................................... 7-2
7.2.4. Azimuth & Elevation Drive ............................................................................................... 7-2
7.2.5. Test Tracking.................................................................................................................... 7-2
7.2.6. Visual Inspection - Radome & Pedestal ......................................................................... 7-2
7.2.7. Mechanical Checks .......................................................................................................... 7-3
7.2.8. Check Balance ................................................................................................................. 7-3
7.2.9. Observe Antenna Initialization ......................................................................................... 7-3
7.3. TROUBLESHOOTING....................................................................................................................... 7-3
7.3.1. Theory Of Stabilization Operation .................................................................................... 7-3
7.3.2. Series 06 TXRX Antenna Initialization .............................................................................. 7-4
7.3.3. Antenna Position Error Monitoring .................................................................................. 7-4
7.3.4. Reference Sensor Testing ............................................................................................... 7-5
7.3.5. Open Loop Rate Sensor Test .......................................................................................... 7-5
7.3.6. Open Loop Motor Test .................................................................................................... 7-6
7.3.7. To Disable/Enable DishScan ............................................................................................ 7-6
7.3.8. Satellite Reference Mode ................................................................................................ 7-6
7.3.9. To Read/Decode an ACU Error Code 0008 (Pedestal Error):........................................... 7-7
7.3.10. Get Remote GPS LAT/LON Position:............................................................................... 7-8
7.4. MAINTENANCE.............................................................................................................................. 7-8
7.4.1. Balancing the Antenna ..................................................................................................... 7-8
7.4.2. 24 VDC Polang Alignment................................................................................................ 7-9
7.4.3. To Adjust Tilt: ................................................................................................................... 7-9
7.4.4. To Reset/Reinitialize the Antenna:................................................................................. 7-10
7.5. PEDESTAL CONTROL UNIT CONFIGURATION –SERIES 06 ................................................................ 7-10
7.5.1. To configure the PCU;.................................................................................................... 7-10
7.5.2. Model Configuration Numbers ...................................................................................... 7-10
7.6. ANTENNA STOWING PROCEDURE.................................................................................................. 7-11
8. 4006-23 TECHNICAL SPECIFICATIONS ...........................................................................................8-1
8.1. ANTENNA REFLECTOR/FEED 4006 .................................................................................................. 8-1
8.2. TX RADIO PACKAGE ...................................................................................................................... 8-1
8.3. RADOME ASSEMBLY,60”.............................................................................................................. 8-1
8.4. STABILIZED ANTENNA PEDESTAL ASSEMBLY .................................................................................... 8-2
8.5. PEDESTAL CONTROL UNIT.............................................................................................................. 8-2
8.6. UNLIMITED AZIMUTH MODEM/MULTIPLEXER (3 CHANNEL) ............................................................... 8-3
8.7. ADE PEDESTAL POWER REQUIREMENTS:........................................................................................ 8-3
8.8. ENVIRONMENTAL CONDITIONS (ABOVE DECKS EQUIPMENT).............................................................. 8-3
8.9. BELOW DECKS EQUIPMENT ........................................................................................................... 8-4
8.9.1. DAC-2202 Antenna Control Unit (ACU) ........................................................................... 8-4
8.9.2. Terminal Mounting Strip (TMS)........................................................................................ 8-4

4006-23 Broadband At Sea Table of Contents
viii
8.9.3. Satellite Modem............................................................................................................... 8-4
8.9.4. Router .............................................................................................................................. 8-4
8.10. CABLES........................................................................................................................................ 8-4
8.10.1. Antenna Control Cable (Provided from ACU-MUX) ......................................................... 8-4
8.10.2. Antenna L-Band IF Coax Cables (Customer Furnished)................................................... 8-4
8.10.3. Multi-conductor Cables (Customer Furnished) ................................................................ 8-5
8.10.4. AC Power Cable Above Decks (Customer Furnished)..................................................... 8-5
8.10.5. Gyro Compass Interface Cable (Customer Furnished) .................................................... 8-5
9. DRAWINGS.........................................................................................................................................9-1
9.1. 4006-23 KU-BAND MODEL SPECIFIC DRAWINGS ............................................................................. 9-1
9.2. 4006 GENERAL DRAWINGS............................................................................................................ 9-1

Introduction 4006-23 Broadband At Sea
1-1
1. Introduction
WARNING: RF Radiation Hazard - This stabilized antenna system is designed to be used with
transmit/receive equipment manufactured by others. Refer to the documentation supplied by
the manufacturer which will describe potential hazards, including exposure to RF radiation,
associated with the improper use of the transmit/receive equipment. Note that the
transmit/receive equipment will operate independently of the stabilized antenna system.
The ultimate responsibility for safety rests with the facility operator and the individuals
who work on the system.
1.1. General System Description
Your system includes a fully stabilized antenna that has been designed and manufactured so as to be
inherently reliable, easy to maintain, and simple to operate. The equipment essentially permits
unattended operation except for start-ups or when changing to different transponders, or satellites.
1.2. Purpose
This shipboard Transmit-Receive (TXRX) system provides you with two-way satellite voice/data
broadband communications while underway on an ocean-going vessel. This can be used to provide a
wide variety of telephone, fax and high speed data applications. Your antenna system can transmit to
and receive from any desired Ku-band satellite which has adequate signal coverage in your current
geographic area. This input will be distributed to your satellite modem and then to all of your other
below decks computer, fax and telephone equipment.
1.3. System Components
The 4006 TXRX system consists of two major groups of equipment; an above-decks group and a below-
decks group. Each group is comprised of, but is not limited to, the items listed below. All equipment
comprising the Above Decks is incorporated inside the radome assembly and is integrated into a single
operational entity. For inputs, this system requires only an unobstructed line-of-sight view to the
satellite, Gyro Compass input and AC electrical power.
For more information about these components, refer to the Basic System Information section of this
manual.
A. Above-Decks Equipment (ADE) Group
1. Stabilized antenna pedestal
2. Antenna Reflector
3. Feed Assembly with LNB(s)
4. Ku-Band Solid State Block Up-Converter (SSPBUC)
5. Radome Assembly
B. Below-Decks Equipment Group
6. Antenna Control Unit
7. Splitter with desired number of outputs (one output to the ACU and one output to the Satellite
Modem are required).
8. Satellite Modem and other below decks equipment required for the desired communications
purposes.

4006-23 Broadband At Sea Introduction
1-2
9. Other below decks LAN and VOIP equipment
10. Ethernet and telephone cables
1.4. General scope of this manual
This manual describes the Sea Tel Series 03 Antenna (also called the Above Decks Equipment), its’
operation and installation. Refer to the manual provided with your Antenna Control Unit for its’
installation and operating instructions.
1.5. Quick Overview of contents
The information in this manual is organized into chapters. Operation, basic system information,
installation, setup, functional testing, maintenance, specifications and drawings relating to this Antenna
are all contained in this manual

Operation 4006-23 Broadband At Sea
2-1
2. Operation
Operation of your system is accomplished from the DAC-2200 Antenna Control Unit (ACU). Refer to the
operation section of the DAC-2200 Antenna Control Unit manual.
2.1. System Power-up
Turn the Power switch on rear panel of the Antenna Control Unit (ACU) ON.
2.2. Antenna Initialization
A functional operation check can be made on the antenna stabilization system by observing its behavior
during the 4 phases of initialization.
Turn the pedestal power supply ON. The PCU will initialize the stabilized portion of the mass to be level
with the horizon and at a prescribed Azimuth and Elevation angles. The antenna will go through the
specific sequence of steps (listed below) to initialize the antenna. These phases initialize the level cage,
elevation, cross-level and azimuth to predetermined starting positions.
Initialization is completed in the following phases, each phase must complete properly for the antenna to
operate properly (post-initialization).
1. Level Cage is driven CCW, issuing extra steps to assure that the cage is all the way to the
mechanical stop. Then the Level cage will be driven exactly 45.0 degrees CW.
2. Elevation axis activates - Input from the LV axis of the tilt sensor is used to drive the Elevation of
the equipment frame to bring the tilt sensor LV axis to level (this results in the dish being at an
elevation angle of 45.0 degrees).
3. Cross-Level axis activates - Input from the CL axis of the tilt sensor is used to drive Cross-Level
of the equipment frame to bring the cross-level axis of the tilt sensor to level (this results in the
tilt of the Cross-Level Beam being level).
4. Azimuth axis activates - Antenna drives in azimuth until the “Home Flag” signal is produced.
This signal is produced by a Hall Effect sensor coming into close proximity to a Magnet mounted
in the azimuth driven sprocket.
This completes the phases of initialization. At this time the antenna elevation should 45.0 degrees and
Relative azimuth should be at be at home flag (magnet in the azimuth driven sprocket is at the hall
sensor mounted in the PCU enclosure).
If any of theses steps fail, or the Antenna Control Unit reports model number as "xx03" or “xx06” re-
configure the PCU as described in section the Maintenance section of this manual. If initialization still
fails, refer to the troubleshooting section of this manual.
2.3. Antenna Stabilization
After initialization has completed, real-time stabilization of the antenna is an automatic function of the
PCU.
2.4. Stabilized Pedestal Assembly Operation
Operation of the stabilized antenna Pedestal Control Unit (PCU) is accomplished remotely by the
Antenna Control Unit (ACU). Refer to the Operation section of the Antenna Control Unit manual for
more specific operation details. There are no other operating instructions applicable to the pedestal
assembly by itself.

4006-23 Broadband At Sea Operation
2-2
2.5. Tracking Operation
Tracking optimizes the antenna pointing, in very fine step increments, to maximize the level of the
satellite signal being received. The mode of tracking used in this antenna is a variation of Conical
Scanning called DishScan. Tracking is controlled by the ACU. You can toggle Tracking ON/OFF from the
ACU.
DishScan continuously drives the antenna in a very small circular pattern at 60 RPM. The ACU evaluates
the received signal throughout each rotation to determine where the strongest signal level is (Up, Right,
Down or Left) and then issues the appropriate Azimuth and/or Elevation steps to move the antenna
toward where stronger signal is.
The pedestal cannot control tracking. Refer to the ACU manual for more Tracking information.
2.6. Antenna Polarization Operation
Linear feeds are equipped with a polarization motor and potentiometer feedback and are controlled from
the Antenna Control Unit. Circular feeds do NOT require polarization adjustment.
Auto-Polarization mode is the default polarization mode of operation from the ACU. Polarization may be
operated manually from the ACU. Refer to the Antenna Control Unit manual for more operation
information.
2.7. Low Noise Block Converter Operation
There are no operating instructions or controls applicable to the LNB. This unit is energized whenever
the matrix switch and satellite receiver(s) have AC power connected to them.
Satellite signals are linear polarized (fixed plane down from the satellite) and, therefore, the pedestal will
only receive linear polarized signals when a linear LNB is installed.
2.8. RF Equipment
The RF Equipment is not operated or controlled by the antenna pedestal or Antenna Control Unit. Refer
to the vendor supplied manuals for the RF Equipment provided with your system.
2.9. FCC TX Mute Function
FCC TX Mute function provides a transmit inhibit, or mute, signal to the Satellite Modem to disable
transmit whenever the antenna is blocked, searching, targeting or is mispointed 0.5 degrees from peak
satellite position. This function is provided by software in the ACU & PCU, hardware wiring connection
between the ACU and the Satellite Modem and proper setup of the ACU SYSTEM TYPE parameter.
After the function has been installed and setup correctly the FCC TX Mute function operation is
automatic, therefore, requires no operator intervention. Refer to the Installation and Setup chapters in
this manual and in your Antenna Control Unit manual.
2.10. Radome Assembly Operation
When operating the system it is necessary that the radome access hatch (and/or side door) be closed
and secured in place at all times. This prevents rain, salt water and wind from entering the radome.
Water and excessive condensation promote rust & corrosion of the antenna pedestal. Wind gusts will
disturb the antenna pointing.
There are no other operating instructions applicable to the radome assembly by itself.

Basic System Information 4006-23 Broadband At Sea
3-1
Fi
g
ure 3-1 Arc of viewable Satellites
3. Basic System Information
This section provides you with some additional information about the satellites you will be using, basics of the
your antenna system and other equipment within your system configuration.
3.1. Satellite Basics
The satellites are in orbit at an altitude of
22,753.2 Statute Miles positioned directly
above the equator. Their orbital velocity
matches the Earth’s rotational speed,
therefore, each appears to remain at a
fixed position in the sky (as viewed from
your location).
The satellites are simply relay stations that
are able to receive signals from one
location on the globe and re-transmit them
to a much larger area on the globe than a
local antenna could do. Because of their high vantage point, they are able to cover an area that is larger
than a continent.
Your antenna can be used with any of the Ku-Band (10.95-12.75GHz) satellites in this orbit that have a
strong enough receive signal level in your location. Your antenna is capable of transmitting and receiving
Linear signal polarization, but requires that you have the appropriate LNB installed for the specific
frequency range of that satellite.
If you could see the satellites in their positions above the equator, they would appear to form an arc as
shown here (as viewed from a position in the Northern Hemisphere). When you are on the same
longitude as the satellite, its’ horizontal and vertical signals will be purely aligned to your horizon. When
the satellite is east or west of your longitude, the satellite signals will appear to be rotated clockwise or
counter-clockwise from pure horizontal and vertical. Both horizontal and vertical signals from a satellite
will appear to be rotated the same amount and are always perpendicular to each other. The amount of
rotation is dependent on how far east or west the satellite is from you and how close you are to the
Equator.
3.1.1. Ku-Band Frequency (10.95-12.75GHz)
At these frequencies the signal from the satellite travels only in a straight line and is affected by
weather changes in the atmosphere. There are several conditions that can cause a temporary
loss of satellite signal, even within an area where the signal level is known to be adequate. The
most common of these normal temporary losses are blockage and rain fade. They will
normally interrupt services only as long as the cause of the loss persists.
Blockage - Blockage is loss due to an object in the path of the signal from the satellite to the
dish. If an object that is large and dense is positioned in the path of the signal from the satellite,
it will prevent sufficient signal from arriving at the dish. The signal can not bend around, or
penetrate through, these objects. The reception will be degraded or completely interrupted until
the object is no longer in the path of the signal to the dish. The dish is actively driven to remain
pointed at the satellite (toward the equator) so, as the boat turns a mast or raised structure on
the boat may become positioned between the satellite and the dish. Blockage may also be
caused a person standing near the radome, tall mountains, buildings, bridges, cranes or other
larger ships near your boat. Signal will be lost when the boat is housed inside an enclosure that
the signal cannot penetrate, like a paint shed or a berth with a roof. Moving or rotating the boat

4006-23 Broadband At Sea Basic System Information
3-2
to position the antenna where it has an unobstructed view to the desired satellite will restore the
antennas ability to receive the satellite signal.
Rain Fade - Atmospheric conditions that may cause sufficient loss of signal level include rain,
snow, heavy fog and some solar activities such as sun spots and solar flare activity. The most
common of these is referred to as “rain fade”. Rain drops in the atmosphere reduce the signal
from the satellite. The heavier the rain, the greater the signal loss. When the amount of loss is
high enough, the antenna will not be able to stay locked onto the satellite signal. Once the
amount of rain has decreased sufficiently, the antenna will re-acquire the satellite signal. In
strong signal areas, rain fall of about four inches per hour will cause complete loss of signal. In
weaker signal areas, lighter rainfall might cause the signal to be lost.
3.1.2. Signal level
The level of the receive signal on a point on the globe is dependant upon how powerful the
transmission is and how wide the signal beam is coverage area is. Focusing the signal into a
narrower beam concentrates its energy over a smaller geographic area, thereby increasing the
signal level throughout that area of coverage. This makes it possible for you to use a smaller
antenna size to receive that satellite signal. The antenna system must be geographically located
in an area where the signal level from the satellite meets (or exceeds) the minimum satellite
signal level required for your size of antenna (refer to the Specifications section of this manual)
to provide suitable reception. This limits the number of satellites that can be used and the
geographic areas where the ship can travel where the signal level is expected to be strong
enough to continue providing uninterrupted reception. When travelling outside this minimum
signal coverage area, it is normal for the system to experience an interruption in its ability to
provide the desired satellite services until entering (or re-entering) an area of adequate signal
level (refer to the satellite footprint information). Systems with larger diameter dish antennas
can receive signal further out towards the fringe of a given satellites coverage area.
3.1.3. Satellite Footprints
The focused beam(s) from the satellites are normally aimed at the major land masses where
there are large population centers. Footprint charts graphically display the signal level expected
to be received in different geographic locations within the area of coverage. The signal will
always be strongest in the center of the coverage area and weaker out toward the outer edges
of the pattern. The Drawing section of this manual contains footprint charts of satellites that are
expected to provide adequate signal level for your size antenna. The coverage areas are
intended to be a guide to reception, however, the actual coverage area and signal level and vary.
Also the signal strength is affected by weather.
3.1.4. Satellite polarization
The satellites you will be using transmit their signals in linear polarization mode (like a flat ribbon
down from the satellite).
The feed assembly installed on your antenna is designed to be fitted with a linear LNB (to
receive horizontal and vertical linear polarized satellite transmissions. A motor, which is
controlled by the ACU (Auto or Manual polarization), adjusts the “polarization” angle of the LNB
installed on the feed to optimize the alignment of the LNB to match the angle of the signal from
the satellite. Auto-Polarization mode of the ACU normally will keep the polarization optimized for
you. When you are on the same longitude as the satellite, its’ horizontal and vertical signals will
be purely aligned to your horizon. When the satellite is east or west of your longitude, the
satellite signals will appear to be rotated clockwise or counter-clockwise from pure horizontal
and vertical. Both horizontal and vertical signals from a satellite will appear to be rotated the
same amount and are always perpendicular to each other. The amount of rotation is dependent
on how far east or west the satellite is from you and how close you are to the Equator.

Basic System Information 4006-23 Broadband At Sea
3-3
3.2. Antenna Basics
The satellite dish is mounted on a three jointed pedestal. As your boat rolls, pitches and turns in the
water, these three joints move to keep the dish pointed at the satellite. The following information is
provided to explain some of the basic functions of the antenna:
3.2.1. Unlimited Azimuth
Azimuth rotation of the antenna is unlimited (no mechanical stops). Azimuth drive, provided by
the azimuth motor, is required during stabilization, searching and tracking operations of the
antenna. When the ship turns, azimuth is driven in the opposite direction to remain pointed at
the satellite. The actual azimuth pointing angle to the satellite is determined by your latitude &
longitude and the longitude of the satellite. It is important to know that the antenna should be
pointed (generally) toward the equator.
The azimuth angle to the satellite would be 180 degrees true (relative to true north) if the
satellite is on the same longitude that you are on. If the satellite is east, or west, of your
longitude the azimuth will be less than, or greater than 180 degrees respectively.
When checking for blockage you can visually look over the antenna radome toward the equator
to see if any objects are in that sighted area. If you are not able to find any satellites it may also
be useful to remove the radome hatch to visually see if the dish is aimed the correct direction
(towards the equator).
3.2.2. Elevation
The antenna can physically be rotated in elevation from –15 degrees (lower stop) to +120
degrees (upper stop). However, you will only be pointing elevation between 00.0 (horizon) and
90.0 (zenith). Elevation drive, provided by the elevation motor, is required during stabilization,
searching and tracking operations of the antenna. The actual elevation pointing angle to the
satellite is determined by your latitude & longitude and the longitude of the satellite. In general
terms, the elevation angle will be low when the ship is at a high latitude and will increase as the
ship gets closer to the equator.
Additionally, from any given latitude, the elevation will be highest when the desired satellite is at
the same longitude that you are on (refer to figure 3-1). If the desired satellite is east, or west,
of your longitude the elevation angle will be lower.
3.2.3. Antenna Reflector/Feed Assembly
Comprised of a aluminum reflector with a Cassegrain feed assembly. The feed assembly is
fitted with a polarization motor and a potentiometer for position feedback required for linear
signal operation. A variety of interchangeable LNBs can be easily fitted to the feed, allowing it to
be fitted with the appropriate frequency range LNB for the desired Ku-Band satellite.
The ACU automatically adjusts the polarization of the feed by remotely controlling the 24 volt DC
motor, using the potentiometer feedback for Linear polarization position (Auto-Polarization
mode).
3.2.4. Antenna polarization
When you have a linear LNB installed the polarization needs to be periodically adjusted, Auto-
Polarization will automatically accomplish this for you.
To adjust polarization UP the LNB (as viewed from the front side of the reflector) must rotate
CCW and to adjust polarity DOWN the LNB must rotate CW.
Polarization adjustment to optimize Auto-Pol is required when initially setting up the system or
after you have installed a different LNB (refer to the Maintenance Section of this manual).

4006-23 Broadband At Sea Basic System Information
3-4
3.2.5. Interchangeable LNBs
Your antenna can easily be fitted with a variety of LNBs. The LNB must match the frequency
band of the desired satellite. You must also have the correct satellite modem installed below
decks for use with a specific satellite voice & data services.
3.2.6. Stabilization
This Sea Tel antenna is stabilized in three axes of motion. Stabilization is the process of de-
coupling the ships motion from the antenna. Simply put, this allows the antenna to remain
pointed at the satellite while the boat turns, rolls or pitches under it. To accomplish this, the
Pedestal Control Unit (PCU) on the antenna pedestal senses any motion of the antenna and
immediately applies drive to the appropriate motor(s) to oppose the sensed motion. Azimuth
(AZ), Elevation (EL) and Cross-Level (left-right tilt) are actively stabilized automatically by the PCU
as part of its normal operation.
3.2.7. Search Pattern
Whenever the desired satellite signal is lost (such as when the antenna is blocked), the Antenna
Control Unit will automatically initiate a search to re-acquire the desired signal.
The search is conducted with alternate azimuth and elevation movements. The size and
direction of the movements are increased and reversed every other time resulting in an
expanding square pattern.
When the antenna finds the desired satellite signal, the ACU will automatically stop searching
and begin Tracking the signal. Tracking optimizes the pointing of the antenna to get the highest
signal level from the satellite.
3.2.8. Tracking Receiver - Satellite Identification Receiver
The Satellite Identification Receiver located in the Antenna Control Unit (ACU) is used to acquire,
identify and track a specific satellite by a unique network ID code (NID). Some TVRO signals
may not allow the NID to be demodulated. In these cases, the ACU may be programmed to
generate its own “ID” based on a pattern match comprised of frequency, baud rate and FEC
rate. In addition, an external modem lock input to the ACU is used as a satellite ID when the
appropriate SYSTEM TYPE value is used.
The receiver must be set up properly for the satellite you wish to find & track. These receiver
settings should be saved to expedite finding, or re-acquiring, the desired satellite in the future.
When searching for a desired satellite, this receiver compares any satellite ID it finds to the
saved satellite ID code. If the ID code does not match the antenna will continue searching until
the correct satellite is found. The system must have adequate satellite signal level, AND the
matching ID, to stop searching (and continue tracking the desired satellite). Refer to your ACU
manual for more information.
3.2.9. Tracking
The ACU actively optimizes the pointing of the dish for maximum signal reception. This process
is called tracking and is accomplished by continuously making small movements of the dish
while monitoring the level of the received signal. Evaluation of this information is used to
continuously make minor pointing corrections to keep the signal level “peaked” as part of
normal operation.
3.3. Components of the System Configuration
The following text provides a basic functional overview of the system components and component
interconnection as referred to in the simplified block diagram below. Also, refer to the appropriate page
of the System Block Diagram which depicts your system configuration for further detail.

Basic System Information 4006-23 Broadband At Sea
3-5
The System is comprised of two major sections: The Above-Decks Equipment (ADE) is comprised solely
of the antenna radome assembly which is mounted outside, on the boats upper deck or mast location.
The Below-Decks Equipment (BDE) includes the Antenna Control Unit, satellite modem and all other
ancillary equipment that is mounted in various locations throughout the interior of the boat.
3.3.1. Antenna ADE Assembly
The Above Decks Equipment consists of an Antenna Pedestal inside a Radome assembly. The
pedestal consists of a satellite antenna dish
& feed with a linear Low Noise Block
converter (LNB) with polarization motor
mounted on a stabilized antenna pedestal.
The radome provides an environmental
enclosure for the antenna pedestal
assembly inside it. This keeps wind, water
condensation and salt-water spray off the
antenna pedestal assembly. This prevents
damage and corrosion that would shorten
the expected life span of the equipment.
RG-11 (or better) coax cables are connected
from the antenna radome assembly to the
below decks equipment. The two cables
carry the intermediate frequency (950-
2050MHz) signals from the antenna
assembly directly to the below decks
equipment. Antenna control communication
between the Antenna Control Unit and the
Pedestal Control Unit are also on one of these coax cables.
And finally an AC Power cable is also routed to the antenna to provide the operating voltage to
the antenna assembly
3.3.2. Antenna Control Unit
The Antenna Control Unit allows the operator to control and monitor the antenna pedestal with
dedicated function buttons, LED’s and a 2 line display. The ACU and its Terminal Mounting Strip
are normally mounted in a standard 19” equipment rack. The ACU should be mounted in the
front of the equipment rack where it is easily accessible. The Terminal Mounting Strip is
normally mounted on the rear of the equipment rack. It is recommended that the antenna
control panel be mounted near one of the Satellite Receiver locations where you can see the
television screen while you are controlling the antenna.
The Antenna Control Unit is connected to the antenna, ships Gyro Compass and modem.
Figure 3-3 Antenna Control Unit
The Antenna Control Unit (ACU) communicates via an RS-422 full duplex data link with the
Pedestal Control Unit (PCU) located on the antenna. This control signal to/from the antenna is on
the Coax cable along with the DC voltage which energizes the LNB and the L-Band Receive IF
from the LNB. The Pedestal Control Unit stabilizes the antenna against the ship's roll, pitch, and
turning motions. The ACU is the operator interface to the PCU and provides the user with a
Figure 3-2 4006 Above Decks Equipment

4006-23 Broadband At Sea Basic System Information
3-6
choice of positioning commands to point the antenna, search commands to find the satellite
signal and tracking functions to maintain optimum pointing.
3.3.3. Above Decks AC Power Supply
Pedestal Power - An appropriate source of AC Voltage (110 VAC 60 Hz OR 220 VAC 50 Hz) is
required for the above decks equipment. Total power consumption will depend on the number
of equipments connected to this power source.
RF Equipment (TX/RX Systems ONLY) - The AC voltage source should be well regulated and
surge protected. Uninterrupted Power Supplies are frequently installed (below decks) to provide
power for the antenna pedestal, especially if RF Equipment is installed on the pedestal. Refer to
the Specifications section of this manual for the power consumption of the antenna pedestal and
RF Equipment.
Marine Air Conditioner Unit (TX/RX Systems ONLY) - If a marine air conditioner is included with
your system, the AC voltage source should be from a separate AC Power breaker source than
the antenna pedestal. AC power for the air conditioner should be well regulated and surge
protected, but does NOT need to from an Uninterrupted Power Supply. Refer to the marine air
conditioner manual for its’ power requirements and consumption specifications.

Installation 4006-23 Broadband At Sea
4-1
4. Installation
Your antenna pedestal comes completely assembled in its radome. This section contains instructions for
unpacking, final assembly and installation of the equipment. It is highly recommended that installation of the
system be performed by trained technicians.
4.1. Unpacking and Inspection
Exercise caution when unpacking the equipment. Carefully inspect the radome surface for evidence of
shipping damage.
4.2. Site Selection Aboard Ship
The radome assembly should be installed at a location aboard ship where:
1. The antenna has a clear line-of-sight to as much of the sky (horizon to zenith at all bearings) as is
practical.
2. The antenna is a minimum of 15 Feet from the ship's Radar, further away if they are high power
Radar arrays.
3. The antenna is not mounted on the same plane as the ship's Radar, so that it is not directly in
the Radar beam path.
4. The antenna is a minimum of 15 Feet from high power short wave transmitting antennas.
5. The Above Decks Equipment (ADE) and the Below Decks Equipment (BDE) should be positioned
as close to one another as possible. This is necessary to reduce the losses associated with long
cable runs.
6. The mounting location is rigid enough that it will not flex, or sway, in ships motion or vibration. If
the radome is to be mounted on a raised pedestal, it MUST have adequate gussets, or be well
guyed, to prevent flexing or swaying in ships motion.
If these conditions cannot be entirely satisfied, the site selection will inevitably be a “best” compromise
between the various considerations.
4.3. Assembly Notes and Warnings
NOTE: Unless otherwise indicated, all nuts and bolts should be
assembled with Loctite 271 or its equivalent.
WARNING: Assure that all nut & bolt assemblies are tightened according the
tightening torque values listed below:
Bolt Size Inch Pounds
1/4-20 75
5/l6-18 132
3/8-16 236
1/2-13 517

4006-23 Broadband At Sea Installation
4-2
4.4. Installing the Above-Decks Equipment (ADE)
4.4.1. 60” Radome Assembly
The antenna pedestal is shipped completely assembled in its 60” radome.
WARNING: Hoisting with other than a webbed four-part sling may result in
catastrophic crushing of the radome. Refer to the specifications and drawings
for the fully assembled weight of your model Antenna/Radome and assure that
equipment used to lift/hoist this system is rated accordingly.
CAUTION: The antenna/radome assembly is very light for its size and is subject
to large swaying motions if hoisted under windy conditions. Always ensure that
tag lines, attached to the radome base frame, are attended while the antenna
assembly is being hoisted to its assigned location aboard ship.
1. Remove the shipping nuts which mount the ADE to its’ pallet.
2. Using a web strap lifting sling arrangement, and with a tag line attached near the radome
base, hoist the antenna assembly to its assigned location aboard ship by means of a
suitably sized crane or derrick.
3. The radome assembly should be positioned with the BOW marker aligned as close as
possible to the centerline of the ship. Any variation from actual alignment can be
compensated with the AZIMUTH TRIM adjustment in the Antenna Control Unit so
precise alignment is not required.
4. Bolt the radome base directly to the ship's deck or mounting plate. When completed
the radome base should be as near level as possible.
4.4.2. Antenna Pedestal Mechanical Checks
1. Open the radome hatch and enter the radome.
2. Inspect the pedestal assembly and reflector for signs of shipping damage.
3. Remove the web strap shipping restraints from the pedestal. Save these straps to
restrain the antenna in the event that the AC power will be turned off while the ship is
underway.
4. Cut and discard the large white tie-wraps from the pedestal.
5. Remove the Cross-Level shipping bar.
6. Remove the rubber isolation damper from the split post.
7. Check that the antenna moves freely in azimuth, elevation, and cross level without
hitting any area of the interior of the radome.
8. Check that the antenna assembly is balanced front to back, top to bottom and side to
side by observing that it remains stationary when positioned in any orientation. Refer to
section 3.5 for complete information on balancing the antenna.
9. Check that all pedestal wiring and cabling is properly dressed and clamped in place.
10. See cable terminations section below.
Table of contents
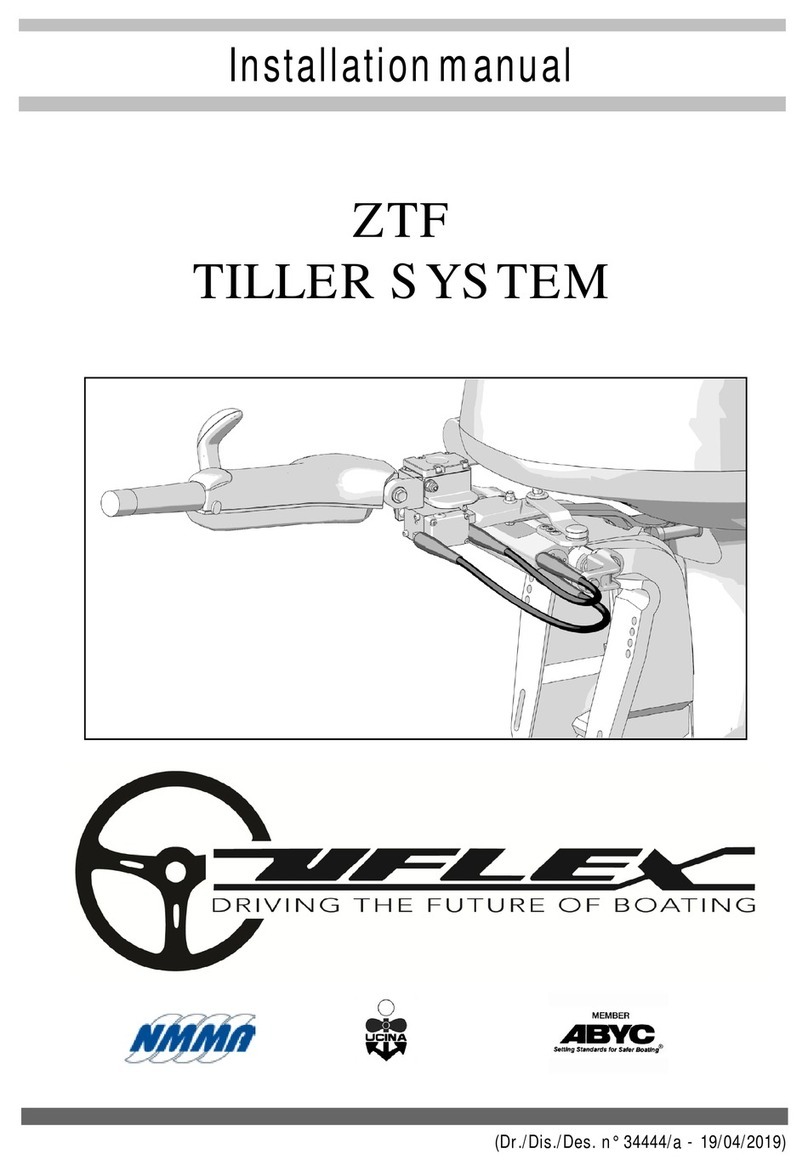
Popular Boating Equipment manuals by other brands
ARG
ARG ARG50T installation manual

Floe
Floe 510-27300-00 Assembly instructions and owner's manual
Doyle Sailmakers
Doyle Sailmakers StackPack installation manual

Mercury
Mercury Vessel View 4 user manual

EZ Dock
EZ Dock EZ Port & Stow Owner's manual and installation instructions
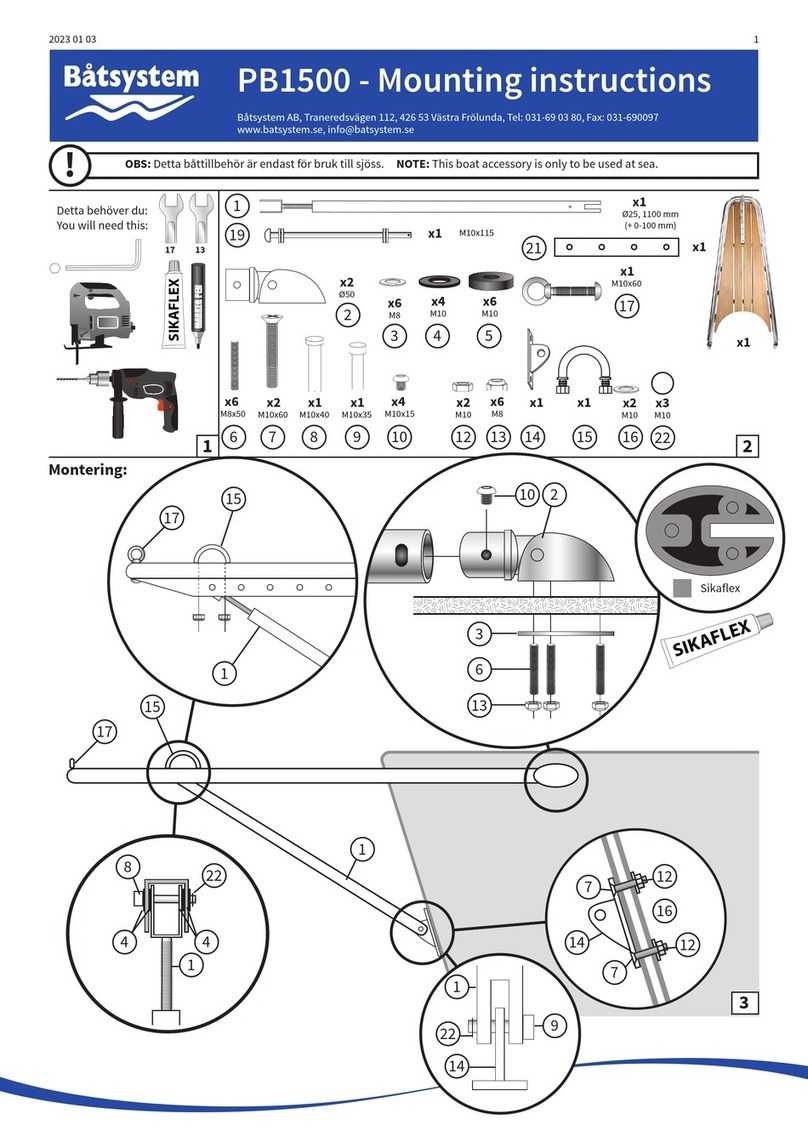
Batsystem
Batsystem PB1500 Mounting instructions
Goiot
Goiot Cristal Series Fitting instructions

Raritan
Raritan PURASAN EX Hold n' Treat Operation, maintenance, and installation instructions

DockCraft
DockCraft DockSider DS200 Assembly, Installation, Setup, and Operating Instruction
Gumotex
Gumotex SEAWAVE user guide

Easytow
Easytow ski owner's manual

Gumotex
Gumotex THAYA user manual
