VS8222 | Issue 1 10/01/17
Original Language Version
© Jack Sealey Limited
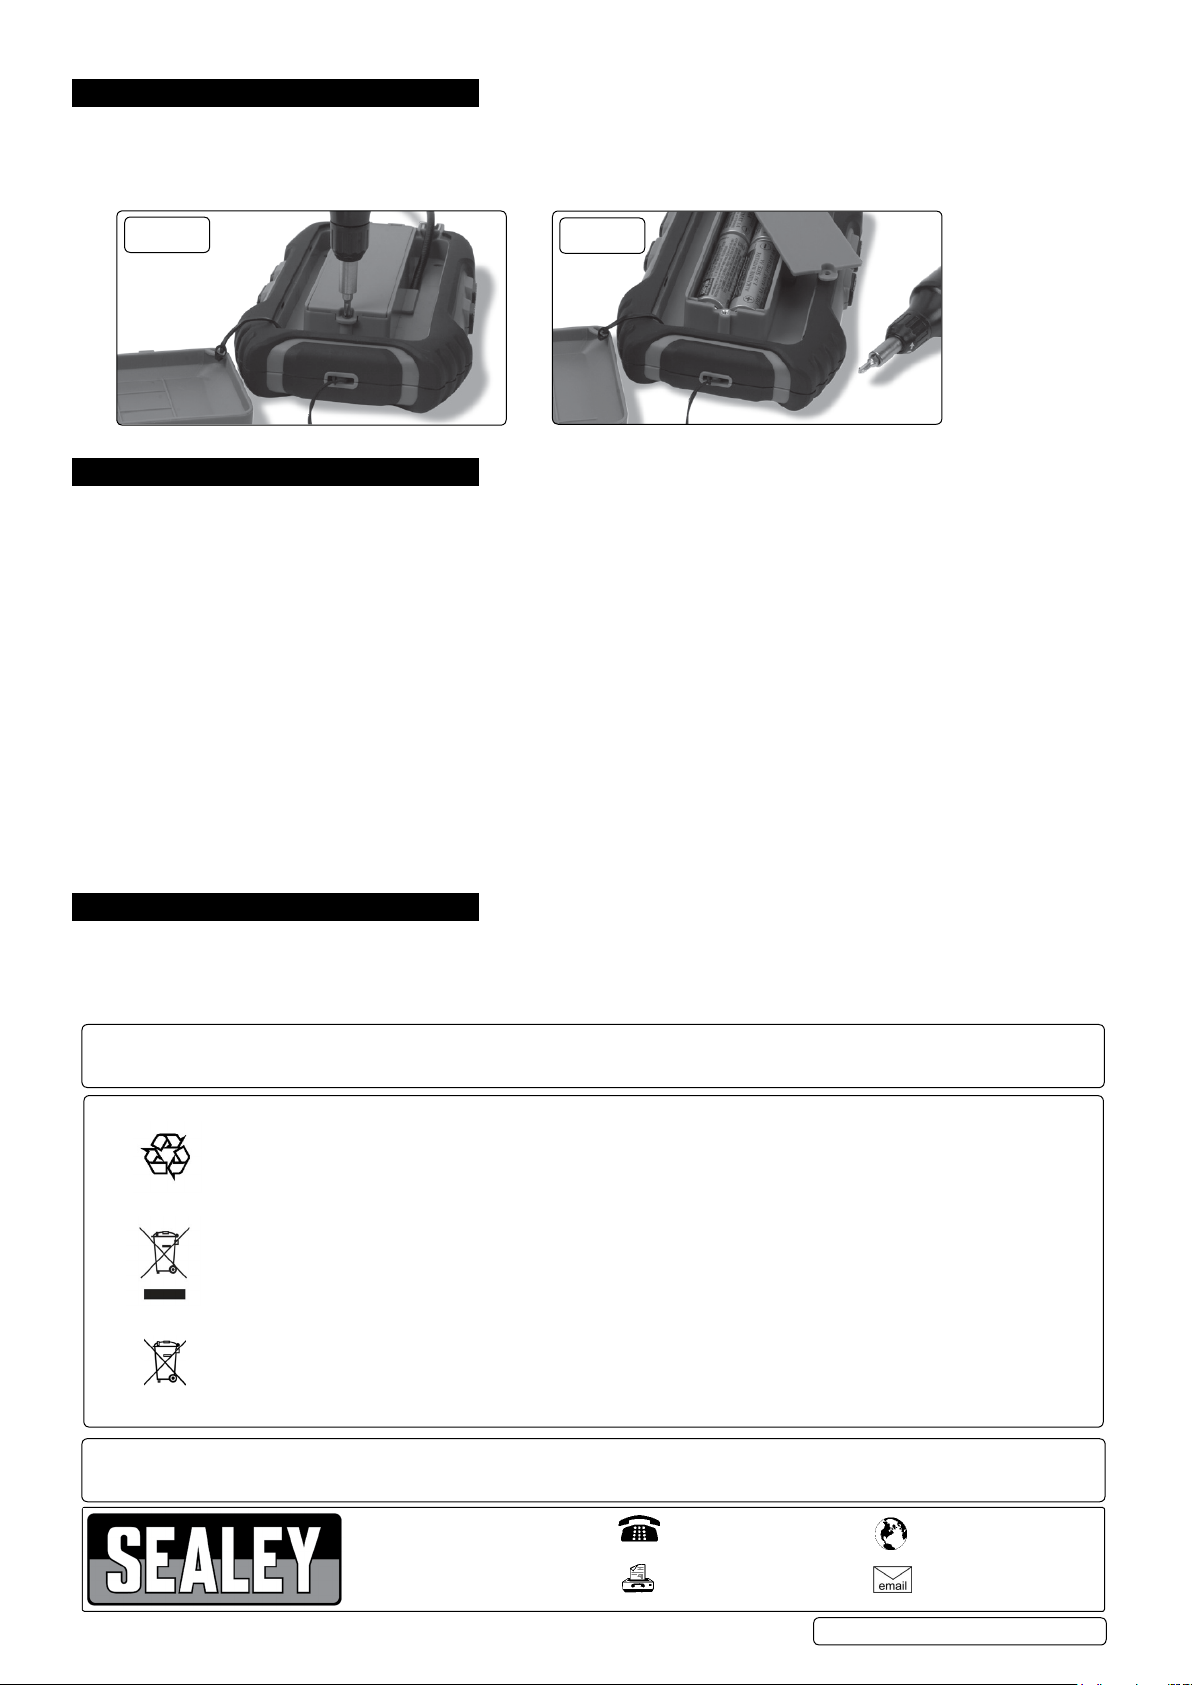
4. BATTERY INSTALLATION
4.1. Turn unit over to expose back. Press in the plastic tab on the right middle of the back cover and lift up to open.
4.2. Use a cross head screwdriver to remove the screw in bottom middle of the battery cover.
4.3. Remove cover and insert 4AA batteries as shown inside the compartment.
4.4. Replace screw.
5. OPERATION
This Borescope inspection camera unit comes fully assembled. Before rst use, carefully peel off the plastic label over the LCD.
5.1. To begin use, carefully uncoil the camera probe assembly coiled around the battery compartment.
5.2. Once probe is fully extended, align the cable with the opening on the upper right of the backside of the unit.
5.3. Align and replace the cover inserting the left hand tabs into the housing rst.
5.4. Press down to ensure a good t, making sure the cable ts through the opening.
5.5. Turn unit over, press and hold the power button for 3 seconds to turn on.
5.6. Point the camera-tipped end of the probe at the target, feed the probe through any holes or bend the probe around objects if necessary.
5.7. DO NOT forcefully bend, kink, or pull the probe, this will damage it.
5.8. Use the function buttons as described in g.1 to set light output, screen size, zoom and viewing orientation.
5.9. Press and hold power button again for 3 seconds to turn off.
5.10. The accessories included with this unit can be used to retrieve small parts, or provide better viewing into inaccessible areas. These
can be attached to the camera head using the accessory collar as follows:
5.10.1. Slide the desired accessory through the accessory collar and align with the notch inside.
5.10.2. Position the hook on the end of the accessory behind the camera head.
5.10.3. Slide the accessory collar over the camera head with the accessory in place, until tightened.
Note: These accessories are not designed for lifting heavy objects or pulling with force.
Always hold the camera probe in your hand while using an accessory. Pulling on the LCD unit will put stress on the cable connection and
could cause the unit to malfunction. Use only for small, lightweight objects.
6. MAINTENANCE
6.1. Make sure the screws are properly tightened to be able to work safely. Use only original accessories and original spare parts.
6.2. If the device is not used, it should be stored in a dry place, away from children.
6.3. If the cable is damaged, or there is a defect with the Borescope see below for contact details.
g.3
g.2
NOTE: It is our policy to continually improve products and as such we reserve the right to alter data, specications and component parts without prior notice.
IMPORTANT: No liability is accepted for incorrect use of this product.
WARRANTY: Guarantee is 12 months from purchase date, proof of which will be required for any claim.
Sole UK Distributor, Sealey Group.
Kempson Way, Suffolk Business Park,
Bury St. Edmunds, Suffolk.
IP32 7AR
www.sealey.co.uk
sales@sealey.co.uk
01284 757500
01284 703534
Environmental Protection
Recycle unwanted materials instead of disposing of them as waste. All tools, accessories and packaging should be
sorted, taken to a recycling centre and disposed of in a manner which is compatible with the environment.
When the product becomes completely unserviceable and requires disposal, drain off any fluids (if applicable)
into approved containers and dispose of the product and the fluids according to local regulations.
WEEE Regulations
Dispose of this product at the end of its working life in compliance with the EU Directive on
Waste Electrical and Electronic Equipment (WEEE). When the product is no longer required, it must be disposed
of in an environmentally protective way. Contact your local solid waste authority for recycling information.
Battery Removal
See section 4
Under the Waste Batteries and Accumulators Regulations 2009, Jack Sealey Ltd are required to inform potential
purchasers of products containing batteries (as dened within these regulations), that they are registered with Valpak’s
registered compliance scheme. Jack Sealey Ltd’s Batteries Producer Registration Number (BPRN) is BPRN00705.
Parts support is available for this product. To obtain a parts listing and/or diagram,
please log on to www.sealey.co.uk, email sales@sealey.co.uk or telephone 01284 757500.


