manuals.online logo
Brands
  1. Home
  2. •
  3. Brands
  4. •
  5. Sealey
  6. •
  7. Heater
  8. •
  9. Sealey IR12 User manual

Sealey IR12 User manual

SEALEY INFRARED QUARTZ HEATER - WALL
MOUNTING 1.2KW/230V
MODEL NO: IR12 / IR12CT
Thank you for purchasing a Sealey product. Manufactured to a high standard, this product will, if used according to these instructions,
and properly maintained, give you years of trouble free performance.
IMPORTANT: PLEASE READ THESE INSTRUCTIONS CAREFULLY. NOTE THE SAFE OPERATIONAL REQUIREMENTS, WARNINGS & CAUTIONS. USE
THE PRODUCT CORRECTLY AND WITH CARE FOR THE PURPOSE FOR WHICH IT IS INTENDED. FAILURE TO DO SO MAY CAUSE DAMAGE AND/OR
PERSONAL INJURYAND WILL INVALIDATE THE WARRANTY. KEEP THESE INSTRUCTIONS SAFE FOR FUTURE USE.
1. SAFETY
1.1. ELECTRICAL SAFETY
WARNING! It is the user’s responsibility to check the following:
Check all electrical equipment and appliances to ensure that they are safe before using. Inspect power supply leads, plugs and
all electrical connections for wear and damage. Sealey recommend that an RCD (Residual Current Device) is used with all electrical
products.
If the product is used in the course of business duties, it must be maintained in a safe condition and routinely PAT (Portable
Appliance Test) tested.
Electrical safety information, it is important that the following information is read and understood.
Ensure that the insulation on all cables and on the appliance is safe before connecting it to the power supply.
Regularly inspect power supply cables and plugs for wear or damage and check all connections to ensure that they are secure.
Important: Ensure that the voltage rating on the appliance suits the power supply to be used and that the plug is tted with the
correct fuse - see fuse rating in these instructions.
8DO NOT pull or carry the appliance by the power cable.
8DO NOT pull the plug from the socket by the cable.
8DO NOT use worn or damaged cables, plugs or connectors. Ensure that any faulty item is repaired or
is replaced immediately by a qualied electrician.
This product is tted with a BS1363/A 3 pin plug.
If the cable or plug is damaged during use, switch o󰀨 the electricity supply and remove from use.
Ensure that repairs are carried out by a qualied electrician.
Replace a damaged plug with a BS1363/A 3 pin plug. If in doubt contact a qualied electrician.
a) Connect the GREEN/YELLOW earth wire to the earth terminal ‘E’.
b) Connect the BROWN live wire to the live terminal ‘L’.
c) Connect the BLUE neutral wire to the neutral terminal ‘N’.
Ensure that the cable outer sheath extends inside the cable restraint and that the restraint is tight.
Sealey recommend that repairs are carried out by a qualied electrician.
1.2. GENERAL SAFETY
CAUTION - Some parts of this product can become very hot and cause burns. Particular attention has to be given to where
children and vulnerable children are present.
WARNING! To reduce the risk of re, keep textiles, curtains or any other ammable material a minimum distance of 2m from
the air outlet.
WARNING! Disconnect the heater from the mains power supply before carrying out any servicing or maintenance.
9Maintain the heater in good order and clean condition for best and safest performance. Replace or repair damaged parts.
9Locate heater in a suitable work area and keep area clean, tidy and free from unrelated materials. Ensure there is adequate
lighting and keep the immediate area in front of the outlet grille clear.
9 Allow the unit to cool before storage. When not in use, disconnect from the mains power supply and store in a safe, cool, dry,
childproof area.
9 Use this heater on a horizontal and stable surface.
8DO NOT use the heater where there are flammable liquids, solids or gases such as petrol, solvents, aerosols etc, or where heat
sensitive materials may be stored.
8DO NOT place the heater near items that may be damaged by heat, allow at least 2m clearance in front of the heater.
8DO NOT allow the heater to get wet as this may cause an electric shock, causing damage to the heater and possible personal
injury.
8DO NOT use this heater in small rooms when they are occupied by persons not capable of leaving the room on their own, unless
constant supervision is provided.
8DO NOT let power lead hang over an edge (i.e. table), or touch a hot surface, lie in the beam of heat, or run under a carpet.
8DO NOT use this heater in the immediate surroundings of a bath, a shower or a swimming pool.
8DO NOT operate the heater when you are tired or under the influence of alcohol, drugs or intoxicating medication.
8DO NOT insert or allow objects to enter any openings of heater as this may cause an electric shock, fire or damage to heater.
8DO NOT use heater if the power cord, plug or the heater is damaged, or if the heater has become wet.
8DO NOT use the heater for any purpose other than for which it is designed.
IR12 / IR12CT Issue:1 03/04/23
Original Language Version
© Jack Sealey Limited
Refer to
Instruction
Manual
Hot surfaces Warning!
electricity Do not cover Indoor use only
RECOMMENDED
FUSE RATING: 13AMP
8DO NOT use the heater with a programmer, timer or any other device that switches the heater on automatically.
8DO NOT touch the lamps, even when cold.
8DO NOT allow children to touch or to operate the heater.
8DO NOT locate the heater below an electrical socket outlet.
8DO NOT use the heater without the grille fitted.
8DO NOT use the heater out of doors. These heaters are designed for indoor use only.
8DO NOT use this heater if it has been dropped.
8DO NOT use if there are visible signs of damage to the heater.
8DO NOT cover heater when in use, and do not obstruct the air inlet and outlet grilles.
8DO NOT place heater too close to yourself or any object, allow the air to circulate freely.
8DO NOT touch the outlet grille of the heater during and immediately after use as it will be hot.
WARNING: The fireguard of this heater is intended to prevent direct access to heating elements and must be in place when the heater is
in use.
WARNING: The fireguard does not give full protection for young children and for infirm persons.
9 Children of less than 3 years should be kept away unless continuously supervised.
9 Children aged from 3 years and less than 8 years shall only switch on/off the appliance provided that it has been placed or installed in
its intended normal operating position and they have been given supervision or instruction concerning the use of the appliance in a safe
way and understand the hazards involved. Children aged from 3 years to less than 8 shall not plug in, regulate and clean the appliance or
perform user maintenance.
This appliance can be used by children aged from 8 years and above and persons with physical, sensory or mental capabilities or lack
of experience and knowledge if they have been given supervision or instruction concerning the use of the appliance in a safe way and
understand the hazards involved. Children shall not play with the appliance. Cleaning and user maintenance shall not be made by
children without supervision.
2. INTRODUCTION
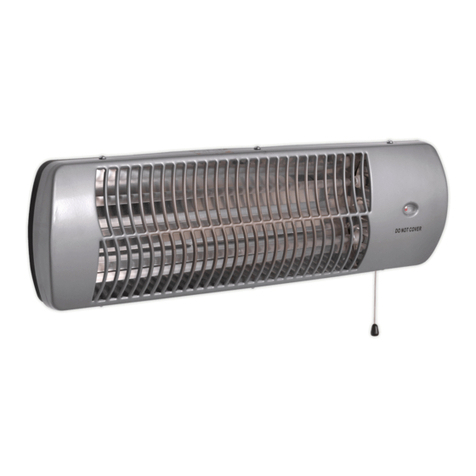
Electric heater with infrared quartz lamp. Suitable for wall or overhead mounting. Reaches maximum heat output within seconds of being turned
on. Supplied with 1.3m power cable and mounting bracket. A totally dry heat with no condensation, no gas, no fumes and no smell.
3. SPECIFICATION
Model No: ....................................................... IR12 / IR12CT
Fuse Rating: ....................................................................13A
Minimum Mounting Height: ............................................1.8m
Mounting Bracket Stand-O󰀨: ......................................134mm
Overall Dimensions IR12 (W x D x H) .......412 x 95 x 210mm
Overall Dimensions IR12CT (W x D x H) 1100 x 1100 x 1490mm
Plug Type:......................................................................3-Pin
Power Supply Cable Length: .........................................1.3m
Power..........................................................................1200W
Supply............................................................................230V
4. INSTALLATION
4.1. WALL MOUNTING (IR12)
4.1.1. MOUNTING LOCATION
WARNING: Locate the unit no closer than 0.3m to the ceiling, no less than 1.8m
from the oor and no less than 1m from any side wall.
WARNING: Ensure the mounting surface is suitable and strong enough to securely
and safely mount the unit (xings not supplied).
4.1.2. Remove the four screws on the rear of the unit and use these to attach the unit mounting bracket to the unit with it’s orientation
arranged in order to facilitate downward adjustment of unit when tted to the wall mounting bracket. Ensure all xings are
rmly and securely attached.
4.1.3. Attach the wall mounting bracket to the mounting surface using suitable xings (not supplied).
4.2. STAND MOUNTING (g.1)
NOTE: Stand Mounting using IRCT Tripod (not supplied, can be bought in conjunction with IR12 in model number IR12CT).
4.2.1. Fit adaptor to the unit mounting bracket with the M8 hexagon head screw, washer and nut. Tighten screw to obtain grip without clamping
the heater bracket totally. The heater angle can be adjusted by rotating about this fixing. Tighten securely after adjustment.
4.3. The tripod will be supplied assembled. Retract plunger at base of upright and pull or push central column tube through sleeve until the
plunger “clicks” into the location hole. This will be the stands maximum height setting.
4.4. Slide the handle down the central column and fix with the thumb screw through the M8 hole.
4.5. Slide adaptor c/w heater into central column to full depth and clamp with thumb screw.
5. OPERATION
WARNING! DO NOT touch the top of the heater when in use as it becomes hot.
WARNING! Always allow elements to cool before moving the unit. Failure to do so will cause premature wear to the lamp and reduce its
working life.
WARNING! This heater is not equipped with a device to control the room temperature. DO NOT use this heater in small rooms when
occupied by persons not capable of leaving the room on their own, unless constant supervision is provided.
5.1. POWER ON/OFF
5.1.1. Connect to mains supply and use rocker switch set to either “I” for low power or “II” for high. Set rocker switch to “O” to turn o󰀨.
5.2. ANGULAR ADJUSTMENT (Wall mounted only)
5.2.1. To adjust the angle of the unit, loosen the hinge bolt, remove the angle locking screw and rotate the unit such that the alternative
locking screw hole can used. Tighten the hinge bolt to rmly and securely clamp the unit at the new angle.
fig.1
Original Language Version
© Jack Sealey Limited IR12 / IR12CT Issue:1 03/04/23
Shows IR12CT
6. MAINTENANCE
8WARNING! Before attempting any maintenance, ensure the unit is unplugged from the mains power supply, and it is cool.
8DO NOT touch the element glass, even when cold.
8DO NOT use the heater without the grills tted.
7. CLEANING
7.1. To clean the reector, remove the front grill by unscrewing the retaining screws and wipe the reector with a clean dry cloth. DO NOT
use abrasives or solvents. The surface of the reector is very soft and scratches may cause it to overheat. Replace the grille.
7.2. FIT NEW ELEMENT
7.2.1. To change the element remove the front grille by unscrewing the retaining screws.
7.2.2. Ease the sprung sockets on the ends of the element back and pull the element forward so that it clears the socket, remove element.
WARNING! Never touch element glass directly with fingers, only touch the ceramic ends or use a soft cloth, to prevent damage.
7.2.3. Carefully insert the replacement lamp into the two push in side fittings with gentle pressure.
7.2.4. Check the element is properly located, then replace front grill.
.
Original Language Version
© Jack Sealey Limited IR12 / IR12CT Issue:1 03/04/23
Sealey Group, Kempson Way, Suffolk Business Park, Bury St Edmunds, Suffolk. IP32 7AR
01284 757500 sales@sealey.co.uk www.sealey.co.uk
ENVIRONMENT PROTECTION
Recycle unwanted materials instead of disposing of them as waste. All tools, accessories and packaging should be sorted, taken to
a recycling centre and disposed of in a manner which is compatible with the environment. When the product becomes completely
unserviceable and requires disposal, drain any fluids (if applicable) into approved containers and dispose of the product and fluids
according to local regulations.
WEEE REGULATIONS
Dispose of this product at the end of its working life in compliance with the EU Directive on Waste Electrical and Electronic Equipment
(WEEE). When the product is no longer required, it must be disposed of in an environmentally protective way. Contact your local solid
waste authority for recycling information.
Note: It is our policy to continually improve products and as such we reserve the right to alter data, specifications and component parts
without prior notice.
Important: No Liability is accepted for incorrect use of this product.
Warranty: Guarantee is 12 months from purchase date, proof of which is required for any claim.
REGISTER YOUR
PURCHASE HERE
Original Language Version
© Jack Sealey Limited
Information requirements for electric local space heaters
* Enter gure or NA
Model identier(s):
Item Symbol Value Unit Item Unit
Heat output Type of heat input, for electric storage local space heaters
only (select one)
Nominal heat output Pnom
kW Manual heat charge control, with
Yes No
integrated thermostat
Minimum heat output (indicative)* Pmin kW Manual heat charge control with room Yes No
and/or outdoor temperature feedback
Maximum continuous heat output Pmax,c kW Electronic heat charge control with room Yes No
and/or outdoor temperature feedback
Fan assisted heat output Yes No
Type of heat output/room temperature control (select one)
Single stage heat output and no room Yes No
temperature control
Two or more manual stages, no room Yes No
temperature control
With mechanic thermostat room Yes No
temperature control
With electronic room temperature control Yes No
Electronic room temperature control plus Yes No
day timer
Electronic room temperature control plus Yes No
week timer
Other control options (multiple selections possible)
Room temperature control, with presence Yes No
detection
Room temperature control, with open Yes No
window detection
With distance control option Yes No
With adaptive start control Yes No
With working time limitation Yes No
With black bulb sensor Yes No
Contact details: Sealey Group, Kempson Way, Su󰀨olk Business Park, Bury St Edmunds, Su󰀨olk, IP32 7AR. www.sealey.co.uk
ERP Table 2
Auxiliary electricity consumption
At nominal heat output elmax
kW
At minimum heat output elmin kW
In standby mode elSB kW
IR12
1.1
NA
0
NA
NA
1.2
v1
IR12 / IR12CT Issue:1 03/04/23
This manual suits for next models

1

Other Sealey Heater manuals

Sealey CD2005T.V3 User manual

Sealey

Sealey CD2005T.V3 User manual

Sealey AB350 User manual

Sealey

Sealey AB350 User manual

Sealey AB1008.V4 User manual

Sealey

Sealey AB1008.V4 User manual

Sealey IWMH2013 User manual

Sealey

Sealey IWMH2013 User manual

Sealey RD1500 User manual

Sealey

Sealey RD1500 User manual

Sealey VS230 User manual

Sealey

Sealey VS230 User manual

Sealey EH2001 User manual

Sealey

Sealey EH2001 User manual

Sealey LP14.V2 User manual

Sealey

Sealey LP14.V2 User manual

Sealey IRS153110V User manual

Sealey

Sealey IRS153110V User manual

Sealey CD2013TT.V3 User manual

Sealey

Sealey CD2013TT.V3 User manual

Sealey IWMH1500 User manual

Sealey

Sealey IWMH1500 User manual

Sealey IRC153110V User manual

Sealey

Sealey IRC153110V User manual

Sealey IRC153110V User manual

Sealey

Sealey IRC153110V User manual

Sealey IR37.V3 User manual

Sealey

Sealey IR37.V3 User manual

Sealey Space warmer LP150.V2 User manual

Sealey

Sealey Space warmer LP150.V2 User manual

Sealey IWMH1809R User manual

Sealey

Sealey IWMH1809R User manual

Sealey RD1500.V6 User manual

Sealey

Sealey RD1500.V6 User manual

Sealey PEH9001 User manual

Sealey

Sealey PEH9001 User manual

Sealey SPACE WARMER LP41 User manual

Sealey

Sealey SPACE WARMER LP41 User manual

Sealey FH2400 User manual

Sealey

Sealey FH2400 User manual

Sealey CD2005T.V2 User manual

Sealey

Sealey CD2005T.V2 User manual

Sealey CH2013.V2 User manual

Sealey

Sealey CH2013.V2 User manual

Sealey EH3001 User manual

Sealey

Sealey EH3001 User manual

Sealey AB1008.V2 User manual

Sealey

Sealey AB1008.V2 User manual

Popular Heater manuals by other brands

TaoTronics TT-HE009 user guide

TaoTronics

TaoTronics TT-HE009 user guide

Carbest IVALO user manual

Carbest

Carbest IVALO user manual

Frico PA3500 Series Original instructions

Frico

Frico PA3500 Series Original instructions

Argo SPLITTO Installation and Using Instructions

Argo

Argo SPLITTO Installation and Using Instructions

MHTeam EH1 Series instruction manual

MHTeam

MHTeam EH1 Series instruction manual

Zibro SRE 270 TC operating manual

Zibro

Zibro SRE 270 TC operating manual

BIEMMEDUE PHOEN 110 instruction manual

BIEMMEDUE

BIEMMEDUE PHOEN 110 instruction manual

TESY HL-202H Usage and Storage Instructions

TESY

TESY HL-202H Usage and Storage Instructions

Pinnacle International MH-400T-KFA User's manual and operating instructions

Pinnacle International

Pinnacle International MH-400T-KFA User's manual and operating instructions

HSC EH230 Safety & operating guide

HSC

HSC EH230 Safety & operating guide

Euronics RAC User manual/instructions

Euronics

Euronics RAC User manual/instructions

Costway OP3178 user manual

Costway

Costway OP3178 user manual

Heinner HFH-L2000GD instruction manual

Heinner

Heinner HFH-L2000GD instruction manual

Consort PHSL2 Series Installation & Control Guide

Consort

Consort PHSL2 Series Installation & Control Guide

Gasmate ALLURE instructions

Gasmate

Gasmate ALLURE instructions

Kohler S600 Series Installation and Homeowners Guide

Kohler

Kohler S600 Series Installation and Homeowners Guide

EOS THERMAT Installation and operation instruction

EOS

EOS THERMAT Installation and operation instruction

habitat et jardin 1421 100152 Series manual

habitat et jardin

habitat et jardin 1421 100152 Series manual

manuals.online logo
manuals.online logoBrands
  • About & Mission
  • Contact us
  • Privacy Policy
  • Terms and Conditions

Copyright 2025 Manuals.Online. All Rights Reserved.