userfromspecicairbornecontaminantsbutmustbeusedcorrectlytobefullyeffective.Haveanindustrialhygienisttesttheair
in your facility to ensure the PAPR provides adequate protection from contaminants in your environment. If you have questions
abouttherespirator,seeequipmentwarninglabelandconsultyourSafetyDirectorandacertiedIndustrialHygienist.
9Follow all applicable EN/ANSI/CSA/AS&NZS, and other regulatory guidelines pertaining to the use of respirators.
8DO NOTusethepoweredairpurifyingrespiratorwherethereisdangerofreorexplosion.
8DO NOT use the powered air purifying respirator in windy conditions or negative pressure inside the hood may draw in
contaminants from the outside air.
8DO NOT use the powered air purifying respirator without a properly installed spark guard cover. Without the spark guard cover,
weldingsparksmayignitethelter,ordamagethelterandallowunlteredairintothehelmet.
9The powered air purifying respirator does not supply oxygen. Use the respirator only in atmospheres for which it is EN/ANSI/CSA/
AS&NZS approved. DO NOT use the respirator where oxygen levels are 19.5% or lower, where contaminant levels are unknown or
areimmediatelydangeroustolifeorhealth,orwherethecontaminantlevelsexceedtherespiratorspecications.
8DO NOT enter a hazardous area until you are sure the respirator equipment is correctly assembled, working properly, and properly
worn.
9Before each use, inspect the respirator equipment for damage and verify it operates properly, Before using the respirator, test air
owtoverifyitisprovidinganadequatevolumeofair.
8DO NOTusethepoweredairpurifyingrespiratorwithoutallltercomponentsorwiththeblowerturnedoff,ashazardouslevelsof
oxygen and carbon dioxide may accumulate in helmet.
9Always wear the powered air purifying respirator when entering a contaminated area. DO NOT remove the respirator until outside
the contaminated area.
9Dangerous contaminants may not smell or be visible. Leave the area immediately if you notice the following:
-Breathingbecomesdifcult.
- You experience dizziness, impaired vision, or eye, nose, or mouth irritation.
- The powered air purifying respirator alarm sounds.
- The equipment is damaged.
-Airowdecreasesorstops.
- If you think the equipment is not supplying adequate protection.
8DO NOT remove the equipment until you are in a safe area.
8DO NOT repair, modify, or disassemble the powered air purifying respirator or use with parts or accessories not supplied by the
manufacturer. Use only those components that are part of the approved assembly.
9 Replacedamagedorcloggedlters.DO NOTwashorreuselters.DO NOTcleanltersbytappingorwithcompressedairorlter
elementsmaybedamaged.Disposeofusedlterelementsaccordingtolocal,state,andfederalrequirements.
9 Thepoweredairpurifyingrespiratormustbeusedwiththehelmet,hood,andltersrecommendedbythemanufacturertoprovidea
respirator system. See the label on the blower for information on the required equipment.
8DO NOT use the powered air purifying respirator belt or shoulder straps(if equipped) as a safety harness.
2. INTRODUCTION
PAPR(PoweredAir-PurifyingSystem)withAutoDarkeningWeldingHelmet.Highlyefcientltercaptureshazardousdust,mistsandfumes.
Lithium battery powered blower unit gives the user a cooling stream of air to their head and face for up to 8 hours. Features a loud audible
and visual alarm to alert user of low battery/low air. The welding helmet has adjustable shade control from 9-13. Fully automatic switching
from light to dark on striking arc. Additional shades 5-8 for gas welding/cutting. Solar panel power supply. Features sensitivity and delay
controls for switching light to dark. Contoured design helmet with adjustable headband for added comfort. Suitable for MIG, TIG and arc
welding. Complies with BS EN 379, BS EN 175 and DIN standards.
3. SPECIFICATION
Model No:...................................................................................................... PWH615
Grinding Function:.................................................................................................. Yes
Operating Temperature: ......................................................................... -5°C to +55°C
Operating Time Light/Dark: .................................................................................0.1ms
Power:......................................................... Solar Cells/Rechargeable Lithium Battery
Shade Active: .................................................................................5-8 & 9-13 Variable
Shade Inactive: .......................................................................................................... 4
Viewing Area: ..........................................................................................120 x 100mm
4. OPERATION
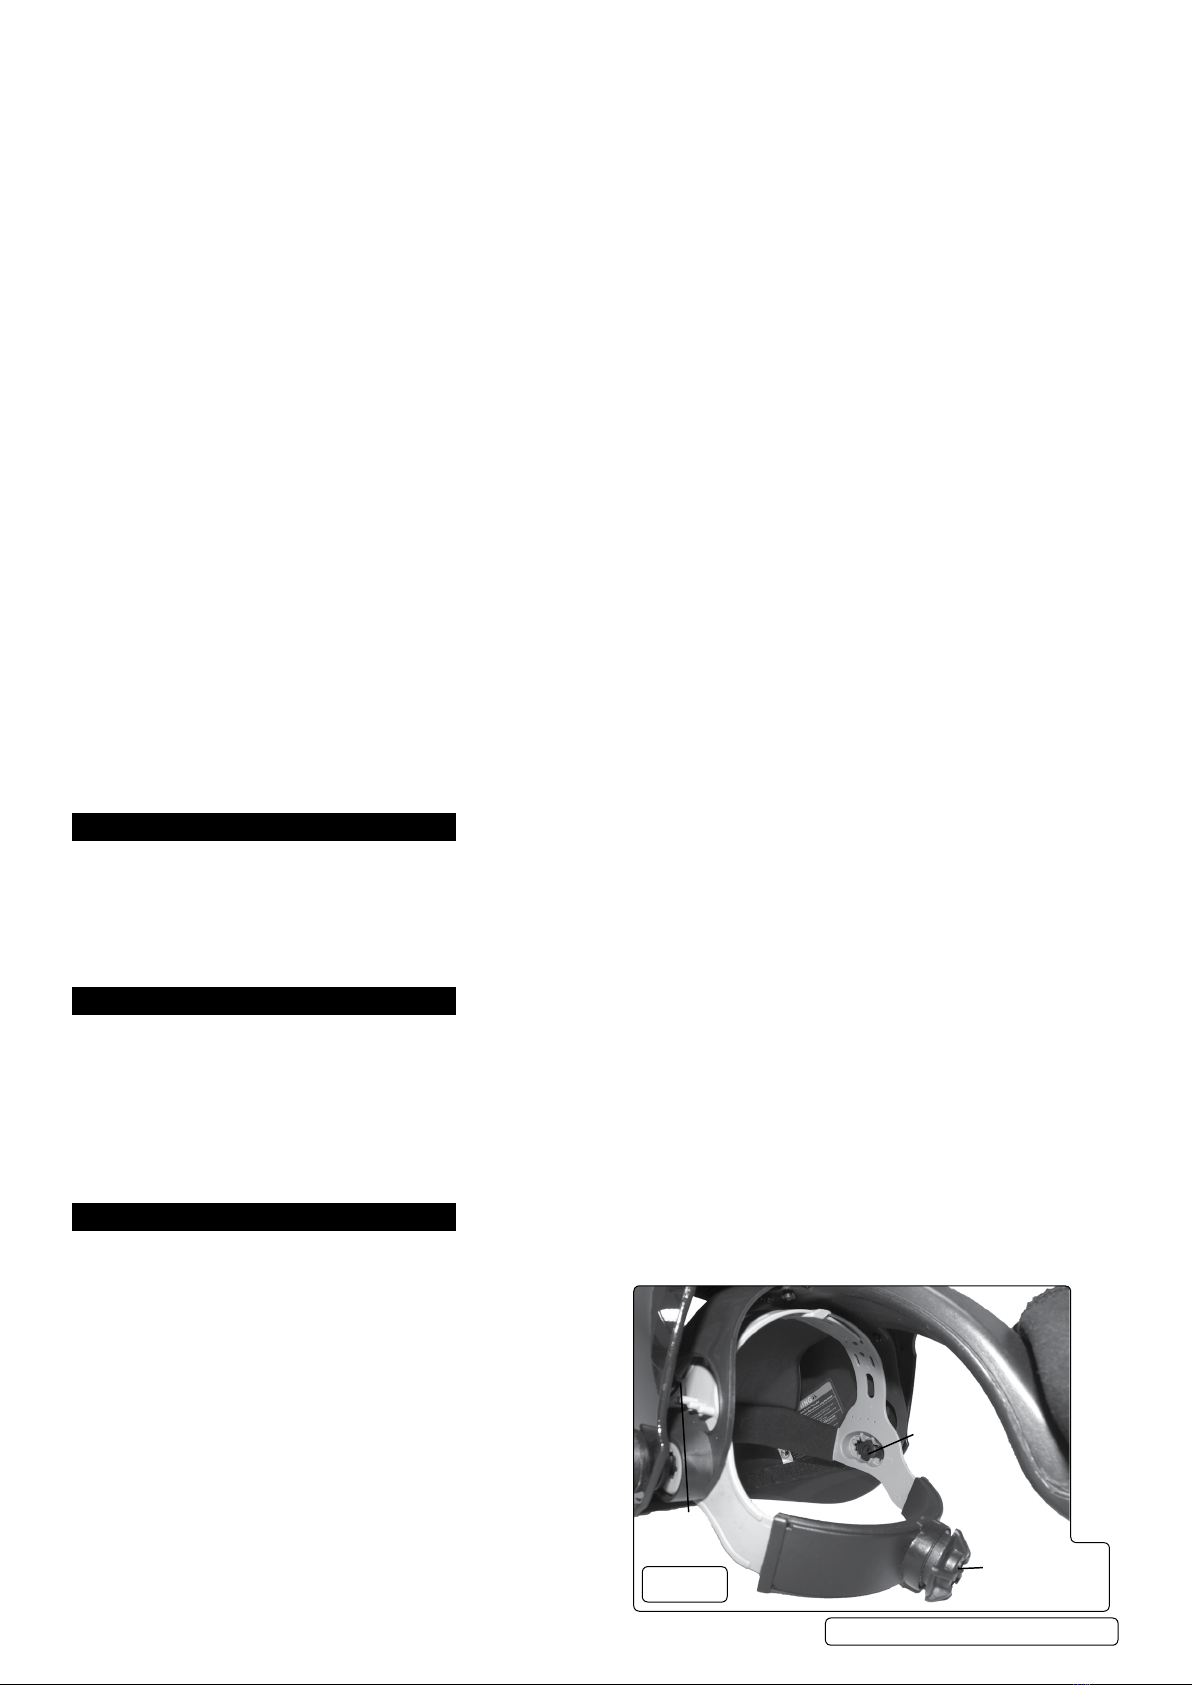
4.1. ADJUSTING THE HELMET
4.1.1. Adjust the headgear diameter with the twist knob on the back. The knob is locked until pushed in. Once unlocked, twist clockwise to
tighten and counter clockwise to loosen.
4.1.2. Adjust the height by snapping the pin on the top band into the hole
to lock securely in place.
4.1.3. To adjust the viewing angle, loosen the knob on both sides of the
helmet and change angle locker to the desired tilt position (5
selection and positioned in the middle by default). Once
achieving the desire angle, tighten the knobs until snug.
The helmet should still swing up, but it should not drift
downward when in place for welding.
4.1.4. To adjust the distance between the user’s face and ADF,
loosen the knobs on both sides of the helmet until the headband
can move back and forth freely, reposition the headband at one
of the 3 slots as desired (The headband is positioned in the
middle by default). This should be done one side at a time and
both sides should be located at the same position for proper
auto-darkeninglteroperation.
Forward/
backward
adjustment
Push in
thumbwheel and
turn to adjust
circumference
Tilt
adjustment
A
i
r
T
u
b
e
g.1
Original Language Version
© Jack Sealey Limited PWH615 Issue 1 15/08/19


