3. OPERATION
WARNING! It is the user’s responsibility to ensure the safe use of the blow torch.
3.1. and must
beusedinconjunctionwiththepressureregulatorsupplied.Thetorchwillworkwithpressuresbetween1-7Atm.SeeTablebelowfor
description of power/energy consumption.
3.1.1. Ensure that the rubber hose for connecting the torch to the regulator/gas cylinder is in good condition.
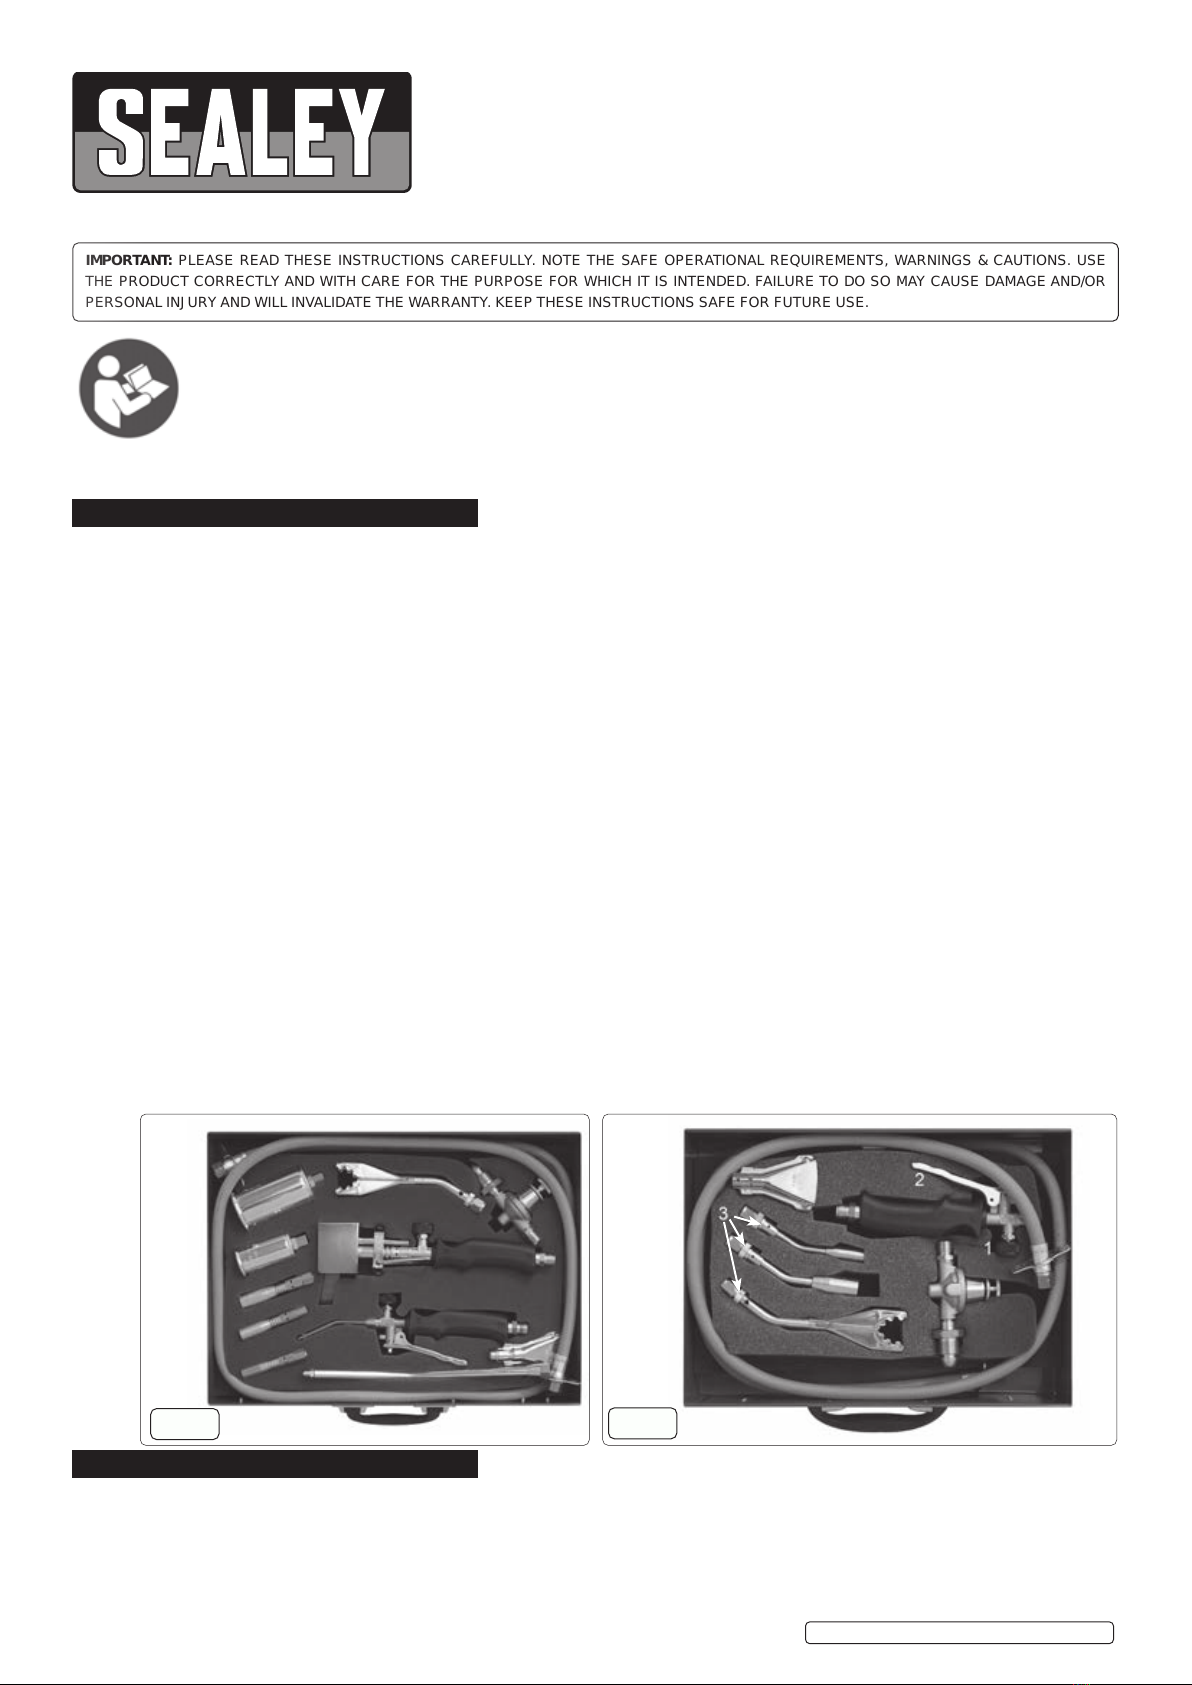
3.1.2. For LPT7 the burners connect directly to the torch. For LPT14 select either the short or long extension and connect it to the torch.
Thenselectthedesiredburnerforthetaskinhandandattachittothetorch(orextension)ensuringthatthejointsareproperlyseated
and fully tightened.
3.1.3. Attach the regulator to the gas cylinder and connect the torch using the rubber hose ensuring that the hose connections are properly
seated and fully tightened.
3.1.4. LEAK TESTING Beforelightingthetorchallconnectionsmustbeleaktestedusingathicksoapsolutionsuchaswashingupliquidor
ideally a proprietary leak detection spray. Close the burner control on the torch. Open the gas cylinder tap and then the regulator.
Sprayeveryjointontheregulator,hoseandtorchwithleakdetectionuidandcheckforleaks.Tightenanyjointsasnecessaryand
retest.Ifanyjointsstillleakturnothegas,disassembleandinvestigate.OnLPT14checkconditionof“Oring”seals.Donotproceed
tolightingthetorchuntilalljointsaregastight.
2.3. IGNITION
NOTE:Pilotlightcontrol.TheburnersontheLPT7arettedwithapilotlightcontrolintheformofabrasssleeveontheburnertube
whichwillslideovertheairinletholesatthebaseoftheburnerstem(seeg.2.3.).Thishastheeectofturningablueametoamore
visibleyellowamewhenonlyapilotlightisrequired.(OnlythepipeheatingburnerontheLPT14hasthisfeature.)
3.1.5. Ensurethattheburnercontroltap(g.2.1.)isturnedo.
3.1.6. Openthegascylindertaprstandthenscrewtheregulatortapdownwardstoopenit.
3.1.7. Open the control tap (1) a small amount only until the gas can be heard escaping .
3.1.8. Drawyourameigniteruptotheundersideofthetorchburneropening.
3.1.9. Once the torch “pilot”has ignited remove and extinguish the source of ignition.
3.2. Iftheameissetforayellowpilotlightslidethepilotlightsleeveawayfromtheairinletholessothattheame
burns blue.
3.2.1. Forincreasedameintensitydepressthetrigger.(g.2.2.)
3.2.2. Releasethetriggertoreturntheametothe“pilot”light.
3.2.3. Flameintensitycanbecontrolledusingtheburnercontroltap(g.2.1.).Asthetapisopeneduptheamegetslarger.Asthetap
approaches fully open the trigger is overridden and only comes back into play again when the tap is partly closed.
3.2.4. Turnthecontroltap(1)otoextinguishthetorchcompletely,andthenturnthegascylindertapo.
4. MAINTENANCE
WARNING! Before commencing service or maintenance turn all gas
tapsoanddisconnectthetorchfromthegassupply.
NOTE:Fromtimetotimetheburnernozzleandinjectormayrequire
cleaning. Refer to relevant section below.
4.1. LPT7 MAINTENANCE
4.1.1. TodismantlethenozzleTodismantlethenozzleandinjectorfromaburner
insert a 4mm hex key into the hexagonal hole to be seen in the base of
eachburnerstem.Unscrewthenozzlefromthestem.Unscrewtheinjector
from the nozzle using a 7mm socket or spanner. Wash the nozzle and
injectorcarefullyinpetrolorsimilarcleaninguid.Donotdislodgethelter
gauzetobefoundinthebaseoftheneinjectors.Blowouttheinjectorwith
compressedairfromthelterendonly.WARNING!DO NOT clean the
injectorwithathinsteelwireasthismayenlargetheholeintheinjector
making it unsafe to use and invalidating your warranty. Reassemble
ensuringthatthelooseconnectornutisheldinplacebytheinjector/nozzle
assembly.
4.2. LPT14 MAINTENANCE
Thenozzle/injectorassembliesaremountedatthebaseofeachburner
headandservetoconnecttheheadstothetorchextensions.Unscrewthenozzle/injectorfromtheburnerheadusinga13mm
spanner.Unscrewtheinjectorfromthenozzleandproceedasabove.
© Jack Sealey Limited Original Language Version
BURNER
DIAMETER mm POWER
kW CONSUMPTION
gr/hr
10 1.4 100
14 1.7 120
17 2140
20 2.1 150
25 3.7 265
35 6.3 450
45 19.5 1400
50 28 2000
60 35 2500
76 54 3850
45 TURBO 29.5 2100
50 TURBO 33 2350
60 TURBO 54 3850
01284 757500 sales@sealey.co.uk www.sealey.co.uk
Note: It is our policy to continually improve products and as such we reserve the right to alter data, specifications and component parts without prior
notice.
Important: No Liability is accepted for incorrect use of this product.
Warranty:Guaranteeis12monthsfrompurchasedate,proofofwhichisrequiredforanyclaim.
ENVIRONMENT PROTECTION
Recycle unwanted materials instead of disposing of them as waste.All tools, accessories and packaging should be sorted,
taken to a recycling centre and disposed of in a manner which is compatible with the environment. When the product
becomescompletelyunserviceableandrequiresdisposal,drainanyfluids(ifapplicable)intoapprovedcontainersand
dispose of the product and fluids according to local regulations.
REGISTER YOUR
PURCHASE HERE
LPT7,LPT14Issue:4(H,F)30/05/23