3. OPERATION
4. BATTERY FITTING
A flashing display indicates that the battery is exhausted - replace as follows:
1. Switch off and then remove battery cover (9) by firmly sliding towards the right.
2. Remove exhausted battery and fit replacement with positive side uppermost (fig.1). Refit battery cover.
3. Dispose of old battery in a safe and approved manner. Do not burn.
If the display fails to alter when the slide is moved, remove the battery - wait at least 30 seconds and
then refit the battery.
fig. 1
01284 757500
01284 703534
E-mail:
sales@sealey.co.uk
Sole UK Distributor
Sealey Group,
Bury St. Edmunds, Suffolk.
Web address: www.sealey.co.uk
NOTE: It is our policy to continually improve products and as such we reserve the right to alter data, specifications and
component parts without prior notice.
IMPORTANT: No liability is accepted for incorrect use of this product.
WARRANTY: Guarantee is 12 months from purchase date, proof of which will be required for any claim.
INFORMATION: For a copy of our catalogue and latest promotions call us on 01284 757525 and leave your full name, address and postcode.
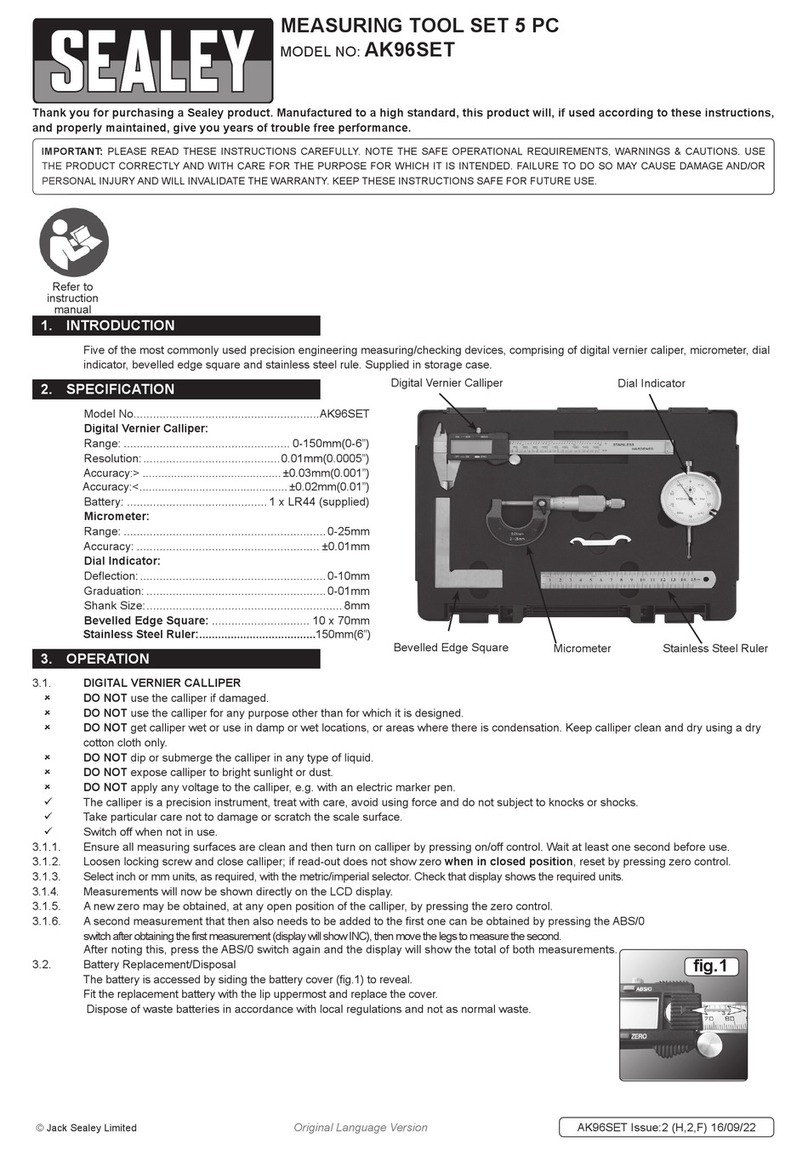
3. OPERATION
!!WARNING! Ensure that you have read and understood Section 1 safety instructions before commencing.
"DO NOT use the calliper if damaged.
"DO NOT use the calliper for any purpose other than for which it is designed.
"DO NOT get calliper wet or use in damp or wet locations, or areas where there is condensation. Keep
calliper clean and dry using a dry cotton cloth only.
"DO NOT dip or submerge the calliper in any type of liquid.
"DO NOT expose calliper to bright sunlight or dust.
"DO NOT dis-assemble calliper. The calliper must be checked by qualified service personnel only.
"DO NOT apply any voltage to the calliper i.e. with an electric marker pen.
#The calliper is a precision instrument, treat with care, avoid using force and do not subject to knocks or shocks.
#Take particular care not to damage or scratch the scale surface.
#Use calliper in reasonably constant temperature conditions of approximately 20OC
#When not in use, turn off and store calliper in a safe, dry, childproof location.
1. Ensure all measuring surfaces are clean and then turn on calliper by pressing on/off control. Wait at least
one second before use.
2. Loosen locking screw and close calliper; if read-out does not show zero when in closed position, reset by
pressing zero control.
3. Select inch or mm units, as required, with the metric/imperial selector. Check that display shows the required
units.
4. Measurements will now be shown directly on the LCD display.
5. A new zero may be obtained, at any open position of the calliper, by pressing the zero control.
6. A second measurement that then also needs to be added to the first one can be obtained by pressing
the ABS/0 switch after obtaining the first measurement (display will show INC), then move out the
callipers to measure the second one. After noting this, press the ABS/0 switch again and the display will
show the total of both measurements.
4. BATTERY FITTING
A flashing display indicates that the battery is exhausted - replace as follows:
1. Switch off and then remove battery cover (9) by firmly sliding towards the right.
2. Remove exhausted battery and fit replacement with positive side uppermost (fig.1). Refit battery cover.
3. Dispose of old battery in a safe and approved manner. Do not burn.
If the display fails to alter when the slide is moved, remove the battery - wait at least 30 seconds and
then refit the battery.
fig. 1
01284 757500
01284 703534
E-mail:
sales@sealey.co.uk
Sole UK Distributor
Sealey Group,
Bury St. Edmunds, Suffolk.
Web address: www.sealey.co.uk
NOTE: It is our policy to continually improve products and as such we reserve the right to alter data, specifications and
component parts without prior notice.
IMPORTANT: No liability is accepted for incorrect use of this product.
WARRANTY: Guarantee is 12 months from purchase date, proof of which will be required for any claim.
INFORMATION: For a copy of our catalogue and latest promotions call us on 01284 757525 and leave your full name, address and postcode.
AK9622EV - (2) - 24/03/06 AK9622EV - (2) - 24/03/06
