INSTRUCTIONS FOR:
GEARED WINCH
Models: GWE1200 & GW1200
Thank you for purchasing a Sealey product. Manufactured to a high standard this product will, if used according to these instructions
and properly maintained, give you years of trouble free performance.
GWE1200 -GW1200 - (0016) - (1) - 251199
1. SAFETY INSTRUCTIONS
IMPORTANT: PLEASE READ THESE INSTRUCTIONS CAREFULLY. NOTE THE SAFE OPERATIONAL REQUIREMENTS, WARNINGS & CAUTIONS.
USE THE PRODUCT CORRECTLY AND WITH CARE FOR THE PURPOSE FOR WHICH IT IS INTENDED. FAILURE TO DO SO MAY CAUSE
DAMAGE OR PERSONAL INJURY, AND WILL INVALIDATE THE WARRANTY. PLEASE KEEP INSTRUCTIONS SAFE FOR FUTURE USE.
pWARNING! winch is not designed for lifting or slinging loads. It is intended only for pulling a load and must be used with care.
3Fit only appropriately rated cable and hook up suitable for the task for which the winch is to be used.
3Ensure the winch is maintained in a safe working condition. Inspect the cable regularly checking for fraying, kinks, broken strands or
distortion. If such appears, replace the cable. Check all component parts, do not use if damaged, contact authorised service agent.
3Most truck beds are not designed to support the pulling capacity of a winch. Choose an appropriately strong winching point, which we
recommend is reinforced with steel plates and appropriate securing bolts. The winch mounting point must be capable of withstanding
above the maximum rated capacity of the winch.
pWARNING! Keep hands, your body and clothing away from the winch components and the cable. Use a rag or protective gloves
when handling cable. Take any necessary precautions to protect your personal safety whilst using the winch.
3For a heavy load place a blanket (or jacket) over extended cable about 2 feet away from the hook in order to lessen the severity of a cable break.
pWARNING! Ensure you know how much load you are winching. Never exceed the maximum pulling capacity. Take into account
any angle of incline over which the load must be pulled. Also account for winching loads from thick mud, or through snow or
water. Chock the wheels of vehicles to be winched then release any brakes and place gears in neutral, ensure the load is capable
of free movement before winching. Take up the strain on the cable and remove the wheel chocks to move the load.
3Ensure the load to be pulled has an appropriate fixing point. If not, fit an adequate sling, eyebolt or other accessory to the load. Ensure
accessories are equal to, or exceed winch and cables maximum pulling capacity.
3Ensure cable is securely attached to the load before winching.
3Maintain correct balance and footing whilst using the winch.
3Remove ill fitting clothing. Remove ties, watches, rings, and other loose jewellery, and contain and/ or tie back long hair.
3Keep children and non essential persons away from the operating area. Be aware of the location of other persons assisting you.
3Apply even and steady pressure to the handle when releasing the tension from the load.
7DO NOT operate the winch if any parts are damaged or missing as this may cause failure or possible personal injury.
pWARNING! DO NOT use winch as a lifting device of any type. DO NOT use the winch for any purpose other than for which it is designed.
pWARNING! DO NOT exceed the rated pulling capacity of the winch.
7DO NOT pull the cable over or around a corner and DO NOT take the hook around the load and hook back onto the cable. Use
appropriate sling if necessary.
7DO NOT operate the winch with less than THREE wraps of cable on the spindle.
sDANGER! DO NOT use any Cheater pipe, lever, or other device to lengthen the handle for additional leverage, as the pulley may
fail causing damage and possible personal injury. If the winch can not be operated by hand, it may be overloaded.
7DO NOT operate the winch if you are tired, under the influence of alcohol, drugs or intoxicating medication.
pWARNING! DO NOT release the brake from model GW1200 until you are sure you are able to hold and control the released load .
Take up the strain on the handle before releasing the brake. Once released, the load will not longer be automatically held.
SPECIFICATIONS
Model: GWE1200 GW1200
Pulling capacity . . . . . . . . . . . . .540kg . . . . . . . . . . . . .540kg
Hand Force first roll . . . . . . . . . . .11kg . . . . . . . . . . . . . .15kg
Third roll . . . . . . . . . . . . . . . . . . . .7kg . . . . . . . . . . . . . .13kg
Model: GWE1200 GW1200
Hub Diameter . . . . . . . . . . . . .Ø34mm . . . . . . . . . . . .Ø19mm
Handle length . . . . . . . . . . . . . .210mm . . . . . . . . . . . .195mm
Unit weight . . . . . . . . . . . . . . . . .3.3kg . . . . . . . . . . . . . .2.8kg
2. INTRODUCTION & SPECIFICATIONS
Hardened steel gears with heavy plate chassis. Suitable for general and recovery operations. GWE1200 features a fully enclosed gearbox whilst
GW1200 has an open gearbox configuration.
3.1. INSTALLING WINCH.
Most truck beds are not designed to support the pulling capacity of a winch. Choose an appropriately
strong winching point, which when fitted will give the winch handle enough clearance to turn.
We recommend that the fixing point is reinforced with steel plate, and ensure the fixing bolts are
adequate for securing the winch with a full load. The winch mounting point must be capable of
withstanding above the maximum rated capacity of the winch.
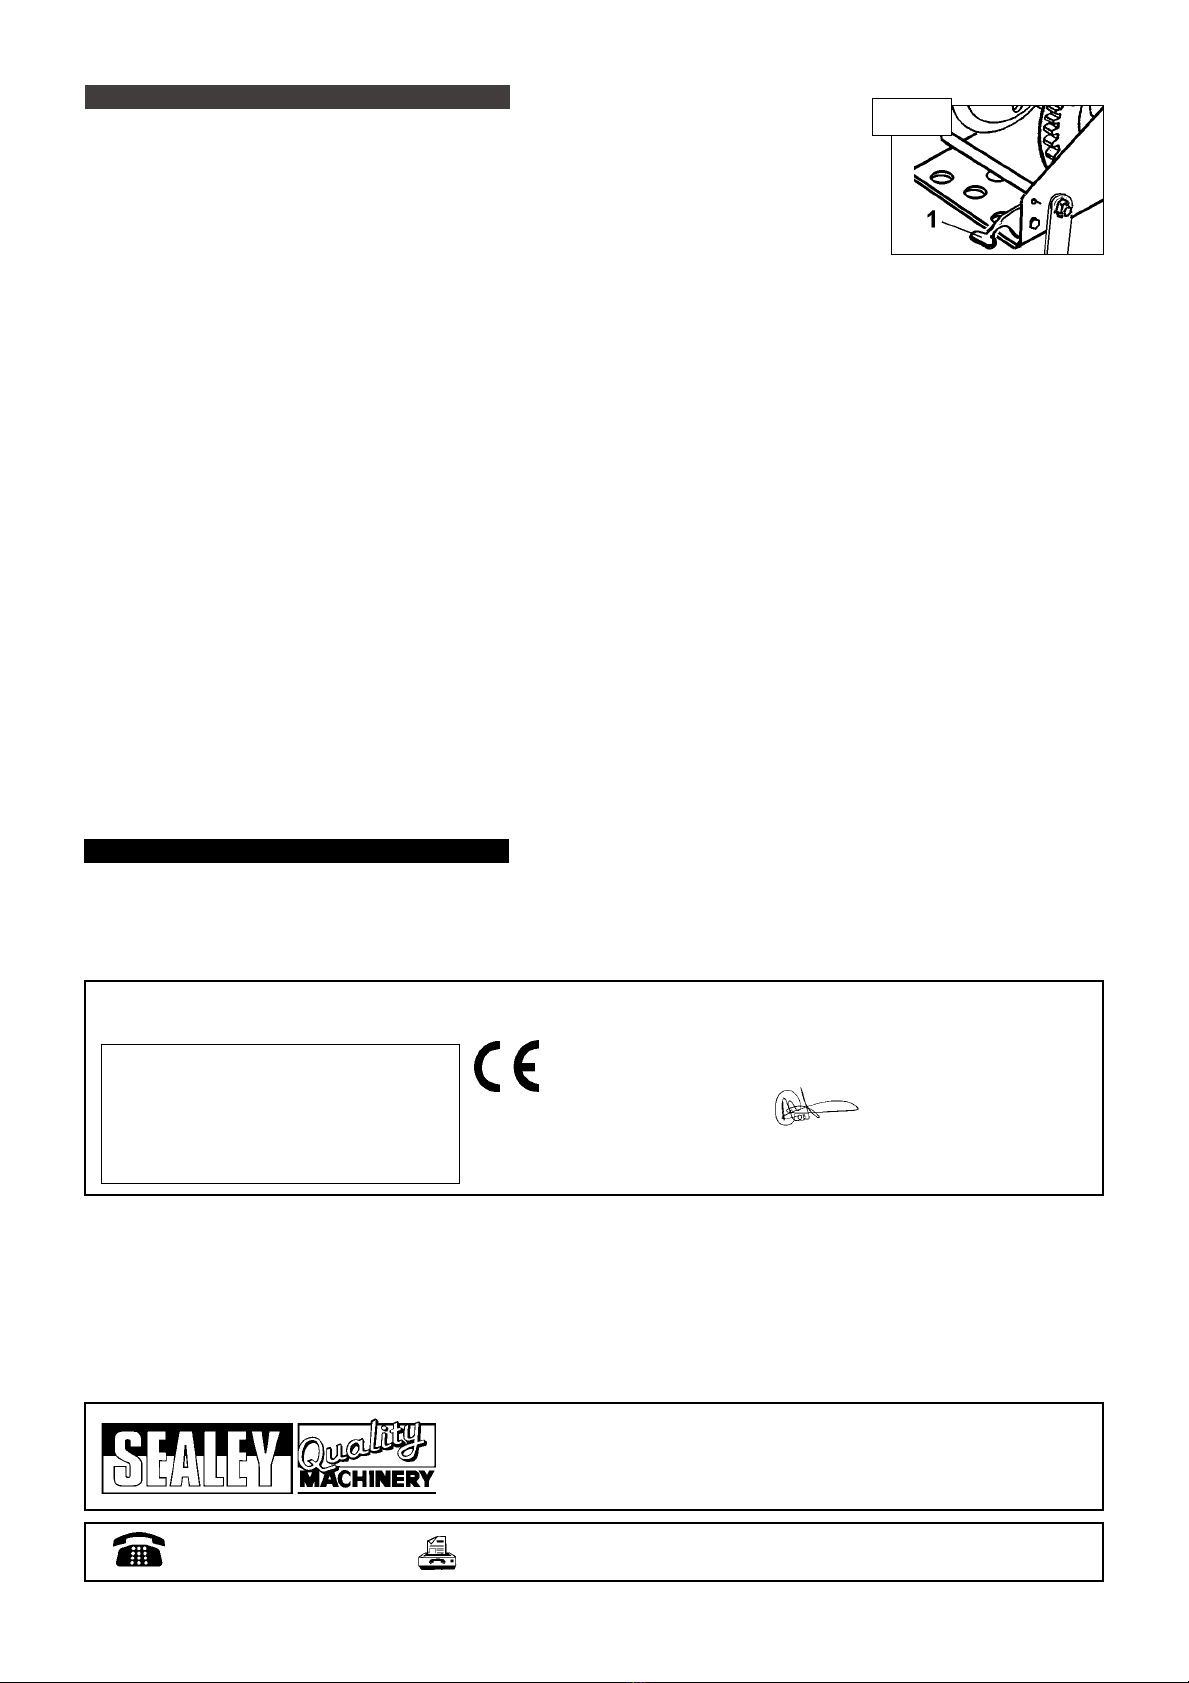
3.2. CONNECTING THE CABLE.
3.2.1. Connect appropriately rated and suitable cable to the winch by passing cable over and around the
spindle, through hole A (fig 1), back through hole B Pass fixing nut/screw through hole C then pass
cable through hole in fixing screw.
3.2.2. Tighten the fixing nut to draw the screw in thus clamping the cable. Check the cable is secure and wind the
remaining cable onto the spindle by turning the handle clock-wise. When in use always leave three wraps of cable on the spindle.
3. INSTALLATION Fig 1