Sealey RW5675.V2 User manual

RECOVERY WINCH 5675KG 12V INDUSTRIAL
MODEL NO: RW5675.V2
Thank you for purchasing a Sealey product. Manufactured to a high standard, this product will, if used according to these instructions,
and properly maintained, give you years of trouble free performance.
IMPORTANT: PLEASE READ THESE INSTRUCTIONS CAREFULLY. NOTE THE SAFE OPERATIONAL REQUIREMENTS, WARNINGS & CAUTIONS. USE
THE PRODUCT CORRECTLY AND WITH CARE FOR THE PURPOSE FOR WHICH IT IS INTENDED. FAILURE TO DO SO MAY CAUSE DAMAGE AND/OR
PERSONAL INJURY AND WILL INVALIDATE THE WARRANTY. KEEP THESE INSTRUCTIONS SAFE FOR FUTURE USE.
1. SAFETY
WARNING! Winching a vehicle, especially with a steel cable, has an inherent danger element to it, and there is always some risk
of injury. Proper training is highly advised and constant risk assessment needs to be undertaken.
WARNING! Never connect DC powered winches to AC current. Motor damage or fatal shock may occur.
DO NOT lift or hoist loads over people. DO NOT lift loads vertically. The winch was designed for ground use only.
DO NOT overload. Be sure all equipment used meets the winch’s maximum line pull rating. We recommend using the pulley block
option to double line the wire rope (see fig.1). Double line with a pulley block to reduce the load on the winch, wire rope and battery.
When double lining, pulley blocks should be rated to a minimum of two times the winch’s line pull rating. The cable may break before the
winch stalls. For heavy loads use a pulley block to reduce the load on the cable.
DO NOT immerse the winch in water. Doing so will immediately effect load holding and brake efficiency and in time will damage the motor
and cause accelerated gearbox wear invalidating the warranty.
DO NOT operate the winch with less than 5 turns of wire rope around the winch drum, since the wire rope end may not withstand the full
load.
DO NOT pull from extreme angles, (see fig.2), because this will cause the rope to build up on one end of the drum, this will break the tie
bars from the castings, will damage the wire rope, and invalidate the warranty.
WARNING! The winch’s line pull capacity is the maximum line pull of the first layer. Never operate a winch by pulling a load that is at
or over the rated capacity.
DO NOT hook the wire cable back to itself because it could damage the wire rope. Use a Self Recovery Kit, (see fig.3) contact your
stockist for full details.
Make sure the winch is securely mounted on the vehicle or bracket before operation.
Before moving a load inspect the wire rope. Prevent kinks and uneven wire layering before they occur. Loosened wire rope must be
properly tensioned under a load of about 100lbs (45.4kg).
Position a Wire Rope Dampener (available as an optional extra) over the wire rope near the hook end when pulling, as this will slow the
snap back of a broken wire rope and reduce/prevent serious injury and/or damage.
DO NOT move your vehicle to assist the winch in pulling the load. It will be easy to overload, and cause wire rope damage.
DO NOT enter the danger zone. Keep away from the danger zone during operation. The danger zone is the area of the winch drum, the
fairlead (if fitted), the wire rope, the pulley block (if used), and the hook.
DO NOT approach or span the wire rope when the winch is under load.
When using the winch to move a load, place the vehicle transmission in neutral, apply the handbrake and chock all wheels. The vehicle
engine should be running during winch operation so that the battery is fully charged. Never use the winch if there is any doubt as to the
efficiency of the battery.
DO NOT disconnect the free spool clutch when there is load on the winch.
After operation release the load immediately. DO NOT allow the cable to tighten anymore.
Inspect winch, wire rope, hooks and other accessories frequently. A mashed, pinched, kinked or frayed wire rope with broken strands
should be replaced at once because a damaged wire rope has a reduced load carrying capability and could break easily.
Keep tension on the cable to re-spool the cable on the drum tightly after operating. It must be re-spooled with a load of about 45.4kg
(100lbs).
DO NOT allow the wire rope to slide through your hands, use heavy rigger gloves when handling wire rope.
Disconnect the clutch first then use the hand saver strap to hitch the hook and pull the wire rope. DO NOT pull the wire rope using your
finger and DO NOT put your finger through the hook.
DO NOT operate the winch when under the influence of drugs, alcohol or medication.
If there is something wrong with the winch, cut the power at once, then check it carefully. If required, return it to your stockist for servicing.
Wear eye protection, insulated work clothes, non-slip shoes, keep hair tied up and wear rigger gloves. Remove all jewellery.
DO NOT machine or alter the winch in any way.
Take good care of the winch when not in use.
WARNING! Unplug the remote control before working in or around the fairlead or the wire rope drum, (the danger zone). Never tuck it
under your arm or allow anyone to hold it when you are in the danger zone, so as to avoid the hand control being accidentally activated.
WARNING! DO NOT use the winch to hold loads in place. Use other means of holding loads such as tie down straps.
WARNING! If you are within four feet of the winch do not hold the wire rope and remote control at the same time.
WARNING! Mount the winch to a firm base. Be sure that your structural support is strong enough to withstand the weight and rated
pulling strength of the winch.
RW5675.V2 Issue:2(S) 02/05/18
Original Language Version
© Jack Sealey Limited
Refer to
instruction
manual
Wear
protective
gloves
Wear
protective
glasses

NOTE: Whilst mounting orientation is at your discretion, the winch is to be operated with the wire rope in an under wound orientation
on the drum. The winch is designed to rope out and rope in, in one direction. DO NOT attempt to reverse the operation of the winch.
WARNING! DO NOT weld or machine any part of the winch, this will weaken it and void the warranty.
WARNING! Batteries contain explosive gases. The following precautions should be taken before making battery connections: wear eye
protection; remove all jewellery; follow the wiring diagram included in the installation instructions; keep spectators away. In the event of a
battery explosion, acid should be washed away as soon as possible, seek medical help immediately.
WARNING! Use of any other accessories or attachments other than those recommended in this instruction manual may result in personal
injury or property damage and could void the warranty.
NOTE: The safety precautions and instructions discussed in this manual can’t cover all possible conditions and situations that may occur.
It must be understood by the operator that common sense and caution are factors which cannot be built into this product but must be
applied by the operator.
2. INTRODUCTION
An all metal chassis for long life and low maintenance, suitable for industrial recovery and off-road use. Motor can easily be rotated 90° to meet
various wiring and mounting requirements. A 6.4hp high power 4.7kw 12V DC motor with a permanent magnet gives first class pulling power.
Innovative ‘Double Lock’ load holding brake design provides zero drag when pulling in. Ergonomic ‘lift and turn’ free spool clutch. Four stage
planetary gears. High quality wire rope feeds through 4-way roller fairlead for even distribution of cable onto drum. Heavy duty all-weather housing
and IP67 rated motor and gearbox.
3. SPECIFICATION
Model no:............................................................... RW5675.V2
Weight: ..............................................................................41kg
Current draw:................................. No load - 50A, Load - 390A
Gear ratio: ........................................................................171:1
Line pull*:.......................................................5675kg (12500lb)
Line speed*: ......No load - 15mtr/min, maximum load 1mtr/min
Motor power: ...................................................... 4.7kW (6.4hp)
Supply: ............................................................................... 12V
Wire rope length: ............................................................. 26mtr
Wire rope Ø: ...................................................................9.2mm
Note *: Performance quoted at first layer of cable on drum.
Fig.1
Fig.2
Fig.3
Fig.4
RW5675.V2 Issue:2(S) 02/05/18
Original Language Version
© Jack Sealey Limited

3.1. PERFORMANCE SPECIFICATIONS
LINE PULL AND LINE SPEED vary according to how much cable is on the drum. The winch is rated at the first layer of cable on the
drum. The maximum line pull force will be reduced by subsequent layers of cable on the drum. Chart 2 illustrates the maximum line
force at increasing cable layers.
4. INSTALLATION
4.1. WINCH INSTALLATION
4.1.1. The winch needs to be mounted onto a steel mounting using the 4 point foot mounting system, in either a horizontal or vertical plane.
4.1.2. Thewinchneedstobemountedonaatsurfacesothatthethreesections(motor,cabledrumandgearhousing)areproperlyaligned.
4.1.3. Before installation ensure the mounting position being used is capable of withstanding the winch weight and the rated capacity.
4.1.4. Usethedimensionsing.4tomanufactureasteelmountingplate,aminimumof6mmthick.Fastenersshouldbehightensilesteel,
grade 5 or better. A poorly designed mount may invalidate the warranty.
4.1.5. Thewinchshouldbesecuredtothemountingwithgrade8.8M12boltsandspringwashers,seeg.5.
CHART 1.
CHART 2.
CHART 3.
RW5675.V2
Rated line pull 5675kg/12500lbs
Gear ratio 171:1
Motor DC12.6V:6.4hp/4.7kW
Gear train 4 stage gear driven
Clutch Pull and turn
Braking action Automatic in the ratchet wheel
Fairlead 4-way roller fairlead
Wire rope 9.2mm x 26m (3/8” x 85.3’)
Drum size 63mm x 222mm (2.48” x 8.74”)
Dimensions 606mm x 172mm x 250mm (23.86” x 6.77” x 9.84”)
Bolt pattern 254mm x 114.3mm (10” x 4.5”)
254 x 165.1mm (10” x 6.5”)
Net weight 41kg (90.2lb)
Layer of cable Rated line pull/layer (kg/lbs Cable capacity per layer (m/ft)
15675/12500 5.4/17.7
24522/9961 12.2/40.0
33759/8280 19.8/65.0
43216/7084 26/85.3
Line pull Ibs 06000 8000 9500 12500
Kg 0 2722 3629 4313 5675
Line speed (12V)FPM 45.9 7.2 5.6 3.9 3.0
(12V)FPM 14.0 2.2 1.7 1.2 0.9
Motor current (12V)Amps 50 260 310 360 390
Fig 6
Fig 5
RW5675.V2 Issue:2(S) 02/05/18
Original Language Version
© Jack Sealey Limited

4.2. ELECTRICAL INSTALLATION (Refer to g.7)
WARNING! This winch works on standard automotive 12V DC only, never connect this winch to a 230V mains as solenoid burnout or
fatal shock may occur.
4.2.1. For normal self-recovery work, your existing electrical system is adequate. A fully charged battery and proper connections are essential.
Run the vehicle engine during winch operation to keep the battery charged. Pay close attention to the electrical connections below,
ensure that they are made correctly.
NOTE: For best performance a battery with 440 cold cranking ampere capacity and a 60 amp alternator are the minimum
recommended power source. If the winch is in heavy use, an auxiliary battery and heavy duty alternator with isolator are recommended.
WARNING! Make sure the battery is disconnected.
4.2.2. Connect the red wire to the red stud (F1) of the motor and terminal 3 of the relay.
4.2.3. Connect the yellow wire to the yellow stud (F2) of the motor and terminal 1 of the relay.
4.2.4. Connect the blue wire to the blue stud (A) of the motor and terminal 4 of the relay.
4.2.5. Connect the thin black wire to the earth (B) of the motor.
4.2.6. Connect the long black wire to the motor earth (B) and the negative (-) terminal of the battery.
4.2.7. The long red wire will be connected to the positive (+) terminal of the battery and terminal 1 of the relay, but leave it disconnected from
the battery for the time being.
NOTE: Your battery must be kept in good condition. Make sure the battery cables are not drawn across any surfaces which
could possibly damage them. Corrosion on electrical connections will reduce performance or may cause a short circuit. Keep all
connections clean especially in the remote control switch and receptacle. In salty environments use silicon sealer to protect
from corrosion.
4.3. ELECTRICAL LEAD WIRE ATTACHMENT
4.3.1. Disconnect the battery.
4.3.2. The battery lead wires should be routed to the battery. To protect against abrasion apply several layers of electrical tape where wiring
may come into contact with sharp metal parts of the vehicle.
4.3.3. All connections to motor, solenoids and battery earths require good, clean tight connections. Connect the red lead to the positive (+)
terminal and the black lead to the negative (-) terminal of the battery.
4.3.4. The relay may be mounted remotely as space requires. If it is mounted more than 700mm (27’) from the winch, use larger diameter
wire.
4.3.5. Reconnectthebattery,positiveterminalrst,thenthenegative.Rotatetheclutchlevertothe“disengagedposition”.Pullseveral
metresofcableoffthedrum.Returntheclutchleverbacktothe“engagedposition”.Plugintheremoteswitchassembly,referto
g.9.Switchthehandcontrolto“ropeout”position.Pullthetriggermomentarilytocheckcabledrumrotationdirection.Ifthedrum
rotates in the wrong direction, recheck the wiring.
WARNING! Double check the wiring. Incorrect wiring could result in motor burn out and/or personal injury.
5. OPERATION
WARNING! The switch assembly must be kept free of dirt and moisture to ensure safe operation.
5.1. The hand held switch activates power to the winch motor. To connect the remote control remove the waterproof plug cover and insert
thecontrolcableplugandturnthesecuringringclockwisetolockseeg.9.Theplugonthecontrolcordiskeyedandwillonlytthe
socketoneway.Theswitchtriggerreturnstothe“Off”positionwhenreleased.Tochangedirection,presstherockerintheother
direction,seeg.8.
Fig.7
Fig.8
Fig.9 Fig.10
RW5675.V2 Issue:2(S) 02/05/18
Original Language Version
© Jack Sealey Limited

5.2. PULLING OUT THE WIRE ROPE
5.2.1. The wire rope has been installed on the winch under minimal load at the factory. It must be re-spooled onto the drum so the outer
layers will not draw down into the inner layers, causing damage to the rope.
5.2.2. Pullandrotatetheclutchlevertothe,“disengaged”positionasshowning.10.Ifthereisaloadonthewirerope,theclutchlever
may not turn easily. DO NOT force the clutch lever. Release the tension on the wire rope by paying out some of the wire rope, then try
releasing the clutch.
5.2.3. Pull out the wire rope and secure it to an anchor or a load.
5.2.4. Checkthatthereareatleastveturnsofwireropeleftonthedrum.
5.2.5. Re-engagethedrumbyrotatingtheclutchlevertothe“engaged”position,seeg.10.
WARNING! The lever must be in the engaged position and locked before winching.
5.2.6. Your winch incorporates a proportional friction-type brake. After winching in a load, this mechanism holds the load, up to the rated
capacity of the winch. While powering out the load, the winch controls the rate of speed by applying the brake in proportion to the
amount of load on the wire rope. This results in heavier loads powering-out more slowly than lighter loads. Similar to the friction-type
brakes in your car which can generate heat if used for a long time, the winch brake can generate heat if used to power-out a load
for a long period of time. To ensure optimum winch performance, always limit powering-out a load to one minute and allow the brake
tocoolforfteenminutesbeforecontinuingtowinch.Undernormalusethebrakemechanismshouldnotrequireanyadjustment.
Should the brake fail to hold a load or maintain a constant rate of speed during a powering-out operation, the brake pad may be worn
and require replacement.
5.2.7. Keep a tightly wound wire rope drum. DO NOT allow the windings on the drum to become loosely wound. A loosely wound drum allows
wire rope under load to work its way down into the layers of wire rope on the drum. When this occurs, wire rope may become wedged
within the body of the windings causing damage to the wire rope. To prevent this keep the wire rope tightly and evenly wound on the
drum at all times. Rewind the rope under tension after each use. One method is to attach the hook to a stationary object at the top of a
small hill or incline and winch your vehicle up the incline.
8DO NOT allow the motor to overheat. The winch is designed for intermittent use only. During long or heavy pulls the motor will get hot,
with its internal parts hotter than the case. To check motor temperature, stop winching and carefully touch the end of the motor. If
uncomfortably warm, allow the motor to cool before continuing. Keep engine running to recharge battery during this break.
5.2.8. The pull required to start a load moving is often much greater than the pull to keep it moving. Avoid stopping and starting during a pull
except when required by motor temperature.
5.2.9. Prevent kinks in the cable before they occur, by keeping an even tension on the cable when paying in. (Refer to 5.2.6).
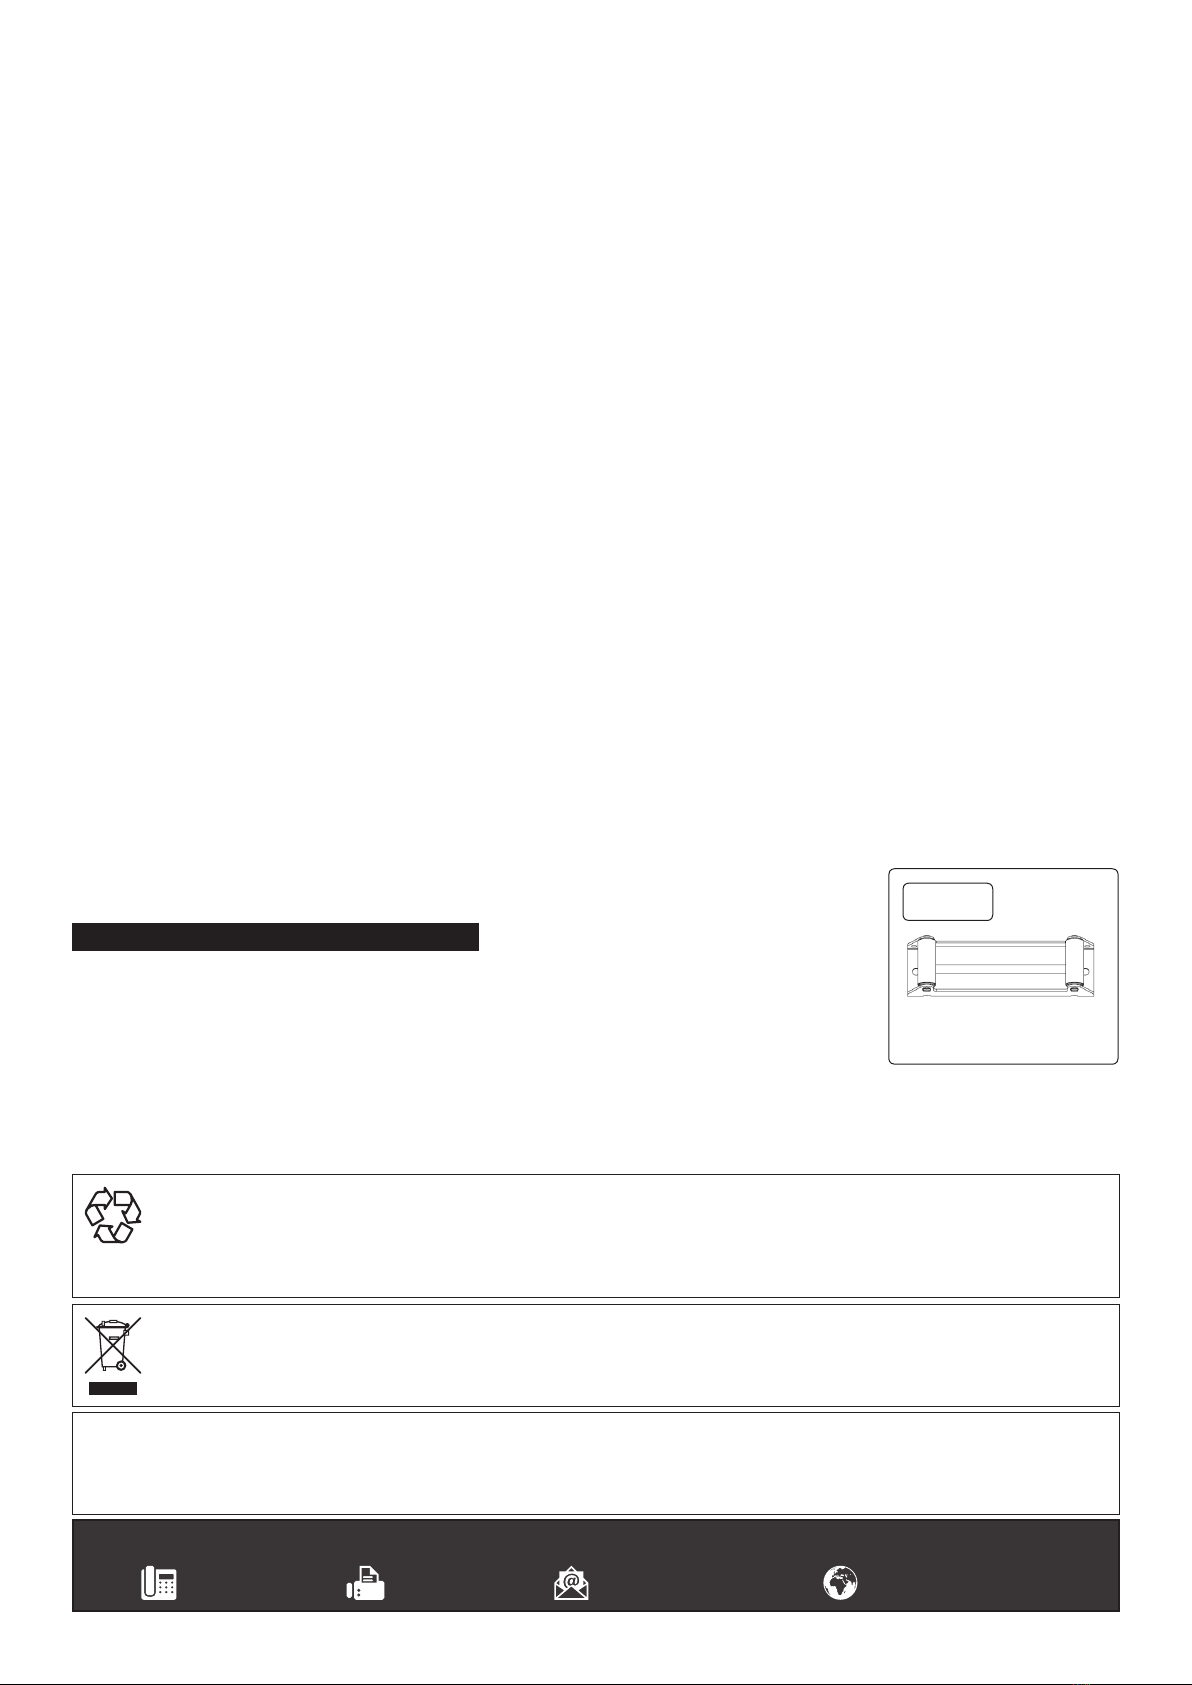
5.2.10. Equipping the winch with a roller fairlead (supplied) will substantially reduce wear on the wire rope during angle pulls, because rollers
eliminateheavyrubbingandabrasiontothewirerope,seeg.11.
NOTE: Never winch your vehicle in gear or in park, which would damage your vehicle’s transmission.
Never wrap the wire rope around an object and hook the cable back onto itself, this can cause damage to the object being pulled and
kink or fray the wire rope.
Keep hands, clothing, hair and jewellery clear of the drum and cable when winching.
Never use the winch if the cable is frayed, kinked or damaged.
Never allow anyone to stand near the cable, or in line with the cable or behind the winch while it is under power. If the cable should slip
or break it can suddenly whip back towards the winch, causing great danger for anyone in the area. Always stand well to the side while
winding and use a wire rope dampener.
8DO NOT leave the switch plugged in when the winch is not in use.
CHECK THE WINCH THOROUGHLY AND CAREFULLY BEFORE OPERATING!
6. MAINTENANCE
6.1. It is strongly recommended that the winch is used regularly (once a month). Simply power out 15mtr
of cable, free spool 5mtr then power back in. This will keep all the components in good working
condition so that the winch can be relied on when needed.
Fig.11
Sealey Group, Kempson Way, Suffolk Business Park, Bury St Edmunds, Suffolk. IP32 7AR
01284 757500 01284 703534 sales@sealey.co.uk www.sealey.co.uk
Note: It is our policy to continually improve products and as such we reserve the right to alter data, specifications and component parts without prior
notice.
Important: No Liability is accepted for incorrect use of this product.
Warranty: Guarantee is 12 months from purchase date, proof of which is required for any claim.
ENVIRONMENT PROTECTION
Recycle unwanted materials instead of disposing of them as waste. All tools, accessories and packaging should be sorted, taken to
a recycling centre and disposed of in a manner which is compatible with the environment. When the product becomes completely
unserviceable and requires disposal, drain any fluids (if applicable) into approved containers and dispose of the product and fluids
according to local regulations.
WEEE REGULATIONS
Dispose of this product at the end of its working life in compliance with the EU Directive on Waste Electrical and Electronic Equipment
(WEEE). When the product is no longer required, it must be disposed of in an environmentally protective way. Contact your local solid
waste authority for recycling information.
RW5675.V2 Issue:2(S) 02/05/18
Original Language Version
© Jack Sealey Limited
Table of contents
Other Sealey Winch manuals

Sealey
Sealey ATV1000W User manual

Sealey
Sealey TW16500/12 User manual

Sealey
Sealey PW1360 User manual

Sealey
Sealey SRW2720 User manual

Sealey
Sealey GWE1200M User manual

Sealey
Sealey RW8180 User manual

Sealey
Sealey WRP1600 User manual

Sealey
Sealey ATV1135.V2 User manual

Sealey
Sealey GWE1200 User manual

Sealey
Sealey RW5675KG User manual
Popular Winch manuals by other brands

HADEF
HADEF 238/10MV Installation, Operating and Maintenance Instruction

IKAR
IKAR PLW Log book and instructions for use

Allied Systems
Allied Systems H12A Operation, parts & maintenance manual

CSI
CSI X3500 Installation Manual & Safety Instructions

Superwinch
Superwinch T2000 owner's manual

Ingersoll-Rand
Ingersoll-Rand LS1500R Parts and maintenance manual