SEFAM DreamStar Info Instruction manual

Quick user guide
DreamStarTM Info & Auto

Welcome
Air outlet
(DreamStar with cover)
Data card slot
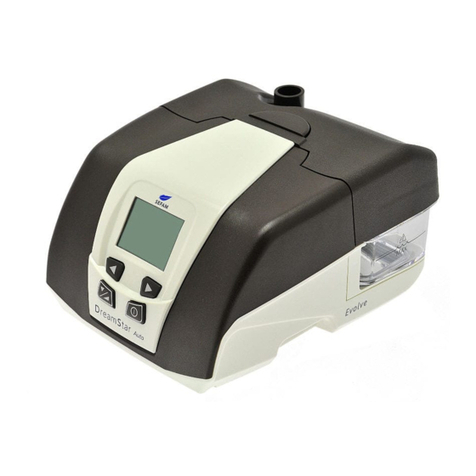
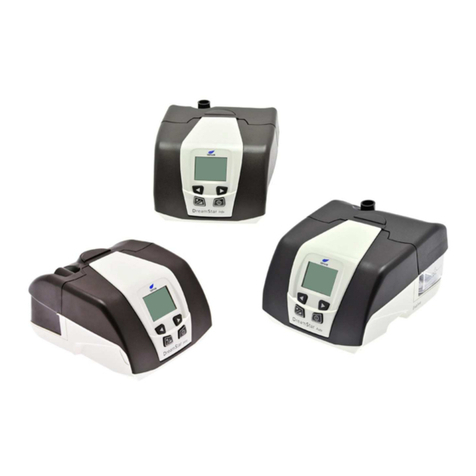
The DreamStar Info & Auto can be delivered in 3 dierent conguraons:
Standard, with no heated humidicaon system on board.
Evolve with cover, the humidicaon system is present but not acve. Oponal the
heated humidier can be acvated and replace the cover by the water reservoir.
Evolve with reservoir, the humidicaon system is acve.
The DreamStar is delivered with the following parts:
DreamStar Info or Auto device, power supply cable, 22mm paent tubing, transport
bag, data card, spare inlet lter and paent manual.
Fine lter, 15mm paent tubing, water reservoir on DreamStar Evolve with cover, cover
on DreamStar Evolve with water reservoir.
Mini USB port 13 V DC inlet
100-240 V AC inlet
Air outlet
(DreamStar with
water reservoir)
Humidier heang plate
(DreamStar Evolve)
Air inlet lter Air outlet
Congratulaons for the purchase of your new DreamStarTM Info or Auto. Please refer to
this quick user guide but always read the user manual prior using your DreamStarTM Info
or Auto device.

Preparation for use
1. Place the device on the side of your bed, in a stable surface (eg bedside table).
2. Make sure that it is carefully and safely posioned.
3. Aach the cover or water reservoir onto the device.
4. Connect the power supply cable on the side of the DreamStar.
5. Plug the cable into the mains.
6. Connect the tubing onto the air outlet.
7. Connect the mask on the other part of the tubing.
Note:
Fill the water reservoir with water prior aaching it on to the device
Respect the maximum water level indicator.
Make sure that the water reservoir is empty while traveling with your DreamStar Info
or Auto device. There is a risk water entering the device if the water reservoir is not
empty.
DreamStar Info & Auto Evolve
with water reservoir
DreamStar Info & Auto
standard or Evolve with cover

Setting up your DreamStar
Provides access to ramp
funcons.
It is also used to select the
next parameter in displayed
menu during the device
sengs.
Turns the device ON or OFF.
It is used to exit the device
sengs menu.
Allows the selec-
on of the sym-
bol at the lower
le of the
screen .
In stand by mode
gives you the
access to device
hour meter &
summary
informaon
about the last 5
sessions.
C for CPAP
A for APAP
Allows the selec-
on of the sym-
bol at the lower
right of the
screen .
In stand by mode
gives you access
to device sengs.
Indicates that
heated
humidicaon
feature is acve
and also show the
seng of heated
humidier .
In stand by mode shows
the date and hour.

Setting up your DreamStar
DreamStar Info or
Auto in CPAP mode:
DreamStar Auto in
Auto CPAP mode:
Press
as many
mes to
access the
desired
parameter
seng
If CC+ is OFF, you can turn it ON by
pressing the le or right parameter
The press to access the next
menu parameter
Increase or decrease
the parameter value with the right
or le parameter sengs buon
This page displays only if the ramp feature and (or) Pressure Alter feature and (or) the
Comfort Calibraon + feature were acvated by the home care provider.
Press
in standby
mode
The page displays:
Press
to select
the
seng
The page changes:
Increase or
decrease
the parameter value
with the right or le
parameter sengs
By pressing the buon, while the device is in standby mode, to select the symbol
displayed on the screen. In the sengs page display:
The symbol at the boom of the screen indicates that is impossible to change the
parameters displayed.
The symbol at the boom of the screen indicates that the parameters displayed
can be changed:
Select the parameter to change by pressing the ramp buon as many mes as it
is necessary .
Increase or decrease the parameter value by pressing the control buons.
To return to the page header, press the ramp buon at the boom of the page or
the on/o buon
To move from one sengs page to another, select the symbol displayed on the
screen by pressing the right control buon . To return to the previous page, select
the symbol by pressing the le control buon .
To exit the sengs menu, press the on/o buon or wait 30 seconds.
Note: The following is a demonstraon how to change the available sengs

Definitions
Data card
Every device is delivered with a data card. The data card allows you to download a
poron of the data stored in the device’s internal memory or even upload sengs if
your physician decides the change of the sengs.
Use the data card located at the right side of the bag.
Insert the card carefully at the data card slot.
Watch the progress bar at the device’s screen.
When nished remove the card.
Use the card that your physician or homecare provide had
programmed the sengs.
Insert the card carefully at the data card slot.
Instantaneously the sengs will be uploaded.
When nished remove the card.
Note: The sengs will be uploaded the rst me you insert
the data card. If you insert again the data card the device will
perform compliance data download
If enabled by the physician or home care provider, the Comfort calibraon + feature aims
to increase the treatment pressure during inspiraon and to decrease it during expira-
on to make the breathing more comfortable during the treatment.
If enabled by your home care provider, the ramp feature allows for a gradual rise of
pressure to help you go to sleep.
If enabled by your home care provider, the latency feature allows for a gradual rise of
pressure to help you go to sleep. During this me the Auto CPAP algorithm is suspended.
If enabled by your home care provider, this feature provides the opon to change the
prescribed pressure by ± 1 cm H2O
Note: Pressure alter is only available in CPAP mode.

Cleaning your DreamStar
Always refer to the device user manual for detailed instrucons for the care of the
device and accessories.
Empty water reservoir and wash it with warm water and
mild detergent. Aer the water chamber has been
cleaned, you can you can let it soak for 15 minutes in a
soluon of 1 part white vinegar to 9 parts water.
Rinse well with water to eliminate any trace of vinegar.
Allow to dry naturally.
Note:
The dierent parts of the water reservoir may also be
washed in a dishwasher (at 60°C maximum for 2 hours).
To prevent micro-organisms to grow, do not allow water
in the chamber to stagnate.
The water reservoir as described above.
The high eciency lter, which is oered as an opon,
cannot be washed. It must be changed once a month or
more frequently if visibly dirty.
Change the lters systemacally, as soon as they are torn
or soiled or when the device displays a reminder to do so.
Clean the outside of the unit using a damp ssue (cloth, paper towel) with a lile
water and one drop of mild detergent.
Eliminate any trace of detergent in repeang this operaon with a new ssue
(cloth, paper towel) moistened with water only.
Wipe the device thoroughly using a dry ssue (cloth, paper towel).
As described above in this page.
As described above in this page.

For more informaon contact us at the following addresses :
customerservice@sefam-medical.com
markeng@sefam-medical.com
DreamStar™ is a trademark of SEFAM 0459
Manufacturing plant 10 Allée Pelleer Doisy - 54600 VILLERS-LES-NANCY - FRANCE
Legal enty, 144 avenue Charles de Gaulle - 92200 NEUILLY sur SEINE - FRANCE BRO064-00/ 2012
This manual suits for next models
1
Table of contents
Other SEFAM Medical Equipment manuals
