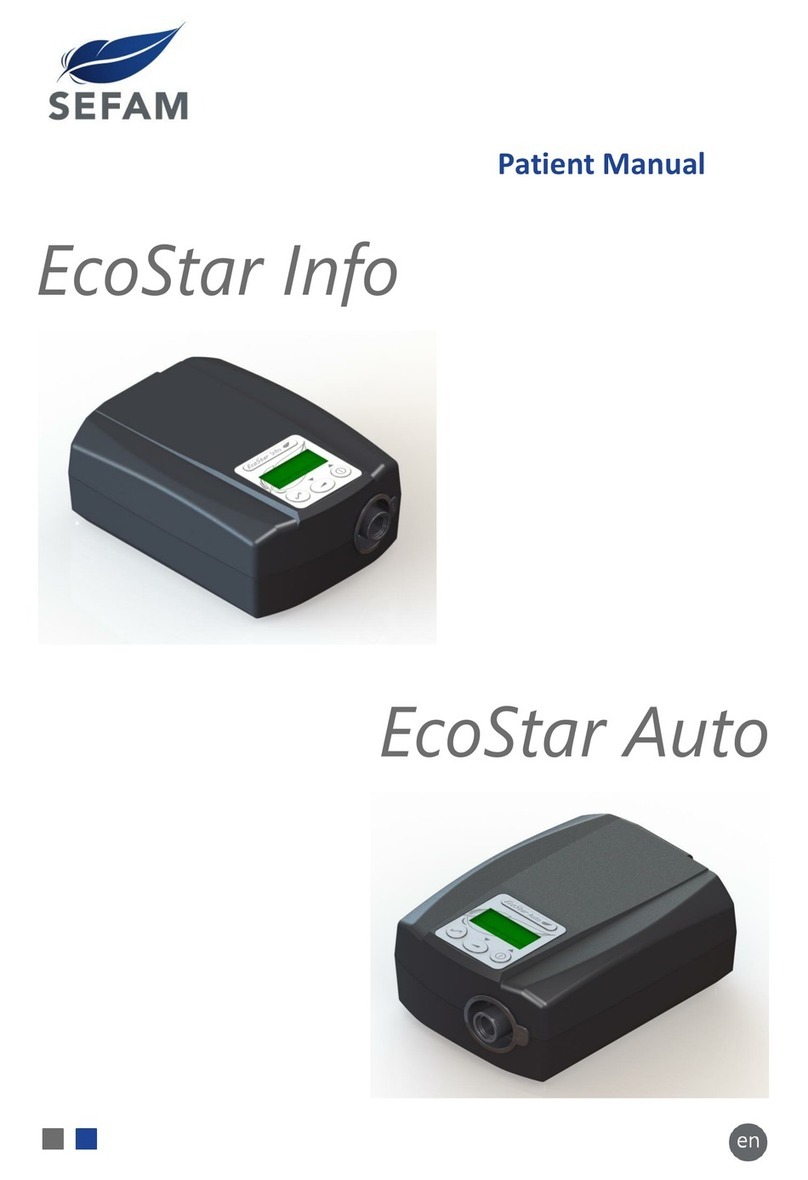
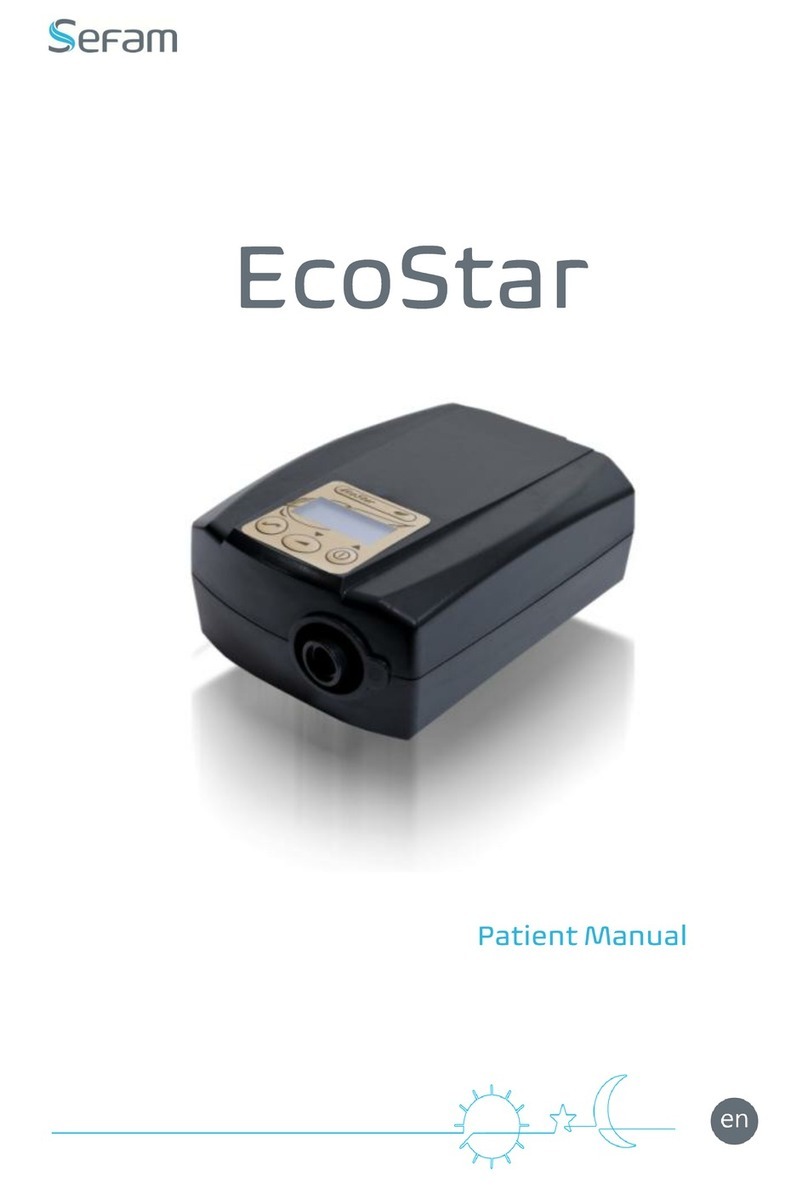
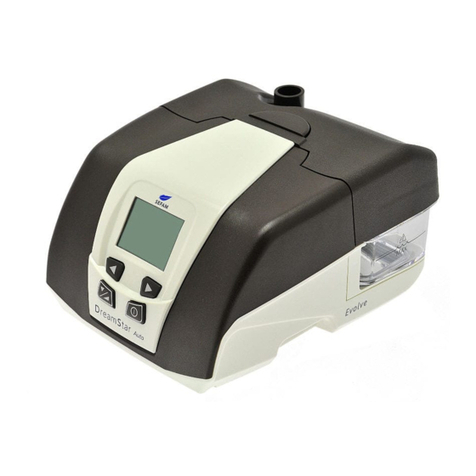
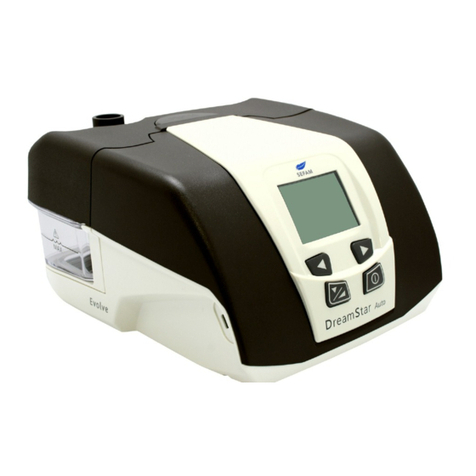
SEFAM DreamStar Intro User manual

DreamStar™ is a brand registered by SEFAM.
DreamStar™ Product Range
DreamStar™ Intro
DreamStar™ Intro Evolve
DreamStar™ Info
DreamStar™ Info Evolve
DreamStar™ Auto
DreamStar™ Auto Evolve

2 DreamStar Intro, Info, Auto
Manufacturer:
Manufacturing plant and technical agency:
SEFAM
144 AV CHARLES DE GAULLE
92200 NEUILLY SUR SEINE
FRANCE
SEFAM
10 ALLEE PELLETIER DOISY
54600 VILLERS-LES-NANCY
FRANCE
TEL : +33 (0) 3 83 44 85 00
www.Sefam-medical.com
Technical Assistance:
E:mail : technicalservice@sefam-medical.com

DreamStar Intro, Info, Auto Table of contents 3
TABLE OF CONTENTS
Before you start ......................................................4
Safety Precautions ........................................... 4
Intended use ...................................................... 4
Contra-indications ............................................ 5
List of authorised accessories ....................... 5
Available Features ..................................................7
Heated Humidification feature available on
Evolve models ................................................... 7
Pressure Alter .................................................... 7
Auto ON feature ................................................ 7
Mask unplugged feature.................................. 7
Patient reminders ............................................. 7
Comfort Calibration.......................................... 8
Ramp feature..................................................... 8
Device Settings .....................................................10
Definitions ........................................................ 10
Settings Ranges.............................................. 11
Accessing the device menus........................ 13
How to set DreamStar™ Intro / Intro Evolve
device ....................................................................15
Accessing the Settings menu....................... 15
Settings menu ................................................. 15
Service menu................................................... 16
How to set DreamStar™ Info / Info Evolve device19
Accessing the Settings menu....................... 19
Settings menu ................................................. 19
Service menu................................................... 21
How to set DreamStar™ Auto / Auto Evolve
device ....................................................................24
Accessing the Settings menu....................... 24
Settings menu ................................................. 24
Service menu................................................... 27
Other settings and information ...........................30
General Information menu............................ 30
Setting the Heat level (if water chamber
included)........................................................... 31
Reminders about key events ........................ 32
Specific calibration of the pneumatic
configuration ................................................... 33
Using a memory card..................................... 33
Cleaning and Maintenance ..................................35
Daily................................................................... 35
Weekly............................................................... 35
Monthly............................................................. 37
Material Disinfection ............................................38
Surface disinfection of the device ............... 38
Water chamber disinfection procedure (if
included)........................................................... 38
What should not be used .............................. 39
Troubleshooting tips ............................................40
Device Messages............................................ 40
Error Messages............................................... 40
Technical Specifications ......................................43
Device performance .......................................43
Integrated Humidifier performance.............43
Operating conditions for the device and
humidifier..........................................................43
Transportation and storage conditions ......44
Device electrical characteristics...................44
Physical characteristics.................................44
CE marking.......................................................44
Symbols on the device ...................................45
Standards Compliance...................................45
Disposing of the device at the end of its life46
ISO 80601-2-70:2015-compliant features ..47
Functional pneumatic block diagram..........50
Electromagnetic compatibility......................51

4 Before you start DreamStar Intro, Info, Auto
Before you start
This manual is intended for the Clinician and home care Provider. Under no circumstances should it be
provided to the patient.
Safety Precautions
WARNING:
This signals a risk of injury or accident to the patient.
Pay attention to the Safety Precautions indicated in the DreamStar™ Patient Manual.
Refer to the Patient Manual for all information relating to installation, maintenance and storage of the device.
Without exception, be sure to supply the patient with the Patient Manual and accessory use instructions.
Use only the accessories that the manufacturer has authorised for use with this device, as listed in this
manual.
During treatment, only equipment included in the List of authorised accessories should be connected to the
device USB connector.
To ensure that maintenance is performed correctly and to avoid any possibility of damage, only qualified
personnel are permitted to perform maintenance on the device and make authorised changes to it. The user
assumes full responsibility for any device malfunction that results from the device being maintained by
personnel other than personnel authorised.
Never use the device without making sure that an air intake filter is installed.
If you observe any anomaly in the device, do not begin treatment.
The swivel outlet elbow, 70° 22 mm diameter, is an accessory intended for single patient use.
WARNING: Portable RF communications equipment (including peripherals such as antenna cables and
external antennas) should be used no closer than 30 cm (12 inches) to any part of the DreamStar™ product
range devices, including cables specified by the manufacturer. Otherwise, degradation of the performance of
this equipment could result.
In the following cases where the device is equipped with a water chamber:
In case of heated humidification feature use, the cover must be removed and replaced by a water chamber.
When the heated humidification feature is enabled on a device equipped with a water chamber, the patient
must take, precautions to eliminate the risk of introducing water into the device and causing irreversible
damage to it. The device must be positioned on a stable horizontal surface and must not be tilted.
The water chamber should always be emptied before moving or transporting the device.
CAUTION:
This indicates that there is a possibility of material damage to this device or
any other device.
If the device is equipped with a cover where the water chamber should be, the heated humidification feature
must be disabled. Otherwise, the device may apply the heat setting. However, there would be no risk as the
device would not reach high temperatures. If you are unsure, check the Service menu to confirm that the
heated humidification feature is disabled.
Since DreamStar™ devices are medical electrical devices, instructions concerning electromagnetic
compatibility indicated in this manual should be followed during installation.
Like all medical electrical devices, the DreamStar™ product range device is vulnerable to interference from
mobile and portable radiofrequency communication equipment (mobile phones, Wi-Fi…).
The DreamStar product range device has to be controlled to check the proper operation, whenever it is
located near to a AM, FM or broadcast antennas.
After storing or transporting the device, ensure it is used in compliance with the conditions of use specified
in this manual.
Intended use
The DreamStar™ product range devices are intended to treat patients suffering from Obstructive Sleep
Apnea Syndrome (OSA) in patients over 30 kg (66 lbs.) and breathing spontaneously. They can be
used in Home Healthcare Environment or in a sleep center.

DreamStar Intro, Info, Auto Before you start 5
The DreamStar™ device is not suitable to be used in close proximity to CT scanners, MRT devices, RF
surgical devices or in transportation vessels (on land, sea or in the air).
NOTE: The EMISSION characteristics of this device allow the machine to be used in industrial zones
and in healthcare centres (class A defined in the CISPR 11). When it is used in a residential area (class
B defined in the CISPR 11 is normally required), this device may not provide enough protection for
communication services with radio frequencies. Users may have to take certain measures, such as
the repositioning or the reorientation of the device in order to correct for this.
Contra-indications
Studies have shown that the use of positive pressure is contra-indicated in some patients affected by
any of the following pre-existent pathologies:
Severe bullous emphysema or emphysema previously complicated by pneumothorax.
Pneumoencephalus, trauma or recent surgery with sequela of cranio-nasopharyngeal fistula.
Decompensated cardiac insufficiency or hypotension, particularly in case of decreased blood
volume or cardiac arrhythmia.
Dehydration.
Massive epistaxis or history of massive epistaxis. Acute sinusitis, otitis media, or perforated
tympanic membrane.
Tracheotomy.
In addition, because positive pressure is known to affect cardiac output in certain patients, patient
arterial pressure and heart rate should be closely monitored when starting treatment at an effective
pressure. The risks and benefits of treatment by Continuous Positive Airway Pressure (CPAP) must be
weighed case by case in such subjects. This evaluation should take into account the fact that the
DreamStar™ device can be set to deliver pressures up to 20 cmH2O and, under certain fault conditions,
static pressures up to 30 cmH2O are possible. The DreamStar™ device therefore should not be used if
such pressure levels pose a risk to the patient.
List of authorised accessories
Unless otherwise specified, all the DreamStar™ product range devices can be used with the following
optional accessories:
Battery cable with lugs, 5 m P/N M-214530-00
Cigarette-lighter cable, 5 m P/N M-214530-01
Mini USB 2 m cable (except for DreamStar™
Intro) P/N M-214831-10
Power supply cord UK, 2 m P/N M-660601-40
Air intake filter (foam, reusable)
P/N M-314850-08 (x10);M-414840-06 (x96)
Optional high-efficiency filter (disposable)
P/N M-314850-09 (x10);M-414841-07 (x100)
Filter holder kit P/NM-314820-02
Clinical kit P/N M-215630-01
Water chamber P/N M-315510-14
Device cover P/N M-315530-19
Memory card P/N M-215530-00
Memory card reader P/N M-214830-03
Software DreamStar™ Analyze
P/N M-215630-00
KnightControl remote control (except for
DreamStar™ Intro) P/N M-114700-EU
Patient Tubing, 15 mm diameter (except for
DreamStar™ Intro/Intro Evolve)
P/N M-261000-00
Patient Tubing, 22 mm diameter
P/N M-261000-04
Swivel outlet elbow, 70° diameter 22 mm
P/N M-267010-00
Carrying case P/N M-815505-00

6 Before you start DreamStar Intro, Info, Auto
WARNINGS
Use only the accessories listed above or ISO 80601-2-74:2017-compliant accessories which are approved
for this device.
Use only those accessories which can guarantee the patient’s treatment pressure and reduce re-breathing of
CO2. When a facial mask is necessary, always use a mask which is equipped with an anti-asphyxia valve.
The essential performance of the DreamStar device is to deliver a pressure equivalent to that of the adjusted
pressure ± 0.5 cm H2O. The device was designed to maintain basic safety and essential performance
without maintenance regarding electromagnetic disturbance during the lifetime of the machine. However, in
case of failure, the device has to be repaired by authorized persons who will use original parts only.
WARNING: Use of this equipment adjacent to or stacked with other equipment should be avoided because it
could result in improper operation. If such use is necessary, this equipment and the other equipment should
be observed to verify that they are operating normally.
WARNING: Use of cables, transducers and accessories other that those specified, may result in increased
electromagnetic emissions or decreased electromagnetic immunity of the DreamStar™ product range
devices and result in improper operation.

DreamStar Intro, Info, Auto Available Features 7
Available Features
The DreamStar™ Intro and DreamStar™ Info devices operate in continuous mode (CPAP), i.e. the device
delivers a constant pressure level.
The DreamStar™Auto device operates in either constant mode (CPAP) or in automatic mode (Auto-
CPAP), i.e. the pressure fluctuates between a minimum pressure and a maximum pressure as a
function of respiratory events detected.
The first 5 minutes of operation of the device are not included in the ramp time or latency time. During
this time, depending on the device in question, compliance and AutoCPAP features are unavailable.
Heated Humidification feature available on Evolve models
The DreamStar™ Intro Evolve, DreamStar™ Info Evolve and DreamStar™ Auto Evolve devices can be
delivered either with a cover or with a water chamber. These devices are equipped with a heated
humidification feature which you can enable or disable.
The heated humidification function is enabled on the devices delivered with a water chamber and it is
disabled on the devices delivered with a cover.
If the device is equipped with a cover and if you want to use the heated humidification feature, it is
necessary to order a water chamber and to proceed as follows:
1. Remove the cover from the device and replace it with the water chamber by referring to the Patient
Manual.
2. Enable the heated humidification function by referring to Item 4 of the Service menu in the settings
procedure of the device concerned page 18, 22 or 28.
Pressure Alter
You can enable this feature which provides the option to the patient to change the prescribed pressure
by 1 cmH2O.
Note:
This feature is only available in CPAP mode.
Auto ON feature
Functionality allowing to automatically start the treatment without pressing the device On/Off button.
Mask unplugged feature
If the patient removes his mask, the device automatically switches to low power. The machine will
restore normal power when the mask is reconnected or if the On/Off button or the ramp button
is pressed. Otherwise, the device will stop after 30 minutes.
Note:
If the patient uses a resistive interface (full face mask with anti-asphyxia valve), a specific calibration of the
pneumatic configuration must be carried out so that the DreamStar ™ unit detects that the mask is
unplugged.
Patient reminders
The DreamStar™ device has a patient reminder feature to help the patient remember key events such
as filter and mask changes, device inspections, and memory card compliance data downloads on the
memory card. This feature is described under “Reminders about key events”, on page 32.

8 Available Features DreamStar Intro, Info, Auto
Comfort Calibration
Available on DreamStar™ Info / Info Evolve and DreamStar™ Auto / Auto Evolve , the (C.C.+) Comfort
Calibration feature is intended to increase the treatment pressure during inspiration and to decrease it
during expiration to make the patient's breathing more comfortable during the treatment. It can be
enabled continuously or during the ramp.
Ramp feature
Whatever the type of ramp used, the ramp feature can be stopped during device operation by pressing
the ramp button for 2 seconds. It can be reactivated by stopping and restarting the device.
The comfort pressure, the ramp time (only if the time ramp is selected and if comfort pressure <
prescribed pressure) and the maximum ramp time can be adjusted.
Time ramp
The Time Ramp feature (T.Ramp) allows for a gradual rise in pressure to help the patient go to sleep.
When it is programmed (ramp time 0), it will be automatically activated at the beginning of the
session at comfort pressure.
In CPAP mode, the treatment begins at a reduced pressure called comfort pressure, then the pressure
increases to treatment pressure.
In Auto-CPAP mode, the Ramp feature delays the commands to raise or lower the pressure. If the
comfort pressure is lower than the minimum pressure, the gradual rise in pressure will be made from
the comfort pressure to the minimum pressure during the ramp time.
Ramp feature in CPAP mode

DreamStar Intro, Info, Auto Available Features 9
Indexed Ramp
Available on DreamStar™ Info / Info Evolve and DreamStar™ Auto / Auto Evolve, the Indexed Ramp
feature (I.Ramp) allows to start the treatment at the adjustable comfort pressure, then to have a rise in
pressure in CPAP mode or the activation of the Auto-CPAP as soon as the device starts to detect
respiratory events which indicate that the patient is asleep.
If the end of the indexed ramp is not detected before the value of the set maximum ramp time, it will
automatically stop.
The table below lists the different cases of the indexed ramp operation in CPAP or Auto-CPAP mode.
End of ramp / detection of events
End of ramp / Max ramp time
CPAP mode
Auto-CPAP mode
Comfort P. < min P.
Comfort P. ≥min P.

10 Device Settings DreamStar Intro, Info, Auto
Device Settings
The adjustment of the therapeutic pressure must be determined by the prescribing physician for each
patient individually, with the configuration of the equipment to be used, including the accessories. The
correct installation and positioning of the patient interface constitute a critical condition for the proper
operation of the device.
The most recent compliance data are recorded by session in the device memory within one year and 8
hours usage day, and they can be retrieved for analysis using DreamStar™ Analyze software.
The settings are accessible directly on all the devices. You can also adjust the settings of the
DreamStar™ Info, DreamStar™ Info Evolve, DreamStar™ Auto and DreamStar™ Auto Evolve using the
DreamStar™ Analyze software on a computer connected via a RS232 or Mini USB cable, or via a
wireless connection
WARNING
Before changing the device settings, confirm that the device delivers sufficient airflow when it is in operating
mode. If it does not, stop immediately and contact the technical support.
Definitions
Comfort pressure:
level of pressure produced by the device when the time ramp (T.Ramp) or the
indexed ramp (I.Ramp) starts up so that the patient can go to sleep comfortably.
When the DreamStar™ Auto / Auto Evolve device is in Auto-CPAP mode, the
pressure is adjusted to the comfort pressure or to the minimum pressure (if
comfort pressure < minimum pressure) when the device detects that there has
been no respiratory cycle for more than 2 minutes or when it detects a high
pressure.
Compliance
counter:
total time during which the patient has effectively breathed in the mask (time
subtracted from the time when the mask was removed and the time with no
respiration).
Heating time:
time needed for the device to reach the operating level required by the heated
humidification feature.
Hour counter:
device operating time (ON/OFF).
IFL:
Inspiratory Flow Limit.
Maximum
pressure:
maximum pressure that the DreamStar™ Auto / Auto Evolve can deliver in Auto-
CPAP mode.
Maximum
pressure on
apnoea command:
maximum pressure on the DreamStar™ Auto / Auto Evolve in Auto-CPAP mode
beyond which no rise in pressure can be applied once a respiratory pause has
been detected.
Maximum ramp
time:
Whatever the type of ramp used, this parameter accessible by the clinician and
home care provider only, allows a limit to be placed on the maximum value of
ramp time which can be set by the patient.
Minimum
pressure:
minimum pressure that the DreamStar™ Auto / Auto Evolve can deliver in Auto-
CPAP mode.
Prescribed
pressure:
level of pressure prescribed for the patient.
Ramp time:
This is the time taken by the device in CPAP mode to reach the prescribed
pressure from the comfort pressure or to activate the Auto-CPAP feature when
the time ramp is enabled.
Session:
period during which data is recorded to memory between the time the device
starts operation and the time the device goes into standby. A session is started
after the device has been on for at least 5 minutes without interruption.
Water chamber:
chamber containing the water necessary for humidification.

DreamStar Intro, Info, Auto Device Settings 11
Settings Ranges
For each parameter, the following table indicates the default value, the minimum and maximum
values that can be set on the devices.
Operating mode on the DreamStar™ Auto or DreamStar™ Auto Evolve:
Parameter
Display
Default
Operating mode
CPAP
AUTO
AUTO
Parameters that can be set on the devices in CPAP mode:
Parameter
Minimum value
Maximum value
Default value
Increment
Set pressure
4 cmH2O
20 cmH2O
8 cmH2O
0.5 cmH2O
Comfort pressure
4 cmH2O
Prescribed
pressure
4 cmH2O
0.5 cmH2O
Ramp time
0 min
Maximum ramp
time
15 min
5 min
Maximum ramp time
0 min
45 min
45 min
5 min
Heat level (if water chamber
included)
0
10
1
1
Device parameters that can be set on the DreamStar™ Auto or DreamStar™ Auto Evolve in Auto-CPAP
mode:
Parameter
Minimum value
Maximum value
Default value
Increment
Comfort pressure
4 cmH2O
Maximum set
pressure
4 cmH2O
0.5 cmH2O
Maximum pressure on apnea
command.
Minimum
pressure
Maximum
pressure
10 cmH2O
0.5 cmH2O
Maximum pressure
4 cmH2O or
minimum
pressure
20 cmH2O
20 cmH2O
0.5 cmH2O
Minimum pressure
4 cmH2O
20 cmH2O or
maximum
pressure
4 cmH2O
0.5 cmH2O
Ramp time (if time ramp
selected)
0 min
Maximum ramp
time
15 min
5 min
Maximum ramp time
0 min
45 min
45 min
5 min
Heat level (if water chamber
included)
0
10
1
1
Parameter
Display
Default
Pressure decrease:
SLOW
FAST
SLOW
The device is started by pressing the On/Off button . If the heated humidification feature is
enabled on a device with a water chamber (Evolve configuration) and the heat level is set from 1 to 10,
the heated humidifier begins operating automatically. The heated humidifier indicator then
displays on the screen. When the heat level is set at 0, the humidifier symbol is displayed without
steam .

12 Device Settings DreamStar Intro, Info, Auto
Note:
When the heat level is set at 10, the water chamber filled to the maximum fill line allows at least 8 hours use.
The rate of water evaporation depends on several factors such as environment, leak rate, patient's breathing
pattern, etc.
Features available on all the devices:
Feature
Feature enabled
Feature disabled
Default
Humidifier
Evolve configuration with water chamber*
*The Humidifier feature is inactive on a device
equipped with a cover).
Pressure Alter
(in CPAP mode)
Mask reminder
Frequency
(increment of 1)
0
0
Filter reminder
Frequency
(increment of 1)
0
0
Service reminder
Frequency
(increment of 1)
0
0
Memory card reminder
Frequency
(increment of 1)
0
0
Features available on DreamStar™ Info / Info Evolve and Auto /Auto Evolve:
Comfort Calibration +
(continuously)
(during the ramp)
EXT. (for an external module connection)
Command on Inspiratory Flow Limit (on
DreamStar™ Auto/Auto Evolve in Auto-CPAP
mode)
Auto ON
Access to setting of ramp time for the patient
(autorised)
(locked)
Access to setting of comfort pressure for the
patient
(autorised)
(locked)
Access to setting of language for the patient
(autorised)
(locked)
Ramp type
Default
Ramp feature
Time ramp
(T.Ramp)
Indexed ramp
(I.Ramp)
Indexed ramp
(I.Ramp)

DreamStar Intro, Info, Auto Device Settings 13
Configuration of the devices depending on the accessories used:
Accessory used
Patient circuit
Pneumatic calibration
(Settings menu)
Humidifier feature
(Service menu)
Cover
L. 1.80 m diam. 15 mm
Ø15mm
L. 1.80 m diam. 22 mm
Ø22mm
Other
SPECIFIC
Water chamber
L. 1.80 m diam. 15 mm
Ø15mm+HH
L. 1.80 m diam. 22 mm
Ø22mm+HH
Other
SPECIFIC
Note:
As all DreamStar™ product range devices are equipped with a differential pressure sensor, pressure
compensation for altitude is automatic.
Accessing the device menus
The four buttons on the front of the device allow one to access the device settings menu, scroll
through different pages, or possibly modify the value of certain parameters within these pages.
The parameters are accessible when the machine is in standby or operating mode.
The parameters that are accessible are grouped on several screen pages indicating:
device settings related to prescribed treatment
general device settings, such as date and time
Information about device servicing,
patient reminders.
Description of a screen page
Each screen page includes:
a first line or page header
up to 4 parameter lines with associated values
a final line showing the various symbols used for
such features as changing a parameter value,
moving about a page, or moving from page to
page (see table entitled “Description of symbols
displayed on the screen“).

14 Device Settings DreamStar Intro, Info, Auto
Description of symbols displayed on the screen
Symbol
Description
Symbol
Description
Access to device information.
Access to device settings.
Provides access to the next page
available for display on the screen.
Provides access to the preceding
page displayed on the screen.
Allows the value of the parameter
displayed on the screen to be raised.
Allows the value of the parameter
displayed on the screen to be
lowered.
The heated humidification feature is
enabled without heat or on a device
connected to a battery.
Heated humidification feature
enabled with heat.
The symbol blinks if the heated
humidifier has a problem.
Parameters displayed on the screen
can be changed.
Parameters displayed on the screen
are for information and cannot be
changed.
Feature enabled.
Feature disabled.
YES.
NO.
Time Ramp feature (T.Ramp).
Indexed Ramp feature (I.Ramp).
C
CPAP operating mode, on the
DreamStar™ Auto or DreamStar
Auto Evolve device.
A
Auto-CPAP operating mode, on the
DreamStar™ Auto or DreamStar
Auto Evolve device.
Indicates that compliance is being
recorded.
The symbol blinks when one or
several patient reminders are about
to expire.
Comfort calibration + feature
enabled on DreamStar™ Info / Auto
(and equivalent in Evolve
configuration).
Selection of Settings menu or
Service menu.
LEAK
Indicates the leak level (except on
DreamStar™ Intro / Intro Evolve).
Displays OK, +, ++, +++, ++++.
DD/MM/YYYY
The dates displayed by the device
are in the format day/month/year.
Memory card present.
The symbol blinks if the memory
card is not operational.
Indicates that a battery is
connected.
The device has detected an
operating error. The symbol displays
alternately with the error code.
Indicates that a remote control is
connected.
For settings specific to the DreamStar™ Intro or DreamStar™ Intro Evolve device, see "How to set
DreamStar™ Intro / Intro Evolve device", on page 15.
For settings specific to the DreamStar™ Info or DreamStar™ Info Evolve device, see "How to set
DreamStar™ Info / Info Evolve device", on page 18.
For settings specific to the DreamStar™ Auto or DreamStar™ Auto Evolve device, see "How to set
DreamStar™ Auto / Auto Evolve device", on page 23.
The "General Information" menu for the devices is described on page 30.

DreamStar Intro, Info, Auto How to set DreamStar™ Intro / Intro Evolve device 15
How to set DreamStar™ Intro / Intro
Evolve device
Accessing the Settings menu
Refer to the "DreamStar™ Intro settings" section in the Patient Manual to know how to use the buttons
and symbols displayed during the device setting procedure.
Access of some settings is limited to the medical team only. For that, press the left control button
and the right control button located on the front of the device simultaneously for 2 seconds.
A page appears on the screen and allows you to choose the SETTINGS menu or the SERVICE menu.
Press the left control button to select the settings menu or the right control button to select the service
menu.
Notes:
In the following screens, the values displayed are given by way of example.
The symbol indicates that the Pressure Alter feature is enabled, and the symbol indicates
that it is disabled.
Settings menu
To access the Settings menu, press the left control button to select the symbol displayed
at the bottom left of the screen:
The page displays:
Press
as many times
as necessary
to access the
desired
parameter
setting.
The page changes:
Increase or decrease the
parameter value with the right or left
parameter settings button.
Then press to access the next
menu parameter.
Prescribed P.: level of pressure prescribed for the patient.
Pressure Alter: feature that can be enabled to allow the patient to adjust the prescribed pressure
1 cmH2O.
Press at the bottom of the page or to return to the page header.
Press to move to the next page.

16 How to set DreamStar™ Intro / Intro Evolve device DreamStar Intro, Info, Auto
DreamStar™ Intro or DreamStar™ Intro Evolve
The page displays:
Press
as many times
as necessary
to access the
desired
parameter
setting.
The page changes:
Increase or decrease the
parameter value with the right or left
parameter settings button.
Then press to access the next
menu parameter.
Comfort pressure: level of pressure produced by the device when the ramp feature starts up.
Max ramp time: maximum ramp time, set at a value from 0 to 45 minutes.
Ramp time: time the device takes to reach the prescribed pressure when starting from the comfort
pressure.
Press at the bottom of the page or to return to the page header.
Press to exit the menu.
Note :
The DreamStar™ Intro device was calibrated at the factory for a 22 mm in diameter tubing and cannot be
used with a 15 mm in diameter tubing.
Service menu
To access the Service menu, press the left control button to select the symbol displayed
at the bottom right of the screen:
1. Selecting the language and setting the clock
The page displays:
Press
as many times
as necessary
to access the
desired
parameter
setting.
The page changes:
The language can be selected by
successive presses on the left or
right parameters settings button.
Then press to access the next
parameter. Increase or
decrease the parameter value
with the right or left parameter
settings button.
Then press to access the next
menu parameter.
Software version: Version of the integrated device software. The version of the integrated device
software can be viewed but not modified.
Press at the bottom of the page or to return to the page header.
Press to move to the next page.

DreamStar Intro, Info, Auto How to set DreamStar™ Intro / Intro Evolve device 17
DreamStar™ Intro or DreamStar™ Intro Evolve
2. Setting the date
The page displays:
Press
as many times
as necessary to
access the
desired
parameter
setting.
The page changes:
Increase or decrease the
parameter value with the right or left
parameter settings button.
Then press to access the next
menu parameter.
Press at the bottom of the page or to return to the page header.
Press to move to the next page.
3. Patient reminders
The page displays:
Press
as many times
as necessary
to access the
desired
parameter
setting.
The page changes:
Increase or decrease the
parameter value with the right or left
parameter settings button.
Then press to access the next
menu parameter.
For each type of reminder, you can set the frequency with which the device will set a reminder
activation date for the patient. The date will appear in the relevant menu (see Patient Manual for
further information).
Filter: reminder how often the filter should be changed
Mask: reminder how often the mask should be changed.
Service: reminder how often the device pressure should be checked.
Memory card: reminder how often the patient should download data to the memory card and return
the card to the home care provider or physician.
CAUTION
The reminder expiration date is recalculated when you change the frequency.
Press at the bottom of the page or to return to the page header.
Press to move to the next page.

18 How to set DreamStar™ Intro / Intro Evolve device DreamStar Intro, Info, Auto
DreamStar™ Intro or DreamStar™ Intro Evolve
4. Other features
The page displays:
Press
as many times
as necessary
to access the
desired
parameter
setting.
The page changes:
Increase or decrease
the parameter value with the right or
left parameter settings button.
Then press to access the next
menu parameter.
Pressure offset: offset of the pressure sensor.
Pressure unit: the unit of measurement used for the displayed pressure can be changed from cmH2O
to hPa, and vice versa.
Humidifier: the heated humidification feature can be enabled or disabled (if water chamber
included).
Note :
If you have changed the value of the pressure offset or the status of the heated humidification feature, a
confirmation message appears when you press the On/Off button. Press the right control button to confirm
the change or the left control button to cancel.
Press at the bottom of the page or to return to the page header.
Press to exit the menu.

DreamStar Intro, Info, Auto How to set DreamStar™ Info / Info Evolve device 19
How to set DreamStar™ Info / Info
Evolve device
Accessing the Settings menu
Refer to the "DreamStar™ Info settings" section in the Patient Manual to know how to use the buttons
and symbols displayed during the device setting procedure.
Access of some settings is limited to the medical team only. For that, press the left control button
and the right control button located on the front of the device simultaneously for 2 seconds.
A page appears on the screen and allows you to choose the SETTINGS menu or the SERVICE menu.
Press the left control button to select the settings menu or the right control button to select the service
menu.
Notes:
In the following screens, the values displayed are given by way of example.
The symbol indicates that the Pressure Alter feature is enabled, and the symbol indicates
that it is disabled.
Settings menu
To access the Settings menu, press the left control button to select the symbol displayed
at the bottom left of the screen:
The page displays:
Press
as many times
as necessary
to access the
desired
parameter
setting.
The page changes:
Increase or decrease the
parameter value with the right or left
parameter settings button.
Then press to access the next
menu parameter.
Prescribed P.: level of pressure prescribed.
Pressure Alter: feature that can be enabled to allow the patient to adjust the prescribed pressure
1 cmH2O.
Press at the bottom of the page or to return to the page header.
Press to move to the next page.

20 How to set DreamStar™ Info / Info Evolve device DreamStar Intro, Info, Auto
DreamStar™ Info or DreamStar™ Info Evolve
The page displays:
Press
as many times
as necessary
to access the
desired
parameter
setting.
The page changes:
Increase or decrease the
parameter value with the right or left
parameter settings button.
Then press to access the next
menu parameter.
Select the ramp type with the right or
left parameter settings button.
Comfort pressure: level of pressure produced by the device when the ramp feature starts up.
Ramp type : Time Ramp (T.Ramp) or Indexed Ramp (I.Ramp).
Max ramp time: maximum ramp time of from 0 to 45 minutes.
Ramp time: time the device takes to reach the prescribed pressure when starting from the comfort
pressure. This parameter is displayed only when the time ramp (T.Ramp) is selected.
Press at the bottom of the page or to return to the page header.
Press to move to the next page.
Calibrating the device
The page displays:
Press
as many
times as
necessary to
access the
desired
parameter
setting.
The page changes:
With the right or left parameter
settings button, you can select the
activation or disactivation status of
the Comfort Calibration + feature.
The and symbols show
that it is enabled during the ramp.
Then press to access the next
menu parameter.
C.C.+ : Comfort Calibration + feature. This feature can be enabled either continuously or during the
ramp only, or it can be disabled.
Patient circuit options are: Ø15mm (15 mm in diameter patient tubing), Ø15mm+HH (15mm in
diameter patient tubing with water chamber), Ø22mm (22mm in diameter patient tubing), Ø22mm+HH
(22mm in diameter patient tubing with water chamber) and SPECIFIC (other configuration).
Note:
If the SPECIFIC patient circuit option is selected, calibration must be launched. Press the ramp button to
enable calibration. If no calibration is PRESENT, the calibration goes back to the default calibration. See
"Specific calibration of the pneumatic configuration" paragraph, on page 33.
Press at the bottom of the page or to return to the page header.
Press to exit the menu.
Other manuals for DreamStar Intro
2
This manual suits for next models
5
Table of contents
Other SEFAM Medical Equipment manuals
