manuals.online logo
Brands
  1. Home
  2. •
  3. Brands
  4. •
  5. Seiko
  6. •
  7. Watch
  8. •
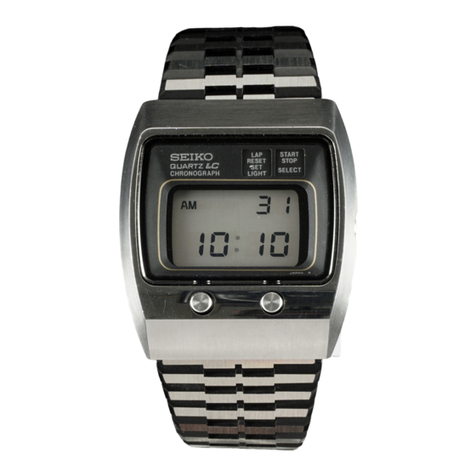
  9. Seiko S651A User manual

Seiko S651A User manual

Other Seiko Watch manuals

Seiko Cal. 5M82 User manual

Seiko

Seiko Cal. 5M82 User manual

Seiko KINETIC 7D46 User manual

Seiko

Seiko KINETIC 7D46 User manual

Seiko Cal. 6T63 User manual

Seiko

Seiko Cal. 6T63 User manual

Seiko Y739A Quick start guide

Seiko

Seiko Y739A Quick start guide

Seiko Kinetic 5M85 User manual

Seiko

Seiko Kinetic 5M85 User manual

Seiko Presage SPB401 User manual

Seiko

Seiko Presage SPB401 User manual

Seiko KINETIC 7D46 User manual

Seiko

Seiko KINETIC 7D46 User manual

Seiko W620 User manual

Seiko

Seiko W620 User manual

Seiko 8R48 User manual

Seiko

Seiko 8R48 User manual

Seiko SFJ001P User manual

Seiko

Seiko SFJ001P User manual

Seiko G-8 User manual

Seiko

Seiko G-8 User manual

Seiko 7T85 User manual

Seiko

Seiko 7T85 User manual

Seiko 9S56 User manual

Seiko

Seiko 9S56 User manual

Seiko 7T82 User manual

Seiko

Seiko 7T82 User manual

Seiko 7F22 User manual

Seiko

Seiko 7F22 User manual

Seiko Grand 3F81 User manual

Seiko

Seiko Grand 3F81 User manual

Seiko Telemeter Operating instructions

Seiko

Seiko Telemeter Operating instructions

Seiko ASTRON 8X53 GPS SOLAR User manual

Seiko

Seiko ASTRON 8X53 GPS SOLAR User manual

Seiko 5T82 User manual

Seiko

Seiko 5T82 User manual

Seiko 5D22 User manual

Seiko

Seiko 5D22 User manual

Seiko ASTRON GPS SOLAR 3x62 Assembly instructions

Seiko

Seiko ASTRON GPS SOLAR 3x62 Assembly instructions

Seiko ASTRON Assembly instructions

Seiko

Seiko ASTRON Assembly instructions

Seiko 7S25B Installer manual

Seiko

Seiko 7S25B Installer manual

Seiko 5R65 User manual

Seiko

Seiko 5R65 User manual

Popular Watch manuals by other brands

Casio QW 5513 Operation guide

Casio

Casio QW 5513 Operation guide

Piaget 560P Instructions for use

Piaget

Piaget 560P Instructions for use

Armitron pro sport MD0346 instruction manual

Armitron

Armitron pro sport MD0346 instruction manual

West Marine BlackTip 13411293 Instruction Booklet and Care Guide

West Marine

West Marine BlackTip 13411293 Instruction Booklet and Care Guide

Jaeger-leCoultre HYBRIS MECHANICA CALIBRE 184 manual

Jaeger-leCoultre

Jaeger-leCoultre HYBRIS MECHANICA CALIBRE 184 manual

FOREVER iGO PRO JW-200 user manual

FOREVER

FOREVER iGO PRO JW-200 user manual

Relic OS10 quick start guide

Relic

Relic OS10 quick start guide

MyKronoz ZeClock manual

MyKronoz

MyKronoz ZeClock manual

Casio QW-782 General guide

Casio

Casio QW-782 General guide

Strikes and Spares SASM80 E-manual

Strikes and Spares

Strikes and Spares SASM80 E-manual

Christopher Ward C1000 Owner's handbook

Christopher Ward

Christopher Ward C1000 Owner's handbook

Lotus ILMFS01 instruction manual

Lotus

Lotus ILMFS01 instruction manual

Chronos Manufactures Chrono Diamond Thyrso 10400 instruction manual

Chronos Manufactures

Chronos Manufactures Chrono Diamond Thyrso 10400 instruction manual

Pandora WATCH2 quick guide

Pandora

Pandora WATCH2 quick guide

Suunto X6 user guide

Suunto

Suunto X6 user guide

MotionX 365 user guide

MotionX

MotionX 365 user guide

Aplus GV18 user guide

Aplus

Aplus GV18 user guide

Garmin VENU SQ 2 owner's manual

Garmin

Garmin VENU SQ 2 owner's manual

manuals.online logo
manuals.online logoBrands
  • About & Mission
  • Contact us
  • Privacy Policy
  • Terms and Conditions

Copyright 2025 Manuals.Online. All Rights Reserved.

SERVICEGUIDE CAL.S651A
1. SPECIFICATIONS
S651A
Movement
Item Cal. No.
(x 1.0)
ø27.9 mm
27.5 mm between 3 o’clock and 9 o’clock sides
27.7 mm between 6 o’clock and 12 o’clock sides
Movement size
Outside diameter
—
Casing diameter
Height 5.9 mm (6.0 mm including the battery portion)
Nematic Liquid Crystal, FEM (Field Effect Mode)
Display medium
Multiplex driving systemDriving system
Calendar display
• Month, date and day; full auto calendar (from January 1995 to
December 2044)
Time display
• Hours, minutes and seconds
Stopwatch display (Up to 10 hours in 1/100 second increments)
Memory recall display
• Lap time memory (Up to 8 lap times)
Timer display (Countdown timer in one second decrements)
• Adjustable timer (Up to 9 hours 59 minutes in one minute
increments)
• Preset timer (Selection of the preset time: 3, 5, 10 and 15 minutes)
Alarm display
• Daily alarm
Display system
Additional mechanism Electroluminescent panel
Confirmation sound for button operation
Battery life indicator
Sound demonstration
Auto illumination and auto signal function
Loss/gain Monthly rate at normal temperature range: less than 20 seconds
Regulation system Nil
Measuring gate by quartz tester Any gate can be used.
Battery SEIKO CR2025, Sony CR2025, Matsushita CR2025, Maxell CR2025,
Eveready ECR2025
Battery life is approximately 2 years.
Voltage : 3.0 V
2. VALUE CHECKING
• Current consumption: less than 5.5 µA
●PARTS OF THE AIR CHAMBER UNIT
●Before removing the air chamber from the watch case or attaching it to the case for such purposes as cleaning
and replacement with a new one, be sure to let the air completely out of it.
●When attaching the air chamber to the watch case, be sure to set the protruding portions of both the rings
at the 6 and the 12 o’clock sides to the small protrusions on the case to fix the air chamber. Otherwise, the
air chamber may come off of the case.
1. HOW TO REMOVE / ATTACH THE RING AT THE 12 O’CLOCK SIDE
●How to remove
Turn the ring in the direction of the arrow to set
its protruding portion to the small hole on the
case, and then, remove the ring.
●How to attach
To fix the ring, set the protruding portion of the
ring to the small hole on the case, and turn the
ring in the opposite direction to the arrow until
the ring’s protruding portion aligns with the
small protrusion on the case.
Remarks
For the parts code, refer to the Casing Parts Catalogue of each model.
Ring
Air pump
Ring (Air release button)
Air chamber
Small hole
on the case
Ring at the 12 o’clock side
Small protrusion
on the case
Ring’s protruding portion
2. HOW TO REMOVE / ATTACH THE RING AT THE 6 O’CLOCK SIDE
●How to remove
Turn the ring in the direction of the arrow to set
its protruding portion to the small hole on the
case, and then, remove the ring.
●How to attach
Set the protruding portion of the ring to the small
hole on the case, and turn the ring in the opposite
direction to the arrow until the ring’s protruding
portion aligns with the small protrusion of the
case. The ring will fix into place with a click.
Ring at the 6 o’clock side
Ring’s protruding portion
Small hole on the case Small protrusion on the case
3. HOW TO REMOVE / ATTACH THE AIR CHAMBER
[ 6 o’clock side ]
Case
Air pump
Case hole
(Shaded portion)
[ 12 o’clock side ]
Slot
Case
Air release portion
Air chamber
●How to remove
1 While squeezing the air pump at the 6 o’clock
side with a finger, pull the air chamber from the
casebacksidethroughthecasehole(theshaded
portion in the illustration) to remove it from the
case.
2 Turn the air release portion at the 12 o’clock
side 90°counterclockwise to fit it into the slot.
Then, pull it out from the case.
●How to attach
1 Set the air release portion at the 12 o’clock side
to the slot, and turn it 90°to fix it to the case. 2 While squeezing the air pump, put it through
the case hole at the 6 o’clock side (the shaded
portion in the illustration).
* Check that the tip of the air chamber is set securely in position as illustrated below. Otherwise, the ring may come
off while the watch is being worn on the wrist.
Air pump
[Setting position of the tip of the air chamber at the 6 o’clock side]
Tip of the air chamber
(99-1) Printed in Japan
TOKYO, JAPAN Printed on recycled paper