- 3 - 03/2023
2023, .
• Thank you for purchasing aSENCOR brand product and we hope that
you will be happy with it.
• Prior to using this appliance, please read the user'smanual
thoroughly, even in cases, when one has already familiarised
themselves with previous use of similar types of appliances. Only use
the appliance in the manner described in this user’smanual. Keep
this user'smanual in asafe place where it can be easily retrieved for
future use.
• We recommend saving the original cardboard box, packaging
material, purchase receipt and responsibility statement of the vendor
or warranty card for at least the duration of the legal liability for
unsatisfactory performance or quality. In the event of transportation,
we recommend that you pack the appliance in the original box from
the manufacturer.
. . . . . . . . . . . . . . . . . . . . . . . . . . . . . . . . . . . . . . . . . . . . . . . . . . . . . . . . . . . . . . . . . . . .
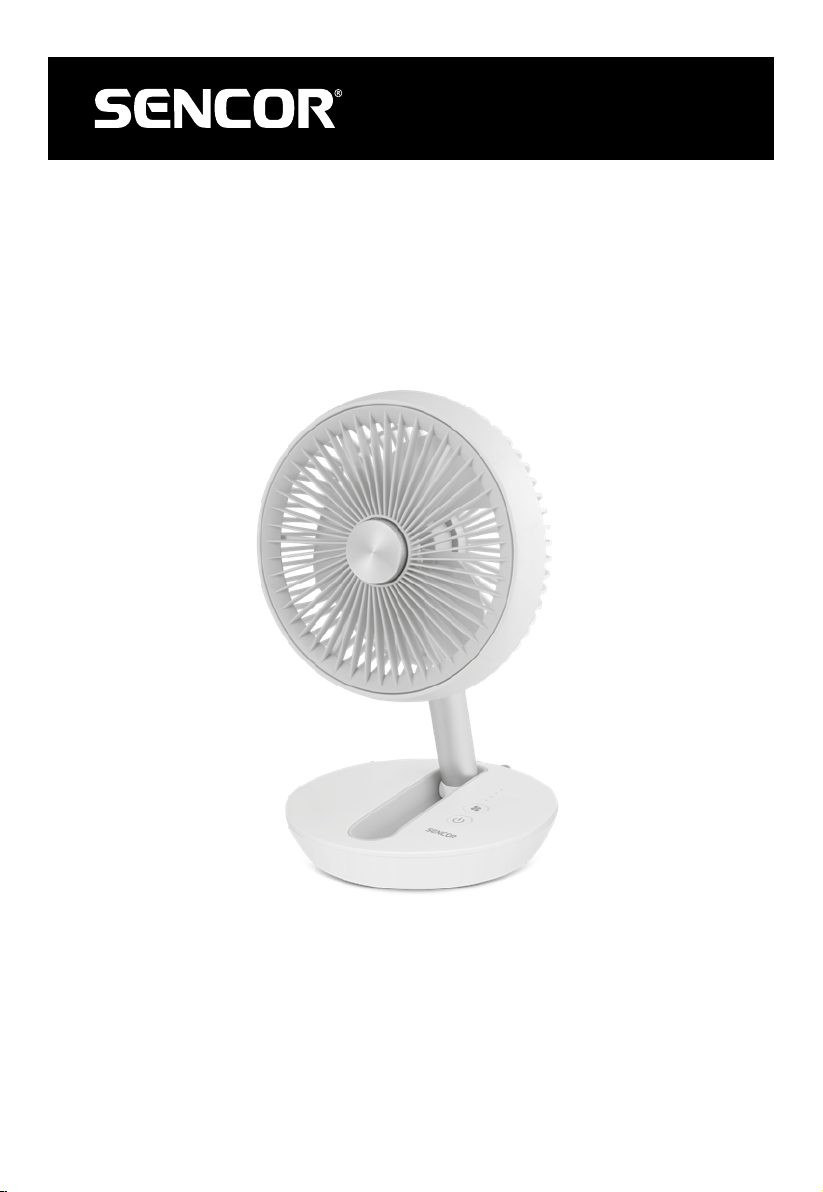
DESCRIPTION OF THE FAN
A1 Front cover
A2 Front protective grille
A3 Fan blades
A4 Front protective grille rotation
control
A5 Base unit
A6 Stand storage compartment
A7 Control panel
A8 Rear protective grille
A9 Fan head joint
A10 Stand
A11 Fan stand joint
A12 Handle
A13 USB-C cable connection
socket
A14 USB-C cable
. . . . . . . . . . . . . . . . . . . . . . . . . . . . . . . . . . . . . . . . . . . . . . . . . . . . . . . . . . . . . . . . . . . .
DESCRIPTION OF THE CONTROL PANEL
B1 LED indicators
B2 Button Fan speed setting B3 Button Fan on/off
. . . . . . . . . . . . . . . . . . . . . . . . . . . . . . . . . . . . . . . . . . . . . . . . . . . . . . . . . . . . . . . . . . . .
BEFORE FIRST USE
• Take the fan out of the package and remove all packaging material
and advertising labels from it. Check that the fan is not damaged.
Putting it into the operating position
• The fan is supplied completely assembled, however, it is necessary to
put it into the operating position.
1. Use one hand to grasp the fan by the front grille and use the other
hand to hold down the base unit. Carefully pull the fan out upwards
until the stand straightens out – see figure C1.
2. Use one hand to hold down the base unit and with the other hand
grasp the fan by the front grille and turn the fan head from the
horizontal to the vertical position – see figure C2.
3. Now the fan is in the operating position – see figure C3.
Note:
The fan can also be used when folded down. Thanks to
the fan head joint, it is possible to set the fan in the optimal
position.
Fan location
• Place the fan on ahorizontal, stable, dry and smooth surface. Ensure
that there is sufficient free space around it.
. . . . . . . . . . . . . . . . . . . . . . . . . . . . . . . . . . . . . . . . . . . . . . . . . . . . . . . . . . . . . . . . . . . .
CHARGING
• For charging, always use the supplied USB-C cable and suitable
power adapter (not included).
• Insert the USB-C plug of the power cable into the slot in the rear part
of the fan and insert the USB-Aplug of the power cable into the slot of
apower adapter. Insert the power plug into aproperly grounded power
socket. The fan will automatically start charging.
Note:
The fan can also be charged using standard appliances
equipped with USB-Aports (e.g. computers).
• We recommend using apower adapter with an output voltage of 5 V/2
A. Avoltage greater than 5 Vcould damage the fan.
• The LED indicators will gradually light up during the charging process.
As soon as the fan is fully charged, all the LED indicators will be lit.
• The charging time is generally 4 hours (power adapter 5 V/2 A, with
the fan turned off). Afull charge provides an operating time of up to 4
hours (high speed), and up to 15 hours (lowest speed).
Important: It is possible to charge the fan while it is running, however we
recommend charging the fan when it is turned off.
• In the event that the charge level of the fan is too low, the lit LED
indicators will flash 5 times for afew moments (depending on the set
speed) and then the fan will turn off. If despite this you press the
button, all the LED indicators will flash five times quickly together but
the fan will not turn on. It is necessary to charge it first.
Checking the battery charge level
• When the fan is turned off, long press the button to check its
battery charge level. The number of lit LED indicators shows the
battery charge level.
Battery charge level LED
indicator 1
LED
indicator 2
LED
indicator 3
LED
indicator 4
<25 % Lit Off Off Off
25 to 49 % Lit Lit Off Off
50 to 74 % Lit Lit Lit Off
75 to 100 % Lit Lit Lit Lit
Note:
The fan is equipped with apower saving function, and
therefore, the LED indicators will turn off after 60 seconds
from the time that any button is pressed. Pressing any
button will turn the buttons on again.
. . . . . . . . . . . . . . . . . . . . . . . . . . . . . . . . . . . . . . . . . . . . . . . . . . . . . . . . . . . . . . . . . . . .
USING THE FAN
Turning on/off
1. Press button , to turn on the fan. It will start at the lowest speed.
2. Press button again, to turn off the fan.
3. If the fan is connected to apower source, it is necessary to
disconnect it from the power source in order turn it off completely.
Speed setting
• Repeatedly press button and select the fan speed from the lowest
(one LED indicator is lit) to the highest (all the LED indicators are lit).
Each time the button is pressed, the corresponding number of LED
indicators will be lit.
Setting front protective grille rotation
• The control knob in the middle of the protective grille serves to set
the rotation of the front protective grille. Turning it anticlockwise will
release it and the front protective grille will start to turn. As you release
it more, the rotation speed of the front grille speeds up.
• Conversely, turning the control knob clockwise tightens it and the
rotation speed slows down.
• If you need the front grille to stop rotating, turn the control knob
clockwise until you feel resistance and the front grille will stop.
EN Cordless desktop fan
User'smanual