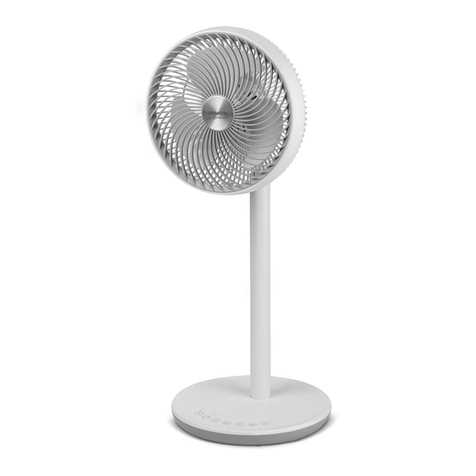
Sencor SFN 4031BK User manual

06/2017
- 1 -Copyright © 2017, Fast ČR, a.s.
EN Pedestal Fan
SFN 4031BK

06/2017
- 2 -Copyright © 2017, Fast ČR, a.s.
EN Pedestal Fan
Important safety instructions
READ CAREFULLY AND STORE FOR FUTURE USE.
■ This appliance may be used by children 8 years of age and older and by
persons with physical or mental impairments or by inexperienced persons,
if they are properly supervised or have been informed about how to use the
product in a safe manner and understand the potential dangers. Cleaning
and user maintenance must not be performed by children unless they are older
than 8 years of age and under supervision. Keep this appliance and the power cord
out of reach of children that are younger than 8 years of age. Children must not
play with the appliance.
■ Before connecting the appliance to apower socket, check that the rated voltage
on its rating label matches the electrical voltage in the power socket.
■ Connect the appliance only to aproperly grounded socket.
■ The appliance is designed for use at home, in oces and similar types of areas. Do
not use it in very dusty or humid rooms such as laundries or bathrooms, in areas
where chemical or explosive substances are stored, in industrial surroundings or
outdoors.
■ Do not place the appliance in the vicinity of an open ame or appliances that are
sources of heat.
■ Do not place the appliance on unstable surfaces such as carpets with very long
and thick bres. Place the appliance on aclean, even, dry and smooth surface.
■ Before turning it on, check that the appliance is correctly assembled according
to the instructions in this user’s manual. Do not start the appliance without
the protective grills properly installed. Only use original parts to assemble the
appliance.
■ Do not cover the appliance with any items while it is running.
■ Avoid coming into contact with the rotating parts of the appliance. Never insert
your ngers or other items through the protective grill when the appliance is
plugged into apower socket. This applies particularly when the appliance is in
operation.
■ Never submerge the appliance or its power cord in water or any other liquid and
do not wash it under running water.
■ Make sure the power cord is placed in such away that nobody can trip over it and
or that it is not touching ahot surface.
■ Always turn o the appliance and disconnect it from the power socket when
leaving it without supervision, when not using it and before assembly, disassembly
or cleaning it.

06/2017
- 3 -Copyright © 2017, Fast ČR, a.s.
■ Disconnect the appliance from the power socket by pulling on the plug, never
pulling on the power cord. Otherwise, this could damage the power cord or the
socket.
■ If the power cord is damaged, it must be replaced by an authorised service centre or
by another similarly qualied person, this will prevent the creation of adangerous
situation. It is forbidden to use the appliance if it has adamaged power cord.
■ Do not use the appliance if it is not working correctly, if it has been damaged or has
been submerged in water. To avoid ahazardous situation arising, do not repair the
device yourself or modify it in any way. Have all repairs performed at an authorised
service centre. By tampering with the appliance, you risk voiding your legal rights
arising from unsatisfactory performance or quality warranty.

06/2017
- 4 -Copyright © 2017, Fast ČR, a.s.
1
2
3
4
5
6
7
8
9
10
11
13
12
16
14
15
A
B

06/2017
- 5 -Copyright © 2017, Fast ČR, a.s.
EN Pedestal Fan
User'smanual
■Prior to using this appliance, please read the user’s manual
thoroughly, even in cases, when one has already familiarised
themselves with previous use of similar types of appliances. Only
use the appliance in the manner described in this user’smanual.
Keep this user’s manual in a safe place where it can be easily
retrieved for future use.
■ We recommend saving the original cardboard box, packaging
material, purchase receipt and responsibility statement of the
vendor or warranty card for at least the duration of the legal
liability for unsatisfactory performance or quality. In the event of
transportation, we recommend that you pack the appliance in the
original box from the manufacturer.
DESCRIPTION OF THE APPLIANCE
A1 Horizontal oscillation toggle switch
A2 Motor unit with adjustable vertical tilt angle
A3 Panel with control buttons
0 – o, 1 – low speed, 2 – medium speed, 3 – high speed
A4 Screw for fastening the control panel to the extensible pole
A5 Inner extensible pole
A6 Inner extension lock
A7 Outer pole
A8 Cross base central connecting piece
A9 Cross base feet
A10 Buttery screw with washer
Serves to fasten the outer pole to the base.
A11 Motor unit shaft
A12 Rear protective grill with fastening clamps and acarry handle
A13 Rear protective grill fastening nut
A14 Fan blades with adiameter of 40 cm
A15 Fan blade fastening nut
A16 Front protective grill
Note:
The accessories include a screw and a nut for joining the
protective grills.
BEFORE FIRST USE
■ Take the appliance and its accessories out of the packaging
materials. Before disposing of the packaging materials, make sure
that no part of the appliance is missing.
ASSEMBLINGANDDISASSEMBLINGTHE APPLIANCE
■ Before assembling or disassembling the appliance, make sure that
it is turned o and disconnected from the power socket.
■ Secure the feet A9 in the cross base central connecting piece A8.
Fit the outer pole A7 from above into the cross base connecting
piece A8 and fasten from underneath using the buttery screw
A10 (see g. B).
■ Use one hand to rmly hold the outer pole A7 and the other hand
to release the inner extension lock A6 by turning the locking
screw anticlockwise. Slide the inner pole A5 out all the way and
secure it rmly by tightening the locking screw clockwise.
■ Use a cross-head screwdriver to loosen screw A4. On to the
inner pole A5, slide the control panel A3 and secure it rmly by
tightening the screw A4.
■ Place the base with the attached control panel A3 on aclean,
even, stable and smooth surface. Place the rear protective grill
A12 against the front side of the motor unit A2 so that the shaft
A11 passes through the centre of the grill A12, so that the tabs
on the front side of the motor unit A2 t into the holes in the
central part of the rear grill A12 and so that the handle is above
the motor unit A2. Screw the nut A13 clockwise to secure the rear
protective grill A12 to the motor unit A2. Before tightening the
nut A13, make sure that the rear grill A12 has not moved and that
the alignment tabs are still in the holes.
■ On to the shaft of the motor unit A11 put on the fan blades A14
so that the shaft A11 properly slides into the centre part of the fan
blades A14. Push the fan blades A14 towards the motor unit A2
all the way. Now, check that the fan blades A14 turn freely, and
secure them in place by screwing nut A15 anticlockwise on to the
shaft A11.
■ Release the clamps along the perimeter of the rear protective
grill A12. Place the front protective grill A16 against the rear
protective grill A12 so that the front grill A16 ts into the
alignment hook in the bottom part of the rear protective grill A12
and so that the screw holes in the top part of the grills are aligned.
Fasten the released clamps along the perimeter of the grills. To
ensure astrong connection of the two grills, into the aligned holes
at the top of the grills it is necessary to screw in the supplied screw
and secure it with the nut.
■ Before putting the fan into operation, check that it is correctly
assembled and that the protective grills are rmly joined.
■ To disassemble, proceed in reverse sequence.
OPERATING THE APPLIANCE
Setting the speed and turning o the fan
■Place the fan on an even, dry and smooth surface within reach of
apower socket. Connect the power cord to apower socket. To set
the air ow speed, use the buttons on the control panel A3. The
functions of the control buttons are described below:
0 – turn o the fan;
1– set alow air ow speed;
2 – set amedium air ow speed;
3– set ahigh air ow speed.
■When you have nished using the fan, always turn it o and
disconnect it from the power socket.
Setting horizontal oscillation
■ The horizontal oscillation of the motor unit A1 can be set using
the toggle switch A2. To start the horizontal oscillation, push the
toggle switch A1 down. The motor unit A2 will oscillate from side
to side at an angle of approximately 90°.
■ To turn o the oscillation, pull the toggle switch A1 up. This will
turn o the oscillation.
Setting the vertical tilt angle of the motor unit
■ Before setting the vertical tilt angle of the motor unit A2, rst turn
o the fan. Set the desired angle of the motor unit A2 and then
you may start the fan again.
Note:
The motor unit A2 may only be tilted up and down in
alimited range. Do not set the tilt angle of the motor unit
A2 by force.
Setting the height of the fan
■The height of the fan may be set in the range from 102 to 120 cm.
■ Turn o the fan before setting its height. Use one hand to rmly
hold the outer pole A7 and the other hand to release the inner
extension lock A6 by turning the locking screw anticlockwise.
Slide the inner extensible pole A5 in or out to set the desired fan
height. To lock the set height in place, tighten the locking screw
clockwise.
06/2017
- 6 -Copyright © 2017, Fast ČR, a.s.
CLEANING AND MAINTENANCE
■ Before cleaning it, make sure that the appliance is turned o and
disconnected from the power socket.
■ Regularly remove dust from the appliance. For normal cleaning,
a clean, dry cloth is sucient. In the event that it is dirtier,
disassemble the appliance and then wipe the individual parts
with a wiping cloth slightly dampened in a solution of warm
water and neutral detergent. Then wipe everything so that it is
thoroughly dry. Make sure that no water enters the motor unit A2
or into the control panel A3 while cleaning.
■ Do not submerge the appliance or its power cord in water and do
not wash it under running water.
■ For cleaning do not use steel wool, cleaning products with an
abrasive eect, petrol and other solvents.
STORAGE
■ If you will not be using the fan for an extended period of time,
store it in aclean, dry place or disassemble it and put it back into
the box.
TECHNICAL SPECIFICATIONS
Rated voltage range............................................................................220−240 V
Rated frequency ............................................................................................. 50 Hz
Rated power ......................................................................................................40 W
Electrical shock protection class........................................................................II
Noise level ...................................................................................................54 dB(A)
Maximum fan ow rate............................................................... 59.32 m
3
/min
Service value ............................................................................ 1.78 (m
3
/min)/W
Maximum air velocity ............................................................................. 2.80 m/s
Measurement standard
for service value .........................................IEC 60879:1986, EN 50564:2011,
EN 60704-2-7:1998, EN 60704-1:2010
Contact details for obtaining
more information............................. FAST ČR, a. s., Černokostelecká 1621,
251 01 Říčany, Czech Republic
The declared noise emission level of the appliance is 54 dB(A), which
represents alevel Aof acoustic power with respect to a reference
acoustic power of 1 pW.
Explanation of technical terminology
Safety class for electrical shock protection:
Class II – electrical shock protection is provided by double or heavy-
duty insulation.
We reserve the right to change text and technical specications.
INSTRUCTIONS AND INFORMATION REGARDING
THE DISPOSAL OF USED PACKAGING MATERIALS
Dispose of used packaging material at asite designated for waste in
your municipality.
DISPOSAL OF USED ELECTRICAL AND ELECTRONIC
EQUIPMENT
This symbol on products or original documents means
that used electric or electronic products must not be
added to ordinary municipal waste. For proper disposal,
renewal and recycling hand over these appliances to
determined collection points. Alternatively, in some
European Union states or other European countries you
may return your appliances to the local retailer when
buying an equivalent new appliance.
Correct disposal of this product helps save valuable natural resources
and prevents potential negative eects on the environment and
human health, which could result from improper waste disposal. Ask
your local authorities or collection facility for more details.
In accordance with national regulations penalties may be imposed
for the incorrect disposal of this type of waste.
For business entities in European Union states
If you want to dispose of electric or electronic appliances, ask your
retailer or supplier for the necessary information.
Disposal in other countries outside the European Union.
This symbol is valid in the European Union. If you wish to dispose
of this product, request the necessary information about the correct
disposal method from the local council or from your retailer.
This product meets all the basic requirements of EU
directives related to it.
Other Sencor Fan manuals

Sencor
Sencor SFN 4040 User manual

Sencor
Sencor SFE 0773WH Repair manual

Sencor
Sencor SFT 3112WH Repair manual

Sencor
Sencor SFN 4040SL User manual

Sencor
Sencor SFT 3113BK Installation and operating instructions

Sencor
Sencor SFG 4055WH User manual

Sencor
Sencor SFE 2311BK User manual

Sencor
Sencor ULTRASILENT SFE 2340WH Repair manual

Sencor
Sencor SFE 3011BK User manual

Sencor
Sencor SFH 8994WH Repair manual
Popular Fan manuals by other brands

Hunter
Hunter Port Haven 50823 installation manual

Airius
Airius R20/EC Duckbill PRODUCT INFORMATION & INSTALLATION GUIDE

Broan
Broan SPK110 SPEAKER FAN instruction sheet

Kampmann
Kampmann SAL Assembly instructions

El Corte Inglés
El Corte Inglés COSTA RICA VP-40NRC quick start guide

Exhausto
Exhausto BESB Series manual