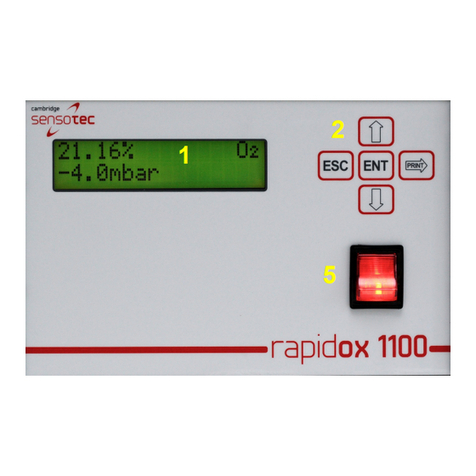
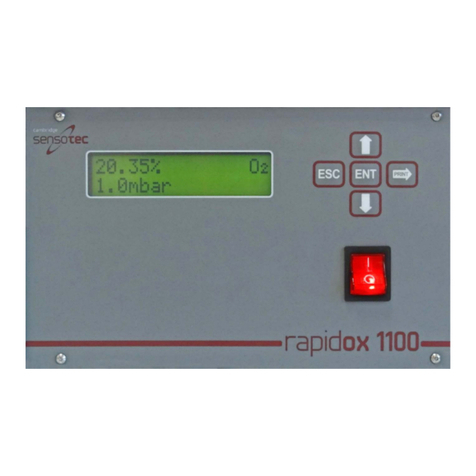
Sensotec Rapidox 1100L User manual

Rapidox 1100L Oxygen Analyser
Instruction Manual
Revision 1.6
Cambridge Sensotec Limited
Unit 29 Stephenson Road
St Ives
CAMBS
PE27 3WJ
Tel. +44 (0)1480 462142
Fax +44 (0)1480 466032
Mobile (07866) 624236

Cambridge Sensotec Rapidox 1100L Oxygen Analyser Instruction Manual
Declaration of Conformity
Manufacturer: Cambridge Sensotec Limited
Unit 29 Stephenson Road
St Ives
CAMBS
PE27 3WJ
Product Names: Rapidox portable oxygen gas analyser
Model Numbers: RX1100L
Conform to the following specifications:
EMC: EN 61326:1998 Electrical equipment for measurement,
control and laboratory use
Declaration: I declare that the above products conform to the applicable
requirements of the LVD Directive 73/23/EEC and the EMC Directive 89/336/EEC
and is CE marked accordingly.
Signature:
Name: Dr. Mark Swetnam
Title: Managing Director
Company: Cambridge Sensotec Limited
Date: 1st August 2010
WEEE Regulations 2006
Cambridge Sensotec takes its responsibilities under the WEEE
Regulations extremely seriously and has taken steps to be compliant in
line with our corporate and social responsibilities. In the UK,
Cambridge Sensotec has joined a registered compliance scheme
“WeeeCare” (WeeeCare registration number WEE/MP3538PZ/SCH).
UK users only: If you have purchased any electronic or electrical product from
Cambridge Sensotec since 2007 and would like to dispose of it correctly under the
WEEE scheme, please contact us and we will be happy to either arrange the
collection of the waste or have it returned to our offices for recycling. All our in-
house manufactured products are scheme compliant and carry the WEEE label
indicating that it is NOT allowed to be disposed of in a landfill site.

Cambridge Sensotec Rapidox 1100L Oxygen Analyser Instruction Manual
Contents
1. Introduction ........................................................................................................ 1
2. Features ............................................................................................................... 1
3. Specification........................................................................................................ 2
3.1 Rapidox Dimensions & Power Requirements ............................................. 2
3.2 Accuracy and Resolution............................................................................. 2
3.3 Display ......................................................................................................... 2
3.4 Calibration ................................................................................................... 2
3.5 Operating Temperature & Pressure ............................................................. 2
3.6 Outputs ........................................................................................................ 3
4. Technical Specification ...................................................................................... 3
5. Precautions.......................................................................................................... 3
6. Warning............................................................................................................... 4
7. Rapidox Operating Instructions ......................................................................... 4
7.1 The Rapidox Analyser - Menu System........................................................ 5
7.2 Getting Started ............................................................................................. 5
7.3 Pump Control............................................................................................... 6
7.4 Menu Access / Passwords............................................................................ 6
7.5 Rapidox Calibration..................................................................................... 7
7.6 Alarms.......................................................................................................... 8
7.7 Analogue Outputs...................................................................................... 10
7.8 Setting the Display Units........................................................................... 12
7.9 Setting the Display Options....................................................................... 12
Internal Pressure Sensor ............................................................................... 12
7.10........................................................................................................................ 12
7.11 Pressure Mode............................................................................................ 13
7.12 Setting the Baud Rate ................................................................................ 13
7.13 RS232 / RS485 Port.................................................................................... 13
7.13.1 RS232 Protocol ................................................................................... 13
7.13.2 RS485 protocol ................................................................................... 15
7.14 Setting the Date & Time............................................................................. 16
7.15 Replacing the Oxygen Sensor.................................................................... 16
7.16 Printing....................................................................................................... 17
7.17 Load Defaults ............................................................................................. 17
8. Rapidox Software Instructions ......................................................................... 18
8.1 Software Installation.................................................................................. 18
8.2 Getting Started ........................................................................................... 18
8.3 On-Screen Help.......................................................................................... 19
8.4 Configuration Page..................................................................................... 19
8.5 Reconfiguring the Analyser....................................................................... 20
8.5.1 Config 1 Screen................................................................................... 21
8.5.2 Config 2 Screen................................................................................... 22
8.5.3 Alarm Config Screen .......................................................................... 23
8.6 On-Screen LCD .......................................................................................... 24
Remote Calibrating ........................................................................................ 25
8.7.......................................................................................................................... 25

Cambridge Sensotec Rapidox 1100L Oxygen Analyser Instruction Manual
8.8 Calibration Error Messages........................................................................ 26
8.9 Replacing the sensor.................................................................................. 27
8.10 Software Utilities ....................................................................................... 28
8.10.1 Setting Analyser Date and Time ........................................................ 28
8.10.2 Check for Updates .............................................................................. 29
8.10.3 Image Grabber..................................................................................... 29
9. Rapidox Data-Logging Software........................................................................ 29
9.1 Introduction ............................................................................................... 29
9.2 Setting up the Data Logger ........................................................................ 29
9.3 Running the Data Logger ........................................................................... 31
9.4 Auto Date Stamped Files ........................................................................... 31
9.5 Live-time Graphing Screen........................................................................ 32
9.6 Main Graph Window ................................................................................. 33
9.7 Plot Colours................................................................................................ 33
9.8 Graph Titles and Labels............................................................................. 33
9.9 Plot Co-ordinates ....................................................................................... 33
9.10 Last data point ........................................................................................... 34
9.11 Using the Cursor ........................................................................................ 34
9.12 Zooming ..................................................................................................... 34
9.13 Y-Axis Graph Units.................................................................................... 34
9.14 Oxygen Scale.............................................................................................. 34
9.15 Second Y Axis............................................................................................ 35
9.16 Loading an Old Run................................................................................... 35
9.17 Printing Graphs.......................................................................................... 35
9.18 Data Logging in the Background ............................................................... 35
9.19 Pausing the Data Logging .......................................................................... 35
9.20 Changing the Data Logging Parameters Mid-run ...................................... 36
9.21 Working with Spreadsheets....................................................................... 36
9.22 Disaster Recovery....................................................................................... 36
9.23 Diagnostics................................................................................................. 37
10. Troubleshooting ............................................................................................ 38
11. Warranty ........................................................................................................ 39
11.1 Conditions of Warranty: ............................................................................ 40

Cambridge Sensotec Rapidox 1100L Oxygen Analyser Instruction Manual
1. Introduction
The Rapidox 1100L oxygen analyser allows accurate oxygen analysis over the
range 0.1ppm to 1% O2using a special German-engineered ppm electrochemical
oxygen cell. This special low range analyser is designed for applications where a
traditional zirconia sensor is not suitable. This includes applications where the
measurement gas contains VOCs, solvents, fuels, helium or hydrogen.
The analyser provides continuous on-line oxygen analysis, with a typical response
time less than three minutes for a response from 1% down to 1000ppm. Below
10ppm response times are considerably longer due to the way electrochemical
sensors work.
The analyser is fitted with a special cell holder which allows the reading to
stabilise as quickly as possible, and is fully temperature and pressure
compensated for enhanced accuracy. The cell is very sensitive to exposure to high
concentrations of oxygen, including air, and to prevent damage the unit is fitted
with a solenoid valve to keep the cell in the measurement gas at all times; even
when switched off.
The analyser contains a powerful diaphragm pump that draws a gas sample at a
flow rate set by the user, of between zero and approximately 1.2 litres per minute.
An on-board pressure sensor compensates for any pressure changes in the sample
gas. Alternatively the pump can be independently switched off and operated
under flowing gas conditions.
The analyser includes two fully programmable alarm circuits (volt-free contacts),
programmable analogue outputs (0-10V and 4-20mA), easy calibration (using 2
user-selectable gases), RS232/RS485 communications and a full set of
communications / data-logging software.
2. Features
9Continuous gas sampling via powerful internally located pump, which can be
independently switched off for the unit to be operated without the pump.
9Accurate oxygen analysis in hydrogen, helium and gases containing solvents.
9Measurement range available 0.1ppm to 10,000ppm (1%) oxygen.
9Accuracy better than ± 2% of reading or ±0.5ppm, whichever is greater.
9Easy to calibrate by the user using any two gases.
90-10V and 4-20mA current loop outputs (user programmable).
9RS232 / RS485 data-output.
9Windows data logging software with MS-Excel compatible data file output.
Version 1.6 1 Last printed 16/11/2011 16:59:00

Cambridge Sensotec Rapidox 1100L Oxygen Analyser Instruction Manual
9Programmable alarms with outputs (volt-free contacts) and audible and visual
warnings.
9Works on any worldwide mains voltage 90-260 Vac.
9Printer and transport Peli-case options.
3. Specification
3.1 Rapidox Dimensions & Power Requirements
Case dimensions: W=250mm; D=263mm; H=150mm. Weight=4kg. Metal
carrying handle supplied as an option. Runs on any Worldwide voltage 90-
260VAC 50/60Hz. Power consumption is 12W maximum.
3.2 Accuracy and Resolution
Sensor response time is typically 180 seconds from 10,000 ppm down to 1000ppm
and 5 hours from 10ppm to 1ppm. High accuracy is maintained between
calibration points. Accuracy is ±2% of the reading or ±0.5ppm, whichever is
greater. Maximum resolution is 0.1ppm.
3.3 Display
The analyser has a 2-line 16x2, 9mm character, back-lit liquid crystal display
(LCD) , whose data update rate is user-programmable. The LCD displays up to
four significant figures of oxygen (O2), with a maximum resolution of 0.1ppm.
The display notation (auto-percent or ppm) is user selectable.
3.4 Calibration
The simple and fully flexible calibration procedure requires two calibration gases.
The calibration gas compositions are user-selectable and programmed into the
Rapidox via the keypad menu or the RS232 link and configuration software.
Factory pre-sets can be reloaded to allow the unit to be 'rescued' from a failed
calibration. The Rapidox is calibrated using the keypad on the front panel or
directly with the software provided. The LCD changes to calibrate mode to inform
the user of progress.
3.5 Operating Temperature & Pressure
Gas inlet temperature must not exceed 50oC. The Rapidox unit’s normal operating
temperature is 5-35oC. Normal operating pressure is 600 to 1750mbar absolute.
Version 1.6 2 Last printed 16/11/2011 16:59:00

Cambridge Sensotec Rapidox 1100L Oxygen Analyser Instruction Manual
3.6 Outputs
The RS232 serial port (RS485 is available on request) outputs on demand values
for oxygen (ppm), the internal temperature and pressure sensor data (temperature
in °C, pressure in bar), time (hh:mm:ss) and date (dd/mm/yy). This data can be
downloaded and logged using the software provided.
Standard 0-10V and 4-20mA analogue outputs are available on the rear panel for
both O2and either temperature or pressure (user-selectable), as are two voltage-
free reed relay alarm signals. These outputs are fully user-programmable either
via the front panel keypad or the supplied configuration software using the RS232
link.
4. Technical Specification
Property Specification
Supply Voltage 90-260VAC, 50/60Hz
Power consumption 12W (max)
Analyser dimensions 250mm X 263mm X 150mm
Weight 4 kg
16 ×2 character (9mm) back-lit LCD
Display
Warm up time 5 minutes at 20°C
Normal operating temperature 5-35°C
Operating pressure range 600 to 1750mbar absolute
Sensor range 0-10,000ppm (0-1%)
±2% of the reading or ±0.5ppm, whichever
is greater
Sensor accuracy
0-10V (user-programmable) into minimum
5kΩ
Outputs: O2& temperature or pressure
4-20mA current loop (user-programmable)
into maximum 500Ω
O
2& temperature or pressure
Programmable alarms Relay circuits – fully user-programmable
RS232 (or RS485) - data streamed on
demand
All data and parameters
Mains type diaphragm vacuum pump
(variable flow) with on/off switch on rear
panel.
Sample Pump
Typically 0-1.2 L.min-1 in 10 stepsFlow Rate
Max. gas temperature at input 50°C
Requires 1 or preferably 2 user-selectable
gas compositions
Calibration
Table 1: Technical specification
5. Precautions
Make sure you read and understand these instructions and keep them safe for later
Version 1.6 3 Last printed 16/11/2011 16:59:00

Cambridge Sensotec Rapidox 1100L Oxygen Analyser Instruction Manual
use. The unit should not be exposed to extreme temperatures < -5°C or > 60°C.
Normal operating temperature is 5-35°C. Avoid direct sunlight. Do not use liquid
cleaners, aerosols or solvents to clean the case. Use a damp cloth for cleaning. Do
not use this equipment near water. Avoid touching the LCD display as this may
cause permanent damage. Make sure the rear ventilation slots and the fan on the
rear panel are free of obstruction.
There are no user-serviceable parts in this unit. Do not attempt to repair yourself.
Refer all servicing to qualified Cambridge Sensotec personnel.
6. Warn ing
This unit is NOT designed for use in life support situations. No responsibility can
be held for injury or loss of life caused by inappropriate use of this equipment.
7. Rapidox Operating Instructions
12
3 4 5
Figure 1: Rapidox 1100L front panel. Numbers are referred to in the text.
Version 1.6 4 Last printed 16/11/2011 16:59:00

Cambridge Sensotec Rapidox 1100L Oxygen Analyser Instruction Manual
7
6
8 9 10
Figure 2: Rapidox 1100L rear panel. Numbers are referred to in the text.
7.1 The Rapidox Analyser - Menu System
All of the user-programmable functions are accessed via a menu system which is
controlled using the front panel Keypad (2). To access the menu press the ENT
button and to escape and return to the operating screen press ESC at any time.
The menu system flow chart is shown in Appendix 1 at the back of the manual.
7.2 Getting Started
Ensure that the Rapidox analyser is located away from extreme heat and dirt
environments. Plug the unit in to a suitable supply (noting the information on the
serial sticker and using the power cable supplied) using the rear power socket (8).
Make sure that the cooling fan (9) is not obstructed during operation.
Turn the unit on using the red power switch on the front (5). The LCD (1) will
display the serial number and firmware version for a few seconds before
measurements begin. The sensor will take approximately five minutes to stabilise.
The LCD display will show the oxygen reading and either the temperature,
pressure or date and time (user-selectable). The symbol AL1 or AL2 may appear
to the bottom right of the LCD if the alarm system is enabled and an alarm
condition applies.
Push the gas sample tube (6mm OD/4mm ID) into the GAS IN (3) quick release
connector. Repeat for the GAS OUT (4) connector should an outlet tube be
required. The pump will draw gas at a flow rate depending on the value set either
in the software or from the menu. The default setting is OFF.
Version 1.6 5 Last printed 16/11/2011 16:59:00

Cambridge Sensotec Rapidox 1100L Oxygen Analyser Instruction Manual
Allow five minutes for the Rapidox to stabilise fully. If the sensor has been
exposed to air or the gas composition is greater than 3% oxygen then the message
“O/Range” will appear on the display. Below 3% oxygen but above 1% the display
will read the maximum value of 10500ppm (or 1.05%) but will flash until the gas
mix goes below 10500ppm, when normal readings will begin. Flush the analyser
with your measurement gas and wait a few moments for the readings to come on
scale.
7.3 Pump Control
The flow rate of gas drawn into the analyser can be controlled using the menu
option 2 “Set Pump Flow”. The unit is supplied with the flow rate set to OFF. If
you wish to change the flow rate press ENT and select menu option 2. Use the UP
& DOWN arrows to change the value from OFF to 100% in 10% increments. 100%
equates to approximately 1.5 litres per minute. Once you have selected the
desired flow rate, press ENT to confirm your selection. If you do not press ENT,
the pump will revert to the previous rate when the unit exits the menu system.
Alternatively the pump can be switched on or off using the switch (10) on the rear
panel. Please make sure that this is switched on and the pump is running. When
using the unit with a pressurised (flowing) gas source the pump can be left
switched off.
7.4 Menu Access / Passwords
The analyser has an option to set a password that will restrict access to the menus.
The password menu is disabled by default in the factory. If you wish to password
protect the analyser press ENT and scroll down to the PASSWORD option (menu
option 12). Pressing ENT again will ask you for the default password which is
“0000”. Enter this using the UP and DOWN arrows. Once the password has been
entered successfully you can choose between ENABLE and DISABLE in the menu
using the UP and DOWN keys.
The other option is to CHANGE the password to a new value. The password must
be 4 digits long and can be any combination of numbers from 0000-9999. Make
sure that the new password is noted down!
If the password function has been enabled then in the future each time the menu
system is accessed, the password prompt will display. After the correct password
is entered then the full menu will be accessible. You can make as many changes
as you want to the menu options and only press ESC once you have finished.
Pressing ESC takes you out of the password protected area and you will have to re-
enter the password to go back in again.
If the password has been forgotten please contact Cambridge Sensotec who will
advise you on how to recover it.
Version 1.6 6 Last printed 16/11/2011 16:59:00

Cambridge Sensotec Rapidox 1100L Oxygen Analyser Instruction Manual
7.5 Rapidox Calibration
Once the unit is at temperature it may be necessary to calibrate the sensor. Full
calibration is a simple procedure requiring only one or two gases. The two gas
values are user-selectable and can be changed via the front keypad (2) or the
communications software described in section 8, and the calibration values can be
stored on file for later use. It is suggested that one cal gas is set between 1000 and
10,000ppm and the other cal gas is set between 10 and 1000ppm. Below 10ppm
the sensor takes many hours to stabilise so calibration could become very slow.
Factory calibration is done at 10,000ppm and 100ppm.
The procedure is as follows:
1) Bearing in mind the points made above, decide which two gases you are
going to use for calibration. If you are constantly working at a particular
range of compositions then it would be wise to obtain small cylinders of
calibration gas with analysis certificates. Cambridge Sensotec can supply
these. Press the ENT button on the front panel keypad (2) to access the
menu system. Using the UP and DOWN arrow buttons scroll to menu
option 1 “Calibrate” and press ENT again to enter the calibration menu.
Use the UP and DOWN arrows to select “O2High” or “O2Low” and press
ENT to proceed. The top line of the display shows the current calibration
gas stored and the bottom line of the display shows the prompts. If the gas
value is not what you require you can edit the value (in ppm scientific
notation) using the up and down and right arrows on the keypad. The
cursor flashes underneath the digit to edit. For example 1000ppm should
be entered as 1.000E+03ppm. Note that you can not go backwards to edit a
digit to the left of the cursor. Instead keep pressing the RIGHT button and
the cursor will wrap around back to the beginning. Alternatively press ESC
to start again. Press ENT when you are ready to proceed.
2) The sensor needs to be exposed to the first calibration gas from a cylinder
of known composition. For accurate calibration it is important to allow
sufficient time to pass to flush the sensor properly. Wait for the top line of
the display (1) to become stable. The time this takes depends on the
oxygen concentration of the gas: for 1% oxygen about 5 minutes should
suffice, but for 100ppm it may be necessary to wait for about 30 minutes.
To complete the calibration press and hold the ENT button for two seconds.
During this time you will see a bar graph progress across the lower display.
The analyser will then recalibrate and display “O2Calibrated” and then
return to normal run mode. The display will now correctly read the value
of the first calibration gas. Note that if the ENT button is released before
two seconds have elapsed, the recalibration will be aborted and when the
analyser eventually returns to run mode it will use the existing calibration.
3) Note that the analyser should ideally be calibrated at normal ambient
pressure and at the temperature at which it will be used. If the pressure
correction mode is set to AUTO then it is still possible to perform an
accurate calibration at pressures other than ambient. If the gas temperature
Version 1.6 7 Last printed 16/11/2011 16:59:00

Cambridge Sensotec Rapidox 1100L Oxygen Analyser Instruction Manual
is significantly different from the ambient temperature, allow the gas to
flow for sufficient time for the sensor temperature to stabilise fully before
calibrating.
4) The analyser predicts the correct signal from the sensor during calibration
and if this is outside the range of expected values then the display will flash
and display “G?” to warn you that either the cal gas flowing over the sensor
is different to the value you have programmed OR the sensor may be old
and approaching the end of its life. Check before proceeding!
5) To calibrate using the second calibration gas, repeat the procedure from 2
but this time press ENT followed by the UP or DOWN button to scroll
through to the “O2Low” screen. Flush the sensor chamber with the second
calibration gas allowing several minutes for the new gas to flush through.
Wait for the display to become stable before pressing the ENT button for
two seconds. The analyser will then recalibrate and display “O2Calibrated”
and then return to normal run mode. The display will now correctly read
the value of the calibration gas.
6) The analyser is now correctly calibrated and will read accurately between
these two calibration points. Note that this procedure can also be
performed remotely using the software described in section 8.
7) If at any time, you encounter difficulties and wish to restore the machine to
its factory set calibration, use the configuration software provided and load
the original factory settings (described in section 7.17 below). Each
machine is provided with a unique file that contains the factory settings.
This is located on the CD-ROM provided and is copied onto your PC during
the installation process.
8) Note that the two calibration points are independent of each other so you
can calibrate the analyser in any order you desire. However please note
that ‘O2High’ must always be greater than ‘O2Low’. Typically the factory
settings are ‘O2High’ = 10000ppm and ‘O2Low’ = 100ppm.
NB You must always perform a FULL calibration to achieve good accuracy.
7.6 Alarms
The Rapidox is fitted with two independent and fully programmable alarm relay
outputs, which can be programmed to be either normally open (N/O) (closes on
alarm) or normally closed (N/C) (opens on alarm). You have the option of
assigning each alarm to the oxygen, pressure (internal) or temperature sensors, as
well as enabling the alarm relay circuits, enabling an audible buzzer and enabling
a visual warning on the screen.
The alarms can be programmed by the user via the keypad (2) on the front panel
or using the software provided (see section 8.5.3). To change the alarm settings
Version 1.6 8 Last printed 16/11/2011 16:59:00

Cambridge Sensotec Rapidox 1100L Oxygen Analyser Instruction Manual
scroll down the menu to option 3 “Set Alarms” and press ENT. Now use the UP &
DOWN arrows to select “Alarm 1” or “Alarm 2” and press ENT. The next screen
shows the message “Assign To:” followed by the currently assigned parameter.
Use the UP and DOWN arrows to select O2, temperature (of the gas) or pressure
depending on which measurement you want the alarm to work with, and press
ENT to proceed. The default is O2.
The next settings configure the behaviour of the alarm. Use the UP & DOWN
arrows to select ON or OFF for the following parameters:
1. OUTPUTS: This enables the rear panel relay outputs when ON is selected
2. AUDIBLE: This enables or disables the audible buzzer inside the unit
which will sound in an alarm condition
3. VISIBLE: This enables or disables warning messages on the LCD screen on
the front of the Rapidox. During an alarm condition either “AL1” or “AL2”
(or a combination of both) will flash at the bottom right hand corner of the
display.
4. POLARITY: This determines whether you are setting a rising or falling
alarm. Use the arrows to change the direction of the alarm to up or down.
A rising alarm means that the alarm will be silent at values below the set-
point but as soon as the value rises above the set-point the alarm will be
triggered
5. SETPOINT: The current alarm set-point is displayed in scientific notation
with a flashing cursor under the first digit. Use the UP & DOWN arrows to
change the digit and the RIGHT arrow to progress until the correct value is
displayed. When done, press ENT to proceed to the next setting.
6. CONTACTS: The relay outputs can be set to either normally open (N/O) or
normally closed (N/C). The factory default is N/O, meaning the contacts
will close when an alarm condition occurs. Press ENT to save all the above
settings for the selected alarm.
Alarm 2 can be set in exactly the same way as described above and both alarm
circuits are completely independent of each other. Note that you must programme
all the parameters for each alarm for the settings to be saved. The bottom line of
the LCD will display “Alarm x set” (where ‘x’ is the selected alarm channel) to
confirm that the settings have been saved.
The alarm circuit relays are accessed via the terminal block on the rear panel and
are clearly labelled. Alarm 1 is assigned to the terminals labelled “Alarm High”
and Alarm 2 is assigned to the terminals labelled “Alarm Low”. The relay circuit
is rated at 24V 0.5amps maximum.
The alarm limits for oxygen are set to a minimum of -100ppm and a maximum of
30,000ppm. Under certain conditions (e.g. the sensor becomes disconnected) the
Rapidox will set the alarm channel to OFF to prevent false alarms, and the relay
contacts for the affected channel will go to the programmed N/O or N/C setting.
For more information please refer to Table 2 in section 7.7 below.
Version 1.6 9 Last printed 16/11/2011 16:59:00

Cambridge Sensotec Rapidox 1100L Oxygen Analyser Instruction Manual
7.7 Analogue Outputs
The standard industrial analogue outputs (0-10V and 4-20mA) for both oxygen
and pressure are accessible via the terminal block (6) on the rear panel. Note that
the ranges of the 0-10V and 4-20mA are tied together so changing one alters the
other. In the case of oxygen, the outputs are factory set to provide a linear
response in the range 0-10,000ppm that will cover most applications. However
the lower and upper values are fully user-programmable using the keypad (2) or
the software provided (section 8). A more details description is given below:
The linear oxygen output mode setting produces an output that is scaled linearly
between 0 and 10V (or 4 and 20mA). So, for example, if the scale is set 0V =
0ppm (0%) O2and 10V = 10,000ppm (1%) O2then 5V would indicate an oxygen
reading of 5000ppm (0.5%) O2. The scaling of this example is shown in the
following plot, from which other intermediate values can also be read.
"Lin(ppm)"
Linear output mode
0
1.25
2.5
3.75
5
6.25
7.5
8.75
10
0 0.1 0.2 0.3 0.4 0.5 0.6 0.7 0.8 0.9 1
O
2
(%)
O
2
Volts output
4
6
8
10
12
14
16
18
20
O
2
mA output
Figure 3: Graph showing the linear output mode option for oxygen
The following general formulae can be used to calculate the oxygen from the
voltage or current outputs when set to the linear output mode:
Output type Formula for calculating oxygen from analogue output signal
0-10V O2= Vout / 10 * (O2H - O2L) + O2L
4-20mA O2= (mAout – 4) / 16 * (O2H - O2L) + O2L
Where: O2L = user setting of oxygen for 0V or 4mA output 1
O2H = user setting of oxygen for 10V or 20mA output 1
Vout = the measured voltage output in volts
mAout = the measured current output in mA
1O2, O2L and O2H must all be in the same units.
Version 1.6 10 Last printed 16/11/2011 16:59:00

Cambridge Sensotec Rapidox 1100L Oxygen Analyser Instruction Manual
To modify the oxygen analogue output range scroll down the menu to no.3 “Set
Outputs” and press ENT. Edit the lower and upper values in exactly the same
manner as described in 7.5 for setting the cal gas values. Once programmed the
new values remain in the memory until they are edited again in the future.
To select and modify the auxiliary outputs (pressure) scroll down to menu option
3 “Set Outputs” and pres ENT four times. Use the up and down arrow buttons to
program the pressure scale and press ENT. The permissible range is -2000mbar to
+2000mbar.
During initial warm up of the Rapidox when the display reads the serial number
the output sent to the rear terminal for oxygen will stay at 2mA (1V) which is the
standby signal. If at any stage a sensor becomes disconnected internally, or the
signal exceeds the measurable range for that sensor, then the display will indicate
there is a fault and the outputs will change to 1mA (0.5V) which is the sensor fault
signal. This will recover as soon as the sensor is reconnected and the fault
cleared. Additional current and voltage signals are provided by the analyser to
give an indication of various conditions and these are described in Table 1 below,
together with the status of the alarms during the condition:
O2Analogue Outputs Alarms(4)
Current(2)
(4-20mA) Voltage(3)
(0-10V) Description Explanation
There is a sensor fault on the oxygen
sensor, and/or the temperature sensor
has a fault condition, and/or the
pressure mode is set to automatic
(pressure compensation active) and
the pressure sensor has a fault
condition.
1mA 0.5V Fault De-activated
2mA 1V Start up The analyser is still initialising. De-activated
2.5mA 1.25V Sensor under range The sensor reading is under range. Active
3mA 1.5V Sensor over range The sensor reading is over range. Active
The sensor reading is in range but the
temperature sensor reading is out of
range, and/or the pressure mode is set
to automatic (pressure compensation
active) and the pressure sensor is out
of range.
Sensor operating out of
specification
3.5mA 1.75V Active
The O2sensor and associated(1)
sensor(s) are operating normally and
readings are in range.
4 to 20mA 0 to 10V Normal operating output Active
Aux Analogue Outputs Alarms(4)
Current(2)
(4-20mA) Voltage(3)
(0-10V) Description Explanation
1mA 0.5V Fault The assigned sensor has a fault. De-activated
2mA 1V Start up The analyser is still initialising. De-activated
The assigned sensor reading is under
range.
2.5mA 1.25V Sensor under range Active
The assigned sensor reading is over
range.
3mA 1.5V Sensor over range Active
The assigned sensor is operating
normally and readings are in range.
4 to 20mA 0 to 10V Normal operating output Active
Table 2: Analogue output settings and alarm status for certain conditions
Notes:
1“Associated” sensors are the temperature sensor and the pressure sensor (when pressure mode is set to automatic).
2The current outputs are active self-powered outputs - they are not loop powered.
3The voltage (0 to10V) outputs produce non-zero voltages during start-up, fault and over/under range conditions - if
1V to 5V outputs are required, with these conditions indicated by corresponding voltages between 0V and 1V, the
current outputs can be used, with a 250 Ohm load resistor.
4Alarms are de-activated during start up initialisation, and when a fault condition occurs on the assigned sensor.
Version 1.6 11 Last printed 16/11/2011 16:59:00

Cambridge Sensotec Rapidox 1100L Oxygen Analyser Instruction Manual
7.8 Setting the Display Units
The notation used by the display is fully programmable to suit your needs using
the keypad (2) or the software provided (section 8.5.1). The following options are
available to you:
1. Oxygen: The oxygen reading can be displayed in percent (e.g. 1.000%), or
ppm (e.g. 1.0ppm) If percent is selected the Rapidox will display oxygen as
a percentage down to 0.01% and in ppm below this value.
2. Temperature: The reading can be displayed in °C or °F
3. Pressure: The reading can be displayed in mbar, bar, psi, torr or kPa.
To programme these options scroll down to menu item 5 “Set Units” and press
ENT. Use the ENT key to progress through the list and the UP & DOWN keys to
select the required units. Once selected press ENT to store and return to run
mode.
7.9 Setting the Display Options
The user can select the LCD refresh rate and the format of the line 2 display using
the keypad or the software provided. Scroll down the menu to option 6 “Display
Setup” and press ENT. Use the UP & DOWN arrows to select either the LCD
refresh interval or Line 2 Options:
1. Line 2 Options: The information displayed on line 2 of the LCD can be
chosen by the user. The options are Pressure, Temperature, None,
Date/Time or alternating Temperature and Pressure. Use the UP & DOWN
arrows to select the required option and press ENT to store and return to
the main menu.
2. LCD Refresh Interval: The display update interval can be selected from
0.1 to 1.5 seconds. The current setting can be edited using the same
method as described previously. Once edited press ENT to store and return
to the main menu. The default setting is 0.3 seconds.
7.10 Internal Pressure Sensor
The Rapidox 1100L is fitted with an internal absolute pressure sensor which
monitors small changes in pressure and vacuum inside the sensor head. The
pressure will normally be ambient absolute (e.g. 1013 mbar) under normal
operation but if the unit is being fed by a gas cylinder or connected to an
apparatus under partial vacuum then the pressure will change and this will have a
direct effect on the oxygen partial pressure and the sensor reading. You have the
option of displaying the pressure reading on the LCD display (1). Select no. 6
“Display Setup” and press ENT. Select “Line 2 Options” using the UP & DOWN
arrows and press ENT. You can set the display to read Pressure or None. Select
Pressure and press ENT. The display will now show the absolute pressure reading
from the internal sensor. If you want to view different units select no. 5 “Set
Units” from the menu and press ENT three times to reach the pressure screen.
Version 1.6 12 Last printed 16/11/2011 16:59:00

Cambridge Sensotec Rapidox 1100L Oxygen Analyser Instruction Manual
Use the UP & DOWN arrows to select mbar, bar, torr, psi or kPa and press ENT.
The display will now show the pressure in the selected units.
7.11 Pressure Mode
The user has the option of using the reading from the internal pressure sensor to
automatically correct for changes in gas pressure and hence oxygen pressure. To
access this function scroll down to menu option 7 “Pressure Mode” and press
ENT. The desired mode can then be selected using the UP & DOWN arrows and
pressing ENT to store and proceed. The two modes available are:
1. None:If this mode is selected then there is no pressure correction
performed on the oxygen reading. The pressure and oxygen sensor act
independently, and the oxygen reading will vary with the gas pressure.
2. Auto:This is the factory default setting. If the Auto mode is selected then
the Rapidox 1100L uses the reading from the internal pressure sensor to
correct the oxygen partial pressure and maintain an accurate concentration
reading.
7.12 Setting the Baud Rate
If you are using the software for data logging you can choose the communications
speed (Baud Rate) by scrolling down the menu to option 8 “Set Baud Rate” and
using the UP & DOWN arrows to select 9600, 57,600 or 115,200. Press ENT
button again to store and return to normal operation. The default factory setting is
115,200. However if you are using an older PC you can decrease this to 57,600 or
even 9600 to improve the reliability of the software and data communications.
7.13 RS232 / RS485 Port
The data communications port is normally configured to RS232. It is also possible
to factory set the data communications port to RS485. Once configured at the
factory it is not possible to change unless the unit is returned to Cambridge
Sensotec Ltd.
Data from the Rapidox is sent on demand to the 9-way 'D' type socket (7) on the
rear panel and can be read using a simple terminal programme such as
'HyperTerminal' in Windows, or with the user's own custom software.
Alternatively a simple and convenient data logger programme is included with the
supplied software and is described in section 9below.
7.13.1 RS232 Protocol
Rapidox data can be read from the RS232 port at the back of the unit. The default
RS232 configuration is 115200-8-N-1, as shown in this example for COM1:
Version 1.6 13 Last printed 16/11/2011 16:59:00

Cambridge Sensotec Rapidox 1100L Oxygen Analyser Instruction Manual
Figure 4: Rapidox default COM properties box
Alternatively, the baud rate can be reduced to 57,600 or 9600 via the “Set Baud
Rate” menu item, using the front panel keypad on the Rapidox. This setting is
stored in EEPROM.
Connection: Connect to RS232 socket at the back of the Rapidox using a 9 way D-
type plug. Signals are as follows:
Rapidox D-type Socket: PC/PLC:
Pin# 2 = Data Out ÆData In (RX)
Pin# 3 = Data In ÅData Out (TX)
Pin# 5 = Common/Gnd -- Common/Gnd
RS232
54321
9 8 7 6
Figure 5: Rapidox RS232 pin configuration
All other pins (1,4,6,7,8,9) = Don’t care
Reading Data: Data is read using command “D”. Send the single character “D” to
the Rapidox. The Rapidox replies with one of the following responses. All valid
responses end with [CR] & [LF] (where [CR] = ASCII 13 and [LF] = ASCII 10).
Response: !Initialising[CR][LF]
Meaning: Rapidox is still initialising
Version 1.6 14 Last printed 16/11/2011 16:59:00

Cambridge Sensotec Rapidox 1100L Oxygen Analyser Instruction Manual
Response: !User setup active
Meaning: The configuration menu has been activated via the front panel
keypad. The menu will automatically time out 30 seconds after the
last key was pressed, or press the keypad’s ESC key to return
immediately to normal run mode.
Response: !Possible sensor fault
Meaning: The sensor has failed to reach operating temperature within 10
minutes from power up. This may be due to the age of the sensor, or
because a high thermal conductivity gas is being used.
Response: !No sensor or sensor fault[CR][LF]
Meaning: Sensor is not connected, or there is a fault in the sensor
Response: d9.959E+04,1.426E+02,2.000E-03,2.610E+01,23:19:40,14/11/10,
ALM1&2,0[CR][LF]
Meaning: “d” means data is being sent
“9.959E+04” is Oxygen reading in ppm
“,” = data separator
“1.426E+02” is Oxygen sensor reading in mV
“,” = data separator
“2.000E-03” is the internal pressure sensor reading in bar (gauge)
“,” = data separator
“2.610E+01” is temperature sensor reading in °C
“,” = data separator
“23:19:40” is Rapidox time – ignore this
“,” = data separator
“14/11/10” is Rapidox date in DD/MM/YY format – ignore this
“,” = data separator
“ALM1&2” means that both alarm conditions 1 and 2 exist **
“,” = data separator
“0” is an integer indicating a sensor fault code: 0 = no faults
[CR] = ASCII 13 (Carriage Return character)
[LF] = ASCII 10 (Line Feed character)
** If no alarm conditions exist, this data is empty, so the response would look
like:
d9.959E+04,1.426E+02,2.000E-03,2.610E+01,23:19:40,14/11/10,,0[CR][LF]
Response: ?
Meaning: “D” command was not recognised. Try to send it again.
7.13.2 RS485 protocol
Please contact Cambridge Sensotec for further information on this feature.
Version 1.6 15 Last printed 16/11/2011 16:59:00

Cambridge Sensotec Rapidox 1100L Oxygen Analyser Instruction Manual
7.14 Setting the Date & Time
The date and time can be programmed either using the software programme or
from the menu on the analyser itself. Scroll up to menu option 9 “Set Date/ Time”
and press ENT. The current date is displayed as e.g., ‘Date: dd/mm/yy’ with the
flashing cursor under the ‘yy’ parameter. Note that the exact format will depend
on the country you are in and the regional options setting of the PC you have used
to connect to the analyser. So for example in the USA you would see ‘Date:
mm/dd/yy’ instead. The prompts at the bottom of the screen indicate what to do:
use the UP and DOWN arrow keys to change the value above the flashing cursor
and press ENT to progress. The cursor always starts under the year value as this
will dictate how the months behave e.g., during a leap year.
Once the date has been set, the display will change to show ‘Time: hh:mm:ss’ with
the flashing cursor under the ‘hh’ parameter. Once all the values are programmed
correctly press ENT to return to the run-mode screen. Note that if you
reprogramme the date and time using the software then this will overwrite any
changes you have just made and will use the current date and time of the PC.
7.15 Replacing the Oxygen Sensor
The oxygen sensor fitted to the 1100L has a life expectancy calculated in terms of
how much electrolyte is remaining in the cell. The electrolyte is a liquid that
slowly dries out over time. This especially happens in dry gases (most low O2
gases will probably be like this) where it is normal to get 12 to 18 months life from
a cell. In humid applications this may be as much as five years however so these
following warnings are just a guide. The cell is held in a metal housing and it is
possible to replace it yourself. Please ask Cambridge Sensotec for advice. Once
the cell is replaced go to menu option 2 “New Sensor” and press ENT whereupon
you will see a message saying “Fit New Sensor in X days”, where X is a number
showing how many days are remaining. The next screen says “New Sensor?” If
you have just replaced the sensor then press ENT to confirm or ESC to leave the
menu. This will give a message confirming “New Sensor Confirmed” and the on-
board countdown clock will set itself to 365 days, based on the current date.
Note that when the sensor countdown is <60 days to zero the start up screen will
display “Fit New Sensor in X days” for 1.5 seconds as a reminder. At <30 days
the start-up screen message will hold for 3 seconds and will be accompanied by
two beeps as an additional reminder.
Finally, for the benefit of units that are never switched off, when the countdown
clock reaches <30 days a flashing “*” will appear next to the “O2” on the display.
If this is ignored and the countdown reaches 0 the “*” will no longer flash. To
remove this warning, replace the sensor and reset the countdown using menu
option 10.
Version 1.6 16 Last printed 16/11/2011 16:59:00
Table of contents
Other Sensotec Measuring Instrument manuals
Popular Measuring Instrument manuals by other brands

Laserworld
Laserworld GREEN-1500 manual
HP
HP 85688 Performance tests and adjustments manual

Eastron
Eastron SDM630MCT Series user manual

BELITE ELECTRONICS
BELITE ELECTRONICS RADIANT RFGA-022C Specifications - installation and operation instructions
FloCat
FloCat C-TJ60 Smart Series Operator's manual
Burkert
Burkert 8222 ELEMENT NEUTRINO operating instructions
