SEVERIN BM 3983 - User manual

TABLE OF CONTENTS
Technical specifications 16
Important safety instructions 17
Your bread-maker 18
Control panel 19
Using the bread-maker 21
Programme functions 22
Before first use 22
Operation 23
Cleaning and care 24
Troubleshooting 24
Recipes 25
Guarantee 28
TECHNICAL SPECIFICATIONS
Model no.: BM 3983
Operating voltage: 230 V~, 50 Hz
Power consumption: 450 W
Baking capacity: max. 600g flour for a 1000g loaf
Approximate dimensions: 35 cm (W) x 22 cm (D) x 30 cm (H)
Weight: 4.6 kg
Timer: Pre-programmable up to12:58 hours
Programme functions: 12
Accessories: Measuring cup and measuring spoon
This product complies with all binding CE labelling directives.
16
Bread-maker

IMPORTANT SAFETY INSTRUCTIONS
Before using the bread-maker, please read the following instructions carefully.
●The surface of the housing and the steam vents heat up during operation. Do not touch
any hot parts of the unit. Be sure to use an oven-cloth or suitable gloves when removing
the bread.
●The bread-maker should only be connected to an earthed socket installed in accordance
with the regulations. Make sure that the supply voltage corresponds with the voltage
marked on the rating label.
●Always remove the plug from the wall socket after use, and also
-in case of any malfunction during use,
-when removing the baking-tin,
-during cleaning.
●When removing the plug from the wall socket, never pull on the power cord; always grip
the plug itself. Do not allow the cord to hang free; the cord must be kept well away from
hot parts of the appliance.
●Do not operate if the appliance or its power cord show any signs of damage.
●Children are not aware of the dangers that may occur when operating electrical
appliances. Always place the unit in such a way that children cannot reach it.
●Ensure a minimum distance of 5 cm to walls or other objects. Do not position or operate
the appliance close to or underneath any hanging objects such as curtains or other
inflammable materials, and do not position any objects on top of the appliance while it is
in use.
●Always place the unit on a level, heat-resistant work surface. Do not allow the appliance
or its power cord to touch hot surfaces or come into contact with any heat sources (e.g.
oven-plates or open flames).
●Do not operate the appliance unless the baking-tin with the ingredients has been placed
inside the unit.
●Do not expose the appliance to rain or moisture and do not operate the appliance
outdoors or on wet surfaces. Always ensure that it is well protected from water splashes.
Never immerse the plug, the power cord or the appliance itself in water.
●This bread-maker is intended for domestic use only and not for commercial applications.
●Do not use this appliance for any purpose other than the one described in this manual.
●The use of any accessories other than those provided by the manufacturer may result in
damage to the appliance; there is also a possibility of severe personal injury.
●Do not touch any moving parts during operation. Do not put your fingers or hands inside
the unit, unless it is disconnected from the mains supply and has cooled down
completely.
●In order to comply with safety regulations and to avoid hazards, repairs of electrical
appliances must be carried out by qualified personnel, including the replacement of the
power cord. If repairs are needed, please send the appliance to one of our customer
service departments. The address can be found in the appendix to this manual.
●Keep this instruction manual for future reference.
17

Your bread-maker
1. Control panel 2. Safety holding clip
3. Baking compartment
A LCD-display 4. Housing
B Timer 5. Bread baking-tin
C Browning control 6. Steam vents
D Menu 7. Dough hook
E Start / Stop 8. Baking-tin handle
F Bread weight 9. Viewing window
10. Lid
18
A
1
B
D
F
E
C
2
3
5
4
10
6
9
8
6
7

Control panel
A LCD-display
The LCD-display shows the selected programme as well as the remaining programme
time. An active programme is indicated by the continuously flashing colon in the time
display.
Example:
In this case, programme 2 (for WHITE BREAD/FRENCH BREAD) has been selected
via the button. The display shows: 2 3:35; in addition, the weight is shown in the
form of a dot in the upper part of the display, indicating a weight of 1kg; the selected
browning level is shown as 'medium', indicated in the form of a dot symbol in the lower
part of the display. The total programme running time is 3 hours and 35 minutes.
B Timer
Programmes 1, 2, 3, 4, 8, 9 or 10 may be started with a delayed timer setting, enabling the
selected programme to finish up to 12:58 hours later.
Example:
You want to start the programme at 20h00, and you would like your bread to be finished
at 7h30 the next morning. Accordingly, the total programme running time will be 11
hours and 30 minutes.
- Use the button to select the desired programme.
- Press the appropriate button until the display shows a total running time of 11:30.
- Add the ingredients following the instructions given in the section Operation. Avoid
any contact between the yeast and fluids or salt.
●Do not use the timer function where a recipe requires the use of perishable ingredients
such as eggs, fresh milk or fruit. The timer function is also unsuitable for recipes which
require the addition of any ingredients (e.g. nuts, grains or dried fruits) during the
second kneading phase.
C Browning
Baking programmes 1-3 allow for a pre-selection of the desired level of browning: four
settings are available; the fourth setting, however, serves for additional quick-browning.
The selected level of browning is shown in the form of a dot in the lower part of the
LCD-display.
LIGHT
MEDIUM
DARK
QUICK
D Menu
Press the button until the desired programme is shown in the LCD-display (A).
The menu allows for 12 different programmes to be selected:
19

20
Programme 1 2 3 4 5 6 7 8 1 2 3
Standard White bread/ Wholemeal Cakes Short Short Biscuits, Wheat Standard White Wholemeal
French bread programme, programme, pastry and rye bread quick bread/French quick
750 g 1000 g (750 g) bread quick
Pre-heating - - 30 min. - - - - 30 min. - - 5 min.
1st Kneading phase
5 min. 5 min. 5 min. 5 min. 13 min. 10 min. 3 min. 5 min. 5 min. 5 min. 5 min.
Standing phase 5 min. 5 min. 5 min. 5 min. 10 min. 8 min. 5 min. 10 min. 5 min. 5 min. 5 min.
2nd Kneading phase
20 min. 20 min. 15 min. 20 min. - - 5 min. 20 min. 20 min. 20 min. 15 min.
1st Rising phase 39 min. 39 min. 49 min. 39 min. - - - 39 min. 15 min. 15 min. 24 min.
1st short stirring phase
10 sec. 10 sec. 10 sec. 10 sec. - - - 10 sec. 10 sec. 10 sec. 10 sec.
2nd Rising phase 25 min. 30 min. 25 min. 25 min. - - - 25 min. 8 min. 15 min. 10 min.
50 sec. 50 sec. 50 sec. 50 sec. 50 sec. 50 sec. 50 sec. 50 sec.
2nd short stirring phase
15 sec. 10 sec. 10 sec. 5 sec. - - - 10 sec. 10 sec. 10 sec. 10 sec.
Last rising phase 49 min. 59 min. 44 min. 51 min. - - - 44 min. 29 min. 38 min. 34 min.
45 sec. 50 sec. 50 sec. 55 sec. 50 sec. 50 sec. 50 sec. 50 sec.
Baking 500 g 48 min. 50 min. 48 min. 50 min. 48 min. 50 min. 48 min.
750 g 53 min. 52 min. 50 min. 55 min. 35 min. 40 min. 90 min. 60 min. 53 min. 52 min. 50 min.
1000 g 60 min. 55 min. 53 min. 60 min. 60 min. 55 min. 53 min.
Programme 500 g 3:13 3:30 3:43 3:17 2:12 2:30 2:28
running 750 g 3:18 3:32 3.45 3:22 0:58 0:58 1:43 3:55 2:17 2:32 2:30
time 1000 g 3:25 3:35 3:48 3:27 2:24 2:35 2:33
Acoustic signal after 17 min. - 42 min. 17 min. - - - 52 min. 17 min. - 17 min.
(from start)
Menu 9 DOUGH 1st Kneading phase 5 min. Standing phase 5 min. 2nd Kneading phase 20 min. Acoustic signal after 18 min. Rising phase 60 min. Total 1:30
(from start)
Menu 10 DOUGH-LIGHT Kneading phase 30 min. Acoustic signal after 10 min. Rising phase 90 Min Total 2:00
(from start)
Menu 11 JAM, MARMALADE Kneading phase 15 min. Baking 50 min. Total 1:05
Menu 12 BAKING Baking 60 min. Total 1:00

E START/STOP button
The button starts or terminates a programme. The continuously flashing colon in the
LCD time display indicates that the programme has been activated.
Protection against incorrect input:
Once a programme has been started, all other control buttons will remain blocked until
the baking process has finished, or until the button has been pressed for a minimum
of 2 seconds.
When pressing any control button, wait until the correct input is acknowledged by a beep
signal before releasing the button.
F Loaf weight
Baking programmes 1-4 allow for a pre-selection of the loaf size. The selected weight is
indicated, i.e. underlined, on the LCD-display.
USING THE BREAD-MAKER
Your new bread-maker allows you to:
-
bake breads to various recipes, some of which can be found in the appendix to this
manual. However, this bread-maker also allows you to use commercially available ready-
to-bake mixtures with up to 600g of solid ingredients (for a loaf of approx. 1000g).
-
mix, knead dough for bread rolls, pizza etc., and let the dough rise.
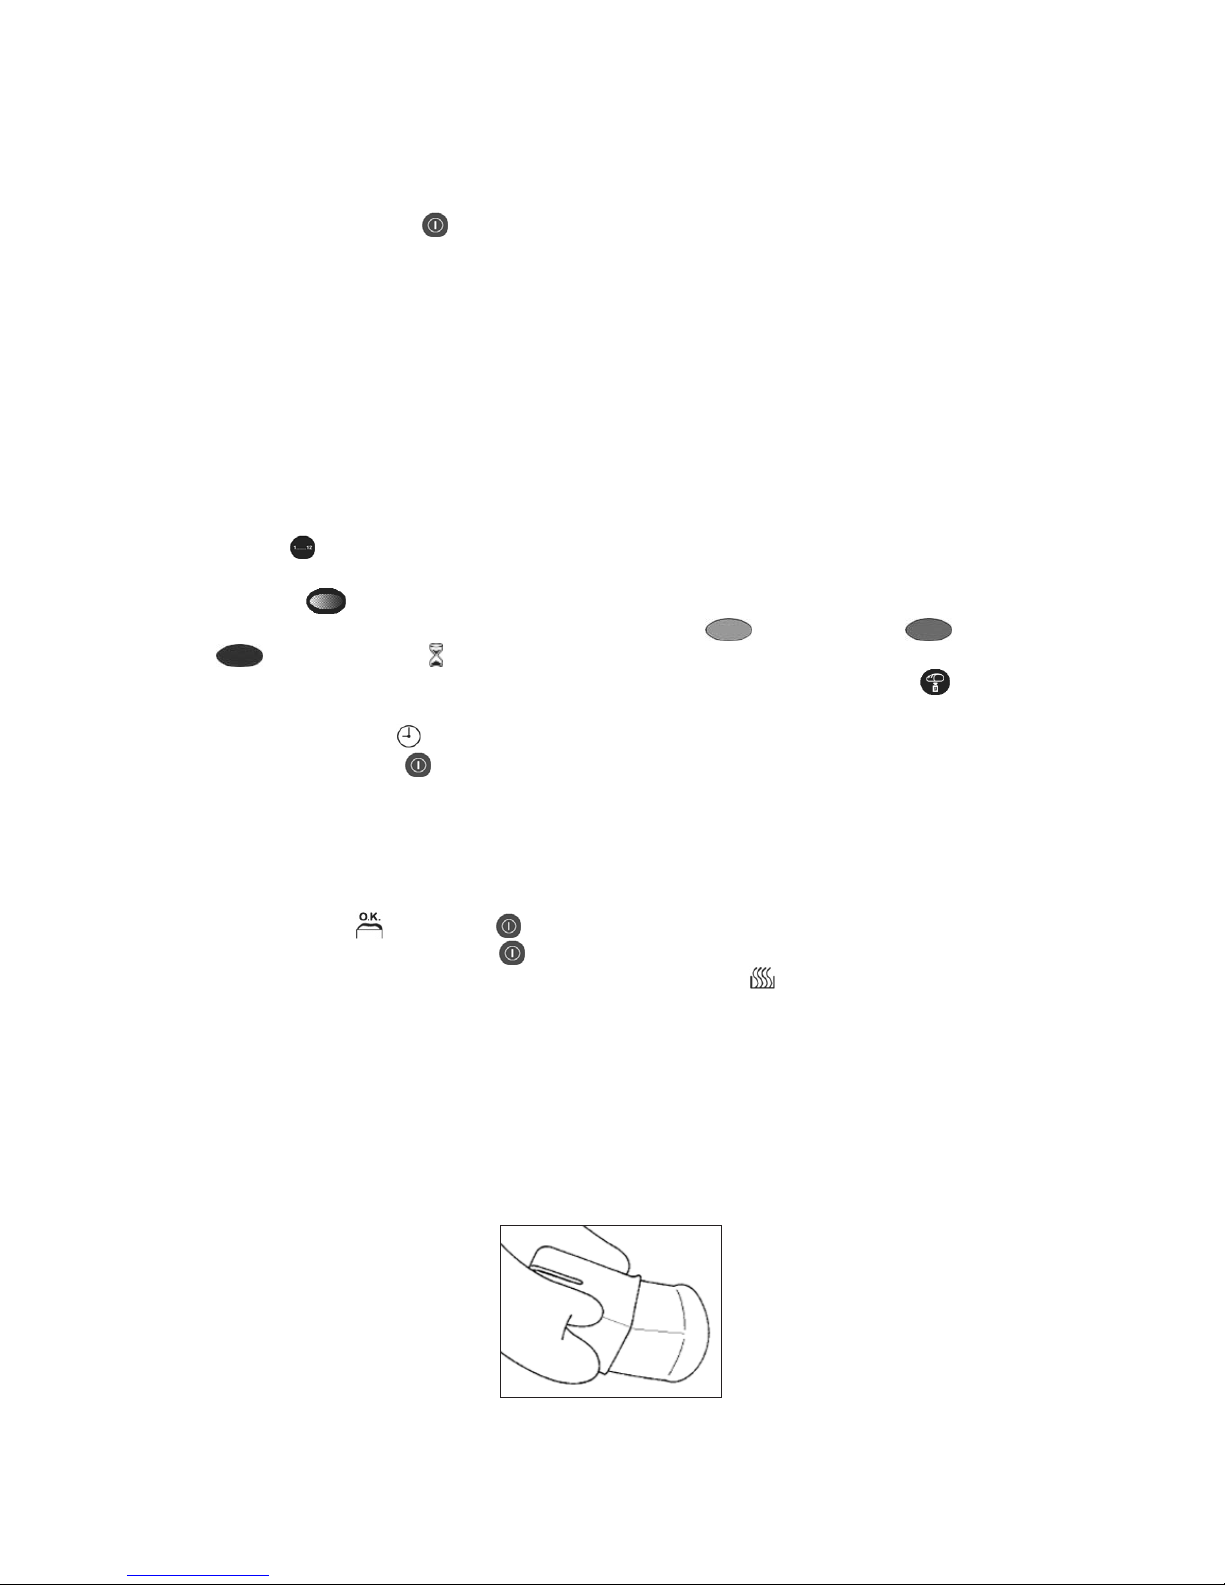
Additional important instructions
-
Always use an oven-cloth or suitable gloves when touching the unit after use, or when
handling freshly baked bread.
-
Only recipes with a flour content of approx. 200g - 600g should be used with this bread-
maker. Should the flour content fall short of this minimum, thorough kneading of the
dough cannot be ensured. Excessive flour content may result in the dough rising over the
edge of the baking-tin.
-
In case of a power failure of less than 7 minutes during operation, the baking process
automatically continues at the point of interruption.
-
During the kneading process, water vapour may condense on the viewing window.
However, this condensation will disappear during the baking phase.
-
To ensure evenly baked bread, do not open the lid during the baking process.
-
After use, allow sufficient time for the bread-maker and the baking-tin to cool down
before cleaning them thoroughly.
-
The baking-tin and the dough hook have an anti-stick coating. In order to avoid damage
to this, do not use any metallic, hard, sharp or pointed objects on the coating.
-
Caution: Operating the bread-maker empty could result in damage to the unit by
overheating of the empty baking-tin.
Caution
-
In the event of any smoke coming from the baking compartment, be sure to keep the
door firmly closed, but immediately remove the plug from the wall socket. Do not, under
any circumstances, try to smother or extinguish smouldering dough with water. Smoke
can occur as the result of dough rising over the edge of the baking-tin and touching the
heating elements. It is therefore very important to follow the quantity limits given in the
recipes.
-
Always make sure that the unit is placed well out of children’s reach, especially while it is
21

operating.
-
Do not place the unit on soft or inflammable surfaces (e.g. carpets). Always ensure that it
is placed on a firm, level work surface. Always position the unit in such a way that it
cannot fall over.
-
Do not touch the steam vents at the rear of the unit, nor the viewing window in the lid:
these parts heat up during operation.
-
After use, ensure that te appliance is disconnected from the power supply and has cooled
down completely before cleaning.
PROGRAMME FUNCTIONS
1 = STANDARD
This programme is used most frequently and suitable for breads with a high content of wheat
flour.
2 = WHITE BREAD/FRENCH BREAD
Suitable for typical light dough such as White bread/French bread.
3 = WHOLEMEAL
In comparison to the STANDARD setting, this programme has extended rising and baking
phases, since the dough for bread with a high rye or wholemeal flour content tends to rise
less strongly than dough containing wheat flour.
4 = CAKES
Because of its relatively high sugar content, sweet yeast dough tends to brown more quickly;
in this programme, the baking phase is therefore shorter.
5 = SHORT PROGRAMME, 750g
Suitable for recipes up to 750g; the loaves will also turn out smaller and firmer than usual.
6 = SHORT PROGRAMME, 1000g
Suitable for recipes up to 1000g; the loaves will also turn out smaller and firmer than usual.
7 = BISCUITS, PASTRY
Suitable for preparing biscuits, when using baking powder instead of yeast.
8 = WHEAT AND RYE BREAD (750g)
In comparison to the STANDARD setting, this programme has a pre-heating phase and is
suitable for breads with different types of flour.
9 = DOUGH
This programme does not include a baking phase. After the programme has finished, the
dough (e.g. pizza dough) can be removed and then be baked in a conventional oven.
10 = DOUGH, LIGHT
In comparison to the DOUGH setting, this dough turns out lighter.
11 = JAM, MARMALADE
Suitable for preparing jam or marmalade. During preparation, make sure the baking-tin is
only filled two-third with all the ingredients, since the mixture may tend to foam up.
12 = BAKING
Suitable for baking dough (e.g. dough previously kneaded using the DOUGH programme).
In this way, the rising phase can be modified according to the type of dough before the
BAKING programme is started.
BEFORE FIRST USE
-
Remove the baking-tin.
-
Insert the plug into a suitable wall socket.
-
Use the button to select programme 12 (BAKING).
-
Press the button and let the unit heat up for approximately 10 minutes with the lid
22

open. This will remove the smell typically encountered when first activating the heating
elements. Ensure sufficient ventilation. To prevent the baking-tin from overheating, be
sure to remove it before switching the unit on.
-
Afterwards, press the button for at least 2 seconds, remove the plug from the wall
socket and allow the unit to cool down. The baking-tin itself must be thoroughly cleaned
before it is used for the first time.
OPERATION
-
Open the lid and remove the baking-tin.
-
Fit the dough hook into its socket inside the baking-tin.
-
For best results, always put liquids in first, followed by solid ingredients such as flour.
-
Finally, add the yeast. Be sure to avoid any contact between the yeast and salt or liquids
when using the timer.
-
Replace the baking-tin in the unit. Make sure that the tin locks firmly into place. Before
starting the programme, close the lid and insert the plug into a suitable wall socket.
-
Use the button to select the desired baking programme. Each time the button is
pressed, the display changes to the next programme in the sequence.
-
Using the button, the desired level of browning can be pre-selected in programmes
1-3. The following settings are available: LIGHT ( ), MEDIUM ( ), DARK
( ) and QUICK ( ).
-
Baking programmes 1-4 allow for pre-selection of the bread size, using the button.
-
If you wish to start the programme with a timer delay, the desired total running time can
now be set with the buttons.
-
Otherwise, press the button to start the kneading and/or baking process.
-
During the second kneading phase in programmes 1, 3, 4, 8, 9 and 10, an acoustic signal
indicates that additional ingredients such as fruits and nuts can be added to the dough.
Do not open the lid after this second kneading phase, but wait until the programme has
finished.
-
Once the bread or dough is ready, a multiple acoustic signal is heard and the time display
shows 0:00 and . Press the button for at least 2 seconds and open the lid.
-
Should you forget to press the button and to remove the bread immediately, it will be
kept warm automatically for a period of 60 minutes ( ). This is to ensure that no
condensation can collect in the baking-tin.
-
Carefully remove the baking-tin using oven cloths. Do not place the hot baking-tin on
any heat-sensitive surfaces.
-
Remove the bread from the baking-tin. To loosen the bread, it may be lightly shaken.
Should the dough hook be stuck in the bread, it should be removed carefully. To avoid
damage or scratches to the anti-stick coating, do not use any metallic or otherwise
unsuitable objects. To allow the underside of the loaf to cool down as well, it should be
placed on a suitable wire rack. Do not attempt to cut the bread until it has cooled down.
23

CLEANING AND CARE
●Caution: before cleaning the appliance, ensure that the plug has been removed from the
wall socket, and that the appliance has cooled down. Do not immerse the bread-maker in
water.
-
Remove the baking-tin from the appliance, and take out the dough hook. The baking-tin
and the dough hook may be cleaned using hot water and a mild detergent. Do not use
any rough material for cleaning. If you are unable to separate the dough hook from the
baking tin using normal force, let it soak in lukewarm water for approximately 30
minutes. Do not use excessive force to remove the hook.
●To prevent damage to the drive-shaft seal, the baking-tin should not be left soaking for
any extended period of time. Do not clean the baking-tin in a dish-washer.
-
The inside of the lid may be cleaned with a slightly damp, soft cloth. The interior of the
appliance should be cleaned with a soft, dry cloth.
●Do not use cleaning agents specifically designed for baking ovens, and do not use any
abrasives or harsh cleaning solutions, vinegar or bleaching agents for cleaning.
●Before storing the appliance, always ensure that it has cooled down and that it is
completely dry.
TYPICAL PROBLEMS
1. The bread has a strong smell.
Check whether the correct amount of yeast was used. Too much yeast causes an
unpleasant smell and makes the loaf rise too much. Always use fresh ingredients.
2. The baked bread is wet and has a sticky surface.
Remove the bread from the appliance immediately after baking, and place it onto a wire
rack, allowing it to cool down.
3. Pressing the Start button fails to activate the selected programme.
Make sure that the unit is properly connected to the mains supply.
Should the appliance still be too hot after a previous work cycle, an automatic safety
switch prevents the appliance from resuming operation. In that case, the LED-display
shows the letters HHH, and a continuous acoustic signal is heard. Press the button for
2 seconds, and remove the baking-tin with the ingredients from the unit. Allow the
bread-maker to cool down for approximately 20 minutes with the lid open before you
attempt to start the programme again.
4. The loaf has risen too high.
Reduce the amount or quantity of yeast, water or flour used.
5. The loaf has not risen high enough.
Increase the amount of yeast, water or sweeteners. Ensure that the correct order is used
when putting the ingredients into the baking-tin: first the liquid ingredients followed by
the solid ingredients, finally the yeast. Note: bread made of rye or wholemeal flour tends
to rise less than bread made of wheat
6. After the baking phase has started, the dough collapses inwards.
The dough is too light. Slightly reduce the quantity of liquids or the amount of yeast, or
use a programme with a shorter rising phase. You may also try increasing the amount of
salt.
24

7. The dough is too soft or too sticky.
The dough texture may become
smoother if a spoonful of flour is added
during the kneading
8. The dough is very difficult to knead.
Add a spoonful of water during the
kneading process.
RECIPES
Wheat bread
Ingredients:
500g 750g 1kg Ingredients
1 1 11/2tsp. Dry yeast
180 300 360 g Wheat flour type 1050
120 200 240 g Wheat flour type 405
1 11/22 tsp. Salt
1 11/22 tsp. Honey or sugar-beet
syrup
1 1 2 tsp. Sourdough powder
from sour dough
180 290 350 ml Water
Programme: STANDARD
Browning: DARK
Wheat and rye bread with soy seeds
Ingredients:
500g 750g 1kg Ingredients
1 1 11/2tsp. Dry yeast
150 250 300 g Wheat flour type 550
130 220 260 g Rye flour type 1150
1 2 2 tsp. Salt
1/211/211/2tsp. Sugar
105 180 210 ml Water
95 160 190 ml Buttermilk
1 11/22 tsp. Sourdough powder
from sour dough
20 30 40 g Soy seeds
1/21 1 tsp. Bread spice
Programme: STANDARD
Browning: MEDIUM
The soy seeds are added after the acoustic
signal.
Onion bread
Ingredients:
500g 750g 1kg Ingredients
1 11/22 tsp. Dry yeast
180 250 360 g Wheat flour type 405
120 250 240 g Rye flour type 1150
1 11/22 tsp. Salt
1/21/21 tsp. Sugar
110 180 220 ml Water
90 150 180 ml Butter-milk
30 40 50 g Fried onions
Programme: WHITE BREAD/FRENCH
BREAD
Browning: MEDIUM
The roast onions are added after the acoustic
signal.
Wheat bread
Ingredients:
500g 750g 1kg Ingredients
1 1 11/2tsp. Dry yeast
145 250 290 g Wheat flour type 550
155 250 310 g Wheat flour type 1050
1 2 2 tsp. Salt
1/21/21 tsp. Sugar
1/211/21 tbs. Sourdough powder from
sour dough
140 240 280 ml Butter-milk
80 120 160 ml Milk
Programme: STANDARD
Browning: MEDIUM
Sweet bread
Ingredients:
750g Ingredients
1 tsp. Dry yeast
500 g Wheat flour type 550
2 tbs. Sugar
2 tbs. Honey
1 tsp. Salt
185 ml Milk
Programme: CAKES
25

Fruit bread
Ingredients:
500g 750g 1kg Ingredients
1 1 11/2tsp. Dry yeast
155 250 310 g Wheat flour type 550
145 250 290 g Rye flour type 1150
1 2 2 tsp. Salt
1/21/21 tsp. Sugar
200 350 400 ml Grapefruit juice
Programme: STANDARD
Browning: DARK
White bread/French bread
Ingredients:
500g 750g 1kg Ingredients
1/21 1 tsp. Dry yeast
260 410 520 g Wheat flour type 405
11/22 21/2tbs. Sugar
1 11/22 tsp. Salt
1 11/22 tbs. Butter
100 150 200 ml Milk
80 110 160 ml Water
Programme: WHITE BREAD/FRENCH
BREAD
Browning: MEDIUM
Rye-wholemeal-wheat bread
Ingredients:
500g 750g 1kg Ingredients
1 11/22 tsp. Dry yeast
150 250 300 g Wheat flour type 1050
150 250 300 g Rye wholemeal flour
1 1 11/2tsp. Salt
1/21/21 tsp. Sugar
190 320 380 ml Water
11/22 3 tbs. Sourdough powder from
sour dough
Programme: WHOLEMEAL BREAD
Browning: DARK
Oat flake bran bread
Ingredients:
500g 750g Ingredients
1/21 tsp. Dry yeast
180 360 g Wheat flour type 550
55 110 g Oat flake bran
1 11/2tbs. Sugar
1 2 tsp. Salt
1 2 tbs. Butter
200 410 ml Milk
Programme: WHOLEMEAL
Browning: MEDIUM
Note: With this recipe, a loaf of
1 kg would rise too much
during baking
Bran bread
Ingredients:
500g 750g 1kg Ingredients
1/21 1 tsp. Dry yeast
225 370 450 g Wheat flour type 550
1/41/21/2cup Wheat bran
1 2 2 tbs. Sugar
1 2 2 tbs. Milk powder
1 1 2 tsp. Salt
1 2 2 tbs. Butter
150 250 300 ml Water
Programme: STANDARD
Browning: MEDIUM
Pizza-dough
Ingredients:
Ingredients
2 tsp. Dry yeast
400 g Wheat flour type 550
2 tsp. Salt
1 tsp. Sugar
3 tbs. Olive oil
230 ml Water
Programme: DOUGH
-
Once the programme has finished, remove
the dough from the baking-tin.
-
Smear a baking tray with olive oil and spread
the dough out with a rolling pin.
26

-
Let the dough rise at room temperature for
approximately 30 minutes.
-
Spread the dough with the toppings of your
choice, and let it bake for 15-25 minutes at
200° C in a pre-heated baking oven, until the
cheese has melted and spread evenly, and the
dough is brown around the edges.
Wheat and rye bread
Ingredients:
500g 750g 1kg Ingredients
1 1 11/2tsp. Dry yeast
150 250 300 g Wheat flour type 550
150 250 300 g Rye flour type 1150
1 11/22 tsp. Salt
1/21/21 tsp. Sugar
140 200 280 ml Water
75 150 150 ml Natural plain yoghurt,
3,5% fat content
1 1 2 tsp. Sourdough powder
from sour dough
Programme: STANDARD
Browning: MEDIUM
Cheese bread
Ingredients:
500g 750g 1kg Ingredients
1 11/211/2tsp. Dry yeast
180 250 300 g Wheat flour type 550
120 250 300 g Rye flour type 1150
1 11/22 tsp. Salt
1 1/21 tsp. Sugar
120 150 240 ml Water
200 150 180 ml Butter-milk
40 50 60 g Finely grated
Emmental cheese
Programme: STANDARD
Browning: DARK
The cheese is added after the acoustic signal.
Commercially available ready-to-bake
mixtures
Various ready-to-bake mixtures are
commercially available.
-
Put up to 600g of the ready-to-bake
mixture and the required amount of dry
yeast into the baking-tin. Depending on
the content, it is possible that only half
of the mixture can be used at a time.
-
Add the corresponding quantity of
liquid.
Programmes: STANDARD, WHITE
BREAD/FRENCH BREAD or
WHOLEMEAL BREAD, depending on
the type of flour used
Jam, Marmalade
The basic recipe consists of finely cut or
puréed fruit and gelatine sugar. Information
about the correct proportions of fruit and
gelatine sugar may be found on the sugar
packaging.
-
Before the fruit is cut into small pieces
or puréed, it must be washed and, if
necessary, peeled.
-
Place the fruit and gelatine sugar into
the baking-tin while making sure that it
is not filled more than two-third, since
the marmalade may tend to foam up
during the cooking process. This process
should be carefully monitored.
-
Start the programme JAM,
MARMALADE.
-
After the programme has finished,
remove the plug from the wall socket
and carefully take out the baking-tin,
using an oven cloth. If necessary, stir
lightly to reduce the foam.
-
Carefully transfer the jam or marmalade
into prepared jars. Close the jars tightly
afterwards, and allow them to cool
down.
●The baking-tin should be thoroughly
rinsed immediately after use.
Additional recipe information
The recipes suggested in this manual may
be modified to taste by adding various
ingredients of your choice.
Depending on your taste, you may add e.g.
wheat germ, sun flower seeds, herbs,
caraway seeds, ground pepper, ground nuts,
muesli, hominy grits, finely cut bacon cubes
etc.
These ingredients may be added after the
27

acoustic signal, approximately 5 – 10 minutes after the second kneading phase has started,
but only for the following programmes: STANDARD, WHOLEMEAL BREAD, CAKES,
WHEAT AND RYE BREAD (750 g) DOUGH and DOUGH, LIGHT.
The bread-maker is designed to process recipes with a flour content of up to 600g. In order
to prevent the dough rising over the edge of the baking-tin and to ensure that the dough is
properly and thoroughly kneaded, do not exceed these limits.
All ingredients should have normal room temperature.
Sugar assists the yeast as a rising agent, and tends to let the crust become darker and thicker.
Salt gives a firmer texture to the dough and slows the rising process down.
When adding additional ingredients of liquid nature to a recipe, make sure that the quantity
of liquid given in the recipe is reduced accordingly. This applies e.g. when eggs, fresh cheese
or yoghurt are used.
The baking results depend on several factors such as air pressure, humidity, hardness of
water, room temperature or the temperature of the ingredients. If a recipe does not turn out
to your taste right away, we recommend to modify the suggested recipes accordingly, as
described in the section 'Typical problems'.
Abbreviations:
Tsp. = Teaspoon (measuring spoon: 1 TSP) = 5 ml
1/2tsp. = one half teaspoon
Tbs. = Tablespoon (measuring spoon: 1 TBS) = 15 ml
g = Gram
ml = Millilitre
Measuring cup: 1 cup = 250 ml
Disposal
Do not dispose of old or defective appliances in domestic garbage, but only through
public collection points.
Guarantee
This product is guaranteed against defects in materials and workmanship for a period of two
years from the date of purchase. Under this guarantee the manufacturer undertakes to
repair or replace any parts found to be defective, providing the product is returned to one of
our authorised service centres. This guarantee is only valid if the appliance has been used in
accordance with the instructions, and provided that it has not been modified, repaired or
interfered with by any unauthorised person, or damaged through misuse.
This guarantee naturally does not cover wear and tear, nor breakables such as glass and
ceramic items, bulbs etc. If the product fails to operate and needs to be returned, pack it
carefully, enclosing your name and address and the reason for return. If within the guarantee
period, please also provide the guarantee card and proof of purchase.
28
Other manuals for BM 3983 -
1
Table of contents
Other SEVERIN Bread Maker manuals

SEVERIN
SEVERIN BM 3991 User manual

SEVERIN
SEVERIN BM 3989 User manual

SEVERIN
SEVERIN BROTBACKAUTOMAT BM 3990 User manual

SEVERIN
SEVERIN BM 3990 User manual

SEVERIN
SEVERIN BM 3992 User manual

SEVERIN
SEVERIN BM 3990 User manual

SEVERIN
SEVERIN BM 3986 - User manual

SEVERIN
SEVERIN BM 3989 User manual

SEVERIN
SEVERIN BM 3986 - User manual

SEVERIN
SEVERIN BM 3983 - User manual
Popular Bread Maker manuals by other brands

Fagor
Fagor PAN-850 Instructions for use

AMF
AMF Bread And Bun Products Orientor Loader features and benefits

Sunbeam
Sunbeam BM3400 Instruction/recipe booklet

Sanyo
Sanyo Bread Factory Plus SBM20 Recipe book

Sanyo
Sanyo SBM-150 Instruction manual and recipe book

West Bend
West Bend L4854 Recipes and instructions