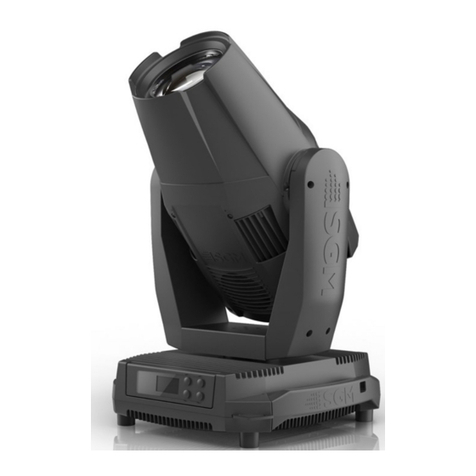
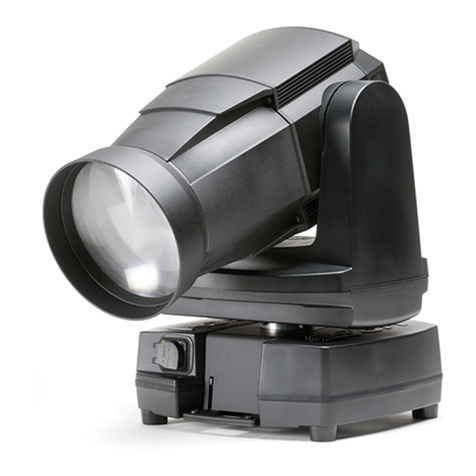
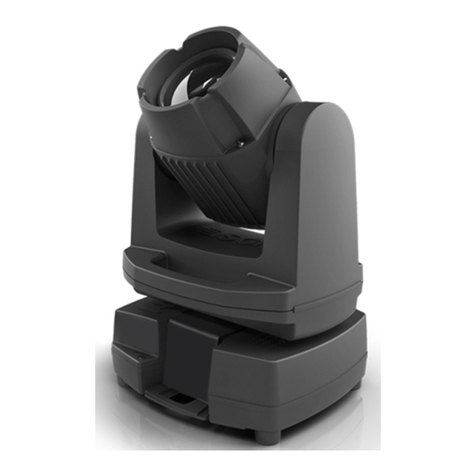
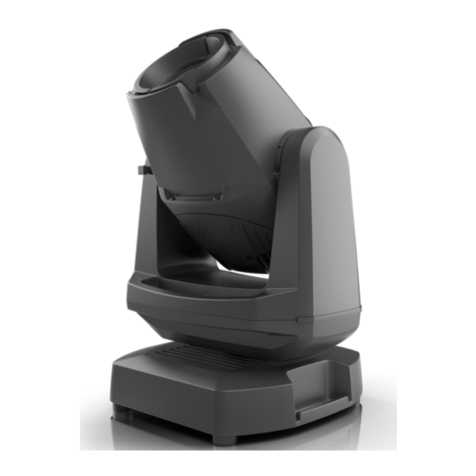
SGM Idea spot 575 User manual


Safety information.................................................................................................................2
General Warranty Conditions.................................................................................................2
Manual symbols....................................................................................................................3
Technical Features ...............................................................................................................4
Important safety information ..................................................................................................5
Fire prevention: ............................................................................................................................5
Prevention of electric shock: ..........................................................................................................5
Protection against ultraviolet radiation:............................................................................................5
Safety: .........................................................................................................................................5
Level of protection against the penetration of solid and liquid matter: .................................................5
1.0 – Installation .................................................................................................................6
1.1 – Access to the internal components ................................................................................6
1.2 - Mounting the lamps .......................................................................................................6
1.3 - Alignment lamp .............................................................................................................7
1.4 - Replacing gobos: ..........................................................................................................7
1.5 - Replacing gobos on the rotating gobo wheel ...................................................................7
1.6 - Voltage and frequency:..................................................................................................8
1.7 - Fissaggio meccanico montaggio:....................................................................................8
1.8 - Safety chain:.................................................................................................................8
1.9 - Protection against liquids ...............................................................................................9
1.90 - Movement..................................................................................................................9
1.91 - Risk of fire...................................................................................................................9
1.92 - Forced ventilation ........................................................................................................9
1.93 - Ambient temperature ...................................................................................................9
1.94 - Mains connection ........................................................................................................9
1.95 - Protection ...................................................................................................................9
1.96 - Collegamento DMX: ..................................................................................................10
1.97 - Construction of the DMX termination...........................................................................11
1.98 - DMX Addresses ........................................................................................................11
1.99 - Changing the DMX address .......................................................................................11
2.0 - Microcomputer Control .............................................................................................12
2.1 - Display functions .........................................................................................................12
2.2 - Automatic operation (AUTO) ........................................................................................14
2.3 - Game 1-2 ...................................................................................................................14
2.4 - Game p ......................................................................................................................14
2.5 - Modalità rec ................................................................................................................14
SCENE channel:.........................................................................................................................14
VIEW channel:............................................................................................................................14
Recording channel (REC)............................................................................................................15
2.6 - Pan & Tilt speed (SPEE) (default: 2).............................................................................15
2.7 - Fan speed (FANS)( default: 6) .....................................................................................15
2.8 - Error messages...........................................................................................................15
2.9 - Hidden menu ..............................................................................................................16
3.0 - Periodic cleaning ......................................................................................................17
3.1 - Lenses and reflectors ..................................................................................................17
3.2 - Fans and air passages ................................................................................................17

GB
2
Idea Spot 575 rel. 1.0
Safety information
Read the instructions in this manual carefully, as they give important instructions regarding installation, operation and
maintenance safety.
This manual must be kept with the fixture for future consultation. In the event of the fixture being sold or
passed to another user, always make certain that the booklet is with the unit, to enable the new owner to
be informed on its operation and relative care.
•Unit not for home use; only for professional use.
•After having removed the packaging, make certain the unit is not damaged in any way. When in doubt, do not
use the unit, and contact an authorized SGM Technical Assistance Centre.
•The various part of the packaging (plastic bags, polystyrene foam, nails, etc.) must not be left within children’s
reach, as they are potential sources of danger.
•The unit must only be used by adults. Do not allow children to tamper with or use the product.
•Fixture installation work must be carried out by experienced qualified staff.
•Avoid using the fixture in locations subject to vibrations, or possible impacts
•
Avoid using the fixture in locations in which the
temperature is above 35° or below 2°C
•Do not attempt to dismantle or modify the fixture.
•The fixture must be kept at a minimum distance of 1.5 metres from surfaces to be illuminated.
•In the event of serious problems or faulty operation, switch off the fixture and immediately contact the nearest
SGM Technical Assistance Centre or contact the manufacturer directly.
•Do not open the fixture: there are no user-repairable parts inside.
•Never try to repair the fixture personally. Repairs carried out by unauthorized staff can cause damage or faulty
operation. Always contact the nearest authorized Technical Assistance Centre.
Safeguard the environment: do not throw away the remaining packaging: consign them to your dealer, or
a special waste collection point.
General Warranty Conditions
•The unit is guaranteed for 24 months from the date of purchase against manufacturing faults of the unit or the
material it is made from
•Faults or breakdowns caused by inexperienced or incorrect use of the unit are not covered by the guarantee
•The guarantee will be considered null and void if the unit has been opened or tampered with by unauthorized
personal
•The guarantee does not foresee the replacement of the unit
•External components such as handles, switches and removable parts are excluded from the guarantee
•Transport costs and consequent risks are the responsibility of the unit’s owner
•The validity of the guarantee is effective to all effects only on presentation of the guarantee to the
manufacturer or the SGM technical assistance centre
•Always quote unit serial number and model when contacting the dealer for information or assistance

Idea Spot 575 rel. 1.0
- 3 -
GB
Manual symbols
This manual uses graphic symbols to emphasize any hazards during the operation work described.
This symbol indicates a General hazard
This symbol indicates electric shock risk
This symbol indicates a hot surface risk
This symbol indicates that the unit must not be laid on an inflammable surface
or in any case must be kept away from naked flames

GB
4
Idea Spot 575 rel. 1.0
Technical Features
New motorized rotating head
Abs covers
Both PAN and TILT are controlled by encoder
Pan: max movement 540° (16 bit)
Tilt: max movement 319° (16 bit)
Display for addresses and setting
Power supply: 230 V 50-60 Hz
Power consumption: 800 VA with in-built factor correction
Lamp: MSR 575/2 W discharge lamp
Control: max 16 channels DMX 512
Linear dimmer
Shutter: strobe max 10 flash/sec + strobe at random speed and evanescence (opening and closing) at 4
different speeds
Colours: 8 dichroic filters with high chromatic yeld + white, 9 different rotating speeds to produce Rainbow
effect.
Gobos: 7 rotating and indexable gobos + open
3 sides prism (angle 14°) with different rotation speed to right or left
Motorized focus
Frost
3 light beam angles (13°/18°/21°)
Optical system: 3 lenses with double antireflective treatment
Working position: any position
Weight:26 kg
46,5cm
65,3cm
30,0mm

Idea Spot 575 rel. 1.0
- 5 -
GB
Important safety information
Fire prevention:
-IDEA uses a Philips 575 MSR/2. The use of any alternative lamp is not recommended and
will null and void the fixture's warranty.
-Never locate the fixture on any flammable surface.
-Minimum distance from flammable materials: 0.5 m.
-Minimum distance from the closest illuminable surface: 2 m.
-Replace any blown or damaged fuses only with those of identical value. Refer to the wiring
diagram if there is any doubt.
-Connect the projector to mains power via a thermal magnetic circuit breaker.
Prevention of electric shock:
-High voltage is present inside the unit. Isolate the projector from the mains supply prior to
performing any function which involves touching the inside of the unit, including lamp
replacement.
-The level of technology inherent in the IDEA requires the assistance of specialised
personnel for all servicing. Refer all work to your authorised SGM service centre.
-A good earth connection is essential for proper functioning of the projector.
-Never connect the unit without proper earth connection.
-The fixture should never be located in a position exposed to rain or in areas of extreme
humidity. A steady supply of circulating air is essential.
Protection against ultraviolet radiation:
-Never turn the lamp on if any of the lenses, filters or the carbon fibre housing is damaged.
Their respective shielding functions will only operate efficiently if they are in perfect working
order.
-Never look directly into the lamp when it is on.
Safety:
-The projector should always be installed with bolts, clamps and other fixtures that are
capable of supporting the weight of the unit.
-Always use a second safety chain of a suitable rating to sustain the weight of the unit in case
of the failure of the main fixing point.
-The external surface of the unit, at various points, may exceed 150°C. Never handle the unit
until at least 10 minutes have elapsed since the lamp was turned off.
-Always replace the lamp if any physical damage is evident.
-Never install the fixture in an enclosed area lacking sufficient air flow. The ambient
temperature should not exceed 35°C.
-A hot lamp may explode, so always wait for at least 10 minutes to elapse after the unit has
been turned off prior to attempting to replace the lamp.
-Always wear suitable hand protection when handling the lamp.
Level of protection against the penetration of solid and liquid matter:
The projector is classified as an ordinary appliance and its level of protection against the penetration of solid
and liquid matter is IP 20. IDEA uses 575W Philips 575 MSR/2 lamps with GX 9.5 base.
The temperature inside the projector can reach 250° C after just 5 minutes, but it can get as high as 350° C.
Always check that the lamp is cold before attempting to remove it. In any case, only open the appliance 10
minutes after it has been turned off.

GB
6
Idea Spot 575 rel. 1.0
1.0 – Installation
1.1 – Access to the internal components
It is possible to inspect the inside of the projector by removing the cover as indicated below.
ATTENTION! remove mains power prior to accessing the projector’s internal
components.
1. Loosen the screws which fix the upper and lower covers (photo 1) and unscrew the side covers
(photo 2).
2. Once unscrewed, simply lift the covers to access the internal components (photo 3).
1.2 - Mounting the lamps
Warning: turn power off before opening the appliance.
Philips 575 MSR/2
Power 575W
Luminous flux 49,000 lm
Colour temperature 7.200°K
Lampbase GX9,5
Rated life 1,000 hours
1. Using a head screwdriver, remove the 3 screws (X,Y, Z) (photo 1, black screws) which hold the
lampholder in place and are located at the rear of the projector head.
Photo 2Photo 1 Photo 4Photo 3
2. Remove the lampholder unit. Locate the lampholder (photo 2).
3. Insert the lamp (photo 3).
4. The lamp used is manufactured from quartz glass and should be handled with care. Always adhere
to the instructions supplied in the lamp's packaging. Never touch the glass directly but use the tissue
provided in the lamp's packaging. The GX 9.5 lampbase is symmetrical.
photo 1
photo 2
photo 3

Idea Spot 575 rel. 1.0
- 7 -
GB
Photo 1 Photo 2 Photo 3
5. DO NOT USE UNDUE FORCE ON THE GLASS. In case of difficulty, re-read the instructions and
repeat the procedure.
6. Replace the lamp assembly (photo 4) and replace and tighten the screws (X,Y,Z), which were
previously removed (photo 1).
1.3 - Alignment lamp
Attention: we recommend that the lamp be realigned in the optical train of the unit to avoid overheating of the
dichroic filters and other components inside the unit. (Photo 5).
Foto 5
Alignment is carried out using the 3 adjusters A, B and C (white screws).
During this operation you must bring the hot-spot to the centre of the beam and flatten it as much as
possible.
1.4 - Replacing gobos:
IDEA uses a mechanical system which allows the fixture's gobos to be removed without the use of specialist
equipment. Replacement gobos should be made of either heat resistant glass or metal.
An ever-increasing range of gobos is available from your SGM sales network.
Gobo dimensions are as follows:
ø external = 28 mm (or 27 mm from the back)
ø of image with defined edge = 24 mm
thickness = from 0.2 to 3.5 mm
1.5 - Replacing gobos on the rotating gobo wheel
When replacing gobos as shown in the following diagrams, ensure that the projector is not turned on.
1. Open the projector housing as described above.
2. Loosen the screws as shown (photo 1) and remove the metal leaf to allow easier access to the
gobos.
3. Release the gobo retaining spring and carefully remove the gobo (photo 2-3).
4. Reverse the procedure to install a replacement gobo.
Photo 5

GB
8
Idea Spot 575 rel. 1.0
1.6 - Voltage and frequency:
The projector can operate at 230V voltage, at 50 or 60 Hz. SGM presets a voltage of 230V at a frequency
of 50Hz (barring specific requests).
1.7 - Fissaggio meccanico montaggio:
IDEA may be either floor or ceiling mounted.
For floor mounting installations, the IDEA is supplied with four rubber mounting feet on the base.
For ceiling mounted installations, we suggest the use of appropriate clamps or fixings to attach the fixture to
the mounting surface.
The supporting structure from which the unit is hung should be capable of bearing the weight of the unit, as
should any clamps used to hang it. The structure should also be sufficiently rigid so as not to move or shake
whilst the IDEA moves during its operation.
Four quarter turn fast locks placed on the base of the units allow for the fixing of brackets that can then be
fixed on to the rails with the use of C clamps or Aliscaf type clamps.
1.8 - Safety chain:
We recommend the use of a safety cable or chain connected to the IDEA and to the suspension truss in
order to avoid the fixture accidentally falling should the main fixing point fail. Make sure that the iron cable or
chain can bear the weight of the entire unit.
You may attach the safety chain to the two holes (A) located on the base of the fixture, as shown in the
diagram below.
A

Idea Spot 575 rel. 1.0
- 9 -
GB
1.9 - Protection against liquids
The projector contains electric and electronic components which should under no circumstances come into
contact with oil, water or any other liquid. The proper working of the unit would be compromised should this
occur.
1.90 - Movement
The projector has a maximum movement of 540° in the base and 319° in the yoke. DO NOT place any
obstructions in the path of the projector's movement.
540°
132°
132°
1.91 - Risk of fire
Each fixture produces heat and must be installed in a well-ventilated position. The minimum recommended
distance from flammable material is 0.5m. Minimum distance from the object being illuminated is 2 m.
1.92 - Forced ventilation
You will note, on inspection, that the fixture features various air inlets and cooling fans located on both the
base and head of the fixture. These should, under no circumstances, be blocked or obstructed whilst the
projector is in operation.
Doing so could cause the fixture to seriously overheat thereby compromising its proper operation.
1.93 - Ambient temperature
The projector should never be installed in places that lack a constant flow of air. The ambient temperature
should NOT exceed 35°C.
1.94 - Mains connection
IDEA operates at voltage 230V at 50 or 60Hz.
Prior to connecting the unit to your mains supply, ensure that the model in your possession correctly
matches the mains supply available. For connection purposes, ensure that your plug is of a suitable rating of
8 amps at 230V.
Strict adherence to regulatory norms is strongly recommended.
1.95 - Protection
The use of a thermal magnetic circuit breaker is recommended for each IDEA.
A good earth connection is essential for the correct operation of the projector.

GB
10
Idea Spot 575 rel. 1.0
1
2
3
4
5
COMMON
DMX-
DMX+
1.96 - Collegamento DMX:
Idea has a DMX 512 input fitted with standard 5-pin XLR connectors. Screened cables in compliance with
EIA RS-485 specifications and the following characteristics must be used for connections:
-2 conductors plus screen
-120Ohm impedance
-low capacitance
-max. transmission rate 250kBaud.
Cable connections:
see illustration, taking care with the screen, which must be connected to Pin 1
ATTENTION: the screened parts of the cable (sleeve) must NEVER be connected to the
system's earth, as this would cause faulty fixture and controller operation.
Example of connection of the DMX line
To avoid the risk of faulty operation, follow these indications:
-Maximum cable length: 500 metres
-Max. N° of fixtures connected: 32
-Cable runs: Avoid running cables alongside power supply lines.
-Termination: A 120Ohm resistor between Pins 2 and 3 on the last fixture.

Idea Spot 575 rel. 1.0
- 11 -
GB
1.97 - Construction of the DMX termination
The termination avoids the risk of DMX 512 signals being reflected back along the cable when they reaches
the end of the line: under certain conditions and with certain cable lengths, this could cause them to cancel
the original signals.
The termination is prepared by soldering a 120Ohm 1/4 W resistor between pins 2 and 3 of the 5-pin male
XLR connector (see diagram).
1
2
3
4
5
120Ω
The standard configuration of the IDEA is with XLR 5 pole connection.
To convert to an XLR 3 pole configuration proceed as follows:
1. Unscrew the external cover (photo 1).
2. Unscrew the screws that fix the connectors to the panel (photo 2).
3. Rotate the electronic card by 180° (photo 3).
4. Position the 3 pole connectors in the special holes and close.
1.98 - DMX Addresses
IDEA can be used in two different modes: 14 or 16 DMX channels.
If you want to use a DMX controller with 14 channels, select the 14 CH mode from the MODE menu and set
the following addresses:
Projector 1 A001
Projector 2 A015 If you want to select the next projector, just add “14”
Projector 3 A029
….. A….
Projector 6 A071
If you want to use a DMX controller with 16 channels, select the 16 CH mode from the MODE menu and set
the following addresses:
Projector 1 A001
Projector 2 A017 If you want to select the next projector, just add “16”
Projector 3 A033
….. A….
Projector 6 A081
1.99 - Changing the DMX address
1. Press the UP-DOWN key until you reach the required DMX number. The numbers on the display will
start to flash (but the new DMX address hasn't yet been set).
2. Press ENTER to confirm your selection. The numbers on the display will stop flashing and the
projector is now controlled by the new 512 DMX number.
WARNING: if you press the UP-DOWN keys together the channels are calculated more quickly and you get
a faster selection.
photo 3
photo 2
photo 1

GB
12
Idea Spot 575 rel. 1.0
2.0 - Microcomputer Control
DMX OUT
DMX IN
UP
DOWN
MENU
ENTER
COURRENT
230 V 50~60 z DISPLAY
2.1 - Display functions
The IDEA display panel shows all the functions available. Using these functions, it is possible to change
some of the parameters and to add some functions. Changing the SGM setting can vary the functions of the
appliance so that it does not respond to the DMX 512 used to control it. Carefully follow the instructions
below before carrying out any variations or selections.
NOTE: the symbol shows which key has to be pushed to obtain the function desired.
Up-DownMENU ENTERUp-Down
.
Up-DownMENU ENTERUp-Down
Up-Down
MENU Up-Down
Up-DownMENU ENTER
Up-Down
Up-Down
Up-Down
Up-Down Up-DownENTER
Display ON
Display OFF
Up-DownENTER Up-DownENTER
Up-Down
PAN MOVEMENT INVERSION
To reverse horizontal direction of
the beam .
TILT MOVEMENT INVERSION
To reverse vertical direction of the beam
DISPLAY
T rn off the diaplay and Inverts display
reading position.
DMX MODE
To select DMX mode : 16-14 channels
Clockwise
Cou terclockwise
Cou terclockwise
Clockwise
Floor positio
Suspe sio positio
16 CHANNELS (Pa & Tilt 16 bit)
14 CHANNELS (Pa & Tilt 16 bit)

Idea Spot 575 rel. 1.0
- 13 -
GB
MENU ENTER ENTER
MENU ENTER
MENU ENTER Up-Down ENTER
Up-Down
MENU ENTER Up-Down ENTER
Up-Down ENTER
Up-Down ENTER
MENU ENTER Up-Down ENTER
Up-Down ENTER
MENU ENTER
MENU ENTER
ENTER Up-Down
Up-Down
Up-Down
Up-Down
MENU Up-Down
Up-Down
Up-Down
Up-Down
Up-Down
Up-Down
Up-Down
Up-Down
ENTER
Pcb 8 motors . Pcb PAN/TILT
Up-Down
ENTER
MENU ENTER Up-Down ENTER
Up-Down
MENU ENTER Up-Down ENTER
Up-Down
Up-Down
MENU ENTER
Up-Down ENTER Up-Down
Up-DownENTER ENTER
Up-Down
Up-Down
ENTER
ENTER
MENU Up-Down
LAMP
ON/OFF lamp via DMX
Up-DownENTER
Up-Down
Up-Down
Enabled
Disabled
ENTER
ENTER
ENTER
Enabled
Disabled
OFF
Fixt re Reset
TEST MODE
Device operation test.
AUTOMATIC MODE
A tomatic demo game witho t DMX controller
RESET
To reset all motors f nction via DMX
DEFAULT
To restore defa lt setting (set by SGM)
SOFTWARE VERSION
Electronic card software version.
FAN CONTROL
To control the fan speed.
TIMER
Vis alization of lamp life (reset possible)
and total time nit's working
(reset not possible)
SPEED
To change the maxim m speed of
PAN and TILT movement
GOBO ROTATION
Activates roto gobos d ring
the gobo change
REC
Record mode
SLAVE
Slave mode as r n by GAM.P,
Synchronised with master

GB
14
Idea Spot 575 rel. 1.0
2.2 - Automatic operation (AUTO)
IDEA can work in automatic mode without a DMX controller.
First of all connect the projectors with a DMX cable (picture below).
OUT INOUT IN OUT
To activate Auto mode on the first unit, use the menu to run through the different modes until AUTO appears
on the display, at this point press enter.
Now it is possible to choose between the different pre-programmed games (GAME 1-2-3) or Game P which
is user programmable through REC mode. To confirm game activation press ENTER on the chosen GAME.
2.3 - Game 1-2
The first unit that will work as a Master should be placed in Automatic mode (AUTO), the other projectors
have to be place in 16 channels DMX mode (MODE 16CH) and the DMX address should be set at A001.
Once a game is chosen and set it is possible to select the speed of the game (SPEE) and the gobo focus
(FOCU).
2.4 - Game p
The first unit that will function as a Master must be put in (AUTO) mode, the other projectors have to be put
in slave mode (selectable through the menu). In this way all units will be synchronised with the master, the
projectors need not be of the same model.
On the master unit it is possible to vary the speed of the GAME P (SPEE)
NB: It is possible to run GAME P on the other units even though these do not have GAME P programmed.
You can do this by setting the units to the same mode as the master is set before programming GAME P
(14CH or 16CH DMX) and selecting A001 ad the DMX address.
2.5 - Modalità rec
It is possible to programme your own game on the IDEA that will then run in AUTO mode (GAME P). Each
unit can have its own programmed game.
In REC mode each projector must be set to the same mode (14CH or 16CH DMX).
For the programming of GAME P besides the channels necessary to control the unit a further 3 DMX
channels are needed. So that in REC mode if the 14CH mode is selected you will need 17 channels for the
programme to work correctly whereas 16CH mode would occupy 19 channels.
Connect the unit to a DMX mixer/controller, every unit should be set to its own Address (See the paragraph
on DMX addresses). The projectors can also be different of models: IDEA spot/wash. When you are in REC
mode R.001 appears on the display (DMX address).
The three new DMX channels are:
SCENE channel:
-Form 0-255 are displayed the programmable scenes (max 16 scenes M.001 M016)
VIEW channel:
-From 1-19 the unit runs the scene that has been saved in the units memory and it is possible to
play through the other scenes using the scene channel.
-From 20-235 the unit runs the configuration given by the received input DMX values. With the
channel scene it is possible to pass from one scene to the next while with REC it is possible to
record the selected scene.

Idea Spot 575 rel. 1.0
- 15 -
GB
-From 236-255 the unit runs the configuration given by the received DMX values from the
projector in that moment. It is possible to select a scene and then close the GAME P with the
REC channel.
Recording channel (REC)
Records the set scene with a variable between 0 and 255 (the display flashes indicating that the
scene has been recorded).
It is advised that you keep the REC channel set to 0 and to run through the 255 only once you have
decided to save the scene. If GAME P is not closed, by indicating the last scene, in playback mode
all 16 scenes will be played through even if not programmed.
2.6 - Pan & Tilt speed (SPEE) (default: 2)
You can set the PAN and TILT engines at high speed on your IDEA.
Press menu until you see SPEE.
Press ENTER and select a speed with UP-DOWN (there are 4 speeds). Confirm by pressing ENTER.
When you use speed 4 (the highest) PAN and TILT speed is very high and your projector may loose its path.
In this case, the encoder corrects the position.
2.7 - Fan speed (FANS)( default: 6)
Fan speed regulation makes it possible to reduce fan noise. However, the ambient temperature must be less
than 35° C.
2.8 - Error messages
ERROR: colour WHEEL POSITION
ERROR: GOBO WHEEL POSITION
ERROR: LENSES WHEEL
POSITION
ERROR: ROTOGOBO POSITION
ERROR: INTERNAL
COMMUNICATION
ERROR: AUTO MODE INPUT
ERROR: ENCODER PAN
ERROR: ENCODER TILT
ERROR: DMX ADDRESS
ERROR: LOAD DATA
EEPROM
ERROR: SENSOR CIRCUIT
COLOR/BEAM ANGLE
ERROR: SENSOR CIRCUIT
GOBO/ROTOGOBO

GB
16
Idea Spot 575 rel. 1.0
2.9 - Hidden menu
For technical personnel only.
To operate this menu:
1. Connect the projector to the DMX controller (DMX SIGNAL MUST BE CORRECTLY RECEIVED)
2. Reset the IDEA (reset from the display projector, not from the DMX controller!).
3. While reset is working, press the MENU and ENTER keys at the same time.
Electronic calibration of the motors.
Reset EEPROM (Reset all settings. ATTENTION: by pressing this key you must repeat all
previous calibrations)
Exit from hidden menu.
Up-DownEN TER
PAN ALIGNMENT
To alignpan movement
ES.
EN TER
Up-DownEN TER
TILT ALIGNMENT
To aligntilt movement
ES.
EN TER
Up-Down
Up-Down
EN TER
Up-DownEN TERUp-Down
GOBOWHEEL ALIGNMENT
To align gobo wheel
ES.
EN TER
Up-DownEN TER
Up-Down
ROTO GOBO ALIGNMENT
To align roto gobo
ES.
EN TER
Up-DownEN TERUp-Down
FOCUS ALIGNMENT
To alignfocus
ES.
EN TER
Up-DownEN TERUp-Down
colourWHEELALIGNMENT
To aligncolour wheel
ES.
EN TER
Up-DownEN TERUp-Down
SHUTTERALIGNMENT
To alignshutter
ES.
EN TER
Up-DownEN TERUp-Down
PRISM ALIGNMENT
To alignprism
ES.
EN TER
Up-DownEN TERUp-Down
LENSES ALIGNMENT
To alignlenses
ES.
EN TER

Idea Spot 575 rel. 1.0
- 17 -
GB
3.0 - Periodic cleaning
3.1 - Lenses and reflectors
Even a fine layer of dust can reduce the luminous output substantially. Regularly clean all lenses and the
reflector using a soft cotton cloth, dampened with a specialist lens cleaning solution.
3.2 - Fans and air passages
The fans and air passages must be cleaned approximately every 6 weeks. This periodic cleaning will depend
of course, on the conditions in which the projector is operating. Suitable instruments for performing this type
of maintenance are a brush and a common vacuum cleaner or an air compressor. If necessary, clean the
fans and air passages more frequently.

Appendix
Idea Spot 575
- A1 -
GB
16 CHANNELS MODE ( 16CH)
1PAN msb
2PAN lsb
3TILT msb
4TILT lsb
5SPEED MOVEMENT
6COLOUR
7GOBO
8SHUTTER
9DIMMER
10 ROTOGOBO
11 PRISM/ROTOPRISM
12 PROPORTIONAL COLOUR (Prioritario)
13 FOCUS
14 LIGHT BEAM ANGLE
15 RESET/LAMP
16 FROST

Appendix
Idea Spot 575
- A2 -
GB
Movement speed – ch 5-
DMX
Value Central
Value Function
0-10 5 Standard
11-25 18 Fast movement
26-127 76 Vector mode from fast to slow
128-247 187 Variable time reaction to DMX signal ( fast to slow)
248-255 251 Slow reaction time to DMX signal
Colour – ch 6 -
DMX
Value Central
Value Function
0-10 5 Color1
11-21 16 Bicolor ½
22-32 27 Color2
33-43 38 Bicolor 2/3
44-54 49 Color3
55-65 60 Bicolor 3/4
66-76 71 Color4
77-87 82 Bicolor 4/5
88-98 93 Color5
99-109 104 Bicolor 5/6
110-120 115 Color6
121-131 126 Bicolor 6/7
132-142 137 Color7
143-153 148 Bicolour 7/8
154-164 159 Color8
165-175 170 Bicolour 8/9
176-186 181 Color9
187-197 192 Bicolour 9/1
198-200 199 Right rotation speed 1 min.
201-203 200 Right rotation speed 2
204-206 205 Right rotation speed 3
207-209 208 Right rotation speed 4
210-212 211 Right rotation speed 5
213-215 214 Right rotation speed 6
216-218 217 Right rotation speed 7
219-221 220 Right rotation speed 8
222-224 223 Right rotation speed 9 max.
225-228 226 Stop
229-231 230 Left rotation speed 1 min.
232-234 233 Left rotation speed 2
235-237 236 Left rotation speed 3
238-240 239 Left rotation speed 4
241-243 242 Left rotation speed 5
244-246 245 Left rotation speed 6
247-249 248 Left rotation speed 7
250-252 251 Left rotation speed 8
253-255 254 Left rotation speed 9 max.
Table of contents
Other SGM Dj Equipment manuals

