NEO PROTON IP 12 QA User manual

P. 1
- Neo Proton IP 12 QA
USER MANUAL / MANUAL DE USUARIO
PLEASE READ THE INSTRUCTIONS CAREFULLY BEFORE USE
POR FAVOR LEA LAS INSTRUCCIÓNES ANTES DE USAR
PROTON
IP 12 QA
OUTDOOR RGBA LED PROFESSIONAL
WASHER WITH WIRELESS DMX

P. 2
Neo Proton IP 12 QA - English version
1. OVERVIEW
PROTON IP 12 QA
Outdoor RGBA LED Professional washer
with wireless DMX
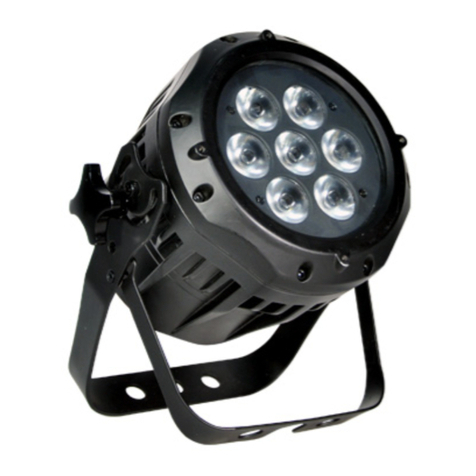
Proton IP 12 QA is a professional outdoor wash light
that sports 12 10W RGBA LEDs and a beam angle of
24º. With adjustable PWM, a function that adjusts the
refresh rate to be able to work without icker, and a
built-in white balance control, the xture is an ideal
alternative for broadcasting applications. Proton IP
12 QA also has four dimmer curves, color macros, an
OLED display with a friendly interface, and an IP65
degree of protection.
Source & Optics
• Light Source: 12 4-in-1 RGBA 10W LEDs
• LEDs life: 50,000 hours
• Beam angle: 24º / Field angle: 38º
Photometric data
• Luminous ux: 912 Lux @ 5m (16 .)
Effects & Functions
• Quad-color LED technology: Smooth RGBA mix
with no multi-colored shadows
• Ideal for any setting thanks to amber color
incorporation
• Color macros and rainbow eect
• Dimmer: 0-100% general & for all colors
• 4 dimming curves
• Strobe eect: 0-30 Hz
• Adjustable PWM (Pulse Width Modulation) to
work icker free in any given situation
• White balance control on-board: 3000K, 4000K,
5000K, 6000K, 7000K, 8000K, 9000K & 10000K
• Heavy duty case
• Very silent operation
Control
• DMX Channels: 4/6/11
• Operational modes: DMX, Master/Slave, Au-
to-run and Static Colors
Physical
• IP Rating: IP65
• OLED display
• DMX connectors: 2 XLR connectors (XLR-5
input and output)
• Seetronic® PowerKon IP65 In/Out power sup-
ply connectors
• Dimensions: 322x305x177 mm. / 12.6x12x6.9 in.
• Weight: 6.2 Kg. / 13.6 Lbs.

P. 3
- Neo Proton IP 12 QAEnglish version
2. SAFETY
Warning
Before carrying out any operations with the
unit, carefully read this instruction manual and
keep it with cure for future reference. It contains
important information about the installation,
usage and maintenance of the unit.
General instruction
• The products referred to in this manual con-
form to the European Community Directives
and are therefore marked with
• The unit is supplied with hazardous network
voltage (230V~). Leave servicing to skilled per-
sonnel only. Never make any modications on
the unit not described in this instruction manu-
al, otherwise you will risk an electric shock.
• Connection must be made to a power supply
system tted with eicient earthing (Class I ap-
pliance according to standard EN 60598-1). It is,
moreover, recommended to protect the supply
lines of the units from indirect contact and/or
shorting to earth by using appropriately sized
residual current devices.
• The connection to the main network of electric
distribution must be carried out by a quali-
ed electrical installer. Check that the main
frequency and voltage correspond to those
for which the unit is designed as given on the
electrical data label.
• This unit is not for home use, only professional
applications.
• Never use the xture under the following condi-
tions: - in places subject to vibrations or bumps;
- in places with a temperature of over 40 °C.
• Make certain that no imammable liquids, wa-
ter or metal objects enter the xture.
• Do not dismantle or modify the xture.
• All work must always be carried out by qualied
technical personnel. Contact the nearest sales
point for an inspection or contact the manufac-
turer directly.
• If the unit is to be put out of operation deni-
tively, take it to a local recycling plant for a dis-
posal which is not harmful to the environment.
Warnings and installation
precautions
• If this device will be operated in any way difer-
ent to the one described in this manual, it may
suer damage and the guarantee becomes
void. Furthermore, any other operation may
lead to dangers like short circuit, burns, elec-
tric shock, etc.
• Before starting any maintenance work or
cleaning the proyector, cut o power from
main supply.
• Always additionally secure the projector with the
safety rope. When carrying out any work, always
comply scrupulously with all the regulations
(particularly regarding safety) currently in force
in the country in ehich the xture's being used.
• Install the xture in a well ventilated place.
• Keep any inplammable material at a safe dis-
tance from the xture.
• Shields, lenses or ultraviolet screens shall be
changed if they have become damaged to such
an extent that their eectiveness is impaired.
• The lamp (LED) shall be changed if it has be-
come damaged or thermally deformed.
• Never look directly at the light beam. Please
note that fast changes in lighting, e.g. ashing
light, may trigger epileptic seizures in photo-
sensitive persons or persons with epilepsy.
• Do not touch the product’s housing when oper-
ating because it may be very hot.
P. 4
Neo Proton IP 12 QA - English version
3. MAINTENANCE
Maintenance and Cleaning the Unit
• Make sure the area below the installation place
is free from unwanted persons during setup.
• Switch o the unit, unplug the main cable and
wait until the unit has cooled down.
• All screws used for installing the device and
any of its parts should be tightly fastened and
should not be corroded.
• Housings, xations and installation spots (ceil-
ing, trusses, suspensions) should be totally free
from any deformation.
• The main cables must be in impeccable condi-
tion and should be replaced immediately even
when a small problem is detected.
• It is recommended to clean the front at regu-
lar intervals, from impurities caused by dust,
smoke, or other particles to ensure that the
light is radiated at maximum brightness. For
cleaning, disconnect the main plug from the
socket. Use a so, clean cloth moistened with
a mild detergent. Then carefully wipe the part
dry. For cleaning other housing parts use only
a so, clean cloth. Never use a liquid, it might
penetrate the unit and cause damage to it.
4. TROUBLESHOOTING
Problems Possible causes Checks and remedies
Fixture does not light up
• No mains supply
• Dimmer fader set to 0
• All color faders set to 0
• Faulty LED
• Faulty LED board
• Check the power supply voltage
• Increase the value of the dimmer channels
• Increase the value of the color channels
• Replace the LED board
General low light intensity • Dirty lens assembly
• Misaligned lens assembly
• Clean the xture regularly
• Install lens assembly properly
Fixture does not power up
• No power
• Loose or damaged power cord
• Faulty internal power supply
• Check for power on power outlet
• Check power cord
• Replace internal power supply
Fixture does not respond
to DMX
• Wrong DMX addressing
• Damaged DMX cables
• Bouncing signals
• Check control panel and unit addressing
• Check DMX cables
• Install terminator as suggested
In case of technical issues that cannot be resolved following about troubleshooting tips, contact your author-
ized dealer for service.

P. 5
- Neo Proton IP 12 QA
English version
5. OPERATING ELEMENTS AND CONNECTIONS
1. MOUNTING BRACKET
2. LOCKING KNOB for the mounting bracket.
3. DMX IN (5-pin IP65 XLR) 1: ground, 2: DMX-, 3:
DMX+, 4 N/C, 5 N/C.
4. DMX OUT (5-pin IP65 XLR) 1: ground, 2 DMX-, 3:
DMX+, 4 N/C, 5 N/C.
5. CONTROL PANEL with display and 4 button
used to access the control panel functions and
manage them.
6. SAFETY ANCHOR POINT to attach safety cable.
7. POWER IN (IP65 PowerKon) for connection to
a socket (100-240V~/50-60Hz) via the supplied
mains cable.
8. POWER OUT (IP65 PowerKno) connect to supply
power to the next unit.
9. GORE VALVE (to prevent condensation).

P. 6
Neo Proton IP 12 QA - English version
6. INSTALLATION
Mounting
Proton IP 12 QA may by set up on a solid and even
surface. The unit can also be mounted upside down
to a cross arm. For xing, stable mounting clips are
required. The mounting place must be of suicient
stability and be able to support a weight of 10 times
of the unit's weight.
When carrying out any installation, always comply
scrupulously with all the regulations (particularly
regarding safety) currently in force in the country in
which the xture's being used.
• Install the projector at a suitable location by
means of the mounting bracket (2).
• Always additionally secure the projector with
the safety rope from falling down. For this
purpose, fasten the safety rope at a suitable
position so that the maximum fall of the projec-
tor will be 20cm.
• Adjust the projector and use the knob to slight-
ly release of tighten the locking mechanism of
the bracket if is necessary (1).

P. 7
- Neo Proton IP 12 QA
English version
Dimensions
Ø195
Ø238
239
201.5

P. 8
Neo Proton IP 12 QA -
7. FUNCTIONS AND SETTINGS
Operation
Connect the supplied main cable to a socket. Then
the unit is ready for operation and can be operated
via a DMX controller or it independently performs
its show program in succession. To switch o,
disconnect the mains plug from the socket. For a
more convenient operation it is recommended to
connect the unit to a socket which can be switched
on and o via a light switch.
Basic
Access control panel functions using the four panel
buttons located directly undernearth the black
OLED display.
English version
Menu Up Down Enter
Used to access the menu
or return a previous
menu option.
Navigates downwards
through the menu list and
increases the numeric
value when in a function.
Navigates upwards
through the menu list and
decreases the numeric
value when in a function.
Used to select a store the
current menu or conrm
the current function
value or option within a
menu.

P. 9
- Neo Proton IP 12 QA
Menu Structure
English version
DMX Address <001> Default: 001
DMX Channel
4Ch
Default: 11Ch
6Ch
11Ch
Static
Fixed Color
RRA
Default: RGBA
GGA
BBA
WRGA
GB RBA
RB GBA
RG RGBA
RGB
Color Temperature
3000K
Default: 3000K
4000K
5000K
6000K
7000K
8000K
9000K
10000K
Manual Color Mixer
Red <0-255>
Default: RGBA: 255
Green <0-255>
Blue <0-255>
Amber <0-255>
Auto Show
Auto 1 <1-100>
Default: Auto 1;
Speed: 100
Auto 2 <1-100>
Auto 3 <1-100>
Auto 4 <1-100>
Auto 5 <1-100>
Master/Slave Master Default: Slave
Slave
Dimmer Mode
O
Default: O
Dimmer 1
Dimmer 2
Dimmer 3

P. 1 0
Neo Proton IP 12 QA -
W-DMX WIRELESS SETTING
The Proton IP 12 QA features an onboard W-DMX
receiver. By default, W-DMX is OFF. To activate:
• Press the MENU button until the display shows
Wireless Setting, Then press ENTER.
• Press the UP/DOWN buttons to select Receive
On, then press ENTER.
• To reset the onboard W.DMX receiver, select
Receive Reset, then press ENTER.
AUTO SHOW
If no DMX control signal is present at the DMX IN-
PUT, the unit independently runs through its show
programme provided that the blackout mode is
switched o:
• Press the button MENU so many times until the
display shows Auto Show, then press the button
ENTER.
• Press the button UP/DOWN to switch between
the show (Auto 1-5). The unit will operate in
show mode.
English version
Menu Structure (cont'd)
Wireless Setting
Receive On/O On Default: O
O
Receive Reset No Default: No
Yes
Back Light
On
Default: On
10S
20S
30S
Key Lock On Password: Up Down Up
Down Enter Default: On
O
Information Fixture Hours <9999H>
Version <V1.0>
Reset Factory No Default: No
Yes
White Balance
O
Default: O
Manual Red <125-255>
Green <125-255>
Blue <125-255>
Amber <125-255>
LED Frequency
600Hz
Default 1200Hz
1200Hz
2000Hz
4000Hz
6000Hz
25kHZ

P. 11
- Neo Proton IP 12 QA
• Using the button UP/DOWN to select the de-
sired run speed slow-fast (1-100).
• Press the button ENTER to save the setting.
IMPORTANT: Programs Auto 1-5 are fully pre-pro-
grammed and will not be altered by changes.
Instead, Manual Color mode allows to combine the
colors Red-Green-Blue-Amber.
• Press the button MENU so many times until
the display shows Static, then press the button
ENTER.
• Through the button UP/DOWN select Manual
Color, the press the button ENTER.
• Select the color Red-Green-Blue-Amber
through the buttons UP/DOWN.
• Press the button ENTER to conrm.
• Set the value (000-255), through the buttons
UP/DOWN.
• Press the MENU button to go back or to meet
the waiting time to exit the setup menu.
STATIC MODE
This xture has the ability to accept custom static
color settings. Access these chases via the control
panel on the back of the xture.
• To enable the static mode, press MENU repeat-
edly until Static shows on the display.
• Press the button ENTER.
• Through the button UP/DOWN select Fixture
Color, then press the button ENTER.
• Select the desired preset color (R-G-B-A-GB-RB-
RG-RGB-RA-GA-BA-RGA-RBA-GBA-RGBA) using
the button UP/DOWN.
• Press the button ENTER to save the setting.
• Press the MENU button to go back. Or, aer
a few seconds, the manu returns to the main
screen.
MASTER/SLAVE MODE
This mode will allow you to link up the units togeth-
er without a controller. Choose a unit to function
as the Master. The unit must be the st unit in line;
other units will work as slave with the same eect.
• Press the button MENU so many times until
the display shows Master/Slave and press the
button ENTER.
• Press UP/DOWN to set the unit as master or
slave (Master/Slave).
• Select the desired program.
• Use Standard DMX cables to daisy chain your
units together via the DMX connector on the
rear of the units. For longer cable runs we sug-
gest a terminator at the last xture.
LINKING
Several units may be interconnected in order to
control all further slave units to the same eect of
the master unit.
1. Connect the DMX OUT of the master unit via
5-pin XLR cable to the DMX IN of the rst slave
unit.
2. Connect the DMX OUT of the rst slave unit to
the DMX IN of the second slave unit, etc. until all
units are connected in a chain.
DMX CONFIGURATION
Proton IP 12 QA is equipped with dierent DMX
conguration.
• Press the button MENU so many times until
shows DMX channel, and press the button EN-
TER to conrm.
• Select the desired DMX conguration (4ch, 6ch,
11ch) through the buttons UP/DOWN.
The DMX tables indicate the operating mode and
DMX value. The Proton IP 12 QA is equipped with
5-pin XLR connections.
DMX ADDRESSING
• Press the button MENU so many times until
the display shows DMX address, and press the
button ENTER to conrm.
• Press UP/DOWN button to select the desired
value (011-509). Press and hold to scroll quickly.
• Press ENTER button to store.
• Press the MENU button to go back or to meet
the waiting time to exit the setup menu.
To operate the Proton IP 12 QA with a light control-
ler, adjust the DMX start address fot the rst a DMX
English version

P. 12
Neo Proton IP 12 QA -
Number of DMX
channels
Start address
(example)
DMX Address
occupied
Next possible
start address
for unit No.1
Next possible
start address
for unit No.2
Next possible
start address
for unit No.3
433 33-36 37 41 45
633 33-38 39 45 51
11 33 33-43 44 55 66
DMX address: 33 DMX address: 37
DMX512 Controller
Example of DMX conguration in 4-channel mode
DMX address: 41 DMX address: 45
Beam Angle: 24°
Proyect Distance (m) 1m
16256 lux 1806 lux
3m
Luminance (lux)
Full
Photometrics
channel. If e.g. address 33 on the controller is pro-
vided for controlling the function of the srt DMX
channel, adjust the start address 33 on the Proton
IP 12 QA. The other functons of the light eect pan-
el are then automatically assigned to the following
addresses. An example with the started address 33
is shown below:
English version
650 lux
5m

P. 13
- Neo Proton IP 12 QA
Connection of the DMX line
DMX connection employs standard XLR connectors.
Use shielded pair-twisted cables with 120Ω im-
pedance and low capacity. The following diagram
shows the connection mode:
ATTENTION
The screened parts of the cable (sleeve) must never
be connected to the system's earth, as this would
cause faulty xture and controller operation.
Over long runs can be necessary to insert a DMX
level matching amplier.
For those connections the use of balanced micro-
phone cable is not recommended because it cannot
transmit control DMX data reliably.
• Connect the controller DMX input to the DMX
output of the rst unit.
• Connect the DMX output to the DMX input to
the following unit. Connect again the output to
the input of the following unit until all the units
are connected in chain.
• When the signal cable has to run longer dis-
tance is recommended to insert a DMX termina-
tion on the last unit.
DMX-INPUT
XLR plug
Pin1: GND - Shield
Pin2: Negative
Pin3: Positive
Pin4: N/C
Pin5: N/C
DMX-OUTPUT
XLR socket
English version
Construction of the DMX termination
The termination avoids the risk of DMX 512 signals
being reected back along the cable when they
reaches the end of the line: under certain condi-
tions and with certain cable lenghts, this could
cause them to cancel the original signals.
The termination is prepared by soldering a 120Ω
1/4W resistor between pins 2 and 3 of the 5-pin
male XLR connector, as shown in gure.

P. 14
Neo Proton IP 12 QA -
DMX Control
Mode 11 Ch Function DMX Value
1Dimmer 0~100% 000-255
2Red 0~100% 000-255
3Green 0~100% 000-255
4Blue 0~100% 000-255
5Amber 0~100% 000-255
6
Strobe
No function
Slow to fast
000-010
011-255
7
Color macro + Amber Balance
No function
R:100% / G:0~100% / B:0
R:100%~0 / G:100% / B:0
R:0 / G:100% / B:0~100%
R:0 / G:100%~0 / B:100%
R:0~100% / G:0 / B:100%
R:100% / G:0 / B:100%~0
R:100% / G:0~100% / B:0~100%
R: 100%~0 / G:100%~0 / B:100%
R: 100% / G:100% / B:100% / A:100%
Color 1
Color 2
Color 3
Color 4
Color 5
Color 6
Color 7
Color 8
Color 9
Color 10
Color 11
000-010
011-030
031-050
051-070
071-090
091-110
111-130
131-150
151-170
171-200
201-205
206-210
211-215
216-220
221-225
226-230
231-235
236-240
241-245
246-250
251-255
8
Color Temperature
No function
3000K
4000K
5000K
6000K
7000K
8000K
9000K
10000K
No function
000-005
006-039
040-069
070-099
100-129
130-159
160-189
190-219
220-250
251-255
English version

P. 15
- Neo Proton IP 12 QA
Mode 6 Ch Function DMX Value
1Dimmer 0~100% 000-255
2Red 0~100% 000-255
3Green 0~100% 000-255
4Blue 0~100% 000-255
5Amber 0~100% 000-255
6
Strobe
No function
Slow to fast
000-010
011-255
9
Auto Programs
No Function
Auto Program 1
Auto Program 2
Auto Program 3
Auto Program 4
Auto Program 5
000-010
011-060
061-110
111-160
161-210
211-255
10 Auto Speed
Slow to fast 000-255
11
Dimmer Speed
Preset dimmer speed from display menu
Dimmer speed mode o
Dimmer speed mode 1 (fast speed)
Dimmer speed mode 2 (middle speed)
Dimmer speed moder 3 (slow speed)
000-051
052-101
102-152
153-203
204-255
English version
Mode 4 Ch Function DMX Value
1Red 0~100% 000-255
2Green 0~100% 000-255
3Blue 0~100% 000-255
4Amber 0~100% 000-255

P. 1 6
Neo Proton IP 12 QA -
Fixture Settings
It is possible to change the parameter values in the
following ways:
DIMMER
• Enter in Dimmer mode to select specic dim-
ming curve, press the button MENU so many
times until shows Dimmer Mode, and press the
button ENTER to conrm.
• Press the button UP/DOWN to select O - Dim-
mer 1 - Dimmer 2 - Dimmer 3.
• Press ENTER button to store, then press MENU
to return to main menu.
BACKLITE
• To activate Blacklight display press the button
MENU so many times until shows Back Light,
and press the button ENTER to conrm.
• Press the button UP/DOWN to selec 0n - 10s -
20s - 30s.
• Press ENTER button to conrm the selection,
then press MENU to return to main menu.
LED FREQUENCY
• To adjust the frequency of the LEDs, press
the MENU button repeatedly until the display
shows LED Frequency, and then press the EN-
TER button.
• Select the frequency (600Hz - 25kHz) using the
UP/DOWN buttons.
• To conrm, press the ENTER key, then press
MENU to return to main menu.
Fixture Information
FIXTURE HOURS
Show the xture working hours.
• Press the button MENU so many times until
shows Information. Press the button ENTER to
conrm.
• Using the button UP/DOWN to select Fixture
Hours, then press the button ENTER to conrm.
• Then the display will show the working hours.
Press MENU to return ro main menu.
VERSION
Show the xture rmware version.
• Press the button MENU so many times until
shows Information.
• Select through the button UP/DOWN the Ver-
sion menu voice.
• The display will show rmware data. PRess
MENU to return to main menu.
TEMPERATURE
• To read the value of the internal temperature of
the device, press the MENU button repeatedly
until the display shows Temperature, and then
press ENTER button to read the value.
• Press the MENU button to go back or wait a few
seconds to exit the setup menu.
Amber Balance
Enter the White balance to adjust the Red, Green,
and Blue levels to achieve dierent whites.
• Press the button MENU so many times until
shows Amber Balance, and press the button
ENTER to conrm.
• Select the color R, G, B, A using the UP/DOWN
buttons, the press ENTER.
• Using UP/DOWN button, select the desired color
value 125-255.
• Press ENTER button to continue to the next
color R, G, B, A.
• Continue until the desired mix is obtained.
• Press the MENU button to go back or wait a few
seconds to exit the setup menu.
Design and product specications are subject to change without prior notice.
English version

P. 17
- Neo Proton IP 12 QA
Versión Español
1. DESCRIPCIÓN
PROTON IP 12 QA
Bañador LED RGBA profesional para exterior con DMX
inalámbrico
Proton IP 12 QA es un bañador profesional para
exteriores que cuenta con 12 LEDs RGBA de 10W y
un ángulo de haz de 24º. Con PWM ajustable, función
que ajusta la frecuencia de refresco para poder
trabajar realmente sin parpadeo, y un control de
balance de blanco incorporado, el equipo es una
alternativa ideal para aplicaciones de broadcasting.
Proton IP 12 QA tiene, además, un dimmer con cu-
atro curvas de dimmeo, macros de color, un display
OLED con una interface amigable, y un grado de
protección IP65.
Fuente & Ópticas
• Fuente de luz: 12 LEDs RGBA 4-en-1 de 10W
• Vida útil promedio: 50.000 horas
• Ángulo de haz: 24º / Ángulo de campo: 38º
Datos fotométricos
• Flujo lumínico: 912 Lux @ 5m (16 pies)
Efectos y funciones
• Tecnología LED de cuatro colores: Mezcla RGBA
suave sin sombras multicolor
• Ideal para ambientación por la incorporación
del ámbar
• Macros de color y efecto arcoiris
• Dimmer: 0-100% general & para todos los
colores
• 4 curvas de dimmeo
• Efecto estrobo: 0-30 Hz
• PWM ajustable: 600 / 1200 / 2000 / 4000 Hz o 25
KHz
• Control integrado de balance de blanco: 3000K,
4000K, 5000K, 6000K, 7000K, 8000K, 9000K &
10000K
• Diseño ultra-resistente y funcionamiento
silencioso
Control
• Canales DMX: 4/6/11
• Modos de operación: DMX, Maestro/Esclavo,
Automático & colores estáticos
Físico
• Certicación IP65
• Display OLED
• Conectores DMX: 2 conectores XLR-5 IP65 de
Entrada/Salida
• Conectores de alimentación: Seetronic IP65
PowerKon IP65 de Entrada/Salida
• Dimensiones: 322x305x177 mm. / 12,6x12x6,9
pulg.
• Peso: 6,2 Kg. / 13,6 Lbs.

P. 18
Neo Proton IP 12 QA -
2. INSTRUCCIONES DE SEGURIDAD
Advertencia
Lea atentamente el manual antes de utilizar
el equipo y procure seguir las instrucciones.
Consérvelo para futuras referencias ya que
contiene información importante sobre el uso,
la instalación y el mantenimiento del equipo.
Instrucciones Generales
• Este equipo cumple con las Directivas de la
Comunidad Europea y, por lo tanto, cuenta con
certicación .
• El equipo funciona con un voltaje de entrada de
230V~. Para su instalación, póngase en contac-
to con un profesional calicado. Para evitar el
riesgo de shock eléctrico, no introduzca modi-
caciones no autorizadas en el equipo.
• El equipo requiere de un sistema de suministro
eléctrico con puesta a tierra (equipo clase I,
norma IEC 60598-1). A su vez, se recomienda
proteger los cables de alimentación de los con-
tactos indirectos y cortocircuitos mediante el
uso de interruptores diferenciales del tamaño
adecuado.
• La instalación eléctrica debe realizarla un
electricista certicado. Procure que el voltaje y
la frecuencia coincidan con los requeridos por
la unidad.
• La unidad está diseñada para uso profesional.
No es de uso residencial.
• Procure no utilizar el equipo bajo las siguientes
condiciones: -En lugares proclives a vibraciones
y sacudidas. - En lugares con temperatura
superior a 40°C.
• Evite que líquidos inamables, objetos de metal
o agua entren en contacto con el equipo.
• No desarme o modique el equipo.
• El mantenimiento o reparación del equipo
deben ser realizados por personal calicado.
Pónganse en contacto con el servicio técnico
autorizado más cercano o directamente con su
proveedor.
• Con el n de respetar el medio ambiente, pro-
cure desechar la unidad en la planta de recicla-
do más cercana.
Instalación: Advertencias y
precauciones
• La garantía no cubre daños provocados por el
uso inapropiado del equipo. El uso inadecuado
del equipo puede ocasionar quemaduras, cor-
tocircuitos, shock eléctrico, etc.
• Desconecte el equipo del suministro eléctrico
antes de realizar cualquier tarea de limpieza o
mantenimiento.
• Procure utilizar un cable de seguridad para ar-
mar la instalación. Al utilizar la unidad, cumpla
en todo momento con las regulaciones (espe-
cialmente de seguridad) actualmente vigentes
en su país.
• Instale el equipo en una zona con ventilación.
• Mantenga cualquier tipo de material inamable
lejos de la unidad.
• Reemplace la cubierta, los lentes o la luz ultra-
violeta si se dañan y comprometen el óptimo
funcionamiento del equipo.
• Reemplace la lámpara de LED si se daña o sufre
deformación por el calor.
• No mire de forma directa hacia la fuente de luz
cuando el equipo esté encendido. La luz puede
generar convulsiones en las personas fotosensi-
tivas o con epilepsia.
• No toque el equipo durante su funcionamiento
ya que su temperatura puede ser muy elevada.
Versión Español

P. 1 9
- Neo Proton IP 12 QA
Versión Español
3. LIMPIEZA Y MANTENIMIENTO
Lineamientos generales
• Asegúrese de que no haya personas ajenas a la
instalación al momento de jar el equipo.
• Apague el quipo, desconéctelo de la corriente
eléctrica y aguarde a que se enfríe antes de
realizar cualquier tarea de mantenimiento.
• Ajuste bien todos los tornillos que se utilicen
para la instalación del equipo y procure que no
muestren signos de corrosión.
• La cubierta, las herramientas de jación y los
puntos de instalación (cielos rasos, suspen-
siones y sistemas de truss) deben estar libres
de deformaciones.
• Conserve los cables principales en buenas
condiciones. Reemplácelos de forma inmediata
si detecta algún problema.
• Para garantizar el óptimo desempeño del
equipo, es indispensable limpiar el frente con
frecuencia para remover impurezas causadas
por el exceso humo, polvo u otras partículas.
Antes de limpiarlo, desconecte el equipo de la
corriente eléctrica. Utilice un paño suave hume-
decido con un detergente suave. Luego seque
el frente con cuidado. Para otras partes del
equipo solo emplee un paño suave y limpio. No
utilice ningún tipo de líquidos ya que podrían
ltrarse en el equipo y causar daños severos.
4. RESOLUCIÓN DE PROBLEMAS
En caso de que los problemas persistan o de que se presente un problema no listado, póngase en contacto
con el servicio técnico autorizado más cercano.
Problema Posible causa Resolución
El equipo no ilumina
• Falta de suministro eléctrico
• Dimmer con valor 0
• Colores con valor 0
• Lámpara LED agotada
• Tablero LED defectuoso
• Verique el voltaje del suministro eléctrico
• Aumente el valor de los canales de dimmer
• Aumente el valor de los canales de color
• Sustituya la lámpara
• Sustituya el tablero
Poca intensidad de luz • Lentes sucios
• Lentes mal alineados
• Limpie los lentes del equipo
• Reinstale los lentes
El equipo no se enciende
• Falta de suministro eléctrico
• Cable suelto o defectuoso
• Suministro eléctrico defectuoso
• Corrobore la presencia de corriente en las
tomas
• Verique el estado del cable
• Verique la instalación eléctrica
El equipo no responde al
controlador DMX
• Dirección DMX errónea
• Cables DMX defectuoso
• Rebote de señal
• Modique la dirección DMX en el panel de
control
• Sustituya el cable DMX
• Instale un terminador

P. 2 0
Neo Proton IP 12 QA -
5. DESCRIPCIÓN DEL EQUIPO: CONEXIONES
1. ABRAZADERA DE MONTAJE
2. PERILLA DE FIJACIÓN para la abrazadera.
3. ENTRADA DMX (XLR-5 IP65) 1: Tierra, 2: DMX -, 3:
DMX +, 4: Sin función, 5: Sin función.
4. SALIDA DMX (XLR-5 IP65) 1: Tierra, 2: DMX -, 3:
DMX +, 4: Sin función, 5: Sin función.
5. PANEL DE CONTROL con pantalla y cuatro
botones que brindan acceso a las funciones
disponibles.
6. ORIFICIO PARA EL CABLE DE SEGURIDAD
7. ENTRADA DE POTENCIA: Conector PowerKon
IP65 (100-240 V, 50/60 Hz).
8. SALIDA DE POTENCIA: Conector PowerCon IP65
para enlazar la próxima unidad de una cadena.
9. VÁLVULA GORE® para prevenir la condensación.
Versión Español
Table of contents
Languages:
Other NEO Dj Equipment manuals

NEO
NEO Flex Par User manual

NEO
NEO Moving Torch User manual

NEO
NEO Mini Panel User manual

NEO
NEO ELIPSOLED 3100 MAX User manual

NEO
NEO Proton 12 HEX USB User manual

NEO
NEO ION 715Z User manual

NEO
NEO PROTON IP QW ZOOM User manual

NEO
NEO Ion 280 3-en-1 User manual

NEO
NEO ION 280F User manual

NEO
NEO Proton 6 QUAD USB User manual
Popular Dj Equipment manuals by other brands

Pioneer
Pioneer DDJ-400 operating instructions

Chauvet DJ
Chauvet DJ SlimPAR T12BT Quick reference guide

Numark
Numark MIXDECK EXPRESS quick start guide

Velleman
Velleman HQ POWER VDL360LO2N manual

Chauvet Professional
Chauvet Professional Maverick MK2 Profile user manual

Chauvet DJ
Chauvet DJ JAM Pack Silver user manual