Sharp MX-M202D User manual

FACSIMILE EXPANSION KIT
OPERATION GUIDE
MODEL
MX-FX13
Be sure to become thoroughly familiar with this manual to gain
the maximum benefit from the product.
Before installing this product, be sure to read the cautions
sections of the Start Guide.
Be sure to keep all operation guides handy for reference
including this manual, the Start Guide and Operation Guide for
any optional equipment which has been installed.
Page
•BEFORE USING THE FAX
FUNCTION.............................. 6
•BASIC OPERATIONS .......... 16
•ADVANCED TRANSMISSION
METHODS ............................ 31
•TRANSMISSION USING
F-CODES.............................. 52
•CONVENIENT METHODS OF
USE....................................... 64
•PROGRAMMING.................. 66
•TROUBLESHOOTING.......... 90
•SYSTEM SETTINGS............. 96
•APPENDIX.......................... 112

Telecommunication Line Cable:
Use only the line cable that was provided with the machine.
Notice for Users in Europe
This equipment has been designed to work on the British analogue public switched telephone network.
This equipment has been tested according to the pan-European ES 203 021 regulation.
It will operate on all analogue telephone networks which comply with the ES 203 021.
Please contact your dealer or network operator, if you are not sure whether your network operates according to ES
203 021.
Hereby, SHARP Electronics (Europe) GmbH declares that this Facsimile Expansion Kit MX-FX13 is in compliance
with the essential requirements and other relevant provisions of Directive 1999/5/EC.
Par la présente, SHARP Electronics (Europe) GmbH déclare que l’appareil Facsimile Expansion Kit MX-FX13 est
conforme aux exigences essentielles et aux autres dispositions pertinentes de la directive 1999/5/CE.
Hiermit erklärt SHARP Electronics (Europe) GmbH, dass sich das Gerät Facsimile Expansion Kit MX-FX13 in
Übereinstimmung mit den grundlegenden Anforderungen und den übrigen einschlägigen Bestimmungen der
Richtlinie 1999/5/EG befindet.
Снастоящето SHARP Electronics (Europe) GmbH декларира, че Facsimile Expansion Kit MX-FX13 отговаря
на съществените изисквания идругите приложими изисквания на Директива 1999/5/ЕС.
SHARP Electronics (Europe) GmbH tímto prohlašuje, že Facsimile Expansion Kit MX-FX13 splňuje základní
požadavky a všechna příslušná ustanoveni Směrnice 1999/5/ES.
Undertegnede SHARP Electronics (Europe) GmbH erklærer herved, at følgende udstyr Facsimile Expansion Kit
MX-FX13 overholder de væsentlige krav og øvrige relevante krav i direktiv 1999/5/EF.
Käesolevaga kinnitab SHARP Electronics (Europe) GmbH seadme Facsimile Expansion Kit MX-FX13 vastavust
direktiivi 1999/5/EÜ põhinõuetele ja nimetatud direktiivist tulenevatele teistele asjakohastele sätetele.
ΜΕ ΤΗΝ ΠΑΡΟΥΣΑ SHARP Electronics (Europe) GmbH ∆ΗΛΩΝΕΙ ΟΤΙ Facsimile Expansion Kit MX-FX13
ΣΥΜΜΟΡΦΩΝΕΤΑΙ ΠΡΟΣ ΤΙΣ ΟΥΣΙΩ∆ΕΙΣ ΑΠΑΙΤΗΣΕΙΣ ΚΑΙ ΤΙΣ ΛΟΙΠΕΣ ΣΧΕΤΙΚΕΣ ∆ΙΑΤΑΞΕΙΣ ΤΗΣ Ο∆ΗΓΙΑΣ 1999/5/ΕΚ.
Por la presente, SHARP Electronics (Europe) GmbH, declara que este Facsimile Expansion Kit MX-FX13 cumple
con los requisitos esenciales y otras exigencias relevantes de la Directiva 1999/5/EC.
SHARP Electronics (Europe) GmbH vakuuttaa täten että Facsimile Expansion Kit MX-FX13 tyyppinen laite on
direktiivin 1999/5/EY oleellisten vaatimusten ja sitä koskevien direktiivin muiden ehtojen mukainen.
Con la presente SHARP Electronics (Europe) GmbH dichiara che questo Facsimile Expansion Kit MX-FX13 è
con-forme ai requisiti essenziali ed alle altre disposizioni pertinenti stabilite dalla direttiva 1999/5/CE.
Alulírott, SHARP Electronics (Europe) GmbH nyilatkozom, hogy a Facsimile Expansion Kit MX-FX13 megfelel a
vonatkozó alapvetõ követelményeknek és az 1999/5/EC irányelv egyéb elõírásainak.
Ar šo SHARP Electronics (Europe) GmbH deklarē, ka Facsimile Expansion Kit MX-FX13 atbilst Direktīvas
1999/5/EK būtiskajām prasībām un citiem ar to saistītajiem noteikumiem.
Šiuo SHARP Electronics (Europe) GmbH deklaruoja, kad šis Facsimile Expansion Kit MX-FX13 atitinka esminius
reikalavimus ir kitas 1999/5/EB Direktyvos nuostatas.
Hierbij verklaart SHARP Electronics (Europe) GmbH dat het toestel Facsimile Expansion Kit MX-FX13 in
overeenstemming is met de essentiële eisen en de andere relevante bepalingen van richtlijn 1999/5/EG.
Niniejszym SHARP Electronics (Europe) GmbH deklaruje że Facsimile Expansion Kit MX-FX13 jest zgodny z
zasadniczymi wymaganiami i innymi właściwymi postanowieniami Dyrektywy 1999/5/EC.
Prin prezenta, SHARP Electronics (Europe) GmbH, declarăcăaparatul Facsimile Expansion Kit MX-FX13 este în
conformitate cu cerinţele esenţiale şi cu alte prevederi pertinente ale Directivei 1999/5/CE.
SHARP Electronics (Europe) GmbH týmto vyhlasuje, že Facsimile Expansion Kit MX-FX13 spĺňa základné
požiadavky a všetky príslušné ustanovenia Smernice 1999/5/ES.
SHARP Electronics (Europe) GmbH izjavlja, da je ta Facsimile Expansion Kit MX-FX13 v skladu z bistvenimi
zahtevami in drugimi relevantnimi določili direktive 1999/5/ES.
Härmed intygar SHARP Electronics (Europe) GmbH att denna Facsimile Expansion Kit MX-FX13 står I överensstämmelse
med de väsentliga egenskapskrav och övriga relevanta bestämmelser som framgår av direktiv 1999/5/EG.
SHARP Electronics (Europe) GmbH erklærer herved at utstyret Facsimile Expansion Kit MX-FX13 er i samsvar
med de grunnleggende krav og øvrige relevante krav i direktiv 1999/5/EF.

1
INTRODUCTION
Thank you for purchasing this product. This manual only explains the facsimile functions of the product. For safety
precautions and general information on using the machine such as loading paper, clearing misfeeds, and handling
peripheral units, see the Operation Guide for the machine.
For other functions, see the following manuals as appropriate:
Copier function/Printer function
: See the Operation Guide.
Network printer function/Network scanner function
: See the "Operation Guide(for Network Expansion kit)" (if the
Network Expansion kit option is installed).
The explanations in this manual assume that certain optional peripheral units are installed.
This manual refers to the Reversing single pass feeder as the "RSPF" and the single pass feeder as the "SPF".
Unless specific mention is made, both the RSPF and the SPF are referred to simply as "SPF".
CONNECTING AN EXTENSION PHONE
You can connect a telephone to the machine and use it as an extension phone to place and receive calls like any
normal phone. Fax reception can also be activated from an extension phone connected to the machine. (remote
operation)
CONNECTING AN EXTENSION PHONE
1Insert the end of the extension phone
cord into the extension phone jack on
the left side of the machine.
Make sure you hear a "click"
sound indicating that the cord is
securely connected.
The fax function is not available in some countries and regions.
• If you connect a combination telephone/answering machine to the machine, you will not be able to use the
answering machine function.
• You can place calls from the phone even during a power failure.
Note
Extension
phone jack

2
CONTENTS
INTRODUCTION........................................................................................................................................ 1
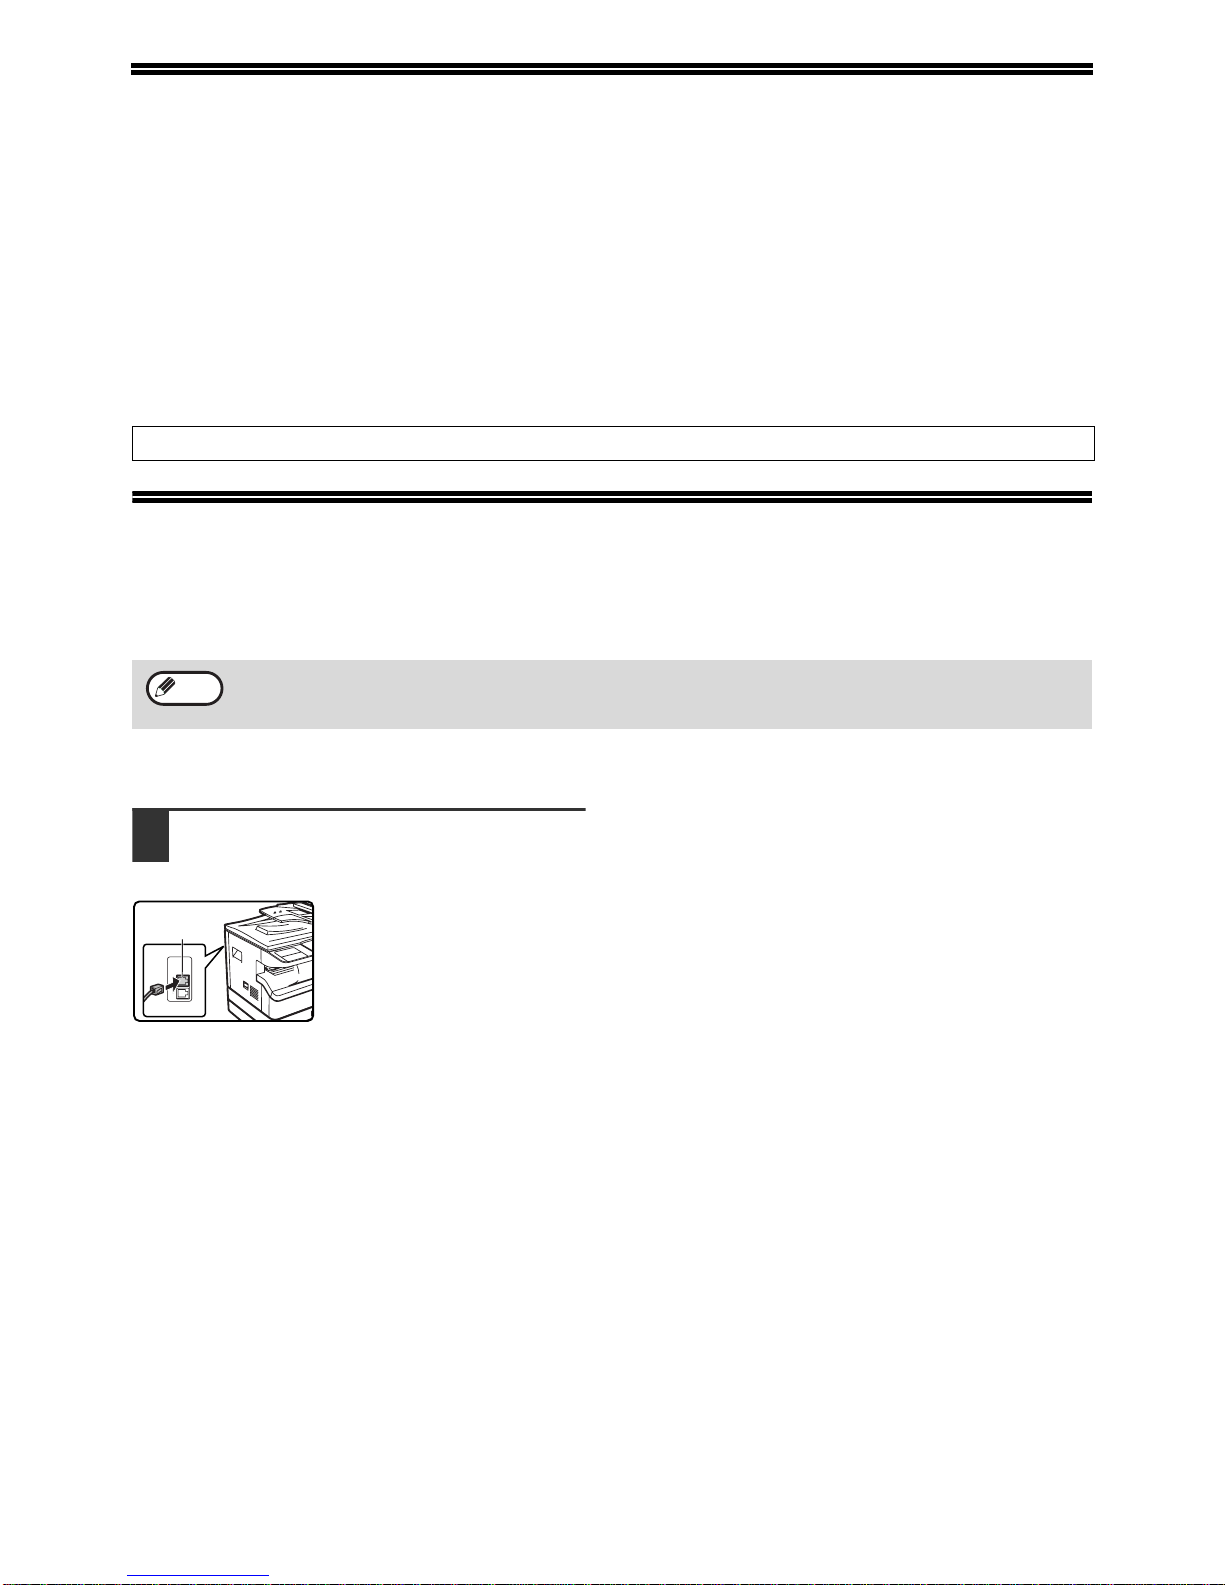
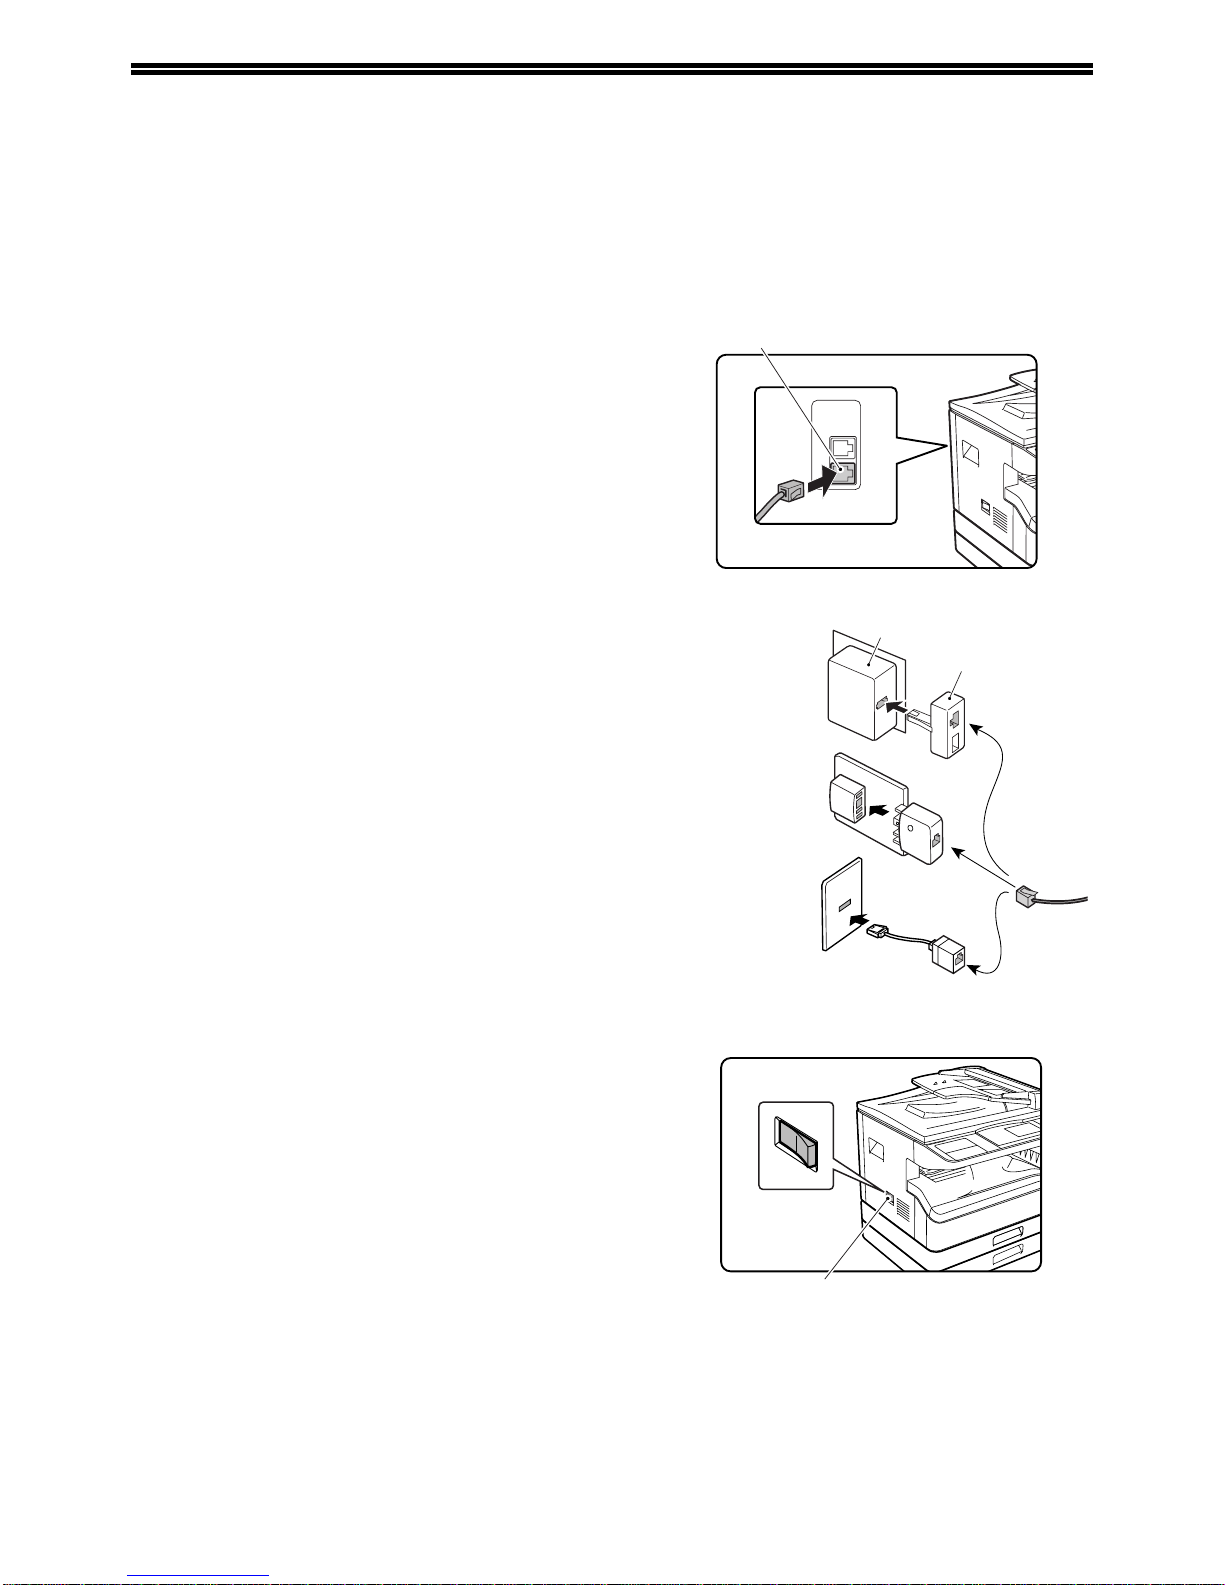
CONNECTING AN EXTENSION PHONE.................................................................................................. 1
TO USE THIS PRODUCT CORRECTLY AS A FACSIMILE..................................................................... 4
1
BEFORE USING THE FAX FUNCTION
POINTS TO CHECK AND PROGRAM AFTER
INSTALLATION................................................. 6
PART NAMES AND FUNCTIONS..................... 7
●OPERATION PANEL........................................7
●FAX MODE (BASE SCREEN) ..........................9
●AUDITING MODE...........................................10
ORIGINALS...................................................... 11
●ORIGINALS THAT CAN BE FAXED...............11
PLACING THE ORIGINAL............................... 12
●USING THE SPF/RSPF..................................12
●USING THE DOCUMENT GLASS..................12
CHECKING THE SIZE OF A PLACED
ORIGINAL........................................................ 13
●
MANUALLY SETTING THE SCANNING SIZE
......13
SELECTING RESOLUTION AND EXPOSURE
SETTINGS........................................................ 14
CONVENIENT DIALLING METHODS
(AUTO-DIALLING)........................................... 15
2BASIC OPERATIONS
SENDING A FAX ............................................. 17
●
BASIC PROCEDURE FOR SENDING FAXES
......17
●TRANSMISSION BY AUTO-DIALLING (RAPID
DIALLING AND GROUP DIALLING) ..............19
●SENDING A FAX BY SPEED DIALLING........19
●
SEARCHING FOR A PROGRAMMED DESTINATION
(USING THE [ADDRESS] KEY)
...........................20
●
FAXING A TWO-SIDED ORIGINAL
(MX-M182D/MX-M202D/MX-M232D)
....................21
●CANCELLING A FAX TRANSMISSION .........25
RECEIVING FAXES......................................... 27
●RECEIVING A FAX.........................................27
●FAX PRINT HOLD FUNCTION.......................29
3
ADVANCED TRANSMISSION METHODS
SENDING THE SAME DOCUMENT TO MULTIPLE
DESTINATIONS IN A SINGLE OPERATION
(BROADCAST TRANSMISSION)
...................... 31
●USING BROADCAST TRANSMISSION........ 32
AUTOMATIC TRANSMISSION AT A SPECIFIED
TIME (TIMER TRANSMISSION)
..................... 33
●SETTING UP A TIMER TRANSMISSION...... 33
TRANSMISSION AND RECEPTION USING THE
POLLING FUNCTION...................................... 35
●USING THE POLLING FUNCTION ............... 36
●USING POLLING MEMORY.......................... 38
INCLUDING SENDER INFORMATION ON
FAXES ............................................................. 41
FAXING A DIVIDED ORIGINAL (DUAL PAGE
SCAN).............................................................. 42
ADDING A COVER SHEET/MESSAGE TO A
FAX TRANSMISSION...................................... 43
USING SETTINGS STORED AS A PROGRAM
.... 44
●USING A PROGRAM..................................... 44
FORWARDING RECEIVED DATA TO A
NETWORK ADDRESS (INBOUND ROUTING
SETTINGS) ...................................................... 45
●CONFIGURING THE BASIC SETTINGS....... 45
●SETTINGS THE DESTINATION.................... 47
FORWARDING RECEIVED FAXES TO
ANOTHER MACHINE WHEN PRINTING IS NOT
POSSIBLE (FORWARDING FUNCTION)....... 49
●USING THE FORWARDING FUNCTION...... 49
SENDING A FAX DIRECTLY FROM A
COMPUTER (PC-Fax)..................................... 50
4
TRANSMISSION USING F-CODES
COMMUNICATION BETWEEN MACHINES
SUPPORTING F-CODES ................................ 52
●
BOXES AND SUB-ADDRESSES/PASSCODES
REQUIRED FOR F-CODE TRANSMISSION
....... 52
●CREATING A BOX FOR F-CODE
TRANSMISSION............................................ 53

3
CONTENTS
F-CODE POLLING MEMORY.......................... 54
●
HOW F-CODE POLLING MEMORY WORKS
.......54
●USING F-CODE POLLING MEMORY............55
●PROCEDURE FOR F-CODE POLLING.........57
F-CODE CONFIDENTIAL TRANSMISSION ... 59
●F-CODE TRANSMISSION (F-CODE
CONFIDENTIAL TRANSMISSION)................59
●PRINTING A DOCUMENT RECEIVED TO AN
F-CODE CONFIDENTIAL MEMORY BOX.....61
F-CODE RELAY BROADCAST
TRANSMISSION.............................................. 62
●
USING THE F-CODE RELAY BROADCAST
FUNCTION (your machine is the relay machine)
......63
●
USING THE F-CODE RELAY REQUEST FUNCTION
(your machine requests a relay broadcast)
...........63
5
CONVENIENT METHODS OF USE
CONNECTING AN EXTENSION PHONE........ 64
●USING AN EXTENSION PHONE...................64
●SETTING THE RECEPTION MODE ..............65
6PROGRAMMING
PROGRAMMING ............................................. 66
STORING, EDITING, AND DELETING AUTO DIAL
NUMBERS AND PROGRAMS
.......................... 66
●STORING, EDITING, AND DELETING
AUTO-DIAL NUMBERS (RAPID KEYS, SPEED
DIAL NUMBERS, AND GROUP KEYS) .........66
●STORING, EDITING AND DELETING
PROGRAMS...................................................76
PROGRAMMING, EDITING, AND DELETING
F-CODE MEMORY BOXES............................. 78
●
PROGRAMMING AN F-CODE MEMORY BOX
.....78
PRINTING LISTS OF PROGRAMMED
INFORMATION, SETTINGS, AND
COMMUNICATION ACTIVITY......................... 85
ENTERING CHARACTERS............................. 86
●CHARACTERS THAT CAN BE ENTERED....86
●CHANGING TO ENTRY MODE......................86
●CHARACTER ENTRY KEYS..........................87
●INITIAL PROCEDURE FOR ENTERING
CHARACTERS ...............................................88
7TROUBLESHOOTING
WHEN A TRANSACTION REPORT IS PRINTED
...... 90
●INFORMATION APPEARING IN THE
TYPE/NOTE COLUMN.................................. 90
VIEWING THE COMMUNICATION ACTIVITY REPORT
AT REGULAR INTERVALS (Communication activity
report)
.............................................................. 92
WHEN AN ALARM SOUNDS AND A WARNING
MESSAGE IS DISPLAYED ............................. 92
●SELF-DIAGNOSTIC FUNCTION................... 93
●
MESSAGES DURING NORMAL OPERATION
..... 93
PROBLEMS AND SOLUTIONS ...................... 94
8SYSTEM SETTINGS
●ADMINISTRATOR SETTINGS LIST.............. 96
●ADMINISTRATOR SETTINGS MENU........... 97
PROCEDURE FOR USING THE SYSTEM
SETTINGS ....................................................... 98
●INITIAL PROCEDURE................................... 98
SYSTEM SETTINGS FOR THE FAX FUNCTION.....99
●LIST PRINT/SET............................................ 99
●INITIAL SETTING ........................................ 100
●SENDING FUNCTION................................. 105
●RCV. FUNCTION......................................... 108
●POLLING SECURITY .................................. 111
9APPENDIX
SPECIFICATIONS ......................................... 112
INDEX ............................................................ 113

4
TO USE THIS PRODUCT CORRECTLY AS
A FACSIMILE
Several points must be kept in mind when using this product as a facsimile.
Please note the following.
Line connection
Be sure to use the provided telephone line cord to connect
the machine to a telephone line jack. Insert one end of the
telephone line cord into the LINE jack on the left side of the
machine as shown. Insert the other end of the telephone
line cord into a telephone line jack.
Insert the plug firmly until you hear a "click".
In some countries, an adapter is required to connect the
telephone line cable to the wall telephone socket, as shown
in the illustration.
Power switch
Keep the machine power switch turned on at all times. Do
not turn off the power. If the power is turned off, the fax
function cannot be used.
When the power is off, the machine cannot receive faxes.
Before turning off the power, make sure the machine is idle.
If the power is turned off while the machine is in operation, a
paper jam may occur. If settings are being configured, the
settings will be cancelled.
Setting the date and time and programming your sender's name
and number
Before using the fax function, you must set the date and time and program your sender's name and number in the
machine. This procedure is explained in "POINTS TO CHECK AND PROGRAM AFTER INSTALLATION" on page 6
of this manual.
LINE jack
Adapter
Wall socket
For Australia
For New Zealand
For United
Kingdom
Power switch

5
TO USE THIS PRODUCT CORRECTLY AS A FACSIMILE
Lithium battery
A lithium battery in the machine is used to retain settings and programmed information such as auto-dial numbers
(page 66).
• When the battery dies, settings and programmed information will be lost, so please keep a record of this
information. (See "PRINTING LISTS OF PROGRAMMED INFORMATION, SETTINGS, AND COMMUNICATION
ACTIVITY" on page 85.)
• The life of the battery is approximately 5 years when the power switch is kept continuously off.
• When the battery dies, please contact your local Sharp dealer or authorised service representative for assistance
in disposing of this battery. The machine will not operate once the battery dies.
Please note
In the event of a thunderstorm, remove the power cord from the power outlet to ensure safety. Information will be
retained in memory even if the power cord is unplugged.

6
1BEFORE USING THE FAX
FUNCTION
This chapter contains basic information about using the fax function of the machine. Please read this chapter before
using the fax function.
POINTS TO CHECK AND PROGRAM
AFTER INSTALLATION
After installing the machine and before using it as a fax machine, check the following points and program the
required information.
Set the date and time
The machine has an internal clock. It is important to set the correct date and time because they are used for such
features as Timer Transmission (page 33).
The date and time are set in the system settings. (Page 104)
The date and timeappear in the display. Make sure the correct date and time appear. If the date and time are wrong,
please correct them.
Program the sender's name and sender's number
The name and fax number of the user of the machine is programmed in "OWN PASSCODE SET" (page 101) in the
system settings. (Only one name and number can be programmed.)
The programmedname and number are printed at the top of each transmitted fax page. The sender's number is also
used as an identification number when you use the Polling function to request transmission from another fax
machine (see "USING THE POLLING FUNCTION" on page 36).
Paper sizes that can be used for fax mode
The machine can use A3, B4, A4, A4R, B5, B5R, A5, 11" x 17", 8-1/2" x 14", 8-1/2" x 11", 8-1/2" x 11"R, and 5-1/2"
x 8-1/2"* size paper; however, 11" x 17", 8-1/2" x 14" and 5-1/2" x 8-1/2" size paper cannot be used in fax mode.
(Among INCH sizes, only 8-1/2" x 11" and 8-1/2" x 11"R can be used.) (If your machine uses inch-based paper
sizes, A3, B4, B5, B5R, and A5 size paper cannot be used in fax mode. (Among AB sizes, only A4 and A4R can be
used.)) For this reason, if only paper sizes that can be used in other modes but not in fax mode are loaded in the
machine, received faxes cannot be printed. (For other points regarding fax reception, see "RECEIVING FAXES"
page 27.)
* A5 (5-1/2" x 8-1/2") size paper can only be loaded in tray 1, regardless of the mode. A5 (5-1/2" x 8-1/2") paper cannot be
loaded in tray 2 or in the optional 250-sheet paper feed unit or 2 x 250-sheet paper feed unit.
You can check your programmed name and number by printing out the "Administrator Settings List" in the system
settings. (See "LIST PRINT" on page 99.)
For the procedures for loading paper in the trays, see the Operation Guide for the machine.
Note
Note

7
1
PART NAMES AND FUNCTIONS
OPERATION PANEL
(1) Page pallet (page 86)
(2) [REDIAL/PAUSE] key (pages 15)
This is used to redial the last number dialled, and
enter a pause when entering a fax number.
(3) [SPEAKER/SHIFT] key (pages 15, 86)
This is used to dial without lifting an extension
phone connected to the machine and to shift
between upper and lower case when entering
characters.
(4) [FAX STATUS] key (page 25)
This is used to cancel a fax transmission or a
stored fax transmission.
(5) Display (page 9)
This key displays the base screen and the
function setting screen.
(6) [BACK] key
In a setting or programming screen, this key is
used to move back to the previous screen.
(7) [OK] key
This key is used to enter a setting that has been
selected with the arrow or other keys ( ).
(8) Numeric keys
These are used to enter fax numbers,
sub-addresses, passcodes, and numerical
settings. (See "BOXES AND
SUB-ADDRESSES/PASSCODES REQUIRED
FOR F-CODE TRANSMISSION" on page 52.)
(9) [C] key
This is used to clear a mistake when entering fax
numbers, sub-addresses, passcodes, and
numerical settings. One digit is cleared each time
the key is pressed.
When an original is being scanned, this key can
also be used to cancel scanning.
(10) [SPEED/SYMBOL] key (pages 15, 88)
This is used to dial by Speed dialling and to enter
a symbol when entering characters.
(11) [COMM. SETTING/SPACE/-] key (page 22)
This is used to switch between memory
transmission and direct transmission, and to
switch between automatic reception and manual
reception. It is also used to enter a space or "-"
when entering characters.
(12) [FAX] key/FAX indicator/LINE indicator/DATA
indicator
Press to switch to fax mode. The base screen of
fax mode will appear in the display.
The LINE indicator lights up during transmission
or reception of a fax. When a fax has been
received, the DATA indicator blinks. (When there
is fax transmission data in memory, the DATA
indicator lights up.)
21 22 23 24 25
16 17 18 19 20
11 12 13 14 15
06 07 08 09 10
01 02 03 04 05
EXPOSURE
COLOUR MODE
PROGRAM
COPY
SCAN
FAX
SPECIAL
FUNCTION
FAX STATUS
SHIFT
SYMBOL
SPACE/–
SPEAKER
REDIAL/PAUSE
SPEED
COMM. SETTING
LINE
DATA
DATA
ON LINE
FAX
SCAN
PRINT
COPY
(4)(3)(2)
(1)
(13)(12) (15)(14)
(11)(10)

8
BEFORE USING THE FAX FUNCTION
(13) [MODE SELECT] keys (step 1 on page 17)
These are used these keys to change modes.
(14) [SPECIAL FUNCTION] key
This key is used to select a special transmission
or reception function, configure function settings,
and to store auto-dial numbers.
(15) [PROGRAM] key (page 44)
Press this key to use a program.
(16) [RESOLUTION] key (page 14)
This key is used to select resolution and exposure
settings.
(17) [ADDRESS] key (page 20)
This key is used to search for a fax destination
that has been stored as an auto-dial number in
the address book.
(18) [BROADCAST] key (page 31)
This is used to perform a broadcast transmission.
(19) [ORIGINAL SIZE] key (page 13)
This is used to set the size of the original to be
faxed.
(20) [DUPLEX SCAN] key (page 21)
Press this key to use the duplex scan function.
(Only on models with a RSPF installed.)
(21) Arrow keys ( )
These are used to select items and move through
pages.
(22) [CA] key
This is used to cancel a transmission or
programming operation. When pressed during an
operation, the operation is cancelled and the display
returns to the base screen described on page 9.
This key is also used to cancel a resolution, paper
size, or special function setting that was selected
when sending a fax.
(23) [START] key ( )
This is used at the following times:
(1) When starting transmission
(2) When scanning an original
(3) When starting manual reception
(4) When configuring and storing settings
ABC DEF
JKLGHI MNO
TUVPQRS WXYZ
@.-
_
READ-END
ACC. #-C
BACK OK
INTERRUPT
COPY RATIO
ADDRESS
ADDRESS
DUPLEX SCAN
DUPLEX SCAN
2-SIDED COPYPAPER SELECT
RESOLUTION
RESOLUTION
AUTO IMAGE
FORMAT
BROADCAST
OUTPUT
ORIGINAL SIZE
ORIGINAL SIZE
(5) (6) (7) (8)
(16) (17) (18) (19) (20) (21) (23)(22)
(9)
• When the auto power shut-off function is
activated, all indicators except the
[START] key indicator go off. For the
information on the auto power shut-off
function, see the Operation Guide for the
machine.
• For information on the keys and lights
which are used for the copy function and
other functions, see "Operation Panel" in
the manual for each function.
Note

9
BEFORE USING THE FAX FUNCTION
1
FAX MODE (BASE SCREEN)
The base screen of fax mode is displayed by pressing the [FAX] key when the print mode, copy mode, or scan mode
screen appears.
The base screen of fax mode
(1) Message display
Messages appear here to indicate the current
status of the machine.
An icon ( ) appears to the right side when a
confidential fax has been received.
(2) Date and time display
This shows the date and time.
(3) Transmission mode display (page 22)
There are three transmission modes: memory
transmission, direct transmission, and manual
transmission. This shows the currently selected
transmission mode.
(4) Exposure display (page 14)
This shows the exposure for scanning the original
that has been selected with the [RESOLUTION]
key.
(5) Resolution display (page 14)
This shows the resolution for scanning the
original that has been selected with the
[RESOLUTION] key.
(6) Free memory display
This shows the percentage of fax memory that is
free.
(7) Reception mode display (page 65)
There are two modes for receiving faxes:
automatic reception and manual reception. This
shows the currently selected reception mode.
(8) Original display (page 13)
This displays an icon to indicate the original
scanning mode when an original has been
placed.
:One-sided original scanning in the SPF.
:Document glass
:Two-sided original scanning in the RSPF.
This also shows the size of the placed original.
Stand-by. 96%
10 MAY MON 10:25 AM
MEMORY AUTO
CONT A4R
STANDARD
AUTO
(2)
(3)
(4)
(5)
(1)
(7)
(8)
(6)
The following functions operate even when copy mode is selected:
• Automatic reception (including F-code confidential reception)
• Timer Transmission
• Memory polled function
• Transmission of stored memory transmission jobs
• Voice calls (voice calls can be answered but not placed).
• Remote reception
• Manual reception
• Relay station function for F-code relay broadcast transmission
Note

10
BEFORE USING THE FAX FUNCTION
AUDITING MODE
Accounts that can transmit faxes (up to 50) can be established and transmission time and other information can be
tracked for each account. The Acc. Usage List (page 99) can be printed out which shows the time used for
transmission and pages transmitted by each account.
• This function is enabled using "ACCOUNT CONTROL" and "ACCOUNT # SET" in the system settings. (Page 103)
Using auditing mode
When auditing mode is turned on, the account number entry screen is displayed. Enter your account number
(five-digit identification number) as explained below before performing a fax operation.
1Enter your account number (five
digits) with the numeric keys.
• As the account number is entered, the hyphens "-"
change to asterisks " ". If you enter an incorrect
digit, press the [C] key and re-enter the correct digit.
• After you enter your account number, the base
screen of fax mode appears. (Page 9)
2When you have completed the fax
operation, press the [ACC.#-C] key
().
Enter your account
number.
ACCOUNT #:-----
• If you enter an account number for copy
mode has also been programmed for fax
mode, you can change to fax mode after
completing the copy operation and
continue with the fax operation without
re-entering your account number.
If you enter an account number for copy
mode that has not been programmed for
fax mode, enter your account number for
fax mode after you press the [FAX] key to
change to fax mode.
• When "ACC. # SECURITY" in the system
settings (see the "System settings guide"
in the Operation Guide for the machine.) is
enabled, the message "Please see your
administrator for assistance." will appear
for one minute in the event that you enter
an incorrect or invalid account number
three times in a row. During that time
operation of the machine will not be
possible.
ABC DEF
JKLGHI MNO
TUVPQRS WXYZ
@.-
_
READ-END
ACC. #-C
OK
Enter your account
number.
ACCOUNT #: ---
Note
@.-
_
READ-END
ACC. #-C

11
1
ORIGINALS
ORIGINALS THAT CAN BE FAXED
Original sizes
*Long originals
Depending on the resolution setting and the width of the original, there may not be sufficient space in memory to
hold a long original. When a long original cannot be entirely scanned, select a lower resolution setting and/or
shorten the original.
Scanning area of original
When faxing an original, note that the edges of the
original cannot be scanned.
Width of edges that cannot be scanned:
5 mm from top and bottom edges, 6 mm (or less) from left
and right edges
Automatic reduction of faxed document
If the size (width) of the faxed document is greater than the receiving machine's paper size, the size will be
automatically reduced.
You can turn off automatic reduction. In this case, the left and right edges will not be transmitted. (See "AUTO
REDUCE TX" on page 105.)
Minimum original size Maximum original size
Using the SPF/RSPF
A5: 210 mm (width) x 148 mm (length)
(8-1/2" (width) x 5-1/2" (length))
A5R: 148 mm (width) x 210 mm (length)
(5-1/2" (width) x 8-1/2" (length))
297 mm (width) x 800 mm* (length)
(11" (width) x 31-1/2"* (length))
* Long documents can be
transmitted
Using the document glass 297 mm (width) x 432 mm (length)
(11" (width) x 17" (length))
• Originals that are not a standard size (A5, A4, A4R, B4, A3, 8-1/2" x 11", 8-1/2" x 11"R (5-1/2" x 8-1/2", 5-1/2"
x 8-1/2"R, 8-1/2" x 11", 8-1/2" x 11"R, 8-1/2" x 14", 11" x 17", A4, A4R if the machine uses inch-based paper
sizes)) can also be faxed.
• There are restrictions on originals that can be scanned using the SPF/RSPF. For more information, see
"NORMAL COPYING" in the Operation Guide for the machine.
Faxed document width Receiving machine's
paper width Size after reduction Ratio
A3 (11" x 17") B4 (8-1/2" x 14") B4 (8-1/2" x 14") 1 : 0.78 (1 : 0.64)
A3 (11" x 17") A4 (8-1/2" x 11") A4R (8-1/2" x 11"R) 1 : 0.5 (1 : 0.5)
B4 (8-1/2" x 14") A4 (8-1/2" x 11") A4R (8-1/2" x 11"R) 1 : 0.64 (1 : 0.78)
Note
5 mm
5 mm
Total of 6 mm or
less

12
PLACING THE ORIGINAL
An original can be placed in the SPF/RSPF or on the document glass. Use the SPF/RSPF when faxing a large
number of sheet originals. Use the document glass to fax originals that cannot be scanned using the SPF/RSPF
such as thick or thin sheet originals, or books or other bound originals.
USING THE SPF/RSPF
1Open the SPF/RSPF, make sure that
an original has not been left on the
document glass, and then gently
close the SPF/RSPF.
2Adjust the original guides on the
document feeder tray to the width of
the document.
3
Align the edges of the document pages
and then insert the stack in the document
feeder tray so that the first page is face up.
• Insert the originals all the way
into the document feeder tray.
• Make sure the stack does not
exceed the indicator line
(maximum of 40 sheets, or 30
sheets of 90 g/m2(24 lbs.)
paper, thickness 4 mm (5/32")
or less).
USING THE DOCUMENT GLASS
1Open the SPF/RSPF, place the original
face down on the document glass,
and then gently close the SPF/RSPF.
•
If auto power shut-off has
activated, press the [START]
key, wait until the machine has
returned to normal operation,
and then place the original.
•
When transmitting a small
original such as a postcard, be
sure to press the [ORIGINAL
SIZE] key and set the original
size. (Page 13)
Regardless of the size of the original, place the original
in the far left corner of the document glass. (Align the
upper left-hand corner of the original with the tip of
the mark.) Place the original in the appropriate
position for its size as shown below.
• Do not load originals that are different
sizes even if the widths are the same. This
may cause misfeeds.
• Use the SPF/RSPF for long originals. The
document glass cannot be used.
• When inserting a long original, the original
should be in contact with the surface of
the document feeder tray. If the original is
not in contact with the surface of the
document feeder tray, an incorrect original
size may be detected.
Note
A4R R
Document glass scale
A4 A3
B4
Document glass scale
A5
The difference between A4 (8-1/2" x 11") and A4R (8-1/2" x 11"R)
This manual uses both A4 (8-1/2" x 11") and A4R (8-1/2" x 11"R) to indicate paper and original sizes. The "R" is
used to distinguish the orientation of originals and paper. ("R" is used for this purpose for other sizes as well.)
[Example] Difference between the orientations of A4 (8-1/2" x 11") size and A4R (8-1/2" x 11"R) size
A4 (8-1/2" x 11") indicates an original placed as
follows: A4R (8-1/2" x 11"R) indicates an original placed as
follows:
Vertically oriented
Top
Document feeder tray Document glass
Top
Top
Horizontally oriented
Document feeder tray Document glass

13
1
CHECKING THE SIZE OF A PLACED ORIGINAL
When a standard-size* original is placed, the original size is automatically detected
(automatic original detection function) and displayed in the original display. Make sure
that the size has been detected correctly.
(1)When an original is placed, an icon appears to indicate the original scanning mode.
:One-sided scanning in the SPF.
:Scanning on the document glass
:Two-sided scanning in the RSPF.
(2)Displays the original size.
If a non-standard size original is placed or if you wish to change the scanning size,
follow the steps below to manually set the original scanning size.
MANUALLY SETTING THE SCANNING SIZE
If you load an original that is not a standard size (such as a long original), or if the size is not detected correctly, be
sure to press the [ORIGINAL SIZE] key and set the original size manually.
Perform the following steps after placing the original in the document feeder tray or on the document glass (page 12).
1Press the [ORIGINAL SIZE] key.
The original size
selection screen appears.
2Select the original size with the [ ] or
[ ] key.
The selected original size
is highlighted.
To select an INCH size, press the [ ] key and go to step 4.
When the [ ] key is
pressed, the original size
selectionscreenforINCH
sizes appears.
3Press the [OK] key.
You will return to the base
screen and the selected original
size will appear in the original
display.
Selecting an INCH original size
4Select the original size with the [ ] or
[ ] key.
To return to selection of AB original sizes, press the
[ ] key and return to step 2.
5Press the [OK] key.
You will return to the base screen
and the selected original size will
appear in the original display.
*Standard sizes
The following sizes are standard sizes: A3, B4, A4, A4R, A5 (11" x 17", 8-1/2" x 14", 8-1/2" x 11", 8-1/2" x 11"R,
5-1/2" x 8-1/2", if the machine uses inch-based paper sizes). If a non-standard size original is loaded (including
special sizes), the closest standard size may be displayed, or the original size may not appear at all.
In Taiwan, the following standard original sizes are detected by the automatic original detection function: A3, B4,
A4, A4R, B5, B5R, A5.
If a size is specified that is different from the actual original size when scanning a two-sided original in the RSPF,
a scanning error or a cut-off image may result.
Stand-by. 100%
10 MAY MON 10:25 AM
MEMORY AUTO
CONT A4R
STANDARD
AUTO
(2)(1)
Note
Note
RATIO
RESS
RESS
DUPLEX SCAN
DUPLEX SCAN
2-SIDED COPYAUTO IMAGE
FORMAT
BROADCAST
OUTPUT
ORIGINAL SIZE
ORIGINAL SIZE
ORIGINAL SIZE
AUTO
A3
B4
AB
PQ
ACC
LEX SCAN
LEX SCAN
DED COPY
ORIGINAL SIZE
AUTO
A3
B4
AB
ORIGINAL SIZE
AUTO
8 x11
8 x11R
INCH
12
12
To cancel a manual original scanning size
setting, press the [CA] key.
If it is not possible to select the actual original
size, select a size that is larger than the actual
original size. If a smaller size is selected, part
of the original will not be transmitted.
GHI
PQRS
BACK OK
ORIGINAL SIZE
AUTO
8 x11
8 x11R
INCH
12
12
OK
Note

14
SELECTING RESOLUTION AND EXPOSURE SETTINGS
The resolution and exposure can be adjusted to match the size and darkness of text on the original, or for an original such
as a photograph. To change the settings, follow the steps below after selecting fax mode and placing the original. (Page 12)
1Press the [RESOLUTION] key.
The resolution selection
screen will appear.
2Select the resolution with the [ ] or
[ ] key.
The selected resolution is
highlighted.
To set the exposure next, press the [ ] or [ ] key
and go to step 4.
When the [ ] or [ ] key is pressed, the exposure
display changes from "AUTO" to a 5-step display.
3Press the [OK] key.
You will return to the base
screen and the selected
resolution will appear in the
resolution display.
4Select the desired exposure with the
[ ] or [ ] key.
• To select a light setting for a dark original such as a
newspaper, press the [ ] key to move the setting
toward ( ).
• To select a dark setting for a light original such as
writing in pencil or faint colour text, press the [ ] key
to move the setting toward ( ).
• When the exposure setting reaches the left side or
the right side, pressing the [ ] or [ ] key changes
the exposure display from the 5-step display to
"AUTO".
5Press the [OK] key.
You will return to the base
screen and the selected
exposure will appear in the
exposure display.
STANDARD Use this setting for originals with
normal-size text.
FINE
Use this setting for originals with
smalllettersordetaileddrawings.
The original will be scanned at
twice the resolution of Standard.
SUPER FINE
Use this setting for originals with
intricate drawings or diagrams. A
higher-quality image will be
produced than with the Fine setting.
ULTRA FINE
Use this setting for originals with
intricate drawings or diagrams.
This setting gives the best image
quality. However, transmission
will take longer than with the
other settings.
(FINE/HALF
TONE)
(S-FINE/HALF
TONE)
(U-FINE/HALF
TONE)
Use halftone if your original is a
photograph or has gradations of
colour (such as a colour original).
This setting will produce a clearer
image than "FINE", "SUPER FINE",
or "ULTRA FINE" used alone.
When halftone is selected,
transmission will take longer.
COPY RATIO
ADDRESS
ADDRESS
EXPOSURE
COLOUR MODE
PROGRAM
PAPER SELECT
RESOLUTION
RESOLUTION
AUTO IMA
FORMA
BROADCA
COPY
SCAN
FAX
RESOLUTION
STANDARD
FINE
SUPER FINE
AUTO
PQ
ACC
LEX SCAN
LEX SCAN
DED COPY
RESOLUTION
STANDARD
FINE
SUPER FINE
AUTO
RESOLUTION
STANDARD
FINE
SUPER FINE
• The default resolution setting is
"STANDARD" and the default exposure
setting is "AUTO". The default settings for
the resolution and exposure can be
changed in the system settings. (See
"RES. CON. SET" on page 105.) When
using the document glass to scan multiple
original pages, the exposure setting can
be changed each time you change pages.
When using the SPF/RSPF, the resolution
and exposure settings cannot be changed
once scanning has begun.
• Even if you send a fax using a high
resolution setting such as "FINE",
"SUPER FINE", or "ULTRA FINE", some
receiving fax machines may print the fax
at a lower resolution.
• To cancel a resolution or exposure
selection, press the [CA] key.
GHI
PQRS
BACK OK
RESOLUTION
STANDARD
FINE
SUPER FINE
OK
Note

15
1
CONVENIENT DIALLING METHODS (AUTO-DIALLING)
The fax function includes a convenient auto dial feature (Rapid dialling, speed dialling and group dialling). By
programming frequently dialled numbers, you can call and send faxes to these locations by means of a simple
dialling operation (page 19). There are three types of auto-dialling: Rapid dialling, speed dialling, and group dialling.
To program auto-dial numbers, see page 66.
• Rapid dialling
A stored destination can be dialled by simply pressing
a Rapid key ([01] to [50]). A name up to 36 characters
in length can be programmed for the location (a
maximum of 12 characters are displayed).
When using F-code transmission, a sub-address and
passcode (page 52) can also be programmed . The programmed user
names appear.
• Speed dialling (300 stations)
A stored destination can be dialled by pressing the
[SPEED] key, entering a 3-digit number (000 to 299),
and pressing the [START] key ( ). A name
(maximum 36 characters) can be stored for each
destination.
When using F-code transmission, a sub-address and
passcode (page 52) can also be programmed. The Speed number entry
screen appears.
• Group dialling
Multiple Rapid dial and/or Speed dial destinations can
be stored in a Rapid key for Group dialling.
Destinations can also be stored for Group dialling by
entering fax numbers with the numeric keys. This is
convenient for communicating with a group of other
fax machines. The programmed group
names appear.
• REDIALLING
The machine retains the last fax or phone number
dialled. This number can be redialled by simply
pressing the [REDIAL] key and then the [START] key
().
•
If you pressed a numeric key during the previous call,
the [REDIAL] key may not dial the correct number.
• Redialling is not possible to broadcast transmission
(page 31), serial polling (page 37), timer
transmission (page 33), group dialling (page 19), or
F-code transmission (page 59) destinations.
The last number dialled is
displayed.
• ON-HOOK DIALLING
This feature allows you to dial without lifting an
extension phone connected to the machine. Press the
[SPEAKER] key, listen for the dial tone through the
speaker, and then dial.
• If a person answers, lift the extension phone to
answer. (You can only speak to the other party if an
extension phone is connected to the machine.)
• Faxes must be sent manually when using on-hook
dialling. (Page 23)
• On-hook dialling is not possible using a Rapid key
that includes a sub-address and passcode, or a
group dial key.
• A combined total of 50 Rapid dial and group dial keys can be stored, and 300 speed dial destinations can be
stored.
• Stored Rapid keys, group keys, and Speed dial destinations can be called up using a search name entered
when the key or destination was stored. (Page 20)
• To prevent dialling a wrong number and sending a fax to an incorrect destination, check the message display
carefully when you store the number. You can also check stored numbers by printing out the programmed
information after storing the number (page 85).
46 47 48 49 50
41 42 43 44 45
36 37 38 39 40
31 32 33 34 35
26 27 28 29 30
ABCDE
FGHI J
KLMNO
PQRST
UVW
XYZ
SP
XXXXXX
1234567890
MEMORY AUTO
CONT A4R
STANDARD
AUTO
SYMBOL
SPACE/–
REDIAL/PAUSE
SPEED
COMM. SETTING
FAX
SCAN
PRINT
Enter SPEED #.
SPEED:___ (000-299)
MEMORY AUTO
CONT A4R
STANDARD
AUTO
46 47 48 49 50
41 42 43 44 45
36 37 38 39 40
31 32 33 34 35
26 27 28 29 30
ABCDE
FGHI J
KLMNO
PQRST
UVW
XYZ
SP
XXXXXX
:0123456789
BROADCAST
CONT A4R
STANDARD
AUTO
SHIFT
SYMBOL
SPEAKER
REDIAL/PAUSE
SPEED
FAX
SCAN
PRINT
COPY
Redialling. 100%
:0123456789
MANUAL AUTO
CONT A4R
STANDARD
AUTO
SHIFT
SPEAKER
REDIAL/PAUSE
PRINT
COPY
ENTER DIAL #
:
MANUAL AUTO
CONT
STANDARD
AUTO
Note

16
2BASIC OPERATIONS
This chapter explains the basic procedures for sending and receiving faxes.
There are three basic methods for fax transmission: memory transmission, direct transmission, and manual
transmission. When memory transmission is used, the document is temporarily stored in memory before being
transmitted. When direct transmission or manual transmission is used, the document is transmitted without being
stored in memory, The default transmission setting can be set to "MEMORY TX" or "DIRECT TX" using "SEND
MODE" (page 106) in the system settings. To manually switch between "MEMORY TX" and "DIRECT TX", use the
[COMM. SETTING] key. (See "Faxing by direct transmission" on page 22.)
The following explanations generally assume that memory transmission is being used.

17
2
SENDING A FAX
BASIC PROCEDURE FOR SENDING FAXES
1Make sure that the machine is in fax
mode.
The FAX indicator is lit when the
machine is in fax mode. If the
indicator is not lit, press the
[FAX] key. If auditing mode has
been enabled for the fax function
in the system settings, a
message will appear prompting you to enter your
account number when you switch to fax mode. Enter
your account number (5 digits) with the numeric keys.
(See "ACCOUNT CONTROL" on page 103.)
2Place the original(s) in the document
feeder tray or on the document glass.
• Using the SPF/RSPF: page 12
• Using the document glass: page 12
If you are using the document glass to send
multiple pages, place the first page first.
3Check the original size. If the original
is not a standard size or the size was
not detected correctly, press the
[ORIGINAL SIZE] key.
When the [ORIGINAL SIZE] key is pressed, the size
selection screen appears. See "MANUALLY SETTING
THE SCANNING SIZE" (page 13) to set the original
size.
4If needed, adjust the resolution and
exposure settings. (Page 14)
To adjust the resolution and exposure settings, press
the [RESOLUTION] key. (See "SELECTING
RESOLUTION AND EXPOSURE SETTINGS" on
page 14.)
5Dial the fax number.
• The entered number appears in the message
display. Up to 50 digits can be entered. If you make
a mistake, press the [C] key and then enter the
correct number.
• Redialling and automatic dialling can also be used
(pages 15, 19).
Entering a pause
If a pause is necessary when
dialling out from a PBX or when
dialling an international number,
press the [REDIAL] key. (This
key functions as a pause key
when entering a number.)
If you press the [PAUSE] key once, a hyphen ("-")
appears and a 2-second pause* is inserted.
After entering a number, you can also press the
[PAUSE] key to enter a hyphen and then enter another
number using the numeric keys or a Rapid key. (This
connects the numbers together, and is called Chain
dialling.)
* The duration of each pause can be changed
inthesystem settings. (See "PAUSE TIME" on page
100.)
You cannot place originals both in the
SPF/RSPF and on the document glass and
send them in a single fax transmission.
C
S
F
G
LINE
DATA
FAX
SCAN
Note
RATIO
RESS
RESS
DUPLEX SCAN
DUPLEX SCAN
2-SIDED COPYAUTO IMAGE
FORMAT
BROADCAST
OUTPUT
ORIGINAL SIZE
ORIGINAL SIZE
ORIGINAL SIZE
AUTO
A3
B4
AB
COPY RATIO
ADDRESS
ADDRESS
EXPOSURE
COLOUR MODE
PROGRAM
PAPER SELECT
RESOLUTION
RESOLUTION
AUTO IMA
FORMA
BROADCA
COPY
SCAN
FAX
RESOLUTION
STANDARD
FINE
SUPER FINE
AUTO
Group keys cannot be used for chain
dialling.
ABC DEF
JKLGHI MNO
TUVPQRS WXYZ
@.-
_
READ-END
ACC. #-C
OK
Stand-by. 100%
:0123456789
MEMORY AUTO
CONT A4R
STANDARD
AUTO
SHIFT
SYMBOL
SPEAKER
REDIAL/PAUSE
SPEED
FAX
SCAN
PRINT
COPY
Note

18
BASIC OPERATIONS
6Press the [START] key ( ).
• Scanning begins.
• If the line is free, the machine will dial the receiving
machine and begin transmission as soon as the first
page is scanned. (Quick online transmission: page
24)
• If there is a previously stored job or a job is in
progress, or if the line is being used, all pages of the
original are scanned into memory and stored as a
transmission job. (This is called memory
transmission: the destination is automatically called
and the document transmitted after previously stored
jobs are completed.)
If scanning is completed
normally, the following
screen is appears briefly
and then the display
returns to the base
screen.
6Press the [START] key ( ).
Scanning begins.
7If you have another page to scan,
change pages and then press the
[START] key ( ).
• Repeat this sequence until all pages have been
scanned.
• You can change the resolution and exposure
settings as needed for each. (page 14)
• If no action is taken for one minute (the [START] key
( ) is not pressed), scanning automatically ends
and the transmission job is stored. (This function can
be disabled in the system settings.)
8After the last page is scanned, press
the [READ-END] key ( ).
Open the SPF/RSPF and remove the original. When
the original is removed or any key operation is
performed, the display returns to the base screen.
(The destination is automatically called and the
document transmitted after any previously stored jobs
are completed.)
Using the SPF/RSPF
MNO
WXYZ
@.-
_
AD-END
READING XX%
No.001 P-XXX
MEMORY AUTO
CONT A4R
STANDARD
AUTO
READ END XX%
No.001 P-XXX
MEMORY AUTO
CONT A4R
STANDARD
AUTO
Using the document glass
MNO
WXYZ
@.-
_
AD-END
READING XX%
No.001 P-XXX
MEMORY AUTO
CONT A4R
STANDARD
AUTO
[START]:CONTINUE
[#]:READ-END
MEMORY AUTO
CONT A4R
STANDARD
AUTO
@.-
_
READ-END
CC. #-C
READ END XX%
No.001 P-XXX
MEMORY AUTO
CONT A4R
STANDARD
AUTO
•To cancel transmission
To cancel transmission while "READING" appears or before the key is pressed, press the [C] or [CA] key. To
cancel a transmission job that is already stored, press the [FAX STATUS] key and cancel the job as explained
on page 25.
• A job number (3 digits) appears in the display with "READ END" when memory transmission is performed. If
you make a note of this number after performing a broadcast transmission, you can use the number to check
the results of the transmission in the transaction report or activity report.
• If the power is turned off or a power failure occurs while an original is being scanned in the SPF/RSPF, the
machine will stop and an original misfeed will occur. After power is restored, remove the original as explained
in "MISFEED IN THE SPF/RSPF" in the Operation Guide for the machine.
Note
This manual suits for next models
3
Table of contents
Other Sharp Accessories manuals