manuals.online logo
Brands
  1. Home
  2. •
  3. Brands
  4. •
  5. Sharp
  6. •
  7. Cash Register
  8. •
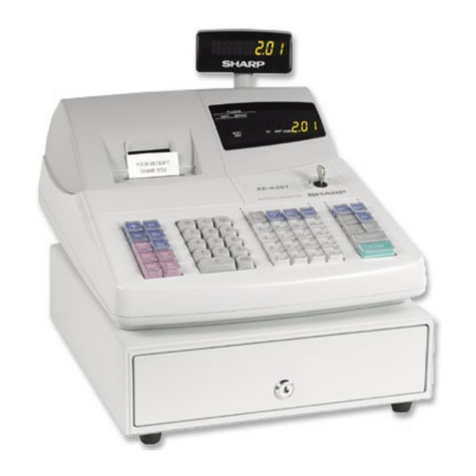
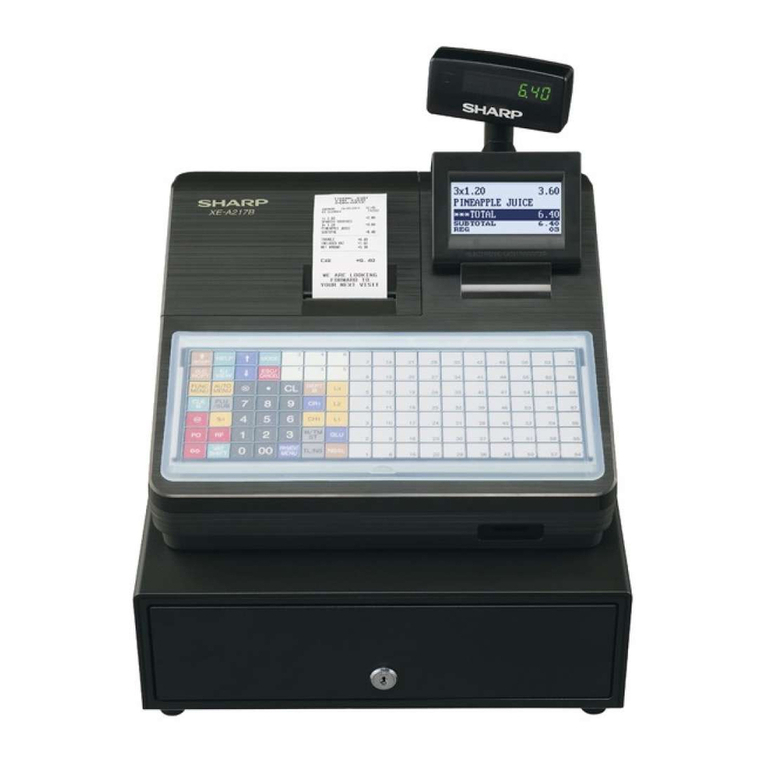
  9. Sharp XE-A307 User manual

Sharp XE-A307 User manual

Other manuals for XE-A307

5

This manual suits for next models

3

Other Sharp Cash Register manuals

Sharp XEA102 - Cash Register User manual

Sharp

Sharp XEA102 - Cash Register User manual

Sharp ER-A550 User manual

Sharp

Sharp ER-A550 User manual

Sharp ER-A247A User manual

Sharp

Sharp ER-A247A User manual

Sharp XE-A42S Parts list manual

Sharp

Sharp XE-A42S Parts list manual

Sharp XE-A107 User manual

Sharp

Sharp XE-A107 User manual

Sharp XE-A113 User manual

Sharp

Sharp XE-A113 User manual

Sharp XE-A507 User manual

Sharp

Sharp XE-A507 User manual

Sharp ER-1910 User manual

Sharp

Sharp ER-1910 User manual

Sharp ER-1910 User manual

Sharp

Sharp ER-1910 User manual

Sharp XE-A404 User manual

Sharp

Sharp XE-A404 User manual

Sharp ER-2386 User manual

Sharp

Sharp ER-2386 User manual

Sharp ER-A450T Product guide

Sharp

Sharp ER-A450T Product guide

Sharp ER-2720 User manual

Sharp

Sharp ER-2720 User manual

Sharp XE-A407 User manual

Sharp

Sharp XE-A407 User manual

Sharp UP-700 User manual

Sharp

Sharp UP-700 User manual

Sharp ER-A320 User manual

Sharp

Sharp ER-A320 User manual

Sharp EL-1607P User manual

Sharp

Sharp EL-1607P User manual

Sharp ER-A430 Owner's manual

Sharp

Sharp ER-A430 Owner's manual

Sharp XE-A302 User manual

Sharp

Sharp XE-A302 User manual

Sharp ER-2386S User manual

Sharp

Sharp ER-2386S User manual

Sharp ER-A457 User manual

Sharp

Sharp ER-A457 User manual

Sharp XE-A42S User manual

Sharp

Sharp XE-A42S User manual

Sharp ER-1017 User manual

Sharp

Sharp ER-1017 User manual

Sharp ER-A247 User manual

Sharp

Sharp ER-A247 User manual

Popular Cash Register manuals by other brands

Royal 480nt operating manual

Royal

Royal 480nt operating manual

Olivetti ECR 8200 S user guide

Olivetti

Olivetti ECR 8200 S user guide

TEC TEC FS-3600 owner's manual

TEC

TEC TEC FS-3600 owner's manual

Integrated System Laboratory ISL 4006 user manual

Integrated System Laboratory

Integrated System Laboratory ISL 4006 user manual

Sam4s ER-380 Operation and program manual

Sam4s

Sam4s ER-380 Operation and program manual

Samsung ER 5215 Operator's manual

Samsung

Samsung ER 5215 Operator's manual

Toast Toast Quick setup guide

Toast

Toast Toast Quick setup guide

QUORION CR 1200 user manual

QUORION

QUORION CR 1200 user manual

Olivetti ECR 7700 LD eco Plus user guide

Olivetti

Olivetti ECR 7700 LD eco Plus user guide

TEC TEC MA-1060 owner's manual

TEC

TEC TEC MA-1060 owner's manual

American Changer CLASSIC Series Operation manual

American Changer

American Changer CLASSIC Series Operation manual

Sam4s ER-5100? SERIES Service manual

Sam4s

Sam4s ER-5100? SERIES Service manual

Casio PCR-T273 user manual

Casio

Casio PCR-T273 user manual

Casio QT-7300 Series user manual

Casio

Casio QT-7300 Series user manual

GALEB GP-100 user manual

GALEB

GALEB GP-100 user manual

Optimas OP-680 manual

Optimas

Optimas OP-680 manual

TEC MA-600 Series owner's manual

TEC

TEC MA-600 Series owner's manual

Sam4s ER-180 Operation manual

Sam4s

Sam4s ER-180 Operation manual

manuals.online logo
manuals.online logoBrands
  • About & Mission
  • Contact us
  • Privacy Policy
  • Terms and Conditions

Copyright 2025 Manuals.Online. All Rights Reserved.

CODE : 00Z
SERVICE MANUAL
CONTENTS
Parts marked with " " are important for maintaining the safety of the set. Be sure to replace these parts with specified
ones for maintaining the safety and performance of the set.
This document has been published to be used
for after sales service only.
The contents are subject to change without notice.
XEA207SM2E
LEAD-FREE SOLDER MODEL
ELECTRONIC CASH REGISTER
XE-A207
XE-A217
MODEL XE-A307
CHAPTER 1. SPECIFICATIONS . . . . . . . . . . . . . . . . . . . . . . . . . . . . 1
CHAPTER 2. INSTALL . . . . . . . . . . . . . . . . . . . . . . . . . . . . . . . . . . . 11
CHAPTER 3. MASTER RESET . . . . . . . . . . . . . . . . . . . . . . . . . . . . 14
CHAPTER 4.
MAINTENANCE, DISASSEMBLY AND ASSEMBLY
. . 16
CHAPTER 5. HARDWARE DESCRIPTION . . . . . . . . . . . . . . . . . . . 26
CHAPTER 6. DIAGNOSTIC PROGRAM DESCRIPTION . . . . . . . . 30
CHAPTER 7. PWB LAYOUT . . . . . . . . . . . . . . . . . . . . . . . . . . . . . . 38
CHAPTER 8. CONNECTOR PIN LAYOUT . . . . . . . . . . . . . . . . . . . 40
XE-A207W/B
XE-A217W/B
XE-A307
XE-A207/A217/A307 LEAD-FREE SOLDER
■LEAD-FREE SOLDER
The PWB’ s of this model employs lead-free solder. The “LF” marks indicated on the PWB’s and the Service Manual mean “Lead-Free” solder. The
alphabet following the LF mark shows the kind of lead-free solder.
Example:
(1) NOTE FOR THE USE OF LEAD-FREE SOLDER THREAD
When repairing a lead-free solder PWB, use lead-free solder thread. Never use conventional lead solder thread, which may cause a breakdown or an accident.
Since the melting point of lead-free solder thread is about 40°C higher than that of conventional lead solder thread, the use of the exclusive-use soldering iron is rec-
ommendable.
(2) NOTE FOR SOLDERING WORK
Since the melting point of lead-free solder is about 220°C, which is about 40°C higher than that of conventional lead solder, and its soldering capacity is inferior to
conventional one, it is apt to keep the soldering iron in contact with the PWB for longer time. This may cause land separation or may exceed the heat-resistive tem-
perature of components. Use enough care to separate the soldering iron from the PWB when completion of soldering is confirmed.
Since lead-free solder includes a greater quantity of tin, the iron tip may corrode easily. Turn ON/OFF the soldering iron power frequently.
If different-kind solder remains on the soldering iron tip, it is melted together with lead-free solder. To avoid this, clean the soldering iron tip after com-
pletion of soldering work.
If the soldering iron tip is discolored black during soldering work, clean
and file the tip with steel wool or a fine filer.
5mm
Lead-Free
Solder composition
code (Refer to the
table at the right.)
<Solder composition code of lead-free solder>
Solder composition
Sn-Ag-Cu
Sn-Ag-Bi
Sn-Ag-Bi-Cu
Sn-Zn-Bi
Sn-In-Ag-Bi
Sn-Cu-Ni
Sn-Ag-Sb
Bi-Sn-Ag-P
Bi-Sn-Ag
a
b
z
i
n
s
p
Solder composition code
a
CAUTIONS
THERE IS A RISK OF EXPLOSION IF THE BATTERY
IS REPLACED BY AN INCORRECT TYPE.
PROPERLY DISPOSE OF USED BATTERIES ACCORDING
TO THE INSTRUCTIONS.
CAUTIONS
nRisk of explosion if battery is replaced by an incorrect type.
Dispose of batteries according to the instructions.
nDo not leave the unit with the battery discharged for more than one month.
It will shorten the battery life.
If the unit is left unused for a long period, be sure to charge the battery fully.
Also note that the battery must be charged periodically (once a month) because it will discharge naturally.
XE-A207/A217/A307 SPECIFICATIONS
– 1 –
CHAPTER 1. SPECIFICATIONS
1. SPECIFICATIONS
XE-A207W/A207B, XE-A217W/A217B
*Specifications and appearance are subject to change without notice
for improvement.
XE-A307
*Specifications and appearance are subject to change without notice
for improvement.
Model • XE-A207W/XE-A207B
• XE-A217W/XE-A217B
Dimensions 335 (W) x 424 (D) x 326 (H) mm
Weight Approx. 11.0 kg
Power Source Official (nominal) voltage and frequency
Power
Consumption
Stand-by • 9 W (When the official voltage is
220 to 230 V, 50 Hz/60 Hz)
• 10 W (When the official voltage
is 230 to 240 V, 50 Hz)
Operating • 33 W (max.) (When the official
voltage is 220 to 230 V, 50 Hz/
60 Hz)
• 34 W (max.) (When the official
voltage is 230 to 240 V, 50 Hz)
Working
Temperature
0 to 40 °C (32 to 104 °F)
Humidity 10 % to 90 %
Display Operator display LCD display with Tilt mechanism
160 (W) x 64 (H) (dots)
Customer display 7-segment display
Printer Type Drop-in thermal printer
Printing speed Approx. 15 lines/second
Printing capacity 30 digits
Other functions • Receipt (ON-OFF) function
• Compression print for an elec-
tronic journal
Logo Graphic logo
printing
Size 360 pixel (W) x 130 pixel (H)
Logo message
printing
Logo message for the receipt
(max. 30 characters x 6 lines)
Paper Roll Width 58 mm
Max. diameter 80 mm
Quality High quality (0. 06 to 0.08 mm
thickness)
Cash Drawer 5 slots for bills and 8 for coin denominations
Accessories BASIC USER
MANUAL
1 copy
Standard key
sheet
1 (placed under keyboard cover)
for XE-A217W/XE-A217Bonly
Text preset key
sheet
1 (placed under keyboard cover)
for XE-A217W/XE-A217B only
Paper roll 1
Drawer lock key 2
Fixing angle
bracket
1
Model XE-A307
Dimensions 360 (W) x 425 (D) x 330 (H) mm
Weight Approx. 12.0 kg
Power Source Official (nominal) voltage and frequency
Power
Consumption
Stand-by • 9.8 W (When the official voltage
is 220 to 230 V, 50 Hz/60 Hz)
• 9.3 W (When the official voltage
is 230 to 240 V, 50 Hz)
Operating • 37.8 W (max.) (When the official
voltage is 220 to 230 V, 50 Hz/
60 Hz)
• 35.1 W (max.) (When the official
voltage is 230 to 240 V, 50 Hz)
Working
Temperature
0 to 40 °C (32 to 104 °F)
Humidity 20 % to 90 %
Display Operator display LCD display with Tilt mechanism
160 (W) x 64 (H) (dots)
Customer display 7-segment LED display
Printer Type Two-station thermal printer
Printing speed Approx. 12 lines/second
Printing capacity 30 digits each for receipt/
journal paper
Other functions • Receipt (ON-OFF) function
• Compression print for the journal
and electronic journal
• Receipt and journal independent
paper feed function
Logo Graphic logo
printing
Size 360 pixel (W) x 130 pixel (H)
Area of black must be less than
35% of all area.
Logo message
printing
Logo message for the receipt
(max. 30 characters x 6 lines)
Paper Roll Width 57.5 ± 0.5 mm
Max. diameter 80 mm
Quality High quality (0.06 to 0.08 mm
thickness)
Cash Drawer 5 slots for bills and 8 for coin denominations
Accessories Basic User
Manual
1 copy
Paper roll 2
Ta ke - u p sp o o l 1
Paper holding
plate
1
Drawer lock key 2
Fixing angle
bracket
1
Battery caution
label
1
XE-A207/A217/A307 SPECIFICATIONS
– 2 –
2. EXTERNAL VIEW
■FRONT VIEW
XE-A207W/A207B
XE-A217W/A217B
XE-A307
■Rear view
3. ACCESSORIES
Printer cover
Operator Display
Keyboard
Drawer
Drawer lock
SD card slot
Printer cover
Operator Display
Keyboard
Drawer
Drawer lock SD card slot
Printer cover
Keyboard
Drawer
Drawer lock SD card slot
Operator Display
Customer display
RS232C
SK1-1
Drawer lock key: 2 Paper roll: 1 (XE-A207X/B,XE-A217W/B)
Paper roll: 2 (XE-A307)
BASIC USER MANUAL: 1
Standard key sheet: 1
(for XE-A217W/A217B (placed under keyboard cover))
Text preset key sheet: 1
(for XE-A217W/A217B (placed under keyboard cover))
XE-A207/A217/A307 SPECIFICATIONS
– 3 –
4. DISPLAYS
■OPERATOR DISPLAY
SCREEN EXAMPLE 1 (REG MODE)
SCREEN EXAMPLE 2 (PGM MODE)
The display can be tilted back and forth to the best operational viewing angle.
Note: Do not try to force the display beyond its full position.
■CUSTOMER DISPLAY
■SCREEN SAVE MODE
When you want to save the electric power or save the display’s life, use the screen save function. This function can turn the LCD backlight off when
any server does not operate the register for an extended period of time. You can program the time for which your register should keep the normal sta-
tus (in which the backlight is “ON”) before it goes into the screen save mode.
This machine will enter the screen save mode two minutes later by default.
To go back to the normal mode, press any key.
PLU level shift indicator (L1-L3) Shows the PLU level currently selected.
Receipt ON/OFF status indicator (R) Appears when the receipt ON-OFF function signs OFF.
VAT shift status indicator (V) Appears when the VAT status is shifted.
Electronic journal near full indicator ( ) Appears ( ) when the used memory is 80%.
Appears ( ) when the used memory is 90%.
Appears ( ) when the used memory is 95%.
Sentinel mark (X) Appears when the cash in drawer exceeds a programmed sentinel amount. The sentinel check is per-
formed for the total cash in drawer.
Sales information area:
Mode name
Status
information Clerk code
When a transaction information occupies more than 2 lines, scroll key(s)
appears to indicate you can scroll to the direction. Sales information you
have just entered such as items and prices will appear between 1st line
and 2nd line.
Total is always appear at 3rd line.
Numeric Entry Area:
Status area:
Programming area:
Programmable items are listed.
Status area:
Mode name Clerk code
XE-A207/A217/A307 SPECIFICATIONS
– 4 –
5. KEYBOARD (XE-A207W/XE-A207B)
5-1. KEYBOARD LAYOUT
5-2. FUNCTION KEY LIST
*In this manual each department key is represented like in order to distinguish it from direct price lookup keys.
Receipt paper feed key
Electronic journal view key
Function menu key
Auto menu key
Paid out key
Percent 1 key
Void key
Refund key
Help key
Discount key
Multiplication key
Decimal point key
Clear key
Numeric key
Price lookup/Sub department key
Department code entry key
Department shift key
Clerk code entry key
Department 1-32 key
Cursor (up/down arrow) key
Mode key
Escape/Cancel key
Credit 1 key
Payment menu key
Check 1 key
Non-add code/Time display/Subtotal key
Total/No sale key
~
~
XE-A207/A217/A307 SPECIFICATIONS
– 5 –
6. KEYBOARD (XE-A217W/XE-A217B)
6-1. KEYBOARD LAYOUT
6-2. PROGRAMING KEYBOARD LAYOUT
XE-A207/A217/A307 SPECIFICATIONS
– 6 –
6-3. FUNCTION KEY LIST
*In this manual each department key is represented like in order to distinguish it from direct price lookup keys.
Receipt paper feed key
Help key
Guest check receipt key
Electronic journal view key
Function menu key
Auto menu key
Clerk code entry key
Price lookup/Sub department key
Discount key
Percent 1 key
Paid out key
Refund key
Void key
Value added tax shift key
Cursor (up/down arrow) key
Mode key
Escape/Cancel key
Department 1-6 key
Multiplication key
Decimal point key
Clear key
Numeric key
Payment menu key
Department code entry key
Credit 1 key
Check 1 key
PLU level shift 1 to 3 keys
Non-add code/Time display/Subtotal key
Guest lookup key
Total/No sale key
New balance key
Direct PLU key
~
~
~
~
XE-A207/A217/A307 SPECIFICATIONS
– 7 –
6-4. INSERTING THE KEYBOARD SHEET
Two types of keyboard sheets are installed on the cash register; one for
ordinal use and one for text programming.
Insert the keyboard sheet between the keyboard cover and the cabinet
as illustrated below.
1) Turn over the keyboard cover.
2) Insert the keyboard sheet into the slit.
3) Close the keyboard cover.
Note:
• Do not spread the keyboard cover too far as it might tear.
• Replace the keyboard sheet with a new one if by chance it gets wet.
Use of a wet keyboard sheet may cause problems.
• Be sure to use only SHARP-supplied keyboard sheets. Thick or hard
sheets make key operations difficult.
• Smooth the keyboard sheet evenly under the keyboard cover, without
any folds or wrinkles, to ensure easier operation.
• If you require a new keyboard sheet, please contact your dealer.
7. KEYBOARD (XE-A307)
7-1. KEYBOARD LAYOUT
Keyboard sheet
Keyboard cover
1
2
XE-A207/A217/A307 SPECIFICATIONS
– 8 –
7-2. FUNCTION KEY LIST
Receipt paper feed key
Journal paper feed key
Function menu key
Auto menu key
Paid out key
Percent 1 key
Void key
Refund key
Help key
Discount key
Multiplication key
Decimal point key
Clear key
Numeric key
Price lookup/EAN key
Department code entry key
Department shift key
Clerk code entry key
Department 1-40 key
Cursor (up/down arrow) key
Mode key
Escape/Cancel key
Credit 1 key
Electronic journal view key
Foreign currency exchange key
Check 1 key
Payment menu key
Non-add code/Time display/Subtotal key
Total/No sale key