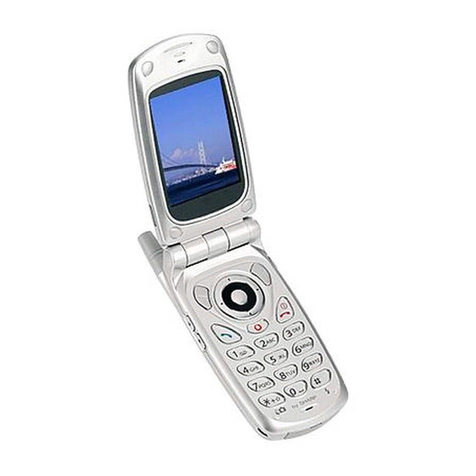
Sharp GX20 User manual

CONFIDENTIAL
CHAPTER 1. GENERAL DESCRIPTION
[1] Specifications ................................................ 1-1
[2] Names of parts .............................................. 1-2
[3] Operation manual.......................................... 1-3
CHAPTER 2. ADJUSTMENTS
[1] Adjustments
SHARP Pro ram Support Tool
(
SPST
)........ 2-1
[2] SHARP RF Test tool manual....................... 2-30
[3] Adjustment procedures
after replacement of the parts .................. 2-36
[4] Test points ................................................... 2-39
[5] Troubleshootin ........................................... 2-42
[6] Specification for function test ...................... 2-64
CHAPTER 3. DISASSEMBLY AND REASSEMBLY
[1] Servicin Concerns ....................................... 3-1
[2] Disassembly and reassembly ....................... 3-5
CHAPTER 4. DIAGRAMS
[1] Block dia ram .................................................4-1
CHAPTER 5. SCHEMATIC DIAGRAM AND
WIRING SIDE OF P.W.BOARD
[1] Notes on schematic dia ram ..........................5-1
[2] Types of transistor and LED ...........................5-1
[3] Waveforms of circuit .......................................5-2
[4] Schematic dia ram/
wirin side of P.W.Board ..............................5-6
CHAPTER 6. OTHERS
[1] Function table of IC.........................................6-1
[2] Function table of Camera .............................6-27
Par s Guide
SERVICE MANUAL
GX20
No. S9311TQGX20/B
DIGITAL MOBILE PHONE
GX20
MODEL
SHARP CORPORATION
CONTENTS
Parts marked with " " are important for maintainin the safety of the set. Be sure to replace these parts with specified ones for
maintainin the safety and performance of the set.
This document has been published to be used
for after sales service only.
The contents are subject to chan e without notice.
(INTERNAL MODEL NAME:
TQ-GX20E/G/R/T/S/H/EP/PP/W/B/D/A/Z/Q/L/F/C)
E : For U.K.
R : For Ireland
S : For Spain
EP: For U.K. (Prepaid)
W : For Sweden
D : For Greece
Z : For New Zealand
L : For Mal a
C : For Swi zerland
G : For Germany
T : For I aly
H : For Ne herlands
PP: For Por ugal (Prepaid)
B : For Hungary
A : For Aus ralia
Q : For Egyp
F : For France
• In the interests of user-safety the set should be restored to its
ori inal condition and only parts identical to those specified
should be used.
• Caution
Risk of explosion if battery is replaced by an incorrect type,
dispose of used batteries accordin to the instruction.

GX20
1 – 1
CONFIDENTIAL
OZ/IQ/YO/CalcGX20Service ManualTQGX20MarketE
CHAPTER 1. GENERAL DESCRIPTION
[1] Specifications
FOR A COMPLETE DESCRIPTION OF THE OPERATION OF THIS UNIT, PLEASE
REFER TO THE OPERATION MANUAL.
Genera : Tri - ban (GSM 900 MHz/DCS 1800 MHz/
PCS 1900MHz)
GPRS-enable
WAP, MMS, SMS
Dimensions
(fo ded, exc ud-
ing the aeria )
(H x W x D): 95 x 49 x 25 mm
Weight: 102 g
Battery operating
temperature: 0°C - 40°C
Main disp ay: Display imensions: 320 x 240 pixels
LCD isplay: CGS 262,144 colours with backlight
LCD backlight: LED backlight white colour LEDs
Externa disp ay: Display imensions: 60 x 80 pixels
LCD isplay: STN 256 colours LCD with backlight
Camera: CCD 350K pixels built-in camera
Zoom: Wi e an zoom mo e
[Supporte 4 (when image size is
120 x 160 pixels) x zoom]
Lens: F2.8, f = 2.6 mm
Sound: 16-polyphonic ring melo ies
Mobi e ight: 7 colours
Externa DC
supp y vo tage: 5.2 V
Battery: 3.7 V, 720 mAh, Li-Ion
Standby time: 100 ~ 250 hours
Ta k tim e: 180 ~ 240 min.
Others: Si e key
Infrare port 1.2 L/P (maximum istance 20 cm)
Connector for AC charger an ata cable
Stan ar han s free connector (ø2.5)
Battery ranning time epen s on the battery an SIM car as well as
the network con itions an usage
Specifications for this mo el are subject to change without prior
notice.
Licensed under U.S. Patent 4,558,302 and foreign counter-
parts.
T9 Text input is licensed under one or more of the following:
U.S. Pat. Nos. 5,818,437, 5,953,541, 5,187,480, 5,945,928,
and 6,011,554; Australian Pat. No. 727539; Canadian Pat.
No. 1,331,057; United Kingdom Pat. No. 2238414B; Hong
Kong Standard Pat. No. HK0940329; Republic of
Singapore Pat. No. 51383; Euro. Pat. No. 0 842 463
(96927260.8) DE/DK, Fl, FR, IT, NL,PT.ES,SE,GB;
Republic or Korea Pat. Nos. KR201211B1 and
KR226206B1; and additional patents are pending
worldwide.
Powered by JBlend , 1997-2003 Aplix Corporation. All
rights reserved.
Java and all Java-based trademarks and logos are trade-
marks or registered trademarks of Sun Microsystems, Inc.
in the U.S. and other countries.
JBlend and all JBlend-based trademarks and logos are
trademarks or registered trademarks of Aplix Corporation in
Japan and other countries.
In this product, JBlend is incorporated.
JBlend is a Java execution environment
that Aplix developed for implementing
advanced performance and fast operation
on small-memory systems. JBlend and
JBlend logo are trademarks or registered
trademarks of Aplix Corporation in Japan
and other countries.
Powered by Mascot Capsule /Micro3D Edition
TM
Mascot Capsule is a registered trademark of HI Corpora-
tion
2002-2003 HI Corporation. All Rights Reserved.
Licensed by Inter Digital Technology Corporation under one
or more of the following United States Patents and/or their
domestic or foreign counterparts and other patents pend-
ing, including U.S. Patents: 4,675,863: 4,779,262:
4,785,450 & 4,811,420.
RC
R
R
R
R
C

GX20
1 – 2
CONFIDENTIAL
[2] Names of parts
22
23
24
25
26
1
2
3
4
5
6
7
16
8
9
10
11
12
13
14
15
17
18
19
20
21
1. Earpiece
2. Navigation Keys (Arrow Keys):
Moves cursor to select
menu items, etc.
, , , in this
manual indicate these keys.
Up/Down arrow keys: Displays Contacts List
entries in stand-by mode.
Left arrow key: Displays list of
pplications in stand-by
mode.
Right arrow key: Displays list of Saved
Pictures in stand-by mode.
3. Centre Key: Displays Main menu in
stand-by mode and
executes functions.
in this manual indicates
this key.
4. Left Soft Key: Executes the function at the
bottom left of the screen.
in this manual indicates
this key.
5. Send Key: Makes or accepts calls,
views the call in stand-by
mode.
. Voice Mail Key:Press and hold this key to
connect to the Voice mail
centre automatically.
(Depends on the SIM card.)
7. * /Shift Key,
Viewfinder Switch Key:
Enters *.
Press and hold this key to
switch input method among
four modes: bc, BC, abc
and 123.
Switches viewfinders
between main display and
external display in digital
camera/video camera
mode.
8. Main Display
9. Hands Free Connector
10. Right Soft Key: Executes the function at the
bottom right of the screen.
in this manual indicates
this key.
11. “Vodafone live!” Key:
Used to access “Vodafone
live!” by opening the
browser.
12. End/Power Key: Ends a call, turns power on/
off.
13. Keypad
14. #/Flash light Key: Switches symbol screens.
Press and hold this key to
shift text input method
between multi-tap and T9
mode.
Turns the flash/auxiliary
light on or off in digital
camera/video camera
mode.
15. Microphone
1 . External Connector:
Used to connect either the
charger or data cable.
17. Aerial
18. Mobile Light: Usedasaflashoran
auxiliary light in digital
camera/video camera
mode, as a battery charge
indicator, or notification for
incoming calls, data/fax
calls or messages.
19. Macro Dial: Turns the dial to normal
(Close-up) ( ) or macro ( )
position.
20. Camera
21. External Display
22.InfraredPort: Sends and receives data via
infrared.
23. Speaker
24. RF Connector
25. Side-Up/Side-Down Keys:
Moves cursor to select
menu items, adjusts
earpiece volume, etc.
In stand-by mode, press
and hold this key to turn the
mobile light on and off.
When the mobile light is
on, press this key to change
the light colour.
2 . Battery Cover

GX20
1 – 3
CONFIDENTIAL
[3] Operation manual
(Page numbers refer to the user guide)
[Optional Accessories]
[Quickstart Guide] (Except for France, Swiss)
• Li-ion spare battery (XN-1BT11)
• High capacity Li-ion battery (XN-1BT13)
• Cigarette lighter charger (XN-1CL10)
• Data cable (RS232C cable: XN-1DC10)
The above accessories may not be available in all regions.
For details, please contact your dealer.
(for France: XN-1QC11)
• AC charger (Except for France: XN-1QC10, XN-1QC11)
i
In just a few minutes this QuickStart Guide will show you how to use
some of the main features of your new GX20. QUICKSTART GUIDE
1: GETTING STARTED
The Sharp GX20 is one of the most advanced mobile handsets available. With it you will be
able to use its built-in camera to take pictures and video clips, play arcade uality games,
listen to life-like polyphonic ringtones and sounds, send Multimedia messages, and connect
to Vodafone live! and the mobile internet.
But before you can do any of this, first you need to make sure your handset is prepared.
1. Inserting your SIM card:
Slide off the battery cover, and remove the battery. Slide your Vodafone SIM card (with the
gold contacts facing downwards) into its holder. Replace the battery and cover.
2. C arging t e battery:
Before using your handset for the first time, it’s important to charge the battery for at least 2
hours (see page 14 of the Manual).
3. Turning it on and off:
Open the handset, then press and hold the red key. Do the same to turn it off again.
SIM card
ii
QUICKSTART GUIDE
2: NAVIGATION
by SHARP
G
Camera
Select Exit
The GX20 has many features, but ex loring and using them is sim le,
thanks to the 5-way central navigation key and the contextual
softkeys.
(Centre key): Use to select an icon or menu item.
In Standby: Takes you to the main Menu (shown in phone).
In Camera mode: Takes a picture or starts/stops video recording.
(Navigation keys): Use to move between icons in menus and item lists.
(In Standby): Brings up commonly used menus (Contacts List, Applications and Saved
Pictures).
T e softkey selects w atever icon or command is s own in t e bottom left of t e
screen. T e softkey selects t e bottom rig t of t e screen (t is usually acts as
Cancel or Back.) T e key will select w at’s in t e middle.
(W en ringing): Answers a call.
(In Standby): Brings up Last Dialled numbers.
(During call): Ends a call.
(Press and hold): Turns handset on and off.
(In menus): Takes you back to t e Standby screen.
Takes you to t e Vodafone live! ome page.

GX20
1 – 4
CONFIDENTIAL
iii
The GX20’s built-in camera now lets you take video clips, as well as
having digital zoom and even a flash Once you’ve taken your video
or picture you can save it, then send it to others at a mobile number
or email address (see next page)
QUICKSTART GUIDE
3: THE CAMERA
1. Video Camera mode:
Go to the main Menu (press in Standby mode), select the Camera icon (you’ll see the
word ‘Camera’ in the red title bar), then press . Select Video Camera.
2. Recording a video c ip:
The screen becomes your viewfinder. ou can zoom in (up to 4×) by pressing the key
(the key zooms out again). ou can also adjust the brightness using the and
keys. Then press to start recording. When you’ve finished, press again.
3. Saving your video:
Now you’ll be offered the choice of Save or Preview.ChoosePreview to review your clip,
then press [Back]. If you’re happy with the clip, select Save (it will be saved in My Stuff
in the main Menu). If not, press [Cancel], and try again.
4. Digita Camera mode:
Choose Digita Camera in the Camera menu (or press the key in Standby mode).
Press to take the picture. Press [Save] to save it (in My Stuff), or press [Cancel]
and take it again.
Tip: ou can change the camera viewfinder to the external display (for taking pictures/
videos of yourself) by pressing the key. And you can adjust the Macro dial around the
lens to take close-up shots ( ).
Stop
16
F
Fine 0 x1
Macro
dial
External
display
iv
QUICKSTART GUIDE
4: MULTIMEDIA MESSAGING
Life is more than just text With Multimedia Messaging you can now
send video clips, pictures and sounds as well! Your handset is already
enabled to send and receive Multimedia Messaging, but if you have
any problems call your local Vodafone customer services
1. Create a new Mu timedia message:
Select Messages in the main Menu (or press the key in Standby mode). Select
Mu timedia Messages,thenCreate Message.
2. Write your message:
Use the keypad to write your text. To enter punctuation or other characters, press the
key, then select the symbol you want. For a space, press .
Tip: To turn Predictive Text (T9) off and on while entering text, press and hold the key
(you’ll see the T9 symbol at the top of the screen). Press and hold the key to cycle
through the Input Method (capitals, numeric, etc.).
3. Add your video c ip: ( symbo in message menu bar)
Press [Options] and select Video C ip. Highlight the clip you want to send. Press ,
then press [Back].
Tip: To send video you may have to adjust the setting. Select Mu timedia Messages in the
Messages menu, then press [Options]. Choose Settings,S ide Show then make sure
that Off is selected.
4. Add your picture: ( symbo in message menu bar)
Press [Options] and select Picture. Highlight the picture you want, press , then press
[Back].
G
Message:
Options Clear
Hi there - wait til you
see this!
|
32KB 34/2000
Abc
T9
G
Select Back
OK
Picture
Sound
Video Clip
Message Template
Text Template
Preview Message
Message:
32KB 34/2000
Abc
T9
Options
v
QUICKSTART GUIDE
5. Add a sound fi e: ( symbo in message menu bar)
Press [Options] and select Sound. To listen to the sounds, press [Options], then P ay.
Highlight the sound you want, press , then press [Back].
6. Preview your message:
Then press [Options], and select Preview Message. If you’re happy with the message,
press , then again to go to the To: screen.
7. Send to another mobi e:
Enter the number of the mobile phone you want to send it to. Press , then select Send
and press again. If the receiving phone can’t display Multimedia messages or video
clips, they’ll be sent a link to a web page they can view them on.
Tip: Try sending it to yourself to see how it works!
8. Send to an emai address:
After Step 6, press [Options], and select Input Method. Choose abc and then press
[Back]. Then write the email address (using the key to bring up the symbols menu for
the @ key). Press , then select Send and press again.
Tip: Press [Options], then select Search in the To: screen to bring up your Contacts list.
Then choose the mobile number or email address for the contact you wish to send it to. It
will be entered in the To: screen automatically.
G
To:
Options Clear
|
21/60
abc
G
Options Back
Hi there - wait til you
see this!
vi
QUICKSTART GUIDE
5: Vodafone ive! Vodafone live! is a mobile internet portal which is your gateway to a
new world of information, games, music and sevices
Connect to Vodafone ive!:
Simply press the key (under the Navigation key) to connect you to the Vodafone live!
main menu. To exit, press the key.
Tip: our GX20 uses GPRS, a fast way of getting mobile information. Also, the connection
is ‘always on’ — which means no wait for dialling up. ou only pay for data you send or get,
not how long you’re connected.
Or ink direct y to Vodafone ive! services:
In the main Menu, select the Vodafone ive! section, and choose your service:
Games: Online fun and games to download...
Ringtones: Download music, sounds and ringtones.
Pictures: Download images, animations and background wallpaper.
News: Get the latest news as it happens...
Sport: News, results and latest scores (with pictures).
Find & Seek: Get the local information you need, wherever you are.
Chat: Instant messaging and text chat with all your friends.
Search: Find what you need in Vodafone live!
Tip: Vodafone live! is growing and changing all the time, so these options may vary. Keep
checking it out to see what’s new.
Help &
earch
Games
Messages
Chat
My
Vodafone
More...
Download
New
This works very like an
ordinary web browser. Use
the navigation keys to
highlight the item you want
to select, then press to
open that page. Press
[Back to go back a page.
Press [Options for the
Browser Option menu.

GX20
1 – 5
CONFIDENTIAL
vii
Personalise your new handset by downloading new ringtones,
images and background wallpaper from Vodafone live!. All
downloads are saved in the My Stuff section of the main Menu.
QUICKSTART GUIDE
6: DOWNLOADING
You can download from the Vodafone live! portal or the handset shortcuts (see previous
page), or use the Download More menus:
1. Download a new ring one:
Your GX20 uses polyphonic ringtones for a more life like sound. Go to the My S uff section
from the main Menu, choose Sounds and then Download More. Choose the ringtone you’d
like and follow the instructions to download it.
Tip: To activate your ringtone, go to Profiles (in the main Menu), then choose Normal,then
select Op ions/Personalise/Assign Melody. Choose My Sounds and select your
downloaded ringtone.
2. Download new background wallpaper:
To choose a new background image for your phone, go to My S uff/Pic ures/
Download More. Choose an image and follow the instructions to download it. Then go to
Se ings (in the main Menu)/Phone Se ings/Main Display/Wallpaper/My Pic ures, and
select your downloaded image.
3. Download new games:
To add more arcade quality games to your handset, go to Fun & Games (in the main Menu)
and choose Games & More/Download More. Choose a game to download, and you’ll find
it in Fun & Games/Games & More/Applica ions.
G
Games & More
Select Back
Applications
Screensavers
Download More
Settings
JavaªInformation
1 1 3
TM
G
Normal
Save Back
Ringer VolumeDownload More
Assign Melody
Vibration
Keypad Tones
Warning Tone
Power On Sound
Power Off Sound
Message Alert
Pattern 1
viii
QUICKSTART GUIDE
7: TIPS AND TRICKS
Here are a few tips to help you use your new handset. There s much
more information in the manual — or you could just explore all the
menus and options screens...
1. Silen mode:
To switch your handset to silent mode, press and hold the key. Highlight the Silen
profile and select it. Select the Normal profile to go back to your usual setting.
2. In erna ional dialling:
Press and hold the key for the (+) sign when dialling international numbers.
3. Voice Memo:
Press then to bring up the Voice Memo application. Press to record, and again
to stop. You can send voice memos as part of a Multimedia message.
4. Fron ligh :
Press and hold the side key on the left side of the handset (in S andby mode) to turn the
light on and off (it can be used as a makeshift torch). Press the side key to change the colour
(the last selection cycles through them all like a disco light).
5. Ex ernal display:
You can customise your External display in the same way as your main screen. Go to Phone
Settings from the main Menu, then choose External Display. Now you can change the way
the clock looks, the background picture, even the icon displayed when there’s a call...
G
External Display
Select Back
Wallpaper
Backlight
LCD Contrast
Incoming Indication
Clock Display
Icon Display
LCD On/Off
Illustration 1
G
Voice Memo
Start Back
Rea y to recor

GX20
2 – 1
CONFIDENTIAL
OZ/IQ/YO/CalcGX20Service ManualTQGX20MarketE
CHAPTER 2. ADJUSTMENTS
[1] Adjustments
SHARP P og am Suppo t Tool (SPST)
1. Outline
This document provides user information required to install and use GX20 Program Support Tool (SPST)
2. System equi ements
• IBM PC compatible personal computer (standard COM1 serial port (115,200 bps) and USB required)
Supporting OS: Windows 98/98SE/2000/XP (except for Windows 95/ME/NT)
(English, German, Italian, Spanish, French and Chinese versions)
• Data cable
• Full charged battery
<During RF adjustment>
• RF test instrument: CMU200
• GPIB interface: National Instruments USB-GPIB cable
Model No : NI GPIB-USB-B
• The battery should be fully charged
3. Int oduction
3.1. Functions
SPST offers five key functions:
1 Software download
2 User data transfer (processes all data at once but not individually)
3 RF calibration
4 Default setting
5 Identification
SPST functions as a launche fo these independent softwa e p og ams
3.2. Installation
The SPST software is distributed in CD-ROM format
1) Use Windows Explorer and copy “UpgradingTool zip” and “SPST zip” to the desktop
2) Unzip and install “UpgradingTool zip” following the procedures below
3) Unzip the “SPST zip”
Hereinafter, procedures are carried out in the SPST folder
3.2.1 Sta ting up
Connect GX20 to an operable serial port of the PC with the supplied data cable Connect the AC charger to the Data cable
Execute the GX20 SPST exe program in the SPST folder
1) The SPC input screen appears Input SPC (2968) and press “OK”
If you do not know SPC, press “Cancel” to close
Figure 1

GX20
2 – 2
CONFIDENTIAL
2) If SPC is correct, the following screen appears
Figure 2
The software for each function is independent and thus multi-bootable However, you can only activate single software at a time To start snother
software, exit the current one
3) Click the “Change Password” button in Step 1 The screen below appears and you can change SPC
Figure 3
3.3. Functions
3.3.1 Identification
SPST downloads and displays the main data configured in GX20
<Operation>
1) On the SPST startup screen, press “Identity”
Figure 4
2) Connect PC and MS with a Data cable
3) Remove the SIM card and turn on the phone → Regular display
4) Select the COM port
5) Press “Get Identity” → The information will be displayed

GX20
2 – 3
CONFIDENTIAL
6) IMEI will be displayed, and the following dialog box appears
Figure 5
7) Make sure GX20 is turned off and press the power key
8) Press “OK” when **** appears on the GX20 display
9) Make sure “Success!!” appears Check the data and exit
Figure 6
Attachment 1 Operator Code Chart
No. Ope ato name Count y Model name
01 Vodafone UK Post-Paid UK A4TQGX20E
02 Airtel Post-Paid Spain A4TQGX20S
03 SFR Post-Paid France A4TQGX20F
04 Vodafone Omnitel Post-Paid Italy A4TQGX20T
05 D2 Post-Paid Germany A4TQGX20G
06 Vodafone NL Post-Paid Netherlands(Holland) A4TQGX20H
08 Vodafone Ireland Post-Paid Ireland A4TQGX20R
10 Vodafone Greece Post-Paid Greece A4TQGX20D
11 Vodafone Hungary Post-Paid Hungary A4TQGX20B
12 Vodafone Australia Post-Paid Australia A4TQGX20A
13 Vodafone New Zealand Post-Paid New Zealand A4TQGX20Z
14 Vodafone Sweden Post-Paid Sweden A4TQGX20W
15 Vodafone Egypt Post-Paid Egypt A4TQGX20Q
16 Vodafone Malta Post-Paid Malta A4TQGX20L
17 Swisscom Post-Paid Switzerland A4TQGX20C
48 Vodafone PT Pre-Paid Portugal A4TQGX20PP
50 Vodafone UK Pre-Paid UK A4TQGX20EP
Refer to the attachment 1
for the operator code.
Software version: 012
IMEISV: 06

GX20
2 – 4
CONFIDENTIAL
3.3.2 Use data t ansfe
SPST saves and downloads all the following use data.
1) Connect PC and MS with a Data cable and turn on MS
2) Activate the software
Figure 7
a) Select the COM port You cannot specify the communication protocol (115 kbps)
b) Press “Recognition”
Do not press “Recognition” until “InsertSIM” appears
3) Press either “BACKUP”, “RESTORE” or “END”
Figure 8

GX20
2 – 5
CONFIDENTIAL
4) If “BACKUP” is pressed, the dialog box for file selection appears Select the file and press “Save”
Figure 9
The buttons are grayed out during the process
Firue 10

GX20
2 – 6
CONFIDENTIAL
When they return to black, the process is complete Press “END” to exit
Figure 11
5) If “RESTORE” is pressed, the following confirmation dialog box appears Press “OK” to confirm
Figure 12
The dialog box for file selection appears Select the file and press “Open”
Figue 13

GX20
2 – 7
CONFIDENTIAL
The buttons are grayed out during the process
The process is complete when the buttons turn black
Figure 14
3.3.3 Default setting
You can reset settings to the factory default The following will be performed:
1 All user data in the file system is deleted
2 All WAP settings return to the default
3 All values set by users return to the default
4 1) MEPLOCK setting remains unchanged
When “MEPLOCK Set Default” is unchecked:
MEPLOCK remains disabled if canceled after shipment Check “MEPLOCK Set Default” to activate it
2) MEPLOCK setting returns to the factory default
Check “MEPLOCK Set Default” Even if canceled after shipment, MEPLOCK is activated
(MEPLOCK is not activated when units are shipped to some countries and remains disabled Check the country code )
<Procedure>
1) Connect the cable to the phone
2) Press the power button to enter the standby mode
3) Click the “Set to Default” button
Figure 15

GX20
2 – 8
CONFIDENTIAL
4) Click the “OK” button, The display changes as follows:
Figure 16
Check the version It takes approx 35 seconds for initialization
Figure 17
5) When MEPLOCK data exists, the screen below appears asking if the data should be restored If there is no data, the screen in 8) appears
Figure 18
6) Select [Yes] After the following screen, turn on the phone power and click the [Retry] button
To cancel the operation, click the [Cancel] button
Figure 19
H/W CHECK
ROM VERSION : 002
GX20 Diag Version. 1.3
CVS A07-005-0094-GX20
BLCD (256): 091 +001
BLCD (64k): 077
∗ GX20 ∗

GX20
2 – 9
CONFIDENTIAL
7) The screen below is displayed after initialization and the phone turns off
Figure 20
8) Click the [OK] button After the following screen, disconnect the cable
Figure 21
The setting is completed
3.3.4 RF Adjustment Tool
1) Tool layout
Figure 22
PC
Data cable
MS GSM tester
GPIB cable
Cable loss should be adjusted
according to the input value.

GX20
2 – 10
CONFIDENTIAL
2) P epa ation
• Connect PC and GSM tester with a GPIB cable
• Connect PC and MS with a Data cable (Use a full charged battery or one close )
• Connect an antenna input/output cable of GSM tester to MS
3) Default setting fo the p og am.
• Activate the program and set defaults
Figure 23
1) Select the COM port.
2) Set the GPIB No.
3) Select the test instrument.
4) Set the GPIB address.
5) Set the cable loss. For the
supplied cables
(YA00-0988-03), set:
GSM 0.60
DCS 0.95
PCS 0.96

GX20
2 – 11
CONFIDENTIAL
4) RF adjustment
1 Press “Calibration”
2 When initialization is complete, press “OK”
Figure 24
3 Turn on the phone and press “OK”
Figure 25
4 Make sure the phone is turned on and press “OK” (Adjustments start )
Figure 26
5 Press “OK”
Figure 27
6 The startup screen appears

GX20
2 – 12
CONFIDENTIAL
5) RF pe fo mance check
Press “Check”
1 When initialization is complete, press “OK”
Figure 28
2 Turn on the phone, enter the PIN code and press “OK”
Figure 29
3 Make sure that the phone is in the idle mode and press “OK”
Figure 30
4 Press the keys 1, 2, 3 and Send and press “OK”
Figure 31
5 Make sure the terminal display is “In Call” and press “OK”
(RF performance check starts )
Figure 32
6 The following message appears during the check Press the keys 1, 2, 3 and Send again and press “OK”
Figure 33

GX20
2 – 13
CONFIDENTIAL
7 Make sure the terminal display is “In Call” and press “OK”
Figure 34
8 RF performance check is complete Press “Save As…”and name the file to save the result Press “OK” to exit
Figure 35
The following will be displayed in case of failure
Figure 36
9 Press “OK”
Figure 37
10 The startup screen appears

GX20
2 – 14
CONFIDENTIAL
Attachment 2
Whole inspection list by RF performance check
Band Send-
ing/
Recei
ve
No. Item to be inspected Chan-
nel
PCL
GSM Tx 1 Sending output 37CH PCL5
band 2 Sending output 975CH PCL5
3 Sending output 124CH PCL5
4 Sending output 37CH PCL11
5 Sending output 37CH PCL19
6 Frequency deviation 37CH PCL5
7 Frequency deviation 975CH PCL5
8 Frequency deviation 124CH PCL5
9 Phase error (RMS) 37CH PCL5
10 Phase error (RMS) 975CH PCL5
11 Phase error (RMS) 124CH PCL5
12 Phase error (Peak) 37CH PCL5
13 Phase error (Peak) 975CH PCL5
14 Phase error (Peak) 124CH PCL5
15 Mod_spectrum –800 37CH PCL5
16 Mod_spectrum –600 37CH PCL5
17 Mod_spectrum –400 37CH PCL5
18 Mod_spectrum –250 37CH PCL5
19 Mod_spectrum –200 37CH PCL5
20 Mod_spectrum +200 37CH PCL5
21 Mod_spectrum +250 37CH PCL5
22 Mod_spectrum +400 37CH PCL5
23 Mod_spectrum +600 37CH PCL5
24 Mod_spectrum +800 37CH PCL5
25 Mod_spectrum –800 975CH PCL5
26 Mod_spectrum –600 975CH PCL5
27 Mod_spectrum –400 975CH PCL5
28 Mod_spectrum –250 975CH PCL5
29 Mod_spectrum –200 975CH PCL5
30 Mod_spectrum +200 975CH PCL5
31 Mod_spectrum +250 975CH PCL5
32 Mod_spectrum +400 975CH PCL5
33 Mod_spectrum +600 975CH PCL5
34 Mod_spectrum +800 975CH PCL5
35 Mod_spectrum –800 124CH PCL5
36 Mod_spectrum –600 124CH PCL5
37 Mod_spectrum –400 124CH PCL5
38 Mod_spectrum –250 124CH PCL5
39 Mod_spectrum –200 124CH PCL5
40 Mod_spectrum +200 124CH PCL5
41 Mod_spectrum +250 124CH PCL5
42 Mod_spectrum +400 124CH PCL5
43 Mod_spectrum +600 124CH PCL5
44 Mod_spectrum +800 124CH PCL5
45 Mod_spectrum –800 37CH PCL11
46 Mod_spectrum –600 37CH PCL11
47 Mod_spectrum –400 37CH PCL11
48 Mod_spectrum –250 37CH PCL11
49 Mod_spectrum –200 37CH PCL11
50 Mod_spectrum +200 37CH PCL11
51 Mod_spectrum +250 37CH PCL11
52 Mod_spectrum +400 37CH PCL11
53 Mod_spectrum +600 37CH PCL11
54 Mod_spectrum +800 37CH PCL11
55 Mod_spectrum –800 37CH PCL19
56 Mod_spectrum –600 37CH PCL19
57 Mod_spectrum –400 37CH PCL19
58 Mod_spectrum –250 37CH PCL19
59 Mod_spectrum –200 37CH PCL19
60 Mod_spectrum +200 37CH PCL19
61 Mod_spectrum +250 37CH PCL19
62 Mod_spectrum +400 37CH PCL19
63 Mod_spectrum +600 37CH PCL19
64 Mod_spectrum +800 37CH PCL19
65 Switch_Spectrum –1800 37CH PCL5
66 Switch_Spectrum –1200 37CH PCL5
67 Switch_Spectrum –600 37CH PCL5
68 Switch_Spectrum –400 37CH PCL5
69 Switch_Spectrum +400 37CH PCL5
70 Switch_Spectrum +600 37CH PCL5
71 Switch_Spectrum +1200 37CH PCL5
72 Switch_Spectrum +1800 37CH PCL5
73 Switch_Spectrum –1800 975CH PCL5
74 Switch_Spectrum –1200 975CH PCL5
75 Switch_Spectrum –600 975CH PCL5
76 Switch_Spectrum –400 975CH PCL5
77 Switch_Spectrum +400 975CH PCL5
78 Switch_Spectrum +600 975CH PCL5
79 Switch_Spectrum +1200 975CH PCL5
80 Switch_Spectrum +1800 975CH PCL5
81 Switch_Spectrum –1800 124CH PCL5
82 Switch_Spectrum –1200 124CH PCL5
83 Switch_Spectrum –600 124CH PCL5
84 Switch_Spectrum –400 124CH PCL5
85 Switch_Spectrum +400 124CH PCL5
86 Switch_Spectrum +600 124CH PCL5
87 Switch_Spectrum +1200 124CH PCL5
88 Switch_Spectrum +1800 124CH PCL5
89 Switch_Spectrum –1800 37CH PCL11
90 Switch_Spectrum –1200 37CH PCL11
91 Switch_Spectrum –600 37CH PCL11
92 Switch_Spectrum –400 37CH PCL11
93 Switch_Spectrum +400 37CH PCL11
94 Switch_Spectrum +600 37CH PCL11
95 Switch_Spectrum +1200 37CH PCL11
96 Switch_Spectrum +1800 37CH PCL11
97 Switch_Spectrum –1800 37CH PCL19
98 Switch_Spectrum –1200 37CH PCL19
99 Switch_Spectrum –600 37CH PCL19
100 Switch_Spectrum –400 37CH PCL19
101 Switch_Spectrum +400 37CH PCL19
102 Switch_Spectrum +600 37CH PCL19
103 Switch_Spectrum +1200 37CH PCL19
104 Switch_Spectrum +1800 37CH PCL19
105 Burst Timing 37CH PCL5
106 Burst Timing 975CH PCL5
107 Burst Timing 124CH PCL5
108 Burst Timing 37CH PCL11
109 Burst Timing 37CH PCL19
Rx 110 Reception sensitivity 37CH PCL5
111 Reception sensitivity 975CH PCL5
112 Reception sensitivity 124CH PCL5
113 Floor sensitivity 2 37CH PCL5
114 Reception level report 37CH PCL5
DCS Tx 115 Sending output 699CH PCL0
band 116 Sending output 512CH PCL0
117 Sending output 855CH PCL0
118 Sending output 699CH PCL5
119 Sending output 699CH PCL15
120 Frequency deviation 699CH PCL0
121 Frequency deviation 512CH PCL0
122 Frequency deviation 885CH PCL0
Band Send-
ing/
Recei
ve
No. Item to be inspected Chan-
nel
PCL
Other manuals for GX20
2
Table of contents
Other Sharp Cell Phone manuals

Sharp
Sharp Aquos D10 User manual

Sharp
Sharp NTT docomo Aquos Zeta User manual

Sharp
Sharp WX-T825 User manual

Sharp
Sharp SoftBank 203SH User manual

Sharp
Sharp Aquos Xx2 User manual

Sharp
Sharp ROUVO V User manual

Sharp
Sharp SH837Wi User manual

Sharp
Sharp AQUOS SHL21 Service manual

Sharp
Sharp AQUOS R User manual

Sharp
Sharp Aquos R compact Installation guide

Sharp
Sharp SH837W User manual

Sharp
Sharp TM150 User manual

Sharp
Sharp WX-T81 User manual

Sharp
Sharp AQUOS wish User manual

Sharp
Sharp AQUOS R Service manual

Sharp
Sharp SHV44 Quick start guide

Sharp
Sharp Aquos phone SL Service manual

Sharp
Sharp GX22 User manual

Sharp
Sharp sh906i Guide

Sharp
Sharp Vodafone 802SH User manual