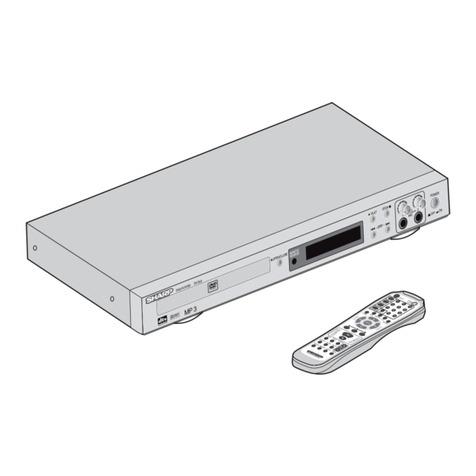
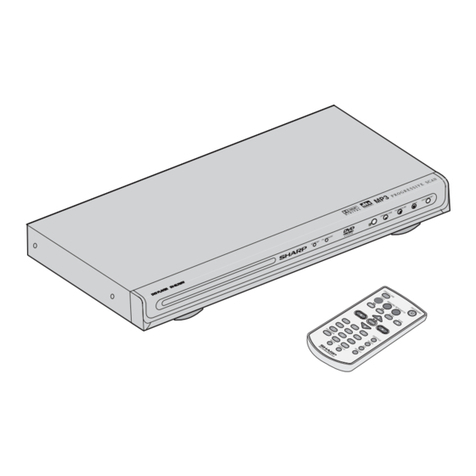
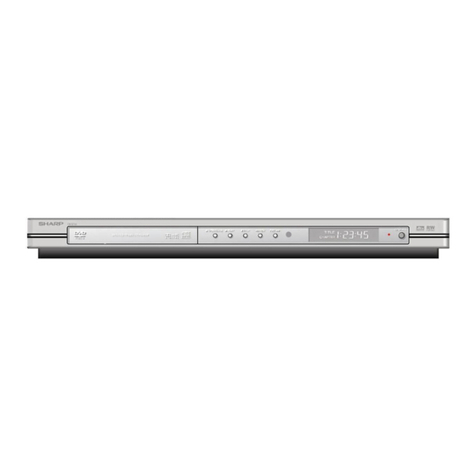
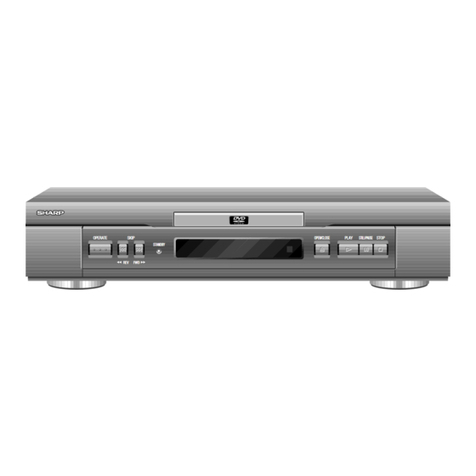
Sharp DV-SV80S(G) User manual

DVD Video Player
MODEL
OPERATION MANUAL
Please read this Operation Manual carefully
before using your DVD Video Player.
2NTSC/PAL
The region number for this DVD player is 2.
SKIP
DV-SV80
DVD / CD / VIDEO CD PLAYER
OPEN/CLOSE PLAY/PAUSE STOP
OPERATE
DV-SV80S(G)
All manuals and user guides at all-guides.com
all-guides.com

- 1 - EN
3RZHU&RUG3URWHFWLRQ
7RDYRLGDQ\PDOIXQFWLRQVRIWKH3OD\HUDQGWRSURWHFW
DJDLQVWHOHFWULFVKRFNILUHRUSHUVRQDOLQMXU\SOHDVHREVHUYH
WKHIROORZLQJ
+ROGWKHSOXJILUPO\ZKHQFRQQHFWLQJRUGLVFRQQHFWLQJWKH
$&SRZHUFRUG
.HHSWKH$&SRZHUFRUGDZD\IURPKHDWLQJDSSOLDQFHV
1HYHUSXWDQ\KHDY\REMHFWRQWKH$&SRZHUFRUG
'RQRWDWWHPSWWRUHSDLURUUHFRQVWUXFWWKH$&SRZHUFRUG
LQDQ\ZD\
1RWH
7KLV3OD\HUFDQEHXVHGRQO\ZKHUHWKHSRZHUVXSSO\LV
$&99+] ,WFDQQRWEHXVHGHOVHZKHUH
&$87,21
86(2)&21752/625$'-8670(17625
3(5)250$1&(2)352&('85(627+(5
7+$17+26(63(&,),('+(5(,10$<5(68/7
,1+$=$5'2865$',$7,21(;32685(
$67+(/$6(5%($086(',17+,63/$<(5,6
+$50)8/727+((<(6 '2127$77(03772
',6$66(0%/(7+(&$%,1(7 5()(56(59,&
,1*7248$/,),('3(56211(/21/<
:$51,1*
725('8&(7+(5,6.2)),5(25(/(&75,&
6+2&. '2127(;326(7+,6(48,30(1772
5$,12502,6785(
725('8&(7+(5,6.2)),5(25(/(&75,&
7+(5(&200(1'('$&&(6625,(621/<
6+2&. $1'$112<,1*,17(5)(5(1&( 86(
/DVHU'LRGH3URSHUWLHV
0DWHULDO *D$V
:DYHOHQJWK '9' QP
&' QP
(PLVVLRQ'XUDWLRQ &RQWLQXRXV
/DVHURXWSXW 0D[ P:
7KLV3OD\HULVFODVVLILHGDVD&/$66/$6(5SURGXFW
7KH&/$66/$6(5352'8&7ODEHOLVORFDWHGRQWKH
UHDUFRYHU
7KLVSURGXFWFRQWDLQVDORZSRZHUODVHUGHYLFH 7RHQVXUH
FRQWLQXHGVDIHW\GRQRWUHPRYHDQ\FRYHURUDWWHPSWWR
JDLQDFFHVVWRWKHLQVLGHRIWKHSURGXFW 5HIHUDOOVHUYLF
LQJWRTXDOLILHGSHUVRQQHO
7KLVHTXLSPHQWFRPSOLHVZLWKWKHUHTXLUHPHQWVRI
'LUHFWLYHV((&DQG((&DVDPHQGHGE\
((&
'LHVHV*HUlWHQWVSULFKWGHQ$QIRUGHUXQJHQGHU(*
5LFKWOLQLHQ(:*XQG(:*PLW¦QGHUXQJ
(:*
&HPDWpULHOUpSRQGDX[H[LJHQFHVFRQWHQXHVGDQVOHV
GLUHFWLYHV&((HW&((PRGLILpHVSDUODGLUHF
WLYH&((
'LWDSSDUDDWYROGRHWDDQGHHLVHQYDQGHULFKWOLMQHQ
((*HQ((*JHZLM]LJGGRRU((*
'HWWHXGVW\URYHUKROGHUNUDYHQHLGLUHNWLYQU ((&
RJ((&PHGWLOOJQU ((&
4XHVW¶ DSSDUHFFKLRqFRQIRUPHDLUHTXLVLWLGHOOHGLUHWWLYH
((&H((&FRPHHPHQGDWDGDOODGLUHWWLYD
((&
(VWHHTXLSDPHQWRREHGHFHjVH[LJrQFLDVGDVGLUHFWLYDV
&((H&((QDVXDYHUVmRFRUULJLGDSHOD
GLUHFWLYD&((
(VWHDSDUDWRVDWLVIDFHODVH[LJHQFLDVGHODV'LUHFWLYDV
&((\&((PRGLILFDGDVSRUPHGLRGHOD
&((
'HQQDXWUXVWQLQJXSSI\OOHUNUDYHQHQOLJWULNWOLQMHUQD
((&RFK((&VnVRPNRPSOHWWHUDVDY
((&
'HWWHSURGXNWHWRSSI\OOHUEHWLQJHOVHQHLGLUHNWLYHQH
((&RJ((&LHQGULQJHQ((&
7lPlODLWHWl\WWllGLUHNWLLYLHQ((&MD((&
YDDWLPXNVHWMRLWDRQPXXWHWWXGLUHNWLLYLOOl((&
SAFETY INFORMATION
All manuals and user guides at all-guides.com

- 2 - EN
SAFETY INFORMATION
/RFDWLRQDQG+DQGOLQJ
'RQRWFRYHURUSODFHWKHSOD\HULQHQFORVHGVSDFHVWR
SUHYHQWH[FHVVLYHWHPSHUDWXUHEXLOGXS
'RQRWSODFHWKH3OD\HULQGLUHFWVXQOLJKWRUQHDUKHDW
VRXUFHV
.HHSWKH3OD\HUDZD\IURPVWURQJPDJQHWLFREMHFWV
'RQRWSODFHDQ\REMHFWFRQWDLQLQJZDWHURURWKHUOLTXLGV
RQWKH3OD\HU,QWKHHYHQWWKDWOLTXLGVKRXOGHQWHUWKHFDE
LQHWXQSOXJWKH3OD\HULPPHGLDWHO\DQGFRQWDFWWKHUHWDLOHU
RUVHUYLFHFHQWUHDSSURYHGE\6+$53LPPHGLDWHO\
'RQRWUHPRYHWKH3OD\HUFDELQHW7RXFKLQJSDUWVLQVLGH
WKHFDELQHWFRXOGUHVXOWLQHOHFWULFVKRFNDQGRUGDPDJH
WRWKH3OD\HU)RUVHUYLFHDQGDGMXVWPHQWLQVLGHWKHFDEL
QHWFDOODTXDOLILHGGHDOHURUVHUYLFHFHQWUHDSSURYHGE\
6+$53
1RQXVH3HULRGV
:KHQWKH3OD\HULVQRWEHLQJXVHGVZLWFKWKH3OD\HUWRWKH
6WDQGE\PRGH
:KHQOHIWXQXVHGIRUDORQJSHULRGRIWLPHWKH3OD\HUVKRXOG
EHXQSOXJJHGIURPWKHKRXVHKROG$&RXWOHW
1R)LQJHUVRU2WKHU2EMHFWV,QVLGH
'RQRWSXWDQ\IRUHLJQREMHFWRQWKHGLVFWUD\
6WDFNLQJ
3ODFHWKH3OD\HULQDKRUL]RQWDOSRVLWLRQDQGGRQRWSODFH
DQ\WKLQJKHDY\RQLW
&RQGHQVDWLRQ
0RLVWXUHPD\IRUPRQWKHSLFNXSOHQVLQWKHIROORZLQJFRQGL
WLRQV
LPPHGLDWHO\DIWHUDKHDWHUKDVEHHQWXUQHGRQ
LQDVWHDP\RUYHU\KXPLGURRP
ZKHQWKH3OD\HULVVXGGHQO\PRYHGIURPDFROGHQYLURQ
PHQWWRDZDUPRQH
,QWKLVFDVHWXUQRQWKHSRZHUDQGZDLWDERXWRQHKRXUIRU
WKHPRLVWXUHWRHYDSRUDWH
&OHDQLQJ
8QSOXJ\RXU3OD\HUEHIRUHFOHDQLQJ8VHDGDPSFORWKIRU
FOHDQLQJ'RQRWXVHFOHDQLQJIOXLGVRUDHURVROVZKLFKFRXOG
HQWHUWKH3OD\HUDQGFDXVHGDPDJHILUHRUHOHFWULFDOVKRFN
7KHVHVXEVWDQFHVPD\DOVRGHWHULRUDWHWKHILQLVKRI\RXU
3OD\HU
,IWKHUHLV1RLVH,QWHUIHUHQFHRQWKH79:KLOHD
%URDGFDVWLVEHLQJ5HFHLYHG
'HSHQGLQJRQWKHUHFHSWLRQFRQGLWLRQRIWKH79LQWHUIHUHQFH
PD\DSSHDURQWKH79PRQLWRUZKLOH\RXZDWFKD79EURDG
FDVWDQGWKH3OD\HULVOHIWRQ7KLVLVQRWDPDOIXQFWLRQRIWKH
3OD\HURUWKH797RZDWFKD79EURDGFDVWWXUQRIIWKH
3OD\HU
5HFRPPHQGHG0HDVXUHVIRU2SWLPXP3LFWXUH
([FHOOHQFH
7KH3OD\HULVDSUHFLVLRQGHYLFHWKDWLVFRQVWUXFWHGXVLQJ
H[WUHPHO\DFFXUDWHWHFKQRORJ\
6RLOLQJRUIULFWLRQDIIHFWLQJWKHSLFNXSOHQVRUGLVFGULYHFDQ
LPSDLUWKHLPDJHTXDOLW\$WWKHZ RUVWQHLWKHUYLGHRQRUDXGLR
ZLOOEHSOD\HGEDFN &RQWDFW\RXUDXWKRUL]HG6KDUSVXSSOLHU
IRUGHWDLOV
$SSDUDWXV&ODLPVRI863DWHQW1RV
DQGOLFHQVHGIRUOLPLWHG
YLHZLQJXVHVRQO\
7KLVSURGXFWLQFRUSRUDWHVFRS\ULJKWSURWHFWLRQWHFKQRORJ\
WKDWLVSURWHFWHGE\PHWKRGFODLPVRIFHUWDLQ86SDWHQWV
DQGRWKHULQWHOOHFWXDOSURSHUW\ULJKWVRZQHGE\0DFURYLVLRQ
&RUSRUDWLRQDQGRWKHUULJKWVRZQHUV8VHRIWKLVFRS\ULJKW
SURWHFWLRQWHFKQRORJ\PXVWEHDXWKRUL]HGE\0DFURYLVLRQ
&RUSRUDWLRQDQGLVLQWHQGHGIRUKRPHDQGRWKHUOLPLWHG
YLHZLQJXVHVRQO\XQOHVVRWKHUZLVHDXWKRUL]HGE\
0DFURYLVLRQ&RUSRUDWLRQ5HYHUVHHQJLQHHULQJRUGLVDV
VHPEO\LVSURKLELWHG
'RQRWDWWHPSWWRFOHDQWKHSLFNXSOHQV\RXUVHOI
6HUYLFH
'RQRWDWWHPSWWRVHUYLFHWKLV3OD\HU\RXUVHOI3OHDVHUHIHU
DQ\VHUYLFHWRWKHQHDUHVWVHUYLFHFHQWUHDSSURYHGE\
6+$53
&RS\ULJKW
$XGLRYLVXDOPDWHULDOPD\FRQVLVWRIFRS\ULJKWHGZRUNVZLFK
PXVWQRWEHUHFRUGHGZLWKRXWWKHDXWKRULW\RIWKHRZQHURI
WKHFRS\ULJKW3OHDVHUHIHUWRUHOHYDQWODZVLQ\RXUFRXQWU\
&RS\3URWHFWLRQ
7KLV3OD\HUVXSSRUWV0DFURYLVLRQFRS\SURWHFWLRQ2Q'9'V
WKDWLQFOXGHDFRS\SURWHFWLRQFRGHLIWKHFRQWHQWVRIWKH
'9'DUHFRSLHGXVLQJD9&5WKHFRS\SURWHFWLRQFRGHSUH
YHQWVWKHYLGHRWDSHFRS\IURPSOD\LQJQRUPDOO\
All manuals and user guides at all-guides.com

- 3 - EN
SAFETY INFORMATION ................................................................. 1
TABLE OF CONTENTS .................................................................. 3
ABOUT THIS MANUAL ................................................................... 4
GENERAL PROPERTIES ............................................................... 4
SUPPLIED ACCESSORIES ............................................................ 5
DISC TYPES COMPATIBLE WITH THIS UNIT ............................. 6
SAFETY PRECAUTIONS ............................................................... 8
FRONT PANEL FUNCTIONS .......................................................... 9
FRONT PANEL DISPLAY (VFD .................................................. 1 0
REAR PANEL CONNECTIONS ..................................................... 11
CONNECTION OF YOUR DVD PLAYER WITH TV .................... 1 2
CONNECTION OF YOUR DVD PLAYER WITH AV AMPLIFIER . 14
FITTING BATTERIES IN YOUR REMOTE CONTROL .............. 15
REMOTE CONTROL FUNCTIONS ............................................. 15
DVD PLAYBACK ........................................................................... 17
RAPID ADVANCE / RAPID REVERSE ......................................... 17
SKIPPING AHEAD OR BACK TO CHAPTERS ........................... 17
STILL PICTURE (PAUSE ............................................................ 18
FRAME ADVANCE (STEP FORWARD ....................................... 18
FRAME BACK (STEP BACKWARD ............................................ 1 8
SLOW- MOTION PLAY FORWARD ............................................. 18
SLOW- MOTION PLAY BACKWARD ........................................... 18
DIRECT SELECTION OF SCENES ............................................. 18
REPEAT PLAY .............................................................................. 1 9
CONVENIENT FUNCTIONS ......................................................... 19
USING A DVD MENU .................................................................. 2 2
VIDEO CD PLAYBACK ................................................................. 23
MENU PLAY .................................................................................. 23
RAPID ADVANCE / RAPID REVERSE ......................................... 24
SKIPPING AHEAD OR BACK TO CHAPTERS ........................... 24
STILL PICTURE (PAUSE ............................................................ 24
FRAME ADVANCE (STEP ........................................................... 2 4
SLOW- MOTION PLAY ................................................................ 24
DIRECT SELECTION OF SCENES ............................................. 24
REPEAT PLAY .............................................................................. 2 5
CONVENIENT FUNCTIONS ......................................................... 25
AUDIO CD PLAYBACK ................................................................. 2 6
RAPID ADVANCE / RAPID REVERSE ......................................... 26
DIRECT SELECTION OF TRACKS ............................................. 26
REPEAT PLAY .............................................................................. 2 7
CONVENIENT FUNCTIONS ......................................................... 27
CD MENU ...................................................................................... 2 8
BASIC PLAY ................................................................................. 2 8
PAUSE .......................................................................................... 2 8
STOPPING PLAY ......................................................................... 28
SKIPPING AHEAD OR BACK TO TRACKS ................................ 2 8
IMAGE TRANSFORMATION ....................................................... 2 8
ZOOM............................................................................................ 2 9
DIGEST MODE............................................................................. 2 9
PROGRAM FUNCTION ................................................................ 30
USING SETUP MENU ................................................................... 3 0
MENU ITEMS ............................................................................... 32
VIDEO SETUP .............................................................................. 32
AUDIO SETUP .............................................................................. 3 3
LANGUAGE SETUP ..................................................................... 33
PARENTAL SETUP ...................................................................... 34
PREFERENCES SETUP .............................................................. 34
TROUBLESHOOTING ................................................................. 35
SPECIFICATIONS ........................................................................ 36
DEFINITION OF TERMS .............................................................. 3 7
TABLE OF CONTENTS
All manuals and user guides at all-guides.com

- 4 - EN
ABOUT THIS MANUAL
Instructions in this manual describe the controls of the player. You can also use the remote control buttons with the same
name as those on the player.
Dear Customers
We would like to thank you for purchasing this DVD/VCD/S VCD/CD R/CD RW/MP3/JPEG/Audio CD player.
We strongly recommend that you carefully study the operating instructions before attempting to operate the unit and that
you note the listed safety precautions.
GENERAL PROPERTIES
1) DVD/VCD/S VCD/CD R/CD RW/MP3/JPEG/Audio CD playback
2) NTSC/PAL playback (according to disc content)
3) User friendly multilanguage OSD menu control
4) Vacuum Fluorescent Display (VFD)
5) Dolby Digital, DTS, LPCM audio via coaxial and optical digital audio outputs.
6) Multiple Aspect Ratio support (16:9 Widescreen, 4:3 Letterbox, 4:3 PAN & SCAN)
7) Multi Audio (up to 8) support (According to disc content)
8) Multi Subtitle (up to 32) support (According to disc content)
9) Multi Angle (up to 9) support (According to disc content)
10) 8 level parental control
11) Fast forward and rewind in 5 different speeds. (2x, 4x, 8x, 16x, 32x)
12) Smooth and seamless playback in 2x speed.
13) Slow motion playback in 4 different speeds. (1/2, 1/4, 1/8, 1/16 forward and backward)
14) Frame by frame forward and backward playback
15) Time Search
16) Repeat
17) A B repeat
18) Program function for Audio CD/MP3
19) Scart Socket
20) Video output
21) S Video output
22) Coaxial & Optical Digital Audio outputs
23) Different play modes for Audio CD and MP3(Track/Scan/All/Random)
All manuals and user guides at all-guides.com

- 5 - EN
SUPPLIED ACCESSORIES
In the packaging material you will find the following:
DF
E
(a) Remote control
(b) Two R03 (AAA) batteries for remote control.
(c) Operation Manual
All manuals and user guides at all-guides.com
all-guides.com

- 6 - EN
DISC TYPES COMPATIBLE WITH THIS UNIT
This player can play the following discs.
'9'
9,'(2&'
$8',2&'
$XGLR
9LGHR
FP
$XGLR
9LGHR
$XGLR
FP
FP
FP
FP
FP
$XGLR
[[[[PS
03&'
-3(*
5($'$%/(
3,&785(&'
9LGHR
WLOOSLFWXUH
FP
FP
03LVUHFRUGHGDVD'LJLWDO6LJQDOZLWK
EHWWHUDXGLRTXDOLW\OHVVGLVWRUWLRQDQG
OHVVGHWHULRUDWLRQRIDXGLRTXDOLW\
RYHUWLPH
-3(*LVUHFRUGHGDVD'LJLWDO6LJQDOZLWK
EHWWHUSLFWXUHTXDOLW\RYHUWLPH
5($'$%/(
'L F7\SH
/RJR
5HFRUGLQJ
7\ SH
'L F6L]H 0D[
3OD\LQJ
7LPH
PLQ
PLQ
PLQ
PLQ
6LQJOH
VLGHGPLQ
'RXEOH
VLGHGPLQ
6LQJOH
VLGHGPLQ
'RXEOH
VLGHGPLQ
&KDUDFWHUL WLF
'9'FRQWDLQVH[FHOOHQWVRXQGDQGYLGHR
GXHWR'ROE\'LJLWDODQG03(*6\VWHP
9DULRXVVFUHHQDQGDXGLRIXQFWLRQVFDQEH
HDVLO\VHOHFWHGWURXJKWKHRQVFUHHQ
PHQX
9LGHRZLWK&'VRXQG9+6TXDOLW\
03(*FRPSUHVVLRQWHFKQRORJ\
$Q/3LVUHFRUGHGDVDQDQDORJVLJQDOZLWK
PRUHGLVWRUWLRQ&'LVUHFRUGHGDVD
'LJLWDO6LJQDOZLWKEHWWHUDXGLRTXDOLW\
OHVVGLVWRUWLRQDQGOHVVGHWHULRUDWLRQRI
DXGLRTXDOLW\RYHUWLPH
All manuals and user guides at all-guides.com

- 7 - EN
The following dis s annot be played ba k on this DVD player.
DVD with region odes other than 2 or ALL. DVD-ROM
DVD-RAM (Never play ba k, otherwise malfun tion may result.) DVD-R/RW
CD-ROM CDV (Only plays ba k the audio part.)
CD-G (Only plays ba k the sound.) CD-I (Never play ba k, otherwise malfun tion may result.)
Super Audio CD (Only the sound re orded on the normal CD layer an be delivered. The sound re orded
on the high density Super Audio CD layer annot be delivered.)
Photo CD (Never play ba k, otherwise malfun tion may result.)
Any other discs without compatibility indications.
Note:
When an in ompatible dis is inserted, a message appears in the VFD and the On S reen Display (NO DISC,
UNKNOWN DISC) indi ating that the Dis is not playable.
Notes on Dis s:
On handling dis s
To keep the disc clean, handle the disc by its edge. Do not touch the surface.
Do not stick paper or tape on the disc.
If the disc is contaminated with any substance like glue remove before using it.
Do not expose the disc to direct sunlight or heat sources such as hot air ducts, or leave it in a car parked in direct sunlight
as the temperature can rise quickly and damage the disc.
After playing, store the disc in its case.
On leaning
Before playing, clean the disc with a cleaning cloth. Wipe the disc from the center out.
Do not use solvents such as benzine, thinner, commercially available cleaners or anti static spray intended for vinyl LPs.
All manuals and user guides at all-guides.com

- 8 - EN
SAFETY PRECAUTIONS
Power Sour e:
The unit should be operated only from a 220 240V 50 Hz outlet. Please do not open the cover by yourself. There is high
voltage in the set, which will endanger your life. Please contact local service agent for help and advice. Repairs to be
carried out by a qualified technician only.
The player is not disconnected from the AC power source (mains) as long as it is connected to the wall outlet, even if
the player itself has been turned off.
If the player will not be used for a long time, be sure to disconnect it from the wall outlet.
Power Cord:
Do not place the unit, a piece of furniture, etc., on the power cord (mains lead), and do not pinch the cord. Handle the power
cord by the plug. Do not pull out the plug by tugging the cord and never touch the power cord when your hands are wet
as this could cause a short circuit or electric shock. Never make a knot in the cord or tie it with other cords. The power
cords should be routed in such a way that they are not likely to be stepped on. A damaged power cord can cause fire
and electrical shock. Check the power cord once in a while. If you find it damaged, ask closest service agent for help.
When the AC power cord needs to be changed, it should be done at a qualified service shop only.
Choi e Of Lo ation:
Please do not place the set in a place subject to direct sun light, excessive dust or mechanical shock or in a location near
heat sources.
The set should be placed on a solid and safe base. Do not place the player on a soft surface such as a rug that might
block the ventilation holes on the bottom.
A location should not be selected such as a room with high humidity, as the condensation, arising in the kitchen for example,
may cause malfunction or damage the set. · Heating or other thermal radiation under the set also may cause
malfunction or damage the set.
The hot air, which arises during the operation, should be ventilated with sufficient air circulation. Please do not put the
set into closed areas and do not cover it.
Please avoid contact of the set with water or humidity. Do not put it into operation near bath or swimming pools.
Make sure enough air circulation is provided around the product. Place the player in a location with adequate ventilation
to prevent heat build up in the player.
Should any solid object or liquid fall into the cabinet, unplug the player and have it checked by qualified personnel before
operating it any further.
All manuals and user guides at all-guides.com

- 9 - EN
FRONT PANEL FUNCTIONS
6.,3
'969
'9'&'9,'(2&'3/$<(5
1. Dis Tray
Place a disc on the tray.
2. OPEN/CLOSE button
Opens or closes the disc tray.
3. PLAY/PAUSE button
Plays/pauses the disc. For any DVD title that has a root menu with still picture, this button functions as SELECT button
(selects highlighted item) in the root menu. Otherwise the disc will prohibit this function on the root menu, and symbol
will appear on screen.
4. STOP button
Stops playing the disc.
5. SKIP buttons
Press to go back to the preceding chapter/track or to go to the next chapter/track.
6. Front Panel Display (VFD)
Indicates the playing time, title, chapter/track, etc.
7. OPERATE button
Turns the unit to OPERATE or STANDBY mode.
All manuals and user guides at all-guides.com

- 10 - EN
FRONT PANEL DISPLAY (VFD)
1. Play/Pause
2. Current Disc
3. Time or Title / Chapter / Track number
4. Dolby Digital / DTS
5. Zoom
6. Title Number
7. Angle
8. Chapter / Track Number
9. Repeat
All manuals and user guides at all-guides.com
all-guides.com

- 11 - EN
REAR PANEL CONNECTIONS
1. DIGITAL OUT onne tors
OPTICAL :
This connection is optional. Connects to an audio component using the optical digital connection cord.
COAXIAL :
Connects to an audio component using the coaxial digital connection cord.
2. AUDIO onne tors
Connects to the AV amplifier or audio input connector on the TV by using 2 cords (Left, Right).
3. VIDEO OUT onne tors
S VIDEO OUT :
Connects to the S video input connector on the TV.
VIDEO :
Connects to the video input connectors on the TV.
4. SCART onne tor
Connects to the scart input connector on the TV.
All manuals and user guides at all-guides.com

- 12 - EN
CONNECTION OF YOUR DVD PLAYER WITH TV
Be sure to turn off the power of each component before making the connections.
S art so ket:
RGB signal via SCART cable gives you the best picture performance. If your DVD player will not be connected to a hi
fi set or A/V amplifier to hear better sound, scart is enough for both audio & video connections.
79
6&$57
6FDUW&DEOHFRPPHUFLDOO\DYDLODEOH
6&$57
Video & Audio Output so kets:
Video (yellow) & audio (Red: right, White: left) output sockets can be used to connect the DVD player to your TV set via
cables. To make this connection, your TV set must have Video & audio input connectors. This type of connection is
alternative to scart connection. Picture quality is not as good as SCART RGB connection but audio performance is the
same.
79
/HIW5LJKW
2XWSXW
9LGHR2XWSXW
$XGLR9LGHR&DEOHFRPPHUFLDOO\DYDLODEOH
All manuals and user guides at all-guides.com

- 13 - EN
S-Video Output so kets:
S Video Output socket can be used to have a better picture quality than the video output. Your TV set must have S video
input connector for this type of connection. This socket is used for only video connection. For audio, red & white output
sockets must be used. S video picture quality is not as good as SCART RGB connection.
79
69LGHR2XWSXW
/HIW5LJKW
2XWSXW
$XGLR9LGHR&DEOHFRPPHUFLDOO\DYDLODEOH
Putting into operation:
After making the necessary connections stated above, plug the power cord to the mains socket. Unit will be in STANDBY
mode. Press OPERATE to turn on the unit. Open the disc tray with open/close button and insert a playable disc (DVD/VCD/
S VCD/CD R/CD RW/MP3/JPEG). Press open/close button again to close the disc tray and to start operating the player.
Player will start playing the disc automatically.
All manuals and user guides at all-guides.com

- 14 - EN
CONNECTION OF YOUR DVD PLAYER WITH AV AMPLIFIER
Be sure to turn off the power of each component before making the connections.
Analog Audio Output So kets:
To get better sound quality, the unit can be connected to an amplifier via analog audio left/right outputs.
79
+,),
/HIW5LJKW
2XWSXW
9LGHR
2XWSXW
7XQHU
$XGLR&DEOHFRPPHUFLDOO\DYDLODEOH
9LGHR&DEOHFRPPHUFLDOO\DYDLODEOH
Digital Audio Output So kets:
For the best sound, the unit can be connected via optical or coaxial digital audio outputs to an AV amplifier with a built
in Dolby Digital or DTS decoder. By using 6 speakers, user can enjoy the 5.1 channel surround sound.
287 ,1
,1
287
Dust protection cap
NOTE:
When this unit is connected to a separate Decoder Box or Amplifier through the DIGITAL AUDIO OUT connector, you may
sometimes hear a short noise when selecting the sound system in the DVD Menu. This is not a malfunction.
All manuals and user guides at all-guides.com

- 15 - EN
FITTING BATTERIES IN YOUR REMOTE CONTROL
First open the battery cover under the remote control. Fit both batteries 1.5Volt (R03/AAA) referring to the imprinted symbols
(+/ ) in the battery case and close the battery cover again.
While using the remote control, direct it towards the front of the DVD player. If the remote control does not work or the
chosen function can not be selected, the batteries are most probably exhausted and they should be replaced as soon
as possible. Please use only the leak proof batteries. If you will not be using your remote control for a long time, it is
recommended to take out the batteries from your remote control to avoid possible damage from battery leakage and
corrosion. Do not leave the remote in an extremely hot or humid place.
REMOTE CONTROL FUNCTIONS
All manuals and user guides at all-guides.com
all-guides.com

- 16 - EN
1. OPERATE button
Turns the unit on or switches the unit to Standby mode.
2. OPEN/CLOSE button
Opens or closes the disc tray.
3. TITLE button
Displays the title menu on the TV screen.
4. DISPLAY button
During playback of a disc, displays the current playing
status on TV screen or changes the playing time display
mode of the disc, title, track etc.on the OSD. Otherwise
displays setup menu on the TV screen.
5. MENU button
Displays the DVD root menu on screen.
6. ZOOM button
Zooms the picture by 2x, 3x, 4x, 1/2, 1/3, 1/4 while playing
DVD/VIDEO CD.
7. RETURN button
Returns to root menu to the main page in setup menu, or
resumes playback from root menu..
8. Arrow buttons
Moves to the items or settings.
9. SELECT button
Executes the items or settings.
10. PLAY/PAUSE button
Plays/pauses the disc. For any DVD title that has a root
menu with still picture, this button functions as SELECT
button (selects highlighted item) on the root menu.
Otherwise the disc will prohibit play/pause button
function, and symbol will appear.
11. STOP button
Stops playing disc.
12. SKIP/FRAME button
Press to go to the next chapter or track, or to go back to the
preceding chapter or track during playback and next/
previous frame during pause.
13. SLOW/SEARCH button
Press to adjust the forward and reverse playback speed
x2, x4, x8, x16 and x32 times during playback (rapid
advance/reverse) and 1/2, 1/4, 1/8, 1/16 times during
pause (Slow motion).
14. SUBTITLE button
Changes the subtitle language while playing a DVD.
15. AUDIO button
Changes the audio language while playing a DVD.
NOTE:
This function is not applicable for Audio CD and Video CD.
16. ANGLE button
Changes the angles when playing a DVD.
17. SEARCH MODE button
Press to select the unit for search (title, chapter, track, time
etc.)
18. PROGRAM button
Press to enter the program menu in stop mode for MP3 CD
and Audio CD.
19. REPEAT button
Press to execute disc/title/chapter repeat.
20. A - B button
Press to execute the A − B repeat play.
21. TIME button
Changes the play time display mode of the disc, title, track,
on the OSD and front panel display.
22. Number buttons
Use number buttons to enter track/chapter/title/time/
etcnumbers directly.
C button
Using this button you can delete the misstyped entries or
you can cancel some functions.
+10 button
Using this button you can enter the numbers greater than
9.
All manuals and user guides at all-guides.com

- 17 - EN
DVD PLAYBACK
Preparations
Press on the OPERATE button of your audio system if the
player has been connected to an audio system and turn on
your TV.
Basi Play
1. Press the OPERATE button
2. Press OPEN/CLOSE to open the disc tray.
3. Place a disc onto the tray
Hold the disc without touching either of its surfaces, position
it with the printed title side facing up, align it with the guides,
and place it in its proper position.
4. Press OPEN/CLOSE.
The disc tray is automatically closed and play
commences.
A menu may appear on the TV screen after a few moments
or the film may start immediately after the introduction of the
movie Company. This behaviour depends on the disc
content and may change.
NOTE:
Step 5 is available only when a menu is shown after the
disc is inserted.
Press 3465 or the number button(s) to sele t
the preferred menu item.
5. Press SELECT
Play of the selected items now starts. The played item may
be a movie, a still picture or another submenu depending
on the disc.
NOTE:
When using menus the dis data ontent ontrols
the behaviour of the player.
Stopping play and returning to the menu s reen
(when a menu is available on the dis )
Press MENU or TITLE button depending on the disc. Play
is suspended, and the Disc menu screen is displayed.
After operation
When the unit is not in use, remove the disc and press the
OPERATE button to turn off the unit.
NOTE:
The disc continues to rotate while the menu is displayed
even after the player has finished playing a particular item.
When no further selections are to be played, be sure to
press the STOP button to clear the menu display.
If the disc is placed upside down (and it is a single sided
disc), the VFD display on the player will indicate NO DISC.
For your referen e:
If an action corresponding to a button is prohibited the
symbol appears.
Stopping Play
Press stop twi e.
For your onvenien e:
When STOP is pressed once, while the play continues,
the unit records the point where the play is stopped and if
the PLAY key is pressed, playback resumes from the point
where the STOP key was pressed. When the tray is
opened or the STOP is pressed again, the RESUME
function will be cleared.
To stop the play permanently, press STOP twice. When
the STOP button is pressed for the first time, a message
PRESS PLAY TO CONTINUE will appear on the screen to
remind you if you want to continue the play. To stop the play,
press the STOP button again or you can press SELECT or
PLAY to continue.
Some discs, however may not let you to continue from the
point you have stopped. In such case, you will not see
warning PRESS PLAY TO CONTINUE on the screen at
the time you STOP the playback. In this case after pressing
PLAY button disc will start playback from the beginning.
Rapid Advance / Rapid Reverse
Press SLOW/SEARCH ( Fast reverse or Fast
forward) on the remote ontrol or Sear h or
on the main unit during play.
Normal play is resumed when the SELECT button is
pressed or PLAY/PAUSE button is pressed twice.
The speed of advance ( 2x, 4x, 8x, 16x,
32x) or reverse ( 2x, 4x, 8x, 16x, 32x)
changes for every press of the or button.
Skipping Ahead or Back to Chapters
Skipping ahead
Press SKIP/ FRAME (Next) on the remote ontrol
or SKIP on the main unit during play.
A chapter is skipped forward each time the button is
pressed.
Skipping ba k
Press SKIP/ FRAME (Previous) on the remote
ontrol or SKIP on the main unit during play.
When the button is pressed once midway through a
chapter, play returns to the previous chapter.
All manuals and user guides at all-guides.com

- 18 - EN
Still Picture (PAUSE)
Press PLAY/PAUSE on e during play.
The action freezes.
To return to normal play press PLAY/PAUSE again.
Fra e Advance (STEP FORWARD)
Press PLAY/PAUSE on e during play.
The action freezes.
Press SKIP/ FRAME (Next) on the remote ontrol
or SKIP on the main unit.
The next frame of the movie is displayed.
You an press SKIP/ FRAME (Next) for the
following frames.
Fra e Back (STEP BACKWARD)
Press PLAY/PAUSE on e during play.
The action freezes.
Press SKIP/ FRAME (Previous) on the remote
ontrol or SKIP on the main unit.
The previous frame of the movie is displayed.
You an press SKIP/ FRAME (Previous) for the
pre eding frames.
Slow- otion Play Forward
Press PLAY/PAUSE on e during play.
The action freezes.
Press SLOW/SEARCH on the remote ontrol or
Sear h on the main unit
The unit starts playing the movie at four
different speeds ( 1/2, 1/4, 1/8, 1/16).
You an in rease or de rease the speed of the
slow-motion play by pressing SLOW/SEARCH .
The speed of slow motion play is displayed on the screen
each time you change it.
To return normal play press PLAY/PAUSE.
Slow- otion Play Backward
Press PLAY/PAUSE on e during play.
The action freezes.
Press SLOW/SEARCH on the remote ontrol or
Sear h on the main unit
The unit starts playing the movie at four different speeds
( 1/2, 1/4, 1/8, 1/16).
You an in rease or de rease the speed of the
slow-motion play by pressing SLOW/SEARCH .
The speed of slow motion play is displayed on the screen
each time you change it.
To return normal play press PLAY/PAUSE.
NOTE:
The forward and backward slow motion operations are
not recursive. The sequence for the slow motion is as
follows:
( 1/16, 1/8, 1/4, 1/2, PAUSE, 1/2,
1/4, 1/8, 1/16)
Direct Selection of Scenes
Sele ting S enes by Chapter Number
Press SEARCH MODE on the remote ontrol on e
during playba k.
The chapter/title search box is displayed on the screen.
You can see the currently playing and total number of
chapters on right hand side of the display bar as / xx.
Enter the number of the hapter using number
buttons.
The selected chapter is played just after you enter the
chapter number.
For your onvenien e:
If the chapter number you entered is between 0 and 9,
player will automatically jump to the related chapter. To enter
a chapter number which is more than 1 digit, press +10 KEY
and then enter the chapter number.
You can clear the field by pressing the C button if you
enter wrong number.
If you attempt to enter a number greater than the total
number of chapters on the current title, the search box
disappears and message is displayed on screen.
If you wait five seconds without pressing any key for
selecting scenes by chapter number, the operation is
cancelled.
Sele ting S enes by Title Number
Press SEARCH MODE on the remote ontrol on e
during playba k.
The chapter/title search box is displayed on the screen.
You can see the currently playing and total number of titles
in left hand side of the display bar as / xx.
Press 3 (Left) or 4(Right) button on the remote
ontrol to sele t the title field in the sear h box to
hange the title.
You can see the currently playing title and total title
numbers on the top left side of the display as / xx.
All manuals and user guides at all-guides.com

- 19 - EN
Enter the number of the title using number
buttons.
The selected title is played just after you enter the title
number.
For your onvenien e:
Enter the title number between 0 and 9, your request will
be acknowledged immediately without pressing any other
key. To select a title number which is more than 1 digit,
press +10 KEY and then enter the title number.
You can clear the field by pressing the C button if you
enter wrong number.
If you attempt to enter a number greater than the total
number of titles, the search box disappears, message
appears.
If you wait five seconds without pressing any key for
selecting scenes by title number, the operation is cancelled.
You can press RETURN key to cancel title search.
Sele ting S enes by Time
You can view the DVD starting from any time point you
want.
Press SEARCH MODE on the remote ontrol twi e
during playba k.
The time search box is displayed on the screen You can
see the total runtime of the title on right side of the display
bar as Title xx/xx Time: : :
Enter the time using number buttons.
The title is played beginning from the desired time just after
you enter the time. If not prohibited by the DVD.
Press SEARCH MODE on the remote ontrol third
time during playba k.
The time search box is displayed on the screen. You can
see the total runtime of the Chapter on right side of the
display bar as Chapter xx/xx Time: : :
Enter the time using number buttons.
The Chapter is played beginning from the desired time just
after you enter the time. If not prohibited by the DVD.
For your onvenien e:
You can clear the fields by pressing the C button if you
enter wrong numbers.
If you attempt to enter a number greater than the total time
of the current title, the time search box disappears,
message is displayed on screen.
If you wait five seconds without pressing any key to enter
time, selecting scenes by time option is cancelled.
You can press RETURN key to cancel time search.
Repeat Play
Repeat Viewing
Press REPEAT during play.
Each time this button is pressed, a different repeat box is
displayed on the screen.
If CHAPTER is displayed, the current chapter will
be played again.
If TITLE is displayed, the current title will be played
again.
If ALL is displayed, all titles and chapters will be
played again.
NOTE:
Repeat play may be prohibited by some DVD titles.
Once the REPEAT function (ALL repeat and CHAPTER
repeat) is set, the unit will remain in repeat mode until
another button is pressed.
Repeating se tions between two spe ifi points.
(A-B repeat)
Press A-B during play at the point where repeat
play is to ommen e (A).
A is displayed.
Press A-B again at the point where repeat play is to
be on luded (B).
AB is displayed and the repeat play of the selection
between points A and B starts, if not prohibited by the DVD.
To return to normal play
Press A-B again.
Convenient Functions
Displaying the time information
Press DISPLAY during PLAY.
During playback, each time this button is pressed, some
information is displayed on TV screen to indicate the current
status of the disc. On the display screen you can find the
following information lines:
Line 1: Title & Chapter Numbers
Line 2: Audio Format, Number of Output Channels & Audio
Language
Line 3: Subtitle Language Number & Subtitle Language
Line 4: Time Counter Mode & Time Counter
You can also reach this information screen by pressing
TIME key.
Time counter modes can be selected by pressing TIME key
consecutively.
First hit to TIME key: Line 4 > TITLE ELAPSED Mode
All manuals and user guides at all-guides.com
Other manuals for DV-SV80S(G)
1
Table of contents
Other Sharp DVD Player manuals

Sharp
Sharp DV-SL10 User manual

Sharp
Sharp DV-SV80S(G) User manual

Sharp
Sharp DV-600S User manual

Sharp
Sharp XL-E171DVH User manual

Sharp
Sharp DV-SL1000W User manual

Sharp
Sharp DV-S1S(S) User manual

Sharp
Sharp DV-SV97S(B) User manual

Sharp
Sharp QT-V5H User manual

Sharp
Sharp DV-SV80S User manual

Sharp
Sharp DV-SL16H User manual

Sharp
Sharp DV-SV92S(RU) User manual

Sharp
Sharp XL-DV75HMKII User manual

Sharp
Sharp DV-NC80W User manual

Sharp
Sharp DV-SV92S(L) User manual

Sharp
Sharp DV-740/T User manual

Sharp
Sharp DV-SL85X User manual

Sharp
Sharp DV-560H User manual

Sharp
Sharp DV-620S User manual

Sharp
Sharp DV-SV80S(B) User manual

Sharp
Sharp DV-S1S(G) User manual