–5–EN
TABLE OF CONTENTS
■ SAFETY INFORMATION. . . . . . . . . . . . . . . . . . . . . . . . 2
■ FEATURES . . . . . . . . . . . . . . . . . . . . . . . . . . . . . . . . . . 4
■ INTRODUCTION . . . . . . . . . . . . . . . . . . . . . . . . . . . . . . 5
Symbols Used in this Manual. . . . . . . . . . . . . . . . . . . . . 5
Supplied Accessories . . . . . . . . . . . . . . . . . . . . . . . . . . 5
■ ABOUT THE DISCS . . . . . . . . . . . . . . . . . . . . . . . . . . . 6
Playable Discs. . . . . . . . . . . . . . . . . . . . . . . . . . . . . . . . 6
Disc Types. . . . . . . . . . . . . . . . . . . . . . . . . . . . . . . . . . . 6
■ FUNCTIONAL OVERVIEW . . . . . . . . . . . . . . . . . . . . . . 7
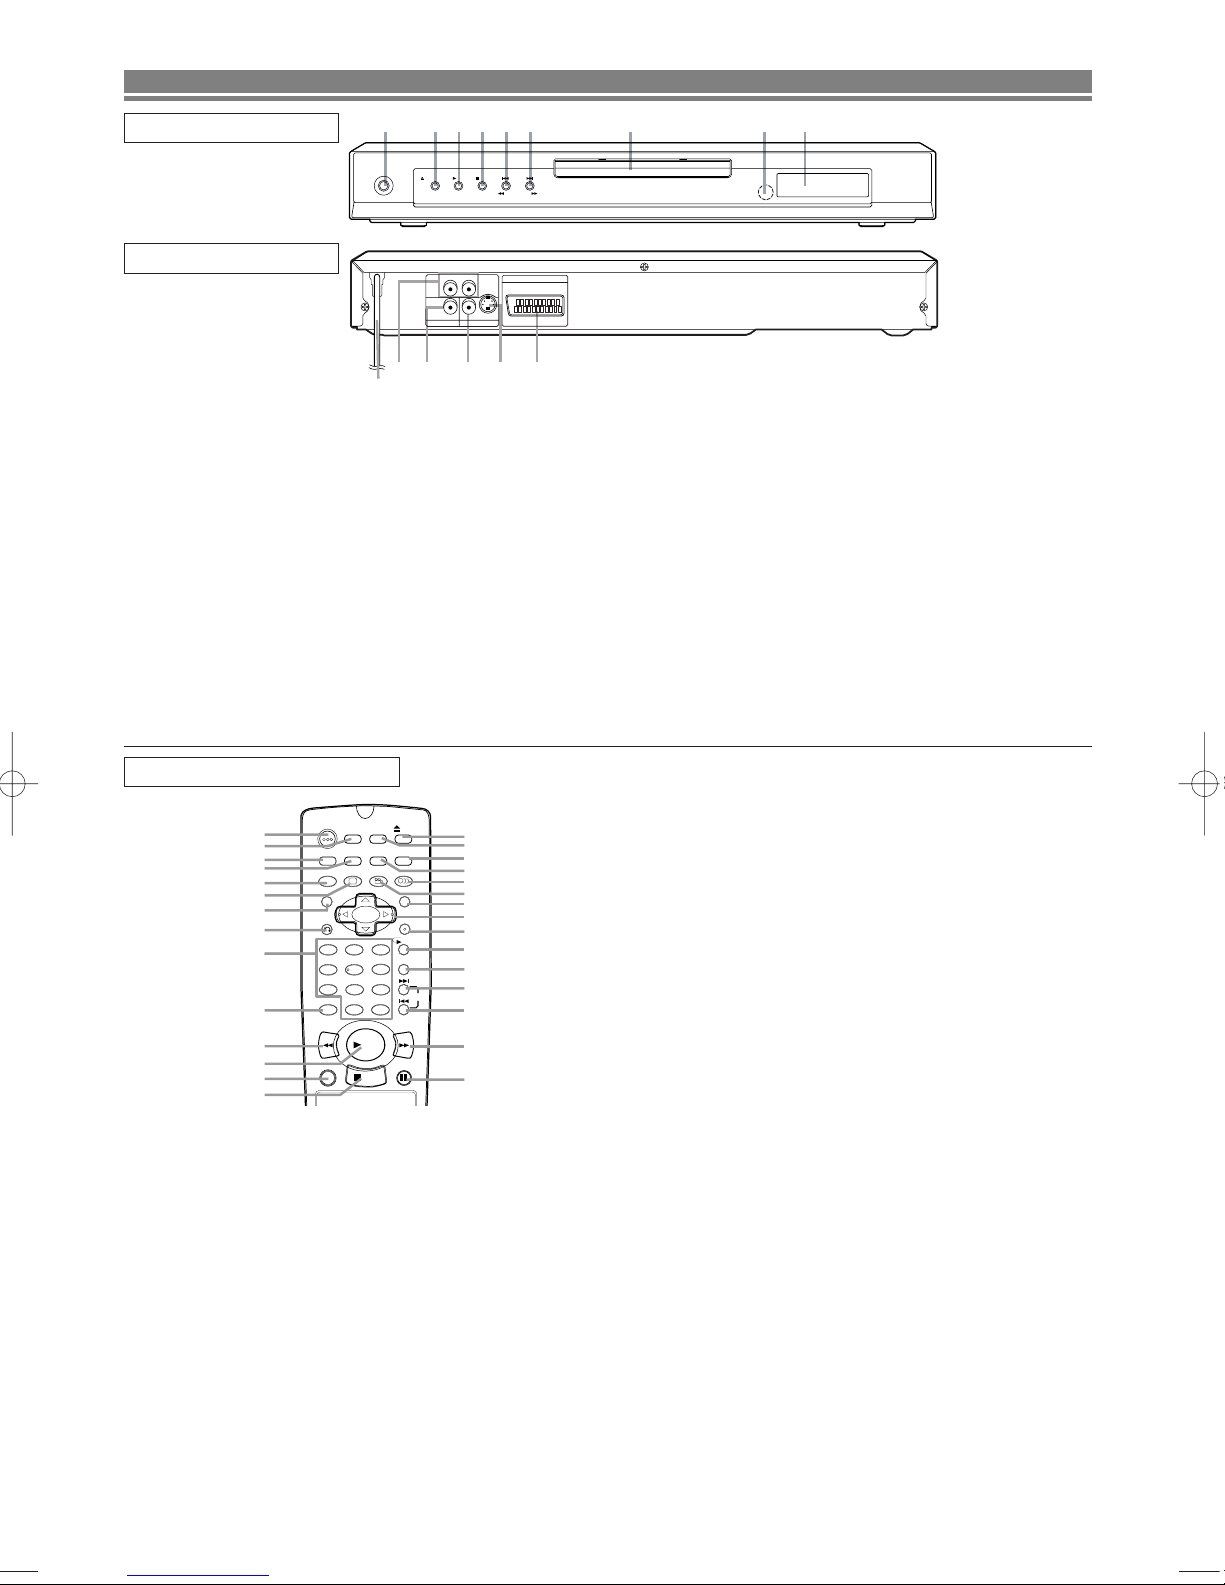
FRONT PANEL . . . . . . . . . . . . . . . . . . . . . . . . . . . . . 7
REAR VIEW . . . . . . . . . . . . . . . . . . . . . . . . . . . . . . . 7
REMOTE CONTROL . . . . . . . . . . . . . . . . . . . . . . . . . 7
Display . . . . . . . . . . . . . . . . . . . . . . . . . . . . . . . . . . . . . 8
Displays During Operation . . . . . . . . . . . . . . . . . . . . . . . 8
Loading the Batteries. . . . . . . . . . . . . . . . . . . . . . . . . . . 8
■ SETTING UP YOUR DVD PLAYER . . . . . . . . . . . . . . . . 8
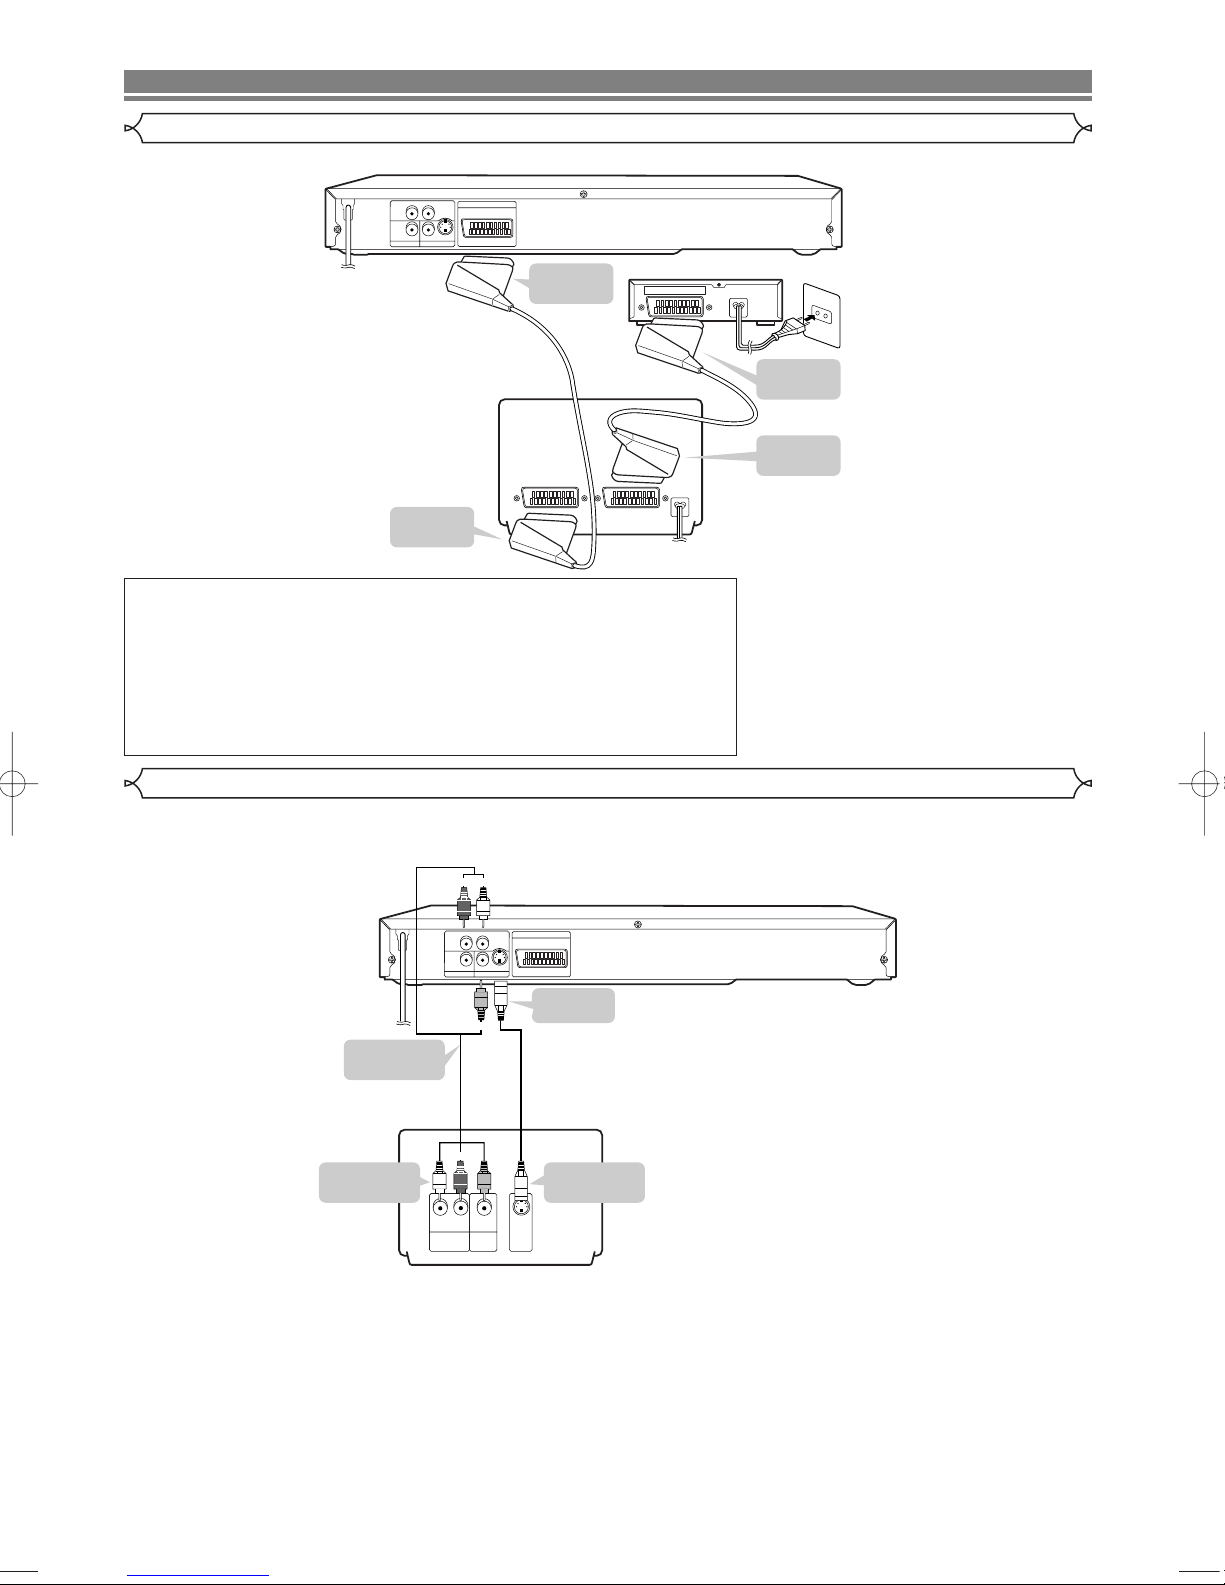
Connecting a TV with AV OUT SCART socket . . . . . . . . 8
If your TV has two SCART sockets . . . . . . . . . . . . . . . . 9
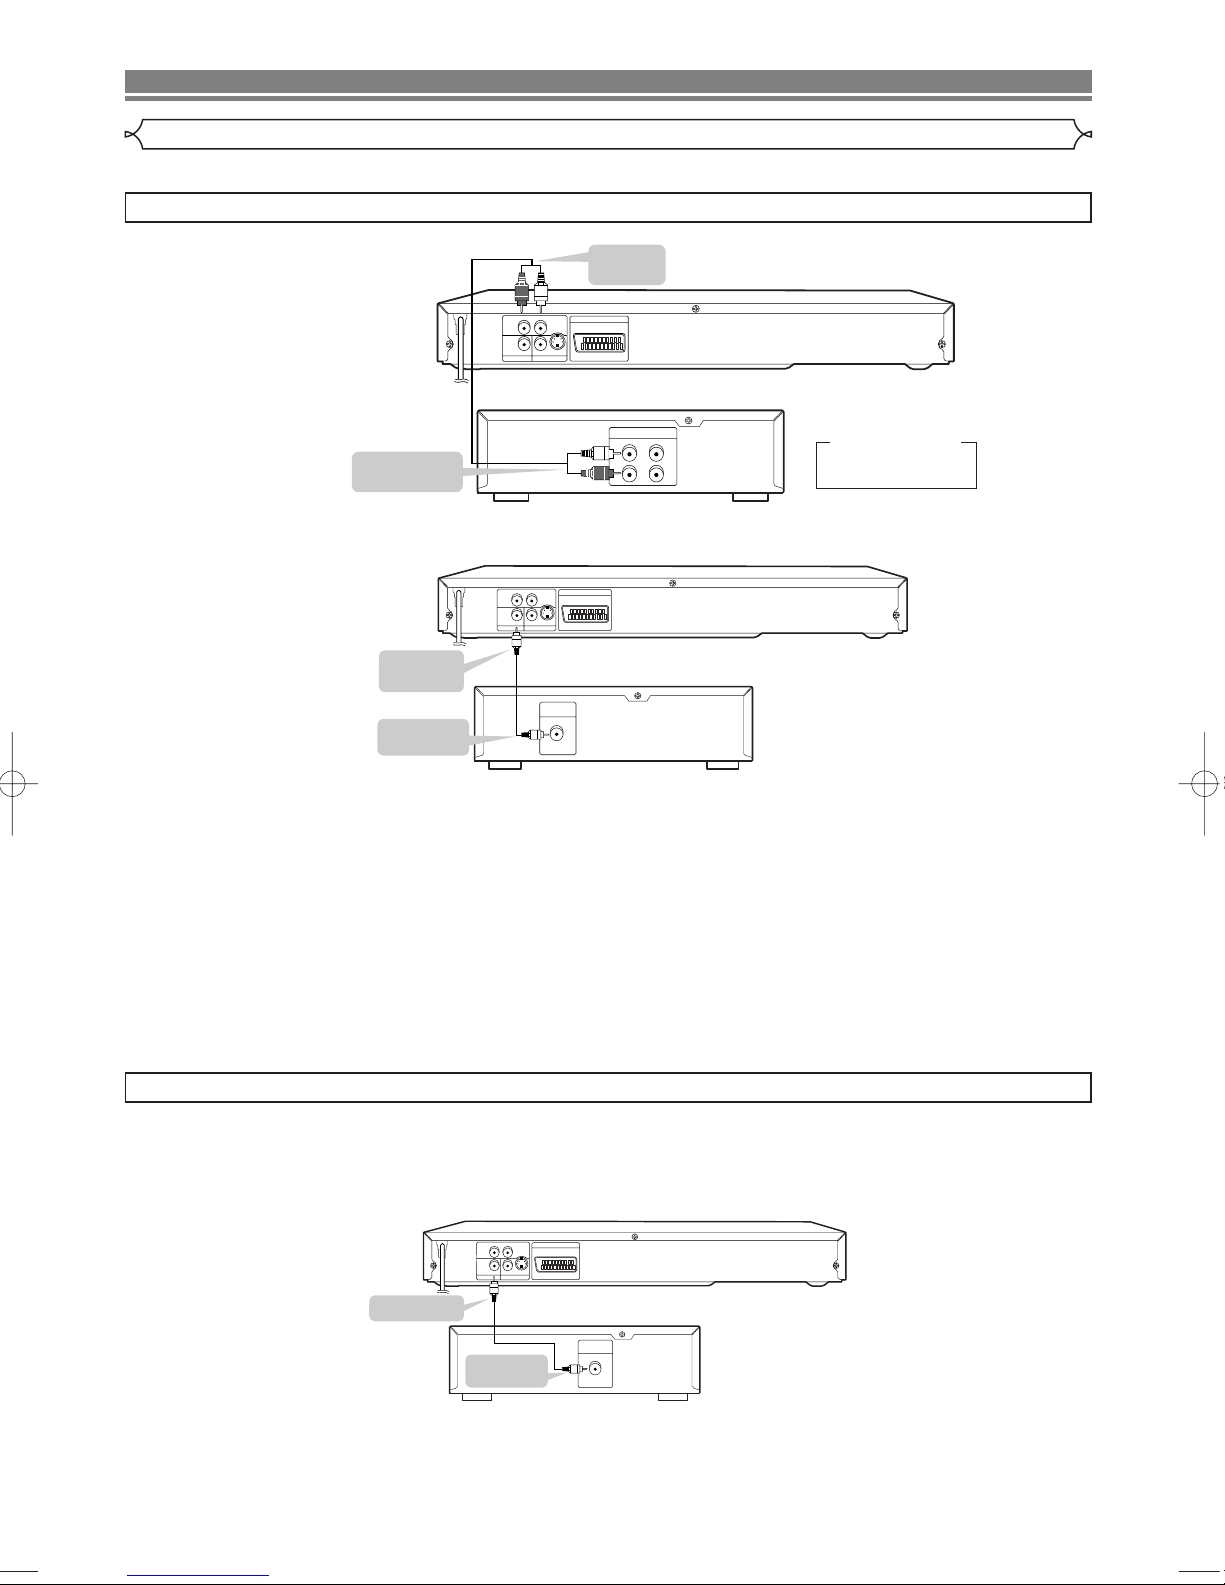
Connecting a TV Equipped with S-VIDEO Input or
VIDEO/AUDIO Input Jacks. . . . . . . . . . . . . . . . . . . . . . . 9
Connecting to Audio Equipment . . . . . . . . . . . . . . . . . . 10
Playing 2 channel audio . . . . . . . . . . . . . . . . . . . . . . 10
Playing Dolby Digital (5.1 channel), DTS
or MPEG audio . . . . . . . . . . . . . . . . . . . . . . . . . . . . 10
■ CONNECTIONS - TV, VCR, DIGITAL SET TOP BOX -
AND DVD PLAYER . . . . . . . . . . . . . . . . . . . . . . . . . . . 11
■ PLAYING A DISC . . . . . . . . . . . . . . . . . . . . . . . . . . . . 12
Basic Playback . . . . . . . . . . . . . . . . . . . . . . . . . . . . . . 12
General Features. . . . . . . . . . . . . . . . . . . . . . . . . . . . . 12
Pause . . . . . . . . . . . . . . . . . . . . . . . . . . . . . . . . . . . . . 12
Disc Menus . . . . . . . . . . . . . . . . . . . . . . . . . . . . . . . . . 12
Title Menu . . . . . . . . . . . . . . . . . . . . . . . . . . . . . . . . . . 13
CALLING UP A MENU SCREEN DURING
PLAYBACK . . . . . . . . . . . . . . . . . . . . . . . . . . . . . . . 13
Step by Step Playback. . . . . . . . . . . . . . . . . . . . . . . . . 13
Resume / Stop . . . . . . . . . . . . . . . . . . . . . . . . . . . . . . 13
Playing the disc recorded in VR mode
(Video Recording format). . . . . . . . . . . . . . . . . . . . . . . 13
Fast Forward / Reverse Search . . . . . . . . . . . . . . . . . . 14
Slow Forward / Slow Reverse . . . . . . . . . . . . . . . . . . . 14
Zoom. . . . . . . . . . . . . . . . . . . . . . . . . . . . . . . . . . . . . . 14
Track . . . . . . . . . . . . . . . . . . . . . . . . . . . . . . . . . . . . . . 14
Title / Chapter Search . . . . . . . . . . . . . . . . . . . . . . . . . 15
Time Search . . . . . . . . . . . . . . . . . . . . . . . . . . . . . . . . 15
Repeat . . . . . . . . . . . . . . . . . . . . . . . . . . . . . . . . . . . . 15
REPEAT TITLE / CHAPTER. . . . . . . . . . . . . . . . . . . 15
REPEAT TRACK . . . . . . . . . . . . . . . . . . . . . . . . . . . 15
A-B REPEAT . . . . . . . . . . . . . . . . . . . . . . . . . . . . . . 15
Programme . . . . . . . . . . . . . . . . . . . . . . . . . . . . . . . . . 16
Random Playback . . . . . . . . . . . . . . . . . . . . . . . . . . . . 16
MP3 Playback . . . . . . . . . . . . . . . . . . . . . . . . . . . . . . . 16
On-Screen Information. . . . . . . . . . . . . . . . . . . . . . . . . 16
Track Selection . . . . . . . . . . . . . . . . . . . . . . . . . . . . . . 17
Random Playback . . . . . . . . . . . . . . . . . . . . . . . . . . . . 17
Programme . . . . . . . . . . . . . . . . . . . . . . . . . . . . . . . . . 17
Audio Language . . . . . . . . . . . . . . . . . . . . . . . . . . . . . 17
Stereo Sound Mode. . . . . . . . . . . . . . . . . . . . . . . . . . . 17
Subtitle Language . . . . . . . . . . . . . . . . . . . . . . . . . . . . 17
Camera Angle . . . . . . . . . . . . . . . . . . . . . . . . . . . . . . . 17
Changing the On-Screen Display. . . . . . . . . . . . . . . . . 18
Marker Setup Screen. . . . . . . . . . . . . . . . . . . . . . . . . . 18
Digital Gamma Setting. . . . . . . . . . . . . . . . . . . . . . . . . 18
Virtual Surround . . . . . . . . . . . . . . . . . . . . . . . . . . . . . 18
■ DVD SETUP . . . . . . . . . . . . . . . . . . . . . . . . . . . . . . . . 19
Audio Setting . . . . . . . . . . . . . . . . . . . . . . . . . . . . . . . . 19
Parental Control. . . . . . . . . . . . . . . . . . . . . . . . . . . . . . 19
PARENTAL LEVEL. . . . . . . . . . . . . . . . . . . . . . . . . . 19
IF YOU FORGET THE PASSWORD . . . . . . . . . . . . . 19
PARENTAL CONTROL LEVELS. . . . . . . . . . . . . . . . 19
Display Setting. . . . . . . . . . . . . . . . . . . . . . . . . . . . . . . 20
Language Setting . . . . . . . . . . . . . . . . . . . . . . . . . . . . 20
■ TROUBLESHOOTING GUIDE. . . . . . . . . . . . . . . . . . . 22
■ SPECIFICATIONS . . . . . . . . . . . . . . . . . . . . . . . . . . . . 23
■ MAINTENANCE . . . . . . . . . . . . . . . . . . . . . . . . . . . . . 23
Symbols Used in this Manual
INTRODUCTION
Manufactured under license from Dolby Laboratories.
“Dolby” and the double-D symbol are trademarks of
Dolby Laboratories.
“DTS” and “DTS Digital Out” are trademarks of Digital
Theater Systems, Inc.
The following symbols appear below in some headings and
notes in this manual, with the following meanings!
: Description refers to playback of DVD video discs. (includ-
ing DVD-RW/R discs)
: Description refers to playback of audio CDs.
/
: Description refers to playback of video CDs.
: Description refers to playback of MP3 discs.
: Description refers to playback of the VR mode (Video
Recording format).
*The VR mode (Video Recording format) is a recording
mode to enjoy editing the programme or “manual mode”
for recording in desired resolution and time.
(QUICK)
: Basic setup can be performed more quickly by selecting
(QUICK setup menu).
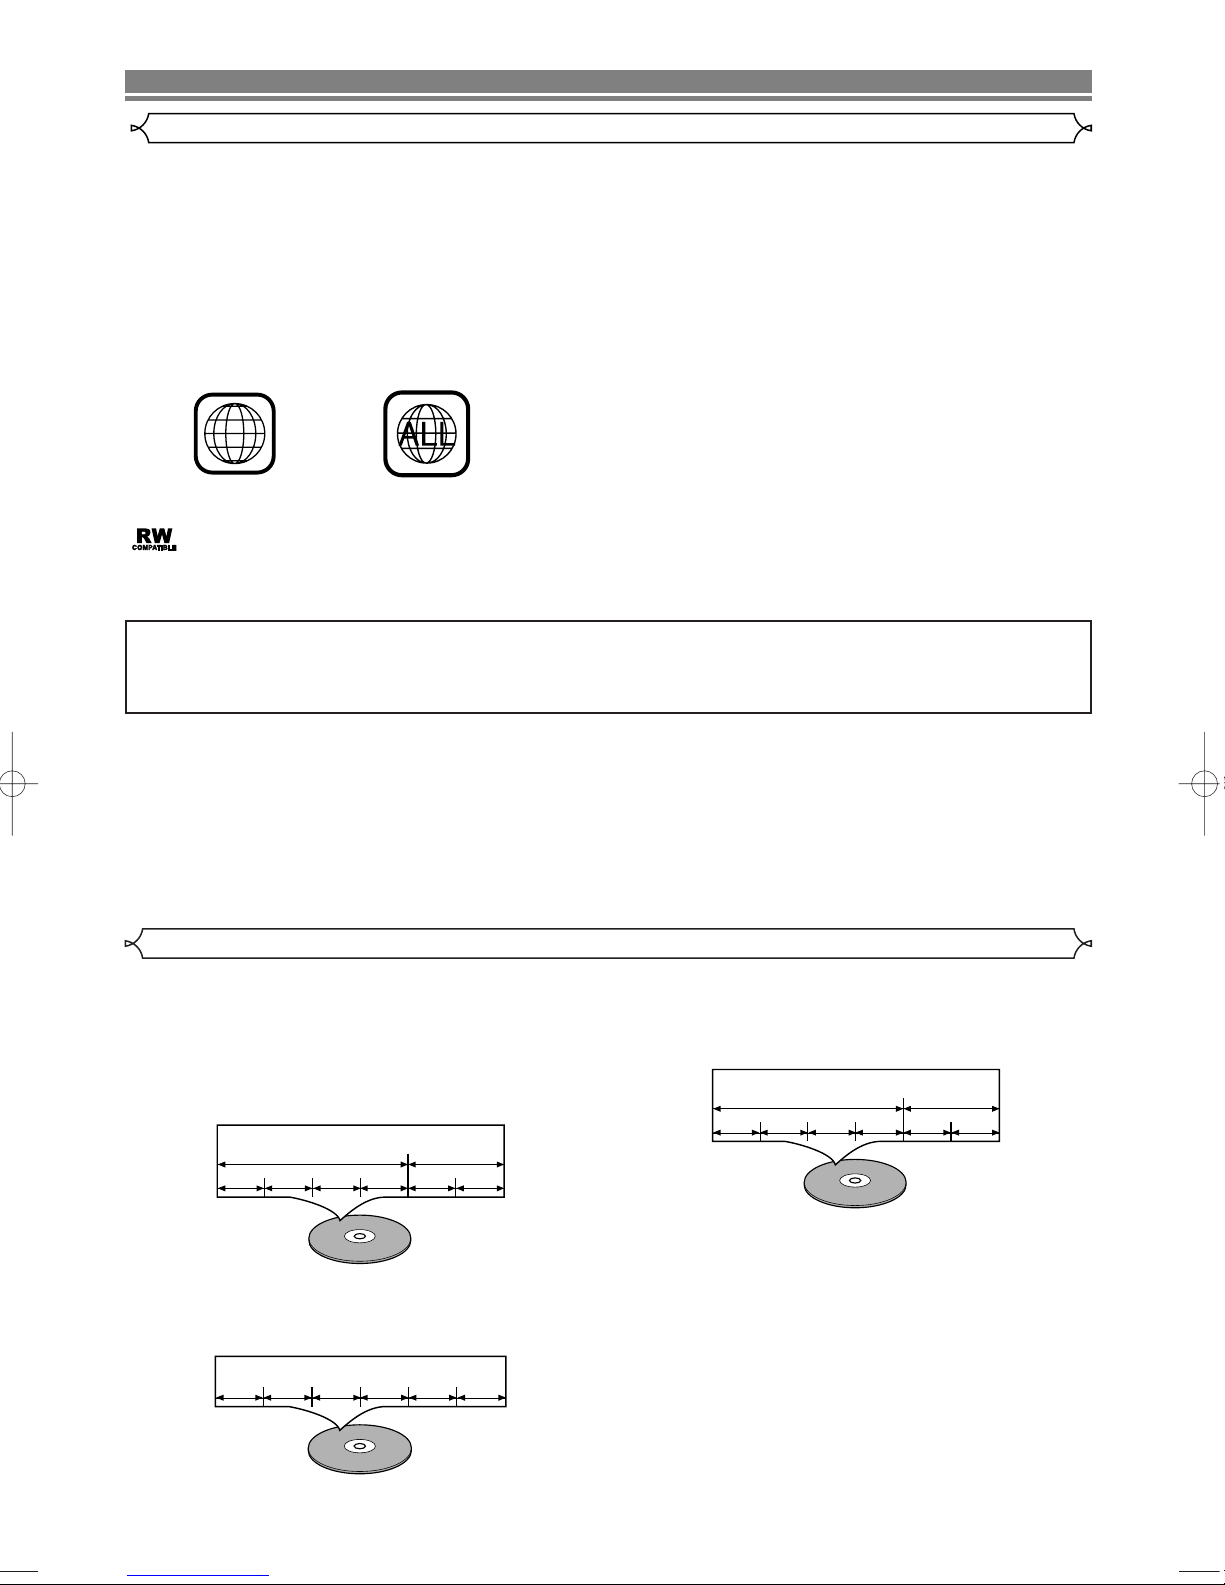
DVD-RW
MP3
VCDVCD
CD
DVD
VR mode
•Remote control
•Two AA batteries
•Operation Manual
Supplied Accessories
without PBC function


 User manual")


 User manual")
 User manual")


 User manual")