PRESET
ADJ/VOL
9
8765
4
0>
10
321
ENTER
SLEEP
ST/MO
TUNING
DISPLAY
LANGUAGE
MUTE
PROG
MENU/PBC
NTSC/PAL
STEP
A-B
REPEAT
ANGLE
DIRECT
LISTENING
SLOW/MEMORY
TITLE
ZOOM AUDIO
RETURN
MODE
SUBTITLE
SET UP
OPEN/
CLOSE ON/
STAND-BY
DVD
VideoCD
CD
Audio Visual
Entertainment
NO DISC
PCHPTRKTITLE
CD MP3V
DIGITAL
Pro Logic
STEREO
PRESET
RL
RSLS
C
S
C
RSLS
PCHPTRKTITLE
CD MP3V
DIGITAL
Pro Logic
PRESET
RL
S
STEREO
LISTENING
STEREO
START
12
5
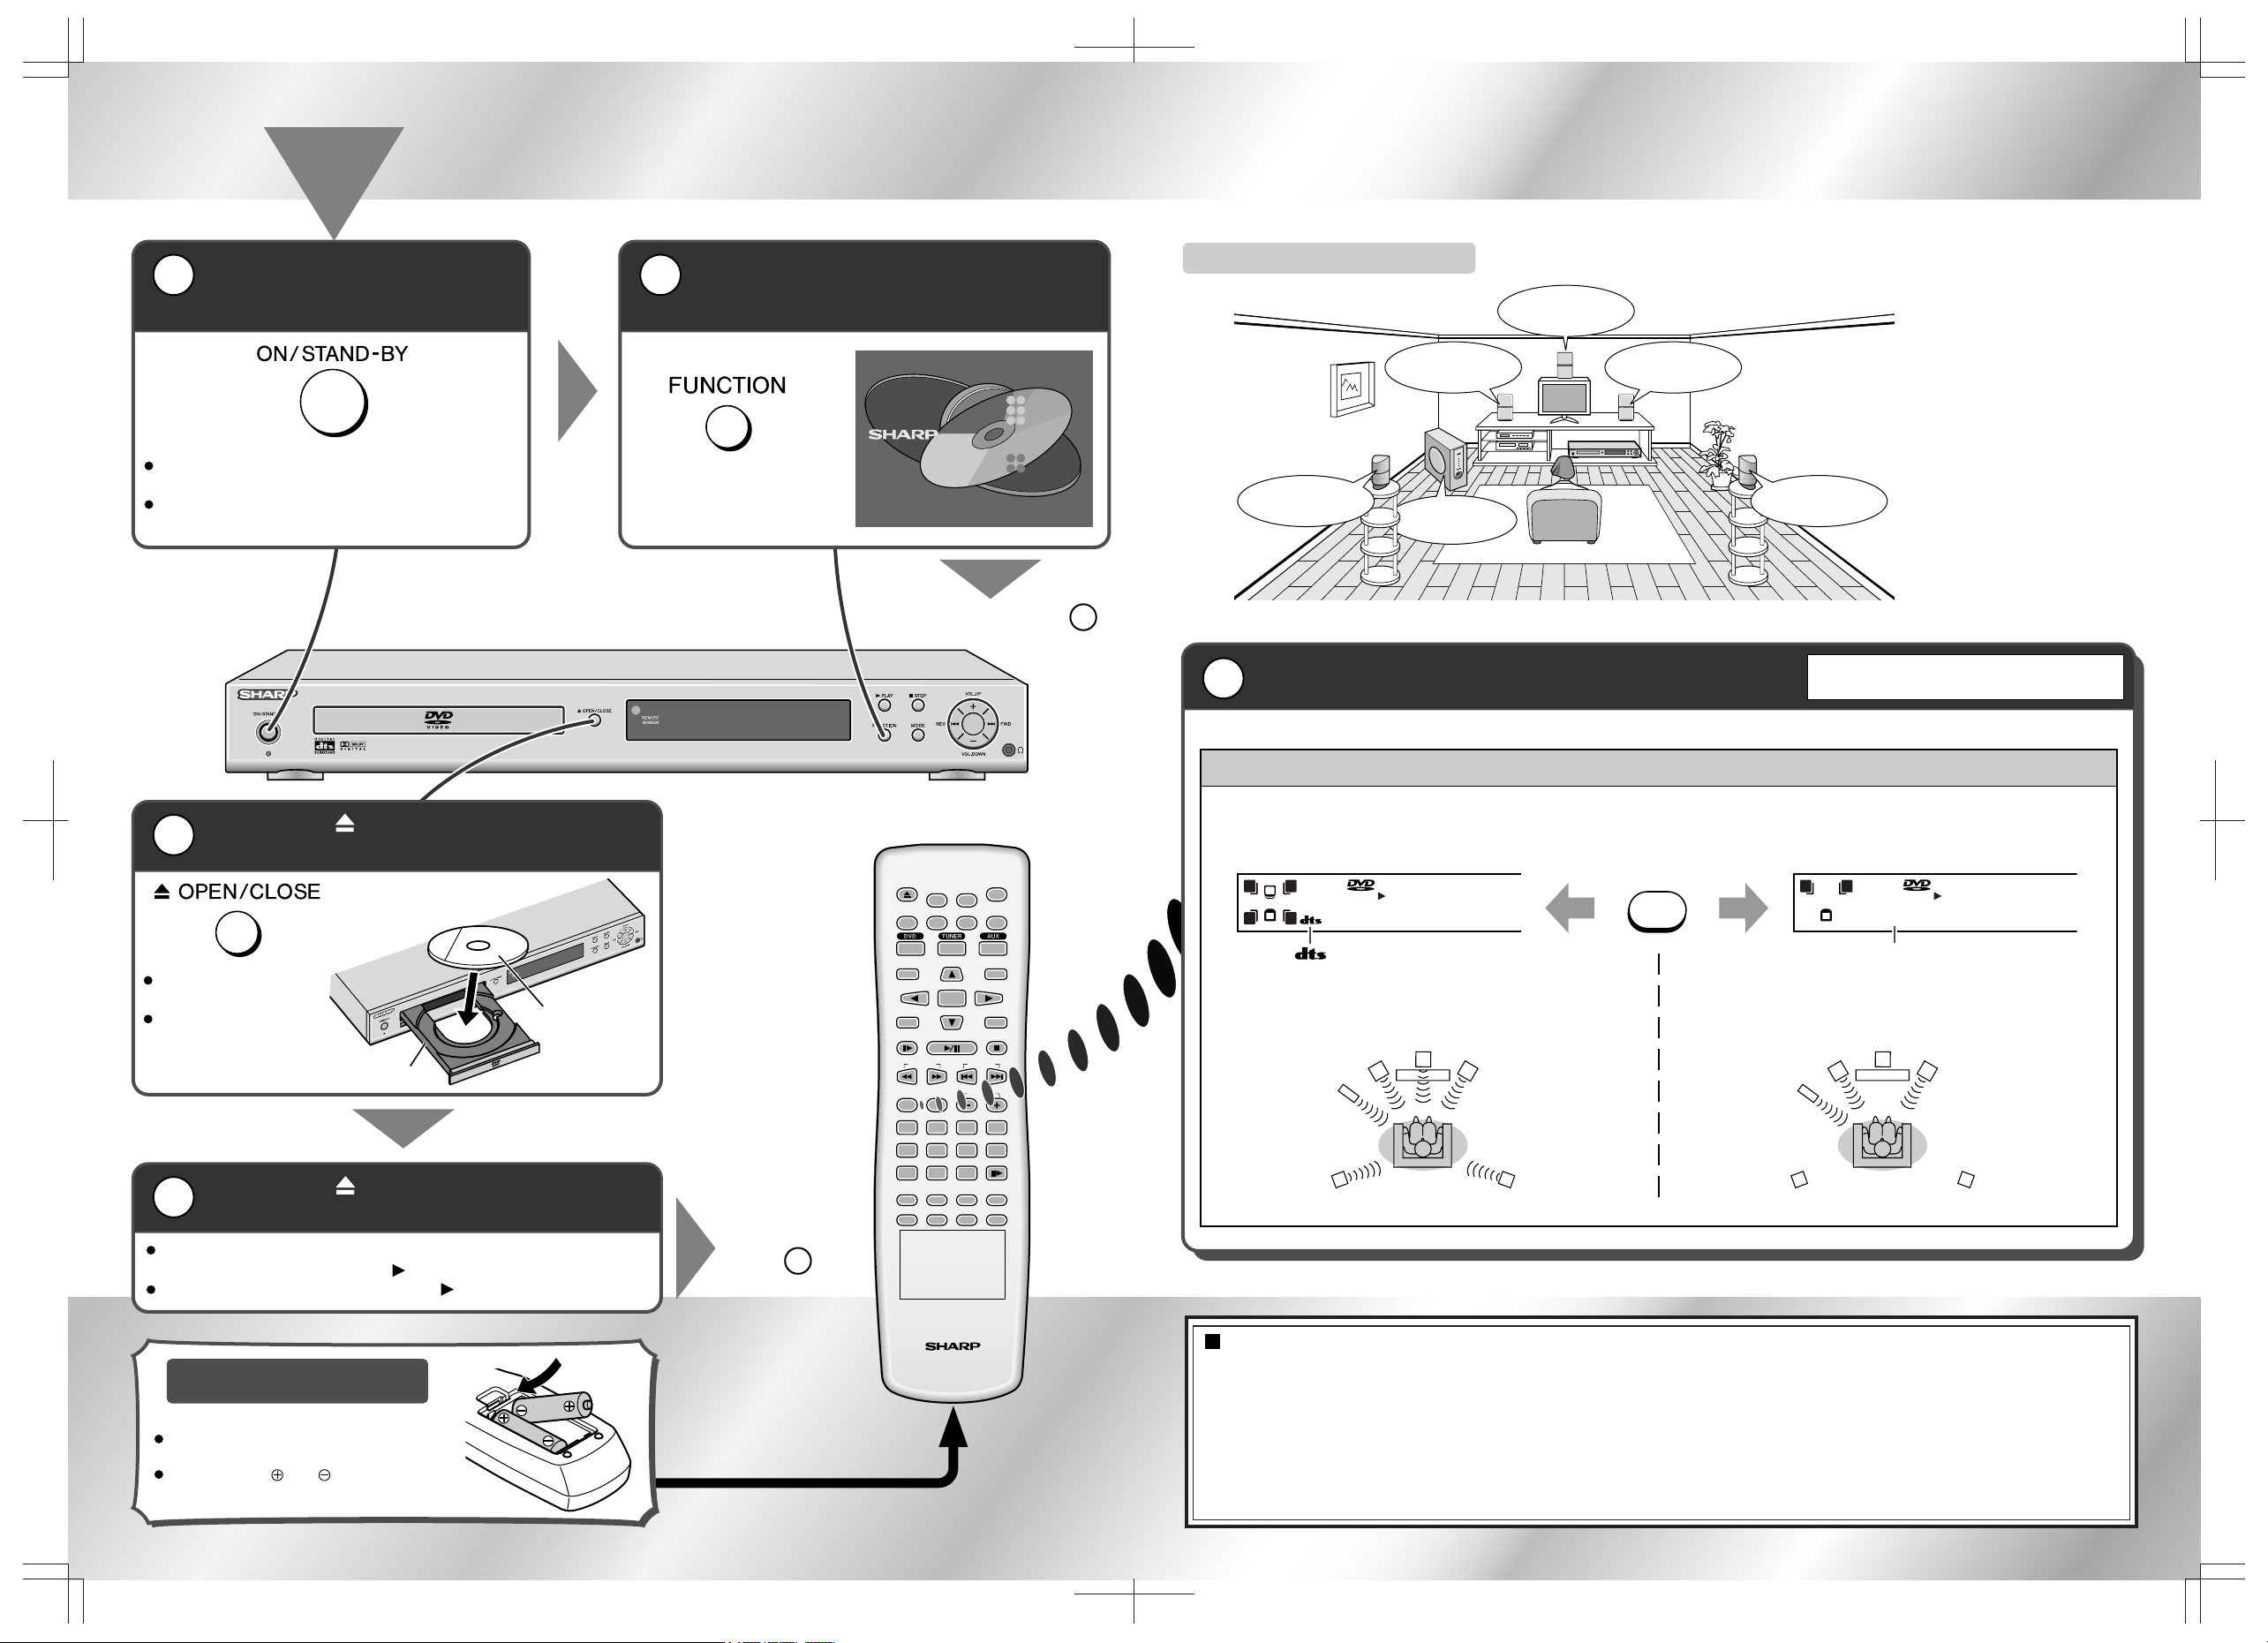
DVD playback
Press the ON/STAND-BY
button to turn the power
on
When the input is not set to the disc
mode, press the FUNCTION button
repeatedly to display the startup screen
Back of remote control
Installation image
Front speaker (left)
Subwoofer
Centre speaker
Front speaker (right)
The best surround effect will
be achieved by placing each
speaker at the same distance
from the listening position.
Enjoying various sounds Refer to the operation manual
(pages 44 and 45).
Whilst a disc is playing, press the LISTENING button repeatedly to select the desired listening mode.
If trouble occurs
When this product is subjected to strong external interference (mechanical shock, excessive static electricity, abnormal supply voltage due to
lightning, etc.) or if it is operated incorrectly, it may malfunction.
If such a problem occurs, do the following:
1Set the unit to the stand-by mode and turn the power on again.
2 If the unit is not restored in the previous operation, unplug and plug in the unit, and then turn the power on.
When the protection circuit is activated:
When short-circuiting the speaker leads or turning the volume too high, the protection circuit may be activated and the system may enter the
stand-by mode. Unplug the unit and, after 15 minutes or more, plug it in again.Turn down the volume if set too high.
The startup screen appears.
3Press the OPEN/CLOSE button to
open the disc tray
Label side
Disc tray
4Press the OPEN/CLOSE button to
close the disc tray
Discs supporting auto start will start to play once you close the disc
tray even if you do not press the PLAY button.
If playback does not start, press the PLAY button.
Enjoy DTS or Dolby Digital sound in 5.1 or 2-channel.
5.1ch surround sound:
Enjoy 5.1-channel surround sound.
Example:DTS
2-ch stereo sound:
Enjoy 2-channel stereo sound.
Front speaker (left)
Subwoofer
Front speaker (right)
Surround
speaker (left) Surround
speaker (right)
Centre speaker Front speaker (left)
Subwoofer
Front speaker (right)
Turn on the TV, and switch the input to the
"VIDEO 1", "VIDEO 2", etc. accordingly.
Press the ON/STAND-BY button again to set the
unit to the stand-by mode.
Go to the step 3
Go to the
step 5
Use 2 "AA" size batteries (UM/SUM-3, R6,
HP-7 or similar). Batteries are not included.
Do not mistake and .
Battery installation
Place the disc on the
disc tray, label side up.
Be sure to place 8 cm
(3") discs in the mid-
dle of the disc posi-
tion.
Surround
speaker (left) Surround
speaker (right)
Downloaded from: http://www.usersmanualguide.com/

 User manual")


