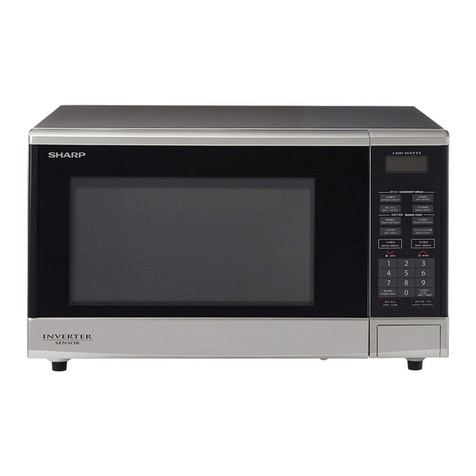
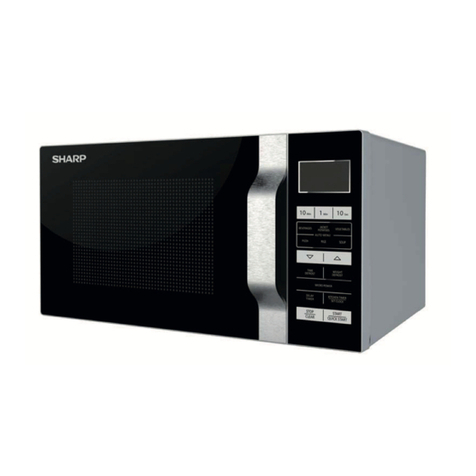
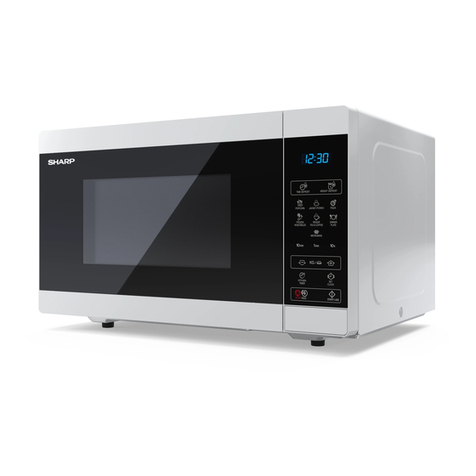
Sharp R-8680(B) User manual

GRILL
&
CONVECTION
MICROWAVE
OVEN/BUILT-IN
TYPE
R-8680(B)/(W)
R-8680(B)
R-8680(W)
ENGLISH
OPERATION
MANUAL

CONTENTS
INSTALLATION
INSTRUCTIONS.
........:..ccccesneeceecsecceeeecneeseeneeeeeeeeeeenepeeeseuseceesaeeaneesneeeenneneattene
2
GENERAL.
INSTRUCTIONS.
2:
ocoscvceceicventiesceecesicsiedecccdenseveenscus
deed
aiesecscne
west
tncsteoecesielesnedee
ee
Seaweste
2
SPECIAL
(NOTES.
sceciesvedacccesdcs
deve
codecsdadociecnsedsucnntatieucdedecipateaues
seca
des
cedeedeeddudecitansduanys
dneustectenys
3
OPERATION
OF
AUTO-TOUCH
CONTROL
PANEL
............ccccceeeseeseeseneeees
bgescacebadhideer
caveivebacsds
4
Clock
Setting
.......ccscsseccseecececsecsccnscesscsssenseccensscessransensesesssceseenacoasesousooscenssscnssaeesentsaneneeeare
4
Miniite
Timer
SOtting:
si
ccc.
eedcevivextesessteseeresenstatec
cseaseveneesvosasins
sesmeuseenabawuyvonecee
tice
Ces
ekeed
sadataveey
4
Auto
Start
Setting
.........ccsccccsscoscceccccsecscsscscuscessccenscesevensenesoescnseaseasssscssceasrsnnoaseasonscescesseets
5
Operation
for
Minute
PlUS
............c.:cecceecseecsereeeceseeeecnscaereeesaseaseseeseecersceeeeecensnseoneseseeeeaesesgere
5
To
Use
the
STOP/CLEAR
Pad
......
lowaeducdssevaca
vee
duevébebas
vel
inesuvecbeiseivs
waeSdces
edn
get
Lccdudeseniecdeeseuesades
6
To
Cancel
a
Programme
During
Cooking
........:.cccccscsesceeceeneteeeeeeeeeaeeeeeeaeeseeeseaeesseseeestaneaeeeers
6
MICROWAVE:
COOKING
®
.ciccceccsceschcstscuccictevesneesds
cngacaie's
odeesdterecovecercsdsnsactadestevasnasepedyensinases
eee
6
Time
Cooking
......cssscosecssscasccesccercceccsesouvensesoeesreavescnscesesenasongusanecsussaaesiasenonsoneneseceooseveneeosers
6
GUIDE
FOR
CONVECTION,
DUAL
AND
GRILL
COOKING
...........cccccccseceeceeeeeetenceeeeesenseseeseeneeeens
7
INGCESSOTIOS
ci
cceidc
cs
cnien
bake
bakhebs
Cad
cbacic
ba
ge's
Secincde
ven
btawseaush
deensngeesdigus
Goveeedecsstededs
coud
auievseaseasee
vate
7
CONVECTION
COOKING
........:2cceceececereeceteersneneeanceesenseneseeseeeneenensceeseeseeseesaeenesaneeseaneesensensenegete
7
Bitial
COOK
IG:
dcwseseeescdiaded
uae
saaa
«
cbuiedaek
xcacees
Soceias
soassseaetgnedabsagnaseoue
nue
secsecncneesedde
ca
Seevevineveaen
8
Grill
COOKING
........cscsscceecasccereeccscsensccavacssssccnseseseeeeeeesnececseeseeeeeneesecaeceeesenenenee
nee
eseennense
een
se
8
CONVECTION
COOKING
sccseas
ceisa
tegen
deveestidscncehatceicc
lacy
sp
tasnctsbadset
vee
Niesadentadestuastanmerantasen
tie
9
To
Cook
by
Convection
........:.:ccscecccsscsssersscctenscenesenacccescuneceeersenscssseseseseosasenansoascesosenersenense
9
TO
PRENGAt:
focse
veda
scence
sehids
voce
duada
sees
eeadsaed
cbaee
jhe
tedee
eA
ae
th
dau
chard
cell
eeeeceecuingeeas
Oseae
tesa
sueee
ners
eevil.
9
To
Preheat
and
Cook
by
Convection
........:.ceeccseseseeesneeecsnceececeeeeeeeeeeeeesaeeesaeeeeeeseseegenwenenaeese
10
DUAL:
COOKING
\<wiancdascers
atcssecenn
is
tetacese
vein
dauslevvereveoivdenstannsetacosuntoosaucacenmtiatenytakGaupuencesnenateys
11
To
Cook:
by
Diial
COOKING
suis
sesccscescacticcecscadssccenseiascodaecsstavacnaseveniyeeseecieuarcesteeteuvarestsarsacereeeys
11
To
Preheat
and
Cook
by
Dual
Cooking
............:cssccsccssceeccessencceseeeeessseeeessesenecoesonseaensaseeeueenses
11
GRIEE
COOKING
sencvccesecticdessaaceaecadesiiwads
oder
cestcaeversetagcessrdenaete
as
deceted
es
voeceitavons
sweseacststeneks
ocr
12
TOC
OOK
DY
GM
sssse
vtec
cestecueccstnddan
ap
saeiupetacihneonser
te
eindveredtabanant
coke
aanrtneainenss
ened
deden
sivawelens
12
Microwave
and
Grill
Cooking
..........scssscosscccsecccsccccsssescovensnsonsuuaseccssenecucccevenscesscssaneceeeeoeets
12
EASY:
DEFROST.
sivcicniescscscsekiScscictv
eves
dee
ctecssene
Gveccces
tides
Causes
ncad
cauacnceraces
Seevcubed
deeb
aniedesaveecteere
13
To
Use
Easy
Defrost
........cssssscssssscsecccccnerstsrsesstavsonecacsesceseseccossaransssassncsuscouseaerenonsesteceneusaets
13
Easy
Defrost
Chart
.........::csccscsssesccnenseseecaeeeceeteeseaeeenacanecssesseeeseeseenersceeeeseneseeeseeesenenseee
nese
14
GCOMPUCOOK.
sasiicicicitecdees
ccndigades
ttucdeacdac
ass
sodbaet
ved
detect
etionieds
eave
Giese
se
vetadav
eve
dsacde
voireeens
sere
eaenae
15
To
Cook
with
CompuCook
.........::cecseceeeseseveeescerteneerenneeneeeeeeeeeeneeaneeeereeeeaneneeneeenseseeeeesgeneeeeiy
15
CompuCook
Chart
......2..c:ssscccsecseenccosnsscssercccsnntscensseaansconseensneensaeasecasssseaseecacseersonescaaansaesen
16
MORE:
LESS)
PAD
©
coicscsvs
acces
cacecscon
ceeds
covet
delivenctvesdcencacavdosdostsetts
opedecattactedesanctedevecdsdadan
anette
17
CARE
AND
CLEANING
.......cccccsdeccersccscsscncccecseesseecevecceceesercereccecceceeassuraasescusccrsesansnecaareneestis
18
SERVICE:
CALE
CHECK
cvveciccccccceucssectieeestveuicuedavstecsaaseacd
duseestcanare
ess
tdenascaiedadscadaboedectetbensa
sie
19
SPECIFICATIONS
anveseis
dsc
Senco
ib
ccdatecwans
oica
fads
salundeeude
ceeds
venvn
sedans
sans’
danssecagvonnsantigdanerseeseiveewad
esate
19
|
|
INSTALLATION
INSTRUCTIONS
1.
Visual
check
after
unpacking:
Remove
all
packing
materials
from
the
oven
cavity.
Check
the
unit
for
any
damage,
such
as
a
misaligned
door,
damaged
gaskets
around
the
door
or
dents
inside
the
oven
cavity
or
on
the
door.
If
there
is
any
damage,
nee
e
do
not
operate
the
oven
and
con-
tact
your
dealer.
If
the
oven
does
not
work,
please
contact
a
MANUFACTURER
AUTHORIZED
SERV-
ICE
AGENT.
2.
The
unit
should
not
be
installed
in
any
area
where
heat
and
steam
are
generated,
for
example,
next
to
a
conventional
oven
unit.
3.
The
unit
is
fitted
with
a
Schuko-plug
and
must
be
connected
to
a
standard
household
outlet
which
is
grounded/earthed.
4.
When
the
unit
is
built
in,
please
refer
to
the
installation
instruction
attached
to
the
built-in
frame
or
ask
your
dealers.
The
unit
is
only
allowed
to
be
built
in
with
the
frame
supplied
by
manufacturer.
5.
Neither
the
manufacturer
nor
the
distributors
can
accept
any
liability
for
damage
to
the
machine
or
personal
injury
for
failure
to
observe
the
correct
electrical
connecting
procedure.
The
AC
voltage
must
be
220V,
50Hz.
(16A
time
lag)
6.
Be
sure
the
power
plug
is
connected
to
a
wall
outlet
within
easy
reach.
GENERAL
INSTRUCTIONS
.
Ventilation
openings.
.
Oven
door
with
see-through
window.
.
Turntable
supporting
plate.
.
Baking
Pan
.
Removable
turntable.
.
Low
rack.
.
High
rack.
.
Door
latches.
.
Door
open
button.
10.
Auto-touch
control
panel.
11.
Digital
readout.
12.
Wave
guide
cover.
13.
Oven
lamp.
The
lamp
will
light
when
door
is
opened
or
during
cooking.
14.
Access
cover
for
oven
lamp
peplacemer't
15.
Grill
heater
Microwave
Symbol
Convection
Fan
Symbol
Indicators
for
variable
cooking
control
and
cook
Digital
display
Time
pad
DUAL
COOK
pad
CONVECTION
pad
MICROWAVE
pad
GRILL
pad
10
EASY
DEFROST
pad
11
COMPUCOOK
pad
12
Menu
Guide
in
German
Self-sticking
label
in
each
languages
is
provided
to
place
over
the
menu
guide.
13
Weight
pad
14
MORE/LESS
pad
15
AUTO
START/CLOCK
pad
16
TIMER/HOLD
pad
17
MINUTE
PLUS/START
pad
18
STOP/CLEAR
pad
19
MAINS
OFF
SWITCH
pad
The
unit
will
be
turned
off
except
touch
control
panel
immediately
by
touching
this
pad.
The
oven
lamp
will
not
turn
on
when
the
door
is
opemcd
while
the
switch
is
turned
off.
The
switch
will
resume
on
when
you
start
the
oven
aga
in.
2
OANOAARWNH
to
TS
ow
w
tow
men
wa
recn
ch
one
OBONOAHPWNH

SPECIAL
NOTES
(a)
Do
not
operate
the
oven
empty
except
in
convection
mode.
The
appliance
should
not
be
operated
without
food
in
the
oven,
operation
in
this
manner
being
likely
to
damage
the
appliance.
(b)
Do
not
attempt
to
operate
the
oven
with
the
oven
door
open,
in
case
the
safety
door
switches
have
been
damaged.
(c)
Do
not
attempt
to
operate
the
oven
whilst
any
object
is
caught
or
jammed
between
the
door
and
the
oven.
(d)
Do
not
operate
the
oven
if
it
is
damaged.
It
is
particularly
important
that
the
oven
door
closes
properly
and
that
there
is
no
damage
to:
(1)
Door
(warped),
(2)
Hinges
and
Latches
(broken
or
loosened),
(3)
Door
Seals
and
Sealing
Surfaces.
(e)
It
is
dangerous
for
this
oven
to
be
adjusted
or
repaired
by
anyone
except
a
properly
qualified
service
technician
trained
by
manufacturer.
(f)
The
turntable
supporting
plate
is
removable
and
should
be
set
in
the
right
place
and
the
turntable
should
be
seated
on
it.
(g)
Do
not
block
the
ventilation
opening
of
the
oven.
FOR
MICROWAVE
COOKING
(a)
Generally
speaking,
metal
should
not
be
used
in
the
oven
when
cooking,
because
metal
reflects
micro-
wave
energy
and
may
cause
arcing.
Even
when
metal
may
be
used
for
limited
application
it
should
not
come
into
contact
with
oven
walls.
(b)
Do
not
cook
eggs
in
the
shell.
Pressure
will
build
up
inside
the
shell
and
they
will
explode
(even
after
cooking
has
stopped).
Do
not
reheat
cooked
eggs
unless
they
are
scrambled
or
chopped.
Puncture
the
yolk
before
cooking
eggs.
(c)
Popcorn
should
be
cooked
only
in
special
microwave
poppers
carefully
following
manufacturer’s
recom-
mendations.
Do
not
pop
popcorn
in
paper
bags
or
glass
utensils.
The
results
are
poor
and
it
can
be
dangerous.
(d)
Do
not
place
cans
of
food
in
the
oven
(Ref.
(a)
above).
(e)
Donot
heat
oil
or
fat
for
deep
frying.
The
temperature
of
the
oil
cannot
be
controlled
and
it
may
overheat.
(f)
When
boiling
water
or
liquids
in
the
oven,
make
sure
that
you
employ
a
wide
mouthed
container.
This
will
allow
forming
air
bubbles
to
escape
freely
and
readily
to
the
surface
of
the
water.
Should
a
nar-
row
mouthed
container
be
employed,
air
bubbles
may
combine
to
form
a
large
bubble
(inside
the
con-
tainer)
which
may
displace
the
water
upwards
when
trying
to
escape
to
the
surface
(even
after
cooking
has
stopped).
The
hot
liquid
displaced
could,
accidentally,
harm
the
oven
user.
(g)
If
you
cook
liquids
in
glasses
or
cups
it
is
advisable
to
use
a
glass
rod
or
something
similar
to
avoid
delay
in
boiling
(splashing
or
burning
may
occur).
(h)
Occasionally
some
foods
will
cause
the
oven
to
‘’sweat’’.
The
humidity
and
moisture
in
food
will
in-
fluence
the
amount
of
moisture
in
the
oven.
Generally,
covered
foods
will
not
cause
as
much
conden-
sation
as
uncovered
foods.
Be
sure
that
the
vent
is
not
blocked.
Condensation
is
a
normal
part
of
microwave
cooking.
(i)
The
door
seal
is
designed
to
prevent
leakage
of
microwave
energy
during
cooking.
Occasionally
moisture
may
appear
around
the
oven
door.
This
is
not
abnormal
and
does
not
necessarily
indicate
the
»ven
is
leaking
microwave
energy.
.
(j}
When
cooking
foods
with
a
high
sugar
or
fat
content
e.g.
christmas
pudding,
mince
pies,
fruit
cake,
be
sure
to
follow
the
cooking
instructions
carefully,
since
exceeding
the
recommended
cooking
times
‘may
result
in
burning
the
oven
contents
and
damaging
your
oven.
(k)
Always
remove
tight
fitting
lids
or
seals
from
containers
before
heating
or
cooking
in
the
microwave
oven.
(e.g.
Baby
Bottles,
Jars,
Take-Away
Food
Containers)
Pressure
will
build
up
inside
the
conain-
er
thus
leading
to
an
explosion,
even
after
cooking
has
stopped.
(1)
Don’t
keep
food
or
anything
inside
the
oven
even
while
it
is
not
used.
FOR
CONVECTION,
DUAL
AND
GRILL
COOKING
(a)
Refer
to
the
chapter
on
recommended
cooking
utensils
in
your
cookbook
for
available
utensils,
(b)
During
dual
cooking
additional
metal
utensils
may
cause
arcing
when
they
come
in
contact
with
the
turntable,
oven
walls
or
accessory
racks.
Arcing
is
a
discharge
of
electricity
that
occurs
when
mic
ro-
waves
come
in
contact
with
metal.
Place
a
heat
resistant
dish
(Pyrex
pie
plate,
glass
pizza
dish
or
dinner
plate)
between
the
metal
dish
and
the
low
rack.
If
arcing
occurs
with
other
metal
utensils,dlis-
continue
their
use
for
dual
cooking.
(c)
The
door
glass
reaches
high
temperatures
during
grill
operation,
convection
operation
and
dual
ope
ra-
tion
mode.
Therefor
this
device
must
be
placed,
or
if
built-in-condition
mounted,
at
a
minimum
of
80
cm
(botom
side
of
the
device)
above
the
floor.
Children
have
to
be
kept
away
from
it.
3

OPERATION
OF
AUTO-TOUCH
CONTROL
PANEL
Your
new
Auto-Touch
microwave
oven
uses
a
microprocessor,
the
electronic
brain
that
provides
the
wide
variety
of
cooking
programmes
which
could
not
be
achieved
by
conventional
control
methods.
The
operation
of
the
oven
is
controlled
by
touching
the
appropriate
pads
arranged
on
the
surface
of
the
control
panel.
The
digital
readout
will
display
the
cooking
time,
or
time
of
day.
Indicator
lights
show
the
variable
cooking
setting
or
cooking
function
you
have
programmed.
An
entry
signal
tone
should
be
heard
each
time
you
touch
the
control
panel
to
make
a
correct
entry.
If
you
do
not
hear
this
sound,
1)
you
have
not
used
enough
pressure
in
touching
the
pad,
2)
you
have
made
more
entries
than
the
control
panel
will
accept,
3)
you
have
made
an
incorrect
entry.
In
addition
to
the
entry
signal
tone,
an
audible
signal
will
sound
for
approximately
2
seconds
at
the
end
of
the
cooking
cycle.
*
Make
sure
the
oven
is
plugged
into
a
power
point
220V
AC
only.
When
the
oven
is
plugged
in,
the
display
will
show
,
flashing
on
and
off
each
second.
Touch
the
(STOP/CLEAR)
pad:
will
appear.
*
You
cannot
programme
the
oven
if
the
door
is
not
closed
tightly.
*
During
cooking,
the
programme
cannot
be
changed
until
the
.
(STOP/CLEAR)
pad
is
touched
twice.
All
functions
are
locked
in
to
prevent
accidental
changes.
*
If
power
to
the
oven
is
interrupted,
the
display
will
intermittently
show
after
the
power
is
reinstated.
If
this
occurs
during
cooking,
the
programme
and
the
time
of
day
will
ke
erased.
Simply
reset
the
clock
for
the
correct
time
of
day.
Clock
Setting
Touch
the
(STOP/CLEAR)
pad;
[__/:
GG]
will
appear.
After
one
minute
the
display
will
show
a
i
8
.
Suppose
you
want
to
enter
the
correct
time
of
day
12:34.
rE
Refer
to
the
attached
‘‘Auto-Touch
Sheet”
A.
Touch
the
(AUTO
START/CLOCK)
pad.
Enter
the
‘‘hour’’
by
touching
10
MIN.
pad
and
1
MIN.
pad.
Then
convert
‘hour’
to
‘“‘minute’’
by
touching
(AUTO
START/CLOCK)
pad.
Enter
the
‘‘minute’’
by
touching
10
MIN.
pad
and
1
MIN.
pad.
Touch
the
(AUTO
START/CLOCK)
pad.
The
clock
is
now
set
and
will
keep
the
time
of
day.
NOTE:
1.
This
is
a
12
hour
clock.
You
can
enter
the
clock
time
from
1:00
to
12:59.
2.
If
the
oven
is
in
cooking
or
the
minute
timer
mode
and
you
wish
to
know
the
time
of
day,
simply
touch
the
(AUTO
START/CLOCK)
pad.
As
long
as
your
finger
is
touching
the
(AUTO
START/CLOCK)
pad,
the
time
of
day
will
be
displayed.
This
checking
opera-
tion
does
not
interfere
with
cooking
time,
or
minute
timer.
oP
NS
Minute
Timer
Setting
The
Auto-Touch
control
panel
can
be
used
as
a
timer
for
timing
up
to
99
minutes,
90
seconds.
There
is
no
cooking
involved.
Suppose
you
want
to
time
a
3
minute
long
distance
phone
call.
-
aaa
Refer
to
the
attached
—
1.
Enter
desired
time.
(3'00‘’)
‘
“‘Auto-Touch
Sheet”
B.
2.
Touch
the
(TIMER/HOLD)
pad.
The
timer
will
begin
to
count
down
to
zero.
When
the
timer
reaches
zero,
the
signal
will
sound.
The
time
of
day
will
reappear
on
the
display.
To
cancel
the
minute
timer
during
operation,
touch
the
(STOP/CLEAR)
pad
and
the
time
of
day
will
reappear.

Auto
Start
Setting
If
you
wish
to
programme
your
oven
to
begin
cooking
automatically
at
a
designated
time
of
day,
follow
this
procedure,
Suppose
you
want
to
start
cooking
a
stew
for
85
minutes
on
t4y
(SIMMER)
at
4:30
this
afternoon.
Before
setting,
check
to
make
sure
the
clock
is
showing
the
correct
time
of
day.
(Suppose
you
are
setting
at
1:00
P.M.)
rcs
Refer
to
the
attached
Enter
desired
start
time.
(4:30)
eure
tae
eheet
2
Touch
the
(AUTO
START/CLOCK)
pad.
Enter
the
desired
cooking
time.
(85’00’’)
Touch
the
[i]
(MICROWAVE)
pad
3
times.
(
1;
)
Touch
the
(MINUTE
PLUS/START)
pad.
The
cooking
time
will
count
down
to
zero.
When
the
timer
reaches
zero,
all
indicators
will
go
out
and
an
audible
signal
will
sound.
The
time
of
day
will
reappear
on
the
display.
NOTE:
1.
Once
you
have
correctly
programmed
the
oven
for
Auto
Start,
the
correct
time
of
day
(not
the
Auto
Start
time)
will
appear
on
the
display.
To
check
the
programmed
Auto
Start
time,
touch
the
(AUTO
START/CLOCK)
pad.
The
programmed
Auto
Start
time
will
appear
on
the
display
as
long
as
your
finger
is
touching
the
pad.
2.
To
cancel
Auto
Start,
simply
touch
the
(STOP/CLEAR)
pad
twice.
PRYL
>
The
Auto
Start
feature
can
be
used
for
any
of
the
programmes
except
the
following.
1)
EASY
DEFROST
2)
MINUTE
PLUS
3)
TIMER
Operation
for
Minute
Plus
The.‘‘Minute
plus’’
system
allows
you
to
cook
for
an
extra
minute
at
cil;
(FULL
POWER)
by
simply
touch-
ing
the
(MINUTE
PLUS/START)
pad.
You
can
also
extend
cooking
time
in
multiples
of
1
minute
by
repeatedly
touching
the
(MINUTE
PLUS/START)
pad
during
a
cooking
programme.
(a)
:
Suppose
you
want
to
cook
at
vy
(FULL
POWER)
for
1
minute
easily.
1.
Touch
the
(MINUTE
PLUS/START)
pad.
cE
-
Refer
to
the
attached
‘‘Auto-Touch
Sheet”
D.
When
the
timer
reaches
zero,
all
indicators
will
go
out
and
an
audible
signal
will
sound.
The
time
of
day
will
reappear
on
the
display.
NOTE:
(MINUTE
PLUS/START)
can
be
activated
during
cooking
or
within
1
minute
after
cock
ing
is
completed,
(STOP/CLEAR)
pad.
is
touched
or
the
door
is
closed.
(MINJTE
PLUS/START)
also
starts
the
oven
if
any
programme
is
displayed.
(b)
:
Suppose
you
want
to
increase
by
1
minute
during
cooking,
for
example,
when
1
minute
30
seconds
is
left
at
th
(ROAST).
1.
Touch
the
(MINUTE
PLUS/START)
pad.
When
the
timer
reaches
zero,
all
indicators
will
go
out
and
an
audible
signal
will
sound.
The
time
ofdlay
will
reappear
on
the
display.
NOTE:
The
cooking
time
can
be
increased
in
multiples
of
1
minute
by
repeatedly
touciéng
the
(MINUTE
PLUS/START)
pad
during
the
cooking
programme.
The
(MINUTE
PLUS/START)
can
be
used
for
any
of
the
programmes
except
the
folloving.
1)
(COMPU
COOK)
2)
[_#&
]
(EASY
DEFROST).

To
Use
the
STOP/CLEAR
Pad
1.
Erase
if
you
make
a
mistake
during
programming.
2.
Cancel
minute
timer.
3.
Stop
the
oven
temporarily
during
cooking.
To
Cancel
a
Programme
During
Cooking
If
you
are
in
the
process
of
cooking
and
wish
to
stop
the
oven
and
cancel
the
entire
cooking
programme,
follow
either
of
the
steps
below:
1.
Open
the
oven
door.
2.
Close
the
door.
3.
Touch
the
(STOP/CLEAR)
pad.
or
1.
Touch
the
(STOP/CLEAR)
pad
twice.
MICROWAVE
COOKING
There
are
five
preset
power
levels.
Time
Cooking
Approximate
percentage
of
microwave
power
for
each
power
level.
4;
FULL
POWER
(HIGH)
(Touch
the
[qf]
=<]
(MICROWAVE)
pad
once.)
100%
(650W)
4
ROAST
(M.
HIGH)
(Touch
the
(qi)
=<]
(MICROWAVE)
pad
twice.)
70%
(455W)
tts
SIMMER
(MEDIUM)
(Touch
the
(af)
=<]
(MICROWAVE)
pad
3
times.)
50%
(325W)
vis
DEFROST
(M.
LOW)
(Touch
the
[df]
=<]
(MICROWAVE)
pad
4
times.)
30%
(195W)
<3
WARM
(LOW)
(Touch
the
[df]
=<]
(MICROWAVE)
pad
5
times.)
10%
(
65W)
Many
foods
are
cooked
at
FULL
POWER
(100%)
for
best
results.
The
—
[ff]
(MICROWAVE)
pad
al-
lows
you
to
select
the
rate
of
microwave
cooking,
but the
oven
will
automatically
operate
at
4,
(FULL
POWER)
if
the
(ip)
(MICROWAVE)
pad
is
not
touched.
Your
oven
can
be
programmed
for
up
to
4
automatic
cooking
sequences,
switching
from
one
variable
power
setting
to
another
automatically.
Suppose
you
want
to
heat
soup
for
2
minutes
30
seconds
at
ry
(SIMMER).
1.
Enter
desired
cooking
time.
(2'30'’)
cs
Refer
to
the
attached
2.
Touch
the
[tp]
(MICROWAVE)
pad
3
times.
“‘Auto-Touch
Sheet”’
E.
3.
Touch
(MINUTE
PLUS/START)
pad.
To
program
a
second
sequence,
for
example
1
minute
30
seconds
at
ty
(FULL
POWER);
3.
After
Step
2,
enter
desired
time
for
second
cooking
sequence.
(1'30’')
4.
Touch
(MINUTE
PLUS/START)
pad.
The
timer
will
count
down
the
first
sequence
and
when
it
reaches
zero,
the
second
sequence
wil
appear
on
display
and
begin
to
count
down.
When
the
timer
reaches
zero,
all
indicators
will
go
out
and
an
audible
signal
will
sound.
The
time
of
day
will
appear
on
the
display.
NOTE:
1.
When
the
door
is
opened
during
the
cooking
process,
the
cooking
time
in
the
readout
automati-
cally
stops.
The
cooking
time
starts
to
count
down
again
when
the
door
is
closedand
the
(MINUTE
PLUS/START)
pad
is
touched.
2.
If
the
(i)
(MICROWAVE)
pad
is
touched
after
reaching
the
lowest
readout
(LOQVV),
the
display
will
return
to
the
starting
point
(HIGH).
3.
If
i
(FULL
POWER)
is
selected
as
the
final
sequence,
it
is
not
necessary
to
bias
ch
the
(ai)
(MICROWAVE)
pad.
lf
4
(FULL
POWER)
is
not
the
final
sequence,
the
[Ui]
(MICROWAVE)
pad
must
be
touched.
4.
The
turntable
rotates
both
clockwise
and
counterclockwise
depending
on
the
position
(«f
motor
when
starting
the
cook
cycle.

GUIDE
FOR
CONVECTION,
DUAL
AND
GRILL
COOKING
This
section
of
the
Operation
Manual
explains
the
use
of
the
oven
for
Convection
heating
alone,
dual
cooking
and
grill
cooking.
Please
use
it
as
a
guide along
with
your
Cookbook.
Accessories
The
following
accessories
are
designed
especially
for
use
in
the
Oven.
These
are
for
convection,
dual
or
grill
cooking
only;
do
not
use
for
microwave
cooking
alone.
Do
not
substitute
similar
types
of
accessories
for
these
specially
designed
ones.
Please
refer
cooking
procedure
of
each
recipe
in
cookbook
for
these
application.
High
Rack
—
This
rack
is
used
for
two-level
cooking
in
convection,
such
as
sponge
cakes,
etc.
or
for
grill
cooking.
Low
Rack
—
Used
for
Convection
roasting,
dual
or
grill
cooking.
Baking
Pan
and
High
Rack
—
Used
for
two-level
cooking
of
biscuits
etc.
Convection
Cooking
Some
foods
are
best
when
cooked
using
convection
heating
alone.
During
convection
heating,
hot
air
is
circulated
throughout
the
oven
cavity
to
brown
and
crisp
foods
quickly
and
evenly.
Helpful
Hints
1.
Donot
cover
turntable
or
high
rack
with
aluminum
foil.
It
interferes
with
the
flow
of
air
that
cooks
food.
2.
If
food
is
not
done
when
checked
after
cooking
time,
let
stand
in
oven
one
or
two
minutes
to
compl
ete
cooking.
Recommended
Cooking
Utensils
Metal
turntable
High
rack
Baking
pan
Ovenable
paper
board
containers
Low
rack
Aluminum
foil
containers
Heat
resistant
glass
Corning
Ware®

Dual
Cooking
The
Dual
Cook
System
enables
you
to
achieve
the
results
your
conventional
oven
gives
but
cooked
in
a
much
shorter
time,
due
to
microwaves,
results
neither
one
can
achieve
alone.
Microwaving
brings
out
the
natural
flavours
of
food
and
keeps
them
moist
or
juicy,
but
most
foods
do
not
brown.
Those
which
do
brown,
like
joints
and
chicken
do
not
have
a
dry
crisp
surface.
Convection
heat
browns
and
crisps
food
beautifully
if
cooked
by
convection
alone,
breads
or
cakes
may
overbrown
or
develop
a
thick
crust
before
the
inside
is
done.
In
the
dual
cooking
convection
heat
seals
and
browns
the
outside
perfectly
while
microwave
energy
makes
sure
the
interior
is
done.
A
Guide
to
Using
Dual
Cook
When
conventional
recipes
should
be
prepared
by
dual
cooking
the
following
principles
should
be
followed:-
1.
2.
3.
4.
5.
Cut
time
by
2/3rd
to
1/2
the
normal
cooking
time
given
for
conventional
recipes.
Raise
the
oven
the
temperature
up
to
20°C
from
conventional
recipe
temperatures.
As
a
general
guide
use
microwave
t4y
on
recipes.
This
can
then
be
adjusted
higher
or
lower
if
necessary.
Cook
on
the
low
rack
where
ever
possible.
Check
dishes
a
few
minutes
before
the
end
of
cooking
time
to
see
if
they
are
cooked.
Test
cakes
for
example
in
the
traditional
way
by
using
a
skewer
to
see
if
the
centre
is
cooked.
Note
1.
2.
Preheating
of
the
oven
by
dual
cooking
is
unnecessary.
The
most
favourable
results
will
be
achieved
from
a
cold
start.
During
dual
cooking
some
metal
baking
utensils
may
cause
arcing
when
they
come
in
contact
with
‘the
turntable,
oven
walls
or
accessory
racks.
Arcing
is
a
discharge
of
electricity
that
occurs
when
micro-
waves
come
in
contact
with
metal.
If
arcing
occurs
when
using
a
metal
utensil,
place
a
heat
resistant
dish
(glass
pie
plate,
glass
pizza
dish
or
dinner
plate)
between
the
pan
and
the
low
rack
(on
the
turntable).
Recommanded
Cooking
Utensils
Metal
turntable
Ovenable
paper
board
containers
Low
rack
Aluminum
foil
containers
Heat
resistant
glass
Corning
Ware®
Grill
Cooking
The
grill
is
ideal
for
cooking
steaks
and
chops
traditionally,
giving
succulent
results.
Preheating
of
the
oven
is
unnecessary.
Recommended
Cooking
Utensils
Metal
turntable
High
rack
Low
rack

CONVECTION
COOKING
To
Cook
by
Convection
Your
Oven
can
be
programmed
for
ten
different
convection
cooking
temperatures
for
up
to
99‘Mninutes,
90
seconds.
(CONVECTION)
pad
once.
(CONVECTION)
pad
twice.
(CONVECTION)
pad
three
times.
(CONVECTION)
pad
four
times.
(CONVECTION)
pad
five
times.
(CONVECTION)
pad
six
times.
(CONVECTION)
pad
seven
times.
(CONVECTION)
pad
eight
times.
Touch
the
(CONVECTION)
pad
nine
times.
Touch
the
(CONVECTION)
pad
ten
times.
Example:
Suppose
you
want
to
cook
at
200°C
for
25
minutes.
cs
Refer
to
the
attached
1.
Enter
desired
cooking
time.
“‘Auto-Touch
Sheet'’
F.
2.
Touch
the
(CONVECTION)
pad
four
times.
TEMP
will
flash.
3.
Touch
the
(MINUTE
PLUS/START)
pad.
Convection
Fan
Symbol
will
rotate
and
the
cooking
time
will
count
down
to
zero.
Touch
the
Touch
the
Touch
the
Touch
the
Touch
the
eo
Touch
the
Touch
the
Touch
the
ss
si]
reese
When
the
timer
reaches
zero,
an
audible
signal
will
sound
and
the
time
of
day
will
reappear
on
the
display.
After
cooking,
the fan
will
remain
on
for
a
while
to
lower
the
temperature
of
the
electronic
or
mechanical
components
in
case
that
the
excess
temperature
remain
in
the
unit.
NOTE:
If
you
are
cooking
and
wish
to
check
the
temperature
you
have
piogtamindd:
simply
touch
the
KA
(CONVECTION)
pad.
The
programmed
temperature
will
be
displayed
as
long
as
the
(CONVECTION)
pad
is
touched.
To
Preheat
The
oven
should
not
be
used
without
the
turntable
and
the
turntable
supporting
plate
in
place
and
they
should
never
be
restricted
so
that
they
cannot
rotate.
You
may
remove
the
turntable
when
preheating
the
oven
or
when
preparing
food
to
be
cooked
directly
on
the
turntable;
biscuits,
for
example.
Your
Oven
allows
you
to
preheat
to
the
desired
temperature.
In
case
of
preheating,
no
‘‘time’’
is
entered.
The
oven
will
signal
when
it
is
ready.
Example:
Suppose
you
want
to
preheat
to
250°C.
cE
Refer
to
the
attached
1.
Touch
the
(CONVECTION)
pad
once.
“‘Auto-Touch
Sheet’
G.
TEMP
will
flash.
2.
Touch
the
(MINUTE
PLUS/START)
pad.
Convection
Fan
Symbol
will
flash.
and
[
HEAT]
are
displayed
repeatedy
while
preheating
is
in
the
process.
3.
When
the
oven
reaches
the
programmed
temperature,
final
temperature
is
displayed
and
an
audible
signal
sounds
4
times.
Convection
Fan
Symbol
will
stop
flashing
and
begin
rotating.
*
At
this
point
the
oven
is
preheated.
Food
may
be
placed
in
the
oven
and
the
oven
programmed.
{fhe
oven
door
is
not
opened,
the
oven
will
begin
temperature
holding
operation.
The
oven
will
automatically
hold
at
the
preheat
temperature
for
15
minutes.
After
this
time
has
elapsed
an
audible
signal
will
sound
and
the
oven
will
turn
off.
All
indicators
will
go
out.
Whenever
the
door
is
opened
or
the
(STOP/CLEAR)
pad
is
touched
during
this
15
minute
period,
the
programme
is
cancelled
and
the
display
will
return
to
the
time
of
day.
NOTE:
!f
you
are
in
the
process
of
preheating
and
wish
to
check
the
actual
oven
temperature,
singly
touch
the
s§
(CONVECTION)
pad.
The
actual
oven
temperature
will
be
displayeq
as
long
as
the
(CONVECTION)
pad
is
touched.
If
the
oven
temperature
is
below
4
°C
at
this
time,
will
be
displayed.
9

To
Preheat
and
Cook
by
Convection
Your
Oven
can
be
programmed
to
combine
preheating
and
convection
cooking
or
preheating
and
auto-
matic
dual
cooking
operations.
Example:
Suppose
you
want
to
preheat
to
180°C
and
then
cook
for
20
minutes
at
180°C.
1.
2.
3.
5.
6.
Touch
the
(CONVECTION)
pad
five
times.
Ke
Se
a
a
ei
TEMP
will
flash.
uto-Touch
Sheet’’
H.
Enter
desired
cooking
time.
(20’00’’)
Touch
the
(MINUTE
PLUS/START)
pad.
Convection
Fan
Symbol
will
flash
on
and
off.
PRE-
|
and
[
HEAT]
are
displayed
repeatedly
while
preheating
is
in
the
process.
.
When
the
oven
reaches
the
programmed
temperature,
the
Convection
Fan
Symbol
will
stop
flashing
and
begin
rotating
and
an
audible
signal
will
sound
4
times,
and
the
tem-
perature
will
be
displayed.
The
oven
will
automatically
hold
at
the
desired
temperature
for
15
minutes.
This
will
allow
time
to
finish
preparing
the
food
to
be
cooked.
You
may
open
the
door
anytime
during
this
holding
time.
Open
the
door.
The
cooking
time
will
be
displayed.
Place
food
in
oven.
Close
the
door.
Touch
the
(MINUTE
PLUS/START)
pad.
Convection
Fan
Symbol
will
rotate.
The
cooking
time
will
count
down
to
zero.
When
the
timer
reaches
zero,
all
indicators
will
go
out
and
an
audible
signal
will
sound.
The
time
of
day
will
reappear
on
the
display.
After
cooking,
the
fan
will
remain
on
for
a
while
to
lower
the
temperature
of
the
electronic
or
mechanical
components
in
case
that
the
excess
temperature
remain
in
the
unit.
NOTE:
If
you
wish
to
preheat
and
cook
at
a
different
convection
temperature,
follow
Steps
1
and
2,
then
enter
cooking
temperature
by
touching
the
(CONVECTION)
pad
again.
The
cooking
tem-
perature
will
appear
on
the
display.
Continue
with
Step
3-6.
10

DUAL
COOKING
Your
Oven
has
Dual
1
(
(f3$)c13
)
and
Dual
2
(
(GPS§)
2)
)
settings
that
make
it
easy
to
cook
with
both
convection
heat
and
microwaves
automatically.
The
Dual
1
setting
is
preprogrammed
for
250°C
with
iH;
(FULL
POWER)
while
the
Dual
2
setting
is
preprogrammed
for
200°C
with
wv;
(DEFROST).
On
both
of
these
settings
the
convection
heating
system
and
the
microwave
system
simultaneously
oper-
ate
to
give
you
fast,
even
cooking.
The
convection
temperature
and
microwave
power
setting
of
either
setting
can
be
changed
to
accomodate
a
wide
variety
of
foods.
See
your
Cookbook
for
complete
cooking
information.
To
Cook
by
Dual
Cooking
Suppose
you
want
to
roast
for
50
minutes
on
DUAL
COOK
1.
(250°C,
fh)
1.
Enter
desired
cooking
time.
(50‘00'’)
La
ses
is
usual
2.
Touch
the
[@ff3s)
(DUAL
COOK)
pad
once.
uto-Touch
sheet”
I.
If
you
wish
to
change
the
oven
temperature,
touch
the.
(CONVECTION)
pad.
If
you
wish
to
change
microwave
power,
touch
the
(ah)
(MICROWAVE)
pad.
TEMP
will
flash.
3.
Touch
the
{+-/]
(MINUTE
PLUS/START)
pad.
Convection
Fan
Symbol
will
rotate
and
Microwave
Symbol
will
flash.
The
cooking
time
will
count
down
to
zero.
When
the
timer
reaches
zero,
the
indicators
will
go
out
and
an
audible
signal
will
sound.
The
time
of
day
will
reappear
on
the
display.
After
cooking,
the
fan
will
remain
on
for
a
while
to
lower
the
temperature
of
the
electronic
or
mechanical
components
in
case
that
the
excess
temperature
remain
in
the
unit.
NOTE:
1.
If
youareinthe
process
of
(tirs¢]_
(DUAL
COOK)
and
wish
to
check
the
oven
temperature
you
have
programmed,
simply
touch
the
(s&}
(CONVECTION)
pad.
The
programmed
tem-
peraure
will
be
displayed
as
long
as
the
(CONVECTION)
pad
is
touched.
2.
Preheating
the
oven
is
unnecessary.
3.
Do
not
do
two-level
cooking
in
[uss]
(DUAL
COOK)
mode.
4.
To
cook
on
Dual
2
(
{fF¥)°23
)
setting,
use
the
above
procedure,
touching
the
[diss]
(DUAL
COOK)
pad
twice
in
step
2.
To
Preheat
and
Cook
by
Dual
Cooking
Preheating
is
unnecessary
in
this
oven,
but
this
oven
can
be
programmed
to
combine
preheating
and
dual
cooking
operations.
Suppose
you
want
to
preheat
and
bake
for
35
minutes
in
DUAL
COOK
2.
(200°C,
vV&Kr
)
=
a
Refer
to
the
attached
1.
Touch
the
(CONVECTION)
pad
four
times
for
enter
|
‘“Auto-Touch
Sheet’
J.
preheat
temperature.
TEMP
will
flash.
.
Enter
desired
cooking
time.
(35’00°’)
.
Touch
the
tip
ss]
(DUAL
COOK)
pad
twice.
TEMP
will
flash.
.
Touch
the
(MINUTE
PLUS/START)
pad.
Convection
Fan
Symbol
will
flash
on
and
off.
and
[_
447)
are
displayed
repeatedly
while
preheating
is
in
the
process.
5.
When
the
oven
reaches
the
programmed
temperature,
Convection
Fan
Symbol
will
stop
flashing
and
begin
rotating
and
an
audible
signal
will
sound
4
times,
and
the
temperature
will
be
displayed.
The
oven
will
automatically
hold
at
the
desired
temperature
for
15
minutes.
This
will
allow
time
to
finish
preparing
the
food
to
be
cooked.
You
may
open
the
door
anytime
during
this
holding
time.
6.
Open
the
door.
The
cooking
time
will
be
displayed.
7.
Place
food
in
the
oven.
Close
the
door.
Touch
the
(MINUTE
PLUS/START)
pad.
Convection
Fan
Symbol
will
rotate
and
Microwave
Symbol
will
flash.
The
cooking
time
will
count
down
to
zero.
When
the
timer
reaches
zero,
all
indicators
will
go
out
andan
audible
signal
will
sound.
The
time
of
day
will
reappear
on
the
display.
PWN
After
cooking,
the
fan
will
remain
on
for
a
while
to
lower
the
temperature
of
the
electronic
or
mechani:
al
components
in
case
that
the
excess
temperature
remain
in
the
unit.
11

GRILL
COOKING
Your
Oven
has
Grill
Cooking
that
make
food
to
brown
and
crisp
quickly.
To
Cook
by
Grill
Suppose
you
want
to
grill
for
7
min.
:
.
:
TAnie
ae
Refer
to
the
attached
1.
Enter
desired
cooking
time.
(7’00"’)
““Nuto-Touch
Sheet”
K
2.
Touch
the
(GRILL)
pad.
DOUG
eer
3.
Touch
the
(MINUTE
PLUS/START)
pad.
The
cooking
time
will
count
down
to
zero.
When
the
timer
reaches
zero,
the
indicators
will
go
out
and
an
audible
signal
will
sound.
The
time
of
day
will
reappear
on
the
display.
After
cooking,
the
fan
will
remain
on
for
a
while
to
lower
the
temperature
of
the
electronic
or
mechanical
components
in
case
that
the
excess
temperature
remain
in
the
unit.
Microwave
and
Grill
Cooking
Your
Oven
can
be
programmed
to
combine
microwave
and
grill
cooking
operations.
|
Suppose
you
want
to
cook
at
4
(ROAST)
for
10
minutes
by
microwave,
and
then
continue
to
grill
for
5
minutes.
1.
Enter
desired
microwave
cooking
time.
(10’00’’)
cE
Refer
to
the
attached
2.
Touch
the
[@]
(MICROWAVE)
pad
twice.
““Auto-Touch
Sheet”
L.
3.
Enter
desired
grill
cooking
time.
(5’00’’)
4.
Touch
the
(GRILL)
pad.
5.
Touch
the
(MINUTE
PLUS/START)
pad.
The
microwave
cooking
time
will
count
down
to
zero.
And
then
grill
cooking
will
start.
When
the
timer
reaches
zero,
all
indicators
will
go
out
and
an
audible
signal
will
sound.
The
time
of
day
will
reappear
on
the
display.

EASY
DEFROST
The
Easy
Defrost
allows
you
to
defrost
meats
by
entering
weight
only.
To
Use
Easy
Defrost
Easy
Defrost
key
has
3
defrosting
stages.
Suppose
you
want
to
defrost
1.0
Kg
steak
by
EASY
DEFROST.
1.
Touch
the
[2]
(EASY
DEFROST)
pad.
Ics
)Retor
tothe
atrached
:
Auto-Touch
Sheet’
M.
Kg
will
flash.
2.
Enter
desired
weight.
(1.0
Kg)
3.
Touch
the
(MINUTE
PLUS/START)
pad.
The
first
stage
of
the
defrost
will
start,
the
timer
will
begin
to
count
down.
When
the
first
stage
finishes,
audible
signal
will
sound
4
times
and
oven
will
stop.
Cook
indicator
will
go
off.
[7UFN
]{
OVE]
.
will
be
displayed
continuously.
4.
Open
the
door
and
turn
over
and
then
close
the
door,
[FFESS|[START]
will
be
displayed.
5.
Touch
the
(MINUTE
PLUS/START)
pad.
The
second
stage
of
the
defrost
will
start,
the
timer
will
begin
to
count
down.
When
the
second
stage
finishes,
audible
singal
will
sound
4
times
and
oven
will
stop.
Cook
indica-
tor
will
go
off.
[S&-
|{AF
ANG]
will
be
displayed
continuously.
6.
Open
the
door
and
rearrange
or
shield
warm
portions
and
then
close
the
door,
[PRESSI[STAART]
.
will
be
displayed.
7.
Touch
the
(MINUTE
PLUS/START)
pad.
The
timer
will
begin
to
count
down
to
zero,
when
the
timer
reaches
zero,
an
audible
sig-
nal
will
sound.
[S7AN
72!
will
be
displayed
continuously.
aot
ri
at
When
door
is
opened
or
the
(STOP/CLEAR)
pad
is
touched,
will
go
out
andthe
time
of
day
will
appear
on
the
display.
NOTE:
1.
When
keying
in
the
weight,
the
unit
must
be
rounded
off
to
the
nearest
tenth
of
a
kilogramme.
ex
1.65
kg—1.7
kg
2.
Foods
weighing
more
or
less
than
the
quantity
listed
in
the
Chart
should
be
defrosted
following
gude-
lines
in
the
cookbook.
If
the
incorrect
weight
is
entered
and
START
pad
is
touched,
and
incorrect
weight
will
be
displayed
repeatedly.
The
STOP/CLEAR
pad
has
to
be
touched
to
reprogramme
the
oven.
Foods
not
listed
in
the
Chart
can
be
defrosted
using
defrost
setting.
Large
objects/quantities
require
turning,
removing
or
rearranging.
Arrange
food
in
single
layers
where
possible.
If
food
is
in
a
block,
try
to
separate
as
soon
as
possible.
Foil—use
foil
to
protect
outer
edges,
thin
areas,
fatty
areas,
near
bones
etc.
N.B.
Too
much
foil
causes
part
uncovered
to
start
to
cook.
Foil
shouldn’t
touch
sides
of
oven.
If
arcing
occurs,
caused
by
foil
touching
sides,
stop
oven
and
repo-
sition
food.
DARY

Easy
Defrost
Chart
Poultry
Minced
Beef
Chicken
Pieces
Roast
Pork
Roast
Beef
0.2
kg—1.5
kg
1.0
kg—1.5
kg
0.2
kg—1.5
kg
0.2
kg—1.5
kg
0.6
kg—1.5
kg
Procedure
Shield
thin
end
of
chops
or
steaks
with
foil.
Position
the
food
with
thinner
parts
in
the
centre
in
a
single
layer.
If
pieces
are
stuck
together,
try
to
separate
as
soon
as
possible.
When
audible
signal
sounds,
turn
over,
shield
the
warm
portions
and
rearrange.
After
defrost
time,
stand
10—15
mins.
Remove
from
original
wrapper.
Shield
wing
and
leg
tips
with
foil.
Place
breast
side
upwards.
When
audible
signal
sounds,
turn
over
and
shield
the
warm
portions.
After
defrost
time,
stand
wrapped
in
foil
for
15—30
mins.
After
standing
run
under
cold
water
to
remove
giblets
if
necessary.
When
audible
signal
sounds,
turn
over
and
remove
the
defrosted
portions.
After
defrost
time,
stand
10—15
mins.
Shield
the
edge
with
foil.
When
audible
signal
sounds,
turn
over
and
shield
the
warm
portions
and
rearrange.
After
defrost
time,
stand
wrapped
in
foil
for
10—15
mins.
Shield
the
edge
with
foil
strips
about
2.5
cm
wide.
Place
joint
with
lean
side
face
down
(if
possible).
When
audible
signal
sounds,
turn
over
and
shield
the
warm
portions.
After
defrost
time,
stand
wrapped
in
foil
for
15—
30
mins.
14

COMPU
COOK
To
Cook
with
Compu
Cook
|
COMPU
COOK
will
automatically
compute
the
oven
temperature,
microwave
power
and
cooking
time
for
baking,
roasting
and
grilling.
It
is
based
on
specific
foods
and
the
quantity
or
weight
of
the
food.
Suppose
you
want
to
cook
1.45
kg
Roast
Pork
by
COMPU
COOK
2.
1.
Touch
the
s
(COMPU
COOK)
pad
twice.
(S|
Refer
to
the
attached
Kg
will
flash.
‘‘Auto-Touch
Sheet’’
N.
2.
Enter
desired
weight.
(Ex:
1.45
kg
should
be
1.5
kg)
3.
Touch
the
(MINUTE
PLUS/START)
pad.
The
cooking
time
will
count
down
to
zero.
When
the
timer
reaches
zero,
an
audible
signal
will
sound
and
will
appear
on
display.
When
door
is
opened
or
the
(STOP/CLEAR)
pad
is
touched,
the
time
of
day
will
reappear
on
the
display.
After
cooking,
the
fan
will
remain
on
for
a
while
to
Jower
the
temperature
of
the
electronic
or
mechanical
components
in
case
that
the
excess
temperature
remain
in
the
unit.
NOTE:
1.
Use
foods
listed
in
the
COMPU
COOK
Chart.
2.
COMPU
COOK
works
with
foods
at
normal
storage
temperature.
For
example,
chicken
or
beef
would
be
at
refrigerator
temperature
and
cakes
and
bread
would
be
at
room
temperature.
3.
If
you
enter
an
incorrect
quantity,
and
incorrect
weight
will
appear
alternately
on
display.
4.
The
weight
of
food
can
be
entered
for
each
Compu
Cook
Setting.
The
unit,
kilogram
(kg)
will
appear
on
display.
If
you
use
the
cooking
utensil,
to
make
this
most
easy,
please
weigh
first
the
cooking
utensil
(baking
dish,
gratin
dish,
etc.).
And
subtract
it
from
the
total
weight.
Only
the
weight
of
food
may
be
entered,
otherwise
the
cooking
time
will
be
too
long.
5.
Weight
must
be
rounded
off
to
the
nearest
tenth
of
a
kilogram
(Example:
1.25kg
should
be
rounded
off
to
1.3kg).
,
6.
You
can
select
desired
doneness.
Touch
the
[«_]
(MORE)
or
[_¥
]
(LESS)
pad
before
(MINUTE
PLUS/START)
pad,
STANDARD
will
automatically
be
selected
if
you
don’t
touch
[@_]
(MORE)
or
[_¥_]
(LESS)
pad.
7.
[STAN2Z]
will
appear
on
display
alternately
when
COMPU
COOK
for
Roast
Beef,
Roast
Pork
and
Poultly
and
Gratin
are
completed.
When
door
is
opened
or
the
(STOP/CLEAR)
pad
is
touched,
[S7AN7]
will
go
out
and
time
of
day
will
appear
on
display.
8.
Ail
foods
can
be
seasoned,
as
desired,
before
cooking
begins.
9.
If
door
is
opened
during
COMPU
COOK,
shut
door
and
touch
the
(MINUTE
PLUS/START)
pad
to
resume
cooking.
15

————
Chart
DONENESS
QUANTITY
|
UNIT
SETTING
PROCEDURE
MORE
(Well
done)
Season
as
desired.
STANDARD
(Medium)
|
Place
on
the
iow
rack
with
lean
side
face
|:
[EIess
(Rare)
upward.
Roast
Beef
6~1.5
kg
g
|[+]
When
audible
signal
sounds,
turn
meat
10—15
minutes.
Season
as
desired.
Place
on
the
low
rack
with
lean
side
face
downward.
After
cooking,
stand
wrapped
in
foil
for
10—15
minutes.
[~]LESS
over.
After
cooking,
stand
wrapped
in
foil
for
Roast
Pork
|
1.0~2.0
kg
g
|[+]MORE
STANDARD
—
Season
as
desired.
Place
breast
side
up
on
the
low
rack.
After
cooking,
stand
wrapped
in
foil
for
10—15
minutes.
g
|[~]MORE
STANDARD
|{lless
Season
as
desired.
MORE
(Well
done)
STANDARD
(Medium)
|
Place
on
the
high
rack.
;
|
stat
(Rare)
When
audible
signal
sounds,
turn
meat
over.
MORE
Season
as
desired.
Place
on
the
low
rack
with
skin
side
down.
STANDARD
|
sa
When
audible
signal
sounds,
turn
meat
over.
Gratin
5~1.5
kg
g
|[«]MORE
Use
a
gratin
dish.
STANDARD
Place
on
the
low
rack.
antes
Chicken
.2~1.0
kg
Pieces
[«]MORE
Place
on
the
high
rack.
STANDARD
[<JLess
g
|[+]MORE
eed
[y]Less
g
|[+|MORE
STANDARD
[~]LEss
g
|[+]MORE
Chesse
~6
pcs
Toast
_
“_
Cake
5~1.5
kg
(Dry)
Followings
please
find
some
hints
for
the
different
programmes:
2.
Roast
Pork
Recommendable
is
pork
meat
with
fatty
ports,
e.g.
with
crust.
Lean
meat
is
not
so
recommendable.
4.
Beef
Steak
Steak
should
have
a
thickness
of
at
least
1.5
cm,
otherwise
meat
can
become
too
dry.
5.
Chicken
Pieces
Specially
Drumstics
are
very
recommendable
for
this
sequence.
6.
Gratin
In
addition
to
the
recipe
proposals
all
kinds
of
gratin
can
be
prepared
on
this
program
which
Consists
of
ingredients
which
are
precooked
or
only
have
to
be
reheated.
8.
Quiche
On
the
base
of
short
crust
pastry
and
egg—milk
respectively
egg—cream,
you
may
all
kinds
of
quiche,
according
to
your
personal
taste.
9.
Bread
On
this
sequence
only
kinds
of
white
bread
can
be
prepared.
Dark
bread
is
not
suitable,sfould
be
baked
by
convection
only.
0.
Cake
In
addition
to
the
recipes
of
cook
book,
nearly
all
kinds
of
cake
made
of
stirred
pastery
are
ncommend-
able
for
this
program.
Use
a
flan
dish.
Place
on
the
low
rack.
Use
a
baking
dish
or
plate,
greased.
Place
on
the
low
rack.
Remove
from
baking
dish
and
cool.
Use
a
baking
dish,
greased.
Place
on
the
low
rack.
Remove
from
the
baking
dish
after
cool-
ing
for
10
mins.
STANDARD
[~|LESS
SETTING]
FOOD
|
7
Beef
Steak
2~1.0
kg
16

MORE/LESS
Pad
During
operation
The
cooking
time
can
be
increased
or
decreased
in
multiples
of
1
minute
by
repeatedly
touching
{[<7]
(MORE)/
[Ty
_](LESS)
pad.
Before
start
the
(EASY
DEFROST)
The
cooking
result
will
be
adjusted
by
touching[_#_](MORE)/[_¥
](LESS)
pad
once.
1. In
case
you
need
adjust
cooking,
touch
((<_](moRE)/["y
](LESS)
pad
whenever
before
touch
(MINUTE
PLUS/START)
pad.
Suppose
you
want
to
cook
0.6
kg
beef
steak
well
done
by
Compu
Cook
4.
ces
Refer
to
the
attached
‘‘Auto-Touch
Sheet’’
O.
1.
Touch
the
Es
(COMPU
COOK)
pad
4
times.
Kg
will
flash.
2.
Enter
desired
weight.
(0.6
kg)
3.
Select
desired
doneness.
Well
done:
(“a
_]
(MORE)
4.
Touch
the
(MINUTE
PLUS/START)
pad.
When
the
first
stage
finishes,
audible
signal
will
sound
4
times
and
oven
will
stop.
Cook
indicator
will
go
off.
will
be
displayed
continuously.
5.
Open
the
door
and
turn
over
and
then
close
the
door,
will
be
displayed.
6.
Touch
the
(MINUTE
PLUS/START)
pad.
The
cooking
time
will
count
down
to
zero.
When
the
timer
reaches
zero,
all
indicators
will
go
out
and
an
audible
signal
will
sound.
The
time
of
day
will
reappear
on
the
display.
2.
In
case
you
need
to
cancel
and
change(_«_](MORE)/{_¥_](LESS)
pad.
©
To
cancel[_#_](MORE)/[_¥
](LESS)
setting,
touch
the
same
pad
again.
°
To
change
[_«_](MORE)
to(_¥
](LESS)
setting,
simply
touch
the
[_~
](LESS)
pad.
*
To
change[_v
](LESS)
to
[«
_]
(MORE)
setting,
simply
touch
the
[4
_]
(MORE)
pad.
You
can
select
or
change
[_4_]
(MORE)/
[_~
]
(LESS)
setting
whenever
before
touch
the
(MINUTE
PLUS/START)
pad.
17

CARE
AND
CLEANING
DO
NOT
USE
COMMERCIAL
OVEN
CLEANERS,
ABRASIVE
OR
HARSH
CLEANERS
AND
SCOURING
PADS
ON
ANY
PART
OF
YOUR
MICROWAVE
OVEN.
EXTERIOR
Clean
the
outside
with
mild
soap
and
water;
rinse
and
dry
with
a
soft
cloth.
Do
not
use
any
type
of
house-
hold
or
abrasive
cleaner.
TOUCH
CONTROL
PANEL
Care
should
be
taken
in
cleaning
the
touch
control
panel.
If
the
control
panel
becomes
soiled,
open
the
oven
door
before
cleaning.
This
will
inactivate
the
control
panel.
Wipe
the
panel
with
a
cloth
dampened
slightly
with
water
only.
Do
not
scrub
or
use
any
sort
of
chemical
cleaners.
Avoid
the
use
excess
water.
INTERIOR
1.
The
walls
of
the
oven
except
the
rear
oven
are
of
stainless
steel;
for
easy
cleaning,
wipe
any
spatters
or
spills
with
a
soft
damp
cloth
or
sponge
after
each
use.
For
heavier
soil,
use
mild
soap;
rinse
thoroughly
with
hot
water.
While
the
oven
is
still
warm,
remove
the
soil
immediately.
2.
The
rear
wall
of
the
oven
has
a
continuous
clean
finish.
This
finish
involves
a
specially
formulated
cata-
lytic
coating
which
permits
the
gradual
oxidation
of
most
soils
during
normal
cooking
cycles.
The
sur-
face
may
be
damaged
by
commercial
cleaners,
abrasives
or
powder
cleaners.
Some
manual
cleaning
may
be
necessary
if
excess
spattering
occurs;
use
a
paper
towel
or
sponge
to
blot
up
and
remove
ex-
cess
spatter
while
the
oven
is
still
warm
and
the
soil
is
soft
and
pliable.
3.
To
make
the
cleaning
effect
of
the
continuous
cleaning
finish
more
efficient,
it
is
recommended
that
after
the
cooking
of
fatty
meats,
30
minutes
convection
operation
be
done
at
250°C
with
an
empty
oven.
4.
After
each
use
wipe
the
waveguide
cover
in
the
ceiling
of
the
oven
with
a
soft
damp
cloth
to
remove
any
food
splashes.
TURNTABLE
and
TURNTABLE
SUPPORTING
PLATE
Occasionally
it
will
be
necessary
to
remove
the
turntable
and
the
turntable
supporting
plate
for
cleaning,
or
to
clean
the
floor
of
the
oven.
Wash
the
turntable
and
the
turntable
supporting
plate
in
mild,
soapy
water.
Dry
with
a
soft
cloth.
The
turntable
and
turntable
supporting
plate
are
dishwasher
proof.
The
turntable
motor
is
sealed,
but
excess
water
or
spills
should
not
be
allowed
to
stand
in
this
area.
DOOR
Always
keep
the
door
seal
and
door
surfaces
clean
so
that
any
grease,
soil
or
splashes
are
not
allowed
to
build
up.
Such
a
build-up
could
result
in
leakage
of
microwave
energy
from
the
oven.
Wipe
the
window
on
both
sides
with
a
damp
cloth
to
remove
any
spills
or
spatters.
Metal
parts
will
be
easier
to
maintain
if
wiped
frequently
with
a
damp
cloth.
“THIS
APPARATUS
COMPLIES
WITH
THE
REQUIREMENTS
OF
BS-800
AND
EEC-499.”’
IN
ORDER
TO
COMPLY
WITH
THE
EEC
DIRECTIVE:
82/499/EEC,
SHORT
COOKING
OPERA
TIONS
SHOULD
NOT
BE
PERFORMED
MORE
FREQUENTLY
THAN
ONCE
PER
MINUTE.
18

SERVICE
CALL
CHECK
Please
check
the
following
before
calling
for
service:
NOTE:
The
unit
will
be
turned
off
except
touch
control
panel
immediately
by
touching
MAINS
OFF
SWITCH
pad.
The
oven
lamp
will
not
turn
on
when
the
door
is
opened
while
MAINS
OFF
SWITCH
is
turned
off.
MAINS
OFF
SWITCH
will
resume
on
when
you
start
the
oven
again.
1.
Please
check
if
the
wall
socket
and
the
fuse
are
intact.
2.
Place
one
cup
of
water
in
the
oven
and
close
the
door
securely.
Oven
lamp
should
go
off
if
door
is
closed
properly.
Programme
the
oven
for
2
minutes
on
(FULL
POWER).
Touch
these
pads:
H1min.
KD
x2
A.
Does
the
oven
lamp
light?
YES
____
NO
B.
Does
the
cooling
fan
work?
YES
___
CUNO
(Put
your
hand
over
the
rear
or
top
ventilation
opening.)
C.
Does
the
turntable
rotate?
YES
___s—«
NO
D.
At
the
end
of
this
time,
open
the
door.
Does
the
oven
lamp
light?
YES
___
CUNO
Is
the
water
hot?
YES
___
CUNO
3.
Empty
cup
and
refill
room
temperature
water.
Place
it
in
the
oven
and
close
door
securely.
Touch
these
pads:
(Convection
at
180°C
for
5
min,
Grill
for
3
mins)
x
5
x3
A.
Does
the
oven
lamp
light?
YES
__
CC
CNO
B.
Does
the
cooling
fan
work?
YES
__
CUNO
(Put
your
hand
over
the
rear
or
top
ventilation
opening.)
C.
Does
the
turntable
rotate?
YES
__._S
CNN
D.
Do
the
COOK
and
CONV
indicator
lights
go
on
and:
does
the
Convection
Fan
Symbol
rotate?
YES
___
CU
NOL
4.
At
the
end
of
5
minutes
did
the
CONV
indicator
and
Convection
Fan
Symbol
go
out
and
did
the
GRILL
indicator
light?
YES
__.CNO
5.
Does
the
Grill
heater
redden
after
a
while?
YES
___s«NNO
6.
At
the
end
of
3
minutes
did
the
COOK
and
GRILL
indicators
go
out
and
did
an
audible
signal
sound?
YES
___CNNO
7.
Is
the
water
hot?
YES
__ CUNO
8.
Is
the
inside
of
the
oven
hot?
YES
___—ds
NO
SPECIFICATIONS
AC
Line
Voltage:
Single
phase
220V,
50Hz
AC
Power
Required:
Microwave
1.3
kW
Dual
2.8
kW
Convection
1.6
kw
Grill
Max.
2.6
kW
(Grill
Heating
Element
1.0
kW,
Convection
Heating
Element
1.5
kW)
Output
Power:
Microwave
650
W
(2
litre
water
load)
Convection
Heating
Element
1500
W
Grill
Heating
Element
1000
W
Microwave
Frequency:
2450
MHz
Outside
Dimensions:
555mm(W)
x
380mm(H)
x
516mm(D)
Cavity
Dimensions:
375mm(W)
x
254mm(H)
x
385mm(D)
Oven
Capacity:
36
@
(1.3
cu.ft.)
Cooking
Uniformity:
Turntable
(365mm
tray)
system
Weight:
Approx.
30
kg
19
This manual suits for next models
1
Table of contents
Other Sharp Microwave Oven manuals

Sharp
Sharp R-319FW User manual

Sharp
Sharp R-7A53 User manual

Sharp
Sharp R-772M User manual

Sharp
Sharp R-D219G User manual

Sharp
Sharp R-28STM User manual

Sharp
Sharp R224HW Use and care manual

Sharp
Sharp Carousel R-880F User manual

Sharp
Sharp R-204 User manual

Sharp
Sharp Carousel RK56S27 User manual

Sharp
Sharp R-209VN Technical specifications

Sharp
Sharp R-4A55 User manual

Sharp
Sharp R-408LS User manual

Sharp
Sharp R-25ST Instruction Manual

Sharp
Sharp R8-A User manual

Sharp
Sharp R-397F User manual

Sharp
Sharp SMO1854DS User manual

Sharp
Sharp R-22AM User manual

Sharp
Sharp R-879 Instruction Manual

Sharp
Sharp R-207 Instruction Manual

Sharp
Sharp R-209 Instruction Manual