Sharp ZQ-2500 User manual

SHARI?!
ELECTRONIC ORGANIZER
OPERATION MANUAL

This equipment complies with the requirements of Directive 89/336/EEC as amended by 93/68/EEC.
Dieses Gerat entspricht den Anforderungen der EG-Richtlinie 89/336/EWG mit Anderung 93/68/EWG.
Ce materiel repond aux exigences contenues dans la directive 89/336/CEE modifiee par la directive 93/68/CEE.
Dit apparaat voldoet aan de eisen van de richtlijn 89/336/EEG, gewijzigd door 93/68/EEG.
Dette udstyr overholder kravene i direktiv nr. 89/336/EEC med
tillseg
nr. 93/68/EEC.
Quest’ apparecchio
B
conforme ai requisiti
della
direttiva 89/336/EEC come emendata
dalla
direttiva 93/68/EEC.
H
qxanbzaq
awj
avrarcowpivmat
onq axatzfioey
mv
O~I$JV
qs
Euponai~~
Evoo-q$89/336/EOK,
bq
o ~avovtop6~
au$
my.mhqph&l~&
an6
zqv
o6qyia
93/68/EOK.
Este equipamento obedece as exigencias da directiva 89/336/CEE na sua versa0 corrigida pela directiva 93/68/CEE.
Este aparato satisface las exigencias de la Directiva 89/336/CEE modificada por medio de la 93/68/CEE.
Denna utrustning uppfyller kraven enligt riktlinjen 89/336/EEC sa som kompletteras av 93/68/EEC.
Dette produktet oppfyller betingelsene i direktivet 89/336/EEC i endringen 93/68/EEC.
Tama
laite
tayttaa
direktiivin 89/336/EEC vaatimukset,
jota
on muutettu
direktiivilla
93/68/EEC.

PART NAMES
Option
Command center
Display
Power on/off keys
port
(4-pin
option jack)
Cursor movement keys Entei
key
Return key

Congratulations on purchasing the ZQ-2500/ZQ-2700
Electronic Organizer. Please read this operation manual
carefully to familiarize yourself with all the features of the
Organizer and to ensure years of reliable operation. For quick
reference, keep this operation manual on hand.
.
Notes:
.Some of the accessories described in this manual may not
be available in some countries.
l
The only difference between the ZQ-2500 and the ZQ-2700
is the memory capacity.
Unless otherwise specified, this manual applies to both
models.
NOTICE
l
SHARP strongly recommends that separate permanent
written records be kept of all important data. Data may be
lost or altered under certain circumstances. SHARP
assumes no responsibility for data lost or otherwise
rendered unusable whether as a result of improper use,
repairs, defects, battery replacement, use after the specified
battery life has expired, or any other cause.
SHARP assumes no responsibility, directly or indirectly, for
financial losses or claims from third persons resulting from
the use of this product and any of its functions, such as
stolen credit card numbers, the loss or alteration of stored
data, etc.
The information provided in this manual is subject to
change without notice.

INTRODUCTION .
TABLE OF CONTENTS . .
BEFORE USE . . . . .
GETTING STARTED . .
BASIC ENTRY PROCEDURES
USING THE CLOCK FUNCTION . . . .
USING THE CALENDAR FUNCTION .
USING THE SCHEDULE FUNCTION
USING THE ANNIVERSARY FUNCTION .
USING THE TELEPHONE DIRECTORY
USING THE MEMO FUNCTION..
USING THE EXPENSE FUNCTION
USING THE CALCULATOR FUNCTION
USING THE CONVERSION FUNCTION
USING THE SECRET FUNCTION .
MENU . . . . . . . . . . . . . . . . . . . . . . . . . . . . .
USING THE DATA TRANSFER FUNCTION
APPENDICES . . .
INDEX . . . . . . . . . . . . . . . . . . . . . . . . . . . . .
.
.
.
.
.
.
.
.
.
.
.
.
.
.
.
.
.
.
.
.
1
2
. 2
3
5
6
.
. 8
9
.
11
13
15
17
19
.
20
21
.
23
24
30
39
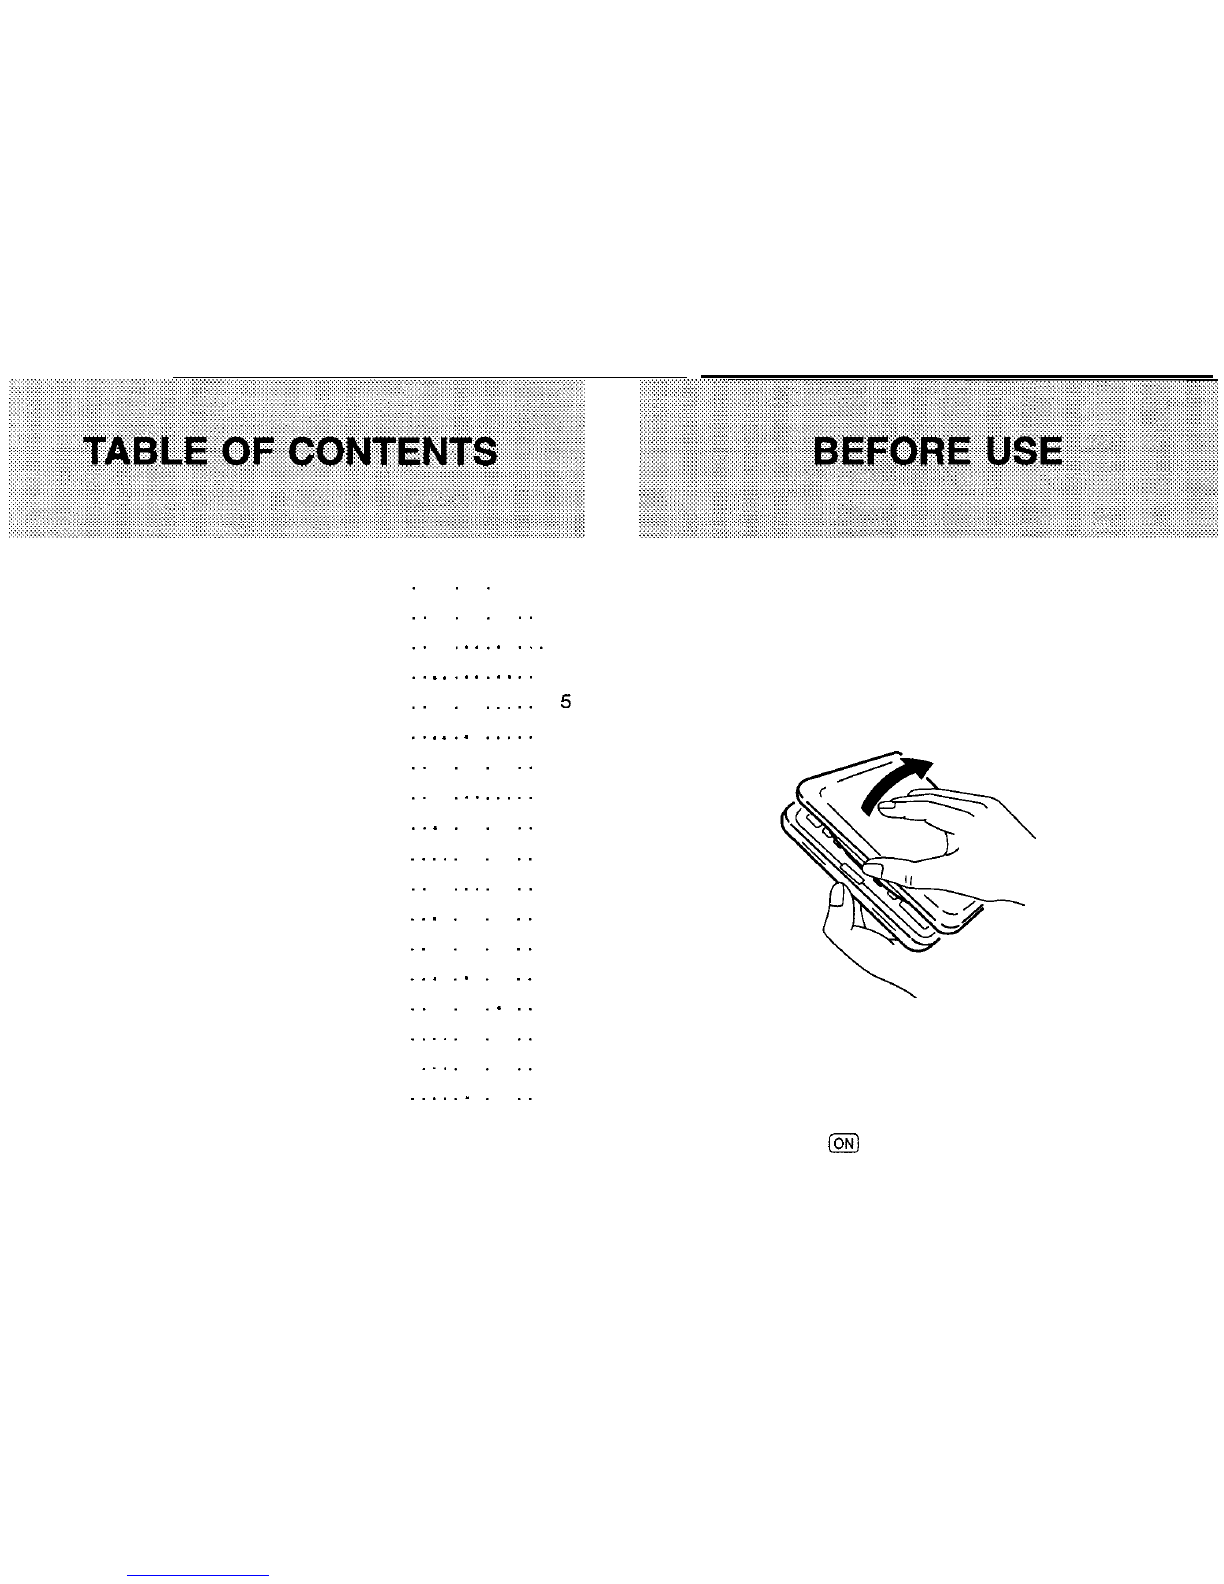
Be sure to perform the following procedures before using your
Organizer for the first time.
1. Open your Organizer in the following manner:
Lift top
Caution: Do not use force when opening the Organizer.
2. Initialize the Organizer.
Simultaneously press @J and the RESET switch on the
bottom of the Organizer.

Display symbols
Note: Under certain conditions the message may appear as
m
“Data has been impaired
!
Press [Y] to CLEAR ALL
EDIT
memory”. Proceed to the next step in either case. 2nd
The Organizer is initialized and then the TEL 1 directory is
displayed.
*
q
h
d’
Q
t+
Indicates a low battery level.
Theentry
on the display may be edited.
12nd]
has been pressed.
Capital letters will be entered. [To enter small letters,
press (CAPS)).
Data on screen is secret data accessible only by the
correct password.
The SECRET function is in effect.
A “beep” will sound when a key is pressed.
The specified schedule alarm(s) will sound.
There is more data which is not on the display. The
data can be displayed by pressing
(rl
or
Ir).

Key notations
This manual uses the following notations for key operations
and functions.
!!!!I
-
-+
[CALENDAR] “Command center” mode keys are
identified by their feature name
enclosed in a box.
Change sign key.
Backspace key.
r’=
Umlaut key.
O-LZ
Letter Z key.
Note: The blue functions and symbols are operated by
pressing
[2ndl
and the appropriate key. The white ones
are operated in the CALCULATOR mode without
(2nd1,
or with
@
in other modes.
Contrast adjustment (on the display)
1.
Press-.
2. Press
a
then
1
(“FUNCTION”).
3. Press 2 (“LCD CONTRAST”).
4. Press
a
or
m
to darken or lighten the display. Holding
either key down will result in a continuous change in
contrast.
5. Press
(CCEI.
Turning the “beep” on and off
While
“
j
”
is displayed, a “beep” will sound whenever a key is
pressed. To turn the “beep” on or off, press
@
then
a.
Date format
I
You can select “MONTH/DAY/YEAR” or
“DAY.MONTH.YEAR”
as your date format.
\
1. Press-.
2. Press
[VI
1 (“FUNCTION”).
I
3. Press
a
3 (“DATE FORMAT”).
4. Press
II]
or
(rl.
I
5. Press [ENTER).
,
Note: The default setting is “MONTH/DAY/YEAR”.
i
I
I
4

Entering characters
Keys and their functions
Moves the cursor to the right. (When an entry is
displayed, pressing this key will allow you to enter the
edit mode.)
Moves the cursor to the left.
Moves the cursor up a line.
Moves the cursor down a line.
Puts the Organizer into the insert mode. Pressing
(INS]
again returns the Organizer to the overwrite mode.
Deletes the character at the cursor position.
Backspace key. Deletes the character to the left of the
cursor.
Moves the cursor to the beginning of the next line (new
line).
Clears the data being entered.
Stores the data being displayed.
(If you wish to save an edited entry without deleting the
original entry,, press
(2ndJ
(GF&)
IMPORTANT: Individual capital letters may be entered by
pressing the desired key while “CAPS” is displayed.
Entering non-English characters
Entering “A”,
“D”,
“e”
and
“8”,
for example.
1. Press
(MEMO]
to enter the MEMO mode and press
B.
2. Press (CAPS]; “CAPS” displayed.
3.
Press
(2ndl
[
A.
4. Press (CAPS)
(2nd]
(7]
u.
5. Press
[2ndl
m
e.
6.
Press
[FZ
(71
o.
Note:
“c”
is entered by pressing (2nd)
[F].
Non-English
characters can also be entered as symbols.
Entering numbers
Use
101
through
(9)
to enter numbers.
Entering graphic symbols and special characters
Press
(SMBLJ
to enter the symbol entry mode. There are a total
of 33 symbols. In each display, five symbols are shown; to
change to a different display, press
a
or
a.
Select a
symbol by pressing its corresponding number.
To exit the symbol entry mode, press
(SMBLI
again.
5

Making corrections
The following examples use three different misspelling of “NEW
YORK”.
Correcting misspellings
Inserting missing letters
1. Press
@.
2. Enter “NEW
YRK”.
3.
Press
m
f?J
(INS].
4. Insert
“0”.
Deleting unwanted characters
Displaying the time
Press (HOME] to display the local
time.
To retain the display, hold the key
down.
NEW YORK
MON JAN
1,1996
12
:
OOAMD
(New York
isthe
default HOME
The time difference from the HOME city.
(London is the default WORLD
. .
\
Setting and changing
HOME city
Set your local city as the HOME city by selecting its zone
number. Zone numbers are based on the distance of the zones

from the International Date Line (zone number zero). For
example, there is a
i3-hour
difference between the
International Date Line and London (London is 13 hours
behind), so the zone number for London is 13. Honolulu is 23
hours behind the date line, so its zone number is 23.
Zone number
1. Press@$
(HOMEI.
2.
Press
m
Ir].
3. Press
(VI
or
W
to display the
desired city.
4.
Press-.
Notes:
NEW YORK
[ls:ol
MON JAN 1.1996
6 :
OOAMB
II
.To set the WORLD city, press
(2ndl
(WORLDJ
then follow the
above procedure.
.If the name of city you want to set is not in the built-in city
list, display the zone number for the city, press
m
and
then enter the city name.
.For zone numbers 0, 14 and 15, the city name display is
blank.
.Some city names are abbreviated on the display as follows:
HONG KONG HONGKONG
NEW DELHI DELHI
RIO DE JANEIRO RIO
LOS ANGELES L.A.
ANCHORAGE ANC.
Setting the HOME time and date
1.
Press
(2ndJ
(HOMEJ.
2. Enter the hour and minutes followed by A (a.m.) or P (p.m.).
3. Press
a,
enter the day and month in two digits each and
the year in four digits.
4. The clock starts when (ENTER1 is pressed.
Notes:
The time and date of the WORLD clock is set automatically
according to the HOME clock.
When using the 24-hour system, in step 2 above, enter the
hour and minutes in four digits.
To select the 12-hour or 24-hour clock, press (MENU],
a,
1,
m,
a
then
1.
Next, select the desired system with
(41
and
[tl
and press
(ENTER_J.
Setting daylight savings time
HOME time clock
1. Press
(2ndj
(HOME_).
2. Enter the correct DST time.
3.
Press
(znd]
(ENTERJ;
“
-@I’
appears.
vi
To clear the DST setting, enter the correct time again in the
same manner as above.

WORLD time clock
Press (2nd) (GiEK$ then
(2ndJ
(ENTERJ.
Displaying and changing the monthly
calendar
Once (CALENDAR) has been pressed, the month can be changed
by pressing
[VI
(to display upcoming months) or
m
(to
display past months).
I
I,
Indicates the 10th
the “cm”
Notes:
l At the top left, a
’
’
”
is attached to the years 1901 to 1999,
while no mark is attached to the years 2000 to 2099.
.When
a
or
a
is held down, the calendar will scroll
forwards or backwards continuously.

Finding a date with the numerical keys
Use
m
or
I+]
to find a date that is a specified number of
days in the past or future.
For example, first find the date 90 days after January 15, then
minus 35 days from that date. (This example assumes the
cursor is on January 15, 1996).
1.
PressI+]
90
m,
2. Press
Q
35
m.
The calendar for March 1996 appears, with the 10th flashing.
Recalling a month by designating the
date
,_
1.
In the calendar mode, press
m
twice.
2. Enter the date.
3.
Press (CALENDAR).
The specified monthly calendar will
be displayed.
Entering scheduled data
Press (SCHEDULE) and display
TUE JAN
30,1996
the desired date using
W
or
1o:oob-1e:ooR
[v).
Or after pressing Sales meeting
(SCHEDULE] press
(CCEJ,
enter the
scheduled date then press
(ENTER].
Enter the schedule time and details.
For the schedule time, input the starting time and ending
time followed by A (a.m.) or P (p.m.). Next, input the
description followed by (ENTER].
Notes:
If you are using the 24-hour system, in step 2 above input
the starting time in four digits and then press
(.1.
Then
input the ending time and press
(ENTERJ.
Then, enter the
details.
The date will be “tagged” on the calendar display. (See the
display sample on pg. 8.)
For schedule items without times, after the “TIME
?”
message appears, simply begin entering the description.
.:.:.:.:.:
gg$
9
B$$$

(The tag marking the scheduled item on the monthly
calendar will appear on the upper right next to the date.)
Recalling scheduled data
1.
Press (SCHEDULE)
(CCEJ
6%).
2. Enter the scheduled date. ,
3. Press (ENTER].
A..
\
{I
DAY
:30
YEAR
:19981
I
“I
I
1
Press
a
(to recall the next/future days) or
(/\I
(to recall past
days).
Notes:
lPress
(2nd)
67)
repeatedly to search for those days on
which items are scheduled, starting with the day appearing
on the display.
l
After the last scheduled item has been found, “NOT
FOUND!” is briefly displayed. Pressing
(2ndl
W
reverses
the search.
Recalling scheduled data using the index display
1.
Press (GiZKG]
2. Press
(MENU1.
3. Press 2 (“INDEX”).
/
4. Press
m
or
m
to move
the pointer
”
b
“.
IO
l 1110 Meeting
1124
Dr.Wilson
vis
l/30
Sales meeting
Use
a
or
CI]
to move to the next or previous page of the
four entries.
5. Press (ENTER) to
reca.ll
item.
Editing scheduled data
1. Press
m
1 (“EDIT”).
2. Edit the data using
(.I,
m,
[rl,
[rl,
@I,
(DEL), etc.
3. Press (ENTER].
Deleting scheduled data
Deleting a single agenda item
1. Recall the data you would like to delete.
2. Press (DEL) Y.
Deleting the agenda for an entire month
1.
Press (CALENDAR) and display the calendar for the month you
would like to delete.
2. Press
IDEL]
Y.
Deleting all the data in the schedule memory
1. Press
(iGiG]
T;Tl
1 (“FUNCTION”).
2. Press 3 (“DATA DELETION”) 2 (“SCHEDULE”).
3. Press 1 (“SCHEDULE”) Y.
Note: When the SECRET function is turned on, ‘SECRET ON

MODE” will appear on the display. The SECRET
function must be turned off before data can be deleted.
(Refer to “USING THE SECRET FUNCTION” on pg. 21.)
Setting the schedule alarm
1.
Press (SCHEDULE)
@CE)
(5Z).
2.
Enter date and press
(SCHEDULEJ
3. Enter time.
4. Enter description.
5. Press
(2ndl
(7);
“k
appears.
6.
Press[ENTERI.
Notes:
L(
Q
”
will appear;
“
4
”
appears or disappears each time
[2ndl
I,]
is pressed.
If you try to set the schedule alarm for a time that has
already passed, “ALARM TIME ELAPSED
!”
will appear on
the display.
To stop the alarm after it starts beeping, press
@;
the
alarm will automatically turn off in approximately 20 seconds.
After the alarm sounds,
“&”
will disappear and the schedule
item will remain in memory without
‘I&“.
If
“
4
”
is turned off and the set alarm time has passed,
“k
will remain in front of the scheduled item.
Entering anniversaries
1.
Press (ANN] to display the ANN menu.
You can enter two types of anniversaries: for events that occur
on the same date every year (MONTH/DAY), such as
birthdays, and for events that occur on a certain day every
year
(MONTH/WEEK).
For the first option,
1. Press 1 (“MONTH/DAY”). MAY 7
2. Input the date then press
(ENTERJ.
-*
3. Input a description then press
JENTERI.
If you want to set a notice a
number of days in advance,
4. Make a selection using
m
,{K
followed by (ENTER]; if notice is
not required, select “NOTICE OFF”.
11

For the second option,
1. Press 2 (“MONTH/WEEK”). MAY
WEEK:2
2. Input the month, week and
day of the week then press
IENTER).
3. Input a description then press
B.
If you want to set a notice a number of days in advance,
4. Make a selection using
m
followed by (ENTER]; if notice is
not required, select “NOTICE OFF”.
Recalling by sequential search
direction or
0
to
1. Press [ANN] then 1 or 2.
2. Enter the date of the event you want to recall.
3. Press
GJ
to recall entries in front or
m
to recall entries in
reverse order.
-
Recalling by using the index display
Recalling anniversaries
Recalling from the ANN NOTICE display
If you set the ANN NOTICE function, a reminder will appear
1. Press
m
then 1 or 2.
2. Press
@
2 (“INDEX”).
3. Press
m
or
[rl
to move the
pointer
“
b
‘I.
Use
[VI
or
m
to
every time the Organizer is turned on either one week before
or on the day of the event, depending on which setting has
been chosen.
Secret entry when secret function is turned on
1. On the specified date, turn the
move to the next or previous
page of the four entries.
4. Press (ENTER] to display the details.
Editing anniversaries
Organizer on.
2. Move the pointer
“
b
”
to select
an entry.
3. Press (ENTER) to display details
3.
of the entry.
Press
(MENV1
1 (“EDIT”).
Edit the date and/or description.
To change the date, press
(rl
to move the date entry field.
Press (ENTER).
12

The ANN NOTICE menu will appear. Change the selection
using
m
and
Ir]
followed by (ENTER] if necessary, or
simply press
(ENTERJ
to store the new entry.
Deleting anniversaries
Deleting single entries
To delete an individual entry, recall it or select it in the index
display with the pointer, and then press (DEL) and
Y.
Deleting all entries
To delete all MONTH/DAY or MONTH/WEEK entries:
1. Press (MENU)
m
1 (“FUNCTION”) 3 (“DATA DELETION”).
2. Press 2 (“SCHEDULE”).
3. Press 2 (“ANN 1”) or 3 (“ANN 2”).
4. Press Y.
Note: When the SECRET function is turned on, “SECRET ON
MODE” will appear on the display. The SECRET
function must be turned off before data can be deleted.
(Refer to “USING THE SECRET FUNCTION” on pg. 21.)
:::::,I
:,:,
.:.:.::::::.:::.>:
..
::::,:,:,:
.
...: ......................... .:
... .
......
.............................
..............................
.
....
:
:::::.:.::,
...........
.
..::.:.:.:
...
ill:ll,.,l:,.g:L::;
::;yx;.:-
,:.:,
..:.
.
...
................
.......
.
.
:::::::.:::...~:j:.:.:.::......::::.::.:.
......
,,.)\:j:jjj::~,::::‘.‘:‘::::.:.:.:
:‘:::‘:‘::::.:.:.‘i’:‘~.~~‘,‘~,~:.::~~~~:
..............................................
..~.~.~.~.~.............::.:.:
.::.
‘,.:.’
...
.
..
:’
........
..
.
.
..
.
::~I::.:::..::.
..................
....................
.................................
:.:.:,,::,,j:j:j
j::
.)
::
..
,::.:
:
..
.....
.:..::::....::
:,
.
.
‘:
,,::,:+
..
........
.:‘,
.::,:j
:
j
:
:,:
:
.......
................................
XI,;
...
.::.::
:.......:..~:~.::::::
.:.:.: .....
..
.
.
..j.j.~.j..:~.~~.:.:.:.:.:.:.:.:.~..:
.
:::.::.:.:.:...............
.:~:..:::::.:.::::‘:
...
:.,:,I
:,,,
j::>:~:....:.j.l:
..:.;:
.:
:
Designating the file names
The directory file names (TEL
1,
TEL 2, and TEL 3) can be
changed from the Function menu.
1.
2.
3.
4.
5.
6.
Press
(MENUJ
r;?
1 (“FUNCTION”).
Press
a
1 (“TEL FILE
NAME”).
At the cursor press
m.
Enter any directory file
name that you like (up to 10
4r
characters).
Press (ENTER].
Continue until all file names have been entered.
Note: If you do not wish to change a file name, skip that file
by pressing (ENTER].
Entering listings
Pressing
(TELJ
for the first time displays directory TEL
1.
Press
(TEL) repeatedly to cycle through the three directories.

Input the name of your contact
then press (ENTER].
.
Input the telephone number; --
press
m
to enter fax number
on the next line then press
[ENTER].
/
Jones Jack
708-759-9555
709-759-9201
,
Illinois
Input the address then press
(ENTEP).
Recalling listings
4.
Press
(ENTERJ
to see the details.
Recalling by sequential search
Each time
a
is pressed, entry is recalled in alphabetical
order. When
a
is pressed, entry is recalled in reverse order.
Editing listings
Recalling by direct search
Press
(CCEI,
then enter the first letter(s) of the listing and press
[VI.
Use
(vl
and
a
to recall other entries sequentially.
1.
Press
@
1
(“EDIT”).
2.
Edit the listing.
3.
Press (ENTER] to store the new listing.
Deleting listings
Recalling by keyword search
Any part of an entry can be a keyword: name, company, etc.
Enter the keyword and press (2nd)
(7)
or
(2ndl
m.
Subsequent listings containing the same word(s)/character(s)
can be recalled in order each time you press
(2ndJ
(71
or
(2ndJ
W.
Deleting single listings
To delete an individual entry, recall it or select it in the index
display with the pointer, and then press (DEL) and Y.
Deleting entire directories
1.
Press
@$
a
1 (“FUNCTION”).
2.
Press
3 (“DATA DELETION”)
1
(“TEL”).
3.
Press
1 (“TEL
1”)
2 (‘TEL 2”) or 3 (“TEL
3”).
Recalling by using the index display
1
I
1.
2.
3.
Press
(TEL].
Press
(MENU]
2 (“INDEX”).
Move the pointer
“
b
”
using
[rlorm.
-
Use
[v)
or (Al to move to the
next or previous page of the
four entries.
FFelipe
Silva
Jones Jack
Robert Martin
Roger Williams
14

4. Press Y
Note: When the SECRET function is turned on, “SECRET ON
MODE” will appear on the display. The SECRET
function must be turned off before data can be deleted.
(Refer to “USING THE SECRET FUNCTION” on pg. 21.)
1:
:::,,
;,,,y&.:.:.,:
............................... .
:.::::
...............
:.::::::............:
.................
:::::::::,:
:..:.:.:.:.::.::::::.:.::~.:~:;:.~:::.’..:. :\
:::_.::::.,:>:
,::
.::.:
......
..................
:. .:
.....................
.....
.......
,,:
,.:.:.:,,,
...:
....
.:::.:
.......
.
..
,:,
.....
......
::,
,,
,,
:
.
.
........
::,,,,:::,:
.:
.::::::::::::i:i’i.i.:i’:‘ijii’ii;:.j::.:::
...................
:
:
...
.
y
...
,::,:,:,
,:,
..
isil;,;ii:‘r’i”i’:‘:;a:i:~S~N,IG:;:7~
E:.‘::‘M
enrio::.iir::i:::::~,:‘::~:
............. ::::::.::,.:.:.
....
::::;:
:,:
...
iiiii:i:i’i’ii’ilii’ii.i’lii’.::.l::.~~:.:::~~.:..:~...:.:.........:
..................
:j:.j::::
:.
..
.............
.........................
,,:
.....
:
.......
..
:::::::j:j.j.j
j,
:.:,:
;;:,,::
:,:,,
:::::.:::::::::::::..:...:::.:::.:::::
...
.................
::::::::::::,:,‘,:,.,:~,:,::,:,:,:::,:.:::.::::i~,~,~,:,~,::j:,_:‘:i’i’i
jj
.:I
::
FRNE’l”[aN:”
::::l::l~,i;~.;i:iii:,::::‘::i-~~~
:i:i:::i:i:i::::.::::.:.~~::::‘::.::::.:.......::..:.......~IIII:
I
.~;,~
:.::..
:
:t):
,.:.:.:
:.:::::::,:,:i:i.~:i~i
j
j
j
j
j:
:.;.;:.
>
,,,,
....................
,,,,::
........
.
.:
..
,:,
....
......
..............................................
.
.
.
.
.
.
.
.........
:.:
.....
:..:.
.....
.
.
.
..
.
.
.
.
.
.
.
.::
...
:
:.;:
”
,-:.:‘.Y
............
........
..........
,,
..:.. : :
..
......
:j:j’::::::l:l:::l(~.~.~.~.~.‘.:.:.
:.:.
..
::.
,,.,:.::,
.............
........
...
...................
:,.:.
...
..... .:.:. ....
..............
>
....
..:.:.:.:.:::
:...i::~:.;::::::::
..:
:,,,
,.:.,:
....
.
~:,~,:,:,~,j,:,::::j,)i~~,~~‘::,:~::::,.::i
,.:::
.::.:.::.:.:.:
:
,:::::
.:..:.
..
‘::
.::
........
,:
..............
......................................................
::
:,
,.,.,:,
..........
:,...:....:....:.
j
,,,1111,
.::.:.:.:.:
...
:
....
:,:,,
:.
........
,,,j
.
...!.
......
.:
:
.....
,:,
..
.
,.I,.‘,,,:.,::.I
Entering memos
1.
Press=.
2. Enter the memo. Press
(JI
after each line.
3. Press (ENTER] to store the memo.
Recalling memos
Recalling memos by sequential search
Each time
m
is pressed, data is recalled in the order of entry
When
[/\1
is pressed, data is searched in reverse order.
Recalling by direct search
Enter the first letter(s) of the memo and press
r;;l
and
a
to
search.
To continue the search, press
r;;7
or
a
repeatedly.
Recalling by keyword search
Any part of an entry can be a keyword: name, company, etc.
Enter the keyword and press
(2ndl
(T]
or
(2ndJ
(Xl.

Subsequent memos containing the same word(s) can be
recalled in order each time you press @$
57)
or (2nd)
[x).
Recalling by using the index display
1. Press-.
2. Press
m
2 (“INDEX”).
3. Move the pointer
“
b
”
using
m
or
(rl.
Use
r;71
or
0
to
move to the next or previous page of the four entries.
4. Press
(ENTERJ
to see the details.
Editing memos
1. Press (MENU] 1 (“EDIT”).
2. Edit the memo.
3. Press
(ENTER]
to store the new memo.
Deleting memos
Deleting single memos
Recall the memo you wish to delete or select it in the index
display, and press (DEL). Then, press
Y.
Deleting entire memos
1. Press
(MENVJ
rv_l
1 (“FUNCTION”).
2. Press 3 (“DATA DELETION”).
3. Press 3 (“MEMO”).
16
4. Press
Y.
Note: When the SECRET function is turned on, “SECRET ON
MODE” will appear on the display. The SECRET
function must be turned off before data can be deleted.
(Refer to “USING THE SECRET FUNCTION” on pg. 21.)
Rearranging the order of memos
Press
m
2 (“INDEX”).
Move the pointer”.” using
Ir]
or
a
to the entry you
want to move and press (INS].
The entry will be highlighted.
Move the highlighted entry to
the position where it is to be
inserted using
[rl
or
[rl.
Press
(ENTER]
to store tha new order.

Entering expense records
1.
2.
3.
4.
5.
Press
(EXPENSEJ
.
Input the expense date then
press
IENTERJ.
.
Input the expense amount
using up to 10 digits including
up to two decimal places then
press (ENTER].
Y
*
EXPENSE
*
$5
DATE ?
MID/Y=03/13/1996
WED MAR 13.1996
123
Select the method of payment.
\r
Press
m
to see other items.
/I::i:::::::“’
Input the description and press
JENTER).
Recalling expense records
Recalling by sequential search
Each time
[VI
is pressed, data is recalled in the order of entry.
When
W
is pressed, data is searched in reverse order.
Recalling by using the index display
1.
2.
3.
4.
5.
Press
(EXPENSE).
2,,
z”
i”i:ij
Move the pointer
“
t
”
using
ir]
or
Ir].
Use
a
or
a
to move to the next or previous
page.
Press
m
to see the details.
Editing expense records
1. Press
(MENUJ
1 (“EDIT”).
A
2. Move to the field you wish to
edit.
3. Edit the entry.
4. Press (ENTER].
17
This manual suits for next models
1
Table of contents
Other Sharp Organizer manuals

Sharp
Sharp Wizard OZ-750PC User manual

Sharp
Sharp ZQ-5450 User manual

Sharp
Sharp ZQ-290HS User manual

Sharp
Sharp EL-6990 User manual

Sharp
Sharp ZQ-570 User manual

Sharp
Sharp EL-6990 Quick start guide

Sharp
Sharp YO-180 User manual

Sharp
Sharp EL-6920 User manual

Sharp
Sharp YOP20HII - 1MB Electronic Organizer User manual

Sharp
Sharp EL-6910 User manual