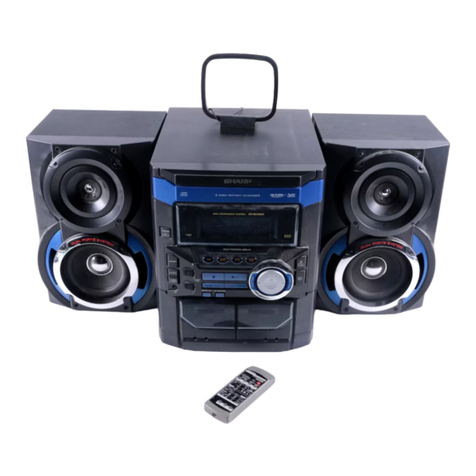
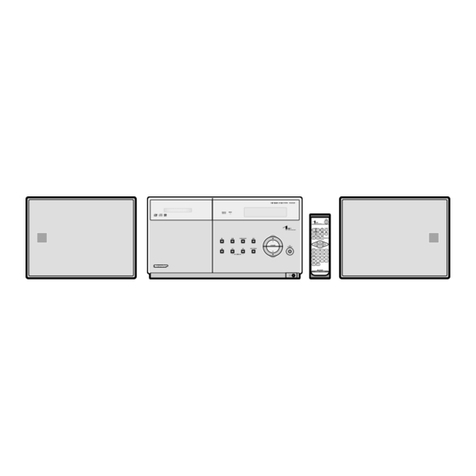
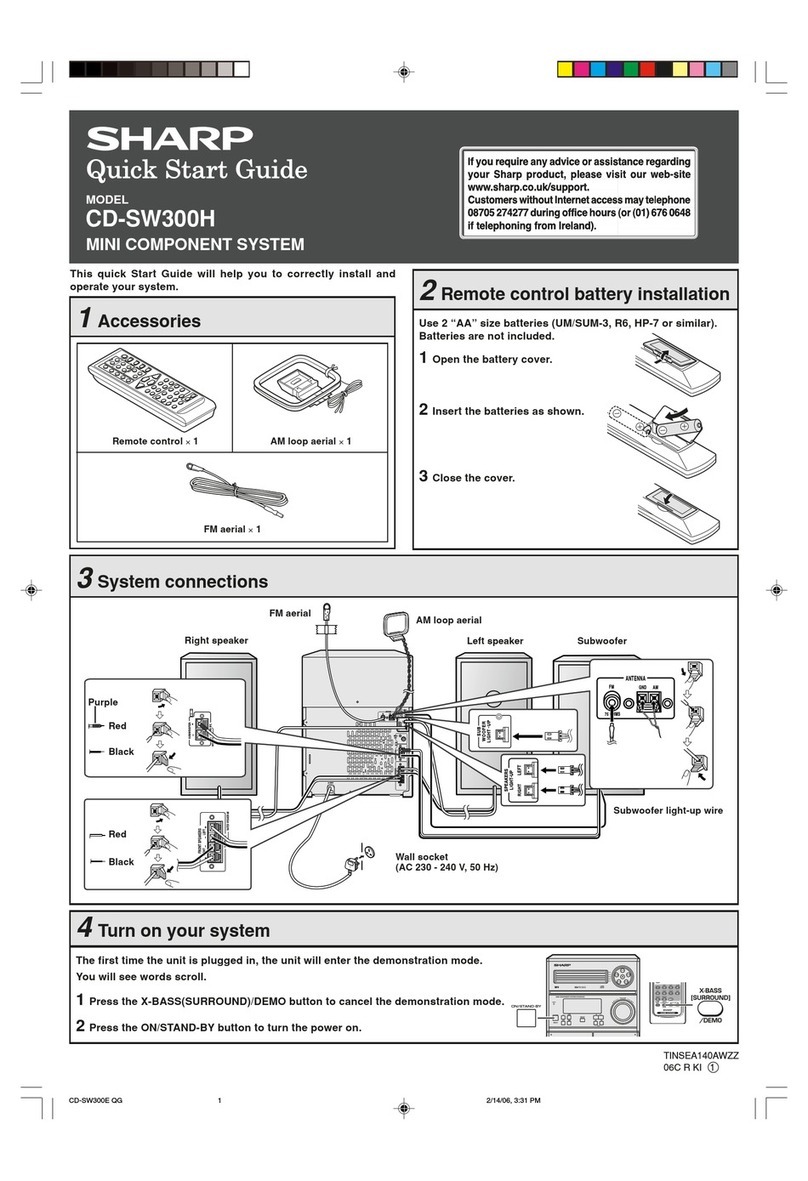
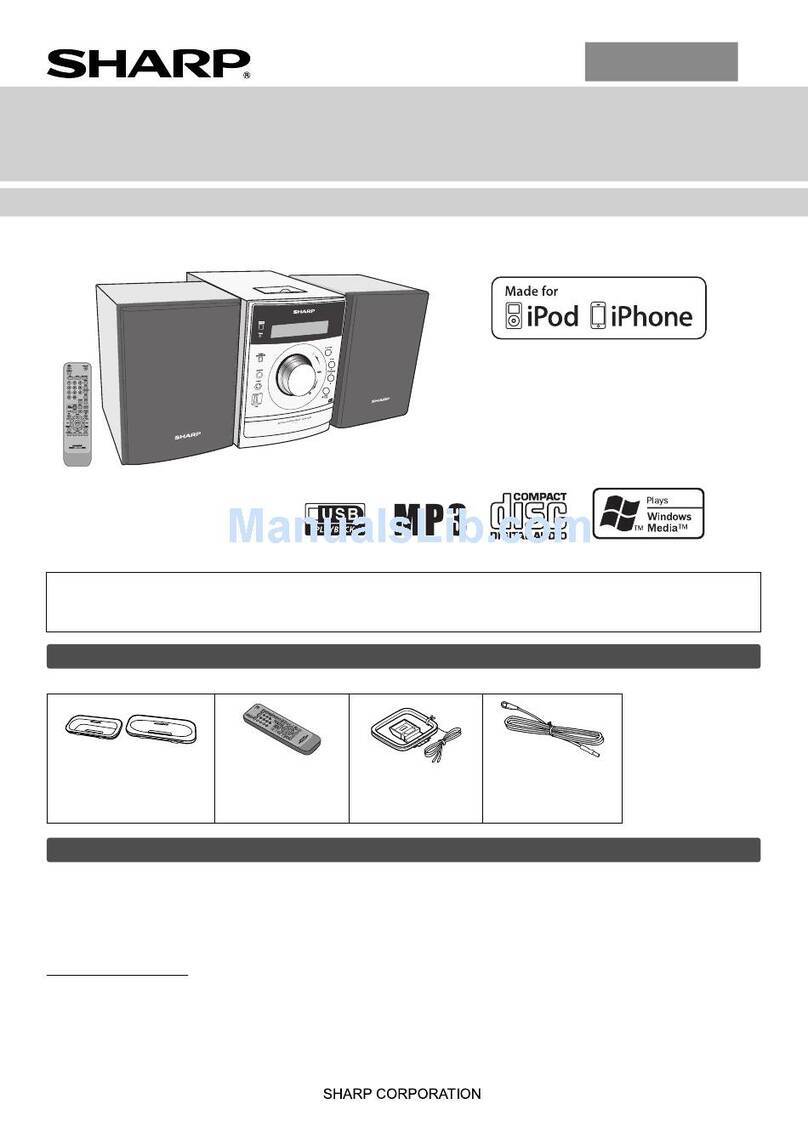
Sharp CD-BA3100 User manual

– 1 –
CD-BA3100
No. S2111CDBA3100
CONTENTS
Page
IMPORTANT SERVICE NOTES (FOR U.S.A. ONLY)....................................................................................................... 2
SPECIFICATIONS ............................................................................................................................................................. 2
NAMES OF PARTS ........................................................................................................................................................... 3
OPERATION MANUAL ...................................................................................................................................................... 5
DISASSEMBLY.................................................................................................................................................................. 9
REMOVING AND REINSTALLING THE MAIN PARTS................................................................................................... 12
ADJUSTMENT ................................................................................................................................................................. 13
CD CHANGER MECHANISM MAIN BASE PARTS ASSEMBLING/ADJUSTING PROCEDURE................................... 16
BLOCK DIAGRAM ........................................................................................................................................................... 23
SCHEMATIC DIAGRAM / WIRING SIDE OF P.W.BOARD............................................................................................. 26
VOLTAGE ........................................................................................................................................................................ 45
NOTES ON SCHEMATIC DIAGRAM .............................................................................................................................. 46
TYPES OF TRANSISTOR AND LED............................................................................................................................... 46
WAVEFORMS OF CD CIRCUIT...................................................................................................................................... 47
TROUBLESHOOTING ..................................................................................................................................................... 48
FUNCTION TABLE OF IC................................................................................................................................................ 52
FL DISPLAY..................................................................................................................................................................... 58
REPLACEMENT PARTS LIST/EXPLODED VIEW
PACKING OF THE SET (FOR U.S.A. ONLY)
• In the interests of user-safety the set should be restored to its
original condition and only parts identical to those specified be
used.
SERVICE MANUAL
This document has been published to be used
for after sales service only.
The contents are subject to change without notice.
SHARP CORPORATION
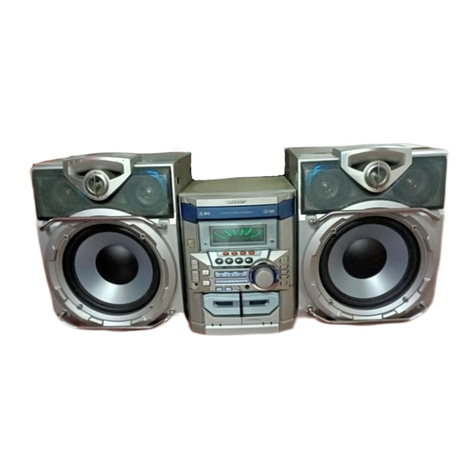
MINI COMPONENT SYSTEM
MODEL CD-BA3100
CD-BA3100 Mini Component System consisting of
CD-BA3100 (main unit) and CP-BA3100 (speaker system).

CD-BA3100
– 2 –
FOR A COMPLETE DESCRIPTION OF THE OPERATION OF THIS UNIT, PLEASE REFER
TO THE OPERATION MANUAL.
Specifications for this model are subject to change without
prior notice.
SPECIFICATIONS
CD-BA3100
IMPORTANT SERVICE NOTES (FOR U.S.A. ONLY)
BEFORE RETURNING THE AUDIO PRODUCT
(Fire & Shock Hazard)
Before returning the audio product to the user, perform the
following safety checks.
1. Inspect all lead dress to make certain that leads are not
pinchedorthathardwareisnotlodgedbetweenthechassis
and other metal parts in the audio product.
2. Inspect all protective devices such as insulating materials,
cabinet,terminalboard,adjustmentandcompartmentcovers
or shields, mechanical insulators etc.
3. To be sure that no shock hazard exists, check for leakage
current in the following manner.
* Plug the AC line cord directly into a 120 volt AC outlet.
* Using two clip leads, connect a 1.5k ohm, 10 watt resistor
paralleled by a 0.15µF capacitor in series with all exposed
metal cabinet parts and a known earth ground, such as
conduit or electrical ground connected to earth ground.
* Use a VTVM or VOM with 1000 ohm per volt, or higher,
sensitivity to measure the AC voltage drop across the
resistor (See diagram).
* Connect the resistor connection to all exposed metal parts
havingareturnpathtothechassis(antenna,metalcabinet,
screw heads, knobs and control shafts, escutcheon, etc.)
and measure the AC voltage drop across the resistor.
AllcheckmustberepeatedwiththeAClinecordplugconnection
reversed.
Anyreadingof0.3voltRMS(thiscorrespondsto0.2milliamp.
AC.) or more is excessive and indicates a potential shock
hazard which must be corrected before returning the audio
product to the owner.
TO EXPOSED
METAL PARTS
CONNECT TO
KNOWN EARTH
GROUND
TEST PROBE
0.15 µF
1.5k ohms
10W
VTVM
AC SCALE
■Tuner
Frequency range FM: 87.5-108 MHz
AM: 530-1,720 kHz
■Cassette deck
Frequency response 50-14,000 Hz (Normal tape)
Signal/noise ratio 55 dB (TAPE 1, playback)
50 dB (TAPE 2, recording/playback)
Wow and flutter 0.3 % (WRMS)
Type 3-way type speaker system
2" (5 cm) Tweeter
5-1/4" (13 cm) Woofer
5-1/4" (13 cm) Subwoofer
Maximum input power (Total)
200 W
Rated input power (Total) 100 W
Impedance 6 ohms
Dimensions Width: 11" (280 mm)
Height: 13" (330 mm)
Depth: 10-11/16" (272 mm)
Weight 10.6 lbs. (4.8 kg)/each
■General
Power source AC 120 V, 60 Hz
Power consumption 164 W
Dimensions Width: 10-1/4" (260 mm)
Height: 13-5/16" (338 mm)
Depth: 14-13/16" (375 mm)
Weight 19.0 lbs (8.6 kg)
■Amplifier
Output power 100 watts minimum RMS per channel into 6 ohms from
60 Hz to 20 kHz, 10 % total harmonic distortion
Subwoofer : 60 W/ch
(60 Hz - 200 Hz, 6 ohms, 10 % T.H.D.)
Main : 40 W/ch
(200 Hz - 20 kHz, 6 ohms, 10 % T.H.D.)
Output terminals Speakers: 6 ohms
Headphones: 16-50 ohms (recommended; 32 ohms)
Input terminals Video/Auxiliary (audio signal): 500 mV/47 kohms
■CD player
Type 6-disc multi-play compact disc player
Signal readout Non-contact, 3-beam semiconductor laser pickup
D/A converter
1-bit D/A converter
Frequency response 20 - 20,000 Hz
Dynamic range 90 dB (1 kHz)
CP-BA3100

– 3 –
CD-BA3100
NAMES OF PARTS
CD-BA3100
■ Front panel
1.
Disc Trays
2.
Timer Set Indicator
3.
CD Direct Play Buttons
4.
CD Eject Buttons
5.
Memory/Set Button
6.
Equalizer Mode Select Button
7.
Volume Control
8.
Extra Bass/Demo Mode Button
9.
Tape 2 Record Pause Button
10.
Tape 2 Cassette Compartment
11.
Tape 1 Cassette Compartment
12.
CD Track Down or Fast Reverse, Tape 2
Rewind, Tuner Preset Down Button
13.
CD Track Up or Fast Forward, Tape 2
Fast Forward, Tuner Preset Up Button
14.
CD Button
15.
Tuner (Band) Button
16.
Tape (1 2) Button
17.
Video/Auxiliary Button
18.
Power On/Stand-by Button
19.
Dimmer Button
20.
Headphone Jack
21.
CD or Tape Stop Button (with Indicator)
22.
CD Play or Repeat,
Tape Play Button (with Indicator)
23.
Clock Button
24.
Timer/Sleep Button
25.
Tuning and Time Down Button
26.
Tuning and Time Up Button
21
22
12
26252423
13 14 15 16 17
18
19
20
1
2
34
5
6
7
8
9
10
11
■Display
01.
CD Music Schedule Indicators
02.
CD Play Indicator
03.
CD Pause Indicator
04.
Tape Play Indicator
05.
CD Repeat Indicator
06.
CD Indicators
07.
FM Stereo Mode Indicator
08.
FM Stereo Receiving Indicator
09.
Memory Indicator
10.
CD Random Play Indicator
11.
Tape 2 Record Indicator
12.
Extra Bass Indicator
13.
Timer Recording Indicator
14.
Timer Play Indicator
15.
Sleep Indicator
16.
Spectrum Analyzer/Volume Level Indicator
9
10
12
13
14
15
16
11
1234 5 6 7 8

CD-BA3100
– 4 –
■Remote control
01.
Remote Control Transmitter
02.
CD Direct Play Buttons
03.
CD Pause Button
04.
CD Memory Button
05.
CD Track Down or Fast Reverse Button
06.
CD Clear Button
07.
Tape 1 Play Button
08.
Tape 1/Tape 2 Stop Button
09.
Equalizer Mode Select Button
10.
Tape 2 Record Pause Button
11.
CD Button
12.
Tuner (Band) Button
13.
Power On/Stand-by Button
14.
Extra Bass Button
15.
CD Stop Button
16.
CD Play or Repeat Button
17.
CD Track Up or Fast Forward Button
18.
CD Random Button
19.
Tuner Preset Up/Down Buttons
20.
Tape 2 Play Button
21.
Tape 2 Rewind Button
22.
Tape 2 Fast Forward Button
23.
Video/Auxiliary Button
24.
Tape (1 2) Button
25.
Volume Up or Down Buttons
1
215
16
17
18
19
20
21
24
3
6
4
7
8
9
10
14
13
12
11
5
25
22
23
✱
✱
✱
Buttons with “✱” mark in the illustration can be operated on the remote control
only.
Other buttons can be operated both on the main unit and the remote control.
■Rear panel
1.
FM/AM Loop Antenna Jack
2.
Video/Auxiliary (Audio Signal) Input Jacks
3.
Speaker Terminals
4.
AC Power Cord
1
3
2
4
CD-BA3100

– 5 –
CD-BA3100
OPERATION MANUAL
To confirm the time display:
Press the CLOCK button.
The time display will appear for about 5 seconds.
Note:
The “CLOCK” or time will flash at the push of the CLOCK button when the AC power
supply is restored after a power failure or unplugging the unit.
Readjust the clock as follows.
To readjust the clock:
Perform “Setting the Clock” from the beginning.
If the time display is flashing, step 3 (for selecting the 12-hour or 24-hour display) will
be skipped.
To change the 12-hour or 24-hour display:
1. Clear all the programmed contents.
[Refer to step 3 under “If trouble occurs” on page 30 for details.]
2. Perform “Setting the Clock” from the beginning.
Setting the Clock
In this example, the clock is set for the 12-hour (AM 12:00) display.
1
Press the ON/STAND-BY button to turn the power on.
2
Press the CLOCK button and within 5 seconds, press the
MEMORY/SET button.
3
Press the TUNING/TIME ( or ) button to select the 12-hour or
24-hour display and then press the MEMORY/SET button.
4
Press the TUNING/TIME ( or ) button to adjust the hour and
then press the MEMORY/SET button.
●
Press the
TUNING/TIME ( or )
button once to advance the time by 1
hour. Hold it down to advance continuously.
●
When the 12-hour display is selected, “AM” will change automatically to “PM”.
5
Press the TUNING/TIME ( or ) button to adjust the minutes
and then press the MEMORY/SET button.
●
Press the
TUNING/TIME ( or )
button once to advance the time by 1
minute. Hold it down to change the time in 5-minute intervals.
●
The hour will not advance even if minutes advance from “59” to “00”.
●The clock begins counting from “0” seconds. (Seconds are not displayed.)
The time display will disappear after a few seconds.
“AM 12:00”→The12-hourdisplaywillappear. (AM12:00 -PM 11:59)
“AM 0:00” →The12-hourdisplay willappear.(AM 0:00 -PM 11:59)
“0:00” →The 24-hour display will appear. (0:00 - 23:59)
Note that this can only be set when the unit is first installed or it has been reset.
(
Refer to step 3 under “If trouble occurs”.
)
CP-BA3100
1.
Subwoofer
2.
Bass Reflex Duct
3.
Tweeter
4.
Woofer
5.
Speaker Wire for SUBWOOFER
Terminals
6.
Speaker Wire for MAIN Terminals
3
4
2
1
3
4
1
2
5
6
5
6
Left speaker
Right speaker

CD-BA3100
– 6 –
Troubleshooting Chart
Many potential “problems” can be resolved by the owner without calling a service tech-
nician. If something is wrong with this product, check the following before calling your
authorized SHARP dealer or service center.
■
Cassette deck
Symptom
●Cannot record.
●Cannot record tracks with proper
sound quality.
●Cannot erase completely.
●Sound skipping.
●Cannot hear treble.
●Sound fluctuation.
●Cannot remove the tape.
Possible cause
●Is the erase-protection tab removed?
●Is it a normal tape?
●(You cannot record on a metal or CrO
2
tape.)
●Is there any slack?
●Is the tape stretched?
●Arethecapstans,pinchrollers, orheads
dirty?
●Ifa powerfailure occursduring playback,
theheads remainengaged withthe tape.
Do not open the compartment forcibly.
Wait until electricity resumes.
■
Tuner
Symptom
●Radio makes unusual noise con-
secutively.
Possible cause
●Is the unit placed near the TV or com-
puter?
●IstheFM/AM loopantenna placedprop-
erly?
Move the AC power cord away from the
antenna if located near.
■
General
Symptom
●The clock is not on time.
●
Whenabutton ispressed, theunit
does not respond.
●No sound is heard.
■
CD player
Symptom
●Playback does not start.
●Playback stops in the middle or is
not performed properly.
●Playback sounds are skipped, or
stopped in the middle of a track.
Possible cause
●Is the disc loaded upside-down?
●Does the disc satisfy the standards?
●Is the disc distorted or scratched?
●Is the unit located near excessive vibra-
tions?
●Is the disc very dirty?
●Has condensation formed inside the
unit?
■
Remote control
Symptom
●The remote control does not op-
erate.
Possible cause
●Is the AC power cord of the unit plugged
in?
●Is the battery polarity respected?
●Are the batteries dead?
●Is the distance or angle incorrect?
●Does the remote control sensor receive
strong light?
■Condensation
Sudden temperature changes, storage or operation
in an extremely humid environment may cause con-
densation inside the cabinet (CD pickup, tape heads,
etc.) or on the transmitter on the remote control.
Condensation can cause the unit to malfunction.
If this happens, leave the power on with no disc (or
cassette) in the unit until normal playback is possible
(about1hour).Wipeoff anycondensationonthetrans-
mitter with a soft cloth before operating the unit.
Possible cause
●Did a power failure occur?
●Reset the clock.
●Setthisunit tothe powerstand-by mode
and then turn it back on.
●If the unit still malfunctions, reset it.
(Refertostep 3under “Iftroubleoccurs”.)
●Is the volume level set to “0”?
●Are the headphones connected?
●Are the speaker wires disconnected?
■
If trouble occurs
When this product is subjected to strong external interference (mechanical shock, ex-
cessive static electricity, abnormal supply voltage due to lightning, etc.) or if it is oper-
ated incorrectly, it may malfunction.
If such a problem occurs, do the following:
1
. Set the unit to the stand-by mode and turn the power on again.
2
. If the unit is not restored in step 1, unplug and plug in the unit, and then turn
the power on.
3
. If neither step 1 nor 2 restores the unit, do the following:
➀ Press the ON/STAND-BY button to enter the power stand-by mode.
➁ While pressing down the MEMORY/SET button and X-BASS/DEMO button,
press the ON/STAND-BY button until “CLEAR AL” appears.
Troubleshooting Chart
Caution:
This operation will erase all data stored in memory including clock, timer settings,
tuner preset, and CD program.
■Test of the remote control
Face the remote control directly to the remote sensor on the unit.
The remote control can be used within the range shown below:
Press the ON/STAND-BY button. Does the power turn on? Now, you can enjoy the
music.
Remote Control
8" - 20'
(0.2 m - 6 m)
Remote sensor

– 7 –
CD-BA3100
Accessories
Accesorios
FM/AM loop antenna × 1
Antena de cuadro de FM/AM
×
1
Remote control × 1
Controlador remoto
×
1
1
1
123
Battery Installation of the Remote Control
Instalación de las pilas del controlador remoto
Use 2 “AA” size batteries (UM/SUM-3, R6, HP-7 or similar). Batteries are not included.
Use dos pilas del tamaño “AA” (UM/SUM-3, R6, HP-7 o equivalentes). Las pilas no están incluidas.
Remove the
Insert the batteries
Replace the cover
.
battery cover.
as shown.
Extraiga la cubierta Inserte las pilas Vuelva a colocar la
de las pilas. como se muestra. cubierta.
1
2
System Connections
Conexiones del sistema
3
3
FM antenna
Antena de FM
Blue
Azul
Red
Rojo
Black
Negro
Right speaker
Altavoz derecho
Left speaker
Altavoz izquierdo
AC outlet
(AC 120 V, 60 Hz)
A un tomacorriente de
CA (120 V de CA, 60 Hz)
Right speaker
Altavoz derecho
Left speaker
Altavoz izquierdo
RCA cord
(not supplied)
Cable RCA
(no suministrado)
To the line
output jack
A la toma de
salida de línea
VCR
Videograbadora
TV
TV
AM loop antenna
Antena de cuadro
deAM

CD-BA3100
– 8 –
Turning on Your System
Conexión de la alimentación de su sistema
4
4
The first time the unit is plugged,
the unit will enter the demonstra-
tion mode. You will see words
scroll.
Cuando se enchufe por primera vez
el aparato, se establecerá en el
modo de demostración. Verá un
desplazamiento de palabras.
12
Press the
X-BASS/DEMO
button to cancel
the demonstration
mode.
Pulse el botón
X-BASS/DEMO para
cancelar el modo de
demostración.
Press the ON/
STAND-BY button to
turn the power on.
Pulse el botón ON/
STAND-BY
para
conectar la
alimentación.
Listening to a CD (CDs)
Audición de un disco CD (discos CD)
1
Press the CD button.
Pulse el botón CD.
2
Press the 1 button to open the disc
tray 1.
Pulse el botón 1 para abrir la bandeja
del disco 1.
3
Place a CD on the disc tray 1, label side
up.
Coloque un disco compacto en la bandeja
deldisco1, conellado dela etiqueta arriba.
4
Press the 1 button to close the disc
tray 1.
Pulseelbotón 1 para cerrarlabandeja
del disco 1.
5
You can place discs on the trays 2 - 6 by
following steps 2 - 4.
Podrá colocar discos en las bandejas 2 - 6
según los pasos 2 - 4.
6
Press the button to start playback.
Pulse el botón para iniciar la
reproducción.
5” (12 cm)
12 cm
3” (8 cm)
8 cm
Listening to a Cassette Tape (TAPE 1 or TAPE 2)
Audición de una cinta de cassette (TAPE 1 o TAPE 2)
Listening to the Radio
Audición de la radio
TAPE 1 TAPE 2
FM stereo mode indicator
Indicador del modo de FM
en estéreo
FM stereo receiving indicator
Indicador de recepción de FM
en estéreo
1
Open the cassette door by pushing the
area marked “ PUSH EJECT”.
Abra la puerta del cassette pulsando la
parte marcada “ PUSH EJECT”.
2
Load a cassette into the TAPE 1 or TAPE
2 cassette compartment with the side to
be played facing toward you.
Cargue un cassette en el compartimiento
de cassette de TAPE 1 o de TAPE 2 con la
cara a reproducirse encarada hacia usted.
3
Press the TAPE (1 2) button to select
the cassette you want to listen to.
Pulse el botón TAPE (1 2) para
seleccìonar el cassette que desee
escuchar.
4
Press the button to start playback.
Pulse el botón para iniciar la
reproducción.
1
Press the TUNER (BAND) button repeat-
edly to select the desired frequency
band (FM or AM).
Pulse repetidamente el botón TUNER
(BAND) para seleccionar la banda de
frecuencia deseada (FM o AM).
2
Press the TUNING/TIME ( or ) but-
ton to tune in to the desired station.
When the TUNING/TIME button is
pressedfor morethan 0.5seconds, scan-
ningwill startautomatically andthe tuner
will stop at the first receivable broadcast
station.
Pulseelbotón TUNING/TIME( o ) para
sintonizar la emisora deseada.
Cuando se pulse el botón
TUNING/TIME
durante más de 0,5 segundos, la
exploración se iniciará automáticamente y
el sintonizador se parará en la primera
emisora difusora que pueda recibirse.
To receive an FM stereo transmission:
Press the TUNER (BAND) button to display the
“ST” indicator.
●“ ” will appear when an FM broadcast is in ste-
reo.
Para recibir una transmisión de FM en estéreo:
Pulse el botón TUNER (BAND) para que se encienda
el indicador “ST”.
●
“ ” aparecerá cuando una difusión de FM sea en
estéreo.

– 9 –
CD-BA3100
1 Top Cabinet 1. Screw ..................... (A1) x5 9-1
2 Side Panel 1. Screw ..................... (B1) x8 9-1
(Left/Right) 2. Screw ..................... (B2) x2
3. Hook....................... (B3) x2
3 Rear Panel with 1. Screw ..................... (C1) x2 9-2
Fan Motor 2. Screw ..................... (C2) x5
3. Screw ..................... (C3) x2
4. Socket .................... (C4) x1
4 CD Changer Unit 1. Socket .................... (D1) x2 9-2
2. Hook....................... (D2) x2
5 Main PWB 1. Screw ..................... (E1) x1 9-2
2. Socket .................... (E2) x3 9-3
3. Flat Cable .............. (E3) x1
6 Power Amp. PWB 1. Screw ..................... (F1) x6 10-1
2. Socket .................... (F2) x3
9-3,10-1
3. Flat Wire................. (F3) x1 10-1
4. PWB Holder ........... (F4) x2
7 Front Panel 1. Screw ..................... (G1) x2 10-1
2. Hook....................... (G2) x2
8 Eject Switch PWB 1. Screw ..................... (H1) x2 10-2
2. Socket..................... (H2) x1
9 Play Switch PWB 1. Screw ..................... (J1) x2 10-2
2. Socket .................... (J2) x1
10 Display PWB 1. Knob....................... (K1) x1 10-2
2. Screw ..................... (K2) x9
3. Flat Cable .............. (K3) x1
11
Headphones PWB
1. Screw ..................... (L1) x1 10-2
12 Tape Mechanism 1. Open the cassette holder. 10-2
2. Screw ..................... (M1) x6
DISASSEMBLY
Caution on Disassembly
Follow the below-mentioned notes when disassembling
the unit and reassembling it, to keep it safe and ensure
excellent performance:
1. Take cassette tape and compact disc out of the unit.
2. Be sure to remove the power supply plug from the wall
outlet before starting to disassemble the unit.
3.Takeoffnylon bands or wire holders wheretheyneedto
beremovedwhendisassemblingtheunit.Afterservicing
theunit,besure to rearrange the leads where they were
before disassembling.
4. Take sufficient care on static electricity of integrated
circuits and other circuits when servicing.
Figure 9-2
Figure9-3
STEP REMOVAL PROCEDURE FIGURE
Figure 9-1
CD-BA3100
CD-BA3100
(B1)x4
ø3x10mm (B1)x2
ø3x12mm
Rear
Panel
(B1)x2
ø3x12mm
(B3)x2
Side Panel
(Right)
Side Panel
(Left)
(A1)x2
ø3x16mm
(A1)x2
ø3x16mm
(B2)x1
ø3x12mm
Top Cabinet
(B2)x1
ø3x12mm
(A1)x1
ø3x10mm
Main PWB
Main PWB
Power Amp.
PWB
Power B PWB
(E3)x1
Power A PWB
(F2)x1
(F2)x1
(E2)x1
(E2)x2
(D1)x1 CD Servo
PWB
Pull
(D2) x1
(D2)x1
CD Changer
Unit
(D1)x1
CD Servo
PWB
(E1)x1
ø3x10mm
Lug Wire
(C3)x2
ø3x10mm
Main PWB
(C2)x5
ø3x10mm
Power Amp.
PWB
(C4)x1
(C1)x2
ø3x12mm
Rear
Panel

CD-BA3100
– 10 –
Figure 10-1
Figure 10-2
Figure 10-3
1 Top Cabinet 1. Screw ................. (A1) x4 9-1
2 Side Panel 1. Screw ................. (B1) x8 9-1
(Left/Right) 2. Screw ................. (B2) x2
3. Hook ................... (B3) x2
3 Rear Panel with 1. Screw ................. (C1) x2 9-2
Fan Motor 2. Screw ................. (C2) x5
3. Screw ................. (C3) x2
4. Socket ................ (C4) x1
4 CD Changer Unit 1. Socket ................ (D1) x2 9-2
2. Hook ................... (D2) x2
5 CD Servo PWB 1. Screw ................. (N1) x4 10-3
(Note) 2. Screw ................. (N2) x4
3. Socket ................ (N3) x4
4. Flat Wire............. (N4) x2
6 CD Mechanism 1. Screw ................. (P1) x4 10-3
STEP REMOVAL PROCEDURE FIGURE
CD-BA3100 (CD CHANGER MECHANISM UNIT)
Note:
After removing the connector for the optical pickup from the
connector, wrap the conductive aluminium foil around the
front end of connector remove to protect the optical pickup
from electrostatic damage.
Power Amp.
PWB
(F1)x2
ø3x8mm
(F1)x2
ø3x10mm
(F2)x1
(F2)x1
(F4)x1
(F1)x2
ø3x10mm (G1)x2
ø3x8mm
Push (F4)x1
Push
Pull
(G2) x1
Pull
(G2) x1
Headphones
PWB
(F3)x1
(K3)x1 (K1)x1
Display PWB
Play Switch
PWB
Open
Cassette
Holder
(H2)x1
(J2)x1
(M1)x6
ø3x10mm
Headphones
PWB
(L1)x1
ø3x10mm Tape
Mechanism
(H1)x2
ø3x10mm
(J1)x2
ø3x10mm
(K2)x9
ø3x10mm
Eject Switch
PWB
(N2)x4
ø3x10mm
(N1)x4
ø3x14mm
(N4)x1
(N3)x1
(N3)x1
(N4)x1
(N3)x2
(P1)x4
ø2.6x10mm
CD Servo PWB
CD Changer
Mechanism
CD Changer
Bracket
CD Mechanism

– 11 –
CD-BA3100
CP-BA3100
1 Side Panel/ 1. Screw ..................... (A1) x4 11-1
Front Panel 2. Net.......................... (A2) x1
3. Catching Holder ..... (A3) x4
4. Screw ..................... (A4) x4
2 Subwoofer 1. Screw ..................... (B1) x4 11-2
3 Woofer 1. Screw ..................... (C1) x4 11-2
4 Tweeter 1. Screw ..................... (D1) x2 11-2
STEP REMOVAL PROCEDURE FIGURE
Figure 11-1
(A1)x4
ø4x20mm
(A4)x2
ø4x20mm
(A3)x2
(A3)x2
(A2)x1
(A4)x2
ø4x20mm
(C1)x4
ø4x16mm
(B1)x4
ø4x16mm
(D1)x2
ø3x10mm
Tweeter
Woofer
Sub Woofer
Figure 11-2

CD-BA3100
– 12 –
REMOVING AND REINSTALLING THE MAIN PARTS
TAPE MECHANISM SECTION
Perform steps 1 to 4 and 7 of the disassembly method to
remove the tape mechanism. (See page 9.)
How to remove the record/playback and erase
heads (TAPE 2) (See Fig. 12-1)
1. When you remove the screws (A1) x 2 pcs., the recording/
playback head and three-dimensional head of the erasing
head can be removed.
How to remove the playback head (TAPE 1)
(See Fig. 12-2)
1. When you remove the screws (B1) x 2 pcs., the playback
head.
How to remove the pinch roller (TAPE 1/2)
(See Fig. 12-3)
1. Carefully bend the pinch roller pawl in the direction of the
arrow <A>, and remove the pinch roller (C1) x 1 pc., in the
direction of the arrow <B>.
Note:
When installing the pinch roller, pay attention to the spring
mounting position.
How to remove the belt (TAPE 2) (See Fig. 12-4)
1. Remove the main belt (D1) x 1 pc., from the motor side.
2. Remove the FF/REW belt (D2) x 1 pc.
How to remove the belt (TAPE 1) (See Fig. 12-4)
1. Remove the main belt (E1) x 1 pc., from the motor side.
2. Remove the FF/REW belt (E2) x 1 pc.
How to remove the motor (See Fig. 12-5)
1. Remove the screws (F1) x 2 pcs., to remove the motor.
Figure 12-1
Figure 12-2
Figure 12-3
Figure 12-4Figure 12-5
(A1)x2
Ø2 x 9mm
TAPE 2
Record/Playback
Head
Erase Head
(B1)x2
Ø2 x 9mm
TAPE 1
Playback
Head
Pinch Roller
(C1)x1 <A>
<B>
Pinch
Roller
Pawl
Pull
TAPE 2 TAPE 1
Main Belt
(E1)x1
TAPE 2
Main Belt
(D1)x1
TAPE 1
Main Belt
(D1)x1
FF/REW
Belt
(D2)x1
FF/REW
Belt
(E2)x1
Motor
Motor
(F1) x2
Ø 2.6 x 5mm
Motor

– 13 –
CD-BA3100
Figure 13-2
Figure 13-1
ADJUSTMENT
MECHANISM SECTION
•Driving Force Check
Torque Meter Specified Value
Play: TW-2111 Tape 1: Over 80 g
Tape 2: Over 80 g
•Torque Check
Torque Meter
Tape 2
Play: TW-2111 30 to 80 g.cm 30 to 80 g.cm
Fast forward: TW-2231 — 70 to 180 g.cm
Rewind: TW-2231 — 70 to 180 g.cm
Specified Value
Tape 1
Specified
Value
Adjusting
Point Instrument
Connection
Test Tape
Normal MTT-111 Variable 3,000 ±30 Hz Speaker
speed Resistor in Terminal
motor. (Load
resistance:
6 ohms)
•Tape Speed
Figure 13-3
TAPE MECHANISM
Tape
Motor
Variable Resistor in motor
(A1) x1
ø2.6 x6mm
CD
Mechanism
Stop Washer
(A3) x1
Gear
(A4) x1
Shaft
(A2) x1
Pickup
(A1) x1
ø2.6 x6mm
Main Cam Motor
Tray Motor
CD Servo
PWB
(1)Front Top Plate
(2)Changer Box,
Left
(2)Changer Box,
Right
(3)Disc Tray,1~6
CD Changer Mechanism
(B1)x4
ø3x10mm
(B2)x4
ø2.6x4mm
CD MECHANISM SECTION
Performsteps1to5ofthedisassemblymethodtoremovethe
CD mechanism. (See page 10.)
Note:
After removing the connector for the optical pickup from the
connector, wrap the conductive aluminium foil around the
front end of connector remove to protect the optical pickup
from electrostatic damage.
How to Remove the pickup (See Fig. 13-1)
1. Remove the screws (A1)x 2 pcs., to remove shaft (A2)x 1
pc.
2.Removestopwasher(A3)x1pc.,toremovegear(A4)x1pc.
3. Remove the pickup.
How to Remove the tray motor/main cam motor
(See Fig. 13-2)
1. Remove the screws (B1)x 4 pcs., to remove the CD Servo
PWB.
2. Remove the (1) front top plate, (2) changer box, left/right
and (3) disc trays 1~6. After that, disassemble as shown in
the figure.
3. Remove the screws (B2)x 4 pcs.
4. Remove the tray motor and main cam motor.
CD CHANGER MECHANISM SECTION
Performsteps1to5ofthedisassemblymethodtoremovethe
CD changer mechanism. (See page 10.)
Note:
The parts of (1), (2) and (3) correspond to the drawing Nos.
117, 102, 103 and 108 to 113 of the CD change mechanism
disassembly drawing.
Remove the screws of 117, 102 and 103, and the parts of (1),
(2)and(3) will be readyforremovaland the screws of thetray
motor and main cam motor will be visible.

CD-BA3100
– 14 –
Test Stage Frequency Frequency
Display Setting/
Adjusting
Parts
Instrument
Connection
CD SECTION
• AM IF/RF
Signal generator: 400 Hz, 30%, AM modulated
*1. Input: Antenna Output: TP302
*2. Input: Antenna Output: TP301
TUNER SECTION
fL: Low-range frequency
fH: High-range frequency
AM IF 450 kHz 1,720 kHz T351 *1
AM Band — 530 kHz (fL): T306 *2
Coverage 1.1 ±0.1 V
AM Tracking 990 kHz 990 kHz (fL): T303 *1
*1. Input: Antenna Output: TP301
*2. Input: Antenna Output: Speaker terminal
•FM RF
Signal generator: 1 kHz, 75 kHz dev., FM modulated
FM Band — 87.50 MHz T301(fL): *1
Coverage 1.3 V ±50 mV
FM RF 98.00 MHz 98.00 MHz L312 *2
(10-30 dB)
Test Stage Instrument
Connection
Frequency Frequency
Display Setting/
Adjusting
Point
Figure 14-1 ADJUSTMENT POINTS
Figure 14-2
CD ERROR CODE DESCRIPTION
Error State Code
[Pickup Mechanism Error]
ER-CD00 Pickup mechanism error
ER-CD01 Pu-in SW detection NG
[CD Changer Mechanism Error]
ER-CD10 Changer error
ER-CD11 Initial error
ER-CD20 Tray error
Items adjusted automatically
(1)Offsetadjustment (The offset voltage between the head
amplifier output and the VREF reference voltage is
compensated inside the IC.)
* Focus offset adjustment
* Tracking offset adjustment
(2) Tracking balance adjustment (waveform drawing
Fig.14-2 EFBL)
(3)Gainadjustment(Thegainiscompensated insidetheIC
sothattheloop gain at the gain crossover frequency will
be 0 dB.)
* Focus gain adjustment
* Tracking gain adjustment
•Adjustment
Since this CD system incorporates the following automatic
adjustment functions, readjustment is not needed when
replacingthepickup.Therefore,differentPWBsandpickups
can be combined freely.
Each time a disc is changed, these adjustments are
performed automatically. Therefore, playback of each disc
can be performed under optimum conditions.
IC301
AM IF
FM IF FM RF
T303
T306
T302 L312
AM
TRACKING fL
AM BAND
COVERAGE fL
T301
T351
FM BAND
COVERAGE fL
MAIN PWB
CNP301
FM/AM LOOP
ANTENNA
TP302
R357
R316
TP301
T
T
EFBL
FDO
TE
Stopped
CH1=500mV
DC 10:1 CH2=200mV
DC 10:1 CH3=1V
DC 10:1 500ms/div
(500ms/div)
NORM:20kS/s
1
2
3
=Record Length=
Smoothing : ON CH1 : 0.000V
CH2 : 0.000V Main : 100K
Zoom : 2k Mode : SINGLE
Type : EDGE CH1
Delay : 0.0ns
Hold off : 0.2µs
CH3 : 0.00V
CH4 : 0.00V
BW : FULL
=Trigger==Filter= =Offset=
CH2
v/DIV
200mV
1999/04/05 20:26:47

– 15 –
CD-BA3100
TEST MODE
During POWER OFF mode, push below each 2 keys and [POWER] key. Then go to each Test Mode.
KEY TEST MODE CONTENTS
[CD] [X-BASS] + [POWER] TEST 1 CD Test mode
[TAPE] [X-BASS] + [POWER] TEST 2 Tape test mode
[TUNER] [X-BASS] + [POWER] TEST 3 Tuner preset memory clear
[VIDEO/AUX] [X-BASS] + [POWER] TEST 4 Tuner preset for production
[MEMORY/SET] [X-BASS] + [POWER] TEST 5 All clear (reset)
[EQUALIZER] [X-BASS] + [POWER] TEST 6 Audio test
[ ] [DIMMER] + [POWER] TEST 7 Key and display test
[TUN UP] [DIMMER] + [POWER] TEST 8 RDS Test1
[TUN DOWN] [DIMMER] + [POWER] TEST 9 RDS Test2
[ ] [CD] + [POWER] TEST 10 CD Changer test
[ ] [CD] + [POWER] TEST 11 Production initialize for changer
[EQUALIZER] [TUN UP] + [POWER] TEST 12 Graphic equalizer test
CD TEST MODE
· Setting the test mode
Any one of test mode can be set by pressing several keys as follows.
<X-BASS> + <CD> + <POWER> TEST: CD operation test
Enter test 1 mode key. C D T E S T
OPEN/CLOSE operation is using manual.
Do TOC IL. Do normal play.
When these following key is input into PLAY key,
track number can be appoint directly.
<<PLAY>> key input. <<MEMORY>> key input.
Laser ON.
<<MEMORY>> key input.
Tracking OFF play at that specific point.
<<MEMORY>> key input.
<< 1>> key: Track 1
<< 2>> key: Track 3
<< 3>> key: Track 7
<< 4>> key: Track 11
<< 5>> key: Track 13
<< 6>> key: Track 15 Tracking ON play from that specific point.
<<MEMORY>>keyinput
a) Display "FOFF_XX"
b) Display "TOFF_XX"
c) Display "TBAL_XX"
d) Display "TGAN_XX"
e) Display "FGAN_XX"
f) Display "RFLS_XX"
<< >>, << >> buttons make pick's slide possible.
<<STOP>> key input.
STOP
<<MEMORY>> key input.
a) Display "FOFF_XX"
b) Display "TOFF_XX"
c) Display "TBAL_XX"
d) Display "TGAN_XX"
e) Display "FGAN_XX"
f) Display "RFLS_XX"
Display every auto setting result for every 2 sec.
<<STOP>> key input.
STOP
VOL –– Last memory
BAL –– CENTER
P.GEQ –– FLAT
X-BASS –– OFF Sliding the PICKUP with
<< >>, << >> button
must only be in STOP mode.
Display each step for 2 sec. XX: HEX VALUE
a) "FOFF_XX" Focus off set
b) "TOFF_XX" Tracking off set
c) "TBAL_XX" Tracking balance
d) "TGAN_XX" Tracking gain
e) "FGAN_XX" Focus gain
f ) "RFLS_XX" RF level shift
To cancel : Power OFF

CD-BA3100
– 16 –
1. Motor assembly (x 2) mounting (screw x 4) 01/29 Fig.17
2. MT idle gear mounting (screw x 1) 25 Fig.17
3. MT system gear assembly 23/24/26/27 Fig.17
4. STB/tray drive system gear and others assembling/ 37/38/45/46 (53)/47/48 Fig.17
mounting (screw x 3)
5. Tray big gear assembly 31 Fig.17 Gear positioning
6. T.M SW PWB mounting (screw x 3) Fig.18
7. STB holder assembling 03 Fig.17
8. STB drive gear L/R assembly mounting (screw x 2) 11 (10)/12 (10) Fig.17
9. Tray joint gear R/tray drive gear R assembling 34/36 Fig.18 Gear positioning
10. Tray gear A/B assembling 32/33 Fig.18 Gear positioning
11. Lift gear B/C assembling 43/44 Fig.19 Gear positioning
12. MT idler gear F assembling, mode big gear 28/42 Fig.19
mounting (screw x 1)
13. Change box R mounting (screw x 4) 04 Fig.19
14. Lift gear A assembling 42 Fig.19 Gear positioning
15. Change box L assembly mounting (screw x 4) 02/30/35 Fig.20
16. Lift cam assembling (shaft inserting) 44 Fig.20 Gear positioning
17. STB holder height adjusting Fig.21 Check/adjustment
18. Top plate F/disc OB LEV. Mounting (screw x 6) 80 Fig.21
19. Trays 1 - 6 assembling 91/92/93/94/95/96 Fig.22
20. Top plate R mounting (screw x 6) ––
Applied part No.
Work content Assembly fig. No. Remarks
CD CHANGER MECHANISM MAIN BASE PARTS ASSEMBLING/ADJUSTING
PROCEDURE
01 (101) MAIN BASE
02 (102) CHANGE BOX L
03 (147) STB HOLDER
04 (103) CHANGE BOX R
10 (119) STB DRIVE GEAR A
11 (120) STB DRIVE GEAR L
12 (122) STB DRIVE GEAR R
20 (149) STABILIZER FH
23 (141) MT IDLER GEAR A
24 (138) MT IDLER GEAR B
25 (137) MT IDLER GEAR C
26 (140) MT IDLER GEAR D
27 (139) MT IDLER GEAR E
28 (131) MT IDLER GEAR F
29 (MOB1,2) MOTOR GEAR
30 (143) TRAY DRIVE GEAR F
31 (134) TRAY BIG GEAR
32 (135) TRAY GEAR A
33 (136) TRAY GEAR B
34 (124) TRAY DRIVE GEAR R
35 (144) TRAY JOINT GEAR F
36 (125) TRAY JOINT GEAR R
37 (142) TRAY GEAR C
38 (130) TRAY IDLER GEAR
Part name
No.
40 (115) LIFT CAM
41 (126) MODE BIG GEAR
42 (127) LIFT GEAR A
43 (128) LIFT GEAR B
44 (129) LIFT GEAR C
45 (132) STB GEAR A
46 (104) STB GEAR B
47 (133-1) STB GEAR C
48 (133-3) STB GEAR D
50 (145) LIFT LEVER
51 (106) TRAY LOCK LEVER
52 (118) DISC OB LEVER
53 (105) STB GEAR ANG.
80 (117) TOP PLATE F
81 (114) TOP PLATE R
91 (108) TRAY 1
92 (109) TRAY 2
93 (110) TRAY 3
94 (111) TRAY 4
95 (112) TRAY 5
96 (113) TRAY 6
Part name
No.
CD CHANGER MECHANISM PARTS LIST
The number of ( ) is the number of the parts guide.

– 17 –
CD-BA3100
Figure 17
31
TRAY BIG GEAR
31
TRAY BIG GEAR
37
TRAY GEAR C
38
TRAY IDLER GEAR
37
TRAY GEAR C
38
TRAY IDLER GEAR
47
STB GEAR C
47
STB GEAR C
46
STB GEAR B
46
STB GEAR B
10
STB DRIVE GEAR A
29
01
MAIN BASE
29 23
23
24
25
26
27
Mark position
03
STB HOLDER
48
STB GEAR D
12
STB DRIVE GEAR R
(ASS'Y)
11
STB DRIVE GEAR L
(ASS'Y)
11(/12) (10)
STB DRIVE GEAR L(/R)
(ASS'Y)
10
STB DRIVE GEAR A
45
STB GEAR A
45
STB GEAR A
53
STB GEAR ANG.
53
STB GEAR ANG.
After assembling TRAY BIG GEAR, turn it in the arrow direction.
TRAY BIG GEAR ASSEMBLING POSITION

CD-BA3100
– 18 –
31
M T SW PWB
33
TRAY
GEAR B
32
TRAY GEAR A
33
TRAY GEAR B
37
32
TRAY GEAR A
38
34
TRAY DRIVE GEAR R
36
TRAY JOINT GEAR R
47
46
34
TRAY DRIVE GEAR R
36
TRAY JOINT GEAR R
10
29
29 23
23
24
25
26
27 Mark position
11
45
TRAY BIG GEAR SET POSITION
33
32
Direct the recess part
(trapezoidal side) of the axis
35 in this direction.
* This position becomes the
reference (stock) position
of the tray.
These holes must align.
It must not rotate in contact
with the peripheral (hatched)
part of 31.
These holes must align.
After assembling 32,
assemble 33.
*1: To position the axis part of 36, engage it with 38.
*2: When it is aligned as described in *1, the hatched part
(low gear-height part of gear) will be positioned in this position.
Note: After positioning the tray big gear in the set position, engage these gears.
*1
*2
Scale: 2 magnifications
Figure 18

– 19 –
CD-BA3100
43
LIFT GEAR B
41
MODE BIG GEAR
33
32
04
CHANGE BOX R
47
46
28
MT IDLER GEAR F
10
Mark position
11
45
42
LIFT GEAR A
53
37
38
44
LIFT GEAR C
34
36
(A) (B)
44
LIFT GEAR C
43
LIFT GEAR B
42
LIFT GEAR A
41
MODE BIG GEAR
Note:
(Assemble the mode big gear in this position.)
To assemble the mode
big gear, incline it,
bring it into contact with
the circumference and
put the center hole into
position since the
hatched part of the main
base is overlapped with
the circumference.
Direct the short tooth
toward the center.
MODE BIG GEAR
LIFT GEAR A/B/C
ASSEMBLING POSITION
Scale: 2 magnifications
<Assembling method of lift gear>
After setting up the mode big gear in the
shown position, engage it with the STB gear A
(gear on the lower side) at the position (A),
and assemble them, turning it in the arrow direction
into the position (B). (The short tooth directs toward the
center of the mode big gear.)
,,,,,,,,,,,,,,,,
,,,,,,,,,,,,,,,,
,,,,,,,,,,,,,,,,
,,,,,,,,,,,,,,,,
,,,,,,,,,,,,,,,,
,,,,,,,,,,,,,,,,
,,,,,,,,,,,,,,,,
,,,,,,,,,,,,,,,,
,,,,,,,,,,,,,,,,
,,,,,,,,,,,,,,,,
,,,,,,,,,,,,,,,,
,,,,,,,,,,,,,,,,
,,,,,,,,,,,,,,,,
,,,,,,,,,,,,,,,,
,,,,,,,,,,,,,,,,
,,,,,,,,,,,,,,,,
,,,,,,,,,,,,,,,,
,,,,,,,,,,,,,,,,
,,,,,,,,,,,,,,,,
,,,,,,,,,,,,,,,,
,,,,,,,,,,,,,,,,
,,,,,,,,,,,,,,,,
,,,,,,,,,,,,,,,,
,,,,,,,,,,,,,,,,
,,,,,,,,,,,,,,,,
,,,,,,,,,,,,,,,,
Figure 19

CD-BA3100
– 20 –
43 44
41
33
32
47
46
28
10
Mark position
11
45
42
LIFT GEAR A
30
TRAY DRIVE GEAR F
35
TRAY JOINT GEAR F
35
TRAY JOINT GEAR F
02
CHANGE BOX L
*1
30
TRAY DRIVE GEAR F
40
LIFT CAM
40
LIFT CAM
30
TRAY DRIVE GEAR F
35
TRAY JOINT GEAR F
37°
*2
TRAY JOINT GEAR F
(CHANGE BOX L ASS'Y) ASSEMBLING POSITION
LIFT CAM
Direct the recess part (trapezoidal side)
of the axis 35 in this direction.
Assembling procedure
1. Turn the mode big gear approx. 37 degrees in the arrow direction.
2. Assemble the change box L ass'y.
Note: At this time, the tray joint gear F must be located in the position shown in figure.
Moreover, the gear must be engaged securely.
3. After assembly, return the mode big gear to the initial position.
4. Assemble the lift cam.
Note: At this time, the lift cam (No.40) must be located in the position shown in figure 20.
Scale: 2 magnifications
*1: To position the axis part
of 35, engage it with 33.
*2: When it is aligned as
described in *1, the hatched part
(low gear-height part of gear)
will be positioned as shown.
Since this gear engagement is not
visually checked, verify that it does
not float when the gear box L is installed.
Scale: 2 magnifications
During assembly, make the
O part visible in this direction.
Note: Among 4 ribs on the
circumference, one rib alone
is provided with O.
Figure 20
Other manuals for CD-BA3100
4
Table of contents
Other Sharp Stereo System manuals

Sharp
Sharp cd-pc4900 User manual

Sharp
Sharp DK-KP82P User manual

Sharp
Sharp XL-70 User manual

Sharp
Sharp SD-NX10H User manual

Sharp
Sharp CD-SW300 User manual

Sharp
Sharp CD-E99 User manual

Sharp
Sharp XL-DV484W User manual

Sharp
Sharp DK-CL6N - Cassette Clock Radio User manual

Sharp
Sharp XL-HP404H User manual

Sharp
Sharp CD-C482 User manual

Sharp
Sharp XL-1000H User manual

Sharp
Sharp XL-LS701H User manual

Sharp
Sharp CD-XP300W User manual

Sharp
Sharp XL-HF202PH(BK) User manual

Sharp
Sharp XL-UH240 User manual

Sharp
Sharp XL-MP40H User manual

Sharp
Sharp XL-1000V User manual

Sharp
Sharp XL-60H User manual

Sharp
Sharp XL-MP130 User manual

Sharp
Sharp CD-MPX880H User manual