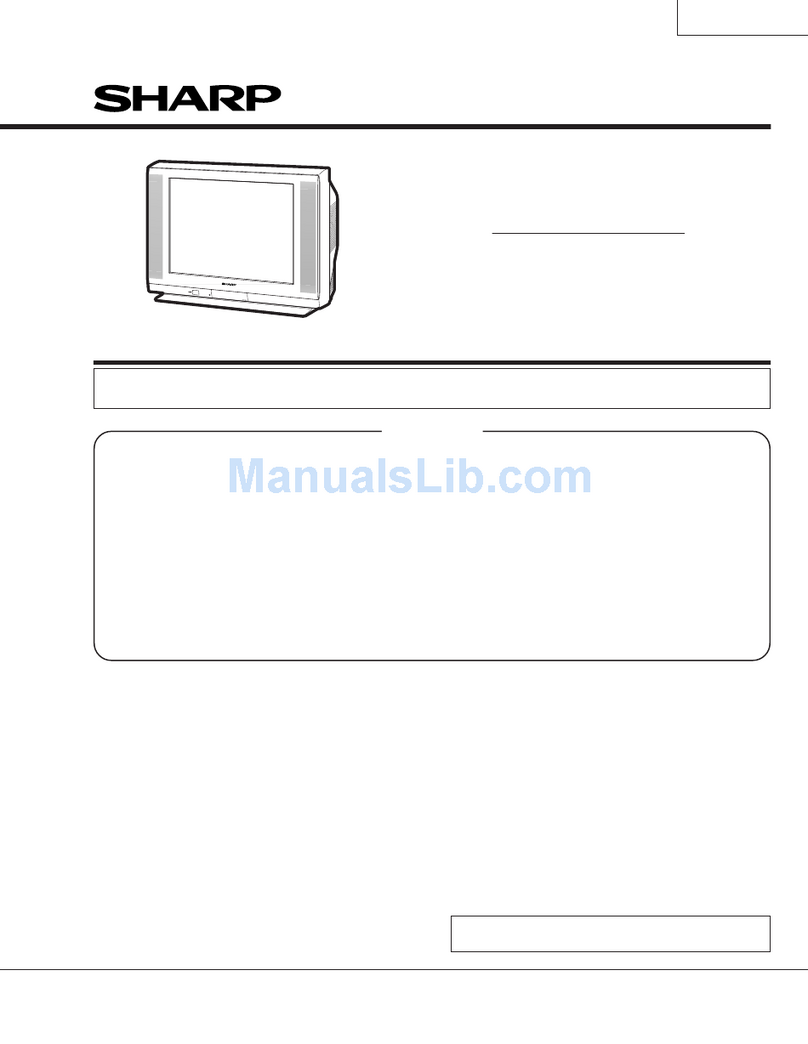
Sharp AQUOS LC-20B5M User manual

LC-20B5M
SERVICE MANUAL
MODEL LC-20B5M
SHARP CORPORATION
LCD COLOURTELEVISION
In the interests of user-safety (Required by safety regulations in some countries) the set should be re-
stored to its original condition and only parts identical to those specified should be used.
CONTENTS
»IMPORTANT SERVICE SAFETY PRECAUTION ........................................................................................2
»SPECIFICATIONS ........................................................................................................................................4
»OPERATION MANUAL .................................................................................................................................5
»DIMENSIONS ...............................................................................................................................................7
»REMOVING OF MAJOR PARTS ..................................................................................................................8
»ADJUSTING PROCEDURE OF EACH SECTION .....................................................................................13
»TROUBLE SHOOTING TABLE ...................................................................................................................24
»CHASSIS LAYOUT .....................................................................................................................................28
»BLOCK DIAGRAM ......................................................................................................................................30
»OVERALL WIRING DIAGRAM ...................................................................................................................32
»DESCRIPTION OF SCHEMATIC DIAGRAM .............................................................................................34
»SCHEMATIC DIAGRAM .............................................................................................................................35
»PRINTED WIRING BOARD ASSEMBLIES ................................................................................................75
»REPLACEMENT PARTS LIST....................................................................................................................86
»PACKING OF THE SET ............................................................................................................................101
Page
1st Edition

2
LC-20B5M
12345678901234567890123456789012123456789012345678901234567890121234567890123456789012345678901212
1
234567890123456789012345678901212345678901234567890123456789012123456789012345678901234567890121
2
12345678901234567890123456789012123456789012345678901234567890121234567890123456789012345678901212
12345678901234567890123456789012123456789012345678901234567890121234567890123456789012345678901212
1
234567890123456789012345678901212345678901234567890123456789012123456789012345678901234567890121
2
12345678901234567890123456789012123456789012345678901234567890121234567890123456789012345678901212
SAFETY NOTICE
Many electrical and mechanical parts in LCD television
have special safety-related characteristics.
These characteristics are often not evident from visual
inspection, nor can protection afforded by them be
necessarily increased by using replacement
components rated for higher voltage, wattage, etc.
Replacement parts which have these special safety
characteristics are identified in this manual; electrical
components having such features are identified by“ å”
IMPORTANT SERVICE SAFETY PRECAUTION
ËService work should be performed only by qualified service technicians who are
thoroughly familiar with all safety checks and the servicing guidelines which follow:
and shaded areas in the
Replacement Parts Lists and
Schematic Diagrams.
For continued protection, replacement parts must be
identical to those used in the original circuit.
The use of a substitute replacement parts which do not
have the same safety characteristics as the factory
recommended replacement parts shown in this service
manual, may create shock, fire or other hazards.
WARNING
1. For continued safety, no modification of any circuit
should be attempted.
2. Disconnect AC power before servicing.
TO EXPOSED
METAL PARTS CONNECT TO
KNOWN EARTH
GROUND
•Use an AC voltmeter having with 5000 ohm per volt, or
higher, sensitivity or measure the AC voltage drop
across the resistor.
•Connect the resistor connection to all exposed metal
parts having a return to the chassis (antenna, metal
cabinet, screw heads, knobs and control shafts,
escutcheon, etc.) and measure the AC voltage drop
across the resistor.
All checks must be repeated with the AC cord plug
connection reversed. (If necessary, a nonpolarized
adaptor plug must be used only for the purpose of
completing these checks.)
Any reading of 0.75V peak (this corresponds to 0.5
mA. peak AC.) or more is excessive and indicates a
potential shock hazard which must be corrected before
returning the monitor to the owner.
BEFORE RETURNINGTHE RECEIVER
(Fire & Shock Hazard)
Before returning the receiver to the user, perform
the following safety checks:
1. Inspect all lead dress to make certain that leads are
not pinched, and check that hardware is not lodged
between the chassis and other metal parts in the
receiver.
2. Inspect all protective devices such as non-metallic
control knobs, insulation materials, cabinet backs,
adjustment and compartment covers or shields,
isolation resistor-capacitor networks, mechanical
insulators, etc.
3. To be sure that no shock hazard exists, check for
leakage current in the following manner.
•Plug the AC cord directly into a 110~240 volt AC outlet,
and connect the DC power cable into the receiver's
DC jack.(Do not use an isolation transformer for this
test).
•Using two clip leads, connect a 50k ohm, 10 watt
resistor paralleled by a 0.15µF capacitor in series with
all exposed metal cabinet parts and a known earth
ground, such as electrical conduit or electrical ground
connected to an earth ground.
CAUTION: FOR CONTINUED PROTECTION
AGAINST A RISK OF FIRE REPLACE ONLY WITH
SAMETYPE F3701 (2A, 250V), F3702 (1.25A, 250V),
F6700 (1.25A, 250V), F6701 (1.25A, 250V), F6702
(1.25A, 250V), F6703 (1.25A, 250V) AND F6704
(1.25A, 250V) FUSE.
DVM
AC SCALE
50k ohm
10W
0.15 µF
TEST PROBE

3
LC-20B5M
Precautions for using lead-free solder
1 Employing lead-free solder
"All PWBs" of this model employs lead-free solder.The LF symbol indicates lead-free solder, and is attached on
the PWBs and service manuals.The alphabetical character following LF shows the type of lead-free solder.
Example:
2 Using lead-free wire solder
When fixing the PWB soldered with the lead-free solder, apply lead-free wire solder.Repairing with conventional
lead wire solder may cause damage or accident due to cracks.
As the melting point of lead-free solder (Sn-Ag-Cu) is higher than the lead wire solder by 40°C, we recommend
you to use a dedicated soldering bit, if you are not familiar with how to obtain lead-free wire solder or soldering bit,
contact our service station or service branch in your area.
3 Soldering
As the melting point of lead-free solder (Sn-Ag-Cu) is about 220°C which is higher than the conventional lead
solder by 40°C, and as it has poor solder wettability, you may be apt to keep the soldering bit in contact with the
PWB for extended period of time. However, Since the land may be peeled off or the maximum heat-resistance
temperature of parts may be exceeded, remove the bit from the PWB as soon as you confirm the steady soldering
condition.
Lead-free solder contains more tin, and the end of the soldering bit may be easily corroded.Make sure to turn on
and off the power of the bit as required.
If a different type of solder stays on the tip of the soldering bit, it is alloyed with lead-free solder.Clean the bit after
every use of it.
When the tip of the soldering bit is blackened during use, file it with steel wool or fine sandpaper.
Be careful when replacing parts with polarity indication on the PWB silk.
Indicates lead-free solder of tin, silver and copper.
Lead-free wire solder for servicing
Part No, ★Description Code
ZHNDAi123250E J φ0.3mm 250g(1roll) BL
ZHNDAi126500E J φ0.6mm 500g(1roll) BK
ZHNDAi12801KE J φ1.0mm 1kg(1roll) BM
LFa

4
LC-20B5M
SPECIFICATIONS
LCD panel
Number of pixels 921,600 dots
Video colour systems World multi system
TV Standard (CCIR) I/DK/M/BG
TV Tuning System Auto preset tuning
TV function STEREO/BILINGUAL NICAM-BG, I, DK/A2 stereo-BG
AUTO PRESET Yes
CATV S1~S41 ch. Hyper Band
4-LINE DIGITAL COMB FILTER Yes
Brightness 450 cd/m
2
Lamp life 60,000 hours*
Viewing angles H: 170°V: 170°
Audio output 2.1 W 2×
×
Speakers 5.7 cm ø, 2 pcs.
AV1 Composite Video, S-Video, Audio
AV2 IN/OUT Composite Video, Audio IN/Composite Video, Audio OUT
COMPONENT Y, PB, PR/Audio
Headphone jack 3.5 mm ø jack (Front)
PC Card Slot PC Card Type II (PC Card Adapter)
Image File Format JPEG files complying with DCF format
OSD LANGUAGE English/Chinese/Arabic
Power requirement DC 12 V, AC 110–240 V, 50/60 Hz
Power Consumption For Asia
63 W (1.2 W Standby):
AC 230 V (With AC adapter)
For Australia
65 W (1.2 W Standby):
AC 230 V (With AC adapter)
55W : DC 12 V
Weight 9.2 kg w/o accessories
Accessories Remote control, Batteries ( 2), Antenna cable, AC adapter,
AC cord, Cable holder, Operation manual
■As a part of policy of continuous improvement, SHARP reserves the right to make design and specification changes for the LCD TV set
improvement without prior notice. The performance specification figures indicated are nominal values of production units. There may be
some deviations from these values in individual units.
MODEL LC-20B5M
ITEMS
Terminals
19.7" (50 cm) Advanced Super View & BLACK TFT LCD
* The typical period of time after which the lamp’s power output will have decreased by about half, given that the AQUOS is used continuously
in a 25°C room under standard lighting and brightness conditions.

5
LC-20B5M
OPERATION MANUAL
MAIN POWERMENUVOL ( )/( )
TV/VIDEOCH ( )/( )
LC-20B5M
Upper control panel
Part Names of Main Unit
Controls
NOTE
•TV/VIDEO,CH ( )/( ),VOL (–)/(+) and MENU on the main unit have the same functions as the same buttons on the remote control.
Fundamentally, this operation manual provides a description based on operation using the remote control.
HEADPHONE jack
Plug the headphone mini-plug into the Headphone jack
located on the front of the LCD TV set.
OPC sensor
Remote sensor OPC indicator (Optical Picture Control)
The Optical Picture Control indicator lights up green when the
“Backlight” is set to “Auto (OPC)”.
POWER indicator
POWER indicator lights up green when the power is on, and
red when in the standby mode (the indicator will not light
when the main power is off). The indicator lights up orange
when the wake-up timer is set.
* The examples used throughout this manual are based on
the LC-20B5M model.
To change the vertical angle of the LCD TV
set, tilt the screen up to 5 degrees forward or
10 degrees backward. The LCD TV set can
also be rotated up to 25 degrees to right and
left. Please adjust the angle so that the LCD
TV set can be watched most comfortably.
Card Lamp
When timer recording is set: Orange
When recording: Red
Standby: Green
PC Card Slot
Speaker
Tilt the display by grabbing onto
the carrying handle while securely
holding down the stand with your
other hand.
How to adjust the angle
Speaker
Terminals
S-VIDEO
AV-IN1 VIDEO
AUDIO (R)
AUDIO (L)
VIDEO
AUDIO (R)
AUDIO (L)
AV-IN2/OUT
Y
ANT. (Antenna terminal)
POWER INPUT (DC12V)
AUDIO (L)
AUDIO (R)
P
B
P
R
COMPONENT
Carrying handle
RearView
How to fix the cables
• Pull the cables connected to each terminal through the holes and close the left and right terminal covers.
Push the cables into the grooves of the support covers. Insert the cable holder (supplied) from above the
support cover and fix the cables.
Terminal cover
Cable holder
Terminal cover
Support cover

6
LC-20B5M
Part Names of Remote Control
Move the cursor to the upwards
(Select the menu items)
/
Still
(Pause the motion picture playback or card recording)
Move the cursor to the right
(Select the menu items)
/
Fast Forward
(Fast forwards the picture)
Move the cursor to the downwards
(Select the menu items)
/
Stop
(stop the motion picture playback or card recording)
OK
(Set the menu or items by selecting the cursor)
/
Play
(Playback the card)
Move the cursor to the left
(Select the menu items)
/
Fast Reverse
(Fast reverses the picture)
How to use the cursor during the
motion picture playback
SUBTITLE
Displays the Teletext
Subtitle directly.
HOLD
Temporarily holds the
current Teletext page.
REC
Records the motion
picture.
(Mute)
Switches the sound on and off.
Yellow,
Timer function Menu
Cyan, Status Display
Channel Select
MENU
Displays the TV menu or return
to normal screen.
VOL (+)/(
-
)
(Flashback)
Returns to the previous
channel.
Red, Picture Menu
END
Returns to normal screen
in Teletext mode.
RETURN
Return to the previous screen.
TEXT
Displays the Teletext mode
screen.
POWER
MPX
Switches the audio
mode.
REVEAL
Displays hidden information
such as solutions to riddles
and puzzles.
CARD
Switches the motion and
still picture.
SUBPAGE
Displays the Teletext
Subpage directly.
CAPTURE
Records the still picture.
TV/VIDEO
Switches the input source
between AV1, AV2, COMPONENT,
CARD and TV mode.
BACKLIGHT
Selects the brightness and
OPC of the display.
Green, Sound Menu
CH ( )/( )
Installing Batteries in the Remote Control
Before using the LCD TV set for the first time, install the two “AAA”size batteries supplied in the remote control. When the
batteries become depleted and the remote control fails to operate, replace the batteries with new “AAA”size batteries.
1
Open the battery cover.
2
Insert two “AAA”size batteries.
3
Close the battery cover.
■Place batteries with their
terminals corresponding to
the (+) and (–) indications in
the battery compartment.
Caution!
Precautions regarding batteries
■Improper use of batteries can result in a leakage of chemicals and/or explosion. Be sure to follow the instructions below.
•Place batteries with their terminals corresponding to the (+) and (–) indications.
•Different types of batteries have different characteristics. Do not mix batteries of different types.
•Do not mix old and new batteries. Mixing old and new batteries can shorten the life of new batteries and/or cause old
batteries to leak chemicals.
•Remove batteries as soon as they are depleted. Chemicals that leak from batteries can cause a rash. If chemical
leakage is found, wipe it off with a cloth.
•The batteries supplied with the LCD TV set may have a shorter operating time due to storage conditions.
•If the remote control is not to be used for an extended period of time, remove the batteries from the remote control.
Preparation
■Engaging the lower
claw with the remote
control, close the
cover.
■Slide the cover while
pressing the ( ) part.
+
–
+
–

7
LC-20B5M
DIMENSIONS
Unit: mm
6880
244
178
403.3
300.8
261
452 (including rubber foot)
673
384
212
39359
450 (including rubber foot)
47
100
100

8
LC-20B5M
REMOVING OF MAJOR PARTS
1. Remove the four lock screws from the stand, and detach the stand.
2. Remove the terminal covers (large and small).
3. Remove the three terminal screws.
4. Remove the fourteen lock screws from the cabinet B.
5. With the card eject button held down, open the cabinet in order of
5-1
thru
5-6
, and detach the cabinet B by
sliding it toward the PC card slot.
6. Remove the four lock screws from the stand angle, and detach the reinforcement angle.
7. Remove the wire holder and tape, and disconnect the connecting cable.
8. Disconnect all the connectors from all the PWBs.
Cabinet B
4
3
1
2
2
5
5-6
PC Card slot
Cabinet A
Terminal Cover (S)
Terminal Cover (L)
Stand
5-4
5-3
5-2 5-1
5-5
P4050
CN2
SC1202
P701
P2003
SC1201
SC3403
P6704
P6703
P6702
P6701
P6700
P6706
P3302
P3404
P3704
P3303
P4001
P3703
P3201
SC1204
SC2001
P5003
CN3
P2005
P9001
P1601
P2006
Operation PWB
Reinforcement Angle
Main PWB
R/C, LED PWBWire Holder Inverter PWB
Card LED PWB
Tape
6
8
8
8
88
8
8
8
8
8
7
7
Analog PWB

9
LC-20B5M
9. Remove the two lock screws from the operation panel (top cover), and detach the operation panel (top cover).
10. Remove the two lock screws from the operation PWB, and detach the operation PWB.
11. Remove the lock screw from the shield, and detach the shield from the main PWB.
12. Remove the two lock screws from the R/C, LED PWB, and detach the R/C, LED PWB.
13. Remove the two lock screws each from the speaker boxes (left and right), and detach both the speaker boxes.
Speaker Box (R)
R/C, LED PWB
Analog PWB
Speaker Box (L)
Inverter PWB
Shield Operation panel (Top Cover)
Operation
PWB
13
10
9
13
12

10
LC-20B5M
14. Remove the two lock screws from the inverter PWB, and detach the inverter PWB.
15.Remove the five lock screws from the main PWB, and undo the claws a and b.Detach the main PWB by lifting the
area around the claws and pulling the PWB out.
16. Remove the one lock screw from the card frame cover over, and detach the card frame cover.
17.Remove the four lock screws from the analog PWB, and undo the claws c and d. Detach the chassis frame (right)
from the analog PWB by pulling out the terminals. In the same way, undo the claws e and f, and detach the
chassis frame (left) from the analog PWB by pulling out the terminals.
Note:When detaching the main PWB and analog PWB, be careful not to break the PWB-fixing claws.
18. Remove the one lock screw from the card LED PWB, and detach the card LED PWB.
Inverter PWB
Main PWB
Analog PWB
f
Chassis Frame (L)
Chassis Frame (R)
Card Frame Cover
Card LED PWB
15 15
17
18
14
16
e
a
bc
d

11
LC-20B5M
»Precautions in handling the liquid crystal panel
1. Handle it in a clean room. (above 50% humidity)
2. The worker must wear an earth band.
3. Be careful not to drop, vibrate and shock the panel.
4. Use an ionizer. (within 30 cm)
19. Remove the three lock screws from the liquid crystal panel, and detach the liquid crystal panel unit.
20. Remove the reflecting/polarizing sheet, prism sheet, diffusion sheet and diffusion plate.
21. Remove the lamp holder (top)-A, -B and the lamp holder (bottom) from the lamp unit assembly.
22. Remove the upper and lower reflection sheets from the back shield.
Reflection Sheet (Top)
(PSHEPA103WJZZ)
Lamp Holder (Top)-B
(LHLDZA212WJKZ)
Lamp Unit Ass'y
(CLMP-A024WJ01)
Reflection Sheet (Bottom)
(PSHEPA104WJZZ)
Lamp Holder (Bottom)
(LHLDZA213WJKZ)
Back Shield
(PSLDMA312WJFW)
Lamp Holder (Top)-A
(LHLDZA211WJKZ)
Diffusion Sheet
(PSHEPA127WJZZ)
Reflection/Defelction
(PSHEPA101WJZZ)
Diffusion Plate
(PCOVUA014WJZZ)
Prism Sheet
(PSHEPA163WJZZ)
20" LCD Panel Unit 19
22
21
20

12
LC-20B5M
»Precautions in servicing the B side (backside) of the main PWB unit
1. Disconnect the FFC (flat cable) from between the main PWB (SC1204) and the liquid crystal panel, and then
connect the service-specific extension FFC (flat cable) (QCNW-A556WJZZ).
2. Disconnect the FFC (flat cable) from between the main PWB (SC1201) and the liquid crystal panel, and then
connect the service-specific extension FFC (flat cable) (QCNW-A555WJZZ).
3. Disconnect only the SC1202 of the FFC (flat cable) from between the main PWB (SC1202) and the liquid crystal
panel, and then connect the service-specific extension FFC (flat cable) (QCNW-B784WJZZ).
4. Disconnect the P701 side of the lead from between the main PWB (P701) and the analog PWB, and then
connect the service-specific extension cord (QCNW-C086WJQZ).
5. Disconnect the FFC from between the main PWB (SC2001) and the analog PWB (SC3403), and then connect
the service-specific extension FFC (flat cable) (QCNW-A556WJZZ).
6. Disconnect the lead from between the main PWB (P2006) and the analog PWB (P1601), and then connect the
service-specific extension cord (QCNW-C498WJQZ).
7. Remove the lock screws from the main PWB, detach the PWB from the chassis frame, and then turn it over to
service.
»Precautions in servicing the inverter PWB unit (backside)
8. Disconnect only the P3703 side of the lead from between the inverter PWB (P6706) and the analog PWB
(P3703), and then connect the service-specific extension cord (QCNW-C086WJQZ).
9. Remove the lock screws from the inverter PWB, detach the PWB (be careful not to get close to the high-tension
area and its surrounding conductive parts), and then turn it over to service.
Step Part No. Description
1 QCNW-A556WJZZ Extension Cable 50-pin Main (SC2004)-LCD panel
2 QCNW-A555WJZZ Extension Cable 20-pin Main (SC1201)-LCD Panel
3 QCNW-B784WJZZ Extension Cable 30-pin Main (SC1202)-LCD Panel
4 QCNW-C086WJQZ Extension Cable 10-pin Main (P701)-Analog (P3201)
5 QCNW-A556WJZZ
Extension Cable 50-pin Main (SC2001)-Analog (SC3403)
6 QCNW-C498WJQZ Extension Cable 15-pin Main (P2006)-Analog (P1601)
8 QCNW-C086WJQZ Extension Cable 10-pin Main (P6706)-Analog (P3703)
CN2
SC1202
P701
SC1201
SC3403
P6706
P3703
P3201
SC1204
SC2001
CN3
P1601
P2006
Main PWB Inverter PWB
3
45
6
12
8
Analog PWB
Inverter
PWB
(Side-B)
7
9
Main PWB
(Side-B)

13
LC-20B5M
ADJUSTING PROCEDURE OF EACH SECTION
The best adjustment is made before shipping. If any position deviation is found or after part replace is performed, adjust
as follows.
Preparation for Adjustments
Use the exclusive-use AC adapter or stable DC power supply.
AC adapter: UADP-A063WJPZ (LC-20B5X)
UADP-A064WJPZ (LC-20B5M)
DC power supply: 12 ± 0.5V 5.6A
1. Adjustment Procedure
1-1. Adjusting the checker
Turning on the power (initialization) → Setting the model and size in inches →Transferring the model-specified
data to the E2PROM (I2C) →Calling the adjustment process mode →Starting the adjustment (+B adjustment)
1-2. Adjusting the finish process
Reassembling the set →Turning on the power →Calling the adjustment process mode (using the remote
controller) →Adjusting the counter bias, TV contrast and white balance
2. Calling the MAIN adjustment process mode
There are the following two ways to choose from.
• Set the Pin (81) (KEY4) or Pin (82) (KEY5) of IC2001 (microprocessor) to "L", turn on the power.
• For servicing, hold down the "TV/VIDEO" and "MENU" keys at once, and turn on the "POWER" switch. (Make
sure the process mode "K" appears at the top left of the screen.) Then press the "CH (Ù)" and "VOL (–)" keys
at once. (Make sure the adjustment process mode screen shows up.) To quit this mode, turn off the power. (Or
turn off the "POWER" switch or use the remote controller’s "OFF" key.)
3. Using the keys for the adjustment process
Selecting a reception channel
• Using the "CH (ù)/(Ù)" key, turn up and down reception (broadcasting) channels.
Just click on the key, and channels are selected on by one.
Hold down the key, and the next receivable channel is searched up and down.
• Adjustment items
Adjust each of the items by using the "MENU", "CURSOR UP/DOWN" and "VOL (+)/(–)" keys (on the set or on
the remote controller).
• Select an adjustment item using the "CURSOR UP/DOWN" key.
• An adjustment item is toggled on and off by activating the MENU SELECT key (next item).
Let’s suppose that the item at the bottom of a page is now selected. When the "MENU" key is activated here, the
item at the top of the next page will be selected.
4. Initialization
4-1. Set pins (81) and (82) of IC2001 (microprocessor) to GND. Turn on the power.
4-2. Select the inch size (20).
4-3. Select the model number "A642M".
~Once "A642M" has been selected, the screen shuts off and the power turns off. But the power turns
itself on to get the set restarted. (The microprocessor resets itself due to a change in model number.)

14
LC-20B5M
5. Adjustment
5-1. Counter bias adjustment: COM BIAS on page 2
Adjust the "COM BIAS" setting until the contrast gets optimum (the black portion blackest). The adjustment
guideline is around 100.
5-2. TAMP adjustment
1) Feed the colour bar pattern signal.
2) See if the "Y" reading on adjustment process page 2 is within the range shown below. If not, adjust the
"NTSC TAMP" setting to bring the "Y" reading within the specified range.
3) If the "NTSC TAMP" setting has been readjusted, write down its new setting in the "PAL TAMP" and
"SECAM TAMP" items manually.
Model LC20B5M
Adjustment value 174~189
0 1 2 3 4 5 6 7 8 9 10 11 12 13 14 15 16 17 18 19 20 21 22 23 24 25 26
2COM B I AS 00
TAMP L 71
14
YD TA
H815
TAMP
A819
3–5
3–2
1–3
9.2
0.0
0
0
1
1. 0
NTSC TAMP
TAMP
31
PAL TAMP 31
SECAM F
RCU TOF F
GCU TOF F
BCUTOF
R–GA IN
G–GA IN
B–GA IN
31
0
1
2
3
4
5
6
7
8
9
10
11
12
13
Y Data
(White 75%)
(Page 2 of adjustment process OSD)
5-3. White balance adjustment
1) Feed the monoscope pattern signal.
2) Adjust the "RCUTOFF", "BCUTOFF", "R-GAIN" and "B-GAIN" settings on adjustment process page 3 to
achieve the colour at the same level as with the standard set.

15
LC-20B5M
5-4. Other adjustments (SOUND, VPC, DPS, DAC, TUNER, OTHERS, TEXT)
1) Move the cursor to a desired item on page 4 of adjustment process menu. Press the CURSOR LEFT/
RIGHT keys, "VOL (+)/(–)" keys or OK key to select the item.
4
I2C DATA 000000000000
I2C DATA WAIT
SOUND
VPC
DPS
DAC
TUNER
OTHERS
TEXT
2) The adjustment process menu of the item appears on the screen. The settings are now ready to change.
Screen with SOUND selected
SOUND1
VOLUME 0
AVC OFF
MSP DATA 0000000000
MSP DATA WAIT
0018H ST 1D
ONTA 1
CARRIER MUTE ON
SP TEST OFF
3) To go back to page 4 of adjustment process menu, press the FLASHBACK key on the remote controller.

16
LC-20B5M
6. Lamp error detection
6-1. Functional description
This LCD colour television has a function (lamp error detection) to be turned off automatically for safety
when the lamp or lamp circuit is abnormal.
If the lamp or lamp circuit is abnormal, or some other errors happen, and the lamp error detection is
executed, the followings occur.
1 The main unit of television is turned off 5 seconds after it is turned on. (The power LED on the front side of
TV turns from green to red.)
2 If the situation 1 happens 5 times sequentially, television can not be turned on. (The power LED remains
red.)
6-2. Countermeasures
6-2-1. Check when turning off the lamp error detection
When television is turned off by the lamp error detection mentioned above, it enters the adjustment
process with the power LED red.Entering the adjustment process turns off the error detection and turns
on TV.
This enables the operation check to detect errors in the lamp or lamp circuit.
Check whether "ERROR NO RESET" on line 4, page 1 of the adjustment process is 1 or more. If it is 1
or more, it indicates the lamp error detection was executed.
6-2-2. Resetting of the lamp error count
After confirming that the lamp or lamp circuit is normal, reset the lamp error count. Select "ERROR NO
RESET" on line 4, page 1 of the adjustment process and set the number to 0 using the volume button.
1M O D E L A642M
I N C H S I Z E 20
E R R O R N O R E S E T 5
P U B L I C M O D E OFF
E X T C O N T R O OFF
E X T M O D E UART
U P D A T E M O D E NORMAL
T E X T R E S E T OFF
V E R R O M 1. 0 0A G AI B U 0. 0 0 0
Reset 0
Page 1 of the adjustment process
Afterwards, perform the operation check to confirm that the lamp error detection does not function.

17
LC-20B5M
7. Public mode
•How to enter into PUBLIC MODE
1. Turn off TV by pressing MAIN POWER switch.
2. While pressing "MENU" key and "VOL(+)" key at the same time, press MAIN POWER switch for more than 2
seconds.
TV will turn on, and you will see the screen display setting pass word of PUBLIC MODE. (See Figure 1)
3. Press "0", "2", "7" key of Remote control, you wilt see the screendisplay a setting of PUBLIC MODE.
(See Figure 2)
• Setting screen of “PUBLIC MODE”
1. You can select each item of functions by pressing cursor UP/DOWN keys or CH(ù)/(Ù) Keys on the remote
control or CH(ù)/(Ù) keys on the LCD TV. The letter of selected item turns to yellow colour when you selected
it.
2. The setting position of each item of functions are made by pressing cursor RIGHT/LEFT keys on the remote
control or VOL (+)/(–)keys on the LCD TV.
3. Select ENTER position after you set all functions, and press cursor RIGHT/LEFT keys on the remote control
or VOL(+)/(–)keys on the LCD TV for confirmation.
Unless otherwise you make ENTER confirmation, the settings will not be memorized.
• 6-functions of Public Mode settings expand for public application
1. MAXIMUM VOLUME (1—————60)
You can set the maximum volume at your desire level.
2. VOLUME FIXED (VARIABLE / FIXED)
You can fix the sound volume at your desire level.
When you set to "FIXED", the sound volume which you just set is fixed.
3. REMOTE CONTROL (RESPOND / LIMITED)
If you set "LIMITED", remote control keys of POWER, CH(ù)/(Ù), VOL(–)/(+) and BRIGHT keys are
responded, but other keys are not responded.
This is a position that you can not make MENU adjustments.
4. USER CONTROL (RESPOND / NO RESPOND)
"NO RESPOND" means that the TV does not respond when you press a user control buttons except main
power button on the main unit.
Factory setting
Figure 2
PUBLIC MODE
MAXIMUM VOLUME [ 60]
VOLUME FIXED [VARIABLE]
REMOTE CONTROL [RESPOND]
USER CONTROL [RESPOND]
MENU BUTTON [RESPOND]
ON SCREEN DISPLAY [YES ]
START MODE [NORMAL ]
INPUT MODE FIXED [NORMAL ]
SOUND ONLY MODE [NO ]
RESET
ENTER
1 ↔2 ··· ↔59 ↔60
VARIABLE ↔FIXED
RESPOND ↔LIMITED ↔NO RESPOND
RESPOND ↔NO RESPOND
RESPOND ↔NO RESPOND
YES ↔NO
NORMAL ↔AV1 ↔COMPONENT ↔CH1 ↔CH2... ↔CH98
NORMAL ↔FIXED
NO ↔YES
Adjust setting
↔CH99 ↔CH0
Figure 1

18
LC-20B5M
5. MENU BUTTON (RESPOND / NO RESPOND)
With "NO RESPOND" selected, the remote controller and the set's MENU key are disabled.
6. ON SCREEN DISPLAY (YES / NO)
If you set "NO" position, OSD will not appear.
7. START MODE (NORMAL↔AV1↔COMPONENT↔CH1↔CH2...↔CH98↔CH99↔CH0)
When any other item than "NORMAL" has been selected, the set gets started in the selected input mode or
channel at the next switch-on.
8. INPUT MODE FIXED (NORMAL↔FIXED)
(* This item cannot be selected if the start mode is "NORMAL".)
If "FIXED" has been selected, any channels and input modes other than those selected in the start mode cannot
be picked up.
9. SOUND ONLY MODE (NO↔YES)
(* This item cannot be selected if "NO" appears on the on-screen display.)
Let's suppose that this item has been selected and the BRIGHT key on the remote control has been pressed.
The item "BRIGHTNESS [OFF]" can now be selected next to the item "BRIGHTNESS [DARK]".
Five seconds later, the screen shuts off and the sound alone is heard.
Once in this mode, no picture but the OSD appears. But the channels and sound volume can still be changed.
To quit this mode, press the BRIGHT key on the remote control again and select any item other than
"BRIGHTNESS [OFF]".
10. RESET
You can cancel all Public Mode settings. (It returns to the factory setting.)
11. ENTER
You make sure after you have specified all functions, then press the enter key. Unless otherwise you press
the enter key, all positions that you have selected will not be set.
Screen with "BRIGHTNESS [OFF]" selected
BRIGHTNESS [OFF] TURNS OFF IN 5 SECS.
Count-down started from 5

19
LC-20B5M
8. Functions of the PC card
8-1. Product outline
Sharp has adopted its original "ASV *2 method low-reflection black TFT flat panel" that can reproduce the
high-contrast images with firm black even in bright rooms."QS technology" *1 reduces residual images even
for quick-moving subjects to realize eye-friendly images, and "I/P conversion for 3-D motions" suppresses
roughness and flickering.They help you watch the high-contrast and clear images from any angles.
Furthermore, this product is equipped with "PC card slot" to record TV programs on memory cards, and to
show the still images taken with digital cameras on the large screen of an LCD TV with memory cards*.
This model has new design that has side-speakers designed by Toshiyuki Kita, a world-known industrial
designer.The speakers are punching metal-processed, so they have a style showing quality sound capabilities.
The screen properties are, needless to say, much superior to CRTTV sets: low power consumption, long life
backlight, and other power-saving features, as well as reduced flickering.
* QS --> only for LC-20B5E (not available on LC-15B5E)
<CARD FUNCTIONS>
(1) Enjoying recorded TV programs
To record the program you are watching, all you need is just push the record button.Supporting the hard
disc PC cards newly realizes long-time recording.There are lots of recording functions*, including "Trace
Recording" (Going back to record to a few seconds before starting recording), "Reserved Recording" (Up
to 8 programs programmable a month) and "Easy Recording" (Finish time presettable during recording),
and you can enjoy the recorded programs on full screen.
* The video record system is MPEG-4. Smooth video with 25 frames/sec is realized.
(SD memory cards, Multimedia cards, Compact flashes, Smart media, Memory sticks, xD picture cards
and Micro drive are supported.For use, the PC card adapter specific for each memory card is necessary.
Names of memory cards are trademark.)
• EVideo Recording/Playing functions
One scene in the TV program you are watching can be recorded on memory cards.The recorded video
can be readily reproduced on demand.The Trace Recording function records from a few seconds before,
so you need not worry about delaying the use of the remote controller.Three recording modes (SP/LP/
EP) are available for your applications.
* Record time is variable for the TV reception condition and the video contents.
* Ground-based broadcasting and external input (except for SCART RGB) that are not copy-protected can
be recorded.
* If the file capacity is over 4 GB, or the record time is longer than 12 hours, recording/playing is impossible.
• EStill-Picture Recording/Playing functions
1) One scene in a TV program can be recorded on memory cards as a still image.
• EYou can readily record text information that you have made a memo until now.
* The number of images is variable for the TV reception condition and the image contents.
2) Enjoying still images taken with digital cameras
With memory cards and on the large screen of an LCD TV, you can readily show still images captured
with digital cameras*.
* Only JPEG still images that were recorded to fit the standard (Design rule for Camera File system: DCF)
by Japan Electronics and Information Technology Industries Association Corp are playable.
* The number of files displayable is up to 1,024, including video and still images.
Record time guideline
Record mode Application Frame rate 256 MB card 5 GB card
FINE 25
25
12.5
Approx. 10 min.
Approx. 30 min.
Approx. 1 hr.
Approx. 4 hrs.
Approx. 10 hrs.
Approx. 25 hrs.
NORMAL
PORTABLE
Standard quality mode
Long time record mode
Portable device compatible mode
Number of still images to be recorded Recording size 32 MB card 128 MB card
Approx. 1000
Approx. 300

20
LC-20B5M
8-2. PC Card Unit Spec
(1) Still-Picture Mode
1) Recording/Play File Format Based on JPEG/DCF
2) Recording Pixcel Numbers 640x480
3) Playing Pixcel numbers 640x480
(2) Motion-picture Mode
1) File system ASF
(3) Motion picture Format
(4) Audio Format
(5) Maximum file size
1) 1024 file (Still & Motion)
2) 4 GB
3) 12 hour
(6) Applicable Card media
HDD Card ...Max 5 GB
Micro Drive ...Max 2 GB
Compact Flash Card ...Max 2 GB
Memory Stick/-DUO/-PRO ...Max 128MB/1GB
SD Card/mini SD ...Max 512/32MB
Multi media Card ...Max 128MB
xD Card ...Max 128MB
Smart Media ...Max 128MB
(7) PC Card Slot Interface 68pin PCMCIA
Video Codec Picel Numbers Transfer Rate Frame Rate
SP (Fine mode) MPEG4 QVGA (320x240) 2.5Mbps 25fps
LP (Normal Mode) MPEG4 QVGA (320x240) 1.0Mbps 25fps
EP (Portable Mode) MPEG4 QVGA (320x240) 384Kbps 12.5fps
Fitting Time Mode MPEG4 QVGA (320x240) Variable 25fps
Video Codec No. of Channel Sampling frequency Frame Rate
SP (Fine mode) WMA 2ch (Stereo) 32KHz 48Kbps
LP (Normal Mode) WMA 2ch (Stereo) 32KHz 48Kbps
EP (Portable Mode) G.726 1ch (monoral) 8KHz 32Kbps
Fitting Time Mode WMA 2ch (Stereo) 32KHz 48Kbps
Table of contents
Other Sharp TV manuals

Sharp
Sharp LC-32WD1E/S/RU User manual

Sharp
Sharp SX66NF8 User manual

Sharp
Sharp LC-40FI5122E User manual

Sharp
Sharp 32JF-76E User manual

Sharp
Sharp 40BJ2K User manual

Sharp
Sharp LC-43CUF8472ES User manual

Sharp
Sharp Aquos LC 15B1U User manual

Sharp
Sharp 21LF-90RU User manual

Sharp
Sharp 14A-30MT User manual

Sharp
Sharp LC-40FI2242KF User manual

Sharp
Sharp 32JW-74EES User manual

Sharp
Sharp LC-32LE240E User manual

Sharp
Sharp Aquas LC-52LE920UN User manual

Sharp
Sharp 21J-FG1RU User manual

Sharp
Sharp Aquos 2T-C50BG1X User manual

Sharp
Sharp AQUOS LC-15E2E User manual

Sharp
Sharp 21K-FG1M User manual

Sharp
Sharp LC-15B2MA User manual

Sharp
Sharp LC-65D93U User manual

Sharp
Sharp 60FW-53E Guide