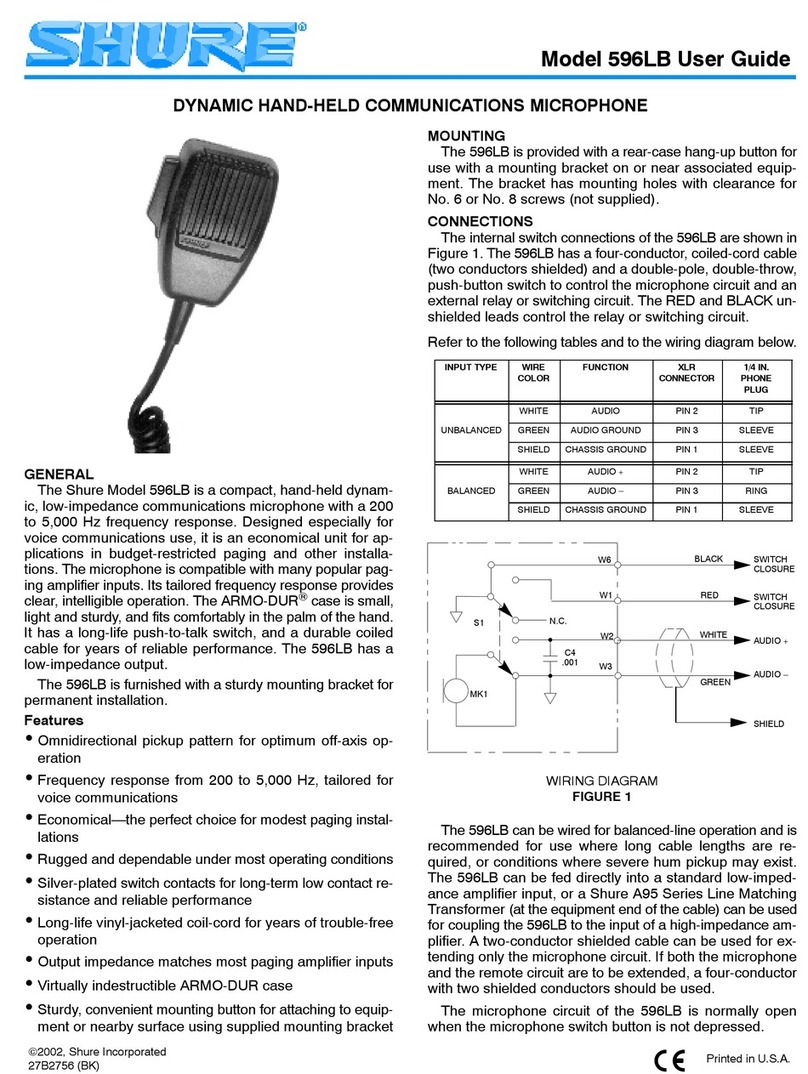
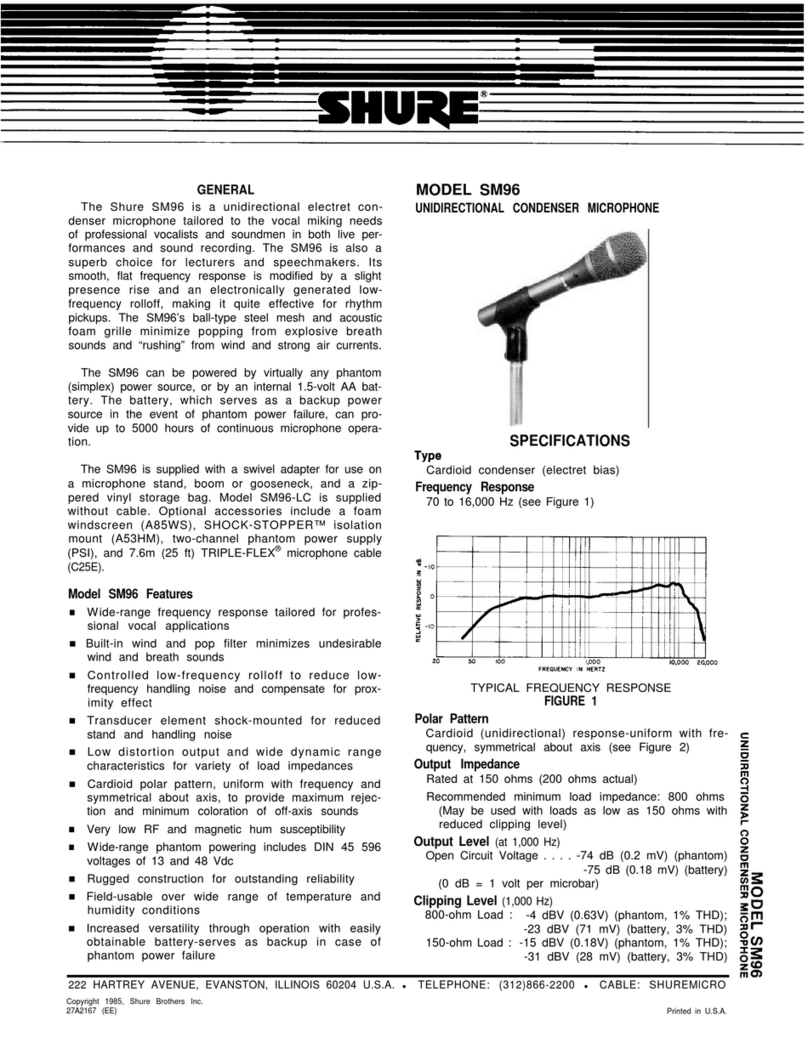
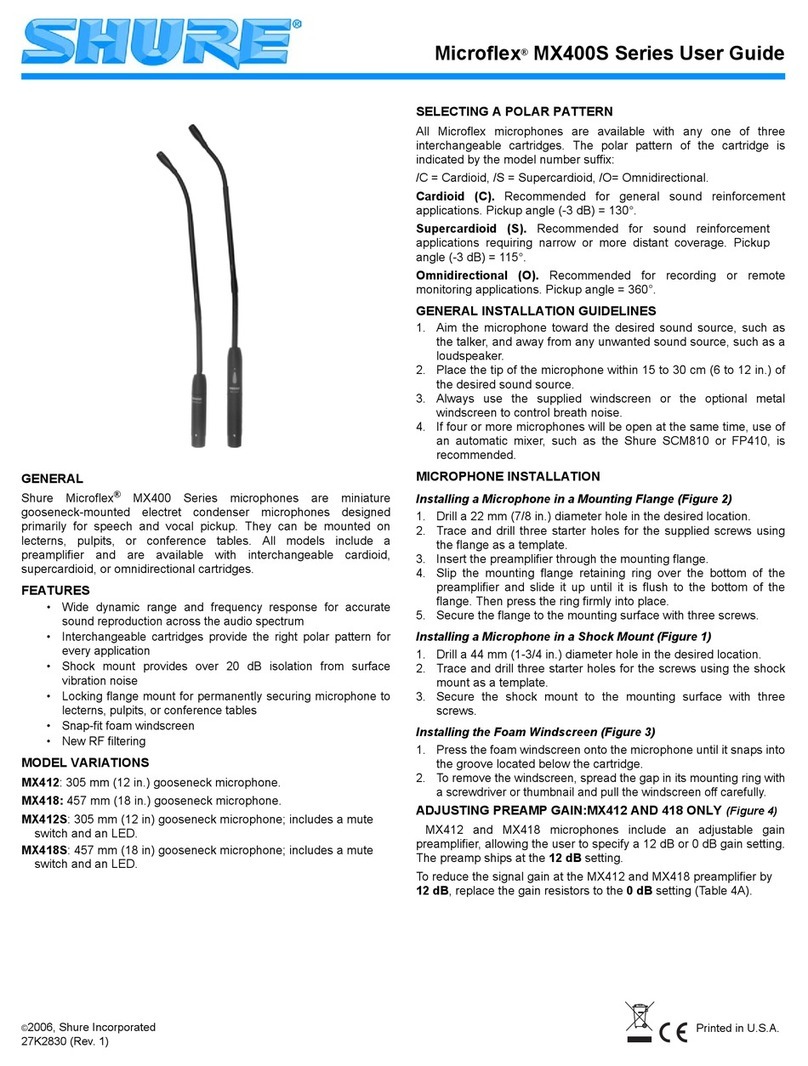
Shure Microflex MX412D User manual

Shure Brothers Incorporated
222 Hartrey A
venue
Evanston IL 60202-3696 U.S.A.
Microfle
x M
X412
D D
eskto
p G
oosenec
k M
icrophone
Use
r G
uide
1996,
Shure Brothers Incorporated
27B2831 (PL)
Printed in U.S.A.
(Photo)
GENERAL
Shure Microflex MX412D Series microphones are miniature
electret condenser gooseneck microphones with a desktop base
and attached 3 m (10 ft) cable. The desktop base allows these
microphones to be used in multi–purpose rooms where quick
set–up is required, or where permanent installation is impractical.
FEATURES
Wide
dynamic range and frequency
response
for accurate
sound reproduction across the audio spectrum
Interchangeable cartridges that provide an optimal polar
pattern choice for each application
Balanced, transformerless output for increased immunity to
noise over long cable runs
Programmable on/off switch and LED on/off indicator
Logic input and output terminals for remote control or use
with automatic microphone mixers
Snap-fit foam windscreen
MODEL VARIATIONS
All Microflex microphones are available with any one of three
interchangeable cartridges. The polar pattern of the cartridge is
indicated by the model number suffix:
C = Cardioid, S = Supercardioid, O= Omnidirectional
MX412D/C: 304.8 mm (12 in.) cardioid desktop
mini–condenser, gooseneck–mounted microphone.
MX412D/S: 304.8 mm (12 in.) supercardioid desktop
mini–condenser, gooseneck–mounted microphone.
MX412D/O: 304.8 mm (12 in.) omnidirectional desktop
mini–condenser, gooseneck–mounted microphone.
SELECTING A POLAR PATTERN
Cardioid
(C).
R
ecommende
d f
o
r g
enera
l s
oun
d r
einforcement
applications. Pickup angle (–3 dB) = 130°.
Supercardioid (S). Recommended for sound reinforcement
applications
r
equirin
g n
arrowe
r o
r m
or
e d
istan
t c
overage
. P
ickup
angle (–3 dB) = 115°.
Omnidirectional
(
O).
R
ecommende
d f
o
r r
ecordin
g o
r r
emote
monitoring applications. Pickup angle = 360°.
GENERAL INSTALLATION GUIDELINES
1. Aim
the microphone toward the desired sound source,
such
as
the talker
, and away from any unwanted sound source,
such as a loudspeaker.
2. Place
the microphone cartridge within 15 to 30 cm (6 to
12
in.) of the desired sound source.
3. Always use the supplied windscreen or the optional
metal
windscreen to control breath noise.
4. If four or more microphones will be open at the same time,
use of an automatic mixer, such as the Shure SCM810 or
FP410, is recommended to minimize feedback and noise.
MICROPHONE INSTALLATION
Securing a Microphone to a Mounting Surface (Figure 1)
1. Install
two No. 6 wood screws, 50.8 mm (2 in.) apart, on the
mounting surface.
2. Place the key holes over the screw heads and push the
microphone
into position. Adjust the height of the screws as
necessary to secure the microphone.
Installing the Foam Windscreen (Figure 2)
1. Press the foam windscreen onto the microphone until it
snaps into the groove located below the cartridge.
2. To remove the windscreen, spread the slot in its mounting
ring
w
it
h a s
crewdrive
r o
r t
humbnai
l a
n
d p
ul
l t
h
e w
indscreen
off carefully.
INTERNAL DIP SWITCH FUNCTIONS
All MX412D models have internal DIP switches that allow the
user to program the On/Off switch for a variety of applications. To
gain access to the DIP switches, remove the bottom plate.
LOGIC TERMINAL DEFINITIONS
LOGIC GND Terminal: Connects to the logic ground of an
automatic
mixer
, switcher
, or
other equipment. Can be modified
to prevent ground loops. Refer to the “MX412D Logic
Modifications” paragraph.
SWITCH OUT Terminal: Provides a TTL logic low (0 Vdc)
when
the membrane switch is pressed. Provides TTL logic high
(5 Vdc) otherwise. This signal is available at all times for all
switch settings. The Switch Out function provides momentary
closure when S1 is Off and latching closure when it is On.
MX412D LOGIC MODIFICATIONS
Isolating Logic Ground from Audio Ground
1. Remove jumper R40 from the top of the circuit board.
2. Make
s
ur
e L
OGI
C G
N
D t
erminal
c
onnect
s t
o t
h
e l
ogi
c g
round
of the automatic mixer, switcher, or other equipment.
Changing SWITCH OUT Terminal to Always Momentary
To accommodate interface equipment requiring momentary
closure of the microphone (even when the desired microphone
function is latching on/off), proceed as follows:
1. Remove R45 from the top of the circuit board.
2. Reinstall R45 at location R46 on the top of the circuit board.

2
Custo
m S
witch Modifications
S4
i
s a
vailabl
e f
or
c
usto
m l
ogi
c m
odifications
. W
he
n S
4 i
s i
n
the
O
N p
osition
, p
a
d W
4 i
s c
onnecte
d to p
a
d W
5.
NOTE:
For technical data by Fax, phone 1-800-488-3297 and
follow
the recorded
instructions. For additional technical assis
-
tance, phone Shure at (847) 866-2200. In Europe, phone
49-7131-72140.
REPLACEMENT PARTS AND ACCESSORIES
Snap–Fit Foam Windscreen (4 per pkg.) RK412WS.
. . . . .
Foam Ball Windscreen (4 per pkg.) A99WS.
. . . . . . . . . . . . .
Locking Metal Windscreen A412MWS.
. . . . . . . . . . . . . . . . . .
Replacement 3 m (10 ft) XLR Cable C120.
. . . . . . . . . . . . . .
Custom Logic Cable (specify length) 15A523/1.
. . . . . . . . . .
Omnidirectional Cartridge R183B.
. . . . . . . . . . . . . . . . . . . . .
Supercardioid Cartridge R184B.
. . . . . . . . . . . . . . . . . . . . . .
Cardioid Cartridge R185B.
. . . . . . . . . . . . . . . . . . . . . . . . . . . .
Base Plate Bumpers 80A8053A.
. . . . . . . . . . . . . . . . . . . . . . .
DESIRED MICROPHONE FUNCTION USER ACTION/LED DISPLAY DIP SWITCH SETTINGS
Push to Mute (As Shipped)
Press and hold switch to temporarily mute micro
-
phone; release switch to unmute
LED turns on when microphone is active
S1 = OFF
S2 = OFF
S3 = OFF
Push to T
alk
Press and hold switch to activate microphone; re
-
lease switch to mute
LED turns on when microphone is active
S1 = OFF
S2 = ON
S3 = OFF
Push On/Push Off
Press switch to toggle microphone on or of
f
LED turns on when microphone is active
S1 = ON,
S2 = ON for muted initial state
S2 = OFF for active initial state
S3 = OFF
Switch Deactivated, Mic Always Active
No action, LED Always OFF S3 = ON
Switch Deactivated, Mic Always Active
Short LED IN terminal to LOGIC GROUND terminal
LED Always ON S3 = ON
Automatic Mixer Mode
If S1=OFF
, SWITCH OUT signal will be momentarily
logic low when switch is pressed
If S1=ON, SWITCH OUT signal will be latching logic
low when switch is pressed
Connec
t S
WITCH OUT signa
l t
o various logic inputs
o
f a
utomatic mixe
r f
or custo
m f
unctions
Connect mixer channel GA
TE OUT to microphone
LED IN. LED on microphone turns on when its
channel is gated on
S1 = ON or OFF
S3 = ON
SPECIFICATIONS
Frequency Response (Figure 3)
50 to 17,000 Hz
Polar Pattern (Figure 4)
Output Impedance
EIA Rated at 150 Ω (180 Ω actual)
Open Circuit Sensitivity
At 1 kHz, ref. 1 V per microbar*
Cardioid: –53.5 dBV (2.11 mV)
Supercardioid: –52.5 dBV (2.37 mV)
Omnidirectional: –48.0 dBV (3.98 mV)
*1 microbar = 74 dB SPL
At 1 kHz, ref. 1 V per Pascal
Cardioid: –33.5 dBV (21.1 mV)
Supercardioid: –32.5 dBV (23.7 mV)
Omnidirectional: –28.0 dBV (39.8 mV)
*1 Pascal = 94 dB SPL
Maximum SPL (1 kHz at 1% THD, 1 kΩload)
Cardioid: 123.0 dB
Supercardioid: 122.0 dB
Omnidirectional:
117.5 dB
Equivalent Output Noise (A-weighted)
Cardioid: 29.0 dB SPL
Supercardioid: 28.0 dB SPL
Omnidirectional:
23.6 dB SPL
Signal to Noise Ratio (referenced at 94 dB SPL)
Cardioid: 65.0 dB
Supercardioid: 66.0 dB
Omnidirectional:
70.5 dB
Dynamic Range with 1 kΩLoad
94.0 dB
Common Mode Rejection
45.0 dB minimum
Mute Switch Attenuation
50.0 dB minimum
Preamplifier Output Clipping Level (1% THD)
–6.0 dBV (0.5 V)
Polarity
Positive sound pressure on diaphragm produces
positive voltage on pin 2 relative to pin 3 of XLR
output connector.
Power Requirements
11 to 52 Vdc phantom, 2.0 mA
Environmental Requirements
Operating
T
emperature Range: –18
°to
57
°
C (0
°
to
135
°F)
Relative Humidity: 0 to 95%
Dimensions (Figure 5)
Weight
0.81 kg (1.80 lbs) net
1.25 kg (2.77 lbs) packaged
Cable Type
The
a
ttache
d c
usto
m c
abl
e c
ontains
a s
hielde
d a
udio
pair
a
n
d t
hre
e u
nshielde
d c
onductor
s f
o
r l
ogic
c
ontrol.
Overall diameter = 0.6 mm (0.165 in.)
Certification
Conforms
to European Union directives, eligible to
bear CE marking; meets European Union EMC
Immunity
Requirements (EN 50 082–1, 1992); RF
radiated
(IEC 801–3); ESD (IEC 801–2); EFT
(IEC
801–4).

3
GUIDE
DE L
’UTILISA
TEUR DU MICROPHONE DE T
ABLE À
COL DE CYGNE MICROFLEXMX412D
GÉNÉRALITÉS
Les modèles Microflex série MX412D sont des microphones
miniatures à col de cygne à condensateur à électret avec pied
pour
t
able
, d
oté
s d
’u
n c
âble fix
e d
e 3 m (1
0 p
i). L
e p
ied d
e c
es
microphones permet de les utiliser dans des salles à usages
multiples,
o
ù u
n
e i
nstallatio
n r
apid
e e
s
t n
écessair
e o
u
l
orsqu’une
installation permanente n’est pas pratique.
AVANTAGES
•Large
g
amm
e d
ynamiqu
e e
t r
épons
e e
n f
réquenc
e p
ou
r u
ne
reproduction précise du son sur tout le spectre audio
•Cartouches interchangeables permettant une courbe de
directivité
optimale pour chaque application
•Sortie équilibrée sans transformateur pour une immunité
au bruit accrue avec de grandes longueurs de fil.
•Interrupteur marche/arrêt programmable et témoin DEL
•Bornes d’entrée/sortie logique pour télécommande ou
usage avec mélangeurs automatiques
•
Coupe–vent en mousse encliquetable
VARIANTES
Tous les microphones Microflex sont offerts avec l’une des
trois
cartouches interchangeables. La courbe de directivité de
la
cartouche utilisée dans un
micro particulier est indiquée par
le suffixe du numéro de modèle :
C = Cardioïde, S = Supercardioïde, O= Omnidirectionnelle
•MX412D/C: microphone de table cardioïde à mini–
condensateur sur col de cygne de 304,8 mm.
•MX412D/S: microphone de table supercardioïde à mini–
condensateur sur col de cygne de 304,8 mm.
•MX412D/O:
microphone de table
omnidirectionnel à mini–
condensateur sur col de cygne de 304,8 mm.
CHOIX DE LA CARTOUCHE
Cardioïde (C). Recommandée pour les applications de so-
norisation générale. Angle de captage (–3 dB) = 130.
Supercardioïde (S). Recommandée pour les applications
de
sonorisation exigeant un captage plus étroit ou à plus gran
-
de distance. Angle de captage (–3 dB) = 115.
Omnidirectionnelle
(O)
:
Recommandée pour
l’enregistre
-
ment ou le captage à distance. Angle de captage = 360.
DIRECTIVES GÉNÉRALES POUR L’INSTALLATION
1. Diriger le microphone vers la source sonore désirée, par
exemple
un orateur
, et à l’opposé des sources sonores in
-
désirables telles que des haut–parleurs.
2. Placer la cartouche du microphone de 15 à 30 cm de la
source sonore désirée.
3. Toujours
utiliser le coupe–vent fourni ou le coupe–vent op
-
tionnel
en métal pour minimaliser les
bruits de respiration.
4. Lorsque
quatre microphones ou plus doivent être ouverts
simultanément l’usage d’un mélangeur automatique, par
exemple le Shure SCM810 ou FP410, est recommandé
pour minimaliser le larsen et le bruit de fond.
INSTALLATION DU MICROPHONE
Fixation des microphones sur une surface de montage
(Figure 1)
1. Poser
deux vis à bois no. 6 à 50,8
mm l’une de l’autre, sur
la surface de montage.
2. Placer
les trous
de montage sur les têtes des vis et pousser
le
microphone en place. Régler la hauteur des vis selon le
besoin pour assujettir le microphone.
Installation du coupe–vent en mousse (Figure 2)
1. Enfoncer le coupe–vent en mousse sur le microphone
jusqu’à
ce qu’il s’encliquette dans la gorge se trouvant au–
dessous de la cartouche.
2. Pour
le retirer
, écarter les extrémités de la bague de rete
-
nue
avec un tournevis ou une punaise et le
dégager du mi
-
cro avec précaution.
FONCTIONS
D
U C
OMMUTATEU
R À P
OSITIONS
M
ULTIPLES
Tous
l
e
s m
odèle
s M
X412
D s
on
t d
oté
s d
’u
n c
ommutateu
r à p
o-
sitions multiples permettant à l’utilisateur de programmer l’inter-
rupteur marche/arrêt pour diverses applications. Pour accéder à
ce commutateur, retirer la plaque de dessous.
DÉFINITION DES BORNES LOGIQUES
Borne
MASSE LOGIQUE (LOGIC GND)
: pour la connexion
à la masse logique,
d’un mélangeur automatique, d’un commu
-
tateur
ou d’un autre appareil. Peut être modifiée pour empêcher
les
boucles de masse. V
oir le paragraphe “Modifications de lo
-
gique du MX412D”.
Borne
de COUPURE (SWITCH
OUT)
: procure un signal lo
-
gique
TTL bas (0 Vc.c.) lorsque l’interrupteur à membrane est
enfoncé. Si l’interrupteur n’est pas enfoncé, le signal logique
TTL
est haut (5 V c.c.). Ce signal est constamment disponible
avec tous les réglages d’interrupteur. La fonction de coupure
permet
de couper le microphone momentanément lorsque l’in
-
terrupteur
DIP S1 est sur arrêt (OFF) ou en permanence lors
-
que l’interrupteur est sur marche (ON).
MODIFICATIONS LOGIQUES DU MX412D
Isolation de la masse logique de la masse audio
1. Retirer le cavalier R40 du dessus du circuit imprimé.
2. S’assurer
que la borne de MASSE LOGIQUE est connec
-
tée à la masse logique, du mélangeur automatique, du
commutateur ou d’un autre appareil.
Configuration de la borne de COUPURE pour la coupure
momentanée permanente
Pour
l
’utilisatio
n a
ve
c u
n d
ispositi
f d
’interfac
e e
xigean
t l
a
c
ou-
pure
m
omentané
e d
u
m
icrophon
e (
mêm
e s
i l
a f
onctio
n d
e m
icro-
phone désirée est verrouillable), procéder comme suit :
1. Retirer le cavalier R45 du dessus du circuit imprimé.
2. L’installer sur la position R46 du dessus du circuit imprimé.
MODIFICATIONS SPÉCIALES
L’interrupteur
S
4 p
erme
t l
e
s m
odification
s s
péciales
. L
orsqu’il
est en position de MARCHE, W4 est connecté à W5.

4
FONCTION DE MICROPHONE DÉSIRÉE ACTION REQUISE/INDICATION DEL RÉGLAGES DES
INTERRUPTEURS
Appuyer pour couper (réglage usine)
Maintenir l’interrupteur enfoncé pour fermer le mi
-
crophone, le relâcher pour le rouvrir
.
L
e t
émoin s’allum
e l
orsqu
e l
e m
icrophon
e e
s
t o
uvert.
S1 = ARRÊT
S2 = ARRÊT
S3 = ARRÊT
Appuyer pour parler
Maintenir l’interrupteur enfoncé pour ouvrir le mi
-
crophone, le relâcher pour couper le micro.
L
e t
émoin s’allum
e l
orsqu
e l
e m
icrophon
e e
s
t o
uvert.
S1 = ARRÊT
S2 = MARCHE
S3 = ARRÊT
Appuyer pour ouvrir/couper
Appuyer sur l’interrupteur pour alternativement ou
-
vrir et couper le microphone.
L
e t
émoin s’allum
e l
orsqu
e l
e m
icrophon
e e
s
t o
uvert.
S1 = MARCHE
S
2 = M
ARCH
E p
ou
r é
ta
t i
nitial coupé
S
2 = A
RRÊ
T p
ou
r é
ta
t i
nitia
l o
uvert
S3 = ARRÊT
I
nterrupteur désactivé, microphone
fermé en permanence
Aucune action, témoin toujours ÉTEINT
S3 = MARCHE
Interrupteur désactivé, microphone
ouvert en permanence
Relier la borne d’entrée (IN) DEL à la MASSE
LOGIQUE
Témoin toujours allumé
S3 = MARCHE
Mode de mélangeur automatique
Si S1 = ARRÊT
, le signal de COUPURE sera mo
-
mentanément en niveau logique bas lorsque l’inter
-
rupteur est actionné.
Si S1 = MARCHE, le signal de COUPURE verrouil-
lera le niveau logique bas lorsque l’interrupteur est
actionné.
Brancher le signal de COUPURE sur les diverses
entrées logiques d’un mélangeur automatique pour
obtenir les fonctions spéciales.
Raccorder la voie SORTIE PORTE (GATE OUT)
du mélangeur à l’entrée DEL du microphone. La
DEL s’allume lorsque cette voie est activée.
S1 = MARCHE ou ARRÊT
S3 = MARCHE
CARACTÉRISTIQUES
Courbe de réponse (Figure 3)
50 à 17 000 Hz
Courbe de directivité (Figure 4)
Impédance de sortie
EIA nominale 150
Ω
(180
Ωréels)
Sensibilité en circuit ouvert
à 1 kHz, réf. 1 V par microbar*
Cardioïde: –53,5 dBV (2,1
1 mV)
Supercardioïde
: –52,5 dBV (2,37 mV)
Omnidirectionnel
: –48,0 dBV (3,98 mV)
*1 microbar = 74 dB NP
A
à 1 kHz, réf. 1 V par Pascal*
Cardioïde: –33,5 dBV (21,1 mV)
Supercardioïde
: –32,5 dBV (23,7 mV)
Omnidirectionnel
: –28,0 dBV (39,8 mV)
*1 Pascal = 94 dB NPA
NP
A maximum (1 kHz avec DHT de 1%, charge de 1 k
Ω)
Cardioïde: 123,0 dB
Supercardioïde
: 122,0 dB
Omnidirectionnel
: 1
17,5 dB
Bruit de sortie équivalent (pondération en A)
Cardioïde: 29,0 dB NP
A
Supercardioïde
: 28,0 dB NP
A
Omnidirectionnel
: 23,6 dB NP
A
Rapport
s
ignal/brui
t (
mesur
é a
ve
c u
n
e p
ression
a
coustique
de
9
4 d
B NPA)
Cardioïde: 65,0 dB
Supercardioïde
: 66,0 dB
Omnidirectionnel
: 70,5 dB
Gamme dynamique avec charge de 1 k
Ω
94,0 dB
Rejet en mode commun
45,0 dB minimum
Atténuation du bouton de coupure
50,0 dB minimum
Niveau d’écrêtage de sortie préampli (1 % DHT)
6,0 dBV (0,5 V)
Polarité
Une
pression acoustique positive sur le diaphragme produit
une
tension positive sur la broche 2 par rapport à la broche 3 du
connecteur
de sortie XLR.
Alimentation
1
1 à 52 V c.c. duplex, 2,0 mA
Environnement
Plage de températures de fonctionnement
: –18 à 57
C
Humidité relative
: 0 à 95 %
Dimensions (Figure 5)
Poids
0,81 kg net
1,25 kg emballé
T
ype de câble
Le câble spécial fixe comporte une paire audio blindée et trois
conducteurs non blindés pour la commande logique. Diamètre
hors
tout = 0,6 mm
Homologation
Conforme aux directives de l’Union Européenne, autorisé à porter
la marque CE ; conforme aux spécifications d’immunité CEM de
l’Union
E
uropéenn
e (
E
N 5
0 0
82–1
, 1
992)
: p
arasite
s R
F é
mi
s (
CEI
801–3) ; décharge électrostatique (CEI 801–2) ; transfert de
fréquence
é
lectroniqu
e (
CE
I 8
01–4).
REMARQUE: Pour toute information technique par télécopie,
composer le 1–800–488–3297 et et suivre les instructions de
l’enregistrement.
Pour toute assistance technique supplémentai
-
re, appeler Shure au (847) 866–2200. En Europe, appeler le
49–7131–72140.
PIÈCES DE RECHANGE ET ACCESSOIRES
Coupe–vent
e
n m
ouss
e e
ncliquetabl
e (
paquets d
e 4
) RK412WS.
Coupe–vent
e
n m
ousse sphériqu
e (
paquets d
e 4
) A99WS.
. . . . . .
Coupe–vent
métallique verrouillable
A412MWS.
. . . . . . . . . . . . .
Câble
XLR de rechange de 3 m (10 pi)
C120.
. . . . . . . . . . . . . .
Câble
logique spécial (préciser la longueur)
15A523/1.
. . . . . . .
Cartouche
omnidirectionnelle
R183B.
. . . . . . . . . . . . . . . . . . . . .
Cartouche
supercardioïde
R184B.
. . . . . . . . . . . . . . . . . . . . . . . .
Cartouche
cardioïde
R185B.
. . . . . . . . . . . . . . . . . . . . . . . . . . . . .
Amortisseurs
de plaque de base
80A8053A.
. . . . . . . . . . . . . . . .

5
MICROFLEXMX412D SCHWANENHALS–TISCHMIKRO-
FON GEBRAUCHSANLEITUNG
ALLGEMEINES
Shure
M
icrofle
x M
ikrofon
e d
e
r R
eih
e M
X412
D s
in
d M
inielektret-
kondensator–Mikrofone in Schwanenhalsausführung mit einem
Tischsockel und einem angeschlossenen 3 m –Kabel. Der Tisch-
sockel
e
rmöglich
t d
i
e V
erwendun
g d
ieser
M
ikrofon
e i
n M
ehrzweck-
räumen, in denen eine rasche Aufstellung erforderlich ist oder in
denen sich die dauerhafte Anbringung als unpraktisch erweist.
MERKMALE
•Breiter Dynamikbereich und Frequenzgang für genaue
Tonwiedergabe über das gesamte Tonfrequenzspektrum
hinweg
•Austauschbare
Kapseln, die
eine optimale Richtcharakte
-
ristik für jeden V
erwendungszweck ermöglichen
•Ausgeglichene, transformatorlose Ausgabe für gesteigerte
Rauschunempfindlichkeit bei langen Kabelführungen
•Programmierbarer Ein/Aus–Schalter und Ein/Aus–LED–
Anzeige
•Eingabe–
u
n
d A
usgabe–Logikanschlüss
e f
ü
r F
ernsteuerung
und Gebrauch mit automatischen Mikrofonmischstufen
•Steckrast–Popfilter aus Schaumstoff
MODELLVARIANTEN
Alle
Microflex Mikrofone sind mit einer von drei austauschba
-
ren Kapseln lieferbar. Die Richtcharakteristik der Kapsel wird
durch das Modellnummer–Suf
fix angegeben:
C = Niere, S = Superniere, O= Alle Richtungen
•MX412D/C: 304,8 mm schwanenhalsmontiertes Minikon-
densator–Tischmikrofon mit Nieren–Richtcharakteristik.
•MX412D/S:
3
04,
8 m
m s
chwanenhalsmontierte
s M
inikonden-
sator–Tischmikrofon mit Supernieren–Richtcharakteristik.
•MX412D/O:
304,8
mm schwanenhalsmontiertes Minikon
-
densator–Allrichtungs–Tischmikrofon.
AUSWAHL EINER RICHTCHARAKTERISTIK
Niere (C). Für allgemeine Tonverstärkungsanwendungen
empfohlen. Ansprechwinkel (–3 dB) = 130.
Superniere (S). Für Tonverstärkungsanwendungen emp-
fohlen,
die
eine engere oder weiter entfernte Abdeckung erfor
-
dern. Ansprechwinkel (–3 dB) = 115.
Alle Richtungen (O). Für Aufzeichnungs– oder Fernüberwa-
chungsanwendungen empfohlen. Ansprechwinkel = 360.
ALLGEMEINE INSTALLATIONSRICHTLINIEN
1. Das
Mikrofon auf die gewünschte Schallquelle,
wie z.B. auf
den Redner, und weg von unerwünschten Schallquellen,
wie z.B. einem Lautsprecher, richten.
2. Die Mikrofonkapsel in einer Entfernung von 15 bis 30 cm
von
der gewünschten Schallquelle plazieren.
3. Stets
d
e
n m
itgelieferte
n P
opfilte
r o
de
r w
ahlweis
e d
e
n M
etall–
Popfilter benutzen, um Atemgeräusche zu unterdrücken.
4. Wenn
v
ie
r o
de
r m
eh
r M
ikrofon
e g
leichzeiti
g i
m E
insat
z s
ind,
ist
d
i
e V
erwendun
g e
ine
r a
utomatische
n M
ischstufe
, w
i
e z
.B.
Shure SCM810 oder FP410, zu empfehlen, um Rückkopp-
lung und Rauschen möglichst gering zu halten.
INSTALLATION DES MIKROFONS
Befestigung eines Mikrofons auf einer Auflagefläche
(Abbildung 1)
1. Zwei
Holzschrauben Nr
. 6 im Abstand von 50,8 mm (2 Zoll)
in die Auflagefläche einschrauben.
2. Die
Schlüssellöcher über den Schraubenköpfen plazieren
und
das Mikrofon in die richtige Position drücken. Die Höhe
der Schrauben nach Bedarf anpassen, um das Mikrofon
si
-
cher zu befestigen.
Anbringung des Schaumstoff–Popfilters (Abbildung 2)
1. Den
S
chaumstoff–Popfilte
r a
u
f d
a
s M
ikrofo
n d
rücken
, b
i
s e
r
in die sich unterhalb der Kapsel befindliche Rille einrastet.
2. Zum
A
bnehme
n d
e
s P
opfilter
s d
i
e K
erb
e i
n s
eine
m B
efest-
igungsring
m
i
t e
ine
m S
chraubenziehe
r o
de
r D
aumennagel
auseinander
s
preize
n u
n
d d
e
n P
opfilte
r v
orsichtig
a
bziehen.
INTERNE DIP–SCHALTERFUNKTIONEN
Alle MX412D Modelle verfügen über interne DIP–Schalter,
die es dem Benutzer ermöglichen, den Ein/Aus–Schalter für
verschiedene
Anwendungssituationen zu programmieren.
Um
Zugriff
auf die DIP–Schalter zu erlangen, muß die
Grundplatte
entfernt werden.
DEFINITIONEN DER LOGIKANSCHLUSSKLEMMEN
Anschlußklemme LOGISCHE ERDE (LOGIC GND): Stellt
die V
erbindung zur logischen Erde einer automatische Misch
-
stufe,
eines Umschalters oder eines anderen Geräts her
.
Kann
zur Verhinderung von Erdschleifen verändert werden. Siehe
Abschnitt $V
eränderungen der MX412D Logik
“.
Anschlußklemme SCHALTER AUS (SWITCH OUT): Liefert
einen TTL–Logik–Tiefpegel (0 V Gleichspannung), wenn der
Folienschalter
gedrückt wird. Bietet ansonsten einen
TTL–Lo
-
gik–Hochpegel
(5 V Gleichspannung). Dieses Signal ist
jeder
-
zeit
für alle Schalterstellungen verfügbar
. Die Funktion “Schal
-
ter
Aus” liefert einen Wischkontakt, wenn S1 ausgeschaltet
ist,
und einen Einrastkontakt, wenn er eingeschaltet ist.
VERÄNDERUNGEN DER MX412D LOGIK
Isolierung der Logikerde von der Audioerde
1. Den
Jumper R40 von der Oberseite der Leiterplatte abneh
-
men.
2. Sicherstellen, daß die Anschlußklemme LOGISCHE ER-
DE die Verbindung zur logischen Erde einer automati-
schen
Mischstufe, eines Umschalters oder eines anderen
Geräts herstellt.
Änderung der Anschlußklemme SCHALTER AUS zu $Im-
mer Wischkontakt“
Folgendermaßen vorgehen, um den Anforderungen von
Schnittstellengeräten
zu entsprechen,
die einen Wischkontakt
des Mikrofons benötigen, (selbst wenn die gewünschte Mikro
-
fonfunktion Einrast–Ein/Aus ist):
1. R45 von der Oberseite der Leiterplatte abnehmen.
2. R45
an der Position R46 der Oberseite der Leiterplatte
wie
-
der
anbringen.
Kundenspezifische Schalteränderungen
S4
steht für kundenspezifische Logikänderungen zur V
erfü-
gung. Wenn sich S4 in der Stellung EIN befindet, ist der An-
schlußfleck W4 mit dem Anschlußfleck W5 verbunden.

6
GEWÜNSCHTE MIKROFONFUNKTION BENUTZERAKTION/LED–ANZEIGE DIP–SCHALTERSTELLUNGEN
Drücken zum Stummschalten
(Werkseinstellung)
Den Schalter niederdrücken und festhalten, um das
Mikrofon vorübergehend stummzuschalten; den S
chal-
te
r l
oslassen
, u
m d
i
e S
tummschaltun
g a
ufzuheben.
LED leuchtet auf, wenn das Mikrofon aktiv ist.
S1 = AUS
S2 = AUS
S3 = AUS
Drücken zum Sprechen
Den Schalter niederdrücken und festhalten, um das
Mikrofon zu aktivieren; den Schalter loslassen, um
das Mikrofon stummzuschalten.
LED leuchtet auf, wenn das Mikrofon aktiv ist.
S1 = AUS
S2 = EIN
S3 = AUS
Drücken zum Ein–/Ausschalten
Den Schalter drücken, um das Mikrofon ein– oder
auszuschalten.
LED leuchtet auf, wenn das Mikrofon aktiv ist.
S1 = EIN
S2 = EIN für stummen Anfangs
-
zustand
S2 = AUS für aktiven Anfangszu
-
stand
S3 = AUS
Schalter deaktiviert, Mik. immer inaktiv
Keine Aktion, LED immer AUS
S3 = EIN
Schalter deaktiviert, Mik. immer aktiv
Anschlußklemme LED EIN mit der Anschlußklemme
LOGISCHE ERDE kurzschließen.
LED immer EIN.
S3 = EIN
Automatischer Mischmodus
W
enn S1 = AUS, ist das Signal SCHAL
TER AUS auf
logischem Wisch–T
iefpegel, wenn der Schalter ge
-
drückt wird.
W
enn S1 = EIN, ist das Signal SCHAL
TER AUS auf
logischem Einrast–T
iefpegel, wenn der Schalter ge
-
drückt wird.
Das Signal SCHAL
TER AUS an diverse Logikeingän
-
ge der automatischen Mischstufe anschließen, um
benutzerdefinierte Funktionen zu erhalten.
De
n M
ischstufenkanal GATTER AUS (GATE OUT
) a
n
di
e M
ikrofonklemm
e L
ED EI
N a
nschließen. Di
e L
E
D a
m
Mikrofo
n l
euchte
t a
uf, wen
n i
hr Kana
l a
ngesteuert wird.
S1 = EIN oder AUS
S3 = EIN
TECHNISCHE DATEN
Frequenzgang (Abbildung 3)
50 bis 17.000 Hz
Richtcharakteristik (Abbildung 4)
Ausgangsimpedanz
EIA–Nennwert: 150 Ω(Ist–Wert: 180 Ω)
Leerlaufempfindlichkeit:
Bei 1 kHz bezogen auf 1 V je Mikrobar*
Niere: –53,5 dBV (2,11 mV)
Superniere: –52,5 dBV (2,37 mV)
Alle Richtungen: –48,0 dBV (3,98 mV)
*1
Mikrobar = 74 dB Schalldruckpegel
Bei 1 kHz bezogen auf 1 V je Pascal*
Niere: –33,5 dBV (21,1 mV)
Superniere: –32,5 dBV (23,7 mV)
Alle Richtungen: –28,0 dBV (39,8 mV)
*1
Pascal = 94 dB Schalldruckpegel
Maximaler
Schalldruckpegel (1 kHz
bei 1% Klirrfaktor
,
1 kΩLast)
Niere: 123,0 dB
Superniere: 122,0 dB
Alle Richtungen: 117,5 dB
Äquivalentausgangsrauschen (mit A–Gewichtung)
Niere: 29,0 dB Schalldruckpegel
Superniere: 28,0 dB Schalldruckpegel
Alle Richtungen: 23,6 dB Schalldruckpegel
Rauschabstand
(bezogen auf 94 dB
Schalldruckpegel)
Niere: 65,0 dB
Superniere: 66,0 dB
Alle Richtungen: 70,5 dB
Dynamikbereich bei 1 kΩBelastung
94,0 dB
Gleichtaktunterdrückung
mindestens 45,0 dB
Stummschalterdämpfung
mindestens 50,0 dB
Vorverstärker–Ausgangsbegrenzungspegel
(
1%
K
lirrfaktor)
–6,0 dBV (0,5 V)
Polarität
Positiver Schalldruck an der Membran erzeugt positive
Spannung an Stift 2 in bezug auf Stift 3 des XLR–Aus-
gangssteckverbinders.
Leistungsbedarf
11 bis 52 V Phantom–Gleichspannung, 2,0 mA
Umgebungsbedingungen
Betriebstemperaturbereich: –18bis 57C
Relative Feuchtigkeit: 0 to 95 %
Abmessungen (Abbildung 5)
Gewicht
0,81 kg netto
1,25 kg mit Verpackung
Kabeltyp
Das angeschlossene Spezialkabel enthält ein abgeschirm-
tes Tonfrequenzpaar und drei nicht–abgeschirmte Leiter für
die Logiksteuerung. Gesamtdurchmesser=0,6 mm
Zertifizierung
Entspricht den Richtlinien der Europäischen Union, zur
CE–Kennzeichnung berechtigt; erfüllt die Anforderungen der
Europäischen Union für elektromagnetische Verträglichkeit
(EN
5
0 0
82–1
, 1
992); HF–Abstrahlun
g (
IEC 801–3)
; e
lektro-
statisch
e G
efährdun
g (
EGB
) (
IE
C 8
01–2);
E
FT (IE
C 8
01–4).
HINWEIS: Faxabruf technischer Daten unter der Rufnummer
1–800–488–3297 (nur innerhalb der USA), dabei Anleitungen
des
A
nrufbeantworter
s b
efolgen
. W
eiter
e t
echnische
U
nterstüt-
zung
w
ir
d v
o
n S
hur
e u
nte
r d
e
r R
ufnummer
+
+
1 (
847
) 8
66–2200
geleistet. In Europa bitte ++49 (7131) 72140 anrufen
ERSATZTEILE UND ZUBEHÖR
Steckrast–Popfilter (4 je Pack.) RK412WS.
. . . . . . . . . . . . . .
Kunststoffkugel–Popfilter (4 je Pack.) A99WS.
. . . . . . . . . . .
Einrastender Metall–Popfilter A412MWS.
. . . . . . . . . . . . . . .
3 m –XLR–Ersatzkabel C120.
. . . . . . . . . . . . . . . . . . . . . . . . . .
Spezial–Logikkabel (bitte Länge angeben) 15A523/1.
. . . . .
Allrichtungskapsel R183B
. . . . . . . . . . . . . . . . . . . . . . . . . . . . .
Supernierenkapsel R184B
. . . . . . . . . . . . . . . . . . . . . . . . . . . .
Nierenkapsel R185B
. . . . . . . . . . . . . . . . . . . . . . . . . . . . . . . . .
Grundplattenpuffer 80A8053A
. . . . . . . . . . . . . . . . . . . . . . . . .

7
MICRÓFONO
CON CUELLO DE CISNE P
ARA ESCRIT
ORIO
MICROFLEXMX412D
GUÍA DEL USUARIO
GENERALIDADES
Los
micrófonos Microflex MX412D de Shure son micrófonos
de
condensador de electreto miniatura con cuello de cisne que
tienen
una base para escritorio y un cable de 3 m (10 pies) de
largo.
La base para escritorio permite usar estos micrófonos en
salas
de uso general, en situaciones en las cuales se requiere
una instalación rápida, o cuando una instalación permanente
resulta poco práctica.
CARACTERISTICAS
•
Gama
d
inámic
a y r
espuest
a d
e f
recuenci
a a
mplia
s p
ara
u
na
reproducción
p
recisa
d
e
l s
onid
o e
n t
od
o e
l e
spectr
o a
udible
•
Cápsulas intercambiables que permiten elegir el patrón
polar óptimo para cada aplicación
•
Salidas
e
quilibrada
s s
in
u
s
o d
e t
ransformadore
s p
ar
a a
umen-
tar la inmunidad a los ruidos en tramos largos de cable
•
Interruptor programable y LED indicador de encendido/
apagado
•
Bornes
de entrada/salida lógica para control remoto o para
usarse con consolas mezcladoras automáticas
•
Pantalla de espuma con anillo elástico
VARIEDADES DE MODELOS
Todos
l
o
s m
icrófono
s M
icroflex
s
e o
frece
n c
o
n u
n
a d
e t
re
s c
áp-
sulas
i
ntercambiables
. E
l p
atró
n p
ola
r d
e c
aptació
n d
e l
a c
ápsula
se designa por el sufijo que tiene en su número de modelo:
C = Cardioide, S = Supercardioide, O = Omnidireccional
•
MX412D/C:
Micrófono de condensador miniatura tipo car
-
dioide
montado en cuello de cisne de 304,8 mm (12 pulg),
para escritorio.
•
MX412D/S: Micrófono de condensador miniatura tipo su-
percardioide
montado en cuello de cisne de 304,8 mm (12
pulg), para escritorio.
•
MX412D/O:
Micrófono de condensador miniatura tipo om
-
nidireccional montado en cuello
de
cisne de 304,8 mm (12
pulg), para escritorio.
SELECCION DEL PATRON POLAR DE CAPTACION
Cardioide
(
C).
S
e r
ecomiend
a p
ar
a a
plicacione
s g
enerale
s d
e
refuerz
o de s
onido
. A
ngul
o de c
aptació
n (
nive
l d
e –
3
d
B
) = 1
30.
Supercardioide (S). Se recomienda para aplicaciones de
refuerzo
de sonido en las cuales la zona de cobertura es más
estrecha
o se requiere un alcance mayor
. Angulo de captación
(nivel de –3 dB) = 115.
Omnidireccional
(O).
Se recomienda para aplicaciones de
grabación
y de
monitoreo remoto de sonido. Angulo de capta
-
ción = 360
GUIA GENERAL DE INSTALACION
1. Apunte el micrófono hacia la fuente sonora deseada (es
decir,
el conferencista) y alejado de las fuentes no desea
-
das, como por ejemplo, los altoparlantes.
2. Coloque
la cápsula del micrófono a una distancia de 15
a
30 cm (6 a 12 pulg) de la fuente sonora deseada.
3. Siempre
use la pantalla provista o la pantalla metálica op
-
cional para controlar el ruido causado por el aliento.
4. Si cuatro o más micrófonos estarán activos simultánea-
mente,
se recomienda usar una consola mezcladora auto
-
mática
tal como la SCM810
ó la FP410 de Shure, para re
-
ducir la realimentación y los ruidos indeseados.
INSTALACION DEL MICROFONO
Fijación
d
e
l m
icrófon
o a u
n
a s
uperfici
e d
e m
ontaj
e (
Figur
a 1
)
1. Atornille
dos tornillos para madera N
6 en la superficie de
montaje, separados 50,8 mm (2 pulg) entre sí.
2. Encaje los agujeros alargados sobre las cabezas de los
tornillos y empuje el micrófono en su posición de fijación.
Ajuste la altura de los tornillos según sea necesario para
fijar el micrófono.
Instalación de la pantalla de espuma (Figura 2)
1. Deslice la pantalla de espuma sobre el micrófono hasta
que
se enganche en la ranura ubicada debajo
de la cápsu
-
la del mismo.
2. Para quitar la pantalla, abra la separación de su anillo de
montaje
con un
destornillador o la uña y tírela cuidadosa
-
mente hasta quitarla.
FUNCIONES DE LOS INTERRUPTORES DIP INTERNOS
Todos los modelos MX412D tienen interruptores DIP inter-
nos
que permiten al usuario programar la función del interruptor
de encendido para una variedad de usos. Para lograr acceso
a los interruptores DIP, quite la placa inferior.
DEFINICION DE SEÑALES LOGICAS DE LOS BORNES
Borne
de tierra de circuitos lógicos (LOGIC
GND): Se conec
-
ta al conductor de puesta a tierra de los circuitos lógicos de
una
consola mezcladora automática, conmutador u otro equipo.
Puede modificarse para evitar los bucles de puesta a tierra.
Consulte
el párrafo ”Modificación de lógica de
funcionamiento
del MX412D”.
Borne
de salida del interruptor (SWITCH OUT):
Proporciona
un
nivel lógico bajo de TTL (0 VCC)
cuando se oprime el inter
-
ruptor
de membrana. De otro modo, proporciona un nivel lógico
alto
de TTL (5
VCC). Esta señal siempre está disponible para
todas
las configuraciones de uso del interruptor
. La función de
salida
del interruptor proporciona una puesta a tierra momentá
-
nea
cuando el interruptor S1 está apagado (OFF)
y se engan
-
cha en puesta a tierra cuando está encendido (ON).
MODIFICACION DE LOGICA DE FUNCIONAMIENTO DEL
MX412D
Para
aislar la tierra de circuitos lógicos de la tierra de circuitos
de
audio
1. Saque el puente R40 de la parte superior de la tarjeta de
circuitos.
2. Asegúrese
que el borne de tierra de circuitos lógicos (LO
-
GIC
GND) quede conectado al
conductor de puesta a tierra
de
los circuitos lógicos de la consola mezcladora automáti
-
ca, conmutador u otro equipo.
Configuración del borne de salida del interruptor (SWITCH
OUT) para funcionamiento momentáneo solamente
Para permitir la conexión de equipo que requiera la puesta
a
tierra momentánea del micrófono (aun cuando se desea que
el micrófono se enganche en posición encendido/apagado),
efectúe el procedimiento siguiente:
1. Saque el puente R45 de la parte superior de la tarjeta de
circuitos.
2. Vuelva a instalar el puente R45 en la posición R46 de la
parte superior de la tarjeta de circuitos.
Modificaciones especiales del interruptor
El
interruptor S4 puede usarse para modificaciones especia
-
les de los circuitos lógicos. Cuando el interruptor S4 está en-
cendido (ON), el borne W4 se conecta con el borne W5.

8
FUNCION DESEADA DEL MICROFONO ACCION DEL USUARIO/INDICACION DE LED CONFIGURACION DE
INTERRUPTORES DIP
Oprim
a p
ar
a s
ilenciar (configuració
n d
e
fábrica)
Mantenga oprimido el interruptor para silenciar el
micrófono; suéltelo para activarlo.
El LED se ilumina cuando el micrófono está activo.
S1 = APAGADO
S2 = APAGADO
S3 = APAGADO
Oprima para hablar
Mantenga oprimido el interruptor para activar el mi
-
crófono; suéltelo para silenciarlo.
El LED se ilumina cuando el micrófono está activo.
S1 = APAGADO
S2 = ENCENDIDO
S3 = APAGADO
Oprima para encender/apagar
Oprim
a e
l i
nterrupto
r p
ar
a e
ncenderl
o y p
ar
a a
pagarlo
El LED se ilumina cuando el micrófono está activo.
S1 = ENCENDIDO
S2 = ENCENDIDO para silen-
ciarlo inicialmente
S2 = APAGADO para activarlo
inicialmente
S3 = APAGADO
Interruptor desactivado
, m
icrófon
o s
iempre
inactivo No
r
equier
e a
cción
a
lguna
. E
l L
E
D p
ermanec
e a
pagado S3 = ENCENDIDO
Interruptor desactivado
, m
icrófon
o s
iempre
activo
Conecte un alambre del borne de entrada (IN) de
LED al borne de tierra lógica.
El LED permanece iluminado.
S3 = ENCENDIDO
Modo para uso con consola mezcladora
automática
Si el interruptor S1 está apagado, la señal de salida
del interruptor se pone en nivel bajo momentánea
-
mente cuando se oprime el interruptor
.
Si el interruptor S1 está encendido, la señal de sali
-
da del interruptor se engancha en nivel bajo cuando
se oprime el interruptor
.
Conecte la señal de salida del interruptor a una de
varias entradas para señales lógicas de una conso
-
la mezcladora automática para controlar funciones
especiales.
Conecte el canal de salida de compuerta (GA
TE
OUT) de la consola mezcladora al borne de entrada
(IN) de LED del micrófono. El LED del micrófono se
ilumina cuando su canal correspondiente se activa.
S
1 = E
NCENDIDO O APAGADO
S3 = ENCENDIDO
ESPECIFICACIONES
Respuesta de frecuencia (Figura 3)
50 a 17.000 Hz
Patrón polar (Figura 4)
Impedancia de salida
Nominal según EIA: 150
Ω
(real: 180
Ω)
Sensibilidad en circuito abierto
A 1 kHz, respecto a 1 V por microbar *
Cardioide:
–53,5 dBV (2,1
1 mV)
Supercardioide:
–52,5 dBV (2,37 mV)
Omnidireccional: –48,0 dBV (3,98 mV)
* 1 microbar = 74 dB SPL
A 1 kHz, respecto a 1 V por pascal *
Cardioide:
–33,5 dBV (21,1 mV)
Supercardioide:
–32,5 dBV (23,7 mV)
Omnidireccional: –28,0 dBV (39,8 mV)
* 1 pascal = 94 dB SPL
Intensida
d m
áx
. s
onido (
1 k
Hz co
n 1
% T
HD
, c
arg
a d
e 1 k
Ω)
Cardioide:
123,0 dB
Supercardioide:
122,0 dB
Omnidireccional: 1
17,5 dB
Ruido equivalente de salida (ponderación A)
Cardioide:
29,0 dB SPL
Supercardioide:
28,0 dB SPL
Omnidireccional: 23,6 dB SPL
Relación
de señal a ruido (con presión acústica de referencia
de
94 dB)
Cardioide:
65,0 dB
Supercardioide:
66,0 dB
Omnidireccional: 70,5 dB
Gama dinámica con carga de 1 k
Ω
94,0 dB
Rechazo en modo común
45,0 dB mínimo
Atenuación introducida por interruptor silenciador
50,0 dB mínimo
Nive
l d
e l
imitació
n d
e s
alid
a d
e
l p
reamplificador (1
% T
HD)
–6,0 dBV (0,5 V)
Polaridad
Una
presión positiva en el diafragma del micrófono produce
un
voltaje positivo en la clavija
2 con respecto a la clavija 3
del conector XLR de salida.
Requisitos de alimentación
1
1 a 52 VCC de potencia fantasma nominal; 2,0 mA
Requisitos de entorno
Gama de temperatura de funcionamiento: –18
a 57
C
(0
a
135
F)
Humedad relativa: 0 a 95%
Dimensiones (Figura 5)
Peso
0,81 kg (1,80 lb) neto
1,25 kg (2,77 lb) en su embalaje
T
ipo de cable
El cable especial conectado al micrófono tiene un par de
cables blindados que conducen la señal de audio y tres
conductores sin blindaje que conducen las señales de
control
lógico. Diámetro total = 0,6 mm (0,165 pulg)
Certificaciones
Cumple con las directrices de la Unión Europea, califica para
llevar
l
a
s m
arca
s C
E
; c
umpl
e c
o
n l
o
s r
equisito
s d
e i
nmunidad
y
c
ompatibilida
d e
lectromagnétic
a d
e U
E (
EN
5
0 0
82–1
, 1
992);
radiación de radiofrecuencias (IEC 801–3); descargas elec-
trostáticas (IE
C 8
01–2)
; E
FT (IE
C 8
01–4).
NOTA: Para obtener información técnica vía Fax, llame al
1–800–488–3297 y siga las instrucciones dadas en la graba-
ción.
P
ar
a r
ecibi
r s
oport
e t
écnic
o a
dicional,
l
lam
e a S
hur
e a
l t
e-
léfono (847) 866–2200. En Europa, llame al 49–7131–72140.
PIEZAS DE REPUESTO Y ACCESORIOS
Pantallas
de e
spuma co
n a
nill
o e
lástic
o (
4 p
o
r p
aquete) RK412WS
Pantallas d
e e
spum
a e
sféricas (
4 p
o
r p
aquete) A99WS.
. . . . . . .
Pantalla
metálica trabable
A412MWS.
. . . . . . . . . . . . . . . . . . . . .
Cable
tipo XLR de repuesto, 3 m (10 pies)
C120.
. . . . . . . . . . .
Cable
para funciones lógicas especiales
(especifique el largo)
15A523/1.
. . . . . . . . . . . . . . . . . . . . . . . .
Cápsula
omnidireccional
R183B.
. . . . . . . . . . . . . . . . . . . . . . .
Cápsula
de supercardioide
R184B.
. . . . . . . . . . . . . . . . . . . . .
Cápsula
de cardioide
R185B.
. . . . . . . . . . . . . . . . . . . . . . . . . .
Pies
de caucho para placa de base
80A8053A.
. . . . . . . . . . .

9
GUIDA D’USO DEL MICROFONO A COLLO D’OCA PER
PIANO ORIZZONTALE MICROFLEXMX412D
DESCRIZIONE GENERALE
I
m
odell
i S
hur
e M
icrofle
x s
eri
e M
X412
D s
on
o m
icrofon
i a c
ollo
d’oca
c
o
n c
ondensator
e t
ip
o m
iniatur
a a e
lettret
e d
otat
i di u
n
a b
a-
se per piano orizzontale e di un cavo di 3 m collegato. La base
permette
d
i u
tilizzar
e q
uest
i m
icrofon
i i
n s
al
e p
e
r a
pplicazion
i v
arie
in
c
u
i s
i r
ichiede
u
n’installazion
e r
apid
a o l
addov
e n
o
n s
i
a s
empli-
ce effettuare un’installazione permanente.
CARATTERISTICHE
•Ampia gamma dinamica e risposta in frequenza a larga
banda,
ai fini di una riproduzione precisa del suono in tutto
lo spettro audio.
•Capsule
intercambiabili, che permettono di scegliere il dia
-
gramma polare ottimale per ogni applicazione.
•Uscita bilanciata, senza trasformatore, per ottenere una
maggiore immunità dal rumore in lunghi tratti di cavo.
•Interruttore
acceso/spento (On/Of
f) programmabile e spia
LED di On/Off.
•Terminali
logici di ingresso
e uscita per il controllo a distan
-
za o per l’uso con mixer microfonici automatici.
•Antivento
i
n s
chiuma
p
oliuretanica
, c
o
n m
ontaggi
o a s
catto.
DESCRIZIONE DEI MODELLI
Tutti i microfoni Microflex sono disponibili con una qualsiasi
delle
tre capsule intercambiabili.
Il diagramma polare della cap
-
sula è indicato dal suffisso del numero di modello.
C = Cardioide, S = Supercardioide, O= Omnidirezionale
•MX412D/C:
microfono a collo d’oca, a minicondensatore,
per piani orizzontali, a cardioide, da 304,8 mm.
•MX412D/S: microfono a collo d’oca, a minicondensatore,
per piani orizzontali, a supercardioide, da 304, 8 mm.
•MX412D/O:
microfono a collo
d’oca, a minicondensatore,
per piani orizzontali, omnidirezionale, da 304,8 mm.
SCELTA DI UN DIAGRAMMA POLARE
Cardioide
(C).
Raccomandato per impianti generali di ampli
-
ficazione sonora. Angolo di ricezione (–3 dB) = 130.
Supercardioide (S). Raccomandato per impianti di amplifi-
cazione sonora che richiedono direttività o portata maggiori.
Angolo di ricezione (–3 dB) = 115.
Omnidirezionale
(
O).
R
accomandat
o p
e
r a
pplicazion
i d
i
m
oni-
toraggio
a d
istanz
a o d
i r
egistrazione
. A
ngol
o d
i r
icezion
e = 3
60.
DIRETTIVE GENERALI PER L’INSTALLAZIONE
1. Rivolgere
il microfono verso la sorgente sonora desidera
-
ta, quale l’oratore, e in direzione opposta a qualsiasi sor-
gente sonora indesiderata, come un diffusore.
2. La capsula del microfono deve trovarsi ad una distanza
compresa
tra 15 e 30 cm (6–12 pollici) dalla sorgente
sono
-
ra desiderata.
3. Usare
s
empr
e l
’antivent
o i
n d
otazion
e o
q
uell
o m
etallic
o (
op-
tional)
p
e
r t
ener
e s
ott
o c
ontroll
o i
l r
umor
e d
ell
a r
espirazione.
4. Se
quattro o più microfoni saranno in funzione contempo
-
raneamente, si raccomanda l’uso di un mixer automatico,
quali
i modelli SCM810 o FP410 della Shure, per ridurre al
minimo i problemi di feedback e rumore.
INSTALLAZIONE DEL MICROFONO
Fissaggio di un microfono ad una superficie di montaggio
(Figura 1)
1. Inserire
n
ell
a s
uperfici
e d
i m
ontaggi
o d
u
e v
it
i p
e
r l
egn
o N
.
6, distanziandole di 50,8 mm l’una dall’altra.
2. Posizionare i fori di montaggio sopra le teste delle viti e
spingere il microfono in posizione. Regolare adeguata-
mente l’altezza delle viti per fissare il microfono.
INSTALLAZIONE DELL’ANTIVENTO IN SCHIUMA POLIU-
RETANICA (FIGURA 2)
1. Premere l’antivento sul microfono finché non scatta nella
scanalatura situata sotto la capsula.
2. Per
rimuovere
l’antivento, allargare l’apertura nell’anello di
montaggio con un cacciavite o con l’unghia del pollice e
staccare con cautela l’antivento stesso.
FUNZIONI DEGLI INTERRUTTORI DIP INTERNI
Tutti i modelli MX412D sono dotati di interruttori DIP interni
che permettono di programmare l’interruttore acceso/spento
(On/Off) per una vasta gamma di applicazioni. Per accedere
agli interruttori DIP, rimuovere la placca inferiore.
DESCRIZIONE DEI TERMINALI LOGICI
Terminale di massa logica LOGIC GND: va collegato alla
massa logica di un mixer automatico, un commutatore o altro
apparecchio.
Può essere modificato per evitare anelli di massa.
Vedi sezione ”Modifiche delle funzioni logiche del modello
MX412D”.
Terminale
di
commutazione chiusura SWITCH OUT
: genera
un
segnale logico TTL a stato basso (0 V c.c.) quando si preme
l’interruttore
a membrana, altrimenti genera un segnale logico
TTL
a stato alto (5 V c.c.). Questo segnale è sempre disponibi
-
le,
per tutte le impostazioni dell’interruttore. La funzione di com
-
mutazione
chiusura
fornisce una chiusura momentanea quan
-
do S1 è Off ed una chiusura a ritenuta quando S1 è On.
MODIFICHE DELLE FUNZIONI LOGICHE DEL MODELLO
MX412D
Isolamento della massa logica dalla massa audio
1. Rimuovere il ponticello R40 dalla parte superiore della
scheda di circuiti.
2. Accertarsi che il terminale LOGIC GND sia collegato alla
massa
logica di un mixer automatico, un
commutatore o al
-
tro apparecchio.
Impostazione
del terminale SWITCH OUT su chiusura mo
-
mentanea permanente
Per
adattare
il microfono ad apparecchi collegati che richie
-
dono una chiusura momentanea del microfono stesso (anche
quando la funzione desiderata del microfono corrisponde ad
una
attivazione/disattivazione della chiusura
a ritenuta), proce
-
dere come segue.
1. Rimuovere R45 dalla parte superiore della scheda di circuiti.
2. Reinstallare
R45 nella posizione R46 nella parte superiore
della scheda di circuiti.
Modifiche personalizzate dell’interruttore S4
S4
può essere modificato per creare funzioni logiche perso
-
nalizzate.
Quando S4 è in posizione On, la piazzola W4 è colle
-
gata a quella W5.
10
FUNZIONE DESIDERATA DEL MICROFONO AZIONE SULL’INTERRUTTORE/STATO DEL LED IMPOSTAZIONI DEGLI
INTERRUTTORI DIP
Silenziamento mediante pressione (impo
-
stazione di fabbrica)
Si tiene premuto l’interruttore per silenziare tempora
-
neamente il microfono, lo si rilascia per attivarlo.
Il LED si accende quando il microfono è attivato
S1 = OFF
S2 = OFF
S3 = OFF
Attivazione mediante pressione
Si tiene premuto l’interruttore per attivare il microfono,
lo si rilascia per silenziarlo.
Il LED si accende quando il microfono è attivato
S1 = OFF
S2 = ON
S3 = OFF
Attivazione/silenziament
o m
ediant
e p
ressione
Si preme l’interruttore per attivare e silenziare, alterna
-
tivamente, il microfono.
Il LED si accende quando il microfono è attivato
S1 = ON,
S2 = ON per stato iniziale di
silenziamento
S2 = OFF per stato iniziale di
attivazione
S3 = OFF
Interruttore disattivato, microfono sempre
disattivato
Nessuna azione. LED sempre spento
S3 = ON
Interruttore disattivato, microfono sempre
attivato
Collegare in cortocircuito il terminale IN del LED al
terminale di massa logica.
LED sempre acceso
S3 = ON
Modalità Mixer automatico
Se S1=OFF
, il segnale SWITCH OUT passa momen
-
taneamente allo stato logico basso quando si preme
l’interruttore.
S
e S
1=ON
, i
l segnal
e S
WITCH OU
T p
ass
a a r
itenuta
allo stat
o l
ogic
o b
ass
o q
uando s
i p
rem
e l
’interruttore.
Collegare il segnale SWITCH OUT a vari ingressi logi
-
ci del mixer automatico per creare funzioni personaliz
-
zate.
Collegare l’uscita porta GA
TE OUT del canale del mi
-
xer al terminale IN del LED del microfono. Il LED del
microfono si accende quando il microfono viene attiva
-
to da questo canale.
S1 = ON od OFF
S3 = ON
Risposta in frequenza (Figura 3)
Da 50 a 17.000 Hz
Diagramma polare (Figura 4)
Impedenza di uscita
V
alore nominale EIA: 150
Ω
(180
Ω
ef
fettivi)
Sensibilità a circuito aperto
A 1 kHz, rif. 1 volt a microbar*
Cardioide: –53,5 dBV (2,1
1 mV)
Supercardioide: –52,5 dBV (2,37 mV)
Omnidirezionale: –48,0 dBV (3,98 mV)
*1 microbar = 74 dB livello di pressione sonora (SPL)
A 1 kHz, rif. 1 volt a pascal*
Cardioide: –33,5 dBV (21,1 mV)
Supercardioide: –32,5 dBV (23,7 mV)
Omnidirezionale: –28,0 dBV (39,8 mV)
*1 pascal = 94 dB SPL
SPL max. (1 kHz a 1% di THD, carico di 1 k
Ω)
Cardioide: 123,0 dB
Supercardioide: 122,0 dB
Omnidirezionale: 1
17,5 dB
Rumore equivalente di uscita (ponderato A)
Cardioide: 29,0 dB SPL
Supercardioide: 28,0 dB SP:
Omnidirezionale: 23,6 dB SPL
Rapporto segnale/rumore (con 94 dB di SPL)
Cardioide: 65,0 dB
Supercardioide: 66,0 dB
Omnidirezionale: 70.5 dB
Gamma dinamica con carico di 1 k
Ω
94,0 dB
Reiezione di modo comune
45,0 dB min.
Attenuazione dell’interruttore di silenziamento
50,0 dB min.
DATI TECNICI Livello di limitazione all’uscita del preamplificatore
(1% di THD)
–6,0 dBV (0,5 V)
Polarità
Una
pressione sonora positiva sul diaframma produce
una
tensione positiva sul piedino 2 rispetto al
piedino
3 del connettore di uscita XLR.
Requisiti di alimentazione
V
irtuale; da 1
1 a 52 V c.c.; 2,0 mA.
Requisiti ambientali
Campo
della temperatura di esercizio:
da –18 a 57
C
Umidità
relativa: da 0 al 95%
Dimensioni (Figura 5)
Peso
0,81 kg netto
1,25 kg lordo
Cavo
Il
cavo collegato contiene un doppino audio schermato
e
tre conduttori non schermati da usarsi per il
controllo
logico.
Diametro complessivo: 0,6 mm.
Omologazioni
Conforme alle direttive della Comunità Europea, con-
trassegnabile con il marchio CE; soddisfa i requisiti
sull’immunità e sulla compatibilità elettromagnetica
specificati dalla CE (EN 50 082–1, 1992); immunità
dalla
r
adiofrequenz
a i
rradiat
a (
IEC
8
01–3)
; i
mmunit
à d
a
scariche elettrostatiche (IEC 801–2); immunità da
transienti rapid
i (
IE
C 8
01–4).
NOTA:
p
e
r o
ttener
e d
at
i t
ecnic
i v
i
a f
ax
, c
hiamar
e i
l n
ume-
ro 1–800–488–3297 (solo negli USA) e seguire le istru-
zioni
r
egistrate
. P
e
r u
lterior
e a
ssistenz
a t
ecnica
, c
hiamare
la Shure al numero USA (847) 866–2200. In Europa,
chiamare il numero 49–7131–72140.
Cavo
per funzioni logiche personalizzabile
(specificare la lunghezza)
15A523/1.
. . . . . . . . . . . . . .
Capsula
omnidirezionale
R183B.
. . . . . . . . . . . . . . . . . .
Capsula
a supercardioide
R184B.
. . . . . . . . . . . . . . . . . .
Capsula
a cardioide
R185B.
. . . . . . . . . . . . . . . . . . . . . .
Elementi
antiurto per la piastra di base
80A8053A.
. . .
COMPONENTI DI RICAMBIO E ACCESSORI
Antivento
in schiuma poliuretanica con montaggio
a scatto (4 per conf.)
RK412WS.
. . . . . . . . . . . . . . . . . .
Antivento
sferico in schiuma poliuretanica
(4 per conf.)
A99WS.
. . . . . . . . . . . . . . . . . . . . . . . . . . .
Antivento
metallico bloccabile
A412MWS.
. . . . . . . . . . .
Cavo
XLR di ricambio, 3 m
C120.
. . . . . . . . . . . . . . . . .

11
150o
120o
150o
120o
180o
30o
60o
90o
30o
60o
0
150o
120o
150o
120o
180o
30o
60o
30o
60o
–5 dB
0
90o
–5 dB
–10 dB
–15 dB
90o90o
500 1,000 2,000 5,000 10,000 20,000
50 100 20020
0
+10
–10
500 1,000 2,000 5,000 10,000 20,000
50 100 20020
0
+10
–10
500 1,000 2,000 5,000 10,00050 100 20020
0
+10
–10
250 Hz
500 Hz
1000 Hz
2500 Hz
6400 Hz
10000 Hz
250 Hz
500 Hz
1000 Hz
2500 Hz
6400 Hz
10000 Hz
250 Hz
500 Hz
1000 Hz
2500 Hz
6400 Hz
10000 Hz
150o
120o
150o
120o
180o
30o
60o
90o
30o
60o
0
150o
120o
150o
120o
180o
30o
60o
30o
60o–10
dB
–15 dB
0
90o
–10 dB
–15 dB
–20 dB
90o
150o
120o
150o
120o
180o
30o
60o
90o
30o
60o
0
90o
150o
120o
150o
120o
180o
30o
60o
90o
30o
60o
0
–5 dB
–10 dB
–15 dB
90o
90o
20,000
–20 dB
–5 dB
–10 dB
–15 dB
–20 dB
–5 dB
–20 dB
–5 dB
–20 dB –20 dB
–15 dB
–10 dB
FIGURE
3
•
FIGUR
E 3
•
ABBILDUN
G 3
•
FIGUR
A 3
•
FIGUR
A 3
FIGUR
E 4
•
FIGUR
E 4
•
ABBILDUN
G 4
•
FIGUR
A 4
•
FIGUR
A 4
SUPERCARDIOID
SUPERCARDIOÏDE
SUPERKARDIOID SUPERCARDIOIDE
SUPERCARDIOIDE
CARDIOID
CARDIOÏDE
KARDIOID CARDIOIDE
CARDIOIDE
OMNIDIRECTIONAL
OMNIDIRECTIONNELLE
ALLE RICHTUNGEN OMNIDIRECCIONAL
OMNIDIREZIONALE OMNIDIRECTIONAL
OMNIDIRECTIONNELLE
ALLE RICHTUNGEN OMNIDIRECCIONAL
OMNIDIREZIONALE
CARDIOID
CARDIOÏDE
KARDIOID CARDIOIDE
CARDIOIDE
SUPERCARDIOID
SUPERCARDIOÏDE
SUPERKARDIOID SUPERCARDIOIDE
SUPERCARDIOIDE
Hz
Hz
Hz
TYPICAL
FREQUENCY RESPONSE
COURBE DE RÉPONSE TYPIQUE
TYPISCHER FREQUENZGANG
RESPUEST
A DE FRECUENCIA TIPICA
RISPOST
A IN FREQUENZA TIPICA
TYPICAL POLAR P
ATTERNS
COURBES DE DIRECTIVITÉ TYPIQUES
TYPISCHE POLARMUSTER
PA
TRONES DE CAPT
ACION POLAR TIPICOS
DIAGRAMMI POLARI TIPICI
AB
50.8 mm
(2 in.)
FIGURE
1
•
FIGUR
E 1
•
ABBILDUN
G 1
•
FIGUR
A 1
•
FIGUR
A 1
FIGUR
E 2
•
FIGUR
E 2
•
ABBILDUN
G 2
•
FIGUR
A 2
•
FIGUR
A 2
FENTE
GORGE D’ENCLIQUETAGE
COUPE–VENT
STECKRASTRILLE KERBE
WINDSCHIRM
RANURA PARA ANILLO ELASTICO SEPARACION
PANTALLA
SCANALATURA
PER
MONT
AGGIO A SCA
TTO
APERTURA
SCHERMO
P
ARAVENTO
SLOT
WINDSCREEN
SNAP-FIT GROOVE

12
LOGIC I/O
LOGIK EIN/AUS
E/S LOCGICAS
I/U LOGICI
ORANGE
NARANJA
ARANCIA
WHITE BLANC
WEIß BLANCA
BIANCA
GREEN VERT
GRÜN VERDE
VERDE
BLACK
RED
WHITE/SHIELD
MEMBRANE
SWITCH
A.C.
V
oltage
D.C. V
oltage
A.C. V
oltage, Mic Of
f
D.C. V
oltage, Mic Of
f
Printed Clrcuit Ground
Case Ground
(+)
/ (–) indicate A.C. polarity relative to input test signal.
NOTES:
1. All
resistors1/10 W
att, 1%, 0805 unless otherwise specified.
2. Electrolytic
capacitors shown in
µF,
±
10%, 50V or more, unlss otherwise spe
-
cified.
3. The following symbols denote:
4. All
voltages measured with input driven by a
0.1 V
rms, 1kHz signal through the test
circuit shown below. The test circuit is powered by a standard 48V phantom power
supply connected to J2, with a 1 kohm load across J2 pins 2 and 3. A Shure M367
mixer or equivalent, with 48 V phantom power switched on, supplies the required
power and load.
102.1
mm
(4 9/16 in.)
50.8 mm
(2 1/32 in.)
161.9 mm
(6 3/8 in.)
355.4 mm
(14 in.)
3.0 m
(10 ft)
0.1 V
rms
1 kHz
TEST CIRCUIT
W2
W3
W1
30.1 K
1.82 K
10
µF
, 10V
FIGURE
5
•
FIGUR
E 5
•
ABBILDUN
G 5
•
FIGUR
A 5
•
FIGUR
A 5
FIGUR
E 6
•
FIGUR
E 6
•
ABBILDUNG 6
FIGUR
A 6
•
FIGUR
A 6
FIGUR
E 7
•
FIGUR
E 7
•
ABBILDUN
G 7
•
FIGUR
A 7
•
FIGUR
A 7
FROM CARTRIDGE
DE LA CARTOUCHE
DEL CARTUCHO
DALLA CARTUCCIA
ON DER KAPSEL
MIC OUT
USCIT
A MICROFONO
SALIDA
DE MICROFONO
MIKRO AUS
SOR
TIE MICRO
BLAC
K N
OI
R S
CHWARZ
NEGR
O N
ERO
RED ROUGE ROT
ROJO ROSSO
WHITE/SHIELD
BLANC/BLINDAGE
BLANCO/BLINDAJ
BIANCO/SCHERMA
TURA
E/S LOGIQUE
Table of contents
Languages:
Other Shure Microphone manuals
Popular Microphone manuals by other brands

RODE Microphones
RODE Microphones Broadcaster instruction manual

AUSTRALIAN MONITOR
AUSTRALIAN MONITOR AMHEAVYG instruction manual

Neumann
Neumann 180 Series Product information

Sennheiser
Sennheiser SKM 935 G2 Product sheet

Neumann
Neumann M 150 Tube Specification sheet

Gecko
Gecko Satellite SRM 2020 owner's manual